
Create Eye-Catching Book Titles with GIMP: Step-by-Step Guide
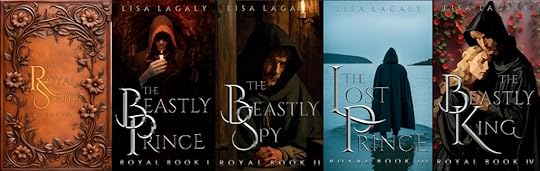
I finally finished editing my Royal Series and putting the individual books on Amazon. No reviews yet but I’m hoping my fancier covers will entice some readers (The picture below should be linked to the first book). If you’re interested, it’s a clean, roughly historically-based shifter fantasy with elements of romance, mystery, alchemy, natural science and…
“We don’t care about your books! We just want to make fancy letters!” you say.
Understood. Let’s get to it then.
I used Cinzel, which is a free font I downloaded off the internet several years ago. The first letters are size 600, the smaller letters are 200, and the ‘THE’ is 100, or they were when I started. I shrank them down to fit my book covers.
Download and install GIMP if you don’t already have it. It’s free. https://www.gimp.org/Install G’MIC-QT https://gmic.eu/download.html. This is free collection of filters for GIMP. I don’t remember how I installed it, but it was pretty painless.Restart GIMP if you had it open while you were installing G’MIC. G’MIC-QT should now appear at the very bottom of the long list under the filter tab in GIMP.Choose a font and arrange your letters the way you like. I found this a lot easier to do in PowerPoint than in Gimp. Make your font BIG, 100 at least (it is better to shrink than enlarge in GIMP), and color them medium gray.After you have your title the way you want (in Powerpoint), copy your letters and in GIMP go to EDIT->Paste As->New Image. You should see your letters with a transparent (light and dark squares) background. If you make some letters really big the way I did, I found it was better to do the next steps on the big and small letters separately. I also found it was very helpful to paste my entire title from PowerPoint as an image in GIMP to serve as a template. You can paste the modified letters on top of the template image in layers which can then be moved around independently.Select the letters in your text image by putting your cursor over the little picture next to the name of your pasted text layer, probably “Pasted Layer”, and hitting alt-click. A dashed line will appear around the edges of your letters.Click Filters->Generic->Distance map (The letters will look faintly beveled)Click Filters-Distorts->Emboss. (this makes your letters look like metal, but choppy)In the Emboss pop-up window adjust the options below, then hit OK. Example values are in parenthesis: To the right of Azimuth, adjust the arrow in the little circle to point to where the light is coming from on your cover.Elevation (40) and Depth (20)Blending options (replace or merge)opacity (90)Click Filters -> G’MIC -> Repair-smooth [Anisotropic] (this smooths out the metal). I adjusted the following.Amp 100Anisitrophy=1Sharpness <1Gradient Smoothness (increase for smoothness, but you can oversmooth. Larger for larger letters)Iterations 2Click Colors -> Curves. In the pop-up window click and drag the slanted line in multiple places to make it look wavy (3 waves is good). Sometimes it helps give the letters a more metallic look and sometimes it doesn’t.Click Colors -> levels. Playing with the options here might help as well.Making the flat, shiny letters is even easier.
Choose the letters like beforeBlack and white foreground and background colors (if you haven’t picked a new color this should be the default)Choose the Gradient toolWith your cursor, click in between the middle of your word just below the top of your letters and drag the cursor down while holding down the shift key to make a vertical line between the letters that starts near the top of the letters and ends just before the bottom of the letters.You can adjust where the bright part of the gradient is by using your cursor to move the little ball on the arrow you just drew.Choose another tool to get out of the gradient option.Play with the Colors->Curves and Colors->Levels as needed.To put your title all together (if you did it piecemeal),
Copy a shiny letter image. Paste the letter into your template image using Edit->Paste As->New LayerOnce you get all your letters placed properly, click the little eyeball next to your bottom layer to hide the templateUse the rectangle select tool (type ‘r’) to draw a box around your text Edit->Copy VisiblePaste your title onto your book cover.Have fun!


