Rebecca Firth's Blog
November 21, 2025
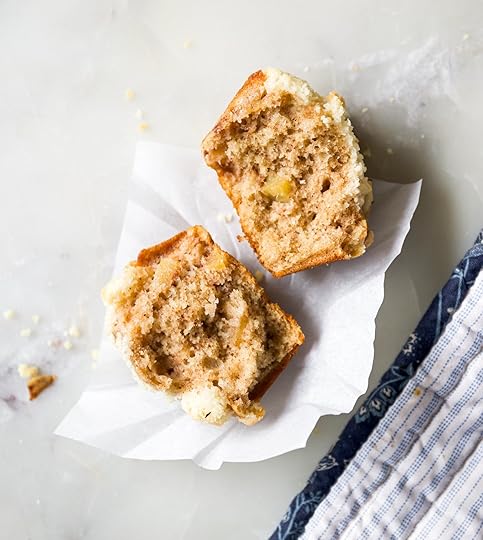
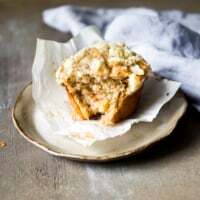
The Best Mega Moist Cinnamon Apple Muffins Recipe
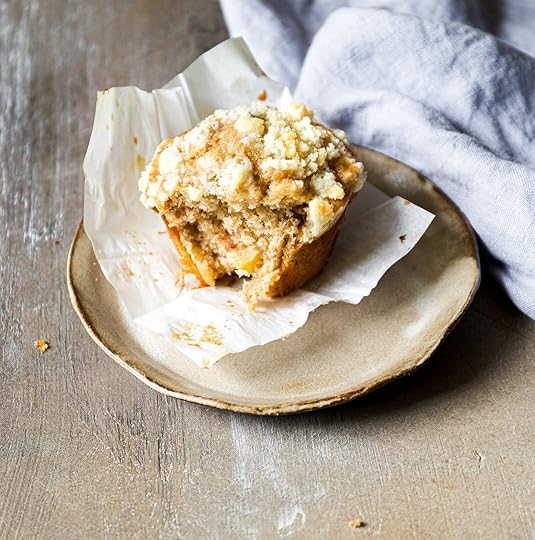
This Mega Moist Cinnamon Apple Muffins recipe is loaded with all of the fall flavors (cinnamon! apples! brown sugar!) coupled with the most tender, fluffy and light crumb. I can’t wait for you to try these easy, fuss-free muffins that are ready in under 55 minutes!
Peeling the whopping 2 cups (197 g) of apples (this is about two small apples) is optional (however, I like how the muffins look when the apples are peeled, fyi). They are then tossed with a mixture of brown sugar and spices that marinades while you throw together the apple muffin batter.
The combination of buttermilk and sour cream is the secret that makes these muffins so damn light and fluffy! The buttermilk can easily be replaced (see the note below the recipe for more details), but the incredible light crumb of these muffins comes from this acidity, so try not to skip!
Lastly, these moist apple cinnamon muffins are topped with my favorite (easy!) blonde streusel that comes together in minutes.
Without gilding the lily further, let’s bake some really delicious apple muffins!!

 Step-by-Step Recipe Photos + Instructions for Making The Best Apple Cinnamon Muffins
For the full, detailed recipe, scroll down below the step-by-step photos!
Gather Your Ingredients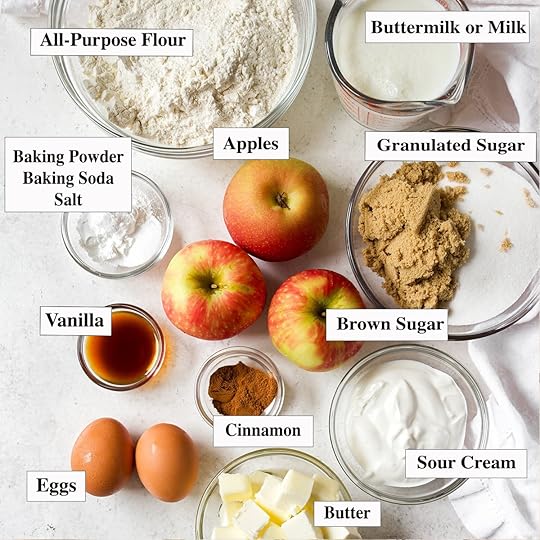 STEP 1: Gather your ingredients: all-purpose flour, granulated sugar, salt, butter, apples, brown sugar, cinnamon, nutmeg (not pictured), oil (not pictured), vanilla, eggs, sour cream, baking powder, baking soda, and buttermilk.Prep the Streusel & Apples
 For the Streusel: In a medium bowl, whisk together the flour, sugar and salt. Grab a spatula (or use your hands) and mix in the butter until it has the consistency of wet sand, and when pinched together, it holds together. Cover and set in the fridge.
 For the Apples: In another medium bowl, mix the apples, brown sugar, flour, cinnamon and nutmeg. Set aside.Mix the Muffin Batter
 STEP 1: In a large mixing bowl, mix together the sugar, butter, brown sugar, oil, vanilla and cinnamon until it looks light and fluffy…
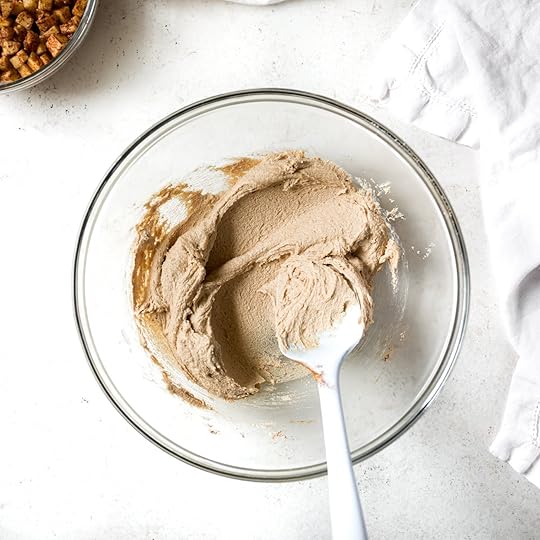 STEP 1: It should look like this!
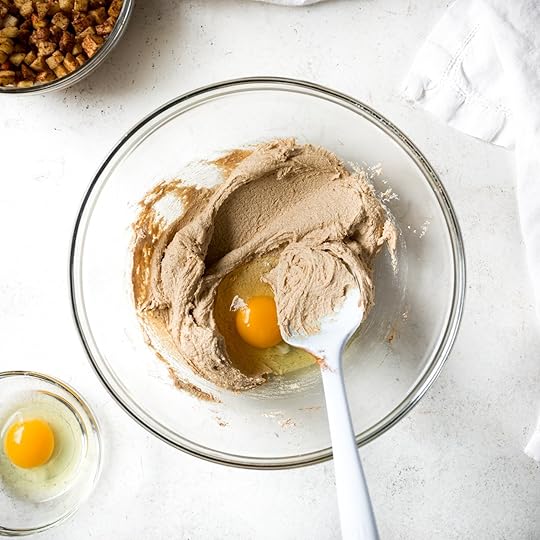 STEP 2: Add in the eggs, one at a time, making sure the first is well blended before adding the next.
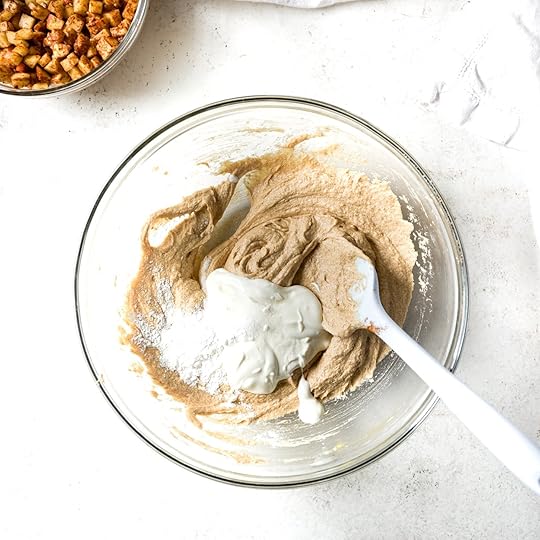 STEP 3: Mix in the sour cream, baking powder, baking soda and salt until well blended.
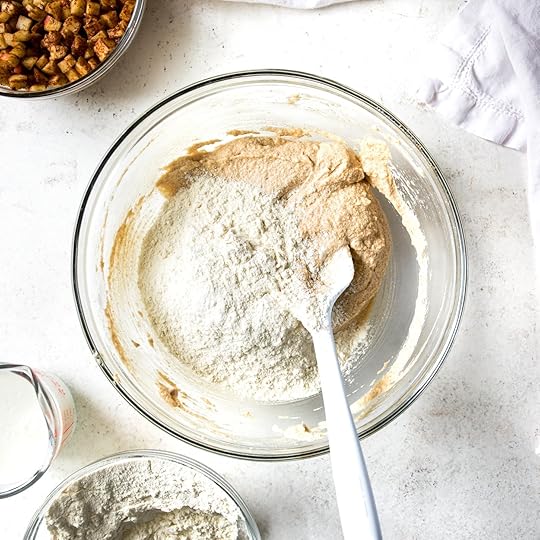 STEP 4: Alternate adding half of the flour and half of the buttermilk, in four additions…
 STEP 5: Mix each addition until just combined so you don’t over-mix the muffin batter (and get rubbery muffins).
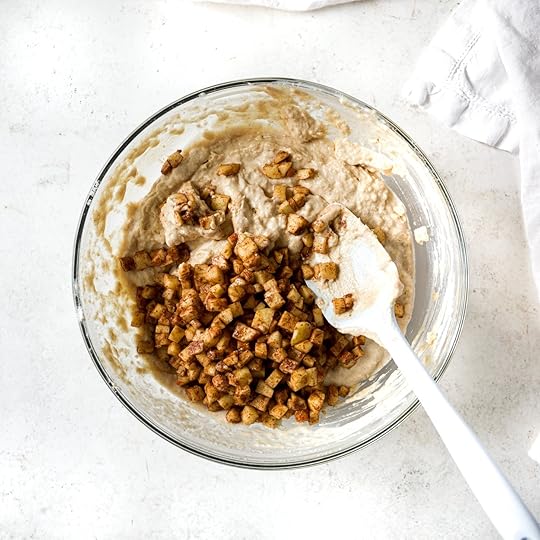 STEP 6: Fold in the apples until they are evenly distributed throughout the muffin batter.
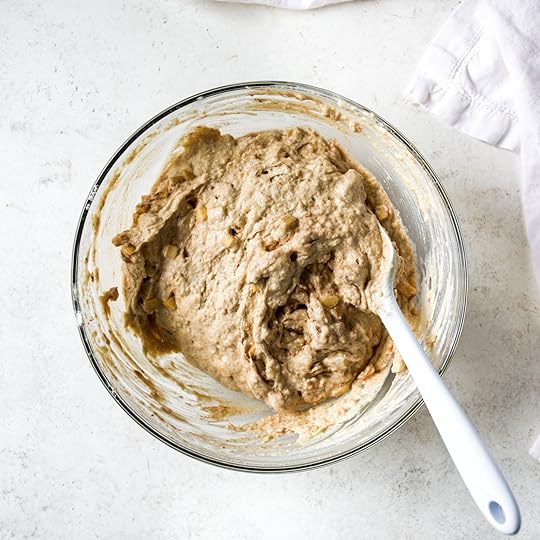 STEP 7: Let the batter sit for 15 minutes. This is the perfect time to clean the kitchen!
  Assemble & Bake Your Apple Muffins!
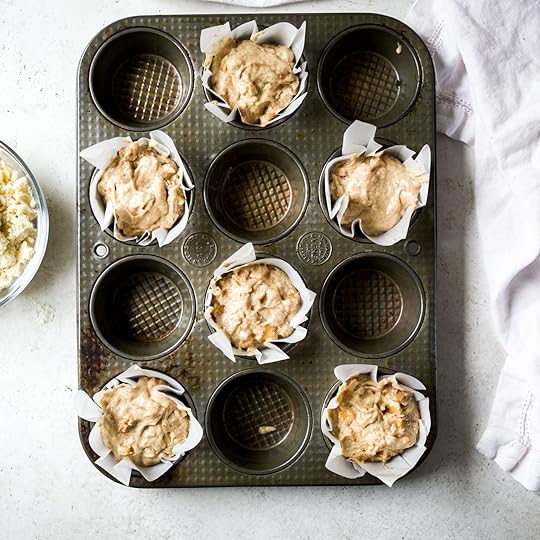 STEP 1: Fill the muffin liners almost to the top of the muffin pan (you can add a little bit more if you’re using the bakery-style liners that are in the photos.
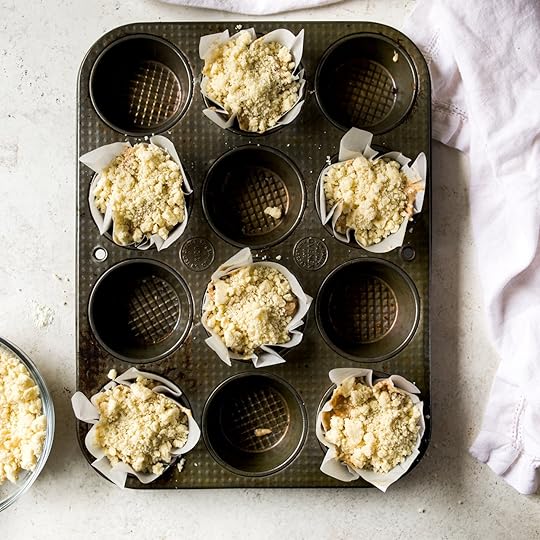 STEP 2: Sprinkle an ample amount (about 2 tablespoons) of streusel over the tops and immediately bake.
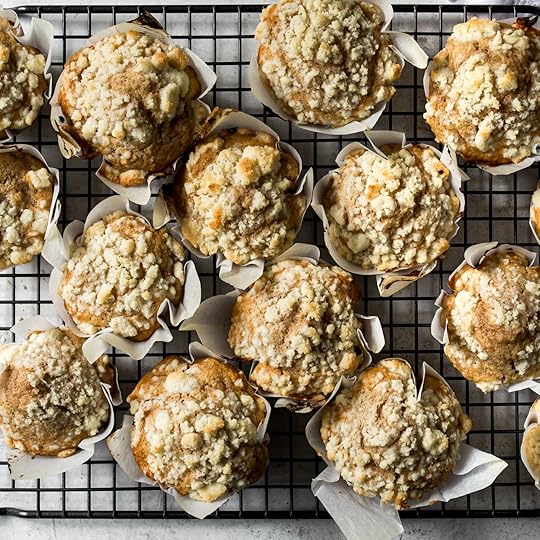 STEP 3: Fresh from the oven, gently remove the muffins from the muffin pan and set them on a wire rack to finish cooling.
 My Favorite Pro-Baking Tips for Making
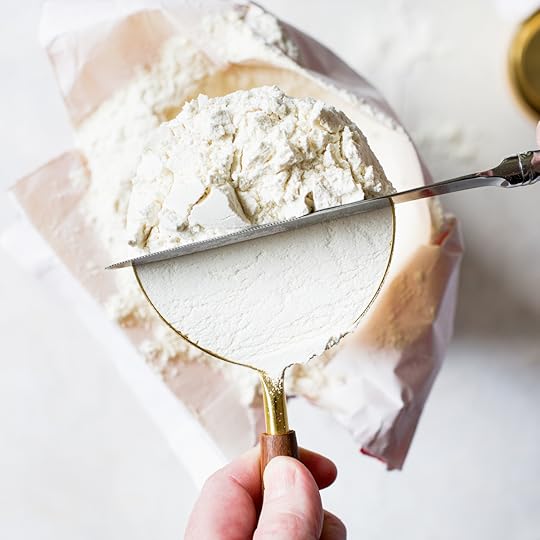
 MEGA MOIST Cinnamon Apple Muffins!Weigh your ingredients! Too much flour is often the culprit for dense or dry muffins. Weighing your ingredients makes sure there is the perfect balance between your wet and dry ingredients. Use buttermilk or milk + acid. For the perfect light muffin crumb, use either buttermilk or whole milk and an acid (apple cider vinegar, white vinegar or fresh lemon juice are great choices). See note below the recipe for more details!Let the cinnamon apple muffin batter rest. Giving this muffin batter a short rest lets the gluten swell and absorb the moisture in the muffin batter, resulting in a taller crown and lighter crumb.Don’t let them sit in the hot pan. Gently get them out of the pan and onto a wire rack to cool as quickly as possible. This will keep them from overbaking in the hot pan.
That’s it! These super simple muffins come together quickly and will be your favorite fall breakfast recipe (promise).

 More Delicious Apple Recipes for You to Try!
Don’t sleep on these Apple Cinnamon Scones, blog favorite Easy Apple Cake or this Apple Cinnamon Pull-Apart Bread.
You can find all of the apple recipes here!
Enjoy this apple cinnamon muffin recipe!
 PrintThe Best Mega Moist Cinnamon Apple Muffins Recipe#wprm-recipe-user-rating-0 .wprm-rating-star.wprm-rating-star-full svg * { fill: #343434; }#wprm-recipe-user-rating-0 .wprm-rating-star.wprm-rating-star-33 svg * { fill: url(#wprm-recipe-user-rating-0-33); }#wprm-recipe-user-rating-0 .wprm-rating-star.wprm-rating-star-50 svg * { fill: url(#wprm-recipe-user-rating-0-50); }#wprm-recipe-user-rating-0 .wprm-rating-star.wprm-rating-star-66 svg * { fill: url(#wprm-recipe-user-rating-0-66); }linearGradient#wprm-recipe-user-rating-0-33 stop { stop-color: #343434; }linearGradient#wprm-recipe-user-rating-0-50 stop { stop-color: #343434; }linearGradient#wprm-recipe-user-rating-0-66 stop { stop-color: #343434; }#wprm-recipe-user-rating-0.wprm-user-rating-allowed.wprm-user-rating-not-voted:not(.wprm-user-rating-voting) svg * { fill-opacity: 0.3; }Brace yourself for the best mega moist cinnamon apple muffins! Loaded with brown sugar, apples and spices, you will love this easy recipe!Course Breakfast, Brunch, SnackCuisine AmericanKeyword Apple Muffins, Streusel, Rebecca Firth, DisplacedHousewife Well-Tested RecipePrep Time 25 minutes minutesCook Time 15 minutes minutesMuffin Batter Rest 15 minutes minutesTotal Time 55 minutes minutesServings 14 MuffinsAuthor Rebecca FirthEquipmentBaking ScaleRegular Muffin Pan#40 2-TBSP Cookie ScoopSpatulaMixing BowlsIngredientsMix Together the Streusel Topping1/2 cup (68 g) all-purpose flour how to measure flour1/4 cup (50 g) granulated sugar¼ teaspoon sea salt4 tablespoons (57 g or 1/4 cup) unsalted butter room temperature and cut into 4 piecesPrep the Apples 2 cups (197 g) finely diced apples about 2 to 3 small, cored apples1 tablespoon (14 g) dark brown sugar packed (light brown sugar can be used as well)1 tablespoon all-purpose flour1 ½ teaspoons cinnamon½ teaspoon nutmegCombine the Muffin Batter3/4 cup (150 g) granulated sugar8 tablespoons (113 g or 1/2 cup) unsalted butter room temperature¼ cup (55 g) light brown sugar packed1 tablespoon (14 g) cooking oil such as olive oil, sunflower or grapeseed oil2 teaspoons real vanilla extract1 ½ teaspoons cinnamon2 large eggs room temperature1/3 cup (82 g) full-fat sour cream room temperature2 teaspoons baking powder1/2 teaspoon baking soda1 teaspoon sea salt1 cup (240 g) buttermilk room temperature; see Notes below recipe for substitutions 2 cups + 2 tablespoons (281 g) all-purpose flourInstructionsCombine the Streusel ToppingIn the bowl of an electric mixer fitted with the paddle attachment*, add the flour, sugar and sea salt and mix for 1 minute on low. Add in the butter and run the mixer until the streusel mixture resembles wet sand, and when pinched together, it holds into clumps. Transfer to a small bowl and store in the fridge, covered, until ready to use.*This entire recipe can be made with a handheld mixer or with a bowl and a spatula; see Notes below recipe.Prep the ApplesIn a medium bowl, toss together the finely diced apples, brown sugar, cinnamon and nutmeg. Set aside.Preheat the oven to 425°F (220°C). Line every other muffin well of your muffin pan with paper liners.Combine the Apple Muffin BatterIn the same bowl of an electric stand mixer fitted with the paddle attachment (no need to clean it), add the sugar, butter, brown sugar, oil, vanilla and cinnamon, and mix on medium for 4 to 5 minutes or until the texture is light and fluffy. Take a big whiff; it smells delicious.Add the eggs, one at a time, making sure the first is well blended before adding in the second. Scrape the sides and bottom of the bowl to make sure everything is well blended.Add in the sour cream, baking powder, baking soda and salt, and run the mixer on low for 1 minute or until well blended. It should look light, fluffy and whipped.With the mixer on low, alternate adding half of the flour and half of the buttermilk (or milk), in four additions, mixing each addition until barely combined. Scrape the sides and bottom of the bowl to make sure there aren't any pockets of flour hiding.Finally, fold in the prepared apples until just combined. If there is any liquid at the bottom of the apple bowl, do not add it to the muffin batter; discard it.At this point, let the muffin batter rest for 15 minutes for a higher muffin top and lighter crumb. Don't let this batter sit for any longer, as the apples will start to release too much moisture into the muffin batter.Assemble & Bake the MuffinsScoop the muffin batter into the prepared muffin tins, filling every other muffin liner almost full. Sprinkle the streusel topping evenly over the tops; you'll need to slightly press down for the streusel to stick to the top of each muffin and not fall off while the muffin rises in the oven.Bake for 5 minutes in the center of the oven and then reduce the oven temperature to 350℉ (177℃) and bake for 15 minutes more. When done, the tops will be light golden brown and puffed up; they should also bounce back when gently pressed in the center. Make sure the batter closest to the apples is baked through. Once they’ve slightly cooled enough to handle, set them on a wire rack to finish cooling.NotesMixer OptionalThe recipe instructions use a mixer, while the step-by-step photos show making the muffins with a bowl and spatula. Use whichever you prefer.If you use a bowl and spatula to mix the muffins, make sure you really cream the butter and sugar (and other ingredients) well, until super light and fluffy for the perfect muffin texture.ButtermilkThe acidity from the buttermilk gives these muffins the best taste and texture! So I highly recommend!Substitution: I tested this once with milk + white vinegar and milk + apple cider vinegar and both were fabulous! Measure out 1 cup (240 g) whole milk. Take out 2 tablespoons (26 g) of the measured milk (return to your milk container), and add 2 tablespoons (26 g) or apple cider vinegar/white vinegar/fresh lemon juice. Let sit for about 5 to 10 minutes before using.Sour CreamFor best results, use full-fat (not reduced fat) sour cream.Substitution: You can use Greek yogurt or Skyr 1:1.Notes on ApplesBest Apples to Use: Some of my favorite baking apples: Granny Smith Apples, Cosmic Crisp, Honeycrisp Apples, Fuji and Gala.Peeling the Apples: I like the look of the peeled apples. However, you’re dicing the apple pieces up so small, it’s not a big deal to use un-peeled apples.Adding More Spices: Feel free to add additional nutmeg, cardamom or all-spice to the apples and the muffin batter. Use about a 1/2 teaspoon.Muffin QuantityI made homemade muffin liners using 5-inch (13-cm) parchment paper squares. These will hold a lot of batter in a standard muffin tin. If you use regular muffin liners, you will get more muffins.Don’t Rest This Batter OvernightIf you’ve made lots of my muffin recipes, you know that I often tell you that the muffin batter can be made the night before and then baked in the morning. This muffin recipe doesn’t work that way as the apples will release too much moisture/liquid into the muffin batter and they won’t bake properly.Apple Muffin StorageStore the apple muffins at room temperature, in an airtight container, for up to three days.To warm up and crisp up the streusel a touch, pop them in a pre-heated 350℉ (177℃) for 2 to 3 minutes. Don’t leave them in for too long or they will dry out.
The post The Best Mega Moist Cinnamon Apple Muffins Recipe appeared first on DisplacedHousewife.


November 7, 2025
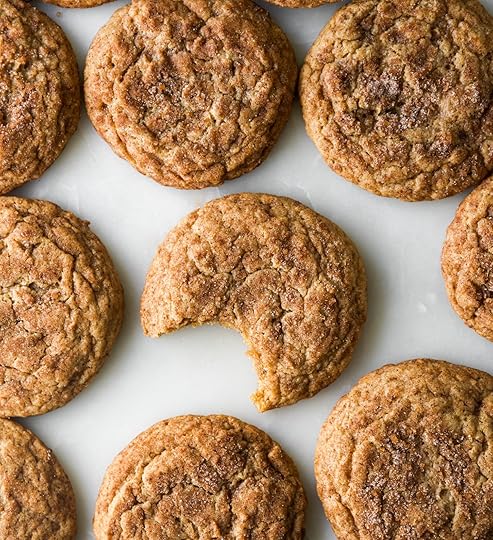
The Best Easy Dirty Chai Snickerdoodles Recipe
Think of the best soft and chewy snickerdoodle cookies combined with the spices of a chai latte, that’s this Dirty Chai Snickerdoodles recipe!
This easy, breezy one-bowl recipe comes together in minutes, needs zero chill time and bakes up beautifully every single time!
But let’s talk texture and flavor! These chai cookies stay soft FOR DAYS! They’re soft, chewy and *not* thick and cakey. A dream, really. These chai snickerdoodles are on the thinner side with a nice bendy consistency (which I love!).
When recipe testing this chai snickerdoodle cookie, I first just rolled them in all of the sugar and spices. But the flavor wasn’t enough (I wanted more!). So I added the spices to both the cookie dough and the sugar cookie. Additionally, this sugar coating has the added crunch and flavor of Demerara sugar that will KNOCK YOUR SOCKS OFF.
The ‘dirty’ component of the cookie comes from the addition of espresso powder in the cookie dough base. You can also sub in finely ground espresso (that you would use for making a shot of espresso), if you don’t have any espresso powder on hand.
I hope you love these dirty chai snickerdoodle cookies as much as we do! Let me know what you think in the comments!

 The Baker’s Guide to Measuring Flour
One of the biggest (and most common) mistakes in baking is how we measure flour. If you find yourself without a scale, see my top tips on how to properly measure flour for the perfect amount every time!
 Let’s Make These Chai Snickerdoodles With Step-by-Step Photos!
Scroll down below the step-by-step photos for the full, detailed recipe, and leave any and all comments & questions at the bottom of this post and we’ll respond asap!
 Step 1: Gather your ingredients! For the cookie dough: butter, brown sugar, granulated sugar, vanilla, cinnamon, espresso powder, ginger, cardamom, allspice, cloves, eggs, cream of tartar, baking soda, salt and flour. For the sugar-spiced cookie coating: granulated sugar, Demerara sugar, cinnamon, ginger, cardamom, allspice and cloves.
 STEP 2: In a mixer or with a bowl & spatula, cream together the butter, brown sugar, vanilla, cinnamon, espresso, ginger, cardamom, allspice, and cloves until lighter in color and texture.
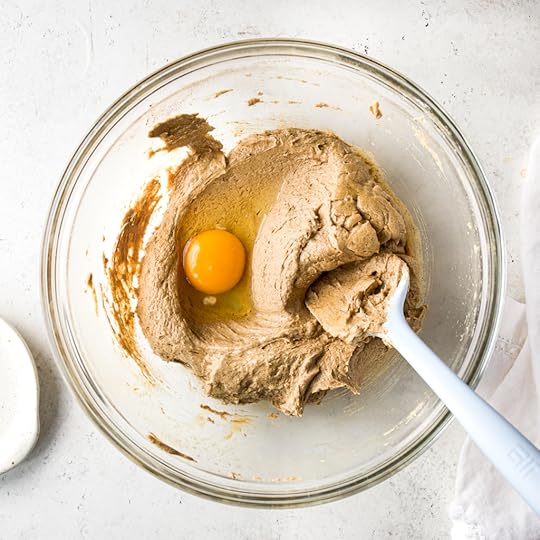 STEP 3: Add in the eggs, one at a time, making sure the first is well blended before adding in the second. Scrape down the sides and bottom of the bowl so that everything is well combined.
 STEP 4: Mix in the cream of tartar, baking soda and salt…
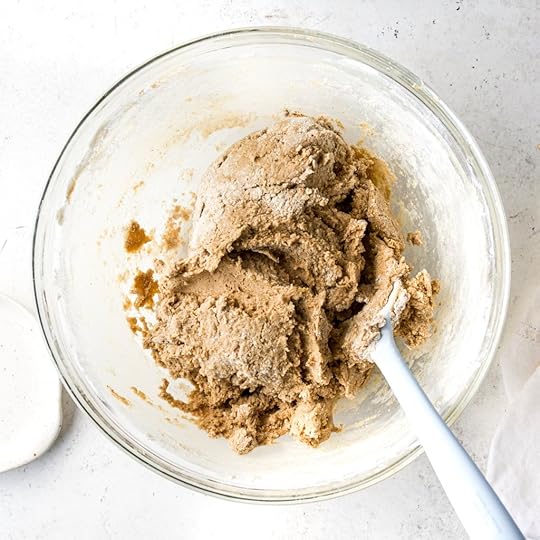 STEP 5: Finally, fold in the flour until just combined. Don’t over-mix, we want a light cookie texture!
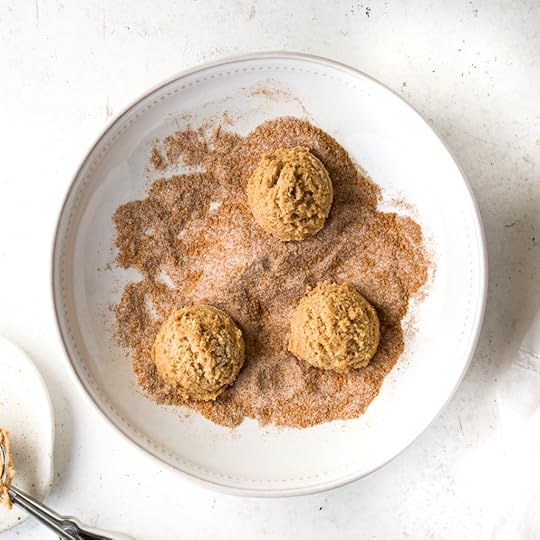 STEP 6: In a shallow bowl, combine the sugar-spice cookie coating: sugar, Demerara sugar, cinnamon, ginger, cardamom, allspice and cloves. Coat the cookie dough balls in this magic.
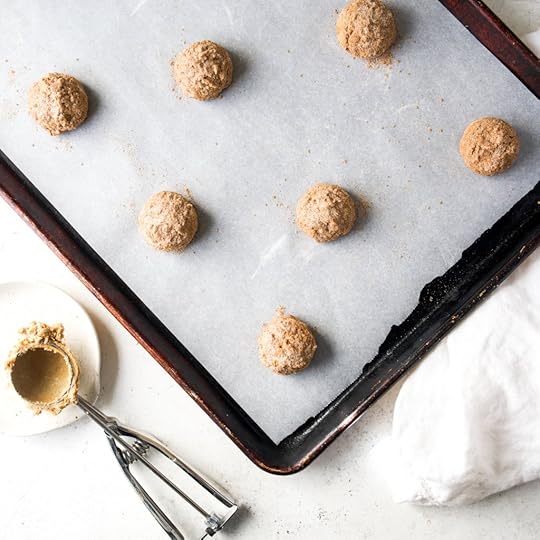 STEP 7: Set the coated cookie dough balls on the prepared baking sheet, leaving space between dough to allow for spreading.
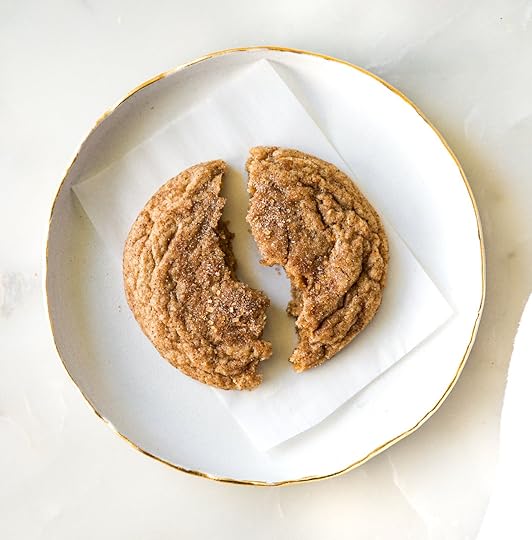
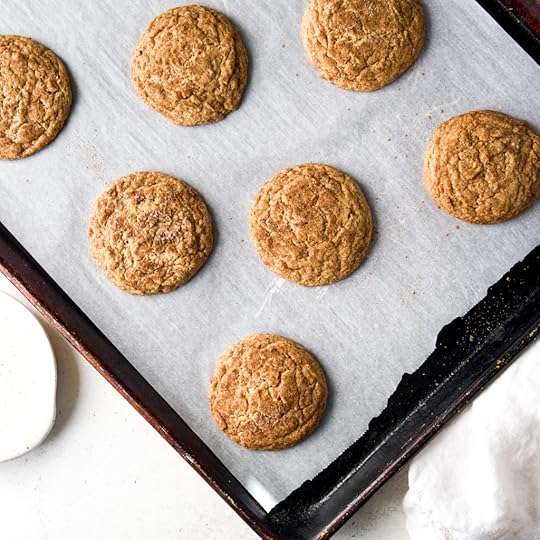 STEP 8: Let the cookies cool on the baking sheet for 5 minutes. They will be puffed up fresh from the oven, collapse and get that signature snickerdoodle crinkle as they cool.
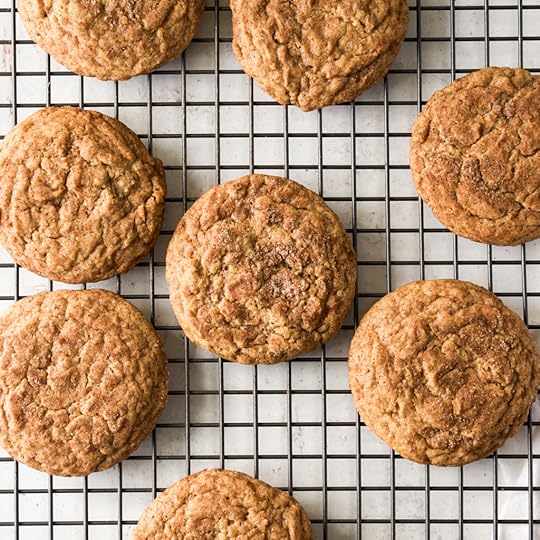 STEP 9: Transfer to a wire rack to finish cooling and enjoy!
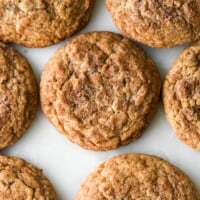
 My Favorite Pro Baker’s Tips For These Chai CookiesThis is a no-rest, no-chill cookie dough (yay!).
You’ll see from the photo above that this cookie is on the thinner side. If you’d like a thicker cookie, then chill the cookie dough for a minimum of 30 minutes (ideally overnight) for a thicker cookie experience.
This cookie has mega flavor!This comes from the combo of spices, dark brown sugar, espresso powder and Demerara sugar. But what if you don’t have all of these ingredients?
The spices should not be omitted. If they are, it will no longer be a dirty chai snickerdoodle!However, the dark brown sugar can be replaced with light brown sugar. Espresso powder can be replaced with finely ground espresso or omitted altogether.Lastly, the Demerara sugar can be left out of the sugar-spice cookie coating. HOWEVER, I love the crunch it adds to the cookie texture and I have a heap of recipe that uses it, so try to get some!This is it! You’ll love these chai snickerdoodle cookies. So let’s get to it!
DH Baking Tip: To quickly bring butter to room temperature, as a first step cut it into small cubes. This will expose more of the butter surface to the air accelerating it warming up a bit. You can also set it on top of the oven while it preheats and you gather all of your ingredients.
 More of My Favorite Snickerdoodle Recipes!
I love snickerdoodle cookies so much! They remind me of my childhood and it’s a cookie my mom made all of the time! Check out these Spiced Pumpkin Snickerdoodles and Brown Butter Snickerdoodles.
You can find more delicious cookie recipes here!
Enjoy these easy chai snickerdoodle cookies!
 PrintEasy Soft & Chewy Dirty Chai Snickerdoodles#wprm-recipe-user-rating-0 .wprm-rating-star.wprm-rating-star-full svg * { fill: #343434; }#wprm-recipe-user-rating-0 .wprm-rating-star.wprm-rating-star-33 svg * { fill: url(#wprm-recipe-user-rating-0-33); }#wprm-recipe-user-rating-0 .wprm-rating-star.wprm-rating-star-50 svg * { fill: url(#wprm-recipe-user-rating-0-50); }#wprm-recipe-user-rating-0 .wprm-rating-star.wprm-rating-star-66 svg * { fill: url(#wprm-recipe-user-rating-0-66); }linearGradient#wprm-recipe-user-rating-0-33 stop { stop-color: #343434; }linearGradient#wprm-recipe-user-rating-0-50 stop { stop-color: #343434; }linearGradient#wprm-recipe-user-rating-0-66 stop { stop-color: #343434; }#wprm-recipe-user-rating-0.wprm-user-rating-allowed.wprm-user-rating-not-voted:not(.wprm-user-rating-voting) svg * { fill-opacity: 0.3; }These are the best easy Dirty Chai Snickerdoodles you'll ever bake! Soft, chewy snickerdoodle cookies infused with warm chai spices and a kick of espresso powder—no chill time needed for this dough!Course Dessert, SnackCuisine American, IndianKeyword Chai, Snickerdoodle, Cookies, Rebecca Firth, DisplacedHousewife Well-Tested RecipePrep Time 10 minutes minutesCook Time 11 minutes minutesTotal Time 21 minutes minutesServings 28 CookiesAuthor Rebecca FirthEquipment#40 2-TBSP Cookie ScoopBaking ScaleFavorite Handheld MixerSpatulaIngredientsFor the Cookie Dough16 tablespoons (226 g) unsalted butter room temperature1 cup (210 g) dark brown sugar packed; you can also use light brown sugar1/2 cup (100 g) granulated sugar1 tablespoon (13 g) real vanilla extract2 teaspoons ground cinnamon1 teaspoon espresso powder or finely ground espresso1 ½ teaspoons ground ginger1/2 teaspoon ground cardamom1/2 teaspoon ground allspice1/4 teaspoon ground cloves2 large eggs room temperature2 teaspoons cream of tartar1 teaspoon baking soda1 teaspoon sea salt2 3/4 cup (372 g) all-purpose flour how to measure flourFor the Sugar-Spiced Cookie Coating¼ cup (50 g) granulated sugar2 tablespoons (24 g) Demerara sugar1 ½ teaspoons ground cinnamon1 teaspoon ground ginger1 teaspoon ground cardamom1/2 teaspoon ground allspice1/2 teaspoon ground clovesInstructionsTo StartPreheat your oven to 350°F (177°C). Line several baking sheets with parchment paper.For the Chai Snickerdoodle Cookie DoughTo the bowl of an electric stand mixer fitted with the paddle attachment, add the butter, brown sugar, granulated sugar, vanilla, cinnamon, espresso, ginger, cardamom, allspice and cloves, and mix on medium for about 4 to 5 minutes, or until lightened in color and texture.*You can also make this recipe with a bowl and a silicone spatula. Make sure the cookie dough is light and fluffy, which will take a couple more minutes when mixed by hand.Mix in the eggs, one at a time, making sure the first is well-blended before adding the second.Add in the cream of tartar, baking soda and salt, and give it a couple of good stirs to distribute evenly throughout the dough.Fold the all-purpose flour into the dough and mix until barely blended, and you still see light streaks of flour.For the Sugar-Spiced Cookie CoatingTo a shallow bowl, mix together the granulated sugar, Demerara sugar, ginger, cardamom, allspice and cloves.Assemble & Bake the Cookies!Portion 2 tablespoon scoops of chai cookie dough. If using a cookie scoop, leave the cookie dough shaped from the scoop and *don't* roll it between your hands (it results in a more textured surface that I love). If you don't have a cookie scoop, just roll away and they'll be fabulous! Give the dough balls a generous coating of the sugar-spice mixture and set them on the prepared baking sheet. Make sure there are about 2 inches (5 cm) between each dough ball, allowing space for spreading whilst baking. Bake one sheet at a time in the center of the oven for 11 minutes. Nudge any misshapen cookies back into a circle, using the edge of a spatula, as soon as they're out of the oven. Let the chai snickerdoodles cool on the cookie sheet for 5 minutes, and then transfer to a cooling rack.NotesDark Brown SugarYou can substitute with light brown sugar.This is a GREAT cookie to use muscovado sugar. If you have some, substitute the brown sugar 1:1.Storing Your Cookie DoughStore your chai cookies at room temperature in an airtight container for up to three days.Freezing Chai Snickerdoodle Cookie DoughI love a cookie dough that freezes well, and this is one of them! For short-term storage:Portion out the dough, don’t roll it in the sugar-spice blend, and place it on a parchment-lined baking sheet. Freeze for several hours until frozen through, transfer to an airtight container and store in the freezer until ready to use.When ready to bake, place the frozen dough balls on a parchment-lined baking sheet and then preheat the oven. This will give the dough some time to defrost. Roll in the sugar-spice mixture just before baking.You’ll need to add several extra minutes to the bake time (but don’t over-bake!).You can store the sugar-spice cookie coating in an airtight container and store it in the freezer next to the cookie dough so it’s ready to go!For long-term storage:Cover the cookie dough in plastic wrap, then a layer of foil, then stash it in an airtight container and set it in the freezer for 2 to 3 months.When ready to use, set in the refrigerator overnight to defrost. Then set on the counter to bring it closer to room temperature before portioning out and baking as detailed above in the recipe.
The post The Best Easy Dirty Chai Snickerdoodles Recipe appeared first on DisplacedHousewife.
October 31, 2025
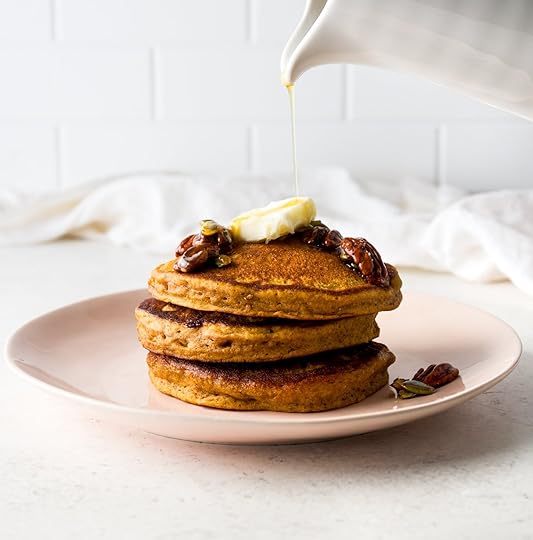
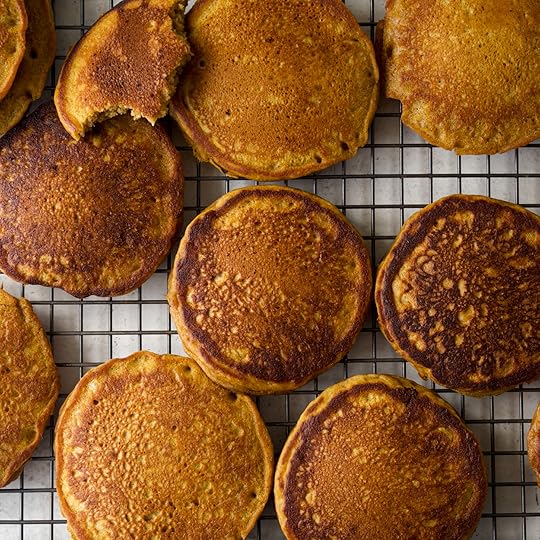
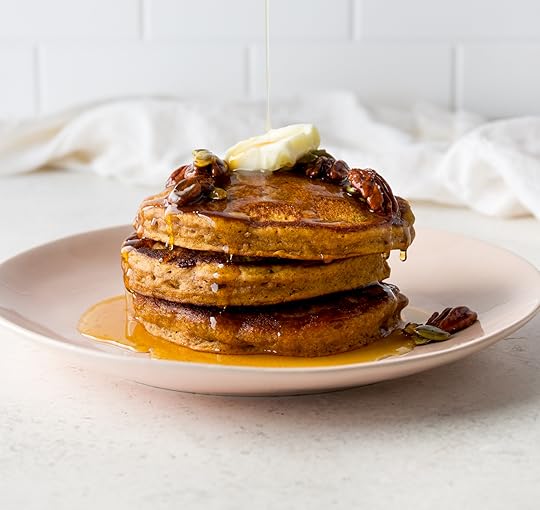
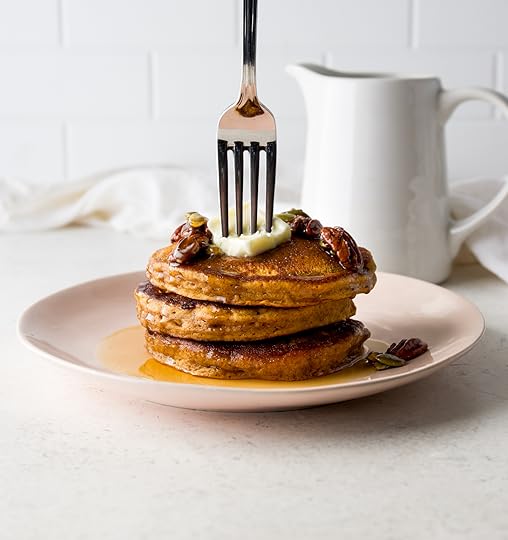
Easy Homemade Fluffy Pumpkin Pancakes
Easy, fluffy, homemade Pumpkin Pancakes are *the* recipe to make when it starts to get cooler and the days are shorter!
These are loaded with a full 1 cup (244 g) of pumpkin puree, lots of cozy, warm spices, and easily made with pantry staples. So grab a bowl and your whisk and whip some up for an easy, delicious breakfast treat!
I can’t wait to hear what you think!
 How to Make Perfect Pumpkin Pancakes with
 Step-by-Step Photos + Instructions!
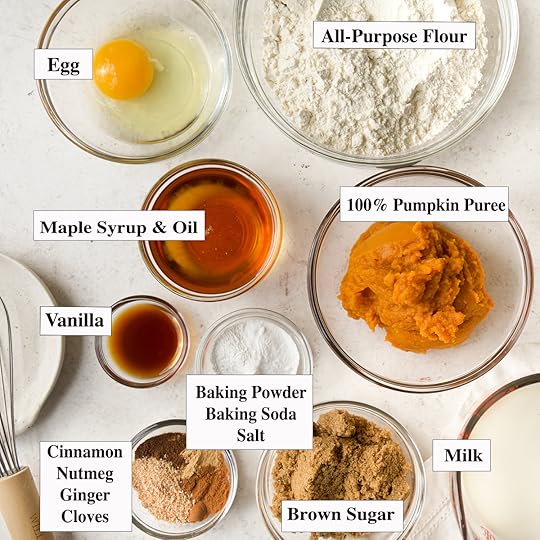 STEP 1: Gather your ingredients: all-purpose flour, brown sugar (I preferred dark, but light brown sugar works too!), cinnamon, nutmeg, ginger, cloves, baking powder, baking soda, salt, milk, 100% pumpkin puree, an egg, oil (use a neutral-flavored oil), real maple syrup and vanilla extract.
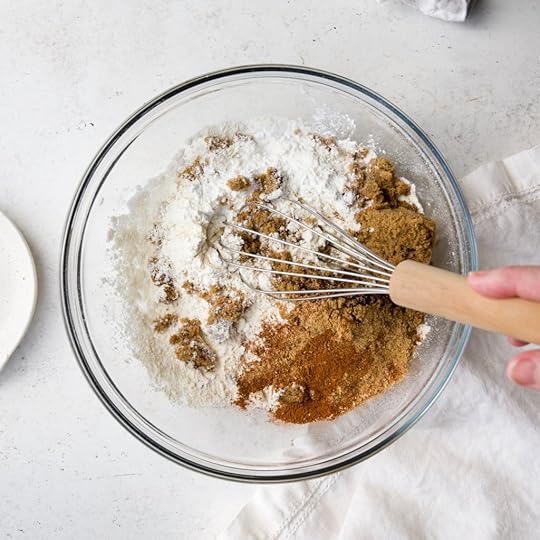 STEP 2: In a large bowl, whisk together flour, brown sugar, cinnamon, nutmeg, ginger, cloves, baking powder, baking soda and salt until well blended. Break up any chunks of brown sugar.
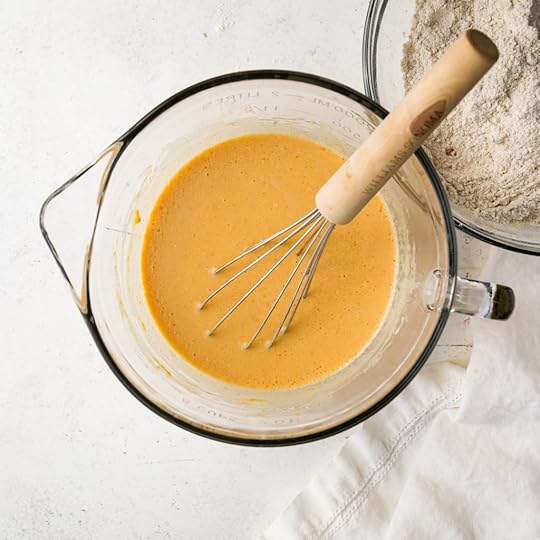 STEP 3: In a medium bowl or large liquid measuring cup, whisk together the milk, pumpkin puree, egg, oil, maple syrup and vanilla until thoroughly combined.
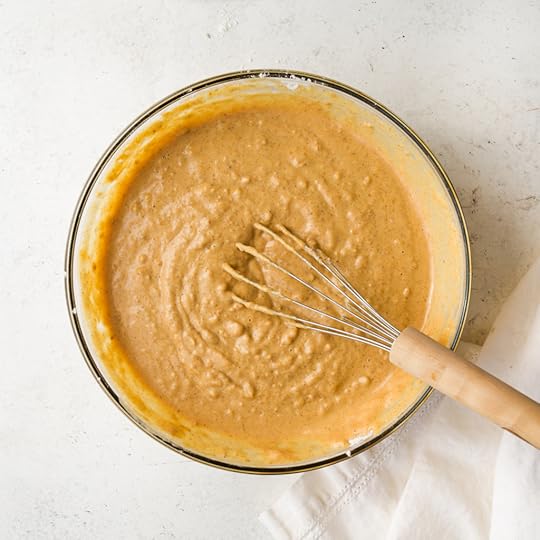 STEP 4: Pour the pumpkin mixture into the dry ingredients and whisk until *just* combined. Don’t overmix, but also make sure there aren’t any pockets of flour hiding.
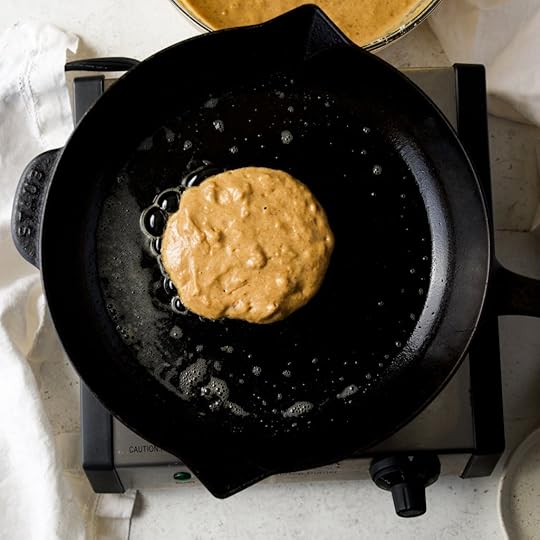 STEP 5: Preheat your pan to medium-low heat and add some fat (butter, neutral-flavored oil, or a combo of both). Once hot and slightly bubbling, add 1/4 cup of pancake batter. It will spread to about 4 1/4 inches (11 cm). Cook for 3 minutes or until air bubbles are popping on the top and it’s golden brown on the bottom.
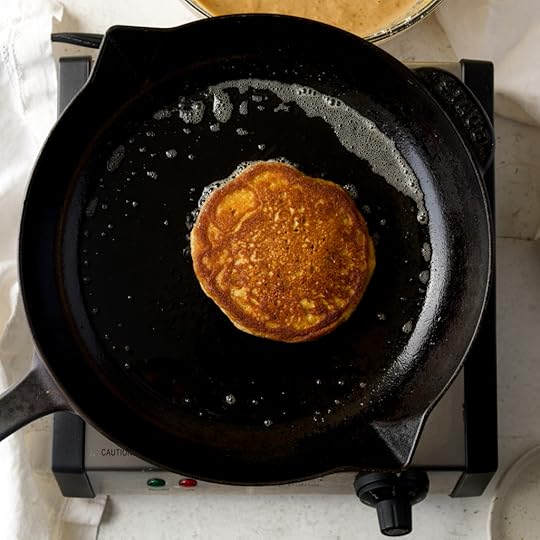 STEP 6: Flip using a spatula and cook, undisturbed, for about 2 to 3 minutes more. I like to add a wee more butter in between batches of pancakes.
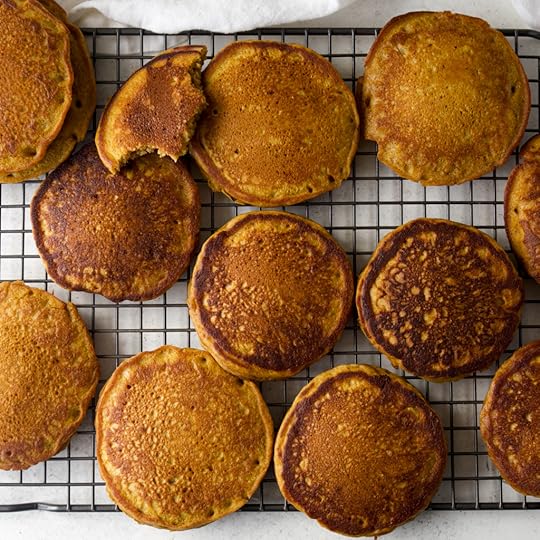 PANCAKE TIP: Heat your oven to 170°F (77°C). Set a wire rack on top of a baking sheet in the oven, and place the pancakes on top to keep warm while you bake all of them.
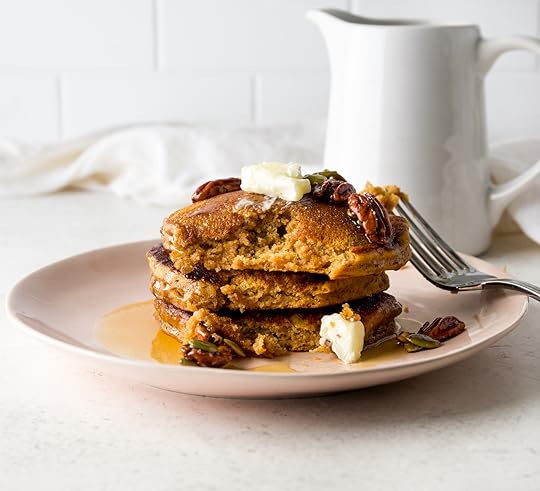 My Favorite Pumpkin Pancake Pro Tips!
These are pretty easy to make, so I only have two tips for you:
Tip #1: Don’t Over-Mix Your Pumpkin Pancake BatterUse as few strokes as possible to mix the pancake batter and use a whisk (or a fork), making sure there aren’t any pockets of flour hiding. Remember, though, by nature pancake batter is lumpy (not smooth), so don’t over-mix it!
Tip #2: Make Sure Your Pan is Properly PreppedYou’ll want to heat your pan over medium-low heat. If it’s nonstick, you can use some butter, and you’ll be good to go. When I cooked the pancakes in a cast-iron skillet, I used both oil and butter to grease the pan. The oil (I used sunflower seed oil) has a higher burn point, and the butter gives great flavor.
These pancakes are quite moist, so you’ll want the pan warm enough to give them a nice bronze and bake them through, but not so warm that the exterior cooks quicker than the interior.
 More Favorite Breakfast Recipes
Check out these Starbucks copycat Pumpkin Cream Cheese Muffins, Sour Cream Coffee Cake and Chewy Chocolate Granola Bars!
You can find all of the breakfast recipes here!
I hope you love the best pumpkin pancake recipe!
 PrintEasy Homemade Fluffy Pumpkin Pancakes#wprm-recipe-user-rating-1 .wprm-rating-star.wprm-rating-star-full svg * { fill: #343434; }#wprm-recipe-user-rating-1 .wprm-rating-star.wprm-rating-star-33 svg * { fill: url(#wprm-recipe-user-rating-1-33); }#wprm-recipe-user-rating-1 .wprm-rating-star.wprm-rating-star-50 svg * { fill: url(#wprm-recipe-user-rating-1-50); }#wprm-recipe-user-rating-1 .wprm-rating-star.wprm-rating-star-66 svg * { fill: url(#wprm-recipe-user-rating-1-66); }linearGradient#wprm-recipe-user-rating-1-33 stop { stop-color: #343434; }linearGradient#wprm-recipe-user-rating-1-50 stop { stop-color: #343434; }linearGradient#wprm-recipe-user-rating-1-66 stop { stop-color: #343434; }#wprm-recipe-user-rating-1.wprm-user-rating-allowed.wprm-user-rating-not-voted:not(.wprm-user-rating-voting) svg * { fill-opacity: 0.3; }Look no further for a super delicious, easy, fluffy pumpkin pancake experience! Using pantry staples, you can whip up the best pumpkin pancakes in minutes. Enjoy!Course Breakfast Brunch, SnackCuisine AmericanKeyword Pumpkin, Pancakes, Rebecca Firth, DisplacedHousewife Well-Tested RecipePrep Time 10 minutes minutesCook Time 6 minutes minutesTotal Time 16 minutes minutesServings 14 PancakesAuthor Rebecca FirthEquipmentSpatula TurnerBaking ScaleMixing Bowls10-Inch Cast Iron SkilletMy Favorite WhiskIngredientsFor the Pancakes2 cups (270 g) all-purpose flour1/3 cup (73 g) dark brown sugar packed (you can use light brown sugar in a pinch!)2 teaspoons cinnamon1 teaspoon nutmeg1 teaspoon ground ginger1/4 teaspoon cloves2 1/2 teaspoons baking powder1 teaspoon baking soda1/2 teaspoon sea salt1 1/2 cup (360 g) whole milk1 cup (244 g) pumpkin puree use 100% pure pumpkin puree and *not* pumpkin pie filling1 large egg3 tablespoons (42 g) sunflower seed oil (or other neutral oil)2 tablespoons (42 g) real maple syrup plus more for serving! (don't use imitation maple syrup; it will change the consistency of the pancakes)1 teaspoon real vanilla extractTo Grease the Panneutral oil and/or butterInstructionsTo StartPreheat your oven to 170°F (77°C) and make sure you have a rack in the center of the oven. Set a wire rack on top of a baking sheet and set that in the oven. You can set the pancakes here to keep warm while you make all of the pancakes.Mix the Pancake BatterIn a medium bowl, whisk together the flour, brown sugar, cinnamon, nutmeg, ginger, cloves, baking powder, baking soda and salt. Break up any chunks of brown sugar.In another medium mixing bowl (or use a large liquid measuring cup), whisk together the milk, pumpkin, egg, oil, maple syrup and vanilla.Pour the liquid pumpkin mixture into the dry ingredients and whisk until *just* combined. Make sure there aren't any hidden pockets of flour; this pancake batter is thick. Also, take care not to overmix. The pancake batter is lumpy. Cook the PancakesHeat a large skillet over medium-low heat. Add butter, a neutral-flavored oil or a combination of the two to the pan. You just want to coat the bottom of the pan; you don't want the pancake swimming in it. Swirl the butter/oil around to cover the surface, and as soon as that's hot, it's ready to test your first pancake!First, let's make a tester pancake (the cook's snack :)). Pour about 1/4 cup of pumpkin pancake batter into the center of the pan. Over medium-low heat, cook for about 2 to 3 minutes (I use the full 3 minutes). You want the bubbles to pop over the top, and the bottom to be a beautiful golden brown. Then flip your pancake and cook for 2 to 3 minutes more. Everyone's stovetop is different, so keep track of how long you need to cook them and continue to adjust the heat as needed.At the right temperature, the pancakes will get the perfect golden color and fluffy rise. If it’s not warm enough, they will spread and become thin. Finish with the remaining batter, adding more butter/oil as you go and adjusting the heat so that it is neither too hot nor too cool. Set the cooked pancakes in the oven while you finish cooking all of the batter. They are delicious plain, but also fabulous with butter, maple syrup, banana slices and/or candied pecans!NotesPumpkin PureeUse 100% pure pumpkin puree and not pumpkin pie filling. US friends, Libby’s is my favorite! Different textures in the pumpkin puree will yield different thickness and color of your pancakes. Homemade pumpkin puree should be drained on paper towels so it is thicker before going into the pancake batter. Maple SyrupIt may be tempting to use imitation maple syrup, but it doesn’t work well in cooking and baking. Use 100% real maple syrup or omit it from the batter if you don’t have any on hand.Cook TimesEveryone’s stovetop is different. Yours may run hot or cool. I find that I need to constantly adjust the temp to keep it right in the zone where it bakes the pancakes perfectly, bronzes gorgeous and cooks all the way through.StorageIf you have any leftover pancakes, store them in an airtight container. They’ll last for about a day at room temperature. Anything longer than that and I would store them in the fridge.For long-term storage, store them in an airtight container in the freezer. If layered, place parchment paper in between pancakes. VariationsThese would be delicious with chocolate chips added to the batter just before cooking!
The post Easy Homemade Fluffy Pumpkin Pancakes appeared first on DisplacedHousewife.
October 17, 2025
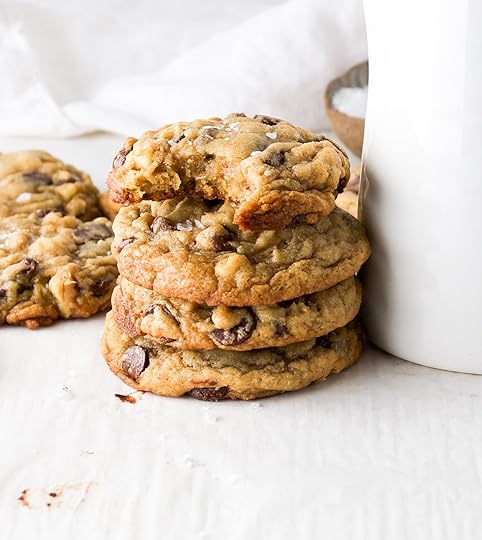
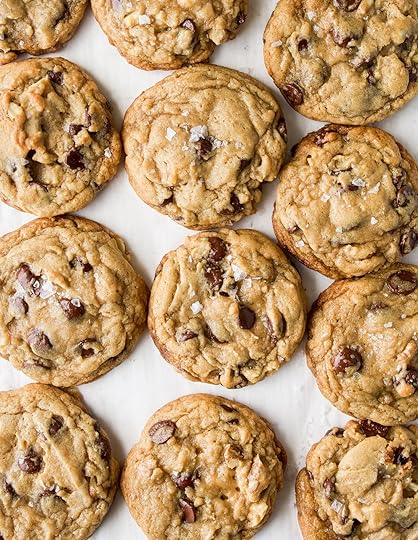
Thick & Gooey Toasted Walnut Chocolate Chip Cookies
This isn’t your usual, run-of-the-mill Toasted Walnut Chocolate Chip Cookie recipe! Let me tell you what’s different…
We start with a brown butter, vanilla-rich cookie dough that ideally needs 60 minutes of refrigeration (ideally overnight) to fully develop the most delicious chocolate chip cookie dough flavor. You can bake the cookies right away, and they’ll still be delicious, but I urge delayed gratification if at all possible!
Toasted, chopped walnuts are laced throughout the cookie dough, as well as a robust amount of chocolate chips for mega chocolate puddles.
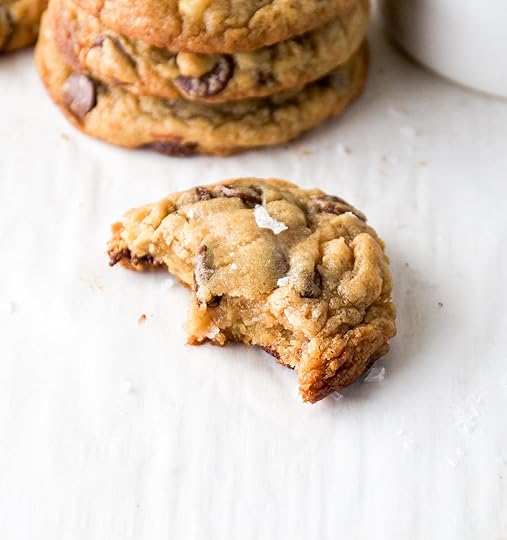
We use an ample amount of cookie dough per cookie (1/4 cup or 4 tablespoons of cookie dough) that we bake until *just* baked. Letting the cookies cool on the baking sheet finishes the bake time for us.
From the minute you take your first bite, you’ll get toasty, nutty, chocolate-y goodness in every bite. These are gooey, thick chocolate chip cookies, and they are EVERYTHING.
This recipe was inspired by ‘The Cookie’ from Metropolitan Market in Seattle. Their cookie is a bit thicker and bigger than mine, but I give you instructions below if you want to super-size your cookies to match theirs.
I’m not normally a ‘nuts in my cookie’ kinda woman (that doesn’t sound appropriate  ). But, this particular toasted walnut chocolate chip cookie is soooo spectacular, I hope that you’ll jump on the bandwagon with me!
Enjoy!
 The Baker’s Guide to Measuring Flour
One of the biggest (and most common) mistakes in baking is how we measure flour. If you find yourself without a scale, see my top tips on how to properly measure flour for the perfect amount every time!
 Dazzling Pro-Baking Tip for this
 Beautiful Toasted Walnut Chocolate Chip Cookie Magic!Careful toasting your walnuts. Nuts can burn quite quickly, so focus on that and only that, while you’re toasting.Let the brown butter cool completely. You want the butter to have firmed up a bit and completely cool so that you can cream the butter and sugar together.Rest your dough. I recipe tested baking the cookies straightaway, after 60 minutes of rest and after an overnight rest. All were magical!!! But resting the dough for 60 minutes or longer lets the starches absorb moisture and puff up (thicker cookies!), and it also develops and concentrates the flavors of the cookie. Love.
Let’s make some fantabulous cookies!
 Step-by-Step Photos + Instructions for Making
 The BEST Chocolate Chip Cookies with Toasted Walnuts
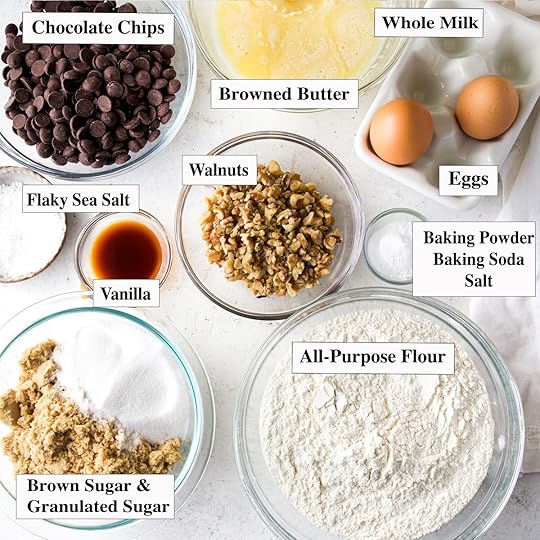 STEP 1: Gathering your ingredients: brown butter (see instructions), milk, walnuts, brown sugar, granulated sugar, vanilla, eggs, baking powder, baking soda, salt and all-purpose flour.
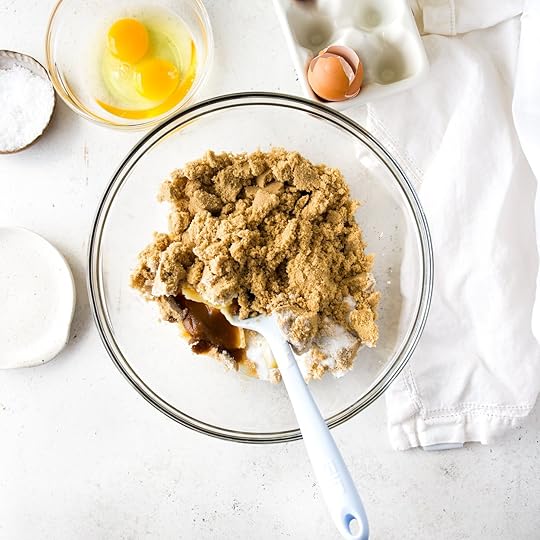 STEP 2: To mix the cookie dough, cream the slightly solidified and cooled brown butter, brown sugar, sugar and vanilla until smooth and creamy.
 STEP 3: Add in the eggs, one at a time. Make sure the first egg is well blended before adding the second.
 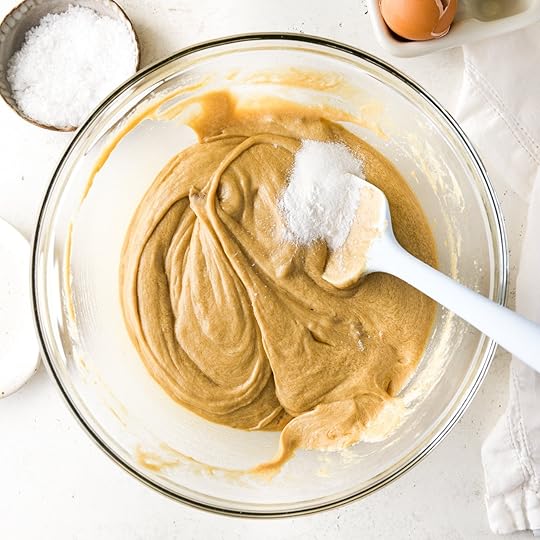 STEP 4: Mix in the baking powder, baking soda and salt. Scrape the sides and bottom of the bowl to make sure everything is well combined.
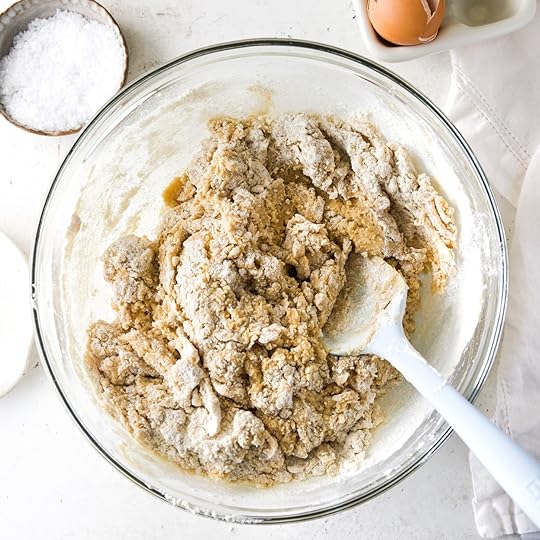 STEP 5: Mix in the flour until barely combined and you still see streaks of flour…
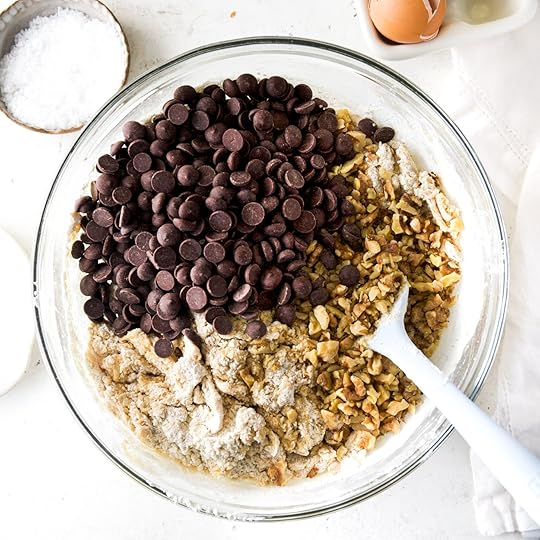 STEP 6: Finally, fold in the chocolate chips and toasted walnuts. You want them evenly distributed throughout the dough. Be careful not to overmix the cookie dough.
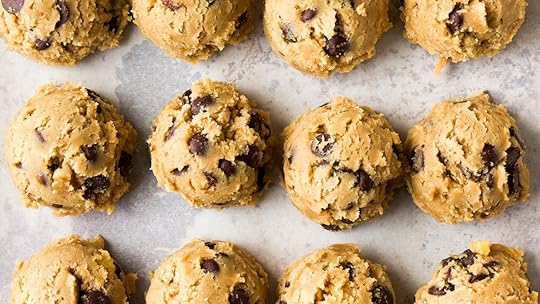
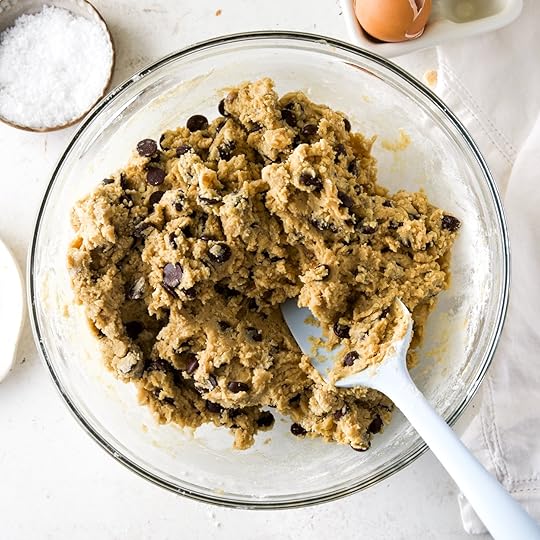 STEP 7: Cover the dough tightly and chill for at least 60 minutes or up to several days.
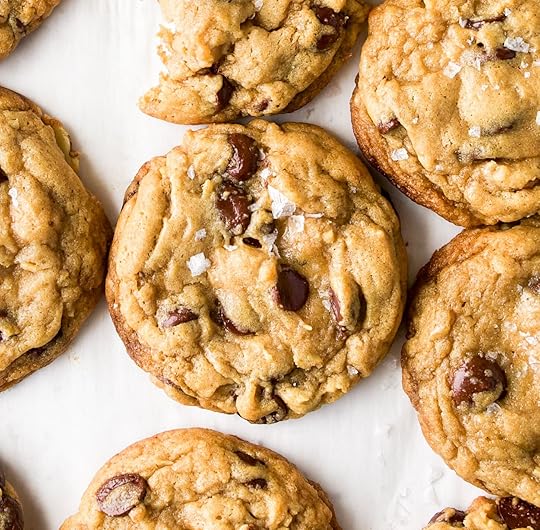
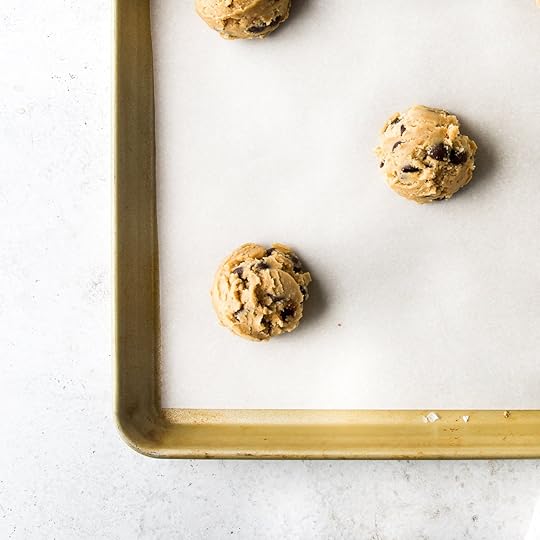 STEP 8: The dough will be quite firm after chilling. Portion 4 tablespoon cookie dough balls and set on the prepared baking sheet. Bake for 12 to 13 minutes and enjoy!
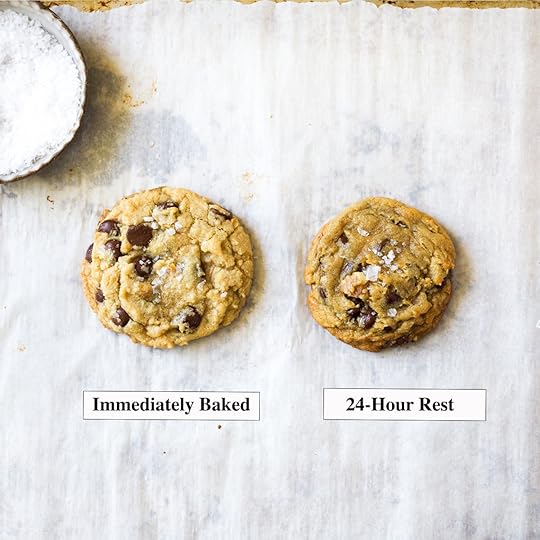 Baker’s Notes: I wanted to share a visual of the difference between rested vs non-rested cookie dough. The cookie dough that is immediately baked spreads more and is lighter in color. The cookie dough that rested in the fridge for 24 hours is darker, puffier, has a smaller circumference and a fudgier interior. I can’t stress enough how both are delicious!!
 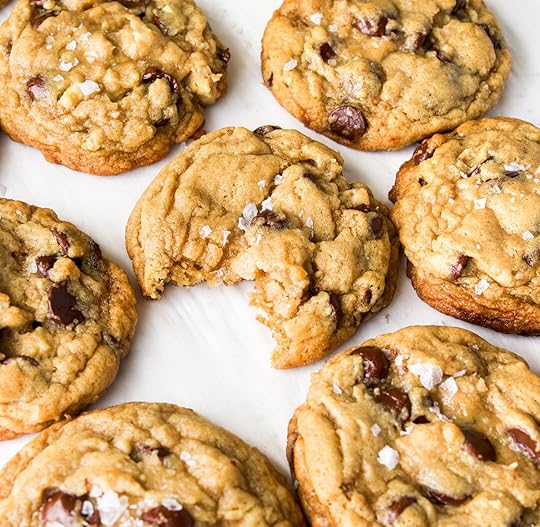 More DELICIOUS Chocolate Chip Cookie Recipes!
Also check out my favorite fabulous Olive Oil Chocolate Chip Cookies, Malted Chocolate Chip Cookies and Salted Caramel Chocolate Chip Cookies!
You can find all of the chocolate chip cookie recipes here!
Have fun making these MEGA FAB Toasted Walnut Chocolate Chip Cookies!
 PrintThick & Gooey Toasted Walnut Chocolate Chip Cookies#wprm-recipe-user-rating-0 .wprm-rating-star.wprm-rating-star-full svg * { fill: #343434; }#wprm-recipe-user-rating-0 .wprm-rating-star.wprm-rating-star-33 svg * { fill: url(#wprm-recipe-user-rating-0-33); }#wprm-recipe-user-rating-0 .wprm-rating-star.wprm-rating-star-50 svg * { fill: url(#wprm-recipe-user-rating-0-50); }#wprm-recipe-user-rating-0 .wprm-rating-star.wprm-rating-star-66 svg * { fill: url(#wprm-recipe-user-rating-0-66); }linearGradient#wprm-recipe-user-rating-0-33 stop { stop-color: #343434; }linearGradient#wprm-recipe-user-rating-0-50 stop { stop-color: #343434; }linearGradient#wprm-recipe-user-rating-0-66 stop { stop-color: #343434; }#wprm-recipe-user-rating-0.wprm-user-rating-allowed.wprm-user-rating-not-voted:not(.wprm-user-rating-voting) svg * { fill-opacity: 0.3; }Thick, Gooey Toasted Walnut Chocolate Chip Cookies are ample, bakery-style cookies (read: big!) that are loaded with chopped, toasty walnuts, lots of chocolate chips and a gooey, slightly underbaked center. You are going to love these cookies!Course Dessert, SnackCuisine AmericanKeyword Rebecca Firth, DisplacedHousewife Well-Tested Recipe, Toasted Walnuts, Chocolate Chip CookiesPrep Time 20 minutes minutesCook Time 13 minutes minutesChill Time 1 hour hour 45 minutes minutesTotal Time 2 hours hours 18 minutes minutesServings 31 CookiesAuthor Rebecca FirthEquipment4-TBSP Cookie ScoopBaking ScaleBaking SheetsCallebaut Semi-Sweet Chocolate ChipsIngredientsFor the Brown Butter182 grams unsalted brown butter 16 tablespoons (226 g unsalted butter before browning)3 tablespoons (45 g) milk cold; ideally, whole milk, but any milk will doFor the Walnuts2/3 cup (75 g) raw walnuts coarsely choppedFor the Cookie Dough1 1/2 cups (330 g) light or dark brown sugar packed1/2 cup (100 g) granulated sugar1 tablespoon (13 g) real vanilla extract2 large eggs room temperature1 teaspoon baking powder1 teaspoon baking soda1 ¼ teaspoons sea salt3 ¼ cups (439 g) all-purpose flour 2 cups (340 g) chocolate chips see Notes belowSea salt flakes for the tops optionalInstructionsFirst, Brown The ButterPlace 16 tablespoons (226 g) unsalted butter in a small saucepan and melt over medium heat. Once melted, crank up the heat to medium-high. Stand by, continuously stirring and watching. Small golden bits will start to settle on the bottom of the pan. Once this happens, take it off the heat and pour it into a medium, heat-safe bowl that can handle going into the fridge (I wouldn't use glass). Add the cold milk, whisking to combine. Stash in the fridge or freezer for about 45 minutes or until the top half of the mixture has solidified (the bottom half will still be liquid).
(For more details on browning butter, check out my How to Perfectly Brown Butter tutorial)
Second, Toast Your WalnutsYou can toast your walnuts in the oven or on the stovetop: For the Oven: Toast your walnuts for 5 to 8 minutes on a rimmed, ungreased baking sheet. Jiggle the baking sheet midway through, keeping an eye on them so that they don't burn.For the Stovetop: Place them in an un-greased skillet (I love my cast iron for this) set over medium-low heat, for about 4 to 5 minutes on low heat. Periodically shake the skillet so they get evenly toasted.Third, Mix The Cookie DoughTo the bowl of an electric stand mixer fitted with the paddle attachment (you can also use a bowl and a spatula for this recipe), cream the cooled brown butter mixture with the brown sugar, granulated sugar and vanilla until light and fluffy, about 4 to 5 minutes. It will smell mega delicious.Add in the eggs one at a time, completely mixing in the first before adding the second. Mix in the baking powder, baking soda and salt until blended. Be sure to scrape down the sides and bottom of the bowl to make sure everything is well incorporated.Then, add the flour to the brown butter cookie dough and mix until just blended and you still see streaks of flour.Finally, add in the toasted walnuts and chocolate chips and continue to blend until evenly distributed throughout. Mix until just combined; do not overmix your cookie dough. Stash in an airtight container and set in the fridge for at least one hour.Bake Your Cookies!Preheat your oven to 350°F (177°C) and line several baking sheets with parchment paper.Scoop 4 tablespoons of cookie dough and place on the baking sheet, leaving 2 inches (5 cm) of space between cookie dough balls.Bake one cookie sheet at a time for 12 to 13 minutes in the center of the oven. When the cookies are done, they will be puffed up, lightly bronzed around the edges and look slightly underdone in the centers. Perfect. As they cool, the cookies will deflate and start to form pretty cracks and crinkles over the tops.Let cool for 10 minutes on the baking sheet before transferring the walnut chocolate chip cookies to a wire rack. Sprinkle each with a pinch of sea salt flakes, if using.NotesTo Make The Cookie More Like the Met Market CookieAdd at least 2 tablespoons more of cookie dough and bake for 3 to 4 minutes more.The Met Market uses Callebaut semi-sweet chocolate chips and bittersweet chocolate chips. I tested this recipe with the semi-sweet and can confirm it’s perfect. Ghirardelli are my favorite store-bought chocolate chips!Resting Cookie Dough NotesResting cookie dough in the fridge anywhere from 60 minutes to overnight (and up to several days) will yield a darker, puffier cookie (see the photo above the recipe). I baked these cookies right away in one test, absolutely delicious. But the cookie was a bit thinner (although not thin) and definitely blonder in color. If you are a patient soul, I recommend also trying them after an overnight rest so you can taste the well-developed flavors as well.Freezing Walnut Chocolate Chip Cookie DoughThis cookie dough freezes like a dream! In fact, I have some in my freezer right now!For short-term storage, portion out the cookie dough and place on a parchment-lined baking sheet. Freeze for several hours before transferring to an airtight container. When baking, add a few extra minutes to the bake time.For longer storage, freeze the dough as a lump, wrapped in plastic wrap, then foil and stashed in an airtight container. Bring close to room temperature before portioning out the dough and baking.Storing These CookiesStore your chocolate chip walnut cookies in an airtight container at room temperature!
PrintThick & Gooey Toasted Walnut Chocolate Chip Cookies#wprm-recipe-user-rating-0 .wprm-rating-star.wprm-rating-star-full svg * { fill: #343434; }#wprm-recipe-user-rating-0 .wprm-rating-star.wprm-rating-star-33 svg * { fill: url(#wprm-recipe-user-rating-0-33); }#wprm-recipe-user-rating-0 .wprm-rating-star.wprm-rating-star-50 svg * { fill: url(#wprm-recipe-user-rating-0-50); }#wprm-recipe-user-rating-0 .wprm-rating-star.wprm-rating-star-66 svg * { fill: url(#wprm-recipe-user-rating-0-66); }linearGradient#wprm-recipe-user-rating-0-33 stop { stop-color: #343434; }linearGradient#wprm-recipe-user-rating-0-50 stop { stop-color: #343434; }linearGradient#wprm-recipe-user-rating-0-66 stop { stop-color: #343434; }#wprm-recipe-user-rating-0.wprm-user-rating-allowed.wprm-user-rating-not-voted:not(.wprm-user-rating-voting) svg * { fill-opacity: 0.3; }Thick, Gooey Toasted Walnut Chocolate Chip Cookies are ample, bakery-style cookies (read: big!) that are loaded with chopped, toasty walnuts, lots of chocolate chips and a gooey, slightly underbaked center. You are going to love these cookies!Course Dessert, SnackCuisine AmericanKeyword Rebecca Firth, DisplacedHousewife Well-Tested Recipe, Toasted Walnuts, Chocolate Chip CookiesPrep Time 20 minutes minutesCook Time 13 minutes minutesChill Time 1 hour hour 45 minutes minutesTotal Time 2 hours hours 18 minutes minutesServings 31 CookiesAuthor Rebecca FirthEquipment4-TBSP Cookie ScoopBaking ScaleBaking SheetsCallebaut Semi-Sweet Chocolate ChipsIngredientsFor the Brown Butter182 grams unsalted brown butter 16 tablespoons (226 g unsalted butter before browning)3 tablespoons (45 g) milk cold; ideally, whole milk, but any milk will doFor the Walnuts2/3 cup (75 g) raw walnuts coarsely choppedFor the Cookie Dough1 1/2 cups (330 g) light or dark brown sugar packed1/2 cup (100 g) granulated sugar1 tablespoon (13 g) real vanilla extract2 large eggs room temperature1 teaspoon baking powder1 teaspoon baking soda1 ¼ teaspoons sea salt3 ¼ cups (439 g) all-purpose flour 2 cups (340 g) chocolate chips see Notes belowSea salt flakes for the tops optionalInstructionsFirst, Brown The ButterPlace 16 tablespoons (226 g) unsalted butter in a small saucepan and melt over medium heat. Once melted, crank up the heat to medium-high. Stand by, continuously stirring and watching. Small golden bits will start to settle on the bottom of the pan. Once this happens, take it off the heat and pour it into a medium, heat-safe bowl that can handle going into the fridge (I wouldn't use glass). Add the cold milk, whisking to combine. Stash in the fridge or freezer for about 45 minutes or until the top half of the mixture has solidified (the bottom half will still be liquid).
(For more details on browning butter, check out my How to Perfectly Brown Butter tutorial)
Second, Toast Your WalnutsYou can toast your walnuts in the oven or on the stovetop: For the Oven: Toast your walnuts for 5 to 8 minutes on a rimmed, ungreased baking sheet. Jiggle the baking sheet midway through, keeping an eye on them so that they don't burn.For the Stovetop: Place them in an un-greased skillet (I love my cast iron for this) set over medium-low heat, for about 4 to 5 minutes on low heat. Periodically shake the skillet so they get evenly toasted.Third, Mix The Cookie DoughTo the bowl of an electric stand mixer fitted with the paddle attachment (you can also use a bowl and a spatula for this recipe), cream the cooled brown butter mixture with the brown sugar, granulated sugar and vanilla until light and fluffy, about 4 to 5 minutes. It will smell mega delicious.Add in the eggs one at a time, completely mixing in the first before adding the second. Mix in the baking powder, baking soda and salt until blended. Be sure to scrape down the sides and bottom of the bowl to make sure everything is well incorporated.Then, add the flour to the brown butter cookie dough and mix until just blended and you still see streaks of flour.Finally, add in the toasted walnuts and chocolate chips and continue to blend until evenly distributed throughout. Mix until just combined; do not overmix your cookie dough. Stash in an airtight container and set in the fridge for at least one hour.Bake Your Cookies!Preheat your oven to 350°F (177°C) and line several baking sheets with parchment paper.Scoop 4 tablespoons of cookie dough and place on the baking sheet, leaving 2 inches (5 cm) of space between cookie dough balls.Bake one cookie sheet at a time for 12 to 13 minutes in the center of the oven. When the cookies are done, they will be puffed up, lightly bronzed around the edges and look slightly underdone in the centers. Perfect. As they cool, the cookies will deflate and start to form pretty cracks and crinkles over the tops.Let cool for 10 minutes on the baking sheet before transferring the walnut chocolate chip cookies to a wire rack. Sprinkle each with a pinch of sea salt flakes, if using.NotesTo Make The Cookie More Like the Met Market CookieAdd at least 2 tablespoons more of cookie dough and bake for 3 to 4 minutes more.The Met Market uses Callebaut semi-sweet chocolate chips and bittersweet chocolate chips. I tested this recipe with the semi-sweet and can confirm it’s perfect. Ghirardelli are my favorite store-bought chocolate chips!Resting Cookie Dough NotesResting cookie dough in the fridge anywhere from 60 minutes to overnight (and up to several days) will yield a darker, puffier cookie (see the photo above the recipe). I baked these cookies right away in one test, absolutely delicious. But the cookie was a bit thinner (although not thin) and definitely blonder in color. If you are a patient soul, I recommend also trying them after an overnight rest so you can taste the well-developed flavors as well.Freezing Walnut Chocolate Chip Cookie DoughThis cookie dough freezes like a dream! In fact, I have some in my freezer right now!For short-term storage, portion out the cookie dough and place on a parchment-lined baking sheet. Freeze for several hours before transferring to an airtight container. When baking, add a few extra minutes to the bake time.For longer storage, freeze the dough as a lump, wrapped in plastic wrap, then foil and stashed in an airtight container. Bring close to room temperature before portioning out the dough and baking.Storing These CookiesStore your chocolate chip walnut cookies in an airtight container at room temperature! The post Thick & Gooey Toasted Walnut Chocolate Chip Cookies appeared first on DisplacedHousewife.
October 10, 2025
Delicious Homemade Pumpkin Cream Cheese Muffins!
You might be wondering if this Pumpkin Cream Cheese Muffin is a Starbucks copycat recipe, and the answer is yes, yes it is! BUT, it’s a jazzed-up, glossed-up version that you can easily make at home (yay!).
We start with a super moist pumpkin muffin base and then fill it with a simple cream cheese filling (that’s just cream cheese, confectioners’ sugar and vanilla) and finish it with a spiced pumpkin seed-brown sugar topping. These muffins are a flavor explosion!
I started recipe testing this recipe years ago. Every fall, I pick up where I left off and am never quite dazzled with the results. The filling just wasn’t turning out (sometimes it would get a weird texture when baked). However, I’m so so sooo happy to report that it is finally perfect! I pulled back the filling to three easy ingredients that stay nice and glossy through the baking process.
This pumpkin muffin recipe hits so many high notes: moist, fluffy, tender, spiced pumpkin muffin base with a creamy, tangy filling, all topped with the perfect touch of spice and sweetness from the pumpkin seed crunch on top.
I can’t wait to hear what you think!
 The Baker’s Guide to Measuring Flour
One of the biggest (and most common) mistakes in baking is how we measure flour. If you find yourself without a scale, see my top tips on how to properly measure flour for the perfect amount every time!
 My Very Favorite Pro-Baking Tips for
THE BEST Cream Cheese Pumpkin Muffins!Chill The Cream Cheese Filling. You’ll make this first, so you have time to chill it. Doing so will thicken the consistency, making it easier to fill each pumpkin muffin with the perfect amount of cream cheese.Let the Muffin Batter Rest. I swear by this! Letting the muffin batter rest lets the starches in the batter absorb the moisture and swell up (puffy tops!).Smooth the Muffin Batter in Each Muffin Well. Take note that when I took the step-by-step photos, I did not smooth the tops of the batter before adding the cream cheese filling. As a result, the muffins didn’t rise in a nice uniform fashion (more lopsided). When the tops are smooth and even, they rise to the gorgeous domes that you see in the photos!
Let’s make some really beautiful pumpkin muffins!
 Step-by-Step Instructions & Photos for
 These Beautiful Fall MuffinsFor The Cream Cheese Filling
 STEP 1: Stir the softened cream cheese with vanilla (you can use real vanilla beans, vanilla extract or vanilla paste) until smooth. Mix in the confectioners’ sugar (also called powdered sugar, icing sugar or 10x), stirring until creamy and no lumps remain. Add the cream cheese filling to a pastry bag fitted with a medium round tip or use a regular plastic bag. Set in the fridge until ready to use.For the Muffins
 STEP 1: Gather your pumpkin muffin ingredients: butter, brown sugar, granulated sugar, vanilla, cinnamon, nutmeg, ginger, cloves, 100% pumpkin puree, baking powder, baking soda, salt, eggs, all-purpose flour and whole milk.
 STEP 2 In a large bowl, cream together the butter, brown sugar, granulated sugar, vanilla, cinnamon, nutmeg, ginger and cloves until smooth and well combined.
 STEP 3: Add the eggs one at a time, ensuring each is well blended before adding the next. Scrape down the sides and bottom of the bowl.
 STEP 4: Add in the pumpkin puree, baking powder, baking soda and salt. The batter may curdle a bit at this point; that’s fine.
 STEP 5: Mix in half of the flour until just combined and you still see some small streaks.
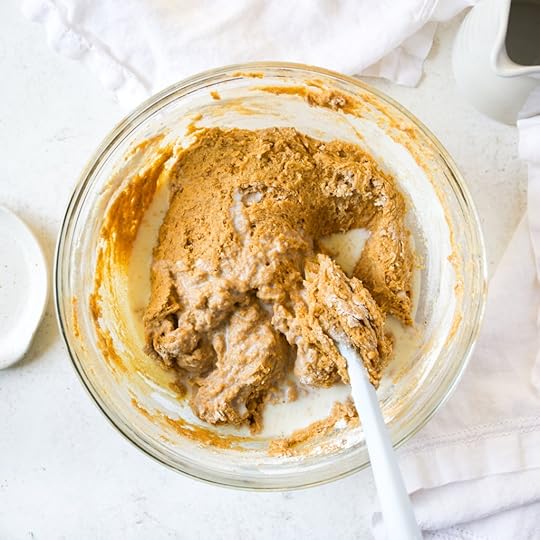 STEP 6: Mix in half of the milk, again mixing until just combined. Repeat with the remaining flour and milk. Cover the bowl and set aside.For the Brown Sugar-Spiced Pumpkin Seeds
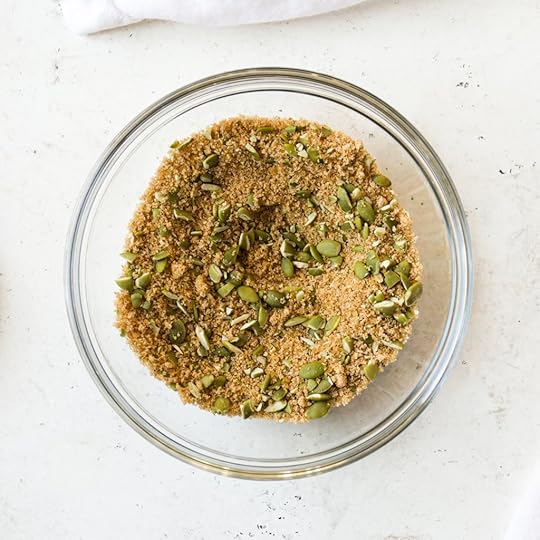 STEP 1: In a small bowl, whisk together the coarsely chopped pumpkin seeds (it’s ok if some are still whole), Demerara sugar, brown sugar, cinnamon and nutmeg. Set aside. To Assemble
 STEP 1: Fill each muffin liner almost to the top. Use the back of a spoon to smooth the tops of the muffins. I didn’t do this for the step-by-step photos, but you’ll end up with prettier muffins if you do!
 STEP 2: Cut the pastry bag (or the corner of the plastic bag), place the tip just inside the top of the muffin batter and add about 1 tablespoon of cream cheese filling. Ensure that some of the cream cheese filling is visible on top of the muffin, as shown in the photo above.
 STEP 3: Sprinkle a thick layer of the Brown Sugar-Spiced Pumpkin Seeds around the cream cheese filling and bake (see recipe for temperature and time specifics).
 STEP 4: Let the muffins cool for a bit in the muffin pan before transferring to a wire rack. If they seem squishy when you’re trying to get them out of the pan, let them sit for another 5 to 10 minutes.
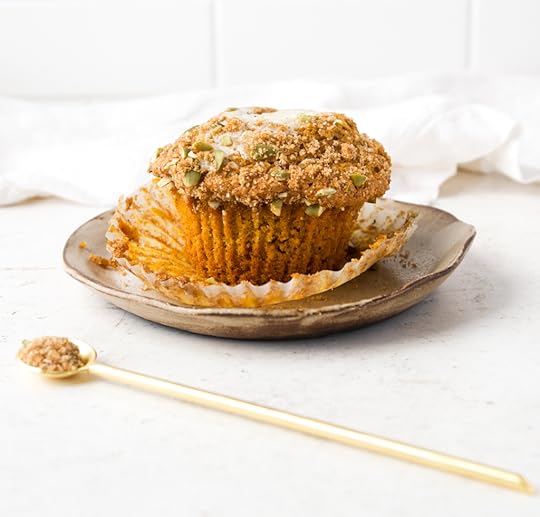
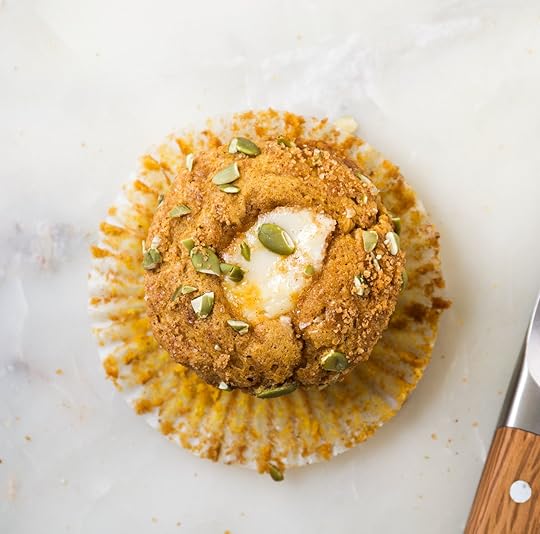
 More Delicious Pumpkin Recipes!
I hope you’ll try this super delicious Pumpkin Loaf with a spiced-sugar exterior (like apple cider donuts!) and these Chocolate Chip Pumpkin Muffins!
You can find all of the pumpkin recipes here!
I hope you love these mega delish cream cheese pumpkin muffins!
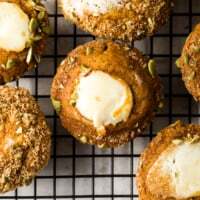 PrintMega Delicious Pumpkin Cream Cheese Muffin Recipe#wprm-recipe-user-rating-0 .wprm-rating-star.wprm-rating-star-full svg * { fill: #343434; }#wprm-recipe-user-rating-0 .wprm-rating-star.wprm-rating-star-33 svg * { fill: url(#wprm-recipe-user-rating-0-33); }#wprm-recipe-user-rating-0 .wprm-rating-star.wprm-rating-star-50 svg * { fill: url(#wprm-recipe-user-rating-0-50); }#wprm-recipe-user-rating-0 .wprm-rating-star.wprm-rating-star-66 svg * { fill: url(#wprm-recipe-user-rating-0-66); }linearGradient#wprm-recipe-user-rating-0-33 stop { stop-color: #343434; }linearGradient#wprm-recipe-user-rating-0-50 stop { stop-color: #343434; }linearGradient#wprm-recipe-user-rating-0-66 stop { stop-color: #343434; }#wprm-recipe-user-rating-0.wprm-user-rating-allowed.wprm-user-rating-not-voted:not(.wprm-user-rating-voting) svg * { fill-opacity: 0.3; }Moist, fluffy pumpkin muffins with a creamy cream cheese filling and a crunchy pumpkin seed-brown sugar crust that you will love! Course Breakfast, Brunch, SnackCuisine AmericanKeyword Pumpkin Muffins, Cream Cheese, Starbuck’s Dup, Rebecca Firth, DisplacedHousewife Well-Tested RecipePrep Time 20 minutes minutesCook Time 20 minutes minutesRest Time 30 minutes minutesTotal Time 1 hour hour 10 minutes minutesServings 16 MuffinsAuthor Rebecca FirthEquipmentBaking ScaleRegular Muffin Pan#40 2-TBSP Cookie ScoopIngredientsFor the Cream Cheese Filling4 ounces (120 g) cream cheese softened1/4 vanilla bean split & scraped (or 1 teaspoon vanilla bean paste or real vanilla extract)1 cup (120 g) confectioners' sugarFor the Pumpkin Muffins12 tablespoons (170 g) unsalted butter room temperature1 cup (220 g) light or dark brown sugar packed½ cup (100 g) granulated sugar1 tablespoon (13 g) real vanilla extract1 tablespoon cinnamon1 teaspoon nutmeg1 teaspoon ground ginger1/2 teaspoon cloves3 large eggs room temperature1 cup (244 g) pure pumpkin puree not pie filling; 100% pumpkin2 ½ teaspoons baking powder1 teaspoon baking soda1 teaspoon sea salt2 3/4 cups (371 g) all-purpose flour1/2 cup (112 g) whole milk room temperatureFor the Brown Sugar-Spiced Pumpkin Seeds1/3 cup (40 g) pumpkin seeds coarsely chopped3 tablespoons (36 g) Demerara sugar2 tablespoons (28 g) light or dark brown sugar packed1/2 teaspoon cinnamon1/4 teaspoon nutmegInstructionsFor the Cream Cheese FillingIn a medium bowl, stir the softened cream cheese with vanilla until smooth. Mix in the confectioners' sugar, stirring until creamy and no lumps remain. Add the cream cheese filling to a pastry bag fitted with a medium round tip or use a regular plastic bag. Set in the fridge until ready to use.For the Pumpkin MuffinsPlace the butter, light brown sugar, granulated sugar, vanilla, cinnamon, nutmeg, ginger and cloves in the bowl of an electric stand mixer fitted with the paddle attachment and mix on medium until creamy and lightened in color, about 4-5 minutes. Scrape the sides and bottom of the bowl to make sure everything is well blended.With the mixer on low, add the eggs, one at a time, mixing each completely before adding the next. Add the pumpkin, baking powder, baking soda, and salt, and mix for an additional 1 minute. Periodically scrape down the sides and bottom of the bowl to make sure everything is well blended. It might look a little grainy after adding the pumpkin; that's fine (see note in step-by-step photos).Add the flour in two batches, alternating with the milk, mixing on low and stopping when just combined. Let the muffin batter sit for 30 minutes while you mix together the Brown Sugar-Spiced Pumpkin Seeds, the oven pre-heats and you prepare the muffin tin.Preheat the oven to 425℉ (220℃) and line every other muffin well with a paper liner.For the Brown Sugar-Spiced Pumpkin SeedsIn a small bowl, whisk together the pumpkin seeds, Demerara sugar, brown sugar, cinnamon and nutmeg. Set aside.To AssembleFill each muffin liner almost to the top and smooth the tops with the back of a spoon. The mixture is thick, and this doesn't have to be perfect. Grab your cream cheese filling from the refrigerator, cut the tip of your pastry bag (or the corner of the plastic bag), press the tip about 1/4 inch (.6 cm) into the center of the pumpkin muffin batter and squeeze about 1 tablespoon into each muffin, leaving some cream cheese filling showing in the top of the muffin (see photos above recipe).Sprinkle a thick coating of the Brown Sugar-Spiced Pumpkin Seeds around the perimeter of the muffins.Bake the pumpkin muffins in the center of the oven for 5 minutes and then lower the temperature to 350℉ (177℃) and bake for 15 minutes more. When done, the muffins will be puffed up and a toothpick pressed along the sides of the muffin will come out with some crumbs, but no wet batter. For best results, bake one tin at a time. Let the muffins cool in the muffin pan for about 10ish minutes, then use a butter knife to help get them out to finish cooling on a rack.NotesMixer OptionalThis is a mixer optional recipe. You can use an electric stand mixer fitted with the paddle attachment, a handheld mixer or a bowl and a spatula.The Brown Sugar-Spiced Pumpkin Seed ToppingThe topping will soften over time. If you’re making these ahead of time, consider omitting the brown sugar from the topping and adding in more Demerara Sugar.If you don’t have pumpkin seeds handy, toasted and chopped pecans or walnuts would be delicious here!Pumpkin PureeMake sure you use 100% pure pumpkin puree and not pumpkin pie filling.If you use real pumpkin, make sure it is drained. You also want to make sure it is a thick consistency, or the muffins won’t turn out.My absolute favorite, ride-or-die pumpkin puree is Libby’s for my US friends!Filling Every Other Muffin WellI have you do this with all of my muffin recipes because it lets more heat circulate around each muffin in the oven, resulting in a higher muffin top. However, this pumpkin batter bakes up with beautiful crowns both ways. If you’re short on time or you only have one muffin tin, feel free to fill up all of them. They will still bake up beautifully! Make-Ahead MuffinsI love these muffins best the same day they are made. You can make the muffin batter, cream cheese filling and the brown sugar-spiced pumpkin seed mixture the day before you plan on serving them. Store everything separately in covered containers and stash in the fridge until you’re ready to bake. The muffins may need an extra minute or two of bake time.StorageStore the muffins at room temperature in an airtight container.
 The post Delicious Homemade Pumpkin Cream Cheese Muffins! appeared first on DisplacedHousewife.
October 3, 2025
Delicious Herby Lemony Potato Focaccia (Overnight & Same-Day Instructions)
Please meet the ULTIMATE cool weather soup companion: Herby Potato Focaccia!
Picture the fluffiest focaccia dough and then layer in small-diced, buttery Yukon Gold potatoes, fresh herbs (sage and rosemary are both delicious), bright lemon zest and rich olive oil. Each bite is a flavor bomb!!
This recipe was inspired by the delicious potato focaccia I had at Sea Wolf Bakers in Seattle and I hope you love it as much as we do!
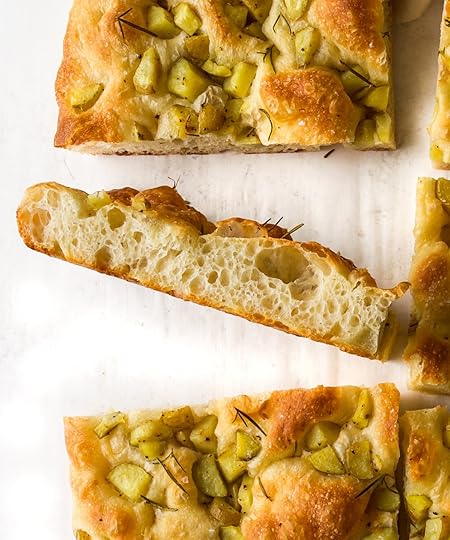 The Baker’s Guide to Measuring Flour
One of the biggest (and most common) mistakes in baking is how we measure flour. If you find yourself without a scale, see my top tips on how to properly measure flour for the perfect amount every time!
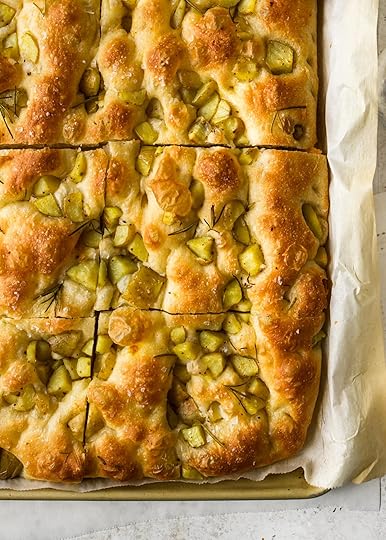 Why You Should Make This Herby Focaccia Bread ASAP!This bubbly potato focaccia has both same-day instructions, as well as an overnight version (see Notes below the recipe)Loaded with layers of flavor: bright lemon zest, fresh herbs, creamy Yukon Gold potatoes, buttery olive oil and sea salt flakesGreat for feeding a group with little effort…and perfect with soup or a salad and that’s itNo need for a mixer, but you can use one (with a dough hook attachment) if you’d likeYou can use any herbs you’d like!The yummiest taste and texture, with lots of bubbles throughout
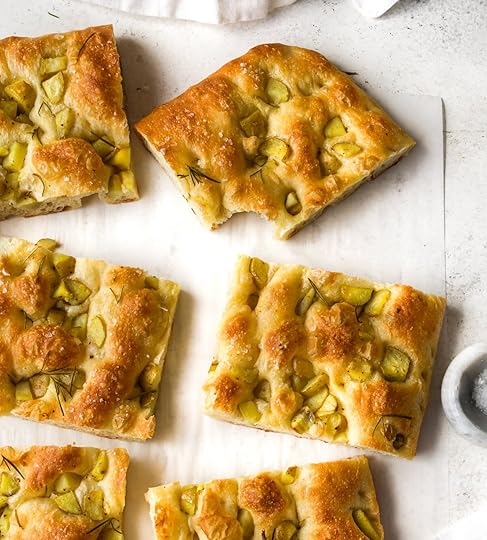 My Favorite Pro-Baking Tips for Making the Best Potato Focaccia!Make sure your yeast is active. Check the expiration date and then make sure it actually activates when mixed with the honey and water. You should see what I call ‘yeast fireworks,’ and it should be foaming at the top of the water. If it’s not, I would start again with new yeast.Give your dough time to rise (don’t rush it). I like this focaccia with a solid 2 hours for each of the rises. It should be light and bubbly by the time you’re putting the toppings on. Weigh your ingredients. With so few ingredients going into the dough, I highly recommend weighing your ingredients if you have access to a scale.
 Step-by-Step Instructions (with photos!) to Make
 Perfect Potato Focaccia
*Step-by-step images below are for the same-day focaccia recipe. See Notes below recipe for the overnight version, as well as tips for freezing the dough.
 STEP 1: Gather your focaccia ingredients: bread flour (or all-purpose flour), water, honey, olive oil, salt and active dry yeast.
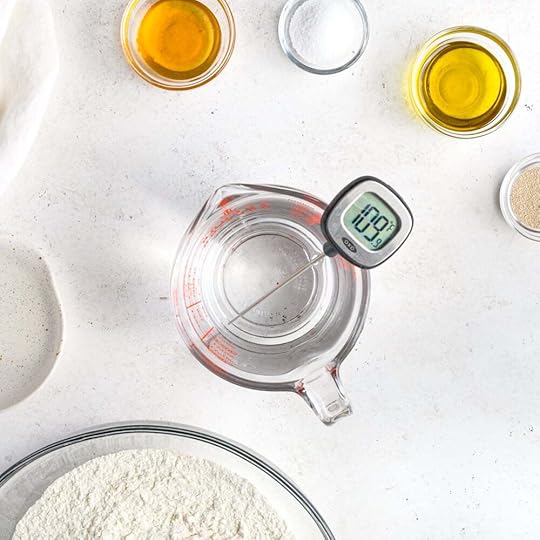 STEP 2: Make sure your water is at the correct temperature. It should be warm to the touch, but not hot.
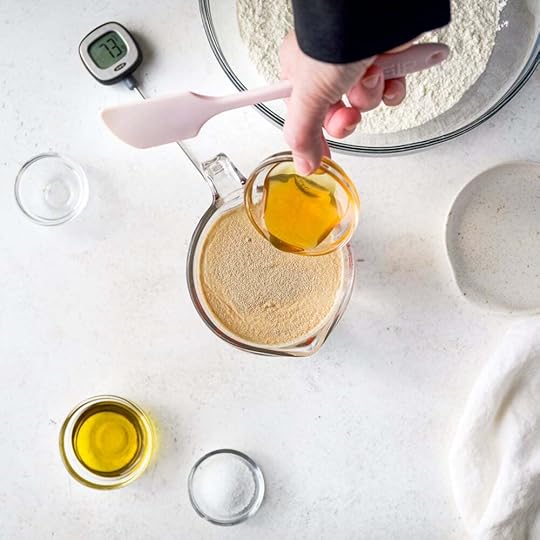 STEP 3: Add the yeast and honey, stirring to combine.
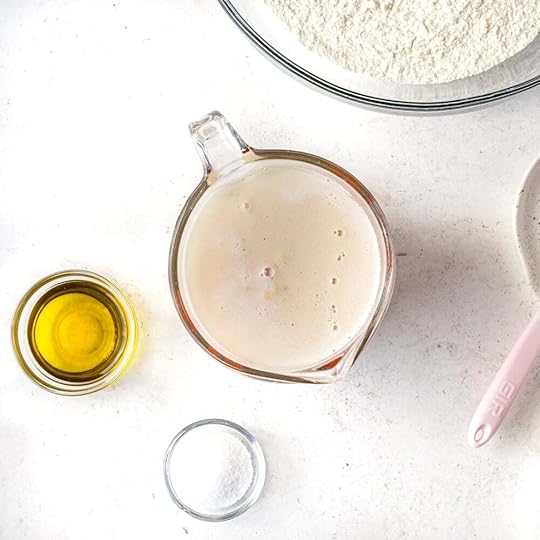 STEP 4: After about 10 minutes, the yeast should be foaming, frothing and you should see signs of activity.Mix the Dough
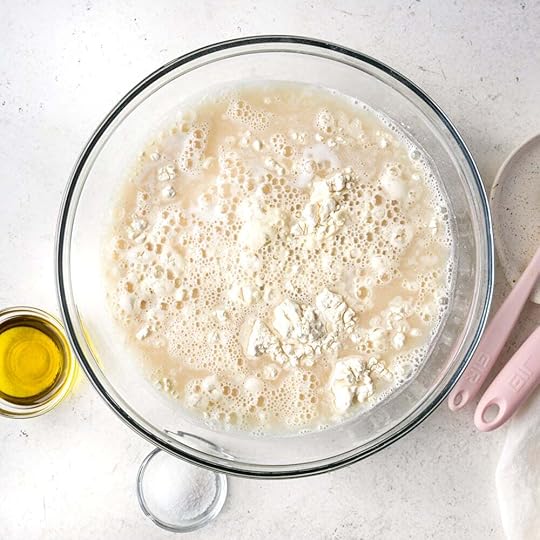 STEP 5: Add in the flour…
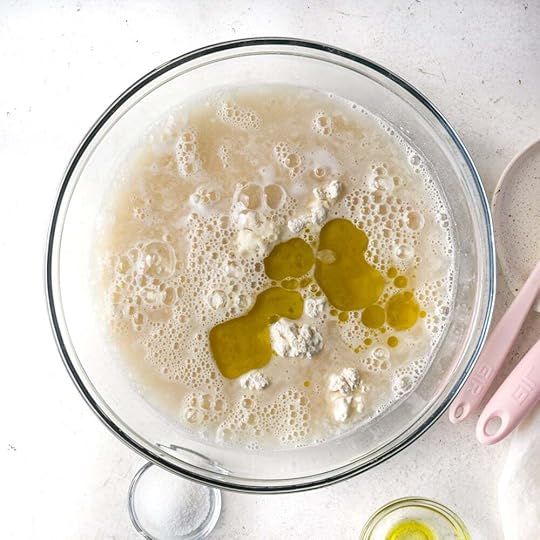 STEP 5: Then the olive oil…
 STEP 6: …stir to combine…
 STEP 6: …and then cover with a damp kitchen towel and let sit for 20 minutes.
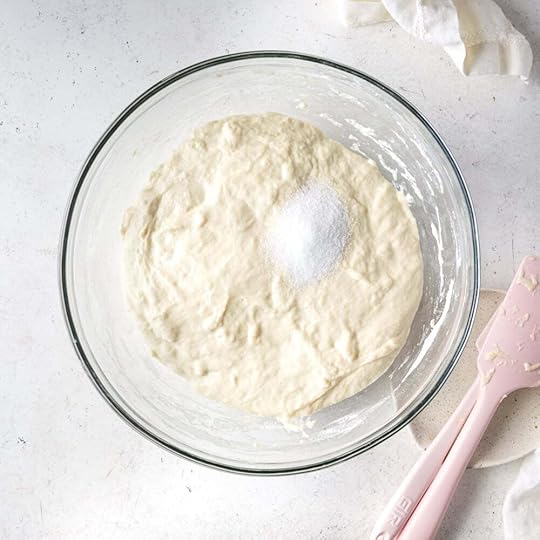 STEP 7: Add in the salt and mix well to thoroughly combine.
First Rise
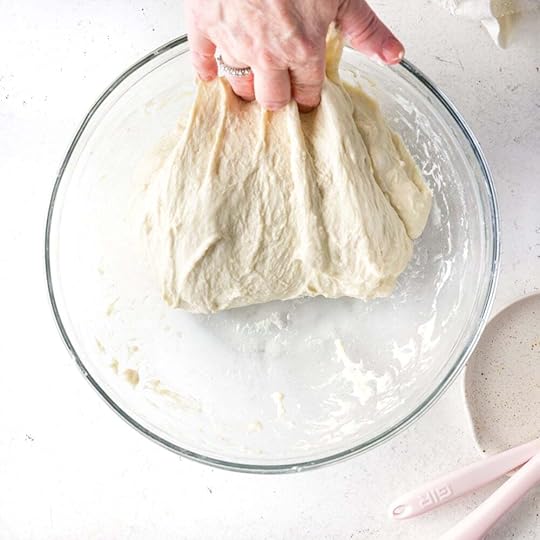 STEP 1: Do a series of stretch and folds every 15 minutes for 1 hour. For the second hour, let the dough sit untouched, covered with a damp cloth.
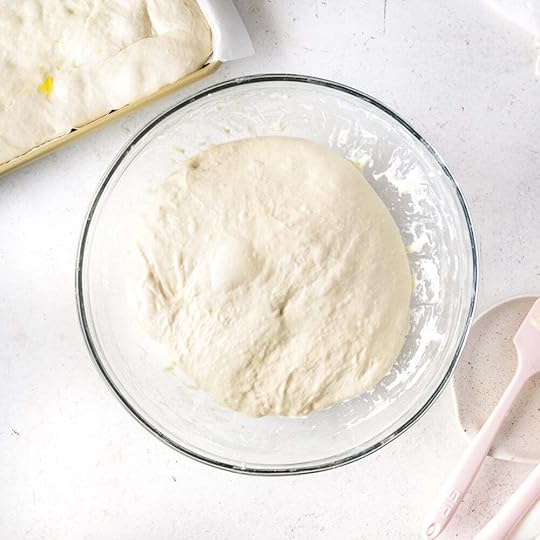 STEP 2: At the end of the first rise, your dough should be doubled in size and you should see the formation of bubbles over the top.Second Rise & Bake
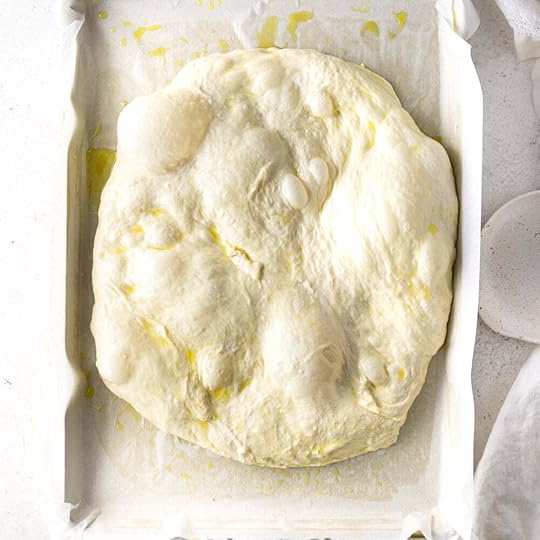 STEP 1: For the first hour, periodically nudge the dough towards the edges of the pan.
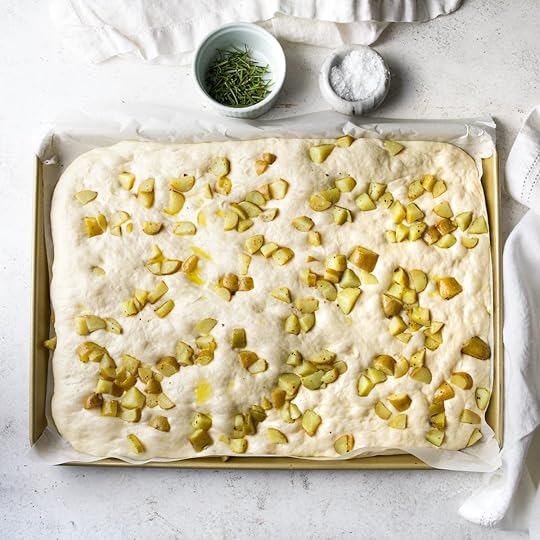 STEP 2: The dough should mostly fill the pan. It should be bubbly and just generally look really happy. Add the potatoes over the top, gently pressing them into the dough and let the dough rest for one hour more.
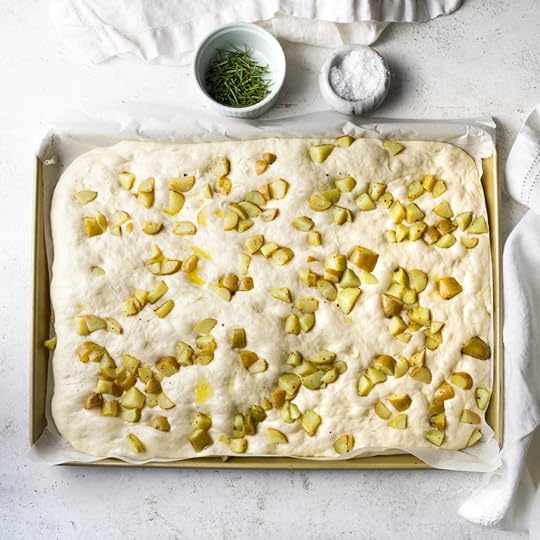 STEP 3: At the end of the hour, the focaccia dough should look like this.
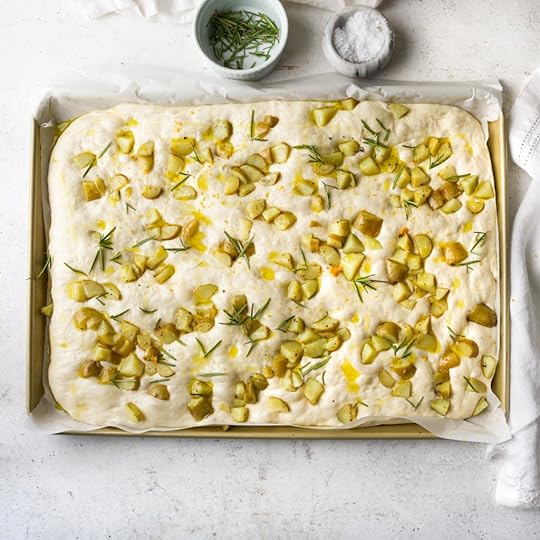 STEP 3: Add the herbs, lemon zest and 2 tablespoons of olive oil over the top of the focaccia…
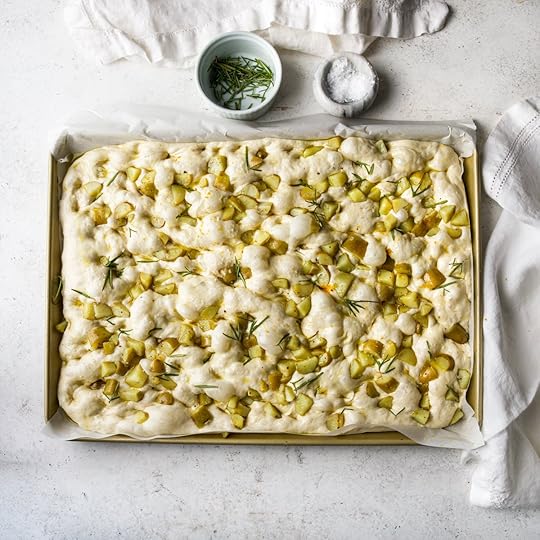 STEP 4: Using your fingers, gently press into the dough, creating a pattern all over the dough. Press to the bottom of the pan, but not through the dough.
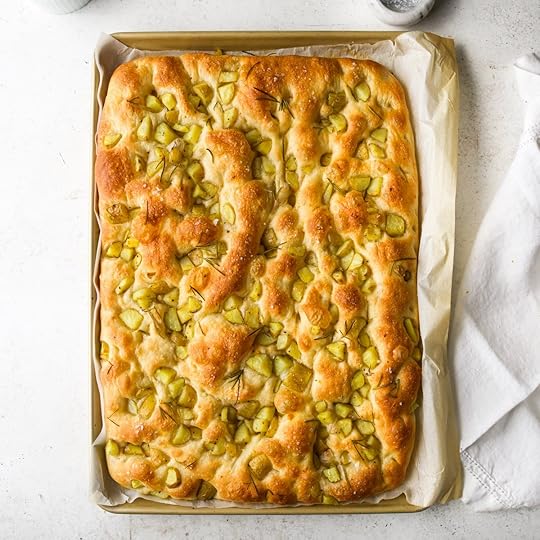 When done, your potato focaccia should be bronzed, crispy and ready to eat!
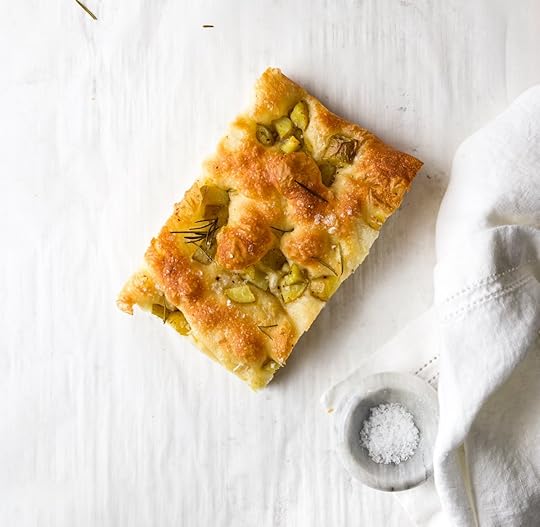 More Yeast-Baking Recipes (my favorites!)
I hope you’ll try my favorite pizza dough! Also, check out my favorite dinner rolls and Bubbly Pizza Focaccia.
You can find all of the yeast recipes here!
Enjoy your mega delicious herby potato focaccia! I can’t wait to hear what you think!
 PrintHerby Potato Focaccia Recipe (Overnight & Same-Day Instructions!)#wprm-recipe-user-rating-0 .wprm-rating-star.wprm-rating-star-full svg * { fill: #343434; }#wprm-recipe-user-rating-0 .wprm-rating-star.wprm-rating-star-33 svg * { fill: url(#wprm-recipe-user-rating-0-33); }#wprm-recipe-user-rating-0 .wprm-rating-star.wprm-rating-star-50 svg * { fill: url(#wprm-recipe-user-rating-0-50); }#wprm-recipe-user-rating-0 .wprm-rating-star.wprm-rating-star-66 svg * { fill: url(#wprm-recipe-user-rating-0-66); }linearGradient#wprm-recipe-user-rating-0-33 stop { stop-color: #343434; }linearGradient#wprm-recipe-user-rating-0-50 stop { stop-color: #343434; }linearGradient#wprm-recipe-user-rating-0-66 stop { stop-color: #343434; }#wprm-recipe-user-rating-0.wprm-user-rating-allowed.wprm-user-rating-not-voted:not(.wprm-user-rating-voting) svg * { fill-opacity: 0.3; }Flavorful, bubbly focaccia dough is loaded with small-diced potatoes, fresh herbs and lemon zest. You can make this as an overnight focaccia dough recipe or use the same-day instructions. Perfect as an appetizer or companion to a cozy bowl of soup or salad for the perfect dinner!Course Dinner, SnackCuisine ItalianKeyword Crispy Focaccia, Recipe, Overnight, Herbs, Lemon Zest, Dinner, Potatoes, Rebecca Firth, DisplacedHousewife Well-Tested RecipePrep Time 40 minutes minutesCook Time 25 minutes minutesRise Time 4 hours hoursTotal Time 5 hours hours 5 minutes minutesServings 12 SlicesAuthor Rebecca FirthEquipmentNordic Ware Half SheetBaking ScaleLiquid Measuring CupIngredientsFor the Focaccia Dough2 cups (448 g) water warm (100-110°F, 38-43°C)1 1/2 tablespoons (32 g) honey1 tablespoon (9 g) active dry yeast4 cups (540 g) bread flour all-purpose flour will work as well; how to measure flour2 tablespoons (28 g) extra-virgin olive oil 1 tablespoon (18 g) sea saltFor the Pan1 tablespoon extra-virgin olive oil For the Focaccia Toppings9 ounces (257 g) Yukon Gold potatoes cleaned, cut into a small dice and cooked; see
Notes
below recipe for more details3 tablespoons fresh herbs chopped; rosemary, sage and/or parsley are my favorites for this recipe (rinse and dry before using)1 lemon zest only; see Potato Notes below regarding using the lemon juice2 tablespoons (28 g) extra-virgin olive oil sea salt flakesInstructionsMixing the Focaccia DoughCover an 18×13-inch (46×33-cm) rimmed baking sheet with parchment paper, allowing the excess to hang over the sides. Press the parchment into the corners. Set aside.*If you don't use parchment paper, generously butter your pan and then add olive oil (see Step 2 beneath the Second Rise) to keep the focaccia from sticking to the pan. Non-stick baking spray also works great.In a large mixing bowl, combine the water, yeast and honey, stirring to combine. Let it sit for 10 minutes until the yeast has foamed over the top of the water.Add in the flour and oil, mixing until thoroughly combined. Cover with a clean, damp kitchen towel and let sit for 20 minutes. After 20 minutes, add the salt and mix it really well into the dough. The dough will be *very* sticky.For the First Rise
This first rise will take place over 2 hours and consist of two parts. The first 1 hour will be doing stretch and folds (details below). In the second hour, the dough will rest, untouched.
HOUR ONE: Leave the dough in the bowl, and for the next hour, you'll do stretch and folds of the dough, every 15 minutes.You'll do this by grabbing the dough on the opposite side of the bowl away from you, pulling it up towards you, then stretching it over the top of the dough and gently pressing it down along the edge of the dough. Give the bowl a quarter turn and repeat until you've done 4 turns, and then let the dough rest for 15 minutes before repeating again.You'll do this 4 times total, covering the bowl with a damp kitchen cloth while it rests.*Rub some olive oil over your hands before each pull and turn to make the dough easier to work with; it will be quite sticky.HOUR TWO: After 1 hour of pull and turns, let the dough sit, with the damp kitchen towel over the top, for 1 hour more. When done, it should have doubled in size with some bubbles over the top.Rise times depend on the warmth and humidity of your kitchen. If it's chilly, it will take longer. Conversely, if it's warm, it will rise much more quickly. Keep the dough out of direct sunlight.For the Second Rise
This second rise will be 2 hours long and consist of two parts as well. In the first hour, you'll periodically help stretch the dough (very gently) towards the edges of the pan (don't rush it). In the second hour, you'll leave it untouched.
HOUR ONE: Drizzle some olive oil over the prepared pan (about 1 tablespoon (14 g)) and scoop the dough into the center of the pan. Pour another 1 tablespoon (14 g) of olive oil over the top of the dough and, using your hands, gently rub it all over the surface of the dough (it doesn't have to be perfect).Gently nudge the dough towards the edges of the pan. It won't come close, that's ok. Over the next hour, continue to gently stretch the dough to the outer edges of the pan. Don't pull on it or make it too thin in any areas.HOUR TWO: Sprinkle the cooked, diced potatoes over the top of the focaccia dough, gently pressing them into the dough. Leave the dough alone for about an hour. During this time, it should fill out the pan.Preheat the oven to 450℉ (232℃) and make sure you have a rack in the center of the oven. I like to preheat my oven for about an hour before I bake the potato focaccia so that it is screaming hot.To AssembleSprinkle the top of the focaccia with the fresh herbs and lemon zest. Then, drizzle about 2 tablespoons (28 g) olive oil evenly over the top of the focaccia. Finally, sprinkle with the sea salt flakes.Immediately place the pan in the center of the oven and bake for 25 minutes or until the top of the focaccia is bubbling, bronzed and some of the larger dough bubbles have darkened (love!).When done, use the parchment paper to drag the hot focaccia onto a wire rack to cool for about 5 minutes and then transfer to a cutting board to cut and serve. I use a bread knife to gently saw (cut) the focaccia. If you just press down, you'll squash this light, fluffy dough. Enjoy!NotesTo Prep Your Potatoes: I don’t bother peeling the potatoes. Cut the clean potatoes into a small dice (doesn’t need to be perfect) and boil for about 4 to 5 minutes. Drain and transfer to a bowl to cool down. Toss in 2 teaspoons of olive oil and salt and pepper to taste.Lemon Juice: For extra lemon flavor, squeeze the fresh lemon juice over the potatoes and toss to coat. It’s DELICIOUS and I love to do this! There will be a little extra lemon juice + olive oil at the bottom of the bowl. Drizzle it over the focaccia.Herbs: When baking the potato focaccia with fresh sage, I used about 9-12 leaves. When I used rosemary, I used roughly 3 tablespoons of fresh rosemary.Alternative Pan: I also tested this in a 9×13-inch (23×33-cm) baking pan (like you’d bake a coffee cake in). This turned out lovely, but it didn’t have as many bubbles (not enough space for them). I love the bubbles. If you only have this size pan, you’ll need to bake your focaccia for 30 to 35 minutes. This also makes a thicker focaccia which is fun!YeastI used Active Dry Yeast for this recipe. For US people, I used Fleischmann’s (it’s my favorite).Make sure your water is warm to the touch, but not hot. I do love to use an instant-read thermometer if you have one available.After 10 minutes, your yeast should be foaming over the top of the water. I like to watch, and you’ll see little fireworks of the yeast coming alive.If you don’t see any action, your yeast could be too old. Consider getting new yeast.Overnight Focaccia OptionIf you’d like to make the dough the day before serving, you’ll make it all the way through Hour 1 of the First Rise. So you’ll do 1 hour of pull & folds and then you’ll place the dough in an airtight lidded container that’s been lightly covered in olive oil. Place the dough inside, turning to coat, cover and then place in the fridge.The next day, when ready to bake, you’ll pick up on Hour 1 of the Second Rise. Pour the dough into the prepared pan and continue on with the recipe instructions.I love this overnight version of the dough!Storing Focaccia: Store in an airtight container in the fridge. This dough is so light and fabulous it tastes delicious cold and at room temperature. However, if you’d like to reheat your focaccia…Reheating Focaccia: To reheat your pizza focaccia, preheat the oven to 350℉ (177℃). Cover any cut areas of the focaccia with foil, set on a baking sheet, spritz with some water and bake for about 5 minutes.Freezing Focaccia DoughThis dough freezes great! Follow the overnight instructions listed above and freeze the dough instead of putting it in the fridge. The night before you’d like to have it, place it in the fridge. Then follow the overnight instructions and jump right into Step 2, Second Rise.Please leave any questions in the comments below! xoFocaccia Variation: I’ve made this recipe and added about 18 to 20 pitted Castelvetrano olives and it was fabulous. Add them when you add the potatoes to the dough. I highly recommend!!Last Note: The step-by-step photo instructions show the yeast proofing in a liquid measuring cup. The recipe instructions, however, have you proof the yeast in a large bowl that you’re going to mix everything in (one bowl, yay!). You can follow either way, both work!
PrintHerby Potato Focaccia Recipe (Overnight & Same-Day Instructions!)#wprm-recipe-user-rating-0 .wprm-rating-star.wprm-rating-star-full svg * { fill: #343434; }#wprm-recipe-user-rating-0 .wprm-rating-star.wprm-rating-star-33 svg * { fill: url(#wprm-recipe-user-rating-0-33); }#wprm-recipe-user-rating-0 .wprm-rating-star.wprm-rating-star-50 svg * { fill: url(#wprm-recipe-user-rating-0-50); }#wprm-recipe-user-rating-0 .wprm-rating-star.wprm-rating-star-66 svg * { fill: url(#wprm-recipe-user-rating-0-66); }linearGradient#wprm-recipe-user-rating-0-33 stop { stop-color: #343434; }linearGradient#wprm-recipe-user-rating-0-50 stop { stop-color: #343434; }linearGradient#wprm-recipe-user-rating-0-66 stop { stop-color: #343434; }#wprm-recipe-user-rating-0.wprm-user-rating-allowed.wprm-user-rating-not-voted:not(.wprm-user-rating-voting) svg * { fill-opacity: 0.3; }Flavorful, bubbly focaccia dough is loaded with small-diced potatoes, fresh herbs and lemon zest. You can make this as an overnight focaccia dough recipe or use the same-day instructions. Perfect as an appetizer or companion to a cozy bowl of soup or salad for the perfect dinner!Course Dinner, SnackCuisine ItalianKeyword Crispy Focaccia, Recipe, Overnight, Herbs, Lemon Zest, Dinner, Potatoes, Rebecca Firth, DisplacedHousewife Well-Tested RecipePrep Time 40 minutes minutesCook Time 25 minutes minutesRise Time 4 hours hoursTotal Time 5 hours hours 5 minutes minutesServings 12 SlicesAuthor Rebecca FirthEquipmentNordic Ware Half SheetBaking ScaleLiquid Measuring CupIngredientsFor the Focaccia Dough2 cups (448 g) water warm (100-110°F, 38-43°C)1 1/2 tablespoons (32 g) honey1 tablespoon (9 g) active dry yeast4 cups (540 g) bread flour all-purpose flour will work as well; how to measure flour2 tablespoons (28 g) extra-virgin olive oil 1 tablespoon (18 g) sea saltFor the Pan1 tablespoon extra-virgin olive oil For the Focaccia Toppings9 ounces (257 g) Yukon Gold potatoes cleaned, cut into a small dice and cooked; see
Notes
below recipe for more details3 tablespoons fresh herbs chopped; rosemary, sage and/or parsley are my favorites for this recipe (rinse and dry before using)1 lemon zest only; see Potato Notes below regarding using the lemon juice2 tablespoons (28 g) extra-virgin olive oil sea salt flakesInstructionsMixing the Focaccia DoughCover an 18×13-inch (46×33-cm) rimmed baking sheet with parchment paper, allowing the excess to hang over the sides. Press the parchment into the corners. Set aside.*If you don't use parchment paper, generously butter your pan and then add olive oil (see Step 2 beneath the Second Rise) to keep the focaccia from sticking to the pan. Non-stick baking spray also works great.In a large mixing bowl, combine the water, yeast and honey, stirring to combine. Let it sit for 10 minutes until the yeast has foamed over the top of the water.Add in the flour and oil, mixing until thoroughly combined. Cover with a clean, damp kitchen towel and let sit for 20 minutes. After 20 minutes, add the salt and mix it really well into the dough. The dough will be *very* sticky.For the First Rise
This first rise will take place over 2 hours and consist of two parts. The first 1 hour will be doing stretch and folds (details below). In the second hour, the dough will rest, untouched.
HOUR ONE: Leave the dough in the bowl, and for the next hour, you'll do stretch and folds of the dough, every 15 minutes.You'll do this by grabbing the dough on the opposite side of the bowl away from you, pulling it up towards you, then stretching it over the top of the dough and gently pressing it down along the edge of the dough. Give the bowl a quarter turn and repeat until you've done 4 turns, and then let the dough rest for 15 minutes before repeating again.You'll do this 4 times total, covering the bowl with a damp kitchen cloth while it rests.*Rub some olive oil over your hands before each pull and turn to make the dough easier to work with; it will be quite sticky.HOUR TWO: After 1 hour of pull and turns, let the dough sit, with the damp kitchen towel over the top, for 1 hour more. When done, it should have doubled in size with some bubbles over the top.Rise times depend on the warmth and humidity of your kitchen. If it's chilly, it will take longer. Conversely, if it's warm, it will rise much more quickly. Keep the dough out of direct sunlight.For the Second Rise
This second rise will be 2 hours long and consist of two parts as well. In the first hour, you'll periodically help stretch the dough (very gently) towards the edges of the pan (don't rush it). In the second hour, you'll leave it untouched.
HOUR ONE: Drizzle some olive oil over the prepared pan (about 1 tablespoon (14 g)) and scoop the dough into the center of the pan. Pour another 1 tablespoon (14 g) of olive oil over the top of the dough and, using your hands, gently rub it all over the surface of the dough (it doesn't have to be perfect).Gently nudge the dough towards the edges of the pan. It won't come close, that's ok. Over the next hour, continue to gently stretch the dough to the outer edges of the pan. Don't pull on it or make it too thin in any areas.HOUR TWO: Sprinkle the cooked, diced potatoes over the top of the focaccia dough, gently pressing them into the dough. Leave the dough alone for about an hour. During this time, it should fill out the pan.Preheat the oven to 450℉ (232℃) and make sure you have a rack in the center of the oven. I like to preheat my oven for about an hour before I bake the potato focaccia so that it is screaming hot.To AssembleSprinkle the top of the focaccia with the fresh herbs and lemon zest. Then, drizzle about 2 tablespoons (28 g) olive oil evenly over the top of the focaccia. Finally, sprinkle with the sea salt flakes.Immediately place the pan in the center of the oven and bake for 25 minutes or until the top of the focaccia is bubbling, bronzed and some of the larger dough bubbles have darkened (love!).When done, use the parchment paper to drag the hot focaccia onto a wire rack to cool for about 5 minutes and then transfer to a cutting board to cut and serve. I use a bread knife to gently saw (cut) the focaccia. If you just press down, you'll squash this light, fluffy dough. Enjoy!NotesTo Prep Your Potatoes: I don’t bother peeling the potatoes. Cut the clean potatoes into a small dice (doesn’t need to be perfect) and boil for about 4 to 5 minutes. Drain and transfer to a bowl to cool down. Toss in 2 teaspoons of olive oil and salt and pepper to taste.Lemon Juice: For extra lemon flavor, squeeze the fresh lemon juice over the potatoes and toss to coat. It’s DELICIOUS and I love to do this! There will be a little extra lemon juice + olive oil at the bottom of the bowl. Drizzle it over the focaccia.Herbs: When baking the potato focaccia with fresh sage, I used about 9-12 leaves. When I used rosemary, I used roughly 3 tablespoons of fresh rosemary.Alternative Pan: I also tested this in a 9×13-inch (23×33-cm) baking pan (like you’d bake a coffee cake in). This turned out lovely, but it didn’t have as many bubbles (not enough space for them). I love the bubbles. If you only have this size pan, you’ll need to bake your focaccia for 30 to 35 minutes. This also makes a thicker focaccia which is fun!YeastI used Active Dry Yeast for this recipe. For US people, I used Fleischmann’s (it’s my favorite).Make sure your water is warm to the touch, but not hot. I do love to use an instant-read thermometer if you have one available.After 10 minutes, your yeast should be foaming over the top of the water. I like to watch, and you’ll see little fireworks of the yeast coming alive.If you don’t see any action, your yeast could be too old. Consider getting new yeast.Overnight Focaccia OptionIf you’d like to make the dough the day before serving, you’ll make it all the way through Hour 1 of the First Rise. So you’ll do 1 hour of pull & folds and then you’ll place the dough in an airtight lidded container that’s been lightly covered in olive oil. Place the dough inside, turning to coat, cover and then place in the fridge.The next day, when ready to bake, you’ll pick up on Hour 1 of the Second Rise. Pour the dough into the prepared pan and continue on with the recipe instructions.I love this overnight version of the dough!Storing Focaccia: Store in an airtight container in the fridge. This dough is so light and fabulous it tastes delicious cold and at room temperature. However, if you’d like to reheat your focaccia…Reheating Focaccia: To reheat your pizza focaccia, preheat the oven to 350℉ (177℃). Cover any cut areas of the focaccia with foil, set on a baking sheet, spritz with some water and bake for about 5 minutes.Freezing Focaccia DoughThis dough freezes great! Follow the overnight instructions listed above and freeze the dough instead of putting it in the fridge. The night before you’d like to have it, place it in the fridge. Then follow the overnight instructions and jump right into Step 2, Second Rise.Please leave any questions in the comments below! xoFocaccia Variation: I’ve made this recipe and added about 18 to 20 pitted Castelvetrano olives and it was fabulous. Add them when you add the potatoes to the dough. I highly recommend!!Last Note: The step-by-step photo instructions show the yeast proofing in a liquid measuring cup. The recipe instructions, however, have you proof the yeast in a large bowl that you’re going to mix everything in (one bowl, yay!). You can follow either way, both work!The post Delicious Herby Lemony Potato Focaccia (Overnight & Same-Day Instructions) appeared first on DisplacedHousewife.
September 26, 2025
Soft & Decadent Chocolate Peanut Butter Cup Cookies Recipe
Calling all Reese’s peanut butter cup fans! Stop everything and make this Soft & Decadent Chocolate Chip Peanut Butter Cup Cookies recipe stat!
You get the creaminess from the melted peanut butter, saltiness from the flaky sea salt and gooey chocolatiness from the cookie and melted peanut butter cup. Heaven.
This rich chocolate cookie base is an easy, one-bowl cookie dough that needs zero rest time. Each cookie dough ball is topped with a mini peanut butter cup (below, I talk about my favorite for this recipe), which then melts over the top of the cookie.
I give tips below the recipe to make sure every bite is the perfect peanut butter-chocolate flavor explosion!
Bonus: This cookie has the softest, most gorgeous texture. I can’t get enough of them!
Fresh from the oven, the tie-dye peanut butter cup vibe is glossy, and as the cookie cools, it will set, making the cookies stackable (and perfect for transporting and sharing).
Have fun with this DELICIOUS cookie recipe!
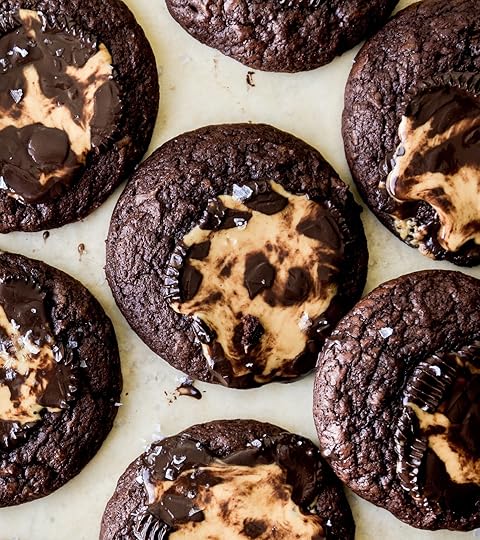 The Baker’s Guide to Measuring Flour
One of the biggest (and most common) mistakes in baking is how we measure flour. If you find yourself without a scale, see my top tips on how to properly measure flour for the perfect amount every time!
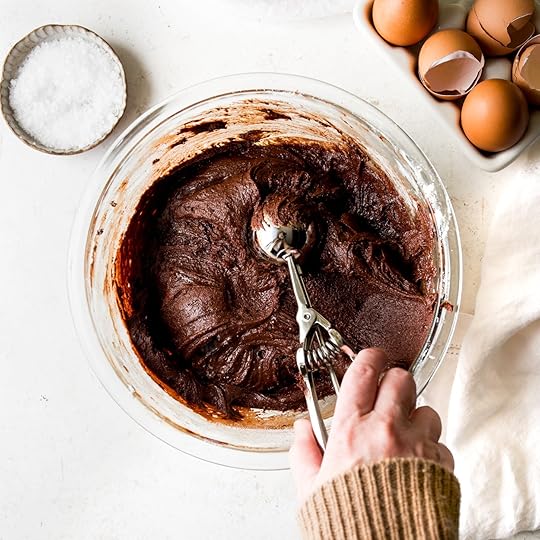 My Favorite Pro Baking Tips for the
 Best Chocolate Peanut Butter Cup CookiesDon’t Let Your Chocolate Get Too Hot. Keep the heat low and let it melt slowly for the best results in terms of cookie taste and texture.Use Dark Chocolate Peanut Butter Cups for Best Results. The mini dark chocolate peanut butter cups melted (and tasted) better than milk chocolate peanut butter cups. See the Recipe Testing section below for more information on recommendations.Set the Peanut Butter Cups Just on Top of the Cookie Dough Balls. Set the peanut butter cups in the very center of the cookie dough balls and don’t press them into the dough balls. This allows the peanut butter cups to melt on top of the cookie rather than into the interior of the cookie.
Are you ready to make the yummiest double chocolate cookies made with peanut butter cups?
 Step-by-Step Instructions (with photos!) for Making These
 Perfect Chocolate Cookies
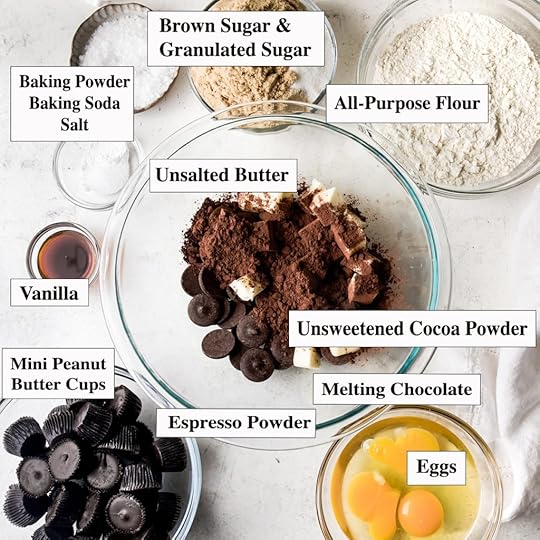 STEP 1: Gather your ingredients: dark chocolate (see
Notes
below recipe), butter, unsweetened cocoa powder, espresso powder (optional), vanilla, sugar, brown sugar, eggs, baking powder, salt, flour, mini peanut butter cups and flaky sea salt (optional).
STEP 1: Gather your ingredients: dark chocolate (see
Notes
below recipe), butter, unsweetened cocoa powder, espresso powder (optional), vanilla, sugar, brown sugar, eggs, baking powder, salt, flour, mini peanut butter cups and flaky sea salt (optional).  STEP 2: Melt the chocolate, butter, cocoa powder and espresso powder in a large, heat-safe bowl.
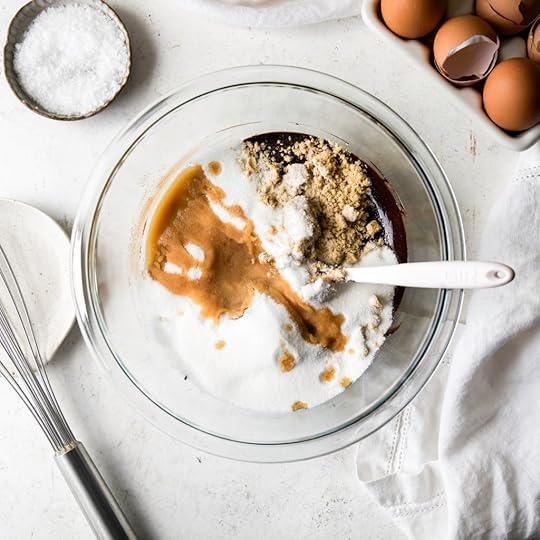 STEP 3: Stir in the vanilla, sugar, and brown sugar…
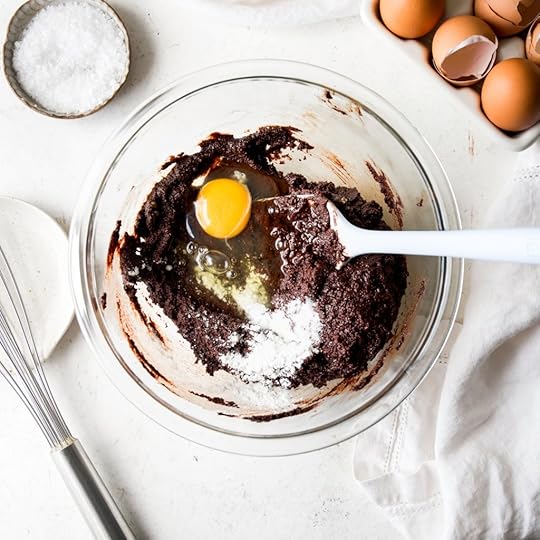 STEP 4: Then, mix in 1 egg plus the baking powder and salt. Then mix in the remaining two eggs, one at a time.
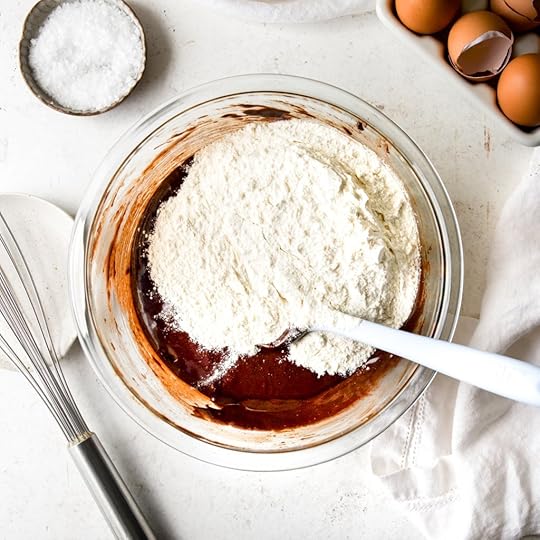 STEP 5: Finally, mix in the flour until just combined.
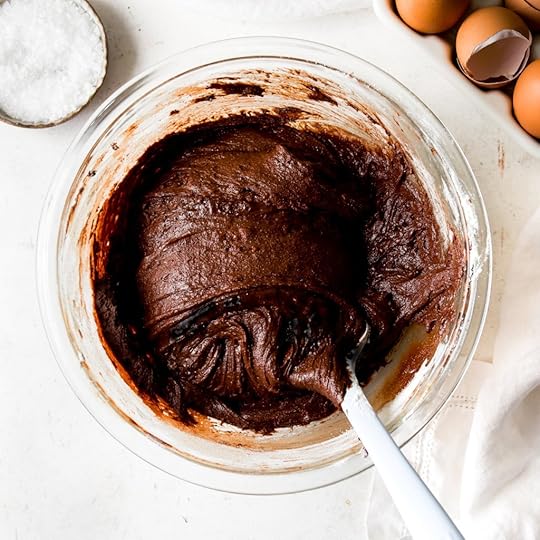 STEP 5: It will look like this!
 STEP 6: Scoop 2 tablespoons of dough onto the prepared baking sheet and set a mini peanut butter cup on top.
 STEP 7: Fresh from the oven, tap the baking sheet on the counter several times to distribute the melted peanut butter cup over the tops of the cookies.
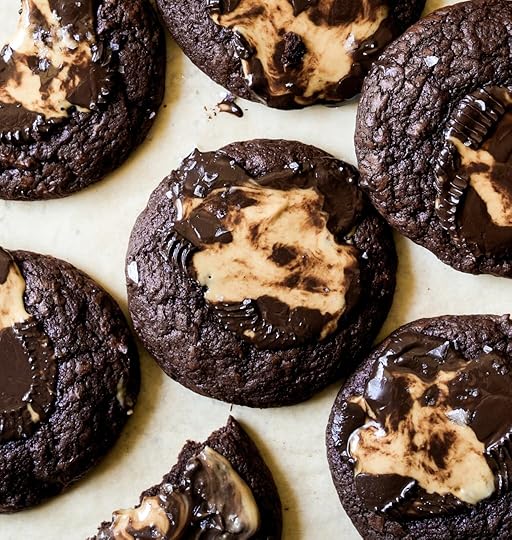 Recipe Testing Notes & Inspiration
When I saw The Floured Table’s Chocolate Peanut Butter Cup Cookies, I knew I had to make my own version! They were simply too pretty!!
I started with the base recipe from these Coffee Toffee Cookies (that are too delicious). It’s an easy, one-bowl chocolate cookie dough that doesn’t need any rest time. Perfect.
I then tested four different mini peanut butter cups: Reese’s Peanut Butter Cups, Trader Joe’s Milk Chocolate Peanut Butter Cups, Trader Joe’s Dark Chocolate Peanut Butter Cups and Justin’s Dark Chocolate Peanut Butter Cups.
The best mini peanut butter cup for this cookie recipe was hands down the Trader Joe’s Dark Chocolate Peanut Butter Cups. The peanut butter cup melted by far the best on top of the cookie, resulting in the prettiest cookie. I also love how the dark chocolate tempers the richness of the cookie a bit.
My least favorite peanut butter cups were the Reese’s and Trader Joe’s milk chocolate. They spread the least and were too sweet (for me) on top of the cookie. I would love to hear your thoughts!
See image below for the differences in the peanut butter cups, and see the Notes section below the recipe on how to maximize whichever peanut butter cup you use.
Quick note on the photo below: that was the first recipe test where I used a different cookie base than the final recipe, which is why it looks a bit different than the other cookie photos.
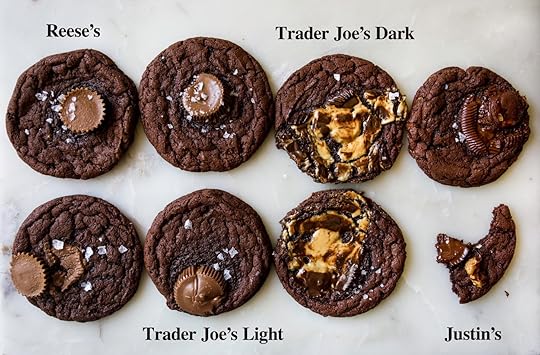
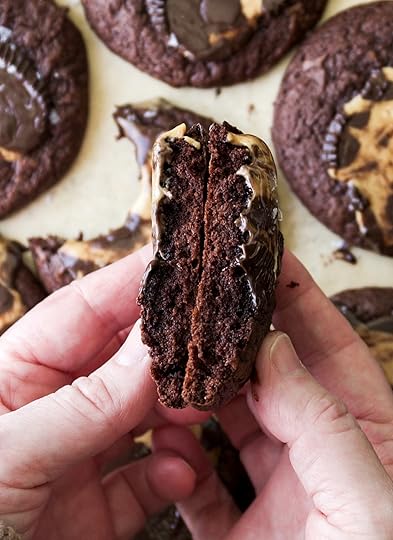
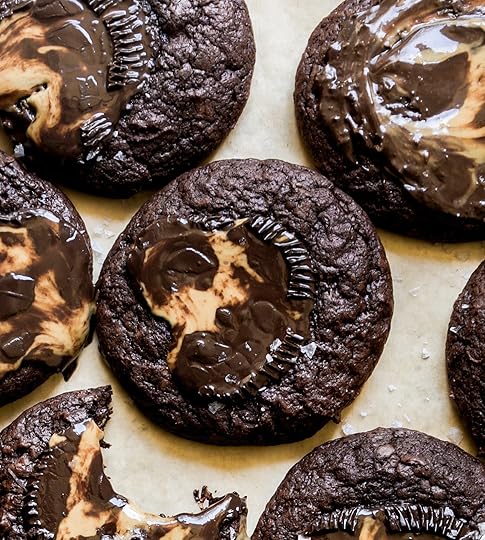 More Delicious Chocolate Cookie Recipes
I love a double chocolate cookie moment! Also check out these Double Chocolate Chip Cookies (the dough freezes like a dream!), these Levain-inspired Coffee Toffee Cookies and these Rich & Fudgy Brownie Cookies.
You can find all of the cookie recipes here!
Have fun with these mega delicious double chocolate peanut butter cup cookies!!
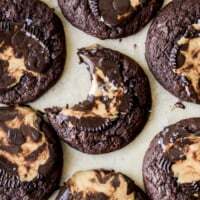 PrintSoft & Decadent Chocolate Peanut Butter Cup Cookie Recipe#wprm-recipe-user-rating-0 .wprm-rating-star.wprm-rating-star-full svg * { fill: #343434; }#wprm-recipe-user-rating-0 .wprm-rating-star.wprm-rating-star-33 svg * { fill: url(#wprm-recipe-user-rating-0-33); }#wprm-recipe-user-rating-0 .wprm-rating-star.wprm-rating-star-50 svg * { fill: url(#wprm-recipe-user-rating-0-50); }#wprm-recipe-user-rating-0 .wprm-rating-star.wprm-rating-star-66 svg * { fill: url(#wprm-recipe-user-rating-0-66); }linearGradient#wprm-recipe-user-rating-0-33 stop { stop-color: #343434; }linearGradient#wprm-recipe-user-rating-0-50 stop { stop-color: #343434; }linearGradient#wprm-recipe-user-rating-0-66 stop { stop-color: #343434; }#wprm-recipe-user-rating-0.wprm-user-rating-allowed.wprm-user-rating-not-voted:not(.wprm-user-rating-voting) svg * { fill-opacity: 0.3; }Peanut butter cup lovers unite! You're going to love this one-bowl, super soft Chocolate Peanut Butter Cup Cookie Recipe! Course Dessert, SnackCuisine AmericanKeyword Peanut Butter Cups, Chocolate, Cookies, One-Bowl, Rebecca Firth, DisplacedHousewife Well-Tested RecipePrep Time 15 minutes minutesCook Time 12 minutes minutesTotal Time 27 minutes minutesServings 26 CookiesAuthor Rebecca FirthEquipmentBaking Scale#40 2-TBSP Cookie ScoopBaking SheetsMixing BowlsSpatulaIngredients1 cup (170 g) dark chocolate finely chopped8 tablespoons (113 g) unsalted butter cut into 8 pieces1/3 cup + 2 tbsp (35 g) unsweetened dark Dutch-processed cocoa powder2 teaspoons espresso powder optional1 tablespoon 13 g real vanilla extract1 cup (200 g) granulated sugar1/2 cup (110 g) light brown sugar packed3 large eggs room temperature1 teaspoon baking powder1 teaspoon sea salt1 3/4 cups (237 g) all-purpose flour 26 Mini Dark Chocolate Peanut Butter Cup Candies see Notes below recipe for more informationSea salt flakes to sprinkle post bake optionalInstructionsPreheat the oven to 350°F (177°C) and line several cookie sheets with parchment paper.To a medium bowl (that's heat safe), set over a pan of simmering water, add the chocolate, butter, cocoa powder and espresso powder. Make sure the water doesn’t boil or touch the bottom of the bowl. Stir frequently until the chocolate is melted and then remove from the heat.Mix in the vanilla, sugar, and brown sugar until well combined and the mixture has a thick consistency.Add one egg, baking powder, and salt, stirring until well blended. Then add in the remaining two eggs, one at a time, making sure the first is well blended before adding in the second. Scrape the sides and bottom of the bowl to make sure everything is completely combined.Mix in the flour until just combined. Scrape the bottom and sides of the bowl to make sure everything is thoroughly mixed. Use a 2-tablespoon cookie scoop and drop the dough on the prepared cookie sheet, leaving 2 inches (5 cm) between cookie dough balls. This dough is sticky. If you don't have a cookie scoop, use two spoons. If it's too sticky to handle, you can let it sit for 10 minutes or set it in the fridge to expedite this.Just before baking, place a mini peanut butter cup on top of each cookie dough ball. Try to place it in the center of each dough ball.Bake one sheet at a time in the center of the oven for 12 minutes. The cookies will be puffed and then collapse and crack as they cool. As soon as they're out of the oven, tap the baking sheet on the counter several times to disperse the melted peanut butter cup over the tops of the cookies (see
Notes
below recipe for more detail). Use the edge of a spatula to nudge any misshapen cookies back into the shape of a circle. Let the peanut butter cup cookies cool on the baking sheets for about 5 minutes before transferring to a wire rack to finish cooling. Sprinkle with sea salt flakes, if using. NotesFor the Prettiest Peanut Butter Cup Cookies:Use Mini Dark Chocolate Peanut Butter Cups. Dark chocolate peanut butter cups melted better than milk chocolate peanut butter cups in recipe testing. The Trader Joe’s mini dark chocolate peanut butter cups were my favorites.Tap the Baking Sheet on the Counter As Soon As They Come Out of the Oven. This will help spread the melted peanut butter cup over the tops of the cookies.If Your Peanut Butter Cups Don’t Melt Enough… you can use the back of a spoon and swirl the hot peanut butter cup over the top of the cookie. I did this with one batch and I liked the results (peanut butter cup in every bite!). Don’t over swirl or you’ll loose the distinct peanut butter and chocolate swirls and then it just looks messy.Melting Chocolate Notes:For the melting chocolate, use chocolate that is specifically used for melting. Feves, wafers, callets and chocolate bars are all excellent choices.Chocolate chips resist melting and can be harder to work with (but will still work in a pinch).I’m loving these baking chips (a GREAT grocery store option; these are 60% cacao) and these are my favorite Callebaut callets (54.5% cacao).Cookie Storage: Store the cookies in an airtight container at room temperature. Let the glossy, melted peanut butter cup cookies set and firm up before stacking. Add parchment between layersFor Best Results: This dough is best if mixed and baked straight away; do not store the dough in the fridge.
PrintSoft & Decadent Chocolate Peanut Butter Cup Cookie Recipe#wprm-recipe-user-rating-0 .wprm-rating-star.wprm-rating-star-full svg * { fill: #343434; }#wprm-recipe-user-rating-0 .wprm-rating-star.wprm-rating-star-33 svg * { fill: url(#wprm-recipe-user-rating-0-33); }#wprm-recipe-user-rating-0 .wprm-rating-star.wprm-rating-star-50 svg * { fill: url(#wprm-recipe-user-rating-0-50); }#wprm-recipe-user-rating-0 .wprm-rating-star.wprm-rating-star-66 svg * { fill: url(#wprm-recipe-user-rating-0-66); }linearGradient#wprm-recipe-user-rating-0-33 stop { stop-color: #343434; }linearGradient#wprm-recipe-user-rating-0-50 stop { stop-color: #343434; }linearGradient#wprm-recipe-user-rating-0-66 stop { stop-color: #343434; }#wprm-recipe-user-rating-0.wprm-user-rating-allowed.wprm-user-rating-not-voted:not(.wprm-user-rating-voting) svg * { fill-opacity: 0.3; }Peanut butter cup lovers unite! You're going to love this one-bowl, super soft Chocolate Peanut Butter Cup Cookie Recipe! Course Dessert, SnackCuisine AmericanKeyword Peanut Butter Cups, Chocolate, Cookies, One-Bowl, Rebecca Firth, DisplacedHousewife Well-Tested RecipePrep Time 15 minutes minutesCook Time 12 minutes minutesTotal Time 27 minutes minutesServings 26 CookiesAuthor Rebecca FirthEquipmentBaking Scale#40 2-TBSP Cookie ScoopBaking SheetsMixing BowlsSpatulaIngredients1 cup (170 g) dark chocolate finely chopped8 tablespoons (113 g) unsalted butter cut into 8 pieces1/3 cup + 2 tbsp (35 g) unsweetened dark Dutch-processed cocoa powder2 teaspoons espresso powder optional1 tablespoon 13 g real vanilla extract1 cup (200 g) granulated sugar1/2 cup (110 g) light brown sugar packed3 large eggs room temperature1 teaspoon baking powder1 teaspoon sea salt1 3/4 cups (237 g) all-purpose flour 26 Mini Dark Chocolate Peanut Butter Cup Candies see Notes below recipe for more informationSea salt flakes to sprinkle post bake optionalInstructionsPreheat the oven to 350°F (177°C) and line several cookie sheets with parchment paper.To a medium bowl (that's heat safe), set over a pan of simmering water, add the chocolate, butter, cocoa powder and espresso powder. Make sure the water doesn’t boil or touch the bottom of the bowl. Stir frequently until the chocolate is melted and then remove from the heat.Mix in the vanilla, sugar, and brown sugar until well combined and the mixture has a thick consistency.Add one egg, baking powder, and salt, stirring until well blended. Then add in the remaining two eggs, one at a time, making sure the first is well blended before adding in the second. Scrape the sides and bottom of the bowl to make sure everything is completely combined.Mix in the flour until just combined. Scrape the bottom and sides of the bowl to make sure everything is thoroughly mixed. Use a 2-tablespoon cookie scoop and drop the dough on the prepared cookie sheet, leaving 2 inches (5 cm) between cookie dough balls. This dough is sticky. If you don't have a cookie scoop, use two spoons. If it's too sticky to handle, you can let it sit for 10 minutes or set it in the fridge to expedite this.Just before baking, place a mini peanut butter cup on top of each cookie dough ball. Try to place it in the center of each dough ball.Bake one sheet at a time in the center of the oven for 12 minutes. The cookies will be puffed and then collapse and crack as they cool. As soon as they're out of the oven, tap the baking sheet on the counter several times to disperse the melted peanut butter cup over the tops of the cookies (see
Notes
below recipe for more detail). Use the edge of a spatula to nudge any misshapen cookies back into the shape of a circle. Let the peanut butter cup cookies cool on the baking sheets for about 5 minutes before transferring to a wire rack to finish cooling. Sprinkle with sea salt flakes, if using. NotesFor the Prettiest Peanut Butter Cup Cookies:Use Mini Dark Chocolate Peanut Butter Cups. Dark chocolate peanut butter cups melted better than milk chocolate peanut butter cups in recipe testing. The Trader Joe’s mini dark chocolate peanut butter cups were my favorites.Tap the Baking Sheet on the Counter As Soon As They Come Out of the Oven. This will help spread the melted peanut butter cup over the tops of the cookies.If Your Peanut Butter Cups Don’t Melt Enough… you can use the back of a spoon and swirl the hot peanut butter cup over the top of the cookie. I did this with one batch and I liked the results (peanut butter cup in every bite!). Don’t over swirl or you’ll loose the distinct peanut butter and chocolate swirls and then it just looks messy.Melting Chocolate Notes:For the melting chocolate, use chocolate that is specifically used for melting. Feves, wafers, callets and chocolate bars are all excellent choices.Chocolate chips resist melting and can be harder to work with (but will still work in a pinch).I’m loving these baking chips (a GREAT grocery store option; these are 60% cacao) and these are my favorite Callebaut callets (54.5% cacao).Cookie Storage: Store the cookies in an airtight container at room temperature. Let the glossy, melted peanut butter cup cookies set and firm up before stacking. Add parchment between layersFor Best Results: This dough is best if mixed and baked straight away; do not store the dough in the fridge.The post Soft & Decadent Chocolate Peanut Butter Cup Cookies Recipe appeared first on DisplacedHousewife.
September 19, 2025
The Best Bakery-Style Chocolate Chip Muffins (I Can’t Stop Eating Them!)
When I say I couldn’t stop eating these Chocolate Chip Muffins, I mean, I COULD NOT STOP EATING THEM. I had to give them away (hi mom and dad!) because I have zero self-control around them. They’re almost too good to be true.
The crumb is perfection. It’s light, it’s fluffy, and it’s LOADED with flavor from cinnamon, a touch of nutmeg and vanilla. Mini chocolate chips dot the interior of each muffin (although you can use regular chocolate chips in a pinch!), and each muffin is topped with the most insane cinnamon brown sugar topping and more chocolate chips.
Let’s talk about the topping a bit more… It’s the perfect mixture of Demerara sugar, brown sugar, granulated sugar and cinnamon. It gives the most amazing crunch and flavor to every single bite.
This chocolate chip muffin recipe is an easy breezy one-bowl recipe* that takes about 10 to 15 minutes to throw together and then a quick, 20-minute bake time in the center of the oven.
The result is a tender, flavorful muffin with a beautiful, tall muffin crown. Perfection.
I can’t wait to hear what you think!
*PS You’ll need an additional small bowl to mix the brown sugar-cinnamon topping…But I still think this qualifies as one-bowl recipe! ;)
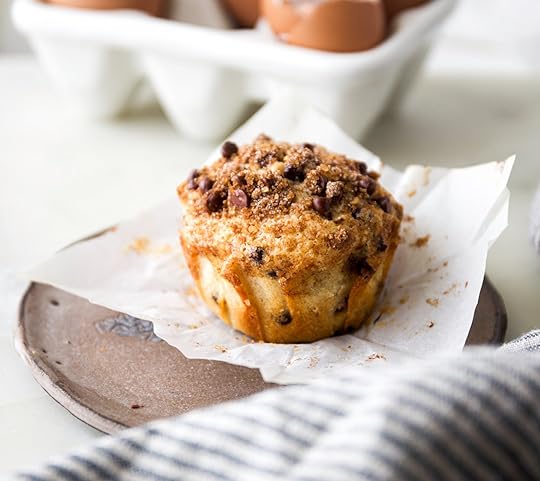 The Baker’s Guide to Measuring Flour
One of the biggest (and most common) mistakes in baking is how we measure flour. If you find yourself without a scale, see my top tips on how to properly measure flour for the perfect amount every time!
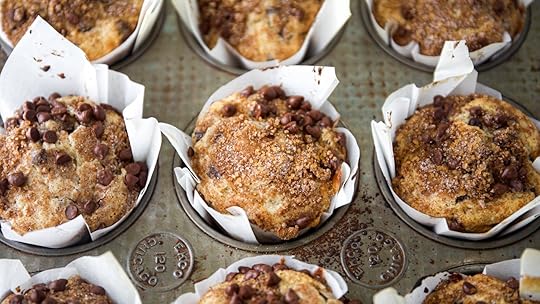
 My Favorite Pro Baking Tips For Tall, Perfect Chocolate Chip Muffins!Don’t overmix your muffin batter. Once you start adding the flour to the mix, use a very light hand with stirring. Mixing the flour too much will result in a dense, rubbery muffin.Do let your muffin batter rest. I tested the recipe by baking the muffins after a 20-minute rest, a 60-minute rest and an overnight rest, and guess what? They all turned out pretty equal! So use whichever one works with your baker’s timeline.
  Bake the chocolate chip muffins until *just* baked. The tops of the muffins will be bronzed and puffed up and the centers just baked. They will continue to bake once out of the oven.
Let’s bake the perfect sour cream muffins with chocolate chips!
 Step-by-Step Instructions & Photos for
 The Most Fabulous Chocolate Chip Muffin Recipe!
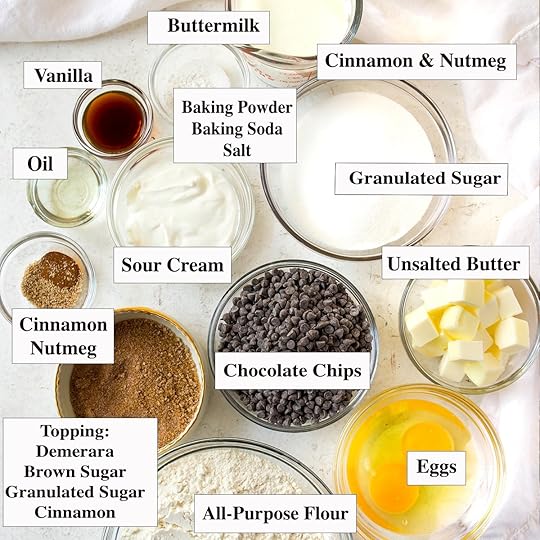 STEP 1: Gather your chocolate chip muffin ingredients: granulated sugar, butter, oil, vanilla, cinnamon, nutmeg, eggs, sour cream, flour, buttermilk and chocolate chips. For the brown sugar-cinnamon topping: brown sugar, Demerara sugar, granulated sugar and cinnamon. See below for the recipe for ingredient substitutions.
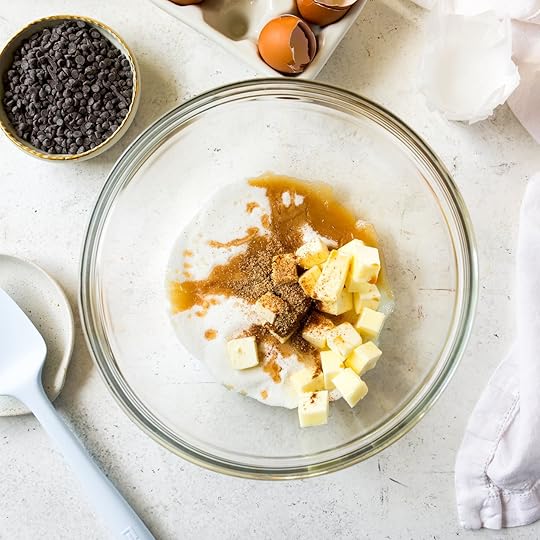 STEP 2: Cream together the sugar, butter, oil, vanilla, cinnamon and nutmeg until light and whipped.
 STEP 3: Add in the eggs, one at a time, making sure the first is well blended before adding the second.
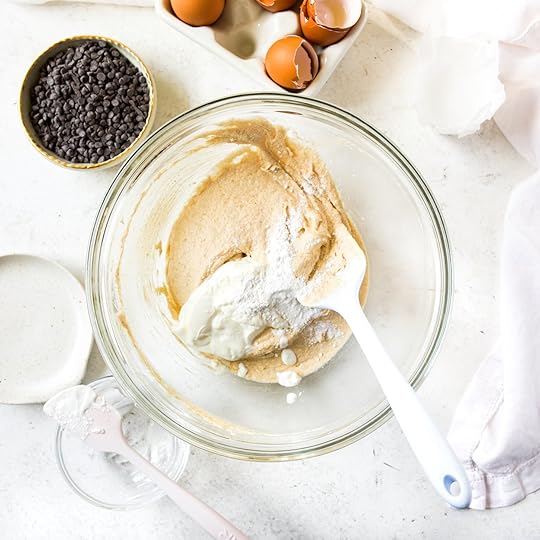 STEP 4: Stir in the sour cream, baking powder, baking soda and salt.
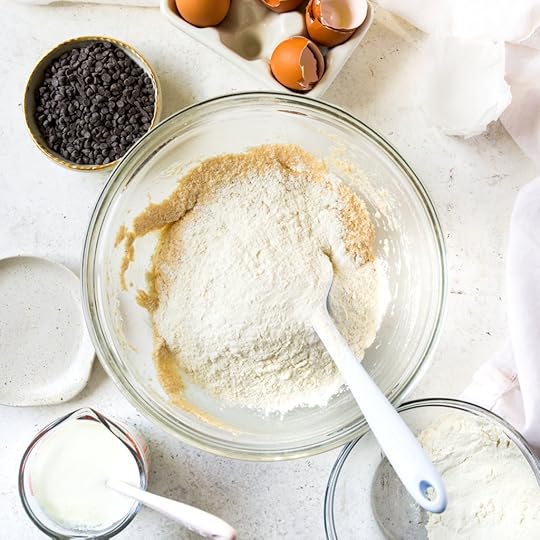 STEP 5: Alternate adding the flour and the buttermilk in two batches…
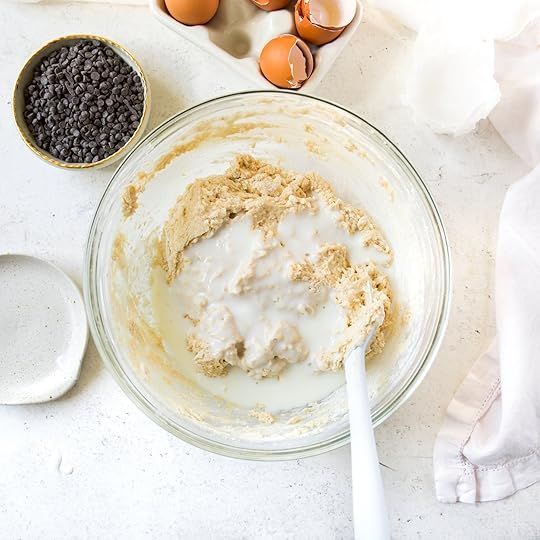 STEP 5: Mix each addition until just barely combined.
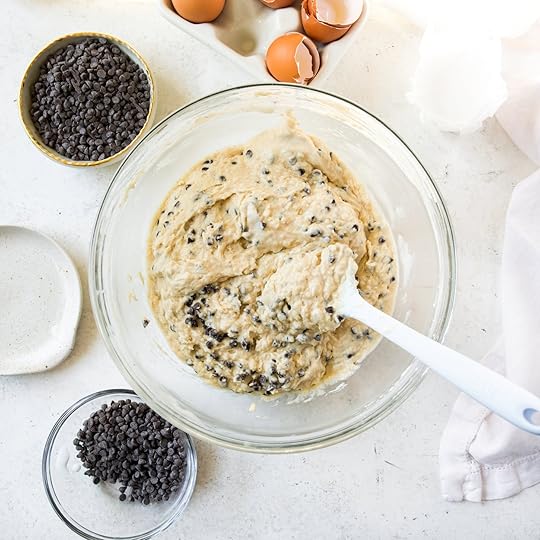 STEP 6: Mix in the chocolate chips, reserving 1/3 cup (57 g) to sprinkle over the tops of the muffins.
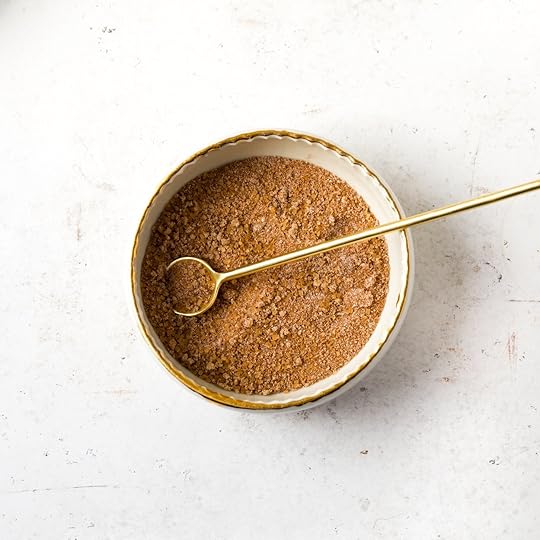 STEP 7: In a small bowl, whisk together the brown sugar, Demerara, granulated sugar and cinnamon. Set aside.
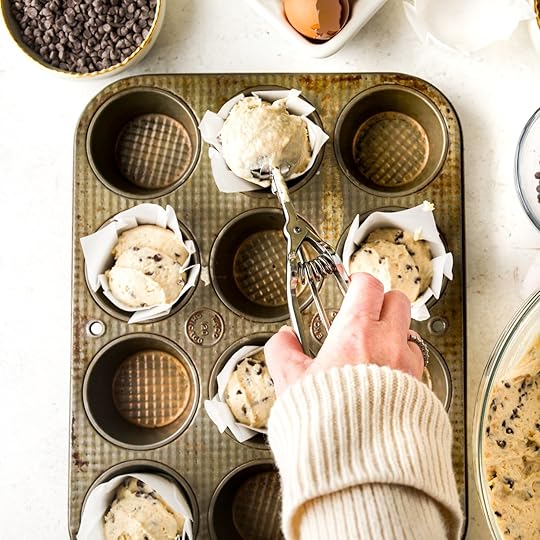 STEP 8: Fill each muffin well until almost full.
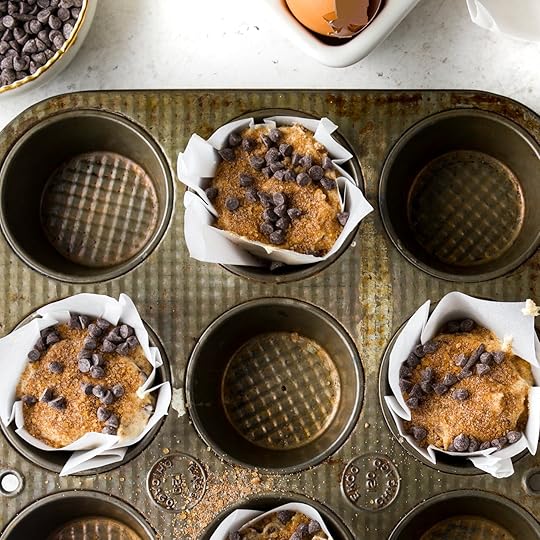 STEP 9: Top with the brown-sugar topping and then some of the reserved chocolate chips.
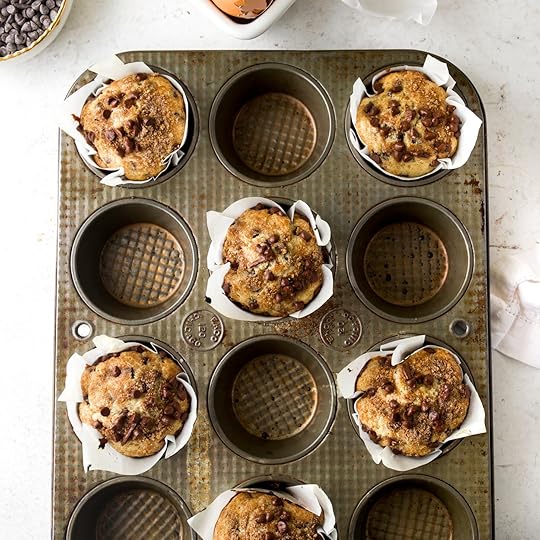 STEP 10: Bake in the center of the oven at high heat for 5 minutes, then reduce the heat and bake for 15 minutes more (full details in the recipe card). Eat one warm, fresh from the oven!
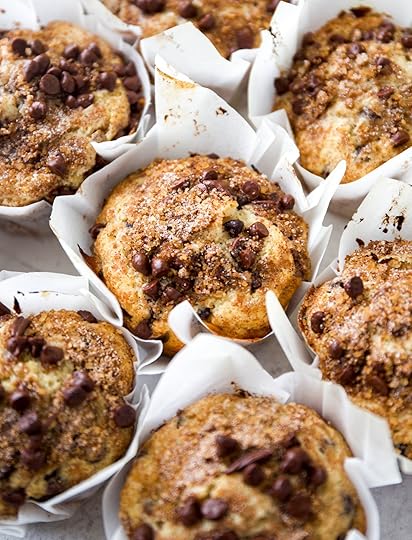
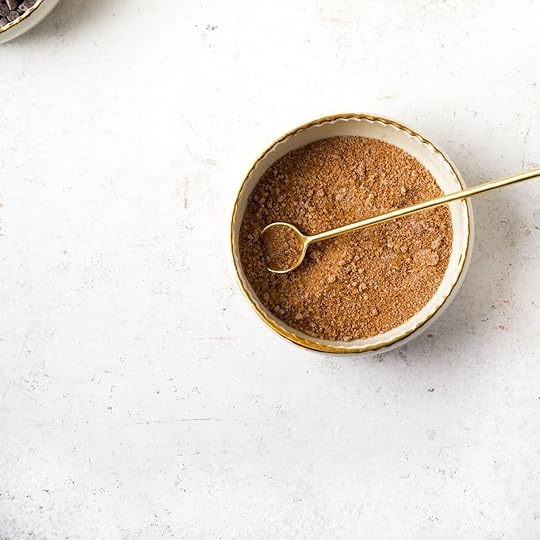 Recipe Testing these Chocolate Chip Muffins
For the muffin base, I referenced these Blackberry Muffins. I really love how light and moist it is, and I knew it would be perfect here.
I’m also having a really long-term love affair with buttermilk, so I used that for the liquid (for substitutions, see the Notes section below the recipe) and reduced the amount of sour cream. The tanginess and acidity in these muffins is perfection! I credit it with the delicious muffin flavor and the lightness in the crumb.
Next, for the topping, I was inspired by these King Arthur Baking Cinnamon-Sugar Crunch Bagels. I recently made some Sourdough Bagels and wanted a cinnamon topping. I made my own version and LOVED it and knew it would be perfect atop these chocolate chip muffins, and it is.
These muffins taste just like a muffin you would get from your very favorite bakery! You’re going to love them!!
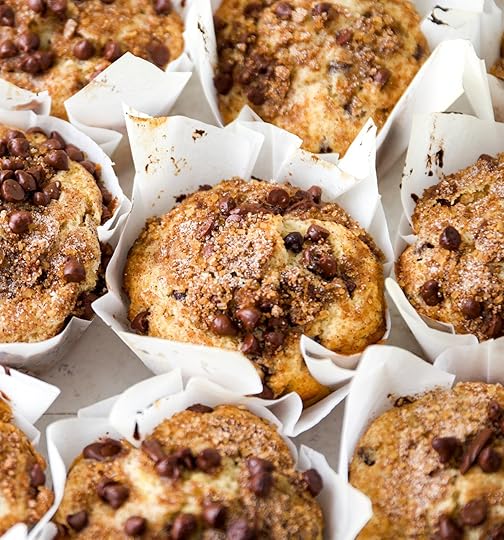 More Delicious Muffin Recipes
I love muffins more than anything! They’re typically pretty easy to throw together and yield something magical that comes in its own to-go carrier. What could be better?!
Since you’re on this muffin journey with me, I hope you’ll also check out the uber popular Raspberry Muffins (with streusel!), Double Chocolate Banana Muffins and these insane Coffee Cake Muffins.
You can browse all of the muffin recipes here!
Have fun and thanks for being here!
 PrintThe Best Bakery-Style Chocolate Chip Muffins (I Couldn’t Stop Eating Them!)#wprm-recipe-user-rating-0 .wprm-rating-star.wprm-rating-star-full svg * { fill: #343434; }#wprm-recipe-user-rating-0 .wprm-rating-star.wprm-rating-star-33 svg * { fill: url(#wprm-recipe-user-rating-0-33); }#wprm-recipe-user-rating-0 .wprm-rating-star.wprm-rating-star-50 svg * { fill: url(#wprm-recipe-user-rating-0-50); }#wprm-recipe-user-rating-0 .wprm-rating-star.wprm-rating-star-66 svg * { fill: url(#wprm-recipe-user-rating-0-66); }linearGradient#wprm-recipe-user-rating-0-33 stop { stop-color: #343434; }linearGradient#wprm-recipe-user-rating-0-50 stop { stop-color: #343434; }linearGradient#wprm-recipe-user-rating-0-66 stop { stop-color: #343434; }#wprm-recipe-user-rating-0.wprm-user-rating-allowed.wprm-user-rating-not-voted:not(.wprm-user-rating-voting) svg * { fill-opacity: 0.3; }These moist, tender Chocolate Chip Muffins topped with crunchy brown sugar-cinnamon come together quickly in an easy, one-bowl recipe. You will not be able to stop with these addictive treats!Course Breakfast, Brunch, SnackCuisine AmericanKeyword Chocolate Chip, Sour Cream, Muffins, Rebecca Firth, DisplacedHousewife Well-Tested RecipePrep Time 13 minutes minutesCook Time 20 minutes minutesRest Time (optional) 20 minutes minutesTotal Time 53 minutes minutesServings 13 MuffinsAuthor Rebecca FirthEquipmentBaking ScaleRegular Muffin Pan#40 2-TBSP Cookie ScoopSpatulaIngredientsFor the Chocolate Chip Muffin Base1 cup (200 g) granulated sugar8 tablespoons (113 g) unsalted butter room temperature1 tablespoon (14 g) cooking oil such as olive oil, sunflower or grapeseed oil1 tablespoon (13 g) real vanilla extract1 teaspoon cinnamon¼ teaspoon nutmeg2 large eggs room temperature1/3 cup (82 g) full-fat sour cream room temperature2 teaspoons baking powder1/2 teaspoon baking soda1 teaspoon sea salt2 cups + 2 tablespoons (281 g) all-purpose flour how to measure flour1 cup (240 g) buttermilk shaken and at room temperature1 ½ cups (255 g) mini dark chocolate chips reserve about 1/3 cup (57 g) to sprinkle over the tops of the muffins; see chocolate chip notes below the recipeBrown Sugar-Cinnamon Topping1 tablespoon (14 g) light or dark brown sugar packed1 tablespoon (12 g) Demerara sugar see Notes below for substitutions1 tablespoon (12 g) granulated sugar1 teaspoon cinnamonInstructionsTo Make The Chocolate Chip Muffin BatterIn the bowl of an electric stand mixer fitted with the paddle attachment, add the sugar, butter, oil, vanilla, cinnamon and nutmeg, and mix on medium for 4 to 5 minutes or until the texture is light and fluffy. Take a big whiff; it smells delicious.
*This muffin recipe can also be made with a handheld mixer or with a bowl and a spatula.
Add the eggs, one at a time, making sure the first is well blended before adding in the second. With a spatula, scrape the sides and bottom of the bowl to make sure everything is well combined. Add the sour cream, baking powder, baking soda and salt, and mix on low for 1 minute or until well blended. It should look light, fluffy and whipped.
*It may curdle a bit at this stage, that's ok!
Take the bowl out of the stand mixer, and alternate adding the flour and buttermilk in two batches, stirring each addition until barely combined. Set aside 1/3 cup (57 g) of chocolate chips to sprinkle over the tops of the muffins just before they go into the oven. Fold the remaining chocolate chips into the muffin batter until just combined and evenly distributed throughout. Rest The Muffin BatterAt this point, you can cover the muffin batter bowl and let it rest at room temperature for 20 to 60 minutes for a higher muffin top and/or stash it in the fridge (in an airtight container) until the following day (see
Notes
below the recipe for more information).Preheat the oven to 425°F (220°C) and line every other muffin well of your muffin pan with paper liners. Alternatively, you can grease and flour the muffin tin or use a nonstick baking spray.Prep Your Muffins for The OvenIn a small bowl, whisk together the brown sugar, Demerara sugar, granulated sugar and cinnamon. Set aside.Scoop the muffin batter into the prepared muffin tins, filling every other muffin liner until almost full. Sprinkle the brown sugar-cinnamon topping evenly over the tops (about 1/2 teaspoon per muffin), and then sprinkle with the reserved chocolate chips.Time to Bake!Bake for 5 minutes in the center of the oven and then reduce the oven temperature to 350℉ (177℃) and bake for 15 minutes more. When done, the tops will be light golden brown and puffed up. Your kitchen will smell amazing!For best results, bake one muffin pan at a time. Let cool in the muffin pan for about 5ish minutes. Use a butter knife to get the warm muffins out of the hot pan and transfer them to a wire rack to finish cooling. These chocolate chip muffins are delicious warm or at room temperature—you can't go wrong!NotesIngredient Substitutions: Since some iteration of this muffin base is used for my Raspberry, Blackberry and Coffee Cake Muffins (and more!), I have tested this recipe with different ingredient variations. Below, find the substitutions that I use the most:Sour Cream: Feel free to use a full-fat yogurt (Greek yogurt would be ideal) in place of the sour cream.Buttermilk: Measure out 1 cup (240 g) of milk and then omit 1 tablespoon (15 g). Then add in 1 tablespoon (15 g) of white vinegar. Let the mixture sit for 10 minutes before using. You can also just use water or milk (without the vinegar), but I love the acidity that the buttermilk (or faux buttermilk) provides.Demerara: Replace the Demerara with sparkling sugar, turbinado sugar or additional brown sugar.Chocolate Chips: Use dark or semi-sweet chocolate chips, regular size or mini…it’s up to you!Resting Your Muffin Batter: This extra step lets the gluten relax and the flour absorb some of the moisture in the batter, which results in a tender, puffier muffin that bakes beautifully! I recipe tested three different Rest Times:20 Minutes: This is my go-to rest time. It doesn’t take much time, and you can preheat the oven and clean up the kitchen while it takes place. Love. 60 Minutes: I didn’t see much difference between 20 minutes vs 60 minutes, so use the timing that works best for you. Overnight: This is my second favorite option! I love making the batter the night before and then baking them fresh in the morning. Take the muffin batter out of the fridge, then preheat the oven and prep your muffin pan. The batter will have thickened overnight, so make sure to gently spread it evenly in the muffin tin so they rise evenly (I use the back of a spoon). If the batter is still cold, the chocolate chip muffins will need a few extra minutes of bake time.Muffin Size & Quantity: The size of your muffin tin will influence how many muffins the recipe yields. Homemade muffin liners tend to result in fewer muffins because they need more muffin batter.Storing Chocolate Chip Muffins: Store your baked muffins in an airtight container at room temperature for several days. The sugar topping will soften after 24 hours…but trust me, they’re still so delicious!!
PrintThe Best Bakery-Style Chocolate Chip Muffins (I Couldn’t Stop Eating Them!)#wprm-recipe-user-rating-0 .wprm-rating-star.wprm-rating-star-full svg * { fill: #343434; }#wprm-recipe-user-rating-0 .wprm-rating-star.wprm-rating-star-33 svg * { fill: url(#wprm-recipe-user-rating-0-33); }#wprm-recipe-user-rating-0 .wprm-rating-star.wprm-rating-star-50 svg * { fill: url(#wprm-recipe-user-rating-0-50); }#wprm-recipe-user-rating-0 .wprm-rating-star.wprm-rating-star-66 svg * { fill: url(#wprm-recipe-user-rating-0-66); }linearGradient#wprm-recipe-user-rating-0-33 stop { stop-color: #343434; }linearGradient#wprm-recipe-user-rating-0-50 stop { stop-color: #343434; }linearGradient#wprm-recipe-user-rating-0-66 stop { stop-color: #343434; }#wprm-recipe-user-rating-0.wprm-user-rating-allowed.wprm-user-rating-not-voted:not(.wprm-user-rating-voting) svg * { fill-opacity: 0.3; }These moist, tender Chocolate Chip Muffins topped with crunchy brown sugar-cinnamon come together quickly in an easy, one-bowl recipe. You will not be able to stop with these addictive treats!Course Breakfast, Brunch, SnackCuisine AmericanKeyword Chocolate Chip, Sour Cream, Muffins, Rebecca Firth, DisplacedHousewife Well-Tested RecipePrep Time 13 minutes minutesCook Time 20 minutes minutesRest Time (optional) 20 minutes minutesTotal Time 53 minutes minutesServings 13 MuffinsAuthor Rebecca FirthEquipmentBaking ScaleRegular Muffin Pan#40 2-TBSP Cookie ScoopSpatulaIngredientsFor the Chocolate Chip Muffin Base1 cup (200 g) granulated sugar8 tablespoons (113 g) unsalted butter room temperature1 tablespoon (14 g) cooking oil such as olive oil, sunflower or grapeseed oil1 tablespoon (13 g) real vanilla extract1 teaspoon cinnamon¼ teaspoon nutmeg2 large eggs room temperature1/3 cup (82 g) full-fat sour cream room temperature2 teaspoons baking powder1/2 teaspoon baking soda1 teaspoon sea salt2 cups + 2 tablespoons (281 g) all-purpose flour how to measure flour1 cup (240 g) buttermilk shaken and at room temperature1 ½ cups (255 g) mini dark chocolate chips reserve about 1/3 cup (57 g) to sprinkle over the tops of the muffins; see chocolate chip notes below the recipeBrown Sugar-Cinnamon Topping1 tablespoon (14 g) light or dark brown sugar packed1 tablespoon (12 g) Demerara sugar see Notes below for substitutions1 tablespoon (12 g) granulated sugar1 teaspoon cinnamonInstructionsTo Make The Chocolate Chip Muffin BatterIn the bowl of an electric stand mixer fitted with the paddle attachment, add the sugar, butter, oil, vanilla, cinnamon and nutmeg, and mix on medium for 4 to 5 minutes or until the texture is light and fluffy. Take a big whiff; it smells delicious.
*This muffin recipe can also be made with a handheld mixer or with a bowl and a spatula.
Add the eggs, one at a time, making sure the first is well blended before adding in the second. With a spatula, scrape the sides and bottom of the bowl to make sure everything is well combined. Add the sour cream, baking powder, baking soda and salt, and mix on low for 1 minute or until well blended. It should look light, fluffy and whipped.
*It may curdle a bit at this stage, that's ok!
Take the bowl out of the stand mixer, and alternate adding the flour and buttermilk in two batches, stirring each addition until barely combined. Set aside 1/3 cup (57 g) of chocolate chips to sprinkle over the tops of the muffins just before they go into the oven. Fold the remaining chocolate chips into the muffin batter until just combined and evenly distributed throughout. Rest The Muffin BatterAt this point, you can cover the muffin batter bowl and let it rest at room temperature for 20 to 60 minutes for a higher muffin top and/or stash it in the fridge (in an airtight container) until the following day (see
Notes
below the recipe for more information).Preheat the oven to 425°F (220°C) and line every other muffin well of your muffin pan with paper liners. Alternatively, you can grease and flour the muffin tin or use a nonstick baking spray.Prep Your Muffins for The OvenIn a small bowl, whisk together the brown sugar, Demerara sugar, granulated sugar and cinnamon. Set aside.Scoop the muffin batter into the prepared muffin tins, filling every other muffin liner until almost full. Sprinkle the brown sugar-cinnamon topping evenly over the tops (about 1/2 teaspoon per muffin), and then sprinkle with the reserved chocolate chips.Time to Bake!Bake for 5 minutes in the center of the oven and then reduce the oven temperature to 350℉ (177℃) and bake for 15 minutes more. When done, the tops will be light golden brown and puffed up. Your kitchen will smell amazing!For best results, bake one muffin pan at a time. Let cool in the muffin pan for about 5ish minutes. Use a butter knife to get the warm muffins out of the hot pan and transfer them to a wire rack to finish cooling. These chocolate chip muffins are delicious warm or at room temperature—you can't go wrong!NotesIngredient Substitutions: Since some iteration of this muffin base is used for my Raspberry, Blackberry and Coffee Cake Muffins (and more!), I have tested this recipe with different ingredient variations. Below, find the substitutions that I use the most:Sour Cream: Feel free to use a full-fat yogurt (Greek yogurt would be ideal) in place of the sour cream.Buttermilk: Measure out 1 cup (240 g) of milk and then omit 1 tablespoon (15 g). Then add in 1 tablespoon (15 g) of white vinegar. Let the mixture sit for 10 minutes before using. You can also just use water or milk (without the vinegar), but I love the acidity that the buttermilk (or faux buttermilk) provides.Demerara: Replace the Demerara with sparkling sugar, turbinado sugar or additional brown sugar.Chocolate Chips: Use dark or semi-sweet chocolate chips, regular size or mini…it’s up to you!Resting Your Muffin Batter: This extra step lets the gluten relax and the flour absorb some of the moisture in the batter, which results in a tender, puffier muffin that bakes beautifully! I recipe tested three different Rest Times:20 Minutes: This is my go-to rest time. It doesn’t take much time, and you can preheat the oven and clean up the kitchen while it takes place. Love. 60 Minutes: I didn’t see much difference between 20 minutes vs 60 minutes, so use the timing that works best for you. Overnight: This is my second favorite option! I love making the batter the night before and then baking them fresh in the morning. Take the muffin batter out of the fridge, then preheat the oven and prep your muffin pan. The batter will have thickened overnight, so make sure to gently spread it evenly in the muffin tin so they rise evenly (I use the back of a spoon). If the batter is still cold, the chocolate chip muffins will need a few extra minutes of bake time.Muffin Size & Quantity: The size of your muffin tin will influence how many muffins the recipe yields. Homemade muffin liners tend to result in fewer muffins because they need more muffin batter.Storing Chocolate Chip Muffins: Store your baked muffins in an airtight container at room temperature for several days. The sugar topping will soften after 24 hours…but trust me, they’re still so delicious!!The post The Best Bakery-Style Chocolate Chip Muffins (I Can’t Stop Eating Them!) appeared first on DisplacedHousewife.
September 13, 2025
Absolutely Perfect Homemade Apple Cinnamon Scones Recipe
I wanted these Apple Cinnamon Scones to truly taste like fall in your mouth. A burst of autumn in every bite.
I also had some very specific goals with this specific scone:
The recipe needed to be incredibly easy, the kind you can make on a sleepy Sunday morning. This recipe is one of my one-bowl-ish recipes: you’ll need just one bowl and one liquid measuring cup.They needed to be bursting with flavor! I wanted a big hug from warm spices and cozy flavors. The finely diced apples are tossed with brown sugar, cinnamon and nutmeg, and then more spice is added to the scone dough. So flipping cozy.Low-maintenance ingredients. What do I mean by this? You should already have all of the ingredients. If you don’t have the buttermilk, you can easily substitute it with milk + an acid (apple cider vinegar or regular white vinegar will do just fine). For more information, see the Notes section immediately below the recipe.Planning ahead? You can totally make the apple scone dough the night before. Freeze the unbaked scones overnight, and in the morning, they’ll bake up just as puffy and fabulous—just add a couple of extra minutes to the oven time. Check the Notes below the recipe for more info!
Light a candle, put on your favorite fluffy socks and make some delicious and easy apple scones!
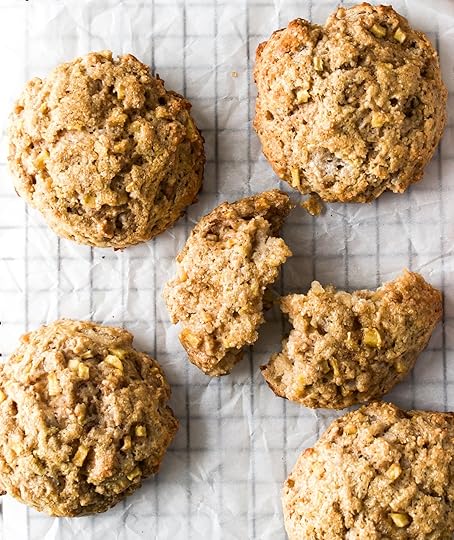 The Baker’s Guide to Measuring Flour
One of the biggest (and most common) mistakes in baking is how we measure flour. If you find yourself without a scale, see my top tips on how to properly measure flour for the perfect amount every time!
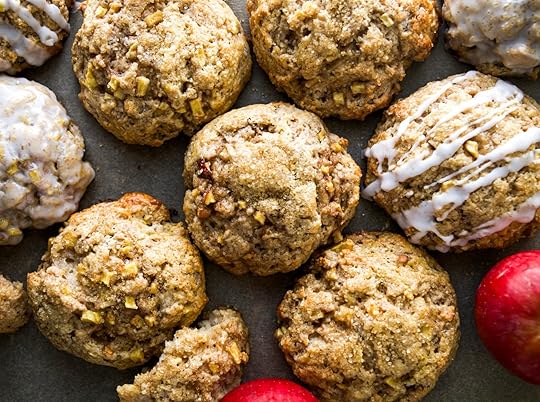
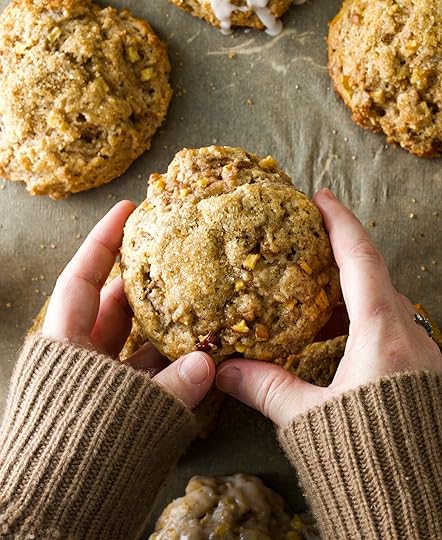 My Favorite Pro Baking Tips for Making Perfect Apple Scones!Make Sure All of Your Ingredients Are Very Cold
Scone dough comes together so quickly, I’m not even exaggerating. One of the first things I do when I make scones is turn on the oven, and then I whisk together the buttermilk and egg, cut up the butter and set both items in the fridge while I gather the remaining ingredients to assemble the scone dough.
This ensures that they’re super cold when you’re ready to mix them into the dough.
Don’t Over-mix The ButterYou don’t want the butter well blended into the dough. You want to stop mixing the butter into the flour mixture once you still see pea-sized chunks of butter.
Definitely Don’t Over-Mix The Scone DoughOver-mixing the dough will lead to tough scones, and nobody wants that! *Just* barely mix the buttermilk into the dough. You want to still see visible streaks of flour. When you add in the spiced apples, mix until just blended again. This will ensure that you use a gentle hand with your scone and are rewarded with tender, moist scones!
Let’s bake the best cinnamon apple scones!
 Step-by-Step Photos & Instructions for
 Making Delicious Apple Cinnamon Scones
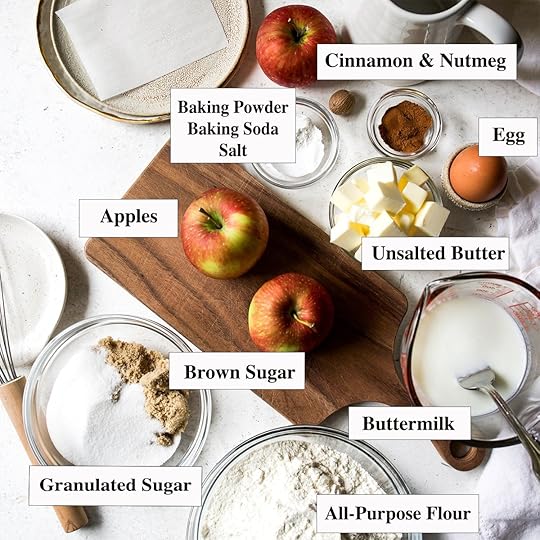 STEP 1: Gather your ingredients: apples, all-purpose flour, light brown sugar, granulated sugar, cinnamon, nutmeg, baking powder, baking soda, salt, butter, egg and buttermilk. If you want to use the optional (but I think necessary ;) garnish: my
favorite egg wash
and Demerara sugar (not pictured).
STEP 1: Gather your ingredients: apples, all-purpose flour, light brown sugar, granulated sugar, cinnamon, nutmeg, baking powder, baking soda, salt, butter, egg and buttermilk. If you want to use the optional (but I think necessary ;) garnish: my
favorite egg wash
and Demerara sugar (not pictured).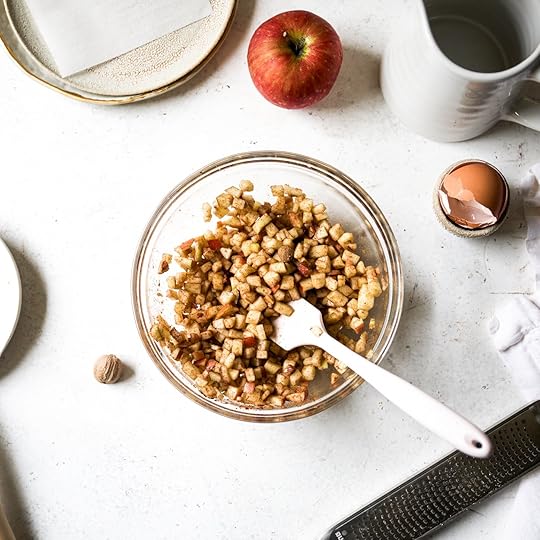 STEP 2: In a medium bowl, mix to combine apples, brown sugar, cinnamon and nutmeg. Set aside.
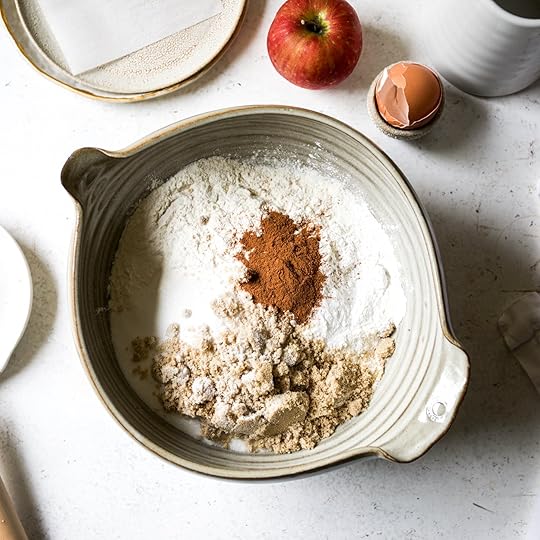 STEP 3: In a large mixing bowl, whisk together flour, brown sugar, sugar, baking powder, cinnamon, baking soda and salt.
 STEP 4: Cut the butter into the flour using a pastry blender or your hands…
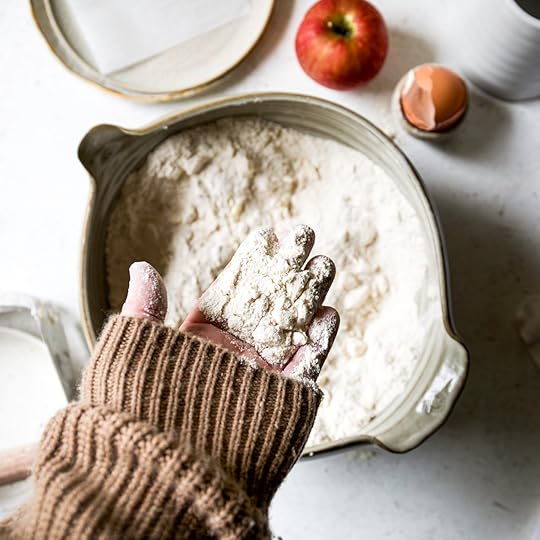 STEP 4: Mix until the butter is the size of frozen peas and looks like this.
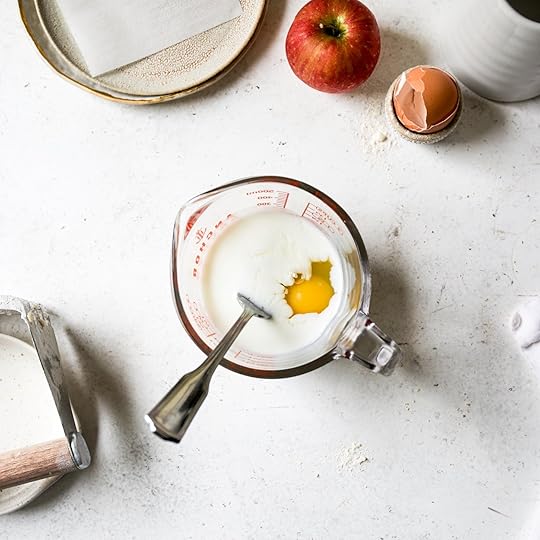 STEP 5: In a small bowl or liquid measuring cup, whisk together the buttermilk and egg.
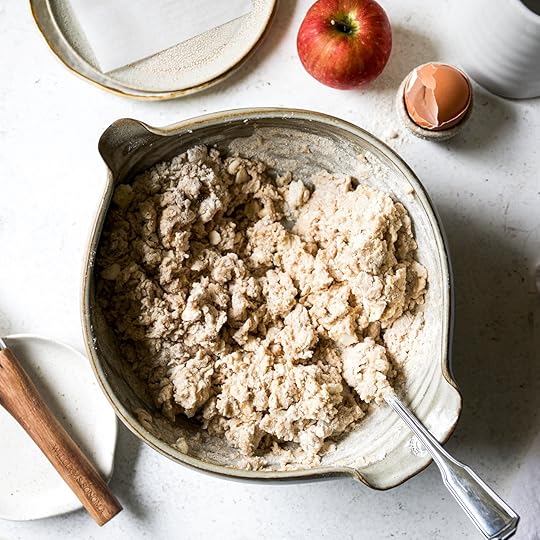 STEP 6: Use a fork to combine the milk into the mixture, mixing until the dough is *just* coming together and you still see streaks of flour.
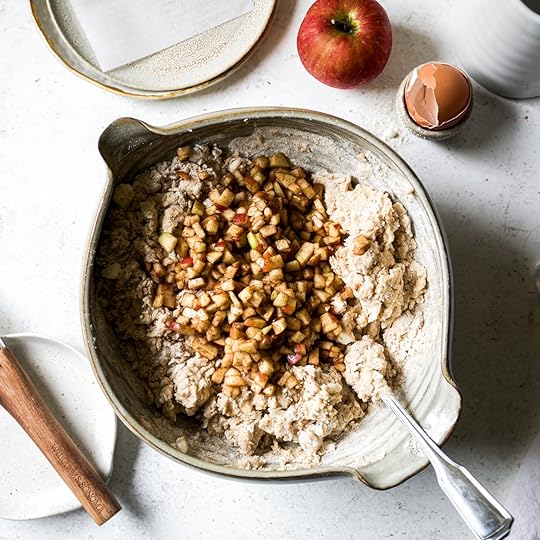 STEP 7: Add the apples…
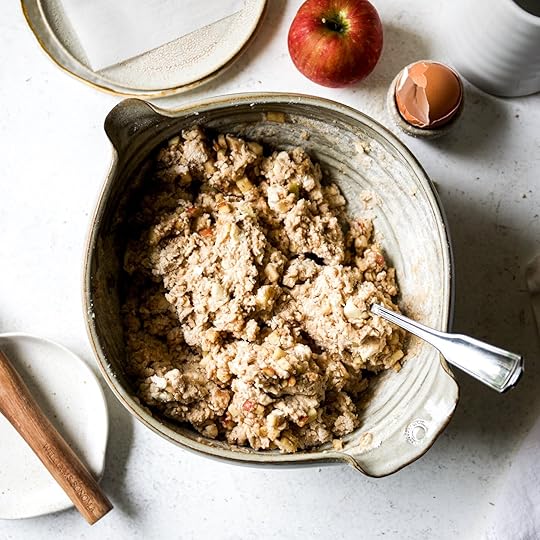 STEP 8: Stir until just combined. Don’t overwork your dough.
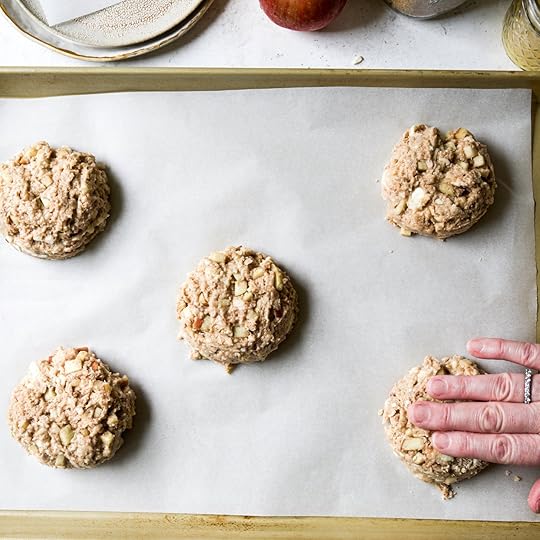 STEP 9: Portion out the dough and gently press each scone down into a disc.
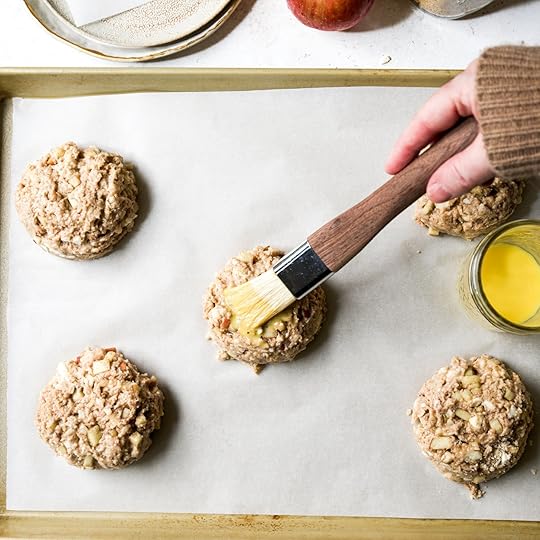 STEP 10: Lightly brush each with egg wash…
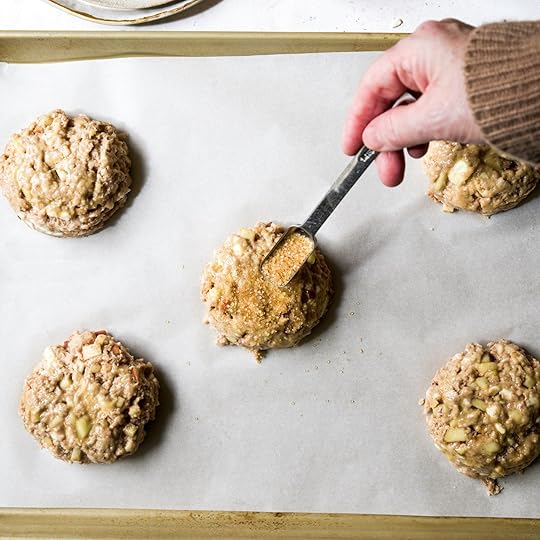 STEP 11: And then sprinkle each scone with 1/2 to 3/4 teaspoon Demerara sugar.
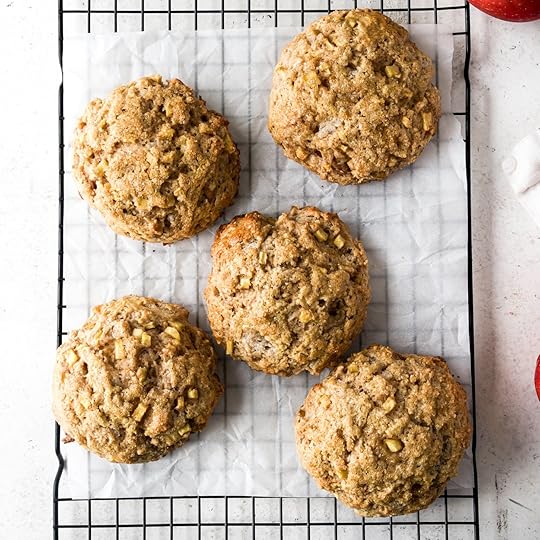 STEP 12: Immediately transfer the fresh-baked scones to a wire rack to cool…Although I always love to eat a warm one! If using the vanilla glaze (linked just below the recipe), wait until the scones have cooled completely before drizzling.
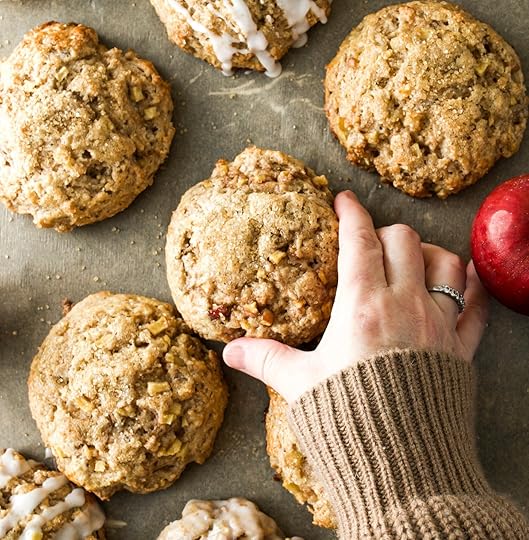 More Delicious Apple Recipes
 Don’t miss this Apple Cinnamon Pull-Apart Bread (that will make your house smell like heaven!) and this dreamy Easy Apple Cake with a crunchy cinnamon-sugar top!
You can find all of the apple recipes here!
I hope you love these moist apple scones as much as we do!
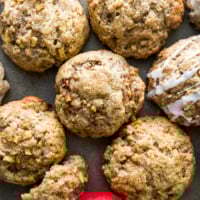 PrintAbsolutely Perfect Homemade Apple Cinnamon Scones#wprm-recipe-user-rating-0 .wprm-rating-star.wprm-rating-star-full svg * { fill: #343434; }#wprm-recipe-user-rating-0 .wprm-rating-star.wprm-rating-star-33 svg * { fill: url(#wprm-recipe-user-rating-0-33); }#wprm-recipe-user-rating-0 .wprm-rating-star.wprm-rating-star-50 svg * { fill: url(#wprm-recipe-user-rating-0-50); }#wprm-recipe-user-rating-0 .wprm-rating-star.wprm-rating-star-66 svg * { fill: url(#wprm-recipe-user-rating-0-66); }linearGradient#wprm-recipe-user-rating-0-33 stop { stop-color: #343434; }linearGradient#wprm-recipe-user-rating-0-50 stop { stop-color: #343434; }linearGradient#wprm-recipe-user-rating-0-66 stop { stop-color: #343434; }#wprm-recipe-user-rating-0.wprm-user-rating-allowed.wprm-user-rating-not-voted:not(.wprm-user-rating-voting) svg * { fill-opacity: 0.3; }Brace your taste buds for all of the fall flavors: finely diced fresh apples, cinnamon, nutmeg and brown sugar all nestled in the apple scone of your dreams!Course Breakfast, SnackCuisine ScottishKeyword Apple, Cinnamon, Scones, Rebecca Firth, DisplacedHousewife Well-Tested RecipePrep Time 15 minutes minutesCook Time 21 minutes minutesChill Time 30 minutes minutesTotal Time 36 minutes minutesServings 8 ServingsAuthor Rebecca FirthEquipmentBaking ScalePastry BlenderPastry BrushExtra-Large Muffin ScoopIngredientsTo Start1 1/2 cup (148 g) apples finely diced; about 1 to 2 small, unpeeled, cored apples1 tablespoon (14 g) light brown sugar packed1 teaspoon cinnamon½ teaspoon nutmegFor the Scone Dough2 2/3 cups (360 g) all-purpose flour1/3 cup (73 g) light brown sugar packed1/3 cup (67 g) granulated sugar1 ½ teaspoons cinnamon2 teaspoons baking powder1/2 teaspoon baking soda1/2 teaspoon sea salt9 tablespoons (127 g) unsalted butter very cold and cut in 32 pieces3/4 cup (180 g) buttermilk cold and shaken; see Notes below recipe1 large egg coldTo Garnish1 batch Perfect Egg WashDemerara or sparkling sugarInstructionsTo StartLine several baking sheets with parchment paper. Set aside.In a medium mixing bowl, combine the finely chopped apples, brown sugar, cinnamon and nutmeg, mixing to evenly coat the apples in sugar and spices. Set aside.For the Apple Scone DoughIn a large bowl, whisk together the flour, brown sugar, granulated sugar, baking powder, cinnamon, baking soda and sea salt. Cut the cold butter pieces into the flour mixture using a pastry blender or your hands. I like to mix until I see small pieces, about the size of peas.Mix the cold egg and 3/4 cup (180 g) of buttermilk together in a small bowl, and then drizzle over the flour mixture. Use a fork, stirring until it just starts to form into a rough dough and you still see streaks of flour in the dough.Add the apple mixture to the scone dough. I like to use a fold and press technique when adding the apples (or you can use a fork, like in the photos). Fold half of the dough onto itself and gently press down so that the apples are in the middle. Don't overmix your dough. It will look shaggy and barely holding together, with some visible scant flour patches. That's perfect.Cover and set the dough in the fridge for 20 minutes. Preheat the oven to 375℉ (191℃).Use a 1/2 cup muffin/cupcake scoop or 1/2 cup measuring cup to portion out 8 mounds of dough on the prepared baking sheet, leaving 3-inches (8-cm) between scones. Gently press down the tops to level a bit and press in any jagged areas on the sides of the scones. You want the dough cohesive but not packed.Garnish & Bake Make 1 batch of my
favorite Egg Wash
and then brush it over the tops of the scones. Take care not to let the wash pool on the tops or sides of the scones. Sprinkle the tops of the scones with Demerara sugar or sparkling sugar.Set the baking sheet in the freezer or refrigerator for 10 minutes and then immediately bake in the center of the oven for 20 to 22 minutes. You want these *just* baked, so keep an eye on them. As soon as the top is set, they're done. They will be golden brown around the edges and lightly golden over the tops. Once out of the oven, transfer the scones to a wire rack to finish cooling. Slightly warm scones are heaven, dig in!NotesGreat Apples for SconesSome of my favorite baking apples: Granny Smith Apples, Cosmic Crisp, Honeycrisp Apples, Fuji and Gala…and I think these are all pretty readily available at your local grocery store. I am having a love affair with Cosmic Crisp at the moment; they are just SO DELICIOUS.Buttermilk SubstituteYou can use milk in place of the buttermilk. Measure out 3/4 cup (180 g) of buttermilk and remove 1 tablespoon (13 g). Replace with 1 tablespoon (13 g) of either apple cider vinegar or white vinegar (you can even use fresh lemon juice; you just need something acidic). Do this as soon as you decide to make the scones, so it can curdle the milk a bit.Scone VariationsSpices: Allspice, cardamom and ginger would all be delicious in here. I would start with 1/4 to 1/2 teaspoon, depending on how much flavor you’re looking for. Nuts: Finely chopped, toasted walnuts or pecans tossed with the apples at the beginning would be delicious. Making More SconesYou can make smaller scones (yay, more scones for everyone!). Use a 1/3 cup to portion them out, which will yield about 11 scones. Bake them for 18 to 19 minutes.Adding GlazeThese are really delicious with some
vanilla glaze
over the tops. I tested them with just a drizzle as well as fully dunking the fresh-baked (and cooled) scone. These latter scones had apple fritter vibes, and I was here for it!This
cream cheese glaze
would be equally delicious!Storing SconesScones are best, I think, the day they are made. Store any remaining scones at room temperature in an airtight container. They’ll last for several days.Freezing Scone DoughThis is my favorite way to store scones if I know that we won’t be eating all of them. Mix and prep the dough all the way up to just before baking them. Set the baking sheet in the freezer for several hours. Once the scones are frozen solid, wrap each individual scone in plastic wrap and then set in an airtight container in the freezer. When ready to bake, unwrap the scone(s) and place on a parchment-lined baking sheet and then pre-heat the oven. They will need 2 to 3 extra minutes of bake time. Enjoy!These Are Different Then My Usual Scones:If you love my usual scones, I promise you will love these too! This scone doesn’t use any cake flour or heavy whipping cream. These also bake at a slightly lower temperature, for slightly longer. If you’re looking for a cream scone, check out my favorite
Maple Oat Scones
! If you’re looking for buttermilk scone that uses cake flour, check out these Blueberry Scones (swoon). You can find all of the
scone recipes
here!Ok, get your scone on! xo
PrintAbsolutely Perfect Homemade Apple Cinnamon Scones#wprm-recipe-user-rating-0 .wprm-rating-star.wprm-rating-star-full svg * { fill: #343434; }#wprm-recipe-user-rating-0 .wprm-rating-star.wprm-rating-star-33 svg * { fill: url(#wprm-recipe-user-rating-0-33); }#wprm-recipe-user-rating-0 .wprm-rating-star.wprm-rating-star-50 svg * { fill: url(#wprm-recipe-user-rating-0-50); }#wprm-recipe-user-rating-0 .wprm-rating-star.wprm-rating-star-66 svg * { fill: url(#wprm-recipe-user-rating-0-66); }linearGradient#wprm-recipe-user-rating-0-33 stop { stop-color: #343434; }linearGradient#wprm-recipe-user-rating-0-50 stop { stop-color: #343434; }linearGradient#wprm-recipe-user-rating-0-66 stop { stop-color: #343434; }#wprm-recipe-user-rating-0.wprm-user-rating-allowed.wprm-user-rating-not-voted:not(.wprm-user-rating-voting) svg * { fill-opacity: 0.3; }Brace your taste buds for all of the fall flavors: finely diced fresh apples, cinnamon, nutmeg and brown sugar all nestled in the apple scone of your dreams!Course Breakfast, SnackCuisine ScottishKeyword Apple, Cinnamon, Scones, Rebecca Firth, DisplacedHousewife Well-Tested RecipePrep Time 15 minutes minutesCook Time 21 minutes minutesChill Time 30 minutes minutesTotal Time 36 minutes minutesServings 8 ServingsAuthor Rebecca FirthEquipmentBaking ScalePastry BlenderPastry BrushExtra-Large Muffin ScoopIngredientsTo Start1 1/2 cup (148 g) apples finely diced; about 1 to 2 small, unpeeled, cored apples1 tablespoon (14 g) light brown sugar packed1 teaspoon cinnamon½ teaspoon nutmegFor the Scone Dough2 2/3 cups (360 g) all-purpose flour1/3 cup (73 g) light brown sugar packed1/3 cup (67 g) granulated sugar1 ½ teaspoons cinnamon2 teaspoons baking powder1/2 teaspoon baking soda1/2 teaspoon sea salt9 tablespoons (127 g) unsalted butter very cold and cut in 32 pieces3/4 cup (180 g) buttermilk cold and shaken; see Notes below recipe1 large egg coldTo Garnish1 batch Perfect Egg WashDemerara or sparkling sugarInstructionsTo StartLine several baking sheets with parchment paper. Set aside.In a medium mixing bowl, combine the finely chopped apples, brown sugar, cinnamon and nutmeg, mixing to evenly coat the apples in sugar and spices. Set aside.For the Apple Scone DoughIn a large bowl, whisk together the flour, brown sugar, granulated sugar, baking powder, cinnamon, baking soda and sea salt. Cut the cold butter pieces into the flour mixture using a pastry blender or your hands. I like to mix until I see small pieces, about the size of peas.Mix the cold egg and 3/4 cup (180 g) of buttermilk together in a small bowl, and then drizzle over the flour mixture. Use a fork, stirring until it just starts to form into a rough dough and you still see streaks of flour in the dough.Add the apple mixture to the scone dough. I like to use a fold and press technique when adding the apples (or you can use a fork, like in the photos). Fold half of the dough onto itself and gently press down so that the apples are in the middle. Don't overmix your dough. It will look shaggy and barely holding together, with some visible scant flour patches. That's perfect.Cover and set the dough in the fridge for 20 minutes. Preheat the oven to 375℉ (191℃).Use a 1/2 cup muffin/cupcake scoop or 1/2 cup measuring cup to portion out 8 mounds of dough on the prepared baking sheet, leaving 3-inches (8-cm) between scones. Gently press down the tops to level a bit and press in any jagged areas on the sides of the scones. You want the dough cohesive but not packed.Garnish & Bake Make 1 batch of my
favorite Egg Wash
and then brush it over the tops of the scones. Take care not to let the wash pool on the tops or sides of the scones. Sprinkle the tops of the scones with Demerara sugar or sparkling sugar.Set the baking sheet in the freezer or refrigerator for 10 minutes and then immediately bake in the center of the oven for 20 to 22 minutes. You want these *just* baked, so keep an eye on them. As soon as the top is set, they're done. They will be golden brown around the edges and lightly golden over the tops. Once out of the oven, transfer the scones to a wire rack to finish cooling. Slightly warm scones are heaven, dig in!NotesGreat Apples for SconesSome of my favorite baking apples: Granny Smith Apples, Cosmic Crisp, Honeycrisp Apples, Fuji and Gala…and I think these are all pretty readily available at your local grocery store. I am having a love affair with Cosmic Crisp at the moment; they are just SO DELICIOUS.Buttermilk SubstituteYou can use milk in place of the buttermilk. Measure out 3/4 cup (180 g) of buttermilk and remove 1 tablespoon (13 g). Replace with 1 tablespoon (13 g) of either apple cider vinegar or white vinegar (you can even use fresh lemon juice; you just need something acidic). Do this as soon as you decide to make the scones, so it can curdle the milk a bit.Scone VariationsSpices: Allspice, cardamom and ginger would all be delicious in here. I would start with 1/4 to 1/2 teaspoon, depending on how much flavor you’re looking for. Nuts: Finely chopped, toasted walnuts or pecans tossed with the apples at the beginning would be delicious. Making More SconesYou can make smaller scones (yay, more scones for everyone!). Use a 1/3 cup to portion them out, which will yield about 11 scones. Bake them for 18 to 19 minutes.Adding GlazeThese are really delicious with some
vanilla glaze
over the tops. I tested them with just a drizzle as well as fully dunking the fresh-baked (and cooled) scone. These latter scones had apple fritter vibes, and I was here for it!This
cream cheese glaze
would be equally delicious!Storing SconesScones are best, I think, the day they are made. Store any remaining scones at room temperature in an airtight container. They’ll last for several days.Freezing Scone DoughThis is my favorite way to store scones if I know that we won’t be eating all of them. Mix and prep the dough all the way up to just before baking them. Set the baking sheet in the freezer for several hours. Once the scones are frozen solid, wrap each individual scone in plastic wrap and then set in an airtight container in the freezer. When ready to bake, unwrap the scone(s) and place on a parchment-lined baking sheet and then pre-heat the oven. They will need 2 to 3 extra minutes of bake time. Enjoy!These Are Different Then My Usual Scones:If you love my usual scones, I promise you will love these too! This scone doesn’t use any cake flour or heavy whipping cream. These also bake at a slightly lower temperature, for slightly longer. If you’re looking for a cream scone, check out my favorite
Maple Oat Scones
! If you’re looking for buttermilk scone that uses cake flour, check out these Blueberry Scones (swoon). You can find all of the
scone recipes
here!Ok, get your scone on! xo The post Absolutely Perfect Homemade Apple Cinnamon Scones Recipe appeared first on DisplacedHousewife.
September 10, 2025
How To Make The Best Cream Cheese Glaze (Recipe!)
I can’t think of a better way to add jazz hands to your baked goods than adding some cream cheese glaze. It’s the perfect combination of creamy and tangy. *And* when spread across the tops of sweet treats, it’s the perfect balance to that sweetness. And bonus, it looks beautiful!
This cream cheese glaze recipe is ready in minutes and uses six easy-to-find ingredients. I use both cream cheese and butter in this glaze for the ideal taste and texture (you will love it!).
This quick and easy recipe is perfect as a glaze or icing for:
Covering cinnamon rolls Gracing the top of loaf cakes Smeared over scones Spread across muffins and donutsAnd on cookies (it would be delicious on these sugar cookies !)For more details on using this recipe as icing vs a glaze, see the Notes section below the recipe on adapting the consistency for your needs.
Have fun with this delicious glaze!
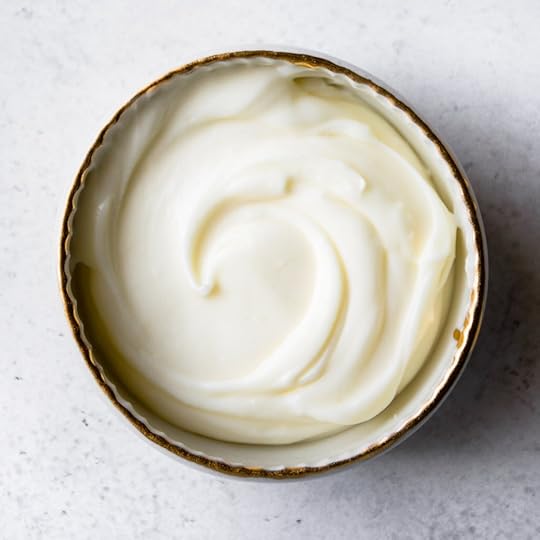
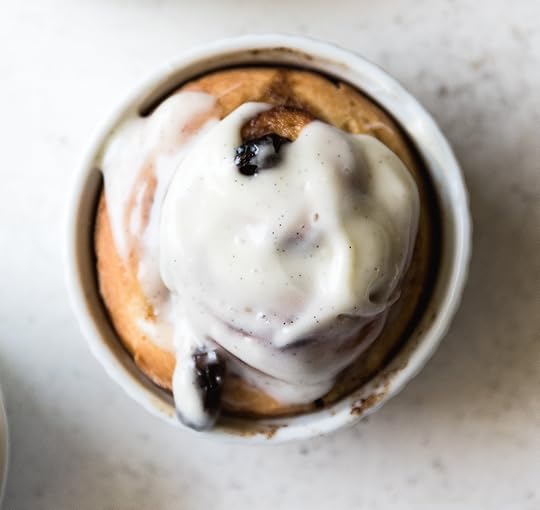 Delicious Recipes That Use Cream Cheese Glaze
This glaze works perfectly with this Cinnamon Apple Pull-Apart Bread (that tastes like a cinnamon roll!). It would also be delicious over these pumpkin muffins.
You can find all of the glaze and buttercream recipes here!
Have fun with this tangy glaze recipe!
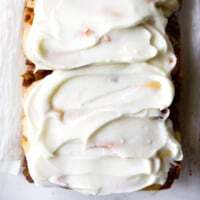 PrintHow to Make the Best Cream Cheese Glaze (Recipe!)#wprm-recipe-user-rating-0 .wprm-rating-star.wprm-rating-star-full svg * { fill: #343434; }#wprm-recipe-user-rating-0 .wprm-rating-star.wprm-rating-star-33 svg * { fill: url(#wprm-recipe-user-rating-0-33); }#wprm-recipe-user-rating-0 .wprm-rating-star.wprm-rating-star-50 svg * { fill: url(#wprm-recipe-user-rating-0-50); }#wprm-recipe-user-rating-0 .wprm-rating-star.wprm-rating-star-66 svg * { fill: url(#wprm-recipe-user-rating-0-66); }linearGradient#wprm-recipe-user-rating-0-33 stop { stop-color: #343434; }linearGradient#wprm-recipe-user-rating-0-50 stop { stop-color: #343434; }linearGradient#wprm-recipe-user-rating-0-66 stop { stop-color: #343434; }#wprm-recipe-user-rating-0.wprm-user-rating-allowed.wprm-user-rating-not-voted:not(.wprm-user-rating-voting) svg * { fill-opacity: 0.3; }Five minutes and six ingredients yield the creamiest, tangiest, most delicious cream cheese glaze recipe perfect for cakes, cinnamon rolls, muffins and more!Course Dessert, SnackCuisine AmericanKeyword Cream Cheese, Glaze, Icing, Rebecca Firth, DisplacedHousewife Well-Tested RecipePrep Time 5 minutes minutesTotal Time 5 minutes minutesServings 1 BatchAuthor Rebecca FirthEquipmentSpatulaBaking ScaleIngredients3 1/2 ounces (103 g) cream cheese room temperature3 tablespoons (42 g) unsalted butter room temperature1/2 vanilla bean (split & scraped) or 2 teaspoons vanilla bean paste or real vanilla extract2 cup (240 g) confectioners' sugar sifted5 tablespoons (55 g) heavy whipping cream room temperature1 tablespoon (15 g) whole milk room temperatureInstructionsIn a medium mixing bowl, use a silicone spatula to cream together the cream cheese, butter and vanilla until very smooth and no lumps remain.Add in the confectioners' sugar, stirring until a thick paste forms. Again, make sure there aren't any remaining lumps.Slowly mix in the cream and milk, stirring really well to combine. Use immediately. See note below on adjusting the consistency.NotesMy Favorite Cream CheeseI recommend
Philadelphia
cream cheese for the best flavor and texture!Room Temperature IngredientsIt is imperative, for the creaminess and smoothness of this glaze, that the butter, cream cheese, cream and milk are at room temperature. The cream cheese and butter will be lumpy and resist combining if they are cold.You can give them a short blitz in the microwave to soften them up. Just don’t let them get hot or turn liquid as that will affect the consistency of the cream cheese glaze.Adjusting the Glaze Consistency & QuantityThe recipe as written is perfect for cinnamon rolls and is the glaze I’ve been using on my cinnamon rolls for YEARS!If using this recipe for a loaf cake, you’ll want to halve the recipe. For best results, use the weight measurements.If you want to use as a thick icing, for say cookies, then start with half of the cream and milk, whisking until you get the desired consistency. If you want a thinner, pourable glaze, make the recipe as noted above and then add milk in 1 tablespoon increments. Whisking well with each addition until you reach the desired consistency.Glaze Variations
For Spiced Cream Cheese Glaze…
You could add all kinds of spices into this…I’m specifically thinking of cinnamon, nutmeg and perhaps some cardamom and/or allspice. I would start with a small amount (1/4 to 1/2 teaspoon), taste and adjust.
For Vanilla Cream Cheese Glaze…
Real vanilla bean makes my heart sing. The combination of taste and appearance (those flecks of vanilla get me) completely elevates a treat. I would use 1/2 of a vanilla bean, split with a paring knife and seeds scraped. As noted in the recipe, you can use vanilla bean paste and real vanilla extract in place of the vanilla bean.The photos above show it with and without vanilla bean flecks.
For Boozy Cream Cheese Glaze…
You can never go wrong with adding booze to glazes and buttercream. For this, I would do something in the bourbon, rum or cognac realm. Replace the milk with booze 1:1.
Using Just Milk or Just Cream For the Recipe…
Heavy whipping cream yields a thicker glaze, period. In a pinch, however, you can substitute milk for the cream, you’ll just get a thinner glaze…which is fine. Start with 1 tablespoon of milk and add more as needed.Conversely, if you use all whipped cream, you will need to add more liquid to the glaze.Make AheadThe glaze can be made ahead of time and stored in an air-tight container in the fridge until ready to use. I wouldn’t make it more than a day or two ahead of time. Bring it closer to room temperature before using. You may need to add additional cream or milk to get it back to the proper consistency.
PrintHow to Make the Best Cream Cheese Glaze (Recipe!)#wprm-recipe-user-rating-0 .wprm-rating-star.wprm-rating-star-full svg * { fill: #343434; }#wprm-recipe-user-rating-0 .wprm-rating-star.wprm-rating-star-33 svg * { fill: url(#wprm-recipe-user-rating-0-33); }#wprm-recipe-user-rating-0 .wprm-rating-star.wprm-rating-star-50 svg * { fill: url(#wprm-recipe-user-rating-0-50); }#wprm-recipe-user-rating-0 .wprm-rating-star.wprm-rating-star-66 svg * { fill: url(#wprm-recipe-user-rating-0-66); }linearGradient#wprm-recipe-user-rating-0-33 stop { stop-color: #343434; }linearGradient#wprm-recipe-user-rating-0-50 stop { stop-color: #343434; }linearGradient#wprm-recipe-user-rating-0-66 stop { stop-color: #343434; }#wprm-recipe-user-rating-0.wprm-user-rating-allowed.wprm-user-rating-not-voted:not(.wprm-user-rating-voting) svg * { fill-opacity: 0.3; }Five minutes and six ingredients yield the creamiest, tangiest, most delicious cream cheese glaze recipe perfect for cakes, cinnamon rolls, muffins and more!Course Dessert, SnackCuisine AmericanKeyword Cream Cheese, Glaze, Icing, Rebecca Firth, DisplacedHousewife Well-Tested RecipePrep Time 5 minutes minutesTotal Time 5 minutes minutesServings 1 BatchAuthor Rebecca FirthEquipmentSpatulaBaking ScaleIngredients3 1/2 ounces (103 g) cream cheese room temperature3 tablespoons (42 g) unsalted butter room temperature1/2 vanilla bean (split & scraped) or 2 teaspoons vanilla bean paste or real vanilla extract2 cup (240 g) confectioners' sugar sifted5 tablespoons (55 g) heavy whipping cream room temperature1 tablespoon (15 g) whole milk room temperatureInstructionsIn a medium mixing bowl, use a silicone spatula to cream together the cream cheese, butter and vanilla until very smooth and no lumps remain.Add in the confectioners' sugar, stirring until a thick paste forms. Again, make sure there aren't any remaining lumps.Slowly mix in the cream and milk, stirring really well to combine. Use immediately. See note below on adjusting the consistency.NotesMy Favorite Cream CheeseI recommend
Philadelphia
cream cheese for the best flavor and texture!Room Temperature IngredientsIt is imperative, for the creaminess and smoothness of this glaze, that the butter, cream cheese, cream and milk are at room temperature. The cream cheese and butter will be lumpy and resist combining if they are cold.You can give them a short blitz in the microwave to soften them up. Just don’t let them get hot or turn liquid as that will affect the consistency of the cream cheese glaze.Adjusting the Glaze Consistency & QuantityThe recipe as written is perfect for cinnamon rolls and is the glaze I’ve been using on my cinnamon rolls for YEARS!If using this recipe for a loaf cake, you’ll want to halve the recipe. For best results, use the weight measurements.If you want to use as a thick icing, for say cookies, then start with half of the cream and milk, whisking until you get the desired consistency. If you want a thinner, pourable glaze, make the recipe as noted above and then add milk in 1 tablespoon increments. Whisking well with each addition until you reach the desired consistency.Glaze Variations
For Spiced Cream Cheese Glaze…
You could add all kinds of spices into this…I’m specifically thinking of cinnamon, nutmeg and perhaps some cardamom and/or allspice. I would start with a small amount (1/4 to 1/2 teaspoon), taste and adjust.
For Vanilla Cream Cheese Glaze…
Real vanilla bean makes my heart sing. The combination of taste and appearance (those flecks of vanilla get me) completely elevates a treat. I would use 1/2 of a vanilla bean, split with a paring knife and seeds scraped. As noted in the recipe, you can use vanilla bean paste and real vanilla extract in place of the vanilla bean.The photos above show it with and without vanilla bean flecks.
For Boozy Cream Cheese Glaze…
You can never go wrong with adding booze to glazes and buttercream. For this, I would do something in the bourbon, rum or cognac realm. Replace the milk with booze 1:1.
Using Just Milk or Just Cream For the Recipe…
Heavy whipping cream yields a thicker glaze, period. In a pinch, however, you can substitute milk for the cream, you’ll just get a thinner glaze…which is fine. Start with 1 tablespoon of milk and add more as needed.Conversely, if you use all whipped cream, you will need to add more liquid to the glaze.Make AheadThe glaze can be made ahead of time and stored in an air-tight container in the fridge until ready to use. I wouldn’t make it more than a day or two ahead of time. Bring it closer to room temperature before using. You may need to add additional cream or milk to get it back to the proper consistency.The post How To Make The Best Cream Cheese Glaze (Recipe!) appeared first on DisplacedHousewife.