
Adam D. Roberts's Blog
November 28, 2025
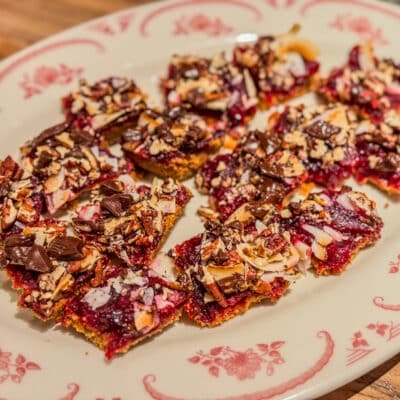
Cranberry Magic Bars
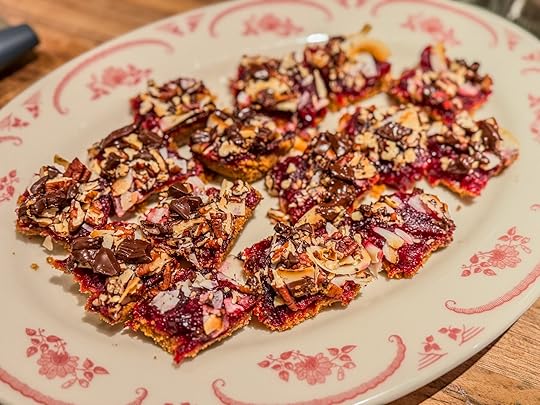
Let’s say it’s the day after Thanksgiving and you have a glut of cranberries. What’s a person to do? You could make cranberry muffins for breakfast, that’s an idea. You could make Melissa Clark’s sticky cranberry gingerbread and people would be tickled. Or you could make what I recently made from Genevieve Ko’s 2016 cookbook, Better Baking: Cranberry Magic Bars. They’ll put a smile on lots of faces.
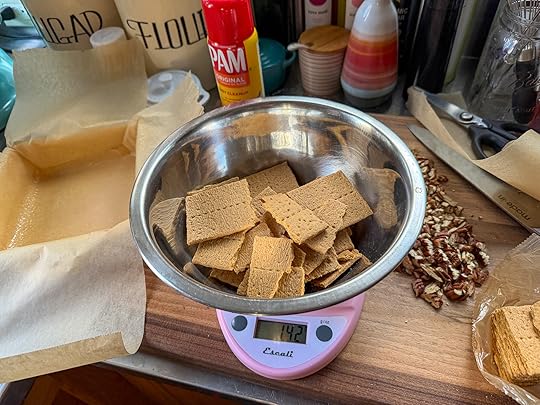
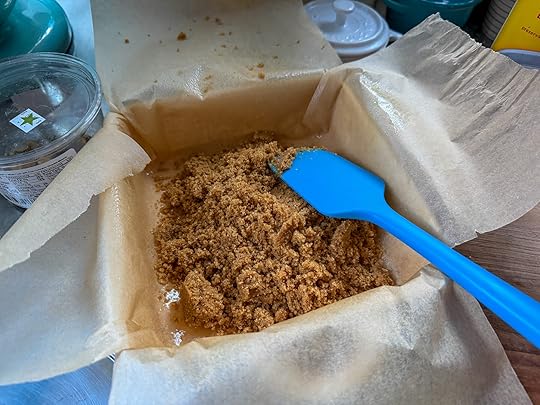
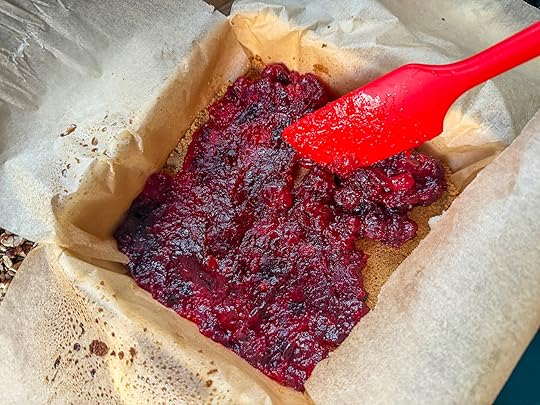
I’m all about transitional recipes and these bars whisk us from turkey season to ho ho ho times. You start with a standard graham cracker base, plus a few toasted pecans for good measure.
 Bring on the Cranberries
Next up, a layer of cooked cranberries that might look a lot like the cranberry sauce you served on T-Day.
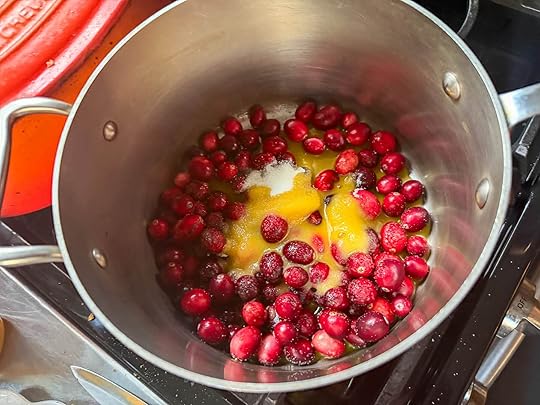
In fact, if your leftover cranberry sauce is sweet and not savory (let’s avoid onions here), I bet you could just spread that on instead of making a fresh batch.
 Toppings Galore
Now comes the fun stuff. What puts the “magic” in cranberry magic bars? Toasted pecans, coconut, and chocolate.
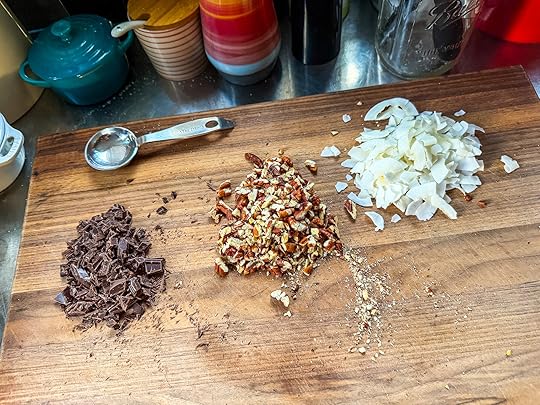
Side rant: I’m a big believer in toasting my nuts these days before using them in a baking recipe. It seems counterintuitive: if it’s going in the oven anyway, why should you pre-toast it? (I actually just watched an episode of Kids’ Baking Championship where an eight year old asked the same thing.) But toasting your nuts separately draws out their oils, changes their color, and brings out a toastiness you won’t get if you just toss them into your cookies or bars.
The coconut, on the other hand, will toast in the oven. (It goes from white to golden pretty fast, hence no need for pre-toasting.)
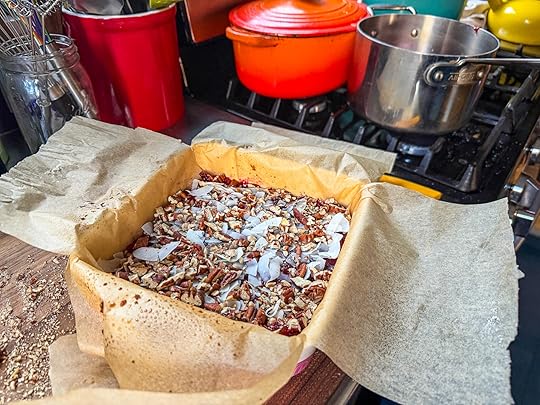
Cut ’em Up and ServeAll you do, once the toppings are on, is bake this for twenty minutes. If you use parchment paper, and let it cool in there, it’s a cinch just to lift it out.
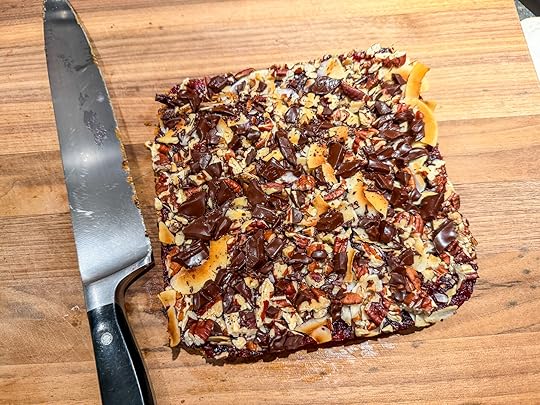
Letting them cool is the hardest part. Then you cut into sixteen squares and serve ’em up. They work as a snack, a dessert, even a decadent breakfast. So don’t throw your cranberries away! Make some cranberry magic.
 PrintCranberry Magic BarsAn easy cranberry, chocolate, and coconut dessert from Genevieve Ko's Better Baking.Course DessertCuisine AmericanKeyword bars, chocolate, coconut, cranberries, cranberry, pecans, treatsPrep Time 1 hour hourCook Time 20 minutes minutesServings 16 barsCalories 299kcalCost 20Ingredients9 graham crackers 141 g, broken¾ cup pecans, toasted and chopped 82 g½ cup plus 3 tablespoons sugar 104 g5 tbsp unsalted butter, melted and cooled 70 g2 cups fresh or thawed frozen cranberries 220 g ¼ cup fresh orange juice 59 g ¼ cup unsweetened coconut flakes, broken up if large 24 g 1/4 cup chopped bittersweet chocolate 42 g InstructionsPosition a rack in the center of the oven and preheat to 350°F. Coat an 8-inch square baking pan with nonstick cooking spray. Line the bottom and sides with foil or parchment paper, and spray again.Combine the graham crackers, ¼ cup (27 g) of the pecans, and the 3 tablespoons sugar in a food processor and pulse until the crackers and nuts are finely ground. Add the butter and pulse until fine crumbs form.Transfer the mixture to the prepared pan and press into an even layer. To get a completely flat bottom, press in the mixture with the bottom of a dry measuring cup.Bake the crust until the edges are golden brown and the center is dry to the touch, 12 to 15 minutes. Cool in the pan on a wire rack for 5 minutes. (Leave the oven on.)Meanwhile, combine the cranberries, orange juice, and the remaining ½ cup (104 g) sugar in a small saucepan and bring to a boil over medium heat. Boil, stirring occasionally, until the mixture is the consistency of jam and has reduced to 1 cup, 8 to 10 minutes.Pour the topping over the crust and spread in an even layer. Sprinkle the coconut and the remaining ½ cup (55 g) pecans evenly on top and gently press into the cranberry mixture. Scatter the chocolate evenly over the top and press it in.Bake the bars until the filling is gently bubbling and the coconut is golden brown, about 20 minutes.NotesThe bars are best the day they’re made but will keep in the refrigerator for up to 3 days.
The post Cranberry Magic Bars appeared first on Amateur Gourmet.


November 26, 2025
Talking Bagels, Tuna, and Food Person on “Book It”
A few months ago, I had the chance to go into CUNY TV’s studios here in NY to have an in-depth conversation about Food Person on “Book It,” with host, Carol Anne Riddell. Boy, did she do her research: she knew all about my hot takes on tuna salad, my strong opinions about bagels, and the emptiness of my parents’ refrigerator. The whole video is embedded above for your viewing enjoyment.
The post Talking Bagels, Tuna, and Food Person on “Book It” appeared first on Amateur Gourmet.
November 23, 2025
Chocolate Amaro Pecan Pie
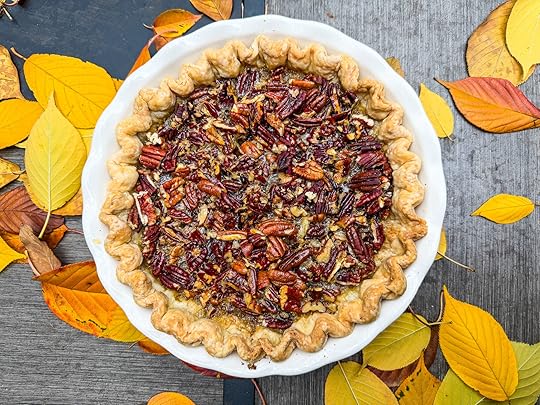
It’s T-minus four days til T-day and most of you who are cooking have your menus worked out. But wait! I’ve got a recipe you need to add to the mix. It comes from Renato Poliafito’s fantastic Italian-American baking book, Dolci!, and it’s a pecan pie that took a trip to Italy and came back a lot more suave. Say hello to this Chocolate Amaro Pecan Pie.
I brought this pie to a brunch today and the combination of the buttery crust, the toasted pecans, the milk chocolate, and the fruity slightly bitter Amaro had everyone sitting up and paying attention.
So how do you make it?
Start with the Pie ItselfI like the pie dough recipe in Dolce because you do it all in a stand mixer, where it all comes together into a ball, which you flatten and refrigerate for an hour. Then you roll it out and crimp your crust all pretty-like.
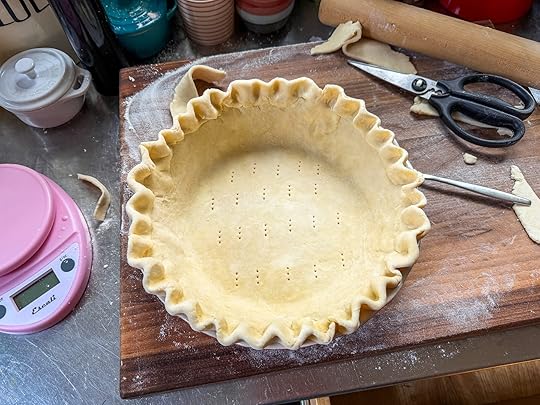
Not bad, right? I’m getting pretty good at this.
Then you fill it with pie weights and par-bake to set things. A little friendly tip: foil works better than parchment paper here because you can press the foil directly into the crimp so it stays crimped. I filled it all the way to the tippy-top with dry rice, dry chickpeas, and pie weights.
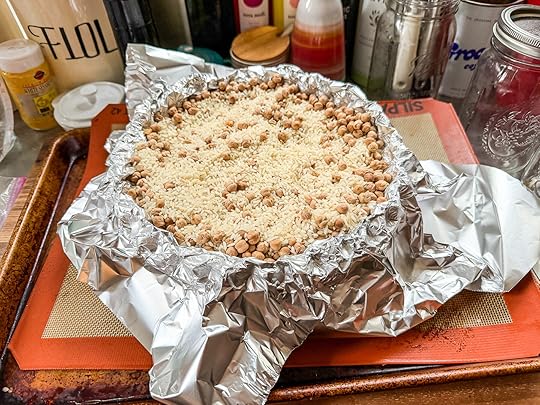
This time things held together (I’ve had issues in the past) and when the pie weights came out, I baked it until set and golden. There was some puffing up, but it deflated after it cooled for a bit. Next time I may prick it more aggressively with my fork.
 Now for the Filling
So this pie has corn syrup: cue the angry corn syrup crowd. David Lebovitz has smart things to say on the subject. There’s also brown sugar, vanilla, eggs, and the previously mentioned Amaro and chocolate (hence the name Chocolate Amaro Pecan Pie).
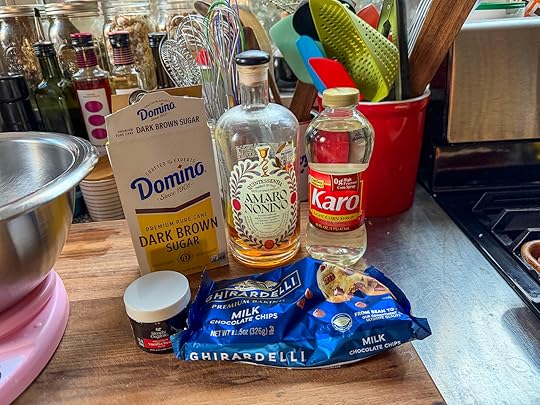
Oh and then there’s pecans. I highly recommend toasting them, like the recipe says: it makes a big difference.
 Let’s Bring it All Together
Once all the components are ready, you start by sprinkling the milk chocolate chips directly into the pie crust.
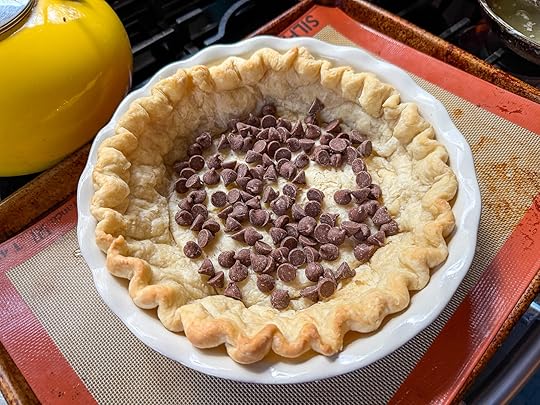
Then in go the pecans, which you’re supposed to toss around with the chips, but I mostly just left them alone. Now you pour in the filling:
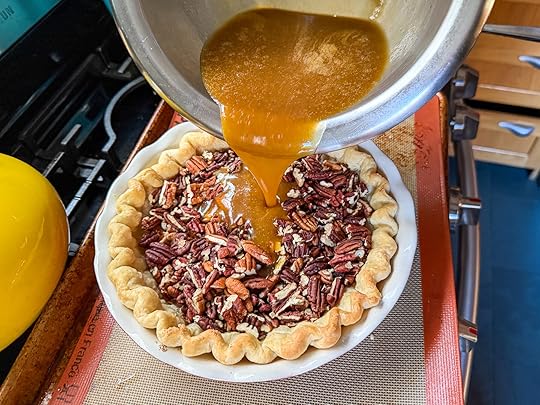
Then you just bake at it 350 for 45 minutes or so until it’s all puffed up and set.
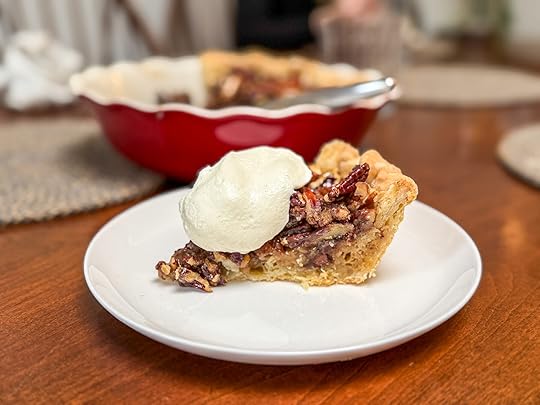
 To Serve
I made some sturdy whipped cream by pouring in about a cup of heavy cream into my KitchenAid mixer with one tablespoon of powdered sugar, one tablespoon vanilla bean paste, and two tablespoons of sour cream. When I got to stiff peaks, I scraped it into the bowl and kept it in the fridge until it was time to serve. The combo of the sour cream and the powdered sugar does this trick.
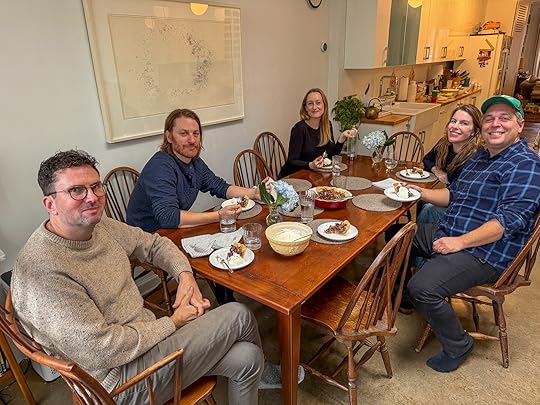
Look at these happy pie eaters!
So knock whatever pie you were planning to make off your list and add this Chocolate Amaro Pecan Pie. It’s one for the ages.
 PrintChocolate Amaro Pecan PieA sophisticated twist on pecan pie from Renato Poliafito's Dolce.Course DessertCuisine AmericanKeyword Amaro, chocolate, pecan pie, pie, Renato PoliafitoPrep Time 2 hours hoursCook Time 40 minutes minutesServings 8 peopleCalories 500kcalCost 40IngredientsFor the pie dough:2 cups all-purpose flour 285 grams1/4 teaspoon fine sea salt 2 grams14 tablespoons unsalted butter, cubed and chilled 195 grams1/4 cup ice cold water, plus more as needed 55 gramsFor the filling:3 large eggs, at room temperature1/2 cup plus 2 tablespoons corn syrup 230 grams3 tablespoons unsalted butter, melted 40 grams1/3 packed cup dark brown sugar 65 grams2 tablespoons Amaro, such as Faccia Brutto or Amaro Nonino 30 grams1 teaspoon Pure vanilla extract 5 grams1/4 teaspoon Fine sea salt 2 grams2/3 cup milk chocolate chips 115 grams3 cups Pecans, toasted and chopped 340 gramsInstructionsMake the pie dough:In a stand mixer fitted with the paddle, combine the flour, salt, and butter. Mix on low speed until the butter pieces are pea-sized. Slowly stream in the ice water, using only what you need until the ingredients hold together evenly in a smooth dough. If there are noticeable cracks, add a small amount more water. If it's wet or tacky, add a small amount more flour.Form the dough into a disk and pat down until 1 inch (2.5 cm) thick. Wrap tightly in plastic wrap and refrigerate for at least 1 hour or overnight. Bring the dough to room temperature for 10 minutes before using.Dust a work surface with flour. Roll the dough into a 12-inch (30 cm) round about ¼ inch (6 mm) thick. Roll the dough up onto the pin and transfer to a 9-inch (23 cm) deep-dish pie plate, pressing to line the bottom and sides. Dock the bottom with the tines of a fork. Trim any excess and crimp the edges. Refrigerate or freeze for 1 hour to firm up.Preheat the oven to 375°F.Line the dough with a parchment round that extends past the sides of the pie plate. Fill the base with pie weights, dried beans, or uncooked rice. Bake until the bottom is set, 25 to 30 minutes. Remove the weights and parchment, and place back in the oven to bake for an additional 10 to 20 minutes, or until firm to the touch. Remove and let cool slightly. Leave the oven on and reduce the temperature to 350°F (180°C).For the filling:In a medium bowl, whisk together the eggs and corn syrup. Add the melted butter, brown sugar, amaro, vanilla, and salt and whisk until the mixture is smooth.Scatter the chocolate chips and pecans into the pie shell and give it a quick toss to combine. Pour in the filling up to the rim of the pie crust.Bake until the filling is set and puffed up, 40 to 50 minutes. Let cool completely, about 2 hours. The pie can be rewarmed in a 300°F (150°C) oven for 15 minutes before serving.
The post Chocolate Amaro Pecan Pie appeared first on Amateur Gourmet.
November 21, 2025
Apollo Bagels

I often make doctor’s appointments with a mind towards lunch. For example, yesterday I went to get my cholesterol checked in Chelsea. When I picked the appointment I chose 10:45 not because I wanted to ride the F train with the commuter crowd, but because I knew that when I was done I could finally check out Apollo Bagels for lunch.
The Most Popular Bagel in Town
The bagels at Apollo Bagels are so popular, the landlord threatened to evict them because the lines outside are so long. I would never wait that long for a bagel; which is why a doctor’s appointment at 10:45 nearby on a Thursday was the perfect strategy to get in and get out before the hordes descended.
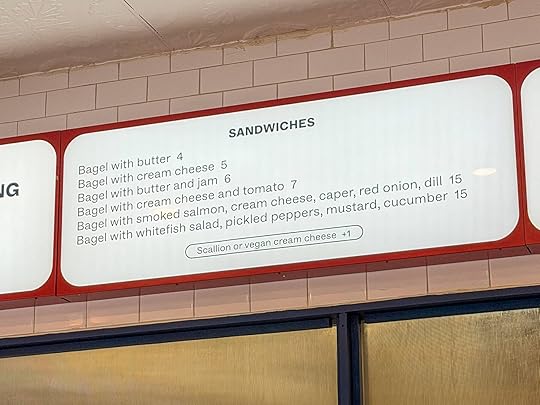
For such a popular bagel spot, the prices are fairly reasonable. At the comparable Courage Bagels in L.A. (more on them in a sec), a smoked salmon bagel is $18. At Court Street Bagels, near us in Brooklyn, a lox deluxe bagel is $19. So $15 for a bagel that people wait for an hour or omre to eat? I appreciate that.
Everything (Bagels) Everywhere All at Once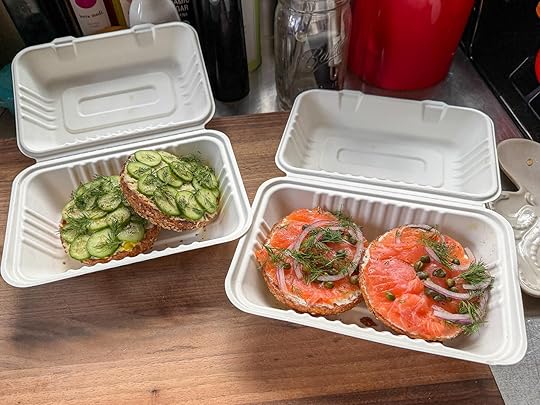
I texted Craig from the line and we decided to go for one whitefish, one smoked salmon. I schlepped them home on the F train and when I opened up the containers, I was delighted to see these works of art. They reminded me so much of the presentation at Courage Bagel in L.A.: from the container itself, to the open-face style.
First up: the whitefish.

This was a really well-balanced bagel. For starters, they put a schmear of mustard on it. Mustard on whitefish salad! I never thought of that, but I liked it. Then a thin layer of whitefish salad — a far cry from the mounds of whitefish I’d get on bagels growing up on Long Island and in Boca — and then the cucumbers, which were refreshing.
But the biggest star of the show was the bagel, just as it should be. The same was true of the smoked salmon bagel:
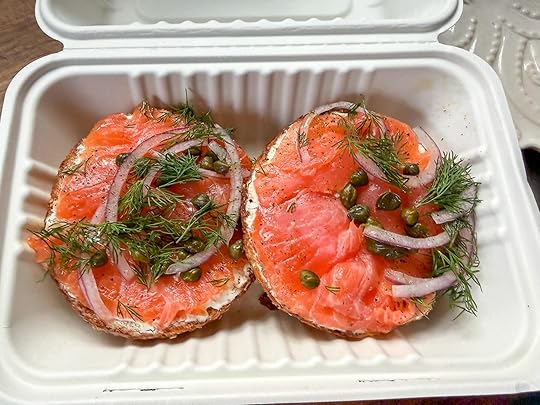
The toppings were excellent but almost besides the point. The bagel was crisp on the outside, airy on the inside, not too thick, and well-seasoned with all of the seeds, onions, and salt.
In conclusion, if you get a chance to pop into Apollo Bagels before the mobs arrive, definitely do it. Just be sure to get your cholesterol checked beforehand, not after.
Apollo Bagels / 73 Greenwich Ave, New York, NY 10014 / (844) 218-3081
The post Apollo Bagels appeared first on Amateur Gourmet.
November 20, 2025
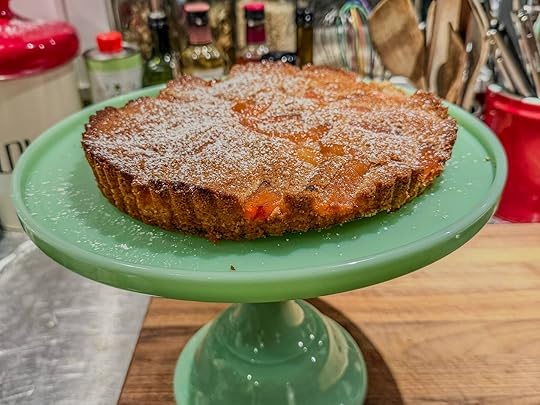
Spiced-Quince Brown-Butter Cake
Taylor Swift is in her tortured poet era, and I’m in my quince era. What can I say? I love how those rock hard, green softballs transform with a little time, a little sugar, and a little liquid into something so fragrant and colorful. Not to mention, when they’re cooked, they taste like honey and apple had a baby.

So far this year, I’ve made quince preserves, but now we turn our attention to a quince cake. Specifically the spiced-quince brown-butter cake from Claudia Fleming’s legendary cookbook, The Last Course. Claudia Fleming was the pastry chef at The Gramercy Tavern and became famous for integrating seasonal farmer’s market produce into her desserts. This quince cake is a perfect example of that.
 Classy Quince
This book, which would make a great gift for a home baker who loves going to farmer’s markets, is capital “e” Elegant. It just oozes class and good taste. And this recipe, which seems simple enough, has various grace notes that give it that signature Claudia Fleming stamp.
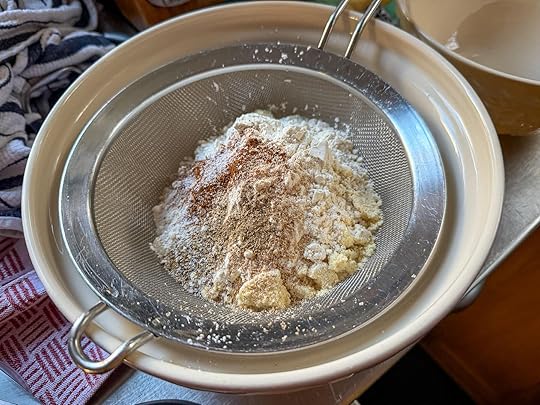
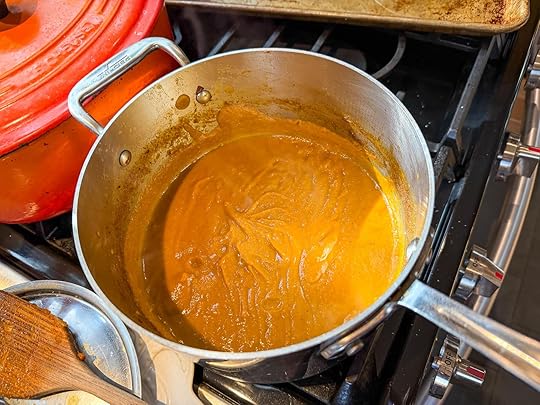
The poaching liquid has dry white wine, a whole clove stuck into a 2-inch strip of orange peel, 1/2 a cinnamon stick, and star anise (an underused drag name). The cake has cinnamon, nutmeg, cloves, cardamom, orange zest, and, most notably, a whole stick of butter that you brown in a skillet.
 Is It Cake?
The technique for the cake is pretty unusual. She has you put the dry ingredients in the mixer with the egg whites, and you beat until moistened. Then on low speed you drizzle in the browned butter.
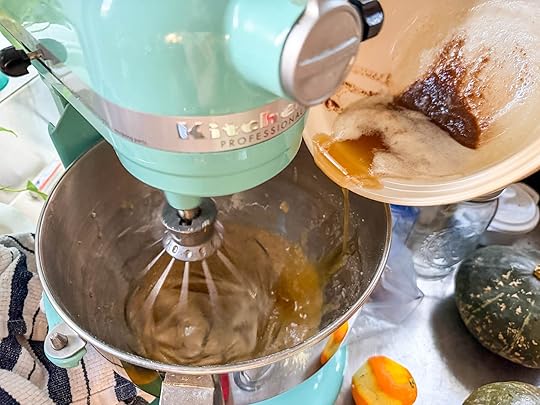
I deserve high marks for the color of that butter! That’s what you’re going for when you brown butter.
Another grace note: you bake the cake in a tart pan. How elegant is that? Just be sure to butter it well or it might stick when it comes out (confession: that happened to me; see lead photo).
 It’s Not Quince Cake without the Quince
As for the quince, when you’re done poaching it, you dry it on paper towels.
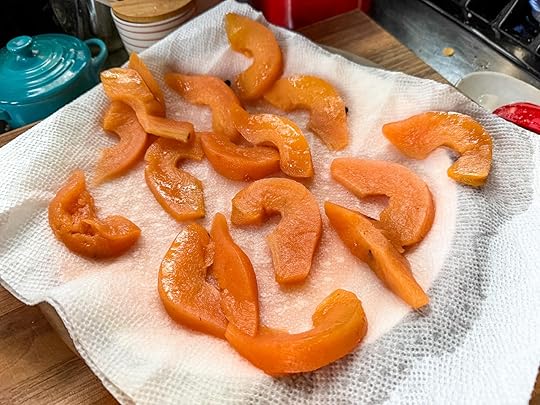
They look like apricot-colored jewels.
Then you just layer it on to the batter in concentric circles.
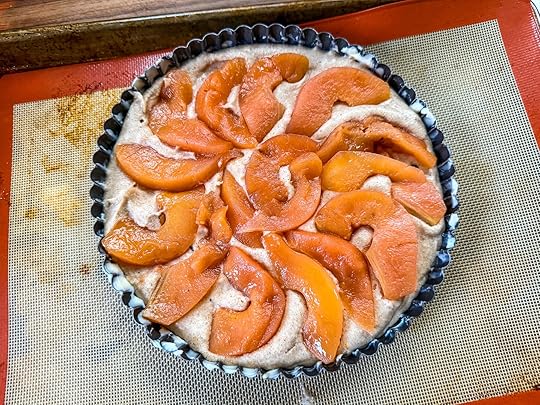
Into a 400 degree oven it goes and out it comes 25 minutes later.
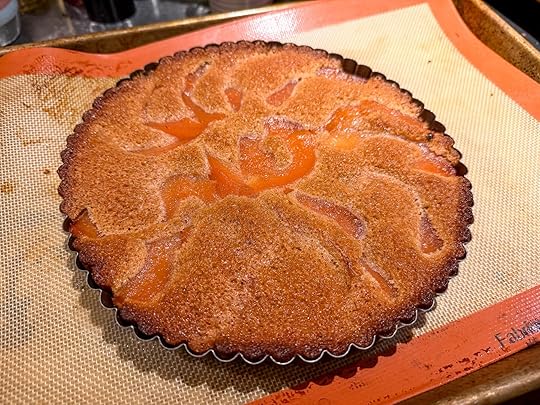
To serve, I dusted with powdered sugar. You could serve with ice cream — Claudia Fleming suggests her Brandied-Fig Ice Cream — but this was great on its own. The quince has so much complexity from the spices and the cake has so much complexity from the browned butter. So the next time you see a quince out in the wild, buy it.
And Taylor Swift, if you’re reading this, get ready for your Quince Era.
 PrintSpiced-Quince Brown Butter CakeAn elegant fall dessert from Claudia Fleming's The Last Course.Course DessertCuisine AmericanKeyword baking, brown butter, Claudia Fleming, quincePrep Time 1 hour hour 30 minutes minutesCook Time 30 minutes minutesServings 8Calories 386kcalCost 25IngredientsFor the quince:1 large quince, peeled, cored, and cut into 16 slices1 1/2 cups sugar1 cup dry white wine1 whole clove stuck into a 2-inch strip of orange peel1/2 cinnamon stick1 star aniseFor the cake:1/2 cup unsalted butter, cut into pieces 1 stick1 1/3 cups confectioners' sugar1/2 cup almond flour1/3 cup cake flour I used all-purpose and it was fine1/2 teaspoon ground cinnamon1/4 teaspoon ground nutmeg1/8 teaspoon ground cloves1/8 teaspoon ground cardamom4 large egg whites 1/2 cup1/2 teaspoon grated orange zestInstructionsFor the quince:To prepare the quince, in a large saucepan, combine the quince, 3 cups water, the sugar, wine, orange peel with clove, cinnamon, and star anise. Cut a round of parchment paper slightly smaller than the pot and lay it on top of the quince (this will keep the fruit submerged; you can also use a sturdy, heatproof plate).Bring the mixture to a boil over high heat, then reduce the heat to medium-low and simmer until the quince is tender and spongy, about 1 1/4 hours. Drain the quince pieces on layers of paper towel. Discard the liquid (or reduce it and use it to make a cocktail!).For the cake:To make the cake, preheat the oven to 400 F. In a large skillet over medium heat, melt the butter. Continue to let the butter cook until the white milk solids fall to the bottom of the skillet and turn a rich hazelnut brown. Strain the browned butter through a fine sieve into a clean bowl, discarding the solids.Sift together the confectioners' sugar, almond flour, cake flour, cinnamon, nutmeg, cloves, and cardamom. Place the sifted ingredients in the bowl of an electric mixer fitted with the whisk attachment. On the lowest speed, add the egg whites and orange zest; mix until all the dry ingredients are moistened. Increase the speed to medium and beat until very smooth. Decrease the speed to low and stir in the browned butter, then increase the speed to medium and beat until smooth.Butter a 10-inch tart pan with a removable bottom or a springform pan. Pour in the batter and smooth the top. Arrange the quince slices on the batter. Bake for 25 to 30 minutes, or until the cake is golden brown. Transfer to a wire rack and cool completely. Remove the sides of the pan before serving.
The post Spiced-Quince Brown-Butter Cake appeared first on Amateur Gourmet.
November 19, 2025
What Soup Are You Cooking on Repeat?
Hey food blog friends, now that I’m up and blogging again I wanted to hear from you! What soup are you making the most these days?
Here’s mine: I made it for lunch last week and I made it for lunch again yesterday and it’s so good. Step one: sauté an onion or two in butter (a few tablespoons). Step two, add squash. If it’s an acorn squash you can just cut it up and discard the seeds, keeping the skin on. If it’s butternut squash, you should probably peel it.
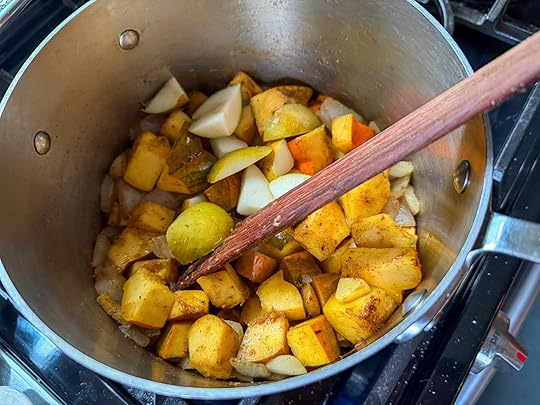
Once things really start to brown, I add a chopped up apple (skin-on) and a pear or two if I have one. I add salt and continue stirring and cooking until things are even browner. Then I add a tablespoon of Burlap and Barrel curry powder, their Garam masala, and a pinch of cinnamon. I cook that for a bit, until it turns aromatic. Then, finally, I cover with chicken stock: specifically, Chicken Bone Broth from Brodo.
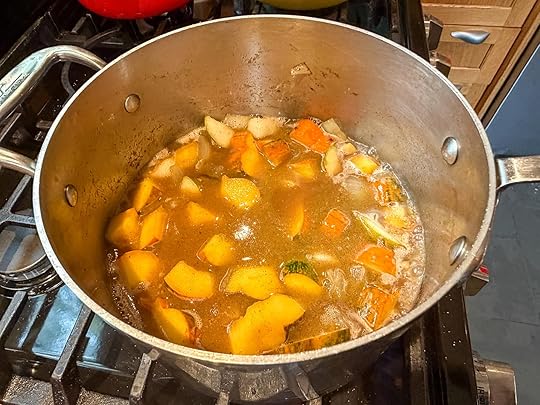
The more liquid you add, the thinner your soup will be. So I try to just cover the vegetables/apples/pears and let it simmer for about 20 minutes until you can smash everything with a wooden spoon against the side of the pot.
Then I get out my trusty hand blender and carefully blitz it all until smooth. Carefully because that’s boiling hot liquid and the blender can make it squirt all over you, so be sure it’s fully submerged.
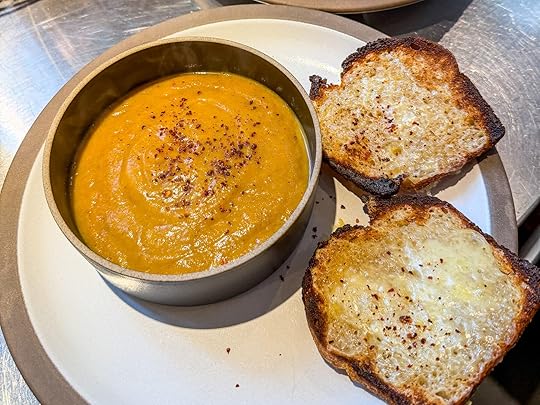
To serve, I slice some really good sourdough bread from ACQ, put it under the broiler on both sides, add a big mound of grated cheddar cheese or Gruyere, put back under the broiler until melted, and then dust everything with Aleppo pepper.
A few tweaks to play around with:
The first time I made this soup, I added about a tablespoon of chopped fresh ginger along with the onions and that added a nice, assertive note;I’ve also finished with a splash of apple cider vinegar or Sherry vinegar;Yesterday, I stirred in a tablespoon of miso at the end and that was way good too.So that’s my soup. Now it’s your turn! What soup are you making the most right now? If yours sounds really good, I might just make it.
The post What Soup Are You Cooking on Repeat? appeared first on Amateur Gourmet.
November 18, 2025
Extra-Crispy Hasselback Potatoes
Thanksgiving potatoes tend to be creamy, buttery, gloppy, gooey, but are they ever crispy? Rarely, if ever, because who has the time to crisp up potatoes while also whisking gravy, heating dinner rolls, and basting a turkey?
But what if I told you that you could have crispy potatoes and all you need is a sharp knife and a pair of chopsticks?
Meet Hasselback Potatoes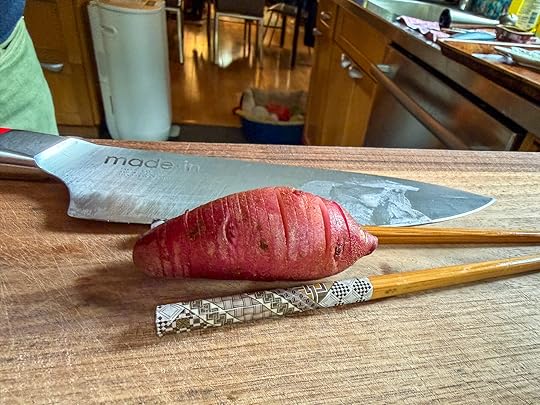
If you’ve never made or had Hasselback potatoes, you’re in for a treat. Imagine a potato that goes to a cosmetic surgeon to maximize its sex appeal, only instead of a surgeon it’s you. Your job: put a small oblong potato in between a pair of chopsticks and slice down with a sharp knife, making little slits an 1/8th of an inch apart, until you have a potato that looks like an accordian.
 Cast Iron is Your Friend
Once you slit your potatoes, all you have to do is doctor them further (see, mom, I’m a doctor!) with olive oil, salt, pepper, some sliced garlic between the slits, and fresh thyme.
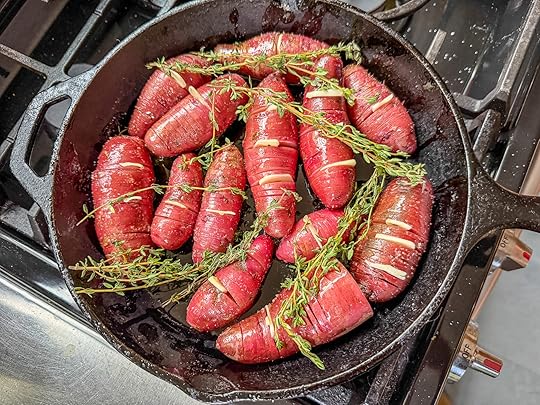
Notice I’m using a cast-iron skillet here: that retains its heat in the oven, so it’ll get your potatoes extra crispy (hence the title).
If you’re doing this for Thanksgiving, you can also do this on a cookie sheet. The key step is covering everything with foil during the first 20 to 25 minutes of cooking at 425 (hat-tip to Jesse Szewczyk’s recipe on Bon Appetit).
 Bake Now, Crisp Up Later
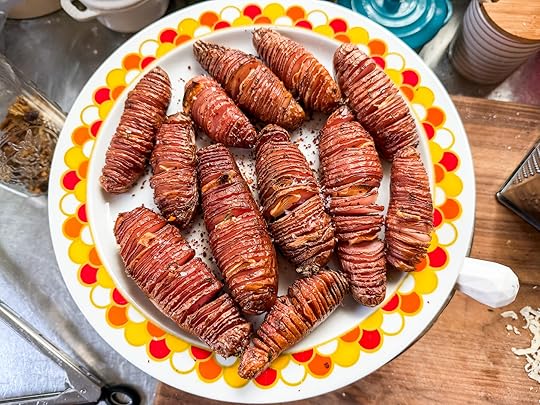
I may be going out on a limb here, but I think it’s entirely possible that you can bake for 20 to 25 minutes with the foil on, until the potatoes are just cooked through, then let it come to room temperature, refrigerate, and the next day, when you’re ready for them to crisp up, take the foil off, pop in a 425 oven, and let it rip for 45 minutes.
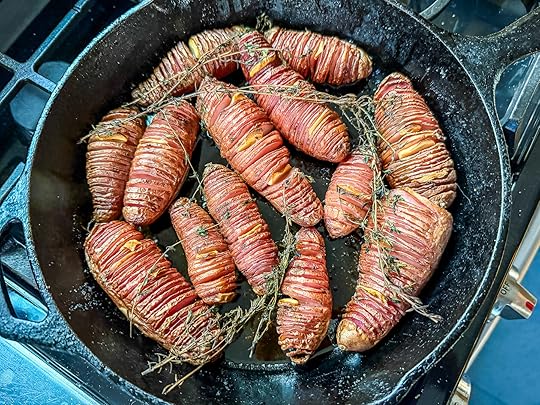
The most important thing is that, early on, you get olive oil in between the slits of the potatoes. That’ll make ’em extra-crispy for sure.
What can I say about how these taste? Imagine the joy of crunching into a potato chip paired with the comfort of biting into a warm roasted potato: here you get the best of everything.
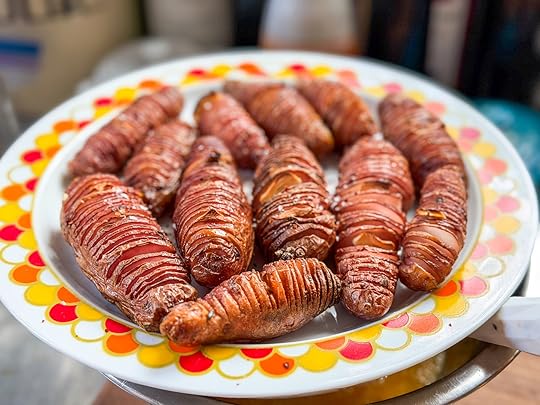
So if you’re looking for a Baywatch revival, call David Hasselback. If you’re looking for a View reunion, call Elizabeth Hasselback. And if you’re looking for the most enticing potato to serve with dinner, make ’em Hasselback. It does justice to the name.
 PrintExtra-Crispy Hasselback PotatoesA classic technique for making your roasted potatoes extra-crispy.Course Side DishCuisine AmericanKeyword Hasselback, potatoes, side dishes, ThanksgivingPrep Time 1 hour hourServings 4 peopleCalories 300kcalCost 10Ingredients2 pounds small potatoes (baby Yukon gold, pee-wee, etc.)1/4 cup extra-virgin olive oilKosher saltFreshly ground black pepper3 cloves garlic, peeled and sliced thin1 bunch fresh thymeInstructionsPreheat the oven to 425.Prep your potatoes, one at a time, by placing them between a pair of chopsticks. With a very sharp knife, cut all the way down towards the chopsticks, at 1/8th-inch intervals. Use the knuckles of your left hand as a guide as you inch along. Continue until you've done this to every potato.In a large cast-iron skillet, toss the potatoes with the olive oil, a big sprinkling of kosher salt (at least 1 tablespoon) and freshly ground black pepper. Be sure to get the oil and salt in between the layers of potato. Insert garlic slices in between the slits of as many potatoes as you can. Layer the thyme on top.Cover with foil and bake for 20 to 25 minutes, or until the potatoes are just tender. At this stage you can cool the potatoes in the pan and refrigerate, still covered with foil, until ready to finish the next day.Remove the foil and place the potatoes back in the oven for 40 to 45 minutes, until deep golden brown all over and crispy on the top. Remove from the oven and let cool slightly before serving.
The post Extra-Crispy Hasselback Potatoes appeared first on Amateur Gourmet.
November 17, 2025
Baked Pasta with Kabocha Squash, Radicchio, Walnuts, and Taleggio
If my friends who are cooking Thanksgiving this year have one dilemma it’s the issue of beloved vegetarians. Do you relegate them to side dishes while everyone else eats turkey? Do you make the main event vegetarian so that everyone feels included? Is it even Thanksgiving if there isn’t a dead animal on the table?
Turn to the SquashI’ve got a solution for you and it comes from Suzanne Goin’s marvelous A.O.C. cookbook. Chef Goin spent time, as a student at Brown, working at the legendary Al Forno restaurant in Providence, Rhode Island; a restaurant famous for its baked pasta.
Now there are baked pastas and there are baked pastas: this is one for the record books. Chef Goin’s baked pasta has four kinds of cheeses: Fontina, Gruyere, Parmigiano-Reggiano, and Taleggio.

Yes, there’s a lot of cheese in here, but we’re competing with a whole roasted bird: so it’s gotta have oomph.
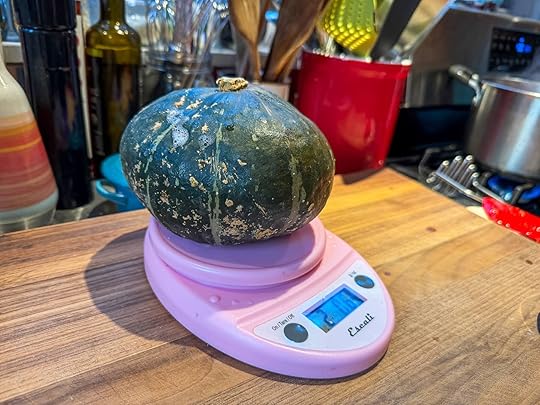
To add to the oomph, you roast a kabocha squash; a fairly quick process because you cut it into cubes first. This cookie sheet isn’t dirty, it’s much-loved.
 Not to Be Cheesy But….
In terms of the process, you make a cheese sauce (aka: a bechamel) which is very similar to what you make when you make a mac and cheese.
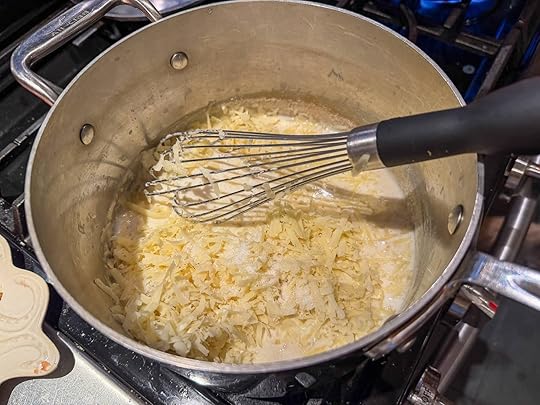
Not only does that cheese give the sauce lots of flavor; but she also has you add freshly grated nutmeg which gives things even more autumnal zhuzh.
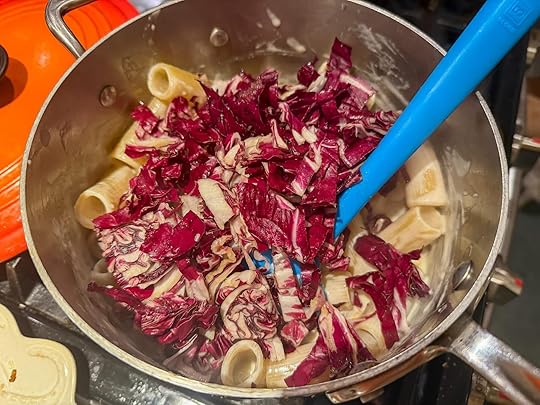
As for the pasta (Chef goin calls for torchio, I usd rigatoni), the key is cooking it four minutes less than the time on the package. It’ll seem inedibly hard at that stage, but have faith: it’ll continue to soften as it bakes in the oven. Even better? It’ll crisp up on top and become the best part of the whole affair.
Oh and after you stir the pasta into the sauce, you add sliced radicchio, for health.
To get this oven-ready, you put a layer of the pasta in a greased 9X13 baking pan, layer in the roasted squash, walnuts, and the Taleggio which you cut into cubes.
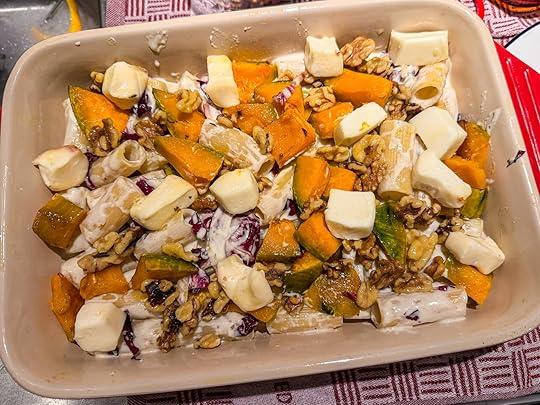
Then you top with another layer of pasta, squash, walnuts, and taleggio, and dust it all with Parmesan cheese.
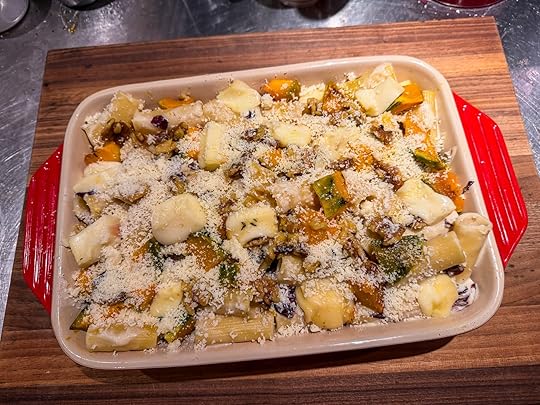
If you’re prepping for Thanksgiving, you can get it to this stage, cover with foil, refrigerate and bake it the next day.
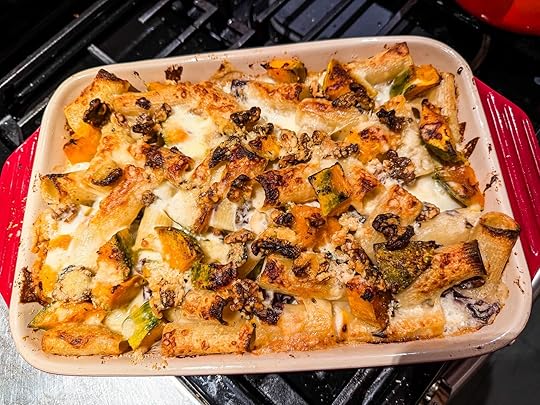
A Good BakeIt takes about 20 minutes in a 450 oven for it to get all bubbly and burnished brown. Look at this beauty:
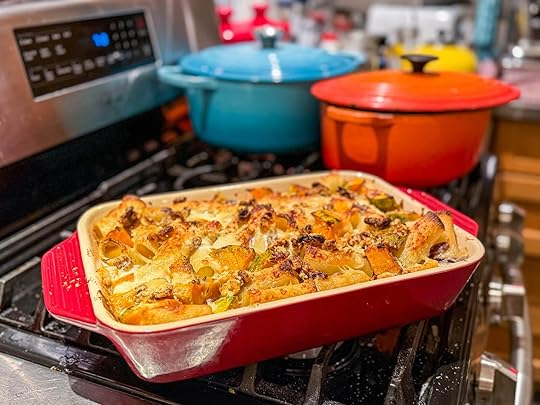
So don’t punish the vegetarians at your Thanksgiving dinner. Make this and just punish the vegans. :p
 PrintBaked Pasta with Kabocha Squash, Radicchio, Walnuts, and TaleggioA hearty and impressive baked pasta dish from Suzanne Goin's A.O.C. cookbook.Course Main CourseCuisine American, ItalianKeyword Al Forno, baked pasta, cheese, pasta, Suzanne GoinPrep Time 1 hour hour 30 minutes minutesCook Time 20 minutes minutesServings 6 hungry peopleCalories 596kcalCost 60IngredientsFor the three-cheese sauce:2 1/2 cups whole milk2 tablespoons unsalted butter2 tablespoons all-purpose flour1/2 cup heavy cream1 1/4 cups grated Italian Fontina 5 ounces3/4 cup grated Gruyere 3 ounces1/4 cup grated Parmigiano-Reggiano 1 ounceSmall piece fresh nutmegKosher salt and freshly ground black pepperFor the baked pasta:1 small kabocha squash, about 2 1/2 pounds To yield 1 1/2 pounds after peeling and seeding7 tablespoons extra-virgin olive oil2 teaspoons thyme leaves1/2 head radicchio1/2 teaspoon minced rosemary3/4 pound Taleggio cheese3/4 cup walnut halves or pieces1 pound torchio or rigatoni pasta1/2 cup freshly grated Parmigiano-ReggianoKosher salt and freshly ground black pepperInstructionsTo make the three-cheese sauce:Bring the milk to a boil in a medium saucepan, and turn off the heat.Place the butter in a medium saucepan over medium heat. When it foams, add the flour, and whisk to combine completely. Turn the heat down to medium-low, and cook for a few minutes, whisking all the time, until the flour is a light-sandy color.Put in one-third of the milk, and whisk vigorously to incorporate. Add another third of the milk, and continue whisking. When the milk is fully incorporated, add the last third, turn the heat up to medium, and bring to a simmer, whisking all the time, until very smooth. Cook for 10 minutes, whisking often, and then remove from the heat.Stir in the cream, Fontina, Gruyere, Parmigiano, 3/4 teaspoon salt, some pepper, and a few gratings of nutmeg. Taste for seasoning.For the baked pasta:Preheat the oven to 425.Cut the squash in half lengthwise, and remove the seeds. Place the squash cut-side down on a cutting board, and use a sharp knife to remove the peel. Cut the squash into 1 1/2-inch chunks.Toss the squash with 1/4 cup olive oil, 1 teaspoon salt, some pepper, and the thyme. Place the squash on a baking sheet, and roast in the oven about 15 minutes, until tender when pierced.Place the half-head of radicchio cut-side down on a cutting board, and slice it into 1-inch-thick ribbons. Toss the radicchio with 2 tablespoons olive oil, the rosemary, 1/2 teaspoon salt, and some pepper.Remove the Taleggio rind, and cut the cheese into 1-inch chunks.Toss the walnuts with remaining 1 tablespoon olive oil and 1/4 teaspoon salt.Preheat the oven to 450 F.Blanch the pasta in boiling salted water for exactly 3 minutes, drain, and rinse with cold water until cooled. Transfer the pasta to a large mixing bowl. Spoon the warm three-cheese sauce over the pasta, add the radicchio and some pepper, and toss well to combine. Place half the pasta in a large (12-inch round or 9-by-12-inch rectangle) oven-to-table baking dish. Tuck half the squash, half the Taleggio, and half the walnuts into the pasta. Top with the remaining pasta, and tuck in the remaining squash, Taleggio, and walnuts. Sprinkle the grated Parmigiano on top, and bake for about 20 minutes, until bubbling and crispy on top.
The post Baked Pasta with Kabocha Squash, Radicchio, Walnuts, and Taleggio appeared first on Amateur Gourmet.
Sukh
I’m a bit aggressive when it comes to picking a restaurant. After all, I’m not just eating for me, I’m eating for you: my adoring public! So on Friday night, when we met our friends Jeremy and Jason for dinner, I found myself in an extraordinary new role: passive restaurant goer. That’s right, Jason picked the restaurant on this particular night and it was Sukh in Fort Greene.

You can see the sense of responsibility that Jason (left) feels in this photo. He had to order a drink to cope. Jeremy talked him down from the ledge: “Don’t sweat it… I’m sure Adam will like it.” He then nervously drank down his cocktail in one gulp.
Well, not to spoil the outcome: but I didn’t like it. I loved it!
 I Hear a Train A Comin’
The inside of Sukh is designed to look like a train car. Their website says: “Thailand’s railway history is an exciting journey through time, starting back in 1855 with its earliest railway event.” The food, therefore, has historic Thai flair. For example: the Hor Mok (picture above), Steamed Branzino curry custard topped with jumbo lump crab meat, karffir lime leaves, red chili, and coconut milk. As unusual as that sounded, it was a perfect little bite to pair with my rum-based cocktail.
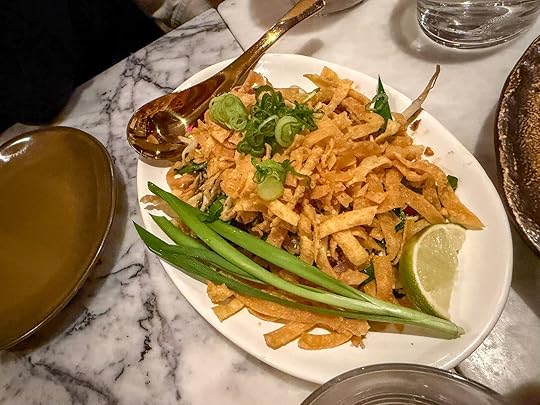
The Gui Chai (fried chive pancake served with sweet soy sauce) was an equally scrumptious appetizer. I promise, there are fried chive pancakes under those noodles.
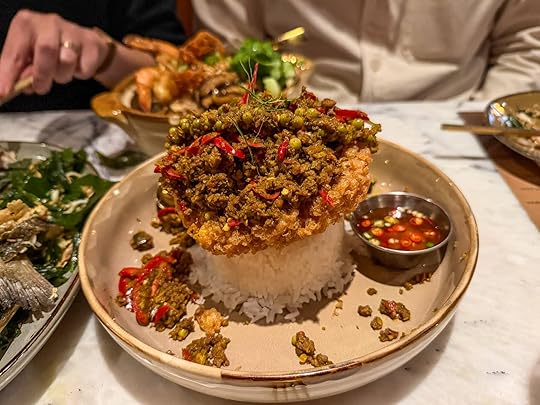
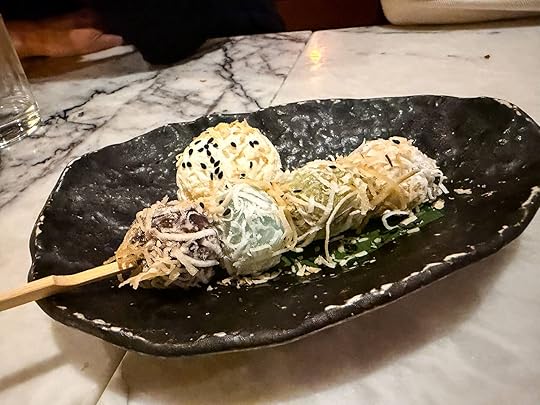
My favorite dish, though, had to be the Khao Khai Ra-Bert — a Thai-style crispy omelette topped with sautéed minced beef, homemade chili pasted over jasmine rice — that you see at the top of this post.
It was wild: the eggs were so transformed into something crispy and golden, I almost didn’t recognize them as eggs. And the ground beef on top was so studded with chilies and other spices, it made me cry more than Beaches (which is saying a lot).
Big FishFor our entrees, we shared the Pla Tod Samun Prai — Fried Branzino topped with crispy Thai herbs served with Thai chili lime sauce and caramelized fish sauce — which was vibrant, spicy, and fun to eat.

The Pad Thai came with the most gloriously-charred skin-on chicken thighs on top:

This was our dessert and I totally forget what it was but it was perfect for four people.
In conclusion, it was very brave of me to let Jason pick the restaurant but I had nothing to be afraid of. He picked a great spot! Just to be safe, though, I’ll pick the next one.
Sukh / 723 Fulton St, Brooklyn, NY 11217 / (347) 494-1999
The post Sukh appeared first on Amateur Gourmet.
November 13, 2025
Pumpkin Pie That’ll Actually Make You Love Pumpkin Pie
If there were a universal “meh” list, pumpkin pie would probably be at the very top. How many people are passionate about that odd combination of orange gunk, eggs, pumpkin pie spices (perhaps the most famous thing about it), in a pale, pallid crust? Not many! And yet, year after year, we make pumpkin pie for Thanksgiving and pretend to like it.
There is Another WayFor those intrepid bakers among you, I have a time-consuming recipe that’ll drain you and make you angry at the world but it’ll produce the best slice of pumpkin pie that you’ve ever tasted. Is it any surprise that the recipe comes from Nancy Silverton, the most brilliant, finicky, perfectionist baker in America?
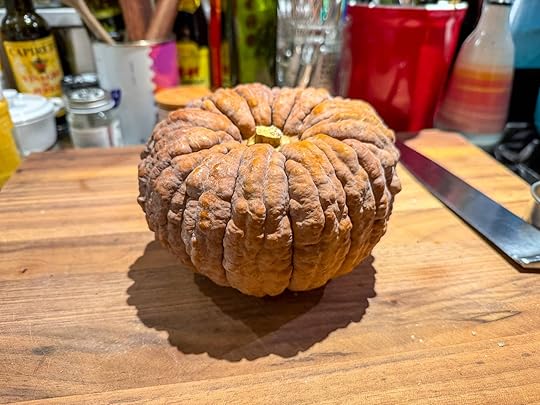
As all great pumpkin pie bakers know, the best pumpkin pies don’t have pumpkin: they have squash. The squash you see above is a Black Futsu squash that came in my CSA and looks a lot like a pumpkin. No matter which you have — honeynut (which is what Nancy Silverton calls for), butternut, Kabocha — you’ll want to roast it the same way: cut in half, flesh-side down, in a 425 oven until golden brown.
 Let’s Blitz
From there, it’s a quick trip to the food processor, where you blitz the flesh, press it through a sieve (told you this recipe was finicky), and weigh it out. You’ll want 510 grams, which this squash didn’t produce: so I supplemented with some leftover kabocha squash puree and (gasp!) Libby’s canned pumpkin (which, apparently, is also made with squash).
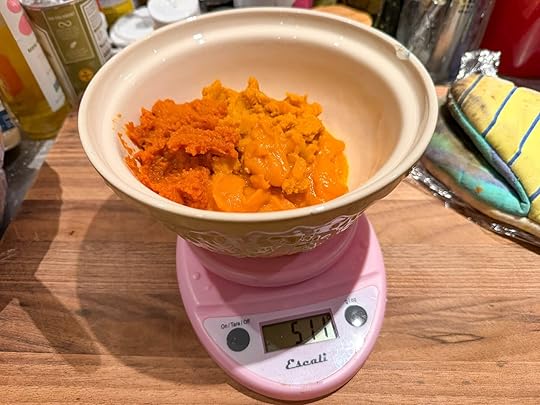
That’s right: you can use canned pumpkin in this recipe and it’ll still work out, though I’d say the whole point of this endeavor is to celebrate the pumpkin/squash itself. So if you use a funky squash, like my Black Futsu, it’ll make the pie that much more special.
As far as flavor enhancers, Nancy goes to town: there’s brown butter, créme fraiche, sweetened condensed milk, artisinal maple syrup, whiskey…
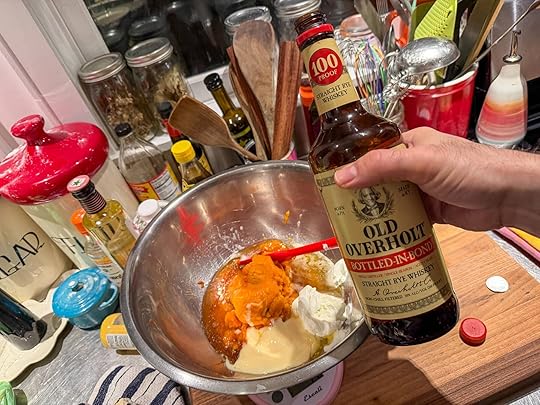
…and vanilla bean paste.
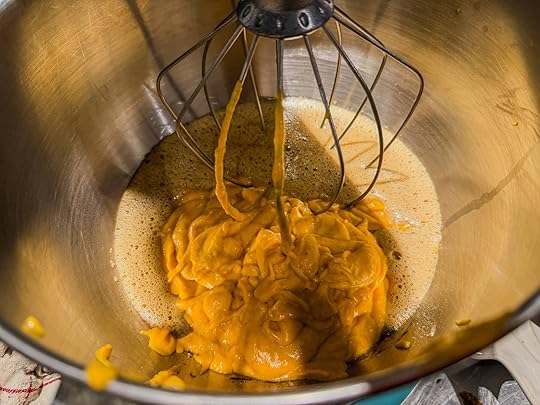
But Wait, There’s MoreSome recipes might have you whisk all that together with eggs and you’d be done. Not this one! In this one you put two extra-large egg yolks and one extra-large egg in a KitchenAid mixer and beat it with brown sugar, cinnamon, allspice, ground ginger, nutmeg, and cloves until light and thick. Oh, and did I mention that Nancy calls for “freshly ground” spices? When was the last time you freshly ground cinnamon? I had to draw the line there.
Lest you think this was all a piece of cake (or pie) for me, I will confess that my pie crust had some issues. I used pie weights like I was supposed to:
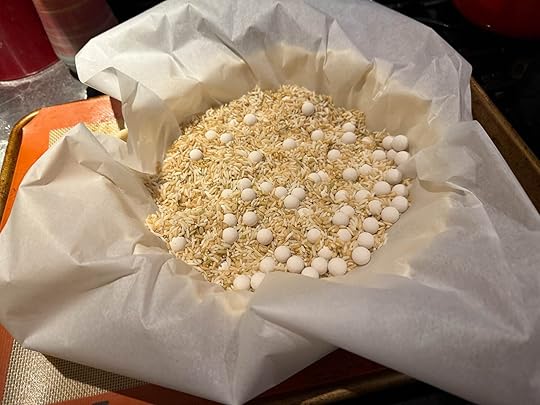
Yet, something clearly went wrong. I tried to do some surgery, unsuccessfully. Where’s Noah Wyle when you need him?
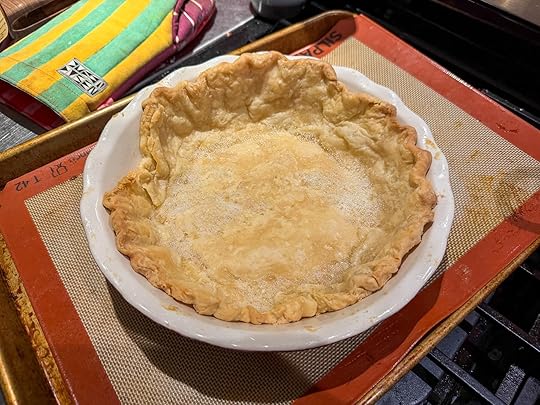
I show you this so you don’t lose heart: once you add the pumpkin mixture and dust with the “spice topping” of sugar, cinnamon, and nutmeg, it looks promising.
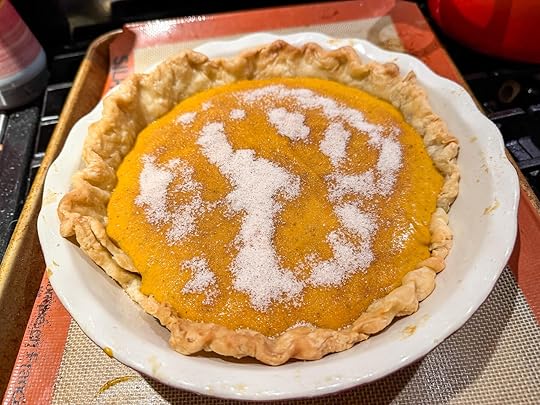
And when it comes out of the oven 45 minutes later, it’ll look perfectly imperfect… that’s how you know it’s homemade.
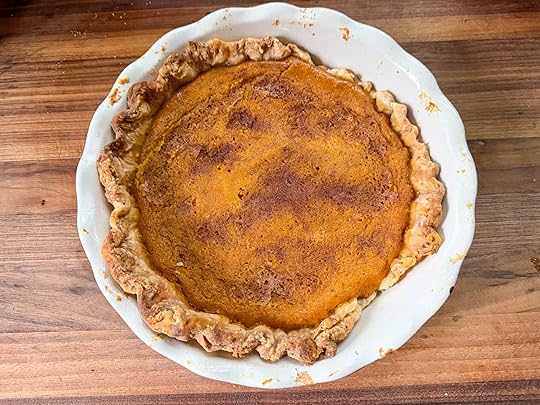
Okay, it’s wonky, there’s no denying that.
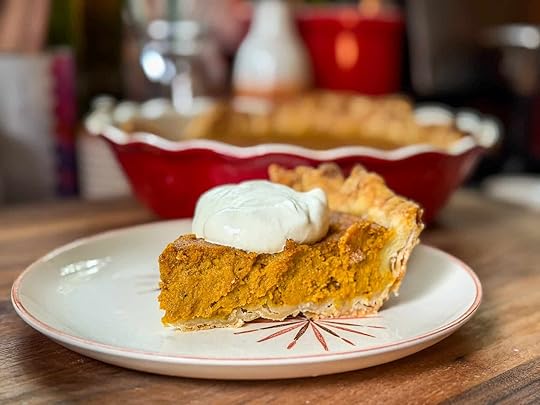
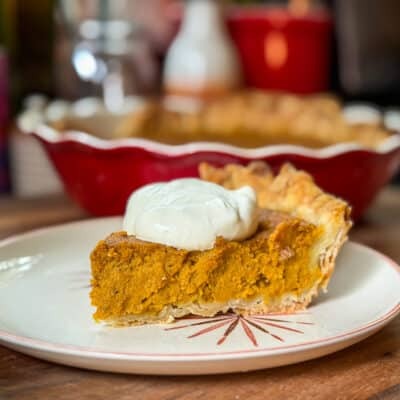
But did I title this post “The Prettiest Pumpkin Pie You’ve Ever Seen”? No, I titled it “Pumpkin Pie That’ll Actually Make You Love Pumpkin Pie.” And once you cut a slice and top it with whipped cream?
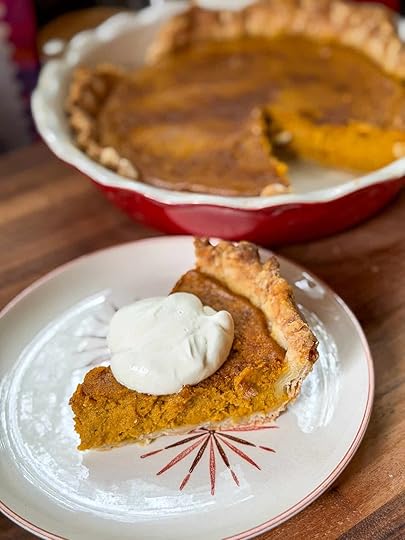
It’s undeniable: all of that work pays off and the layers of flavor — from the good squash you roasted, from the sour cream (my sub for creme fraiche), the brown butter, and all of those not-freshly-ground spices — come bursting through and the texture isn’t homogenous and sterile, it’s rich and complex. This pumpkin pie did, in fact, make me love pumpkin pie… Nancy Silverton’s pumpkin pie. It’s ruined me for all others.
 PrintPumpkin Pie That’ll Actually Make You Love Pumpkin PieAdapted from The Cookie That Changed My Life by Nancy Silverton.Course DessertCuisine AmericanKeyword pie, pumpkin, pumpkin pie, ThanksgivingPrep Time 2 hours hoursCook Time 50 minutes minutesServings 1 9-inch pieCost 50IngredientsFor the crust:45 grams 1 1/2 tablespoons ice-cold water30 grams 1/8 cup heavy cream280 grams 2 cups unbleached all-purpose flour, plus more for dusting1/2 tablespoon + 1/2 teaspoon Diamond Crystal kosher salt227 grams 2 sticks cold unsalted butter, cubedFor the filling:3 pounds honeynut or butternut squash I used a combo of Black Futsu and KabochaExtra-virgin olive oil for drizzling1 teaspoon Diamond Crystal kosher salt113 grams 1 stick unsalted butter, cubed116 grams 1/2 cup créme fraiche96.5 grams 1/4 cup sweetened condensed milk56 grams 3 tablespoons artisinal maple syrup2 tablespoons brandy or whiskey1 tablespoon pure vanilla bean paste or vanilla extract2 extra-large egg yolks1 extra-large eg37.5 grams 3 tablespoons dark brown sugar3/4 teaspoon freshly ground cinnamon1/2 teaspoon freshly ground allspice1/2 teaspoon ground ginger1/4 teaspoon freshly grated nutmeg1/8 teaspoon freshly ground clovesFor the spice toppping25 grams 2 tablespoons granulated sugar1/4 teaspoon freshly ground cinnamon1/4 teaspoon freshly grated nutmegFor the Whipped Cream:360 grams 1 1/2 cups heavy cream116 grams 1/2 cup créme fraiche or 122 grams 1/2 cup sour creamInstructionsFor the crust: whisk the water and cream in a small bowl.Combine the flour and salt in a stand mixer fitted with the paddle and mix on low speed for a few seconds to distribute the salt. Add the butter and mix on low speed until the flour and butter look like wet sand. Add the cream/water mixture and mix on low speed until the dough just comes together.Lightly dust a work surface with flour and transfer the dough to the floured surface. Pat it into a one-inch thick disk, wrap in plastic, and place in the refrigerate to chill until it’s firm, at least two hours.Coat a 9-inch glass or metal pie plate with cooking spray.Lightly dust a work surface with flour. Remove the dough from the refrigerator, unwrap, and place on the floured surface. Pound the dough with a rolling pin to soften it until it is malleable and as flat as possible. Dust the dough dough and rolling pin lightly with flour and, applying firm, steady pressure, roll the dough into a 1/8-inch-thick round, dusting with flour as needed.Place the pie pan upside down on the dough and use a paring knife or kitchen shears to cut a round of dough that is at least 3 inches larger all around than the pan.Loosely wrap the dough around the rolling pin and lower it over the prepared pan, centering it so that the dough overhangs evenly around the edge. Lift the edges of the dough and let it drop into the pan; dip the knuckle of your index finger in flour and use it to gently press the dough into the creases of the pan. Don’t stretch the dough to fit or it will shrink when it is baked. Using kitchen shears, trim the dough so there are 1 1/2 inches of dough overhanging all around.Roll the edge of the dough under itself to create a thick lip of dough that rests on the rim of the pie pan. Press the thumb of one hand on the lip to create an indentation in the dough and press the thumb and forefinger of the other hand on either side of the first thumb, creating a U-shaped indentation. Continue around the perimeter of the crust, creating a crimped, scalloped edge. Dot the bottom of the pie shell all over with the tines of a fork and place the pie shell in the refrigerator to chill until the dough is firm, at least 1 hour.Adjust an oven rack to the center position and preheat the oven to 350°F.Line a large baking sheet with parchment paper.Remove the pie shell from the refrigerator, coat a piece of parchment on one side with cooking spray, and gently press the paper sprayed-side down into the shell to cover the dough. Fill the shell with pie weights (or dried beans), pressing them into the creases of the pie shell. Place the pie shell on the baking sheet.Bake the pie shell on the center rack of the oven until the edges of the crust are light golden, 30 to 40 minutes, lifting the parchment to peek under it and gauge the color. Remove the shell from the oven and lift out the weights and parchment paper. (Set the weights aside to cool to room temperature, then put them away to use again for the same purpose. Discard the parchment paper.) Return the shell to the oven, rotating it front to back, and bake until it is evenly golden brown, 8 to 10 minutes. Remove the shell from the oven and set aside to cool to room temperature.Leave the oven on but increase the temperature to 425°F.To prepare the filling, line a baking sheet with parchment paper.Using a large knife, cut the squash in half lengthwise and use a spoon to scoop out and discard the seeds. Place the squash cut-sides up on the prepared baking sheet. Drizzle with the olive oil, sprinkle with ½ teaspoon of the salt, and massage to coat the squash evenly with the oil and salt. Turn the squash cut-side down on the baking sheet and place it in the oven to roast until it is tender when pierced with a fork, 30 to 40 minutes. Remove the squash from the oven and set aside until it is cool enough to touch.Leave the oven on.Place the butter in a small saucepan or skillet with a light-colored bottom to make golden butter. Warm the butter over medium heat until it melts and begins to bubble, swirling the pan occasionally. Cook the butter, swirling often so it cooks evenly, until it is golden and the milk solids are caramel colored, 3 to 6 minutes. Remove from the heat. Working quickly so the butter doesn’t continue to cook, weigh out 54 grams (or measure ¼ cup) of butter, making sure to include the milk solids and transfer it to a large bowl.Scoop the squash out of its skin and discard the skin. Put the squash in a food processor fitted with a metal blade and puree it. Pass the pureed squash through a fine-mesh sieve, pushing it through the holes with a rubber spatula. Weigh out 510 grams (or measure 2 cups) of the squash puree and put it in a large bowl. (Reserve any remaining squash for another use.) While the squash is still warm, add the warm golden butter and stir with a whisk until it is thoroughly combined. Add the crème fraiche, sweetened condensed milk, maple syrup, brandy, and vanilla and stir them in with the whisk just until they are combined. Do not overmix.Combine the egg yolks, whole egg, brown sugar, cinnamon, allspice, ginger, nutmeg, cloves, and remaining ½ teaspoon salt in a stand mixer fitted with the whisk. Beat on medium-high speed until the eggs have lightened in color and thickened slightly, about 3 minutes. Stop the mixer and scrape down the sides and bottom of the bowl with a rubber spatula. Add the squash mixture and beat on low speed for about 30 seconds to combine. Stop the mixer and remove the whisk and bowl from the stand and scrape the bowl from the bottom up to release any ingredients that may be stuck there.To make the spice topping, stir the sugar, cinnamon, and nutmeg together in a small bowl. Set aside.Place the prepared pie shell on a baking sheet, pour the filling into the shell, and smooth the top with an offset spatula. Sprinkle the sugar and spice topping evenly over the surface.Place the baking sheet with the pie in the oven and bake for 15 minutes.Rotate the baking sheet front to back and reduce the oven temperature to 350°F. Bake the pie until it is evenly colored, puffs up around the edges, and sets up slightly, 25 to 35 minutes longer. The center will still jiggle when you gently shake the pan, but it won’t be liquid. Remove the pie from the oven and set aside to cool to room temperature. Place the pie in the refrigerator to chill overnight.To make the whipped cream, pour the heavy cream into a stand mixer fitted with the whisk and whip the cream on low speed for about 1 minute until it thickens enough not to spatter. Increase the speed to medium-high and whip until soft peaks form, 2 to 3 minutes. Add the crème fraiche and whip on medium-low speed until medium peaks form, about 1 minute.Serve the pie chilled, with the whipped cream on the side.NotesI used my own favorite pie crust (see here) but probably should’ve used Nancy’s — I bet the cream and 2 sticks of butter would’ve made it more stable and prevented shrinkage.
 The post Pumpkin Pie That’ll Actually Make You Love Pumpkin Pie appeared first on Amateur Gourmet.
Adam D. Roberts's Blog

- Adam D. Roberts's profile
- 3 followers

