
Dreena Burton's Blog
April 16, 2026
Oil-Free Vegan French Toast (Easy, Healthy & Delicious!)

This oil-free vegan French toast delivers everything you love – crispy edges, soft centers, and warm cinnamon flavor—without eggs, dairy, or added oil. This is a recipe that’s on REPEAT in my home.

And whether you’re vegan, dairy-free, or just looking for a healthier breakfast option, this recipe proves you don’t have to compromise on taste or texture. Even better? It’s just as easy to make as traditional French toast (or easier).
You will love this French toast because it’s:
100% plant-based & oil-freeRich, custardy texture without eggsNaturally wholesome ingredients Quick and easy Easy to Batch Prep and Cook (see below)Method: Oil-Free Vegan French ToastTo prepare the batter for this French toast, first blend all the ingredients. Once blended, transfer the batter to a large bowl. Simply dredge your slices of bread in the batter, and begin cooking. Always preheat your non-stick pan over medium heat for a few minutes before cooking. This will ensure you get a nice sear & sizzle. Finally, don’t rush the flip! Patience is key – wait until the slice releases easily from the pan before flipping. Continue in batches, transferring slices to a cooling rack when cooked.
 Batch Cooking
You can easily double or triple the batter ingredients to refrigerate the batter (3-4 days) or freeze the batter (2-3 months).
Also try batch-prepping your slices of french toast to refrigerate or freeze. Our youngest is a competitive swimmer and needs hearty breakfasts! So I often batch-prep the french toast, let cool, and then freeze in containers. To reheat, simply thaw slices and toast briefly to bring back that freshly-made French toast appeal!
This recipe is also a GREAT way to use those scraps of breads that no one wants to eat. Sometimes I save those ends and store in the freezer until I’m ready to prep my vegan french toast.
Nut-Free OptionWhile the base recipe here uses cashews with chia seeds, I now always make this recipe with the nut-free swap. Why? It’s a great way to include nutritionally-dense seeds, plus I love the texture. So don’t shy away from the nut-free option – it’s terrific!
 Final Thoughts
This oil-free vegan French toast is proof that simple, wholesome ingredients can create something not just satisfying – but also impressive. This is a recipe that you’ll come back to again and again (I do)!
Please share your thoughts in the comments below.
Enjoy, x Dreena
 PrintCinnamon French ToastI remember French toast fondly from childhood. It was the “treat” breakfast we had as kids, probably far easier for our parents to make than pancakes, and a great way to use up odds and ends of bread. This version is much healthier than what I ate as a kid, and I tell you our girls love it just the same.Course Breakfast, brunchIngredients1 cup + 1-2 tbsp plain or vanilla unsweetened nondairy milk1 tablespoon white chia seeds1/3 cup soaked and drained cashews see note for nut-free option3/4 teaspoon cinnamon1/4 – 1/2 teaspoon pure vanilla extract1/8 teaspoon sea saltSliced bread of choice (whole-grain, gluten-free, etc) see noteInstructionsIn a blender or using a handheld blender, puree the milk (starting with 1 cup; see note), chia, cashews, cinnamon, vanilla extract, and sea salt until very smooth and thick (it will get thicker as it sits a little while and the chia swells). Prepare a nonstick skillet by wiping over with a touch of oil (you need a nonstick skillet, or this will be a sticky event!). Turn heat to high for a few minutes to heat up the pan, then reduce to medium/medium-high. Dip a slice of bread into the batter. Turn over and let it sit in the chia mixture for a few moments to soak, then remove and place in the skillet. Repeat with other slices, frying 2–3 pieces or more at a time, depending on the size of your skillet. Fry for 3–5 minutes on each side, until light brown. Keep the heat high enough to get a good sear/crust on the bread, but reduce if it’s scorching. Note that the slices will be sticky until they are ready to be flipped, so be patient. Repeat until all bread is used. Serve with fresh fruit and pure maple syrup.NotesServing Idea: Another fun serving idea is to make sandwiches out of the French toast, slathering some nut butter between two slices, then serving with maple syrup.Nut-Free Option: Replace 1/3 cup of cashews with 3 tablespoons of hemp seeds. Bread Note: You may use 6–10 slices of bread, depending on the size of the slices.Milk Note: After the batter sits for a few minutes it can become quite thick. You can stir through another 1–2 tablespoons of milk if it has gotten too thick with standing (if you have less than half the batter left, use just 1 tablespoon).
The post Oil-Free Vegan French Toast (Easy, Healthy & Delicious!) appeared first on Dreena Burton | Vegan Recipes & Cookbooks.


April 14, 2026
Power Up Your Plant-Based Plate: 10 Protein-Packed Vegan Foods

What are some protein rich foods for vegans? A roundup of plant-based recipes using protein-rich foods like beans, nuts, seeds, and grains.
 What are some protein rich foods for vegans?
I hesitated to write this post. As someone who has been plant-based for almost 30 years, I’ve had my fill of “where do vegans get their protein?”
Still, I’m often asked about protein-rich meals and snacks, and new vegans can feel overwhelmed and want to ensure they are getting enough protein.
Rather than break down these protein rich foods into grams of protein per serving, I’m sharing recipes that have plant-based foods that are especially good sources of protein. Ultimately if you eat a whole foods plant-based diet, protein intake is not a concern.
Protein Rich Recipes for VegansToday, I’m offering a roundup of recipes that utilize some of the most protein rich foods for vegans: legumes (beans and lentils), quinoa and other whole grains, hemp seeds, pumpkin seeds, nuts, chia seeds, and yup – tofu. Let’s get started!
1) Umami Almond Quinoa Burger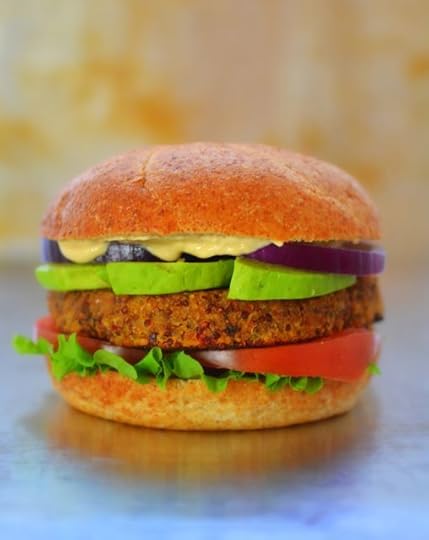 Umami Almond and Sundried Tomato Burger
Think it’s only those “meaty” store-bought burgers that are high in protein? Most homemade burgers are made with nuts, seeds, beans, and grains which are all great sources of protein. Combining quinoa with raw almonds, these Umami Almond Quinoa patties are protein-rich veggie burgers. They are very flavorful without being spicy for little palates.
 PrintUmami Almond, Quinoa, and Sun-Dried Tomato Burgers#wprm-recipe-rating-0 .wprm-rating-star.wprm-rating-star-full svg * { fill: #343434; }#wprm-recipe-rating-0 .wprm-rating-star.wprm-rating-star-33 svg * { fill: url(#wprm-recipe-rating-0-33); }#wprm-recipe-rating-0 .wprm-rating-star.wprm-rating-star-50 svg * { fill: url(#wprm-recipe-rating-0-50); }#wprm-recipe-rating-0 .wprm-rating-star.wprm-rating-star-66 svg * { fill: url(#wprm-recipe-rating-0-66); }linearGradient#wprm-recipe-rating-0-33 stop { stop-color: #343434; }linearGradient#wprm-recipe-rating-0-50 stop { stop-color: #343434; }linearGradient#wprm-recipe-rating-0-66 stop { stop-color: #343434; }These have fast become one of my FAVE plant-powered burger recipes! The flavor is full of umami depth from the nuts, tamari, and sun-dried tomatoes. They taste fantastic paired with sliced avocado in burger buns or wrapped in whole-grain tortillas!Course burgers, Main CourseIngredients2 cups raw almonds1 small-medium clove garlic cut in quarters2 tbsp balsamic vinegar1 tbsp tamari or coconut aminos for soy-free version1 1/2 tbsp tomato paste1/2 tsp dried rosemary or 1 1/2 tsp fresh rosemary leaves1/4 tsp sea salt3/4 – 1 cup green onions sliced1/2 cup sun-dried tomatoes not oil-packed; preferably pre-sliced – or, chop before adding to processor, see note1 1/2 cups cooked quinoa cooled first; can substitute brown riceInstructionsIn a food processor, add almonds, garlic, balsamic, tamari, tomato paste, rosemary, and salt. Puree until the nuts are very finely ground, and becoming a little sticky. Be sure to grind them fine enough so that the almonds release some oils and become a little ‘sticky’, that will help bind the burgers – you don’t want almond butter, but a very fine meal that is becoming clumpy. Then add green onions and sun-dried tomatoes and pulse through until the mixture becomes dense and is starting to hold together. Add quinoa and process/pulse through again until well incorporated. Remove blade, and shape into patties (or refrigerate first for 1/2 hour, helps make easier to shape patties). To cook, heat a non-stick skillet over medium heat. Cook patties, about 5-7 minutes on first side, and then another 3-5 minutes on second side until golden brown. These patties hold their shape well, but if they are flipped a lot and overcooked they become more crumbly and dry. Serve with fixings of choice. Makes about 6 patties.NotesSun-dried tomato note: Some varieties/brands of sun-dried tomatoes can be very tough and hard, and others quite soft. If the ones you have are soft, go ahead and add them straight – but if they are very hard, it is useful to soak them in boiling water for a few minutes to soften (fully drain and pat dry before adding to processor).2) Simplest Marinated Tofu
Okay, I realize it’s ‘cliche’ to list tofu as one of the protein-rich foods for vegans. Some vegans don’t eat tofu, but many do. And, tofu is quite protein-packed. One of the most common questions I get from readers is “what’s an easy way to prepare tofu”. Answer: This recipe!
 PrintSimplest Marinated Baked Tofu#wprm-recipe-rating-1 .wprm-rating-star.wprm-rating-star-full svg * { fill: #343434; }#wprm-recipe-rating-1 .wprm-rating-star.wprm-rating-star-33 svg * { fill: url(#wprm-recipe-rating-1-33); }#wprm-recipe-rating-1 .wprm-rating-star.wprm-rating-star-50 svg * { fill: url(#wprm-recipe-rating-1-50); }#wprm-recipe-rating-1 .wprm-rating-star.wprm-rating-star-66 svg * { fill: url(#wprm-recipe-rating-1-66); }linearGradient#wprm-recipe-rating-1-33 stop { stop-color: #343434; }linearGradient#wprm-recipe-rating-1-50 stop { stop-color: #343434; }linearGradient#wprm-recipe-rating-1-66 stop { stop-color: #343434; }The marinade bakes well into the tofu slices in this recipe. The flavors are delicious but simple—just the way kids like!Keyword tofuServings 4Ingredients2½ tablespoons balsamic vinegar2 tablespoons tamari or coconut aminos1 teaspoon pure maple syrup1 package 12 oz extra firm tofu, cut into square slices ¼”– ½” thick and patted gently to remove excess moisture (20–24 square slices)InstructionsPreheat oven to 375°F. In an 8″ × 12″ baking dish, stir together the vinegar, tamari, and maple syrup. Add the tofu and turn to coat each side.Bake uncovered for 17–22 minutes, turning the tofu pieces once through baking. Remove from oven and let cool a little before serving; pour any remaining marinade over the tofu.NotesSandwich Note: This tofu makes a mighty tasty sandwich filling! Take any leftovers and mash, or pulse in a food processor until crumbly, then mix with diced veggies and condiments of your choice.Flavor Note: To amp up the seasonings for adults, try adding a splash of chipotle hot sauce or vegan Worcestershire sauce, along with some garlic and onion powder. Or, add a teaspoon each of dried basil and oregano leaves, along with some freshly ground black pepper.3) Hummus!
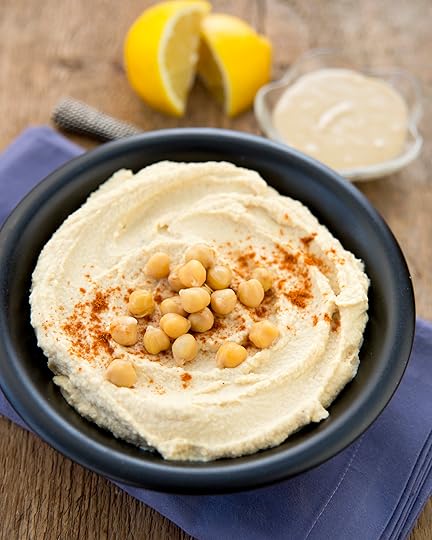
Again, perhaps cliche to add hummus to a list of protein rich foods for vegans. Nevertheless, hummus is a wonderful choice because it’s filled with chickpeas (or other beans, which are a great source of plant-based protein). Here I share my classic Hummus 101 recipe from Plant-Powered Families.
Also check out some of these hummus recipes: Pumpkin Hummus, Green Pea Hummus, Sweet Potato Hummus, White Bean Hummus, Roasted Tomato and Garlic Hummus, and even a Curried Chickpea Hummus. As I say… #hummusisafoodgroup!
 PrintHUMMUS 101 from Plant-Powered Families#wprm-recipe-rating-2 .wprm-rating-star.wprm-rating-star-full svg * { fill: #343434; }#wprm-recipe-rating-2 .wprm-rating-star.wprm-rating-star-33 svg * { fill: url(#wprm-recipe-rating-2-33); }#wprm-recipe-rating-2 .wprm-rating-star.wprm-rating-star-50 svg * { fill: url(#wprm-recipe-rating-2-50); }#wprm-recipe-rating-2 .wprm-rating-star.wprm-rating-star-66 svg * { fill: url(#wprm-recipe-rating-2-66); }linearGradient#wprm-recipe-rating-2-33 stop { stop-color: #343434; }linearGradient#wprm-recipe-rating-2-50 stop { stop-color: #343434; }linearGradient#wprm-recipe-rating-2-66 stop { stop-color: #343434; }Those of you who have followed my work know that I love my hummus. Our entire family loves hummus. I make many different versions, taking many liberties with the pure definition of “hummus”! Here is my basic, traditional version of hummus. Freshly cooked chickpeas taste best, but busy parents will often rely on canned beans—that’s perfectly fine!Servings 4 – 4 1/2 cupsIngredients4 cups cooked chickpeas rinsed and drained, if using canned1/4 cup tahini or more, if you like it even nuttier!2-3 tbsp nutritional yeast optional; see note1 medium clove garlic sliced or quartered (see note)1 teaspoon sea saltFreshly ground black pepper to taste4-5 tbsp freshly squeezed lemon juice to taste2-4 tbsp waterInstructionsIn a food processor, combine the chickpeas, tahini, nutritional yeast, garlic, sea salt, black pepper, lemon juice, and 2 tablespoons of the water, and puree until smooth, adding 1–2 tablespoons water to thin as desired. Stop to scrape down the sides of the bowl a few times, and continue pureeing until very smooth. Season to taste with additional salt, black pepper, and/or lemon juice, and serve.NotesNutritional Yeast Note: Classic hummus recipes do not include nutritional yeast. However, I have found that kids often like the cheesy flavor that it lends. If you are encouraging kids to eat more hummus, add the nutritional yeast—start with a bit less if you like, and adjust to taste!Garlic Note: Many traditional versions of hummus include a heavy amount of garlic. Children typically do not like the sting of raw garlic, so I have included a modest amount in this recipe. Feel free to adjust to your own tastes. Serving Suggestions: Serve with crudité, pita breads, or tortilla chips, or on Hummus Tortilla Pizzas, page 138.4. Greens ‘n Beans Soup
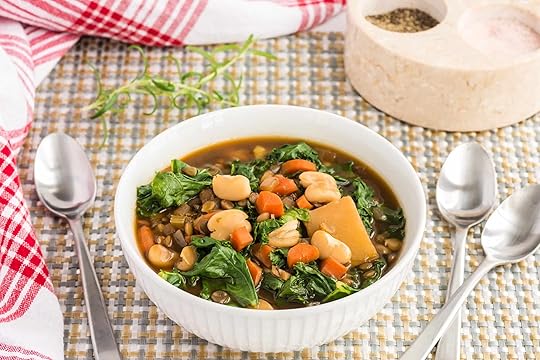
The title says it all! Boasting greens and plenty of beans, along with other vegetables, this soup is a protein-rich recipe that’s a winner.
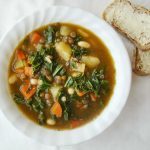 PrintBeans ‘n Greens Soup#wprm-recipe-rating-3 .wprm-rating-star.wprm-rating-star-full svg * { fill: #343434; }#wprm-recipe-rating-3 .wprm-rating-star.wprm-rating-star-33 svg * { fill: url(#wprm-recipe-rating-3-33); }#wprm-recipe-rating-3 .wprm-rating-star.wprm-rating-star-50 svg * { fill: url(#wprm-recipe-rating-3-50); }#wprm-recipe-rating-3 .wprm-rating-star.wprm-rating-star-66 svg * { fill: url(#wprm-recipe-rating-3-66); }linearGradient#wprm-recipe-rating-3-33 stop { stop-color: #343434; }linearGradient#wprm-recipe-rating-3-50 stop { stop-color: #343434; }linearGradient#wprm-recipe-rating-3-66 stop { stop-color: #343434; }Forget chicken noodle soup! This is the kind of soup that will keep you glowing inside and out, with nutrient-rich kale and plenty o’ beans. Yep, this is proper good comforting soup that laughs in the face of all those ‘healing chicken soup’ theories!Course SoupIngredients2 tbsp water or more as needed, to saute1 ½ cups onion diced2 ½ – 3 cups red or yukon gold potatoes cut in chunks about 1 ½ – 2” thick1/2 cup celery diced1 cup carrots diced (or 1 cup red pepper, chopped in small chunks, added later, see note)4-5 medium-large cloves garlic minced1 ½ tsp dried rosemary leaves1 tsp dried thyme leaves1 tsp dried marjoram leaves or dried oregano leaves1 ½ tsp ground mustard1 tsp sea salt¼ tsp freshly grated nutmeg see notefreshly ground black pepper to taste1 cup brown green lentils, rinsed (see note)2 cups vegetable stock5 cups water1 tbsp red miso1 1/2 tbsp blackstrap molasses2 dried bay leaves1 14/15 oz can cannellini beans (or other white beans), drained and rinsed6-7 cups loosely packed fresh kale leaves, roughly chopped or torn (roughly 1 smallish bunch of kale, can use curly kale or dinosaur kale) (keep fairly large pieces, they will wilt significantly)InstructionsIn a large pot over medium heat, add the water, onion, potatoes, celery, carrots (if using), garlic, dried herbs and spices, salt, and pepper.Stir through, cover, and cook for 6-8 minutes, stirring occasionally.If veggies are sticking, add another splash of water. Add the lentils, stir through, cover and cook for another few minutes, and then add the vegetable stock, water, miso, molasses, bay leaves and stir through.Increase heat to bring to a boil, then reduce heat to medium-low, cover and let cook for 30- 40 minutes, until the lentils are very soft and fully cooked. (If using the chopped red pepper, add after first 25-30 minutes of cooking lentils, see note).Turn off heat, add the cannellini beans (see note), kale, stir through, cover, and let wilt in soup for about 5 minutes. Remove bay leaves to serve, and taste to add additional salt and pepper if desired. NotesSpice Note: Nutmeg seems an odd addition to this soup, I know. However, it actually works nicely with bitter greens, and adds a subtle flavor to the soup that is very pleasant. Give it a try!Red Pepper Note: I add the red pepper a little later, just to preserve a little more of the freshness of the pepper. You can add it earlier if you prefer, or use carrot in place of red pepper – though I prefer the red pepper variation.Beans Note: Adding the cannellini beans later in the cooking helps preserve the white color of the beans. You can certainly add them earlier, with the lentils, if you want, but they will absorb the broth and turn a brownish color. Just for visual appeal, I prefer to add them later.Savvy Subs and Adds: Mung beans would make a good substitution for the green lentils if you have those handy. You can substitute other greens in place of the kale if you like, such as collard greens, swiss chard, or spinach. If using swiss chard or spinach, you won’t need to cook them through, just stir through for a minute and serve.5. Protein Bars (no pea protein!)
Beans aren’t the only protein powerhouse of plant-based foods – so are seeds. A tasty, healthy snack that pops protein with every bite. Nut-free and also “pea-protein-free”!
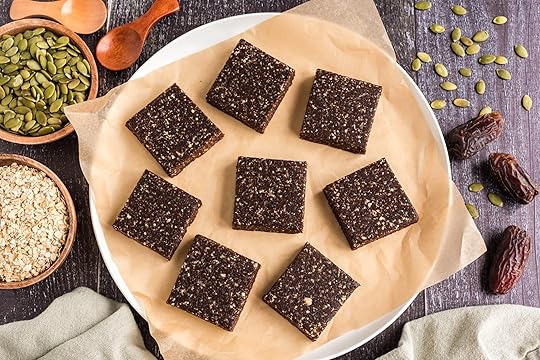
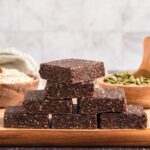 PrintNo-Pea-Protein Protein Bars#wprm-recipe-rating-4 .wprm-rating-star.wprm-rating-star-full svg * { fill: #343434; }#wprm-recipe-rating-4 .wprm-rating-star.wprm-rating-star-33 svg * { fill: url(#wprm-recipe-rating-4-33); }#wprm-recipe-rating-4 .wprm-rating-star.wprm-rating-star-50 svg * { fill: url(#wprm-recipe-rating-4-50); }#wprm-recipe-rating-4 .wprm-rating-star.wprm-rating-star-66 svg * { fill: url(#wprm-recipe-rating-4-66); }linearGradient#wprm-recipe-rating-4-33 stop { stop-color: #343434; }linearGradient#wprm-recipe-rating-4-50 stop { stop-color: #343434; }linearGradient#wprm-recipe-rating-4-66 stop { stop-color: #343434; }After searching high and low for a substantial snack bar that didn’t have pea protein… I decided to make my own. These are easy to make, and I offer nut-free modifications and also substitutions if you don’t want to use the peanut butter and pumpkin powders.Course Breakfast, Snack, snacksKeyword dates, oats, peanut butter, protein, pumpkin seedsServings 12 squaresIngredients1 cup pitted dates steam if needed, see note1/2 cup pumpkin seeds1/2 cup rolled oats1/4 cocoa powder1/4 cup organic peanut butter see notes for peanut/nut free1/4 cup organic peanut butter powder see note1/4 cup pumpkin seed protein powder see note1/4 tsp scant sea salt1 scant tablespoon or 2 1/2 tsp pure vanilla extractInstructionsPrepare a loaf pan with a strip of parchment paper. In a food processor, add all ingredients and pulse through until crumbly. Then continue to process until the mixture becomes sticky and begins to form clumps on the blade. This may take a couple of minutes. It will appear as if nothing is happening, with the mixture whirring around in crumbs, but soon it will start to become sticky. Stop the machine and remove the dough, placing in the loaf pan. Use a spatula to press the mixture into the loaf pan. Then, cover with aluminum foil or plastic wrap and refrigerate for an hour or longer. After chilling, use a butter knife or spatula to begin to release the mixture away from the edges of the loaf pan, and then use the parchment to lift the mixture out. Cut into squares or bars, and then store in the fridge in an airtight container. Makes 12 squares/bars.VideoNotesDates Note: If the dates you have are tough and not moist, steam dates to soften ahead of time. Usually, store-bought dates are soft enough to process.Nut-free Note: For a peanut-free version, replace the peanut butter with cashew butter, and replace the peanut butter powder with the pumpkin protein (thereby using 1/2 cup total of the pumpkin protein powder). For a fully nut-free version, use regular tahini or black tahini (sesame seed paste), sunflower butter, or pumpkin seed butter to replace the nut butter. Since seed butters have a more natural bitter taste, you may want to use another few dates in the mixture or add a touch more vanilla.PB Powder/Pumpkin Powder Note: If you don’t have, or don’t want to use, the peanut and pumpkin protein powders, you can omit and make these modifications: use 1/3 cup peanut butter or nut butter instead of 1/4 cup; 1/3 cup cocoa powder instead of 1/4; and increase rolled oats by another 1/2 cup (using 1 cup total).Idea: If you prefer, you can roll the mixture to form small balls, and optionally roll in a dusting of coconut sugar, cocoa powder, and/or nuts or pumpkin seeds.6. No-Fu Love Loaf
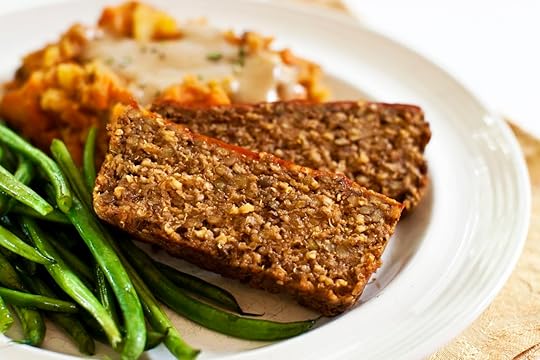 No-Fu Love Loaf
A long-time favorite with readers for the holidays, this No-Fu Loaf is loaded with lentils and steel cut oats, as well as tahini and chia seeds. Not just full of protein, this vegan meatloaf loaf is full of flavor – and satisfies!
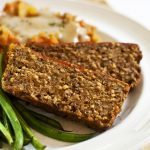 PrintNo-Fu Lentil Loaf#wprm-recipe-rating-5 .wprm-rating-star.wprm-rating-star-full svg * { fill: #343434; }#wprm-recipe-rating-5 .wprm-rating-star.wprm-rating-star-33 svg * { fill: url(#wprm-recipe-rating-5-33); }#wprm-recipe-rating-5 .wprm-rating-star.wprm-rating-star-50 svg * { fill: url(#wprm-recipe-rating-5-50); }#wprm-recipe-rating-5 .wprm-rating-star.wprm-rating-star-66 svg * { fill: url(#wprm-recipe-rating-5-66); }linearGradient#wprm-recipe-rating-5-33 stop { stop-color: #343434; }linearGradient#wprm-recipe-rating-5-50 stop { stop-color: #343434; }linearGradient#wprm-recipe-rating-5-66 stop { stop-color: #343434; }Many vegan versions of meatloaf are made with tofu, veggie ground round, tvp, or even seitan. Those tofu-averse will be happy to know there is no tofu or veggie meats in this loaf. This savory version uses only lentils, cracked wheat, oats, and chia seed, along with a mix of seasonings to make it all magically come together! This loaf can be made wheat and gluten-free (see notes).Course Main CourseIngredients½ cup brown green lentils1 cup vegetable stock1/3 cup water1 dried bay leaf3/4 cup bulgur toasted cracked wheat (for gluten-free version, use certified gf steel cut oats)1 cup water boiled1/4 cup natural ketchup1 cup rolled or quick oats ensure gf certified for gluten-free3 tbsp tamari2 tbsp nutritional yeast2 tbsp ground white chia or can use flax meal2 tbsp vegan Worcestershire sauce see note for gf version2 tbsp tahini or sunflower seed butter2 tsp blackstrap molasses1/4 tsp dried thyme¼ – 1/2 tsp dried oregano1 tsp dried basil1/8 tsp ground fennel optionalFreshly ground black pepper to tasteTopping:3-4 tbsp natural ketchup1 tsp vegan worcestershire sauce optional OR 2 tsp vegan bbq sauce (optional)InstructionsCombine the lentils, vegetable stock, 1⁄3 cup of water, and bay leaf in a saucepan. Bring to a boil, then lower heat to medium-low, cover, and cook for 25 to 30 minutes, until just about tender. Once done, add the bulgur and boiling water, cover, and cook on medium-low heat for another 8 to 9 minutes.Meanwhile, preheat the oven to 375°F. Lightly oil an oven-proof glass loaf pan and line the bottom of the pan with a strip of parchment paper to cover (place it in to protrude along the short ends of the pan; this helps for easier removal of the veggie loaf from the pan). Combine the topping ingredients in a small bowl.Once the bulgur is cooked, remove the bay leaf and add all the remaining ingredients (except topping). Stir very well. Transfer the mixture to prepared pan and pack it in. Spread the topping mixture over the top.Cover the dish with aluminum foil and bake for 25 to 28 minutes. Remove the foil and bake for another 7 to 8 min- utes. Remove from the oven and let stand for 10 to 15 min- utes or so, before cutting to slice and serve.NotesAllergy-Free or Bust! Despite its not having any tofu, tempeh, or TVP, I cannot technically categorize this recipe as “soy free” because of the inclusion of tamari and vegan Worcestershire sauce. These are important seasonings in the loaf. That said, to replace the Worcestershire for a gluten-free version, use instead an extra 1⁄2 tablespoon of wheat-free tamari, along with an extra 1⁄2 teaspoon of molasses, and 2 teaspoons of apple cider vinegar.Savvy Subs and Adds: If you’d like to add some veggies to the loaf, try adding 1⁄2 cup of seeded and finely chopped green pepper, or 1⁄4 cup of finely chopped celery (stir into the mixture with the seasonings).Serving Suggestions: Rosemary Gravy is excellent with this loaf, but this dish is equally delicious served with condi- ments as a burger of sorts: Pop slices of the loaf into pita or a folded tortilla, along with ketchup and vegan mayonnaise (or “Almonnaise”).7. Stewed Chickpeas
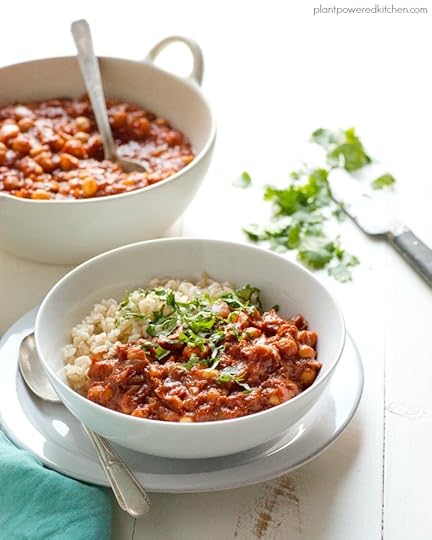
As I like to say “use your bean”!  As mentioned, lentils, beans, pulses are protein-rich vegan foods. Chickpeas are a favorite, and easy to work into many recipes. These Stewed Chickpeas are one of my favorites, in fact, I pulled together this recipe in about 15 minutes of prep yesterday – and I doubled it!
Some other protein-packed vegan recipes using chickpeas: Summer Chickpea Salad, Thai Chickpea Almond Casserole, No Butter No Chicken, Chickpea Ratatouille, and Saucy BBQ Chickpeas.
 PrintStewed Chickpeas in the Instant Pot#wprm-recipe-rating-6 .wprm-rating-star.wprm-rating-star-full svg * { fill: #343434; }#wprm-recipe-rating-6 .wprm-rating-star.wprm-rating-star-33 svg * { fill: url(#wprm-recipe-rating-6-33); }#wprm-recipe-rating-6 .wprm-rating-star.wprm-rating-star-50 svg * { fill: url(#wprm-recipe-rating-6-50); }#wprm-recipe-rating-6 .wprm-rating-star.wprm-rating-star-66 svg * { fill: url(#wprm-recipe-rating-6-66); }linearGradient#wprm-recipe-rating-6-33 stop { stop-color: #343434; }linearGradient#wprm-recipe-rating-6-50 stop { stop-color: #343434; }linearGradient#wprm-recipe-rating-6-66 stop { stop-color: #343434; }These stewed chickpeas have an immensely satisfying flavor and texture. The onions cook down with the dates into the tomato puree creating a rich, smoky-sweet sauce. Delicious and hearty.Course entree, Main CourseIngredients2-3 tbsp water and more if needed2 large or 3 small-medium onions chopped (about 3 – 3 1/2 cups)1 1/2 tbsp smoked paprika1/2 tsp ground cumin1/8 – 1/4 tsp ground allspice1/2 tsp rounded sea salt2 cans chickpeas rinsed and drained2/3 cup pitted dates chopped1 24 oz / 680g jar strained tomatoes or 1 – 28 oz can crushed tomatoesInstructionsAdd water, onions, paprika, cumin, allspice, and salt in the pressure cooker on saute function. Cook for 6-7 minutes, stirring occasionally, and adding extra water if sticking. Add chickpeas, dates, and tomatoes and stir through well. Turn off saute function, and put on lid. Manually set to pressure cook (high) for 20 minutes. Then, let pressure release naturally (or release manually). Stir through, taste, add seasoning if desired, and serve. Serves 4-6 with cooked grain or potatoes (see note).NotesServing Suggestion: Serve over a whole grain like brown rice, millet, or quinoa. Also try over steamed kale, roasted squash, or mashed potatoes.Stovetop method: If you don’t have a pressure cooker, simply use a large pot to cook on stovetop. Follow instructions to saute. After adding the tomatoes, chickpeas, and dates, bring heat to a boil, then reduce to low. Cover, and cook for 40 minutes, or until dates and onions are fully softened.8. Pumpkin Seed Poppers
Another recipe featuring pumpkin seeds – this time paired with whole grains. You might call them vegan meatballs, I like to call them poppers. Serve with a whole-grain or whole-grain pasta for an added ‘pop’ of protein!
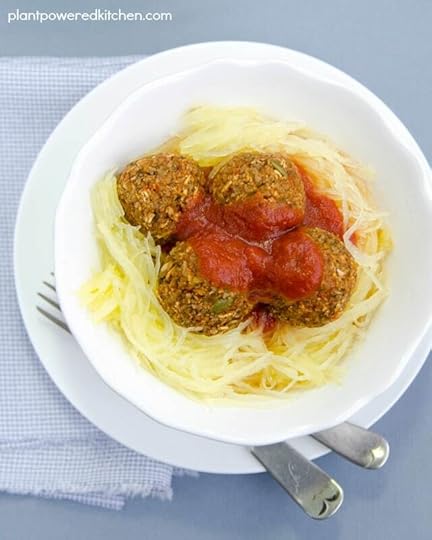
 PrintPumpkin Seed Poppers#wprm-recipe-rating-7 .wprm-rating-star.wprm-rating-star-full svg * { fill: #343434; }#wprm-recipe-rating-7 .wprm-rating-star.wprm-rating-star-33 svg * { fill: url(#wprm-recipe-rating-7-33); }#wprm-recipe-rating-7 .wprm-rating-star.wprm-rating-star-50 svg * { fill: url(#wprm-recipe-rating-7-50); }#wprm-recipe-rating-7 .wprm-rating-star.wprm-rating-star-66 svg * { fill: url(#wprm-recipe-rating-7-66); }linearGradient#wprm-recipe-rating-7-33 stop { stop-color: #343434; }linearGradient#wprm-recipe-rating-7-50 stop { stop-color: #343434; }linearGradient#wprm-recipe-rating-7-66 stop { stop-color: #343434; }Like other vegan meatballs, these are fabulous served up on pasta with a favorite marinara sauce. The flavors might remind you of pizza, so also try serving in a “vegan meatball sandwich”! Leftovers also excellent mashed for a sandwich filling or served up in a salad bowl.Course Main CourseIngredients1 cup precooked/cooled brown rice or 1 cup, packed, precooked/cooled quinoa, see note1 cup roasted pumpkin seeds see note1/2 cup packed roasted red peppers (can use jarred, just drain)1 tbsp tomato paste1/4 – 1/3 cup green onions1 1/2 tbsp balsamic vinegar1 medium clove garlic1 tsp dried oregano1 tsp dried basil3/4 tsp sea salt1/2 tsp blackstrap molasses1/2 cup rolled oats2 tbsp pumpkin seeds to pulse in, optionalInstructionsIn a food processor, add all ingredients except oats and 2 tbsp pumpkin seeds. Puree until well combined, scraping down the bowl as needed. en add oats and pulse through several times to incorporate. Add the pumpkin seeds, and pulse in again, just to slightly incorporate but keep some texture. If possible, refrigerate for about hour. When ready to bake, preheat oven to 375°F. Take scoops of mixture (about 1–1 tbsp), and place on a baking sheet lined with parchment paper. Bake for 17–20 minutes, until golden on just rm to the touch (do not over-bake, they will dry out). Remove, and serve with pasta and tomato sauce, or with baked potatoes. Makes 18–20 balls, serving 4-5.NotesNote: You can toast up the pumpkin seeds yourself, or purchase them roasted. To roast yourself, use raw pumpkin seeds and place on a baking sheet lined with parchment paper. Bake at 400 degrees for about 7-9 minutes, stirring once and watching closely – they turn from golden to burned quickly. If using store-bought, many brands are salted when roasted. If so, reduce the salt in the ingredients to a rounded 1/4 teaspoon.Note: Brown rice is naturally more sticky so helps hold the mixture together. Quinoa can be used if you aren’t able to use the brown rice. Process a little more using quinoa to assist forming the balls.Idea: Try forming patties with this mixture for burgers.Serving Suggestions: Make the balls a little smaller, bake for a few minutes less, and use as mini-bites to top salads and soups.9. Apple-Hemp Muffins
If you’re looking for a muffin that offers a bit more protein than your standard baked good, my Apple-Hemp Muffins are your pick. With plenty of protein-rich hemp seeds and whole-grain flours, these muffins are splendidly nutritious and delicious!
 PrintApple Hemp Muffins#wprm-recipe-rating-8 .wprm-rating-star.wprm-rating-star-full svg * { fill: #343434; }#wprm-recipe-rating-8 .wprm-rating-star.wprm-rating-star-33 svg * { fill: url(#wprm-recipe-rating-8-33); }#wprm-recipe-rating-8 .wprm-rating-star.wprm-rating-star-50 svg * { fill: url(#wprm-recipe-rating-8-50); }#wprm-recipe-rating-8 .wprm-rating-star.wprm-rating-star-66 svg * { fill: url(#wprm-recipe-rating-8-66); }linearGradient#wprm-recipe-rating-8-33 stop { stop-color: #343434; }linearGradient#wprm-recipe-rating-8-50 stop { stop-color: #343434; }linearGradient#wprm-recipe-rating-8-66 stop { stop-color: #343434; }Moist, lightly spiced muffins with the added nutrition of hemp seed nuts. These are easy and quick, and sure to please both kids and adults!Course baking, Breakfast, muffins, SnackServings 12 muffinsIngredients1 1/2 cups whole-grain spelt flour1 cup oat flour2/3 – 3/4 cup hemp seeds2 tsp baking powder1 tsp baking soda1/4 tsp sea salt1 1/2 – 1 3/4 tsp cinnamon1/4 tsp ground cardamom can substitute freshly grated nutmeg1 cup unsweetened organic applesauce1/2 cup pure maple syrup3/4 cup plain or vanilla non-dairy milk1 1/2 tsp pure vanilla extract1/3 cup raisins or chopped raw banana spears use kitchen shears or knife to cut in small pieces about size of raisinsInstructionsPreheat oven to 350°F (176°C). In a large bowl, combine the dry ingredients, sifting in the baking powder and baking soda. Stir through until well combined. In another bowl, combine applesauce, maple syrup, non-dairy milk, and vanilla, and mix together. Add the wet mixture to the dry mixture, and gently fold and mix through, until just combined (do not overmix). Spoon the mixture into a muffin pan lined with cupcake liners (this will fill 12 muffins quite full). Bake for 21-23 minutes, or until a toothpick inserted in the center comes out clean. (See notes above about cooling to help remove from liner.) Makes 12 large muffins.10. Protein Granola
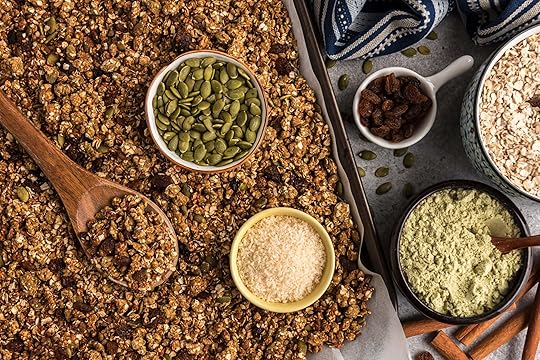
This Protein Granola is PACKED with plant-based protein. See the full post for more.
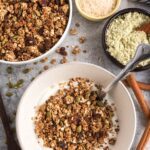 PrintProtein GranolaWe have protein bars, why not protein granola? This one uses a simple pumpkin seed protein powder that is just one ingredient, with a clean flavor and easy to digest. Along with the added seed/nut butter and oats it delivers a good pop of protein!makes about 5 1/2 cupsCourse Breakfast, Snack, snacksKeyword granola, oats, pumpkin, pumpkin seedsServings 5 -6Ingredients3 cups rolled oats use certified gluten-free for that option1 cup pumpkin protein powder see note re extra protein + Canadian link3 tbsp dried sea moss powder optional, see note)2-3 tbsp pumpkin seeds1 1/2 tsp cinnamon1/2 tsp ground cardamom can substitute nutmeg1/4 tsp sea salt1/4 cup hemp seed butter can sub almond butter or other butter of choice1/3 cup brown rice syrup1/4 – 1/3 cup pure maple syrup1 tbsp pure vanilla extract1/4 cup raisins or other dried fruit optionalInstructionsPreheat oven to 300 degrees and line a large rimmed baking sheet with parchment paper.In a large bowl, combine the rolled oats, pumpkin powder, sea moss powder, pumpkin seeds, cinnamon, cardamom, sea salt and stir through until well combined.In another bowl, combine the seed/nut butter with the brown rice syrup, maple syrup (starting with 1/4 cup), and vanilla. Stir well.Add wet mixture to dry and mix to combine well. If you need extra liquid, add another touch of maple syrup.Transfer mixture to your lined baking sheet and spread out to evenly distribute.Bake for 22-25 minutes, stirring a couple of times throughout baking to ensure the mixture browns evenly.Turn off oven, stir in dry fruit if using, and let granola sit in warm oven for another 5 minutes.Once fully cool, store in an airtight container; makes about 5 1/2 cups.VideoNotesPumpkin Powder Note: This brand of pumpkin seed powder tastes great (link here in Canada). It works so well in this granola because it’s almost like pumpkin seeds that have been ground really fine. Other protein powders are finer, and some have odd underlying flavors. Try to use pumpkin seed protein powder in this recipe. If substituting another powder, avoid those with sweeteners (even stevia) and you’ll want to use less, maybe 3/4 cup (as other powders are very fine textured).Nut butter Note: I like using hemp seed butter in this granola, but almond butter substitutes nicely. You can also try cashew or other nut/seed butter. Note that some nut butters are looser than others, so the denser nut butters will take longer to mix with the other wet ingredients.Protein Note: Want MORE protein? Add another 1/4 – 1/2 cup protein powder, reduce oats by 1/4 cup, and add another tablespoon of seed butter/maple syrup if needed. Protein Calculation: This recipe yields between 131-143g of protein.
 On low end: For 6 servings – 21.8g of protein per serving. For 5 servings – 26.2g
On high end: For 6 servings – 23.8g of protein. For 5 servings – 28.6g
This post was originally published May 30, 2021 and updated for April 2026.
The post Power Up Your Plant-Based Plate: 10 Protein-Packed Vegan Foods appeared first on Dreena Burton | Vegan Recipes & Cookbooks.
March 18, 2026
Sweet Potato Turmeric Dressing (Oil-Free, Vegan, Anti-Inflammatory)

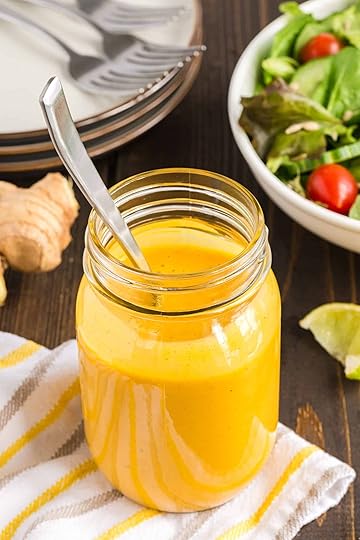
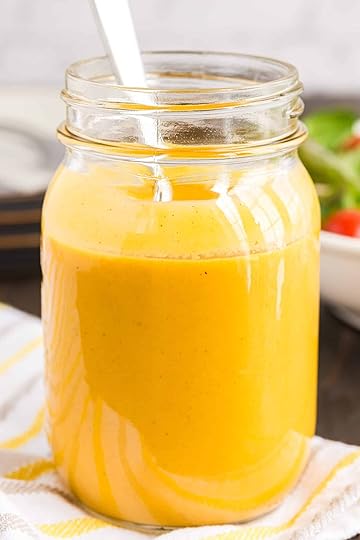
If you’re searching for a healthy, creamy vegan salad dressing, this Sweet Potato Turmeric Dressing is a delicious whole-food option. Made with sweet potato, fresh ginger, turmeric, and lime, this oil-free vegan dressing is packed with flavor while supporting an anti-inflammatory lifestyle.
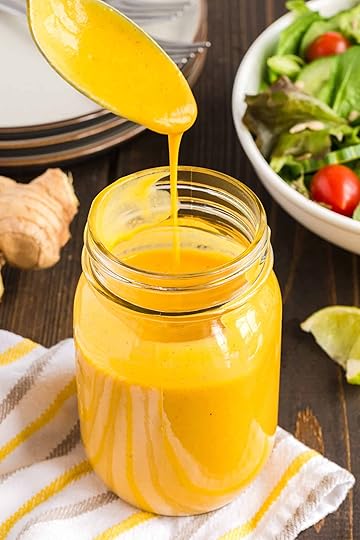
Unlike many store-bought dressings that rely on refined oils, this whole food plant based dressing gets its creamy texture from cooked sweet potato and a small amount of tahini. The result is a rich, golden dressing that’s naturally sweet, slightly tangy, and full of warming spices.
This sweet potato salad dressing works beautifully on leafy green salads, grain bowls, roasted vegetables, and Buddha bowls.
 Why This Is a Healthy Anti-Inflammatory Dressing
This anti inflammatory salad dressing contains several ingredients known for their powerful plant compounds.
Turmeric contains curcumin, a compound studied for its anti-inflammatory and antioxidant effects.
Ginger adds fresh flavor while helping support digestion and immune health.
Sweet potato provides fiber, antioxidants, and natural creaminess without the need for added oils.
Black pepper enhances the absorption of turmeric’s beneficial compounds.
Together, these ingredients create a flavorful ginger turmeric dressing that supports a balanced plant-based diet.
 Image by MYCCF from PixabayWays to Use This Sweet Potato Dressing
This versatile plant based salad dressing pairs well with many meals:
Mixed green saladsSteamed greensDrizzled on quinoa, rice or other grain bowlsRoasted vegetablesBuddha bowlsVeggie wraps or sandwichesIts creamy texture also makes it a great dip for vegetables or roasted sweet potatoes.
 Storage and Prep Tips
Storage: Store in an airtight glass jar in the fridge for up to 5 days. It may thicken as it sits; just give it a quick stir or a splash of water before using.Meal Prep: Roast a couple of sweet potatoes on Sunday so you can whip this up in under 5 minutes during the busy work week.Top 5 pairings for this Anti-Inflammatory Salad DressingTurmeric Note: Fresh turmeric looks like a mini version of ginger root with a bright orange interior. Unlike ginger, you don’t need to peel it! The skin is thin and blends easily. Just be careful—turmeric can stain wooden spoons and countertops!
Since this dressing is creamy, earthy, and slightly sweet, it pairs best with foods that have a bit of “crunch” or a hearty, grain-based foundation. Here are some creative serving suggestions for this creamy sweet potato turmeric dressing:
 1. Massaged Kale & Quinoa Salad
The acidity of the lime and the richness of the sweet potato help soften the fibers of raw kale. Mix into chopped kale, toss through and let sit for the kale to soften. Serve, tossing in other ingredients like cooked quinoa, toasted pumpkin seeds (these are my favorite), and dried cranberries for a texture-rich bowl that holds up well for meal prep.
2. Roasted Buddha BowlsThis dressing was practically made for roasted vegetables. Drizzle it generously over a bowl of:
Roasted chickpeasSteamed broccoli or charred cauliflowerSlices of avocadoA base of brown rice or farro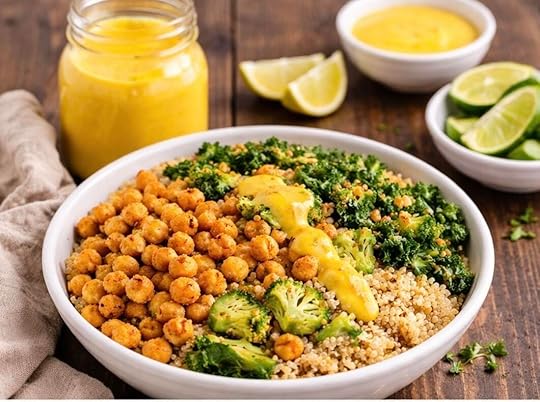 3. Black Bean & Corn Tacos
The cumin and lime in the dressing give it a subtle “taco truck” vibe. Use it as a creamy sauce for soft corn tortillas filled with chili, or a mix of seasoned black beans, crunchy romaine, and pickled red onions.
4. “The Ultimate” Harvest WrapSpread a thick layer of the dressing onto a large whole-wheat tortilla. Fill it with shredded carrots, sliced cucumbers, sprouts, and smoked tofu. The sweet potato base acts like a flavorful spread that keeps the wrap from feeling dry.
5. Air-Fried Tempeh TrianglesTempeh has a nutty, fermented flavor that complements the ginger and turmeric beautifully. Dip air-fried or pan-seared tempeh strips directly into the dressing for a high-protein snack or main dish.
 Final Thoughts
If you’re looking for a flavorful oil-free salad dressing made with nourishing ingredients, this Sweet Potato Turmeric Dressing is a fantastic option. It’s creamy, vibrant, naturally sweet, and full of anti-inflammatory spices.
Once you try this healthy vegan salad dressing, it may quickly become your go-to sauce for salads, grain bowls, and roasted vegetables.
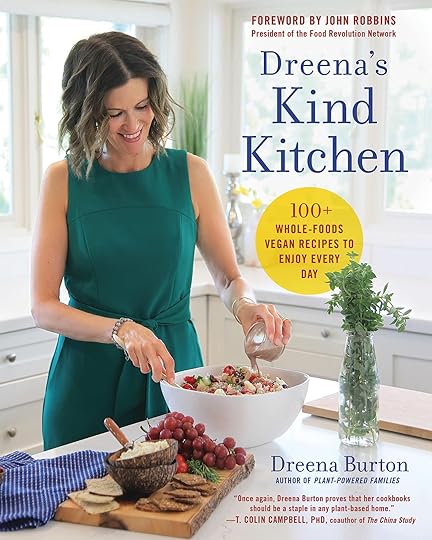
If you love this dressing, you can find more like it in Dreena’s Kind Kitchen. This recipe is found in that cookbook, with the name Ninja Dressing.
 PrintSweet Potato Turmeric Dressing (oil-free, vegan, anti-inflammatory)This dressing uses fresh turmeric along with fresh ginger and black pepper for an anti-inflammatory power punch. The sweet potato mellows out the flavors and makes the dressing creamy and rich. You will want to make this one weekly.Course salad dressings, saladsKeyword gluten-free, oil-free, sweet potatoes, turmericServings 1.25 cups (roughly)Ingredients2/3 cup cooked sweet potato flesh cooled1 tablespoon tahini1 1/2 teaspoons peeled and roughly chopped fresh ginger1 teaspoon sliced or chopped fresh turmeric see note1/2 teaspoon generous sea salt1/2 teaspoon ground cumin or more to taste1/8 –1/4 teaspoon ground cinnamon1/8 teaspoon allspiceFew good pinches freshly ground black pepper1 tablespoon pure maple syrup or other liquid sweetener3 tablespoons fresh lime juice1/2 cup water or more as neededInstructionsStarting with 1/2 cup water and 1/8 teaspoon cinnamon, combine all the ingredients in a blender and puree until very smooth. Taste and add more cinnamon or other seasonings if desired. To thin the dressing to your desired consistency, add extra water as needed. Serve immediately or store in an airtight container in the fridge for up to 5 days.NotesTurmeric Note: Fresh turmeric looks much like fresh ginger root, but with smaller, thinner knobs. While I usually remove the peel from fresh ginger, I don’t remove the skin from fresh turmeric since it’s so thin. However, you may need to trim the ends where they may not be as fresh.
The post Sweet Potato Turmeric Dressing (Oil-Free, Vegan, Anti-Inflammatory) appeared first on Dreena Burton | Vegan Recipes & Cookbooks.
January 20, 2026
The Best Oil-Free Vegan Apple Crisp

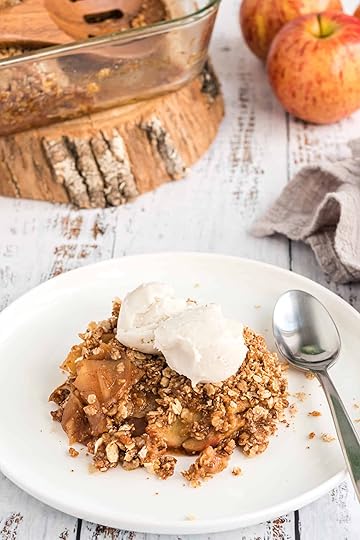
Dare I say this is the best oil-free vegan apple crisp? I dare! If you are looking for a cozy, comforting dessert that feels indulgent but is actually made with wholesome ingredients, you’ll love this oil-free apple crisp.
This recipe comes from Dreena’s Kind Kitchen, and in this book, I call it Charming Apple Crisp, because that’s it is! Charmingly simple and delicious.
The recipe is is completely oil-free, vegan, and refined sugar-free, yet it manages to be richer and more satisfying than a traditional butter-heavy crumble.
In fact, I’ll go out on a limb: this is even better than apple pie!
When I was developing this recipe, my testers absolutely raved about it. My own family was actually disappointed when I finished the testing phase because they didn’t want the constant supply of this crisp to end! It’s the perfect balance of tender, spiced apples and a crunchy, buttery-tasting oat topping.
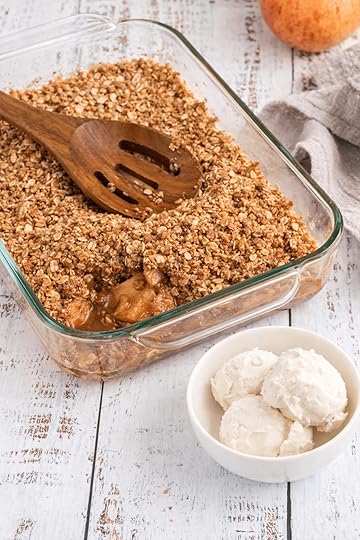 Why You’ll Love This Oil-Free Vegan Apple CrispWhole Food Ingredients: Instead of processed oils or vegan butter, we use coconut butter (or your can substitute raw cashew butter) for a rich, melt-in-your-mouth texture. I developed this recipe to be nut-free for people, as many oil-free vegan desserts use nut butters. But if you prefer not to use coconut butter, then please substitute raw cashew butter (better than roasted). Naturally Sweetened: Pure maple syrup and just a touch of coconut sugar are used for a deep, caramel-like sweetness.The Texture: The arrowroot powder creates a silky, “juicy” sauce for the apples that rivals any bakery filling.Dietary Friendly: It is naturally vegan, oil-free, and can easily be gluten-free if you use certified GF oats and oat flour.
I hope you and your loved ones enjoy this oil-free vegan apple crisp as much as my recipe testers did, and as much as my family does! Please share how you make it your own in the comments. x Dreena
PrintOil-Free Vegan Apple CrispI guarantee this will become a favorite dessert for you. My testers raved about it, and my own family was sad when I was finished with my testing for it. It’s better than any butter or oil-based crisp—and even better than apple pie!Course DessertKeyword apples, crisp, oatsServings 4 -5IngredientsCrisp Topping1/4 cup coconut butter softened11/2 tablespoons pure maple syrup1 cup rolled oats1/4 cup coconut sugar3 tablespoons oat flour1/8 teaspoon sea saltFruit Mixture1/4 cup pure maple syrup1 tablespoon arrowroot powder or organic cornstarch1/4 cup water1 1/2 tablespoons fresh lemon juice1 teaspoon ground cinnamon1/8 teaspoon ground nutmeg and/or ground cardamom1/8 teaspoon sea salt5 cups peeled cored, and thinly sliced apples3-4 tablespoons raisins or dried cranberries optional1 1/2 tablespoons coconut sugarInstructionsPreheat the oven to 350°F. Have ready a 9-inch glass baking dish.For the topping, in a mixing bowl combine the coconut butter and maple syrup and stir well. Add the oats, coconut sugar, oat flour, and salt and mix until crumbly.For the fruit mixture, in a large bowl, whisk together the maple syrup and arrowroot. Add the water, lemon juice, cinnamon, nutmeg, and salt and whisk again. Stir in the sliced apples and raisins, if using, and toss to coat.Sprinkle the coconut sugar in the bottom of the baking dish. Distribute the apple filling in the baking dish, pouring the juices over the top. Add the crisp topping, distributing it evenly over the apples. Bake for 30–35 minutes, until the apples are soft, using a sharp knife to pierce through the apples to test for doneness at 30 minutes. Remove from the oven and let cool a little before serving.NotesServing Suggestions: Serve topped with Dessert Cashew Cream (recipe in Dreena’s Kind Kitchen) or a dollop of non-dairy yogurt or non-dairy ice cream.The post The Best Oil-Free Vegan Apple Crisp appeared first on Dreena Burton | Vegan Recipes & Cookbooks.
January 13, 2026
Easy Curried Carrot Lentil Soup

This Curried Carrot and Lentil Soup promises to become a new favorite in your kitchen.
This isn’t just any lentil soup. We’re talking about a vibrant, aromatic blend of softened earthy lentils and carrots with the soothing warmth of curry powder and the luscious creaminess of coconut milk (yes, you can use ‘lite’).
Truly, this curry lentil soup exemplifies that the whole is much greater than the sum of the parts. It has become a more recent addition to our family’s favorite soups, and I hope your will love it too!
 Why You’ll Love This Curried Carrot & Lentil SoupSimple Ingredients, Big Flavor: Humble ingredients build layers of deep flavors in this soup. From the sweet carrots and savory onions to the fragrant curry and a hint of smoky chipotle, each spoonful is a taste adventure!Hearty & Healthy: Red lentils and carrots are the base of this soup. Lentils are a powerhouse of plant-based protein and fibre, keeping you feeling full and satisfied. Carrots add gorgeous color, plus a boost of vitamins and a touch of natural sweetness.Your Soup, Your Way: Prefer a silky-smooth bisque? Or prefer more texture? This recipe lets you decide! Puree it completely with an immersion blender, or leave some of the veggies and lentils intact for more bite.Weeknight Friendly: With a cooking time just over 1/2 hour, this soup is perfect for a cozy weeknight meal. Most of the time is hands-off simmering, allowing you to relax while the magic happens.Budget-Friendly: Lentils and carrots are economical staples, making this a delicious and affordable meal for the whole family.
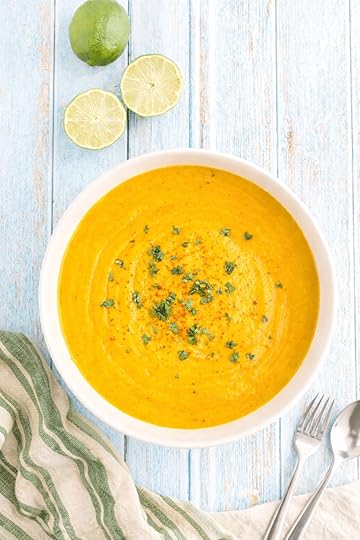 Curried Carrot Lentil Soup: Tips
Saute and Simmer: The beauty of this soup lies in how the flavors meld and deepen as it simmers. We start by sautéing the aromatic vegetables – carrots, onion, and celery – with the curry powder, salt, allspice, and a touch of chipotle. This step “blooms” the spices, releasing their full potential and creating a fragrant base for the soup. Once the veggies are softened, we add the red lentils, water, and creamy coconut milk. The lentils break down beautifully during simmering, contributing to the soup’s naturally thick and comforting texture.
Pro Tip for Curry Flavor: In my experience the “heat” in curry powders can vary greatly. I recommend a mild curry powder in this recipe, for mild heat. If you enjoy more heat, use a hotter curry powder or more chipotle.
Don’t Skip the Lime: A squeeze of fresh lemon or lime juice at the end is a game-changer. It brightens the soup, cutting through the richness of the coconut milk and enhancing all the other flavors. Don’t skip this step!
Recipe Renewal: One of the best things about this Curried Carrot and Lentil Soup? It gets even better with time! Make a big batch, and enjoy the evolving flavors for days. It’s perfect for meal prep, and it freezes beautifully. See my tips for how to “renew” this recipe in the recipe card. (p.s. I share other Recipe Renewal tips like this in Dreena’s Kind Kitchen.)
 Screenshot
  PrintCurried Carrot and Lentil SoupThe ingredients in this soup are simple, but the flavors are full, with warm curry and creamy coconut. If you prefer a chunkier soup, you can skip the pureeing step, or puree just partially to leave some texture.Course Main Course, Soup, stewsKeyword carrots, curry, lentils, red lentilsServings 4 -5 peopleIngredients4 cups water (+ another few tablespoons for saute)4 cups sliced carrot1 cup chopped onion1 cup chopped celery1½ tablespoons curry powder1 – 1 1/4 teaspoons sea salt¼ teaspoon ground allspice plus a pinch for optional garnish⅛ teaspoon chipotle powder plus a pinch for optional garnish (see note)1 cup red lentils rinsed and drained1 cup canned coconut milk lite or regular3-4 tablespoons tablespoons fresh lemon or lime juice4-4 tablespoons tablespoons chopped fresh cilantro for serving (optional)InstructionsPour 2 tablespoons water into a large soup pot and set over medium-high heat. Add the carrots, onion, celery, curry powder, salt (starting with 1 teaspoon), allspice, and chipotle powder. Cook for 7–8 minutes, until the onion and carrot have softened, adding more water if the veggies are sticking.Add the lentils, 4 cups water, and coconut milk and stir. Increase the heat to high to bring the soup to a boil, then reduce the heat to low, cover, and simmer for 15–20 minutes, stirring once halfway though, until the lentils are fully softened.Add 3 tablespoons lemon or lime juice. Use an immersion blender to puree the soup to your desired consistency. Alternatively, you can transfer the soup in batches to a blender and puree. Taste and add extra salt and lemon juice if needed. Divide the soup into bowls and serve sprinkled with cilantro and a pinch of allspice and/or chipotle powder, if desired.NotesChipotle Note: There’s just a small amount of chipotle powder here, so as not to overpower the other flavors. A pinch or two gives a certain “something” in the background, especially if your curry powder is mild. If you don’t want any chipotle powder, feel free to omit. If you want to increase it, do so very modestly. Try another ⅛ teaspoon to start, and then determine if you want more.Greens Boost: Before serving, add several cups of baby spinach and stir until just wilted.Recipe Renewal! You can keep extra soup in the fridge for several days; the flavors will only improve. This soup also freezes well if you want to double the batch. To revamp leftovers as a new meal, gently reheat and try it . . .as a “sauce” over cooked rice and baked sweet potatoestossed into hot pastamixed into beans and greens for a lunch bowl, topped with other vegetables, a sprinkle of pumpkin seeds, and some cubed avocado
I hope this soup becomes a staple in your home as it is in mine. Share your feedback in the comments.
x Dreena
The post Easy Curried Carrot Lentil Soup appeared first on Dreena Burton | Vegan Recipes & Cookbooks.
December 29, 2025
Lucky New Year’s Vegan Baked Beans: A Pressure Cooker Shortcut

These Vegan Baked Beans are my version of a Hoppin’ John recipe, and include a special ingredient that really sets them apart.
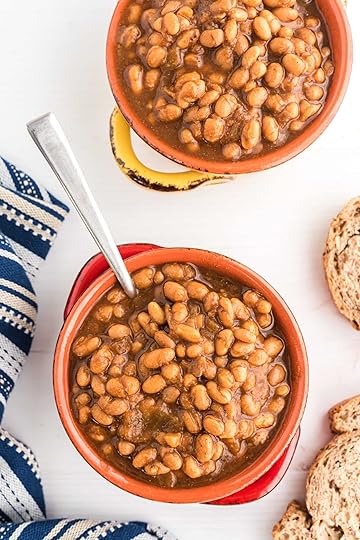
In many cultures, eating legumes on New Year’s Day is more than just a meal—it’s a tradition believed to bring prosperity and good luck for the year ahead. While beans are a daily staple in my kitchen, I make sure to whip up a special version of baked beans every January 1st to kick things off right.
Traditionally, stovetop or oven-baked beans are a labor of love that can take hours of simmering. But who wants to spend their first day of the year hovering over a stove? By using a pressure cooker, you can get that deep, slow-cooked flavor and delectably tender texture in just over half an hour.
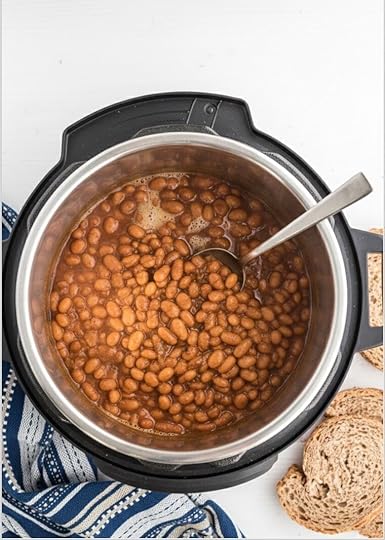 Why These Vegan Baked Beans Are Different
This isn’t your average baked beans flavor profile These beans feature a unique blend of savory and sweet:
The “Secret” Ingredient: My mom always added a hint of curry powder to her beans. It adds a subtle warmth and complexity that makes people ask, “What is that flavor?” (For another legume recipe inspired by my mom, see this post) Natural Sweetness: We use chopped apples and a touch of molasses for a rich, earthy sweetness rather than cloying corn syrup.Navy Beans instead of Black-Eyed Peas: I prefer vegan baked beans with navy beans or another small bean other than black-eyed peas. While black-eyed peas are traditional, I prefer the texture and flavor of other beans.Timing: The 15-minute pressure cook is slightly longer than usual, ensuring the navy beans are buttery-soft.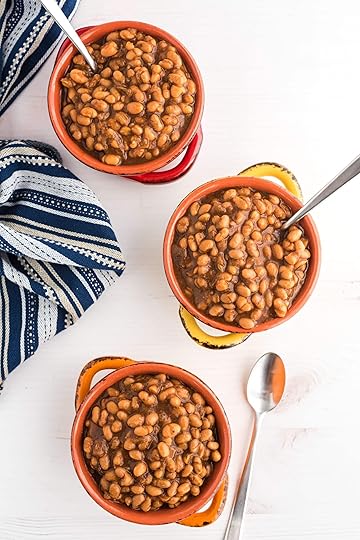
These vegan baked beans come from Dreena’s Kind Kitchen. If you love the recipe, please consider supporting my work by picking up a copy and adding a review on amazon. 
I hope you enjoy the recipe, Happy New Year’s! x Dreena
 PrintPressure Cooker New Year’s Baked BeansIt’s tradition to eat legumes on New Year’s Day for good luck. We eat beans every day, but Imake some version of baked beans at the start of every new year. On the stovetop or in the oven,the bean prep can take hours. Using a pressure cooker, this version is ready in just over a halfhour. Bonus: The beans become delectably tender!Course entree, Main CourseKeyword beans, holidays, new yearServings 6 -8 peopleIngredients3 cups dry navy beans or other small bean (soaked overnight, see note)2½ – 3 cups chopped onion2 tablespoons balsamic vinegar1 tablespoon dried oregano1 tablespoon garlic powder2-3 teaspoons mild curry powder see note1 teaspoon fennel seed1 teaspoon dried thyme½ teaspoon ground allspice¼ teaspoon ground cardamomFreshly ground black pepper to taste4 cups water¼ cup tomato paste2 tablespoons tamari2 tablespoons molasses1 teaspoon sea salt1 large or 2 small bay leaves1½ cups chopped apple optional1½ teaspoons pure maple syrup optional; see noteInstructionsSoak the beans overnight, or do a quick soak. After soaking, rinse well and drain.Set a multifunction pressure cooker (such as an Instant Pot) to sauté.Put the onion, vinegar, dried herbs and spices, and pepper in the pot and cook for 5–7 minutes, stirring frequently, until the onion starts to soften. If the mixture is sticking, add a splash of water.Turn off the sauté function and add the soaked beans, water, tomato paste, tamari, molasses, sea salt, bay leaves, and apple (if using). Stir to mix well.Secure the lid and set the valve to the “sealed” position. Press the Manual button and set the cooktime for 15 minutes at high pressure. Allow the pot to come to pressure and cook.Once the timer goes off, turn off the pot and allow the pressure to naturally release. Open the pot and allow the beans to cool slightly. (Note: The sauce will still be thin at this point.)Taste and adjust the seasonings, adding the maple syrup and more salt and/or pepper if desired. Then, put the lid back on and let the beans sit in the residual heat for a couple of hours if possible. The more the beans sit, the more they absorb the liquid—and thereby the flavors! Shortly before you’re ready to eat, set the pot to “keep warm” until the beans are nice and hot.
The post Lucky New Year’s Vegan Baked Beans: A Pressure Cooker Shortcut appeared first on Dreena Burton | Vegan Recipes & Cookbooks.
November 19, 2025
Vegan & Wellness Gift Guide 2025: Treat Yourself and Others

The holidays are almost here, and if you’re anything like me, you want to give vegan and wellness gifts that are both thoughtful and genuinely healthy. No more frantic, last-minute trips for stuff that will gather dust!
This year, I’ve compiled a list of my absolute favorite vegan, wellness, and self-care items that are sure to delight. From stocking stuffers that actually get used to those “go-big” investment gifts, I’ve got you covered. Get ready to gift some serious good vibes!

 Vegan and Wellness Gifts: Stocking Stuffers
These small vegan and wellness gifts are all about making daily life a little better (and sometimes, a lot easier).
OneSkin Lip Mask : One Skin is doing something different in the skincare world. One Skin goes after the deviant cells, causing aging in the skin. I love their award-winning skincare – and so do celebrities (Jennifer Aniston, Matthew McConaughey, and Katy Perry to name a few)! This new OneSkin product has already sold out once! Get it for Christmas now, it may sell out again soon. See my video about it below. Jar Key: Seriously, stop fighting with jars! This little gadget makes opening stubborn lids effortless. Best part? It’s under $10! Find it here on amazon.com and in canada here.
 Handheld Milk Frother: For the coffee or tea lover who wants café-quality foam at home. Pair it with their favorite non-dairy milk! Find on amazon.com and amazon.ca.
 Fatty15: The award-winning supplement that has been a GAME-changer for me in menopause. See more here, order here and use code DREENA for a sweet discount!
 Tuel Moisturizer: I use two brands of skincare. The first is OneSkin, it targets the senescent aska ‘zombie’ cells so your skin can be healthier and more youthful. OneSkin is my ‘primer’ and then I use some of the Tuel mature skin line for additional peptides and other skincare properties. One of my favorite products is their RESCUE cream. Not only does it smell divine and feel glorious on your skin, just look at what it’s delivering to your skin!
Order here and use code DREENA20 for a very sweet discount!
 ELF Makeup: I have loved ELF makeup for years, their prices are budget-friendly, and the entire line is vegan and cruelty-free. While I don’t wear a lot of makeup, I love a pop of cheek color, lippy, and mascara. ELF hits the mark on all of them.

Plus, check out their Advent Calenders – so fun! Visit their store here in the US and here in Canada.

 Vegan and Wellness Gifts: Unique Food Gifts
Forget the fruitcake. These are exciting, delicious, and sometimes unexpected treats for the foodie in your life.
Black Sesame Seed Paste (ie Black Tahini): Admittedly, this might be one of the oddest food gifts I might suggest… but bear with me! This is not chocolate tahini. Black sesame seeds are very supportive to women in menopause! They are high in antioxidants (due to the intense black color), and in Chinese Medicine are revered for supporting the kidneys and liver, having anti-aging properties for the skin and hair, promoting digestion and nourishing the blood. How to use it? I like it spread on toasted whole-grain breads to pair with soups, to drizzle on pizza or a grain bowl, or swap it for a nut butter in a sandwich – why not? I am working on a couple of recipes with black tahini, but you can’t go wrong with using it very simply. Find it on amazon.com (Canadian friends, I can only find an 8lb tub!) Preserved Lemon Paste: A pantry upgrade that adds bright, complex flavor to dressings, dips, and sautés. Chef’s kiss! Here on amazon.com. (Canadian friends, it’s too darn $$ on amazon.ca!)
 Yu Tea Sencha or Matcha Tea: The best matcha I have tried, and their Sencha is my new favorite way to make a latte. Not sure which teas to order? Try their sample pack to get a taste of each, then stock up on your favorites!
 Organic Spices & Food Gifts from OM Organic Foods: Gorgeous, organic, and ethically sourced ingredients. Their mission is to make organic ingredients more accessible to everyone. They also have the CHAGA nuggets! We all need these.
  If you are in Canada, shop at OMfoods and use code DREENA for $10 off your order! American friends, you can get the same goodies at Essential Organics, again use code DREENA for $10 off.
 ScreenshotGuayusa Tea (not just tasty, also naturally stimulates GLP-1): This Amazonian holly leaf offers a sustained, jitter-free energy boost. Fun Fact: Emerging research suggests that compounds in Guayusa (and its relative, Yerba Mate) may naturally increase the release of GLP-1 (glucagon-like peptide-1), a gut hormone that enhances satiety and is key in metabolic health. Unlike Yerba Mate, Guayasa has a smoother, slightly sweet taste. I have only found Guayusa online. This is my favorite brand on amazon.com. Canadians, it’s available as loose leaf on amazon.ca.
 DIY Pasta Basket: Grab a pack of this protein-rich pasta and pair it with some gourmet fixings like
California Balsamic Vinegars
and a jar of
Truffle Sea Salt
(get 2 and make this cheese for yourself!) Brami pasta is delightful! I am not affiliated with the brand but love it for its protein content – while having great texture and flavor. Why not make a pasta basket with Brami, Truffle sea Salt, and one or two vinegars from California Balsamics? What a great little food gift!
DIY Pasta Basket: Grab a pack of this protein-rich pasta and pair it with some gourmet fixings like
California Balsamic Vinegars
and a jar of
Truffle Sea Salt
(get 2 and make this cheese for yourself!) Brami pasta is delightful! I am not affiliated with the brand but love it for its protein content – while having great texture and flavor. Why not make a pasta basket with Brami, Truffle sea Salt, and one or two vinegars from California Balsamics? What a great little food gift!
 Taza Chocolate Bars: Look for their exciting new flavors—I can’t wait to try these!
 Handfuel Apple Pie Walnuts: I’m obsessed with these! Ridiculously tasty, chewy-crunchy, with all the notes of apple pie. (American friends, I cannot find these on amazon.com, sorry!)
 Go Raw Sprouted Pumpkin Seeds: Nutrient-dense, perfectly crunchy, and great for topping salads or just snacking straight from the bag – I’ve loved these for years! Find on amazon.com (currently too pricey on amazon.ca).
 Vegan and Wellness Gifts: Under $50
You don’t have to break the bank to give a spectacular gift. Here are some beautiful ideas, more to follow in Vegan Fashion (below)…
Vegan Cookbooks: Plant-based cookbooks make such a great gift! Of course I’ll give a shoutout to my books as a great gift under $50. Dreena’s Kind Kitchen is my most recent, and it is fully oil-free and whole foods plant-based.
The Keeping Company Mugs, Advent, or other Treasures
: A dear friend gifted me these Joy and Peace mugs. Every morning when I have my tea, I think of her. We sip tea together, separated by miles, but are hearts are connected. These two mugs are just over $50, however you can find other beautiful, hand-crafted mugs (as pictured below).
They also have advent
The Keeping Company has kindly offered you 10% off your order! Use my name DREENABURTON at checkout.
 Electric Milk Frother: I recently picked up this small appliance, and love it! Use it to froth (hot or cold) or simply heat milk. I use it to make my morning lattes, see this video. It doesn’t take up much space, is easy to clean – and does the job! Get it on amazon.ca and here on amazon.com.
 Gift the Fountain of Youth: Fascia FLO Membership The proof is how I feel, how my community feels, the power of fascia FLO is undeniable. We are in the early days of the importance of fascia, much like we were with eating plant-based 20 years ago. Get on this train early, feel the benefits – improve your healthy, appearance, mobility, longevity – your life.
  Note: Membership rates increase in December to accommodate our expansion and new offerings. Lock in your rate (or gifted rate) by subscribing now.

 Vegan and Wellness Gifts: Fashion (also most under $50!)
Give the gift of great style without compromising on ethics.
My New Fave Boots: Vegan Knee High Boots in Banana Color: Yes, I said banana! It’s a surprisingly versatile, fun shade that makes me feel like I’m wearing sunshine! Find them here on amazon.com (selection limited on amazon.ca).
 Lululemon Hold Tight Clothing: The Hold Tight line is my favorite line of Lululemon. I have a couple of the Hold Tight Henley, tank tops, and more. You can’t go wrong with a Lululemon gift of a Hold Tight shirt or tank top! See more of my lulu favorites here.
  Lululemon Everywhere Belt Bag: Another essential for me, I think this handy bag is a perfect little gift that appeals to many.
 Vegan Bag by Hoxis:
How adorable is this vegan bag?
Under $30! Visit the Hoxis store here for other vegan purses (please check, I think most if not all are vegan). Also in Canada here, it’s a little more expensive – as always.
Vegan Bag by Hoxis:
How adorable is this vegan bag?
Under $30! Visit the Hoxis store here for other vegan purses (please check, I think most if not all are vegan). Also in Canada here, it’s a little more expensive – as always. 

 Vegan and Wellness Gifts: Bigger Investment Gifts with WOW factor!
For the extra-special people (or maybe just for yourself—you deserve it!), these are the wellness upgrades that keep on giving.
Caraway Home Ceramic Non-Toxic Cookware: Beautiful, non-toxic cookware that makes cooking healthier and cleanup easier. Their Black Friday sale has launched. Get big savings on top-notch cookware! More in my video.
 Apollo Neuro: A wearable device that uses gentle vibrations to help the body recover from stress. This is another one of my menopausal game changers.
 Recently, one of my fascia flo members said “I wish I had this years ago, I feel 20 years younger!” The investment pays back many times over, and you can get a kickin’ deal right here.
 Bellicon: Not just for “working out”, you want to use your Bellicon for lymphatic flushing and just getting back to your body. A few minutes is all it takes to stimulate the lymphatic system. Get THE best deal of the year right now – don’t miss it, or miss getting your rebounder in time for Christmas. Copy/paste code BMJQQ084 here for extra extra savings!Vitamix: Still the king of blenders. For anyone serious about blending up magic, Vitamix is your machine. Get your Black Friday deals in the US here or in Canada here.
 Higher Dose Face or Neck Mask: Red light therapy for skin rejuvenation at home. I LOVE my mask, I use it every morning when I meditate. I also now have the neck enhancer. You’ve seen my crazy video, right?
  Not only does it improve elastin and collagen in the skin, the red light helps to combat blue light and improve mood. Get their Black Friday deals here.
  Heating Pad with Jade Stone: Last but not least, THIS heating pad. I have had mine for maybe 8-9 years, it is still in great condition, and it gets HOT. Other heating pads do not compare. I use it in the morning when I meditate and do work (like right now!) and would not do without it. I also bought one for my mother about a year before she passed.
  She loved it as well, because it delivers heat unlike any other heating pad. You can find other size options in their amazon store. Find it here in Canada.

Happy Gifting! I hope this list inspires you to find perfect vegan and wellness gifts for everyone on your list, including a little something for yourself. After all, self-care is a year-round commitment!
The post Vegan & Wellness Gift Guide 2025: Treat Yourself and Others appeared first on Dreena Burton | Vegan Recipes & Cookbooks.
November 7, 2025
5-Minute Steel Cut Oats Recipe: The Secret?

Longing for the hearty nutrition of steel cut oats but short on time? You’ve got it today with this 5-minute steel cut oats recipe!
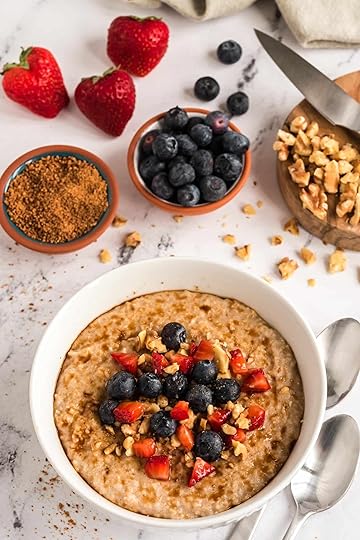
Most recipes call for a long simmer (or overnight soak). When time is short, most of us will turn to a quicker option – instant oatmeal, or cold cereal.
The good news? You can have that satisfying, wholesome oatmeal in minutes—and the secret is a little kitchen shortcut… and it’s not an instant pot!
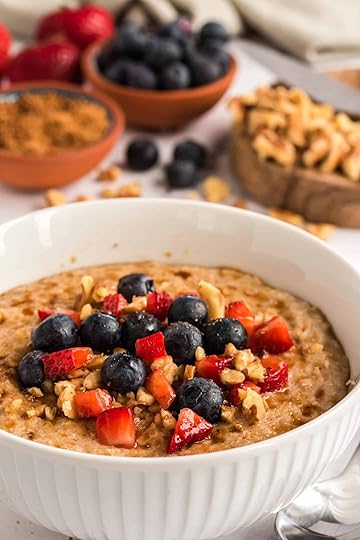
And while many of us love overnight oats, when the weather turns cold, we crave warmer foods like porridge and other cooked cereals.
5-Minute Steel Cut Oats: What’s the Secret?The trick to making these steel cut oats “instantly” is to create a coarse grind of the oats in a blender. This simple step transforms the cooking time. Instead of chewy grains, the oats cook up more like a creamy, thick porridge, similar to the comforting “cream of wheat” you might remember from childhood.
Warming, nourishing, and ready in minutes—let’s dive in!
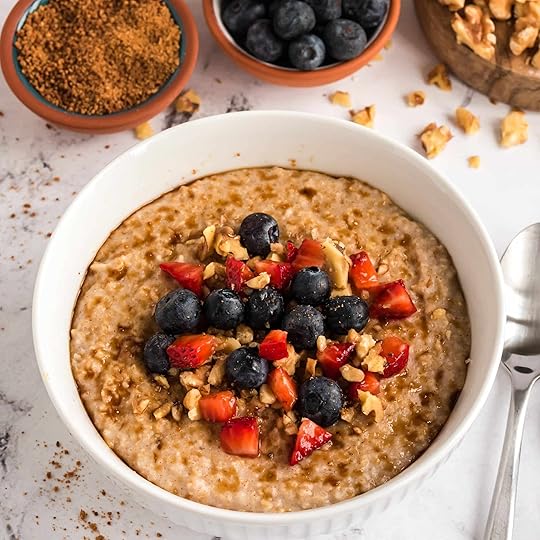 5-Minute Steel Cut Oats Recipe
Let’s get to the recipe! One more secret, for those in menopause…
Did you know that eating 5-6 prunes a day has bone-building benefits? Indeed! So instead of topping your 5-minute steel cut oats with dried fruit like raisins or dates, try organic prunes. Other ideas for customizing your perfect porridge are in the recipe.
Enjoy your instant, creamy comfort! What’s your go-to topping for steel-cut oats? Share in the comments. x Dreena
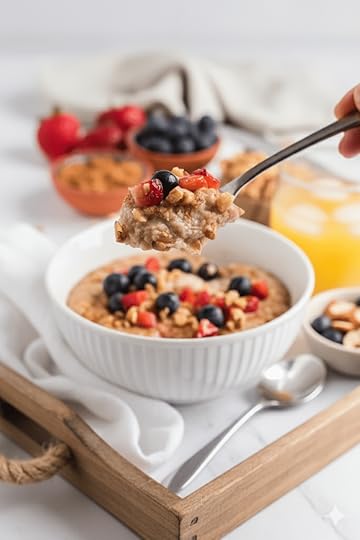 Print5-Minute Steel Cut Oats RecipeThe trick to making these steel cut oats “instantly” is to create a coarse grind of the oats in a blender. The oats then cook up more like a porridge, similar to the “cream of wheat” I remember from childhood – ready in minutes! Be sure to double or triple the recipe to serve more!Course BreakfastKeyword breakfast, cereal, oatmeal, oats, porridge, steel cut oatsServings 2 servingsIngredients3/4 cup coarse ground steel cut oats see Oats Note below2 cups water see Water Note belowPinch salt1/2 tsp cinnamon to taste1/4 tsp ground cardamom or nutmeg or coconut nectar4-6 tbsp non-dairy milk for serving plus more for serving if desired, see Milk Note belowOptional: Sweetener to taste ex: date or coconut sugar, date syrup, pure maple syrupInstructionsIn a saucepan, combine the oats, water, salt, cinnamon, and cardamom over medium heat.Whisk almost continuously while the mixture starts to come to a low boil. This constant whisking is key to achieving that smooth, creamy porridge texture and prevents clumping.Once it is thickening and starting to bubble, reduce heat to medium-low.Once thickened to your liking, add the non-dairy milk and stir it in. (Use a large spoon at this stage as whisking will be difficult.)Taste and add sweetener if desired.Serve immediately! Oatmeal will thicken more as it sits, so add another drizzle of non-dairy milk on top, along with any of your favorite toppings.NotesGrinding Oats Note: Place your regular steel-cut oats in a blender and pulse/puree until you have a flour-like consistency. You aren’t aiming for a perfect powder; a coarse grind is great. I usually do this in batches of about 2-3 cups, and store the extra ‘flour’ in an airtight container for quick use in cookies and this porridge. Once blended, measure out the ¾ cup needed for this recipe.Water Note: For an even richer flavor, try substituting organic apple juice for the water. It’s a naturally sweet and delicious change!Milk Note: If you use a vanilla non-dairy milk (like almond or soy), it will add extra sweetness and a light vanilla flavor to the oatmeal base. Feel free to sweeten more to taste with a sprinkling of unrefined sugar (coconut sugar is especially nice!) or a drizzle of pure maple syrup.Toppings:Chopped fresh fruit (berries, bananas, or apples)Nuts (walnuts, pecans, or almonds)Dried fruit (raisins, chopped prune (5-6 prunes a day for bone-building benefits!), chopped dates, or cranberries)A sprinkle of unrefined sugarA drizzle of maple syrup
The post 5-Minute Steel Cut Oats Recipe: The Secret? appeared first on Dreena Burton | Vegan Recipes & Cookbooks.
September 27, 2025
Moroccan Chickpea Soup Recipe
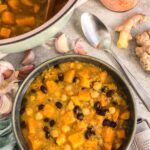
This Moroccan Chickpea Soup is one of my long-time favorite recipes. Some meals feel like a big, comforting hug in a bowl, and this fragrant soup is absolutely one of them.
Imagine walking into your kitchen and being greeted by a wave of fragrant, developed spices—that’s what you get with this recipe. It’s a truly spectacular soup, brimming with hearty beans, cubes of sweet potato, and swimming in a wonderfully seasoned broth. Honestly, it’s one of my all-time favorite soup recipes, and I think it will quickly become one of yours, too!
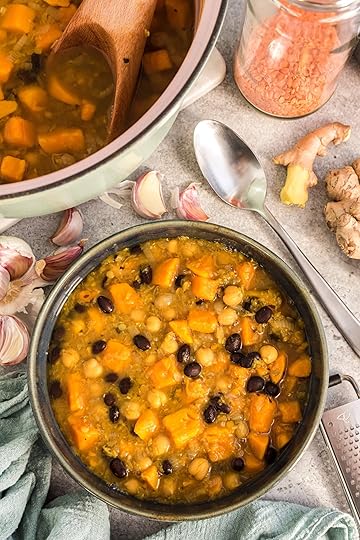 A Symphony of Spices
What makes this Moroccan Bean Soup so incredible is the beautiful blend of warming spices. We’re layering flavors with cumin, cinnamon, coriander, fennel seeds, and turmeric.
Starting by toasting the spices in just a bit of water helps “bloom” them, releasing all their potent, aromatic oils before we even add the vegetables. This simple step is key to creating that deep, complex flavor profile that sets Moroccan cooking apart.
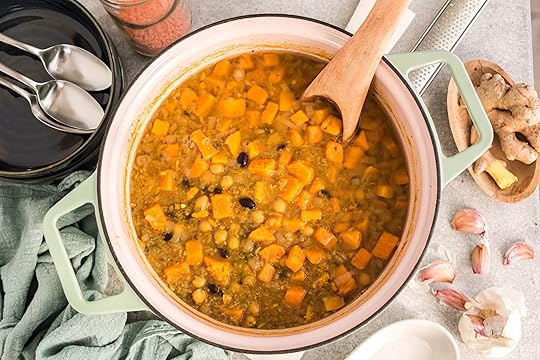 The Ingredients for Comfort
Beyond the spices, the ingredients for this Moroccan Chickpea Soup recipe are straightforward, hearty, and nourishing:
Sweet Potatoes: Their natural sweetness is the perfect foil for the earthy spices, and they break down slightly as they cook, adding a wonderful body to the stew.Beans (Chickpeas and Black Beans/Kidney Beans): These deliver the protein and fiber that make this a truly satisfying meal. Feel free to swap more of either bean if you prefer!Red Lentils: These are the magic ingredient for thickening the broth. They practically dissolve into the liquid as they cook, creating a naturally creamy and luxurious texture without any cream.Fresh Ginger: We save the ginger until the very end. Its bright, zesty heat provides a fresh lift that cuts through the richness of the spices, giving the stew its final flourish.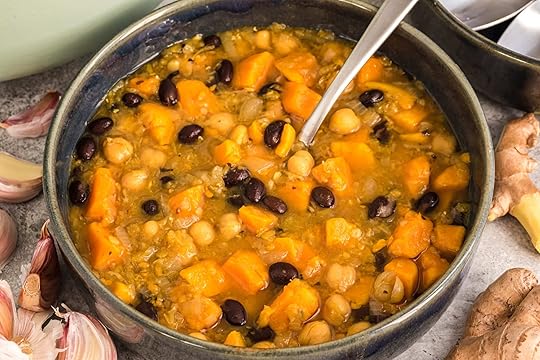 The Recipe: Moroccan Chickpea Soup
This recipe is simple to make and comes together in about an hour, making it perfect for a cozy weekend meal or even a flavorful weeknight dinner.
 PrintMoroccan Chickpea SoupThis soup has warm, developed seasonings in a fragrant broth, and filled withhearty beans and sweet potatoes – one of my all-time favorite soups. It's so delicious you may want to double the batch.Course entree, Main Course, Soup, stewsKeyword black beans, chickpeas, gingerbread, lentils, moroccan, sweet potatoesServings 4 -5 servings (consider doubling!)Ingredients2-3 tbsp water to saute1 tsp cumin seed1 tsp ground cumin1 1/2 tsp cinnamon1 tsp ground coriander1 tsp fennel seeds1/2 tsp ground turmeric1 tsp dried basil1 tsp sea saltFreshly ground black pepper to taste1 1/2 cup diced onions3-4 medium-large cloves garlic minced or grated4 cups bite-sized cubes yellow or orange-fleshed sweet potato1 can 14 oz chickpeas, rinsed and drained1 can 14 oz black beans or kidney beans, rinsed and drained (or more chickpeas)1 cup dry red lentils rinsed and drained3 cups vegetable stock3 1/2 cups water1 1/2 tbsp freshly grated gingerInstructionsIn a large pot over medium heat, add the water with the spices, salt, and pepper. Cook for a couple of minutes, and then add the onion, garlic, and sweet potato. Stir through, cover, and cook for about 7-8 minutes, stirring occasionally, until the onions have started to soften. Add all remaining ingredients except ginger, and increase heat to high to bring to boil.Once at a boil, reduce heat to medium-low, cover, and cook for 20-25 minutes, until lentils are fully dissolved. Add fresh ginger, stir through, and serve. (See tip for adding greens)NotesTip: Want to sneak in some extra vitamins? Try a Greens Boost! Just before you serve the stew, stir in a handful or two of baby spinach. As soon as the spinach wilts from the heat of the soup (which only takes a minute!), it’s ready to eat.
I hope you enjoy this Moroccan Chickpea Soup as much as I do. What’s your favorite warming spice to use in soup? Let me know in the comments!
You can find this recipe and other autumnal recipes in my Metal Element Guide. Thank you for supporting my work, as it enables me to continue to bring new content to my site.
The post Moroccan Chickpea Soup Recipe appeared first on Dreena Burton | Vegan Recipes & Cookbooks.
September 18, 2025
Menopause Game Changers Revealed! Look & Feel Your Best in Perimenopause and Menopause

Menopause Game Changers revealed! Today I share tools and techniques that are truly helping me feel (and look) my best in menopause.
Please review this entire post. Read right through the end (and be sure to add your vote in the comments). These tools and techniques can truly be life-changing, life-giving at this stage of life.
 menopause game changer video below add your comment!
For those of you not yet in menopause, perhaps you want to read for the overall health benefits – because these things can be useful for everyone (men as well). But for those of us in this time of menopause or perimenopause, I feel these tools and techniques are especially beneficial.
I am now menopausal, actually technically in ‘post-menopause’. This photo was taken two weeks ago, just a month before my 55th birthday. What I’m sharing today is helping me feel and look my best – better than I ever imagined – at almost 55.

I now know that I was in perimenopause in my mid-40s (probably early 40s), but didn’t know at the time. Unfortunately, I thought I was “losing it”, and having a nervous breakdown. We weren’t receiving the scores of information that we are now. (Sometimes too much information, but that’s another post). So I didn’t know my symptoms were those of perimenopause. Instead, I thought I was failing at life, which made it even harder.
While we have much more knowledge about perimenopause and menopause now – through podcasts, tv, celebrities, social media, and more – some of us may still attribute these challenging symptoms to some individual fault. So I share that reflection to hopefully help someone, so you might find support.
That’s also the intention of this post and upcoming video: to offer information that might also help you.
So let’s get started, here are my menopause game changers!
Menopause Game Changers: Supplements, Tools, Movement
menopause game changer video below add your comment
The first menopause game changer supplement is creatine. Creatine supplementation has been shown to offer many benefits for women. Creatine use has consistently demonstrated improvements in muscle tissue, resulting in improvements in strength and exercise capacity. When combined with resistance training, creatine further augments body composition and bone mineral density, particularly in post-menopausal females. Creatine supplementation has also been shown to improve mood and cognition.
While we often associate creatine with just muscle performance and strength-training, creatine is being shown to offer benefits beyond just our muscles. Since the body’s production of creatine declines with age, supplementing with creatine can support our muscles, skeletel health (reducing our risk of bone fractures), memory, brain function, and mood.
How much creatine to take? Will I be bloated? How long until I notice the effects of creatine? creatine monohydrate photo credit Aleksander Saks on Unsplash
Most sources recommend 5g of creatine monohydrate a day. It’s easy to take, dissolves in water and is tasteless. Some people report slight bloating and temporary weight gain for the first few days, but it’s not as common on a dosage of 3-5g/day. Creatine pulls water into the muscle, so you might notice a small shift in weight, up to a few pounds. This is sometimes referred to as the “loading phase”, as it takes about 3 weeks for creatine to saturate the muscle cells. Once you are past the loading phase you may start to notice the effects of creatine, and enjoy the benefits of being able to build more muscle – which burns fat and also strengthens bones (ie bone density, ladies!). So bear with the first week or so, and trust the process.
What type of creatine do I take?Look for creatine monohydrate, and aim for 5g/day.
I use the Naked brand, you can find it here on amazon.com and here on amazon.ca.

menopause game changer video below add your comment
The next menopause game changer is Fatty15. I am so grateful I discovered this award-winning supplement, because it is indeed game-changing!
When I learned about Fatty15 I was immediately intrigued – by the science, and the results, including:
C15:0 is the first essential fatty acid to be discovered in 90 yearsFatty15 studies confirm that it is 3x better, broader and safer than omega 3!1 in 3 people are deficient in C15:0 (this can be examined through blood tests), which causes premature agingPeer-reviewed studies have shown: higher C15:0 levels = lower risk of developing heart disease, type 2 diabetes, and fatty liver diseaseAward-winning & VeganReverses cellular aging!We age because our cells do. Fatty15 has been proven to reverse aging at the cellular level, making them more resilient against breakdown, which means WE are more resilient.
75% of people taking fatty15 experience benefits within 4 months, including:
Healthier bodies: better skin, hair, metabolism, heart, immune & liver functioningHealthier Minds:deeper sleep calmer mood, improved cognitive healthMore on Sleep: C15:0 is a natural activator of two key receptors that live throughout the body—including in the brain. These receptors are called PPARs alpha and delta. C15:0 binds to PPAR alpha receptors in the brain, which help to regulate our sleep and
improve the quality and depth of our sleep
.
calmer mood, improved cognitive healthMore on Sleep: C15:0 is a natural activator of two key receptors that live throughout the body—including in the brain. These receptors are called PPARs alpha and delta. C15:0 binds to PPAR alpha receptors in the brain, which help to regulate our sleep and
improve the quality and depth of our sleep
.
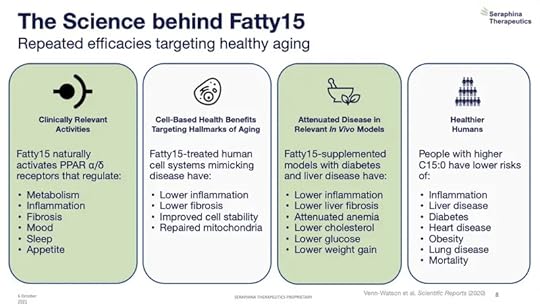 Fatty 15: what did I experience? How much do I take?
I take one Fatty15 capsule a day. By month two using Fatty 15, I noticed my recovery was better after workouts, and my sleep was deeper. Fatty15 details how benefits increase over time on their site.
Order here, and enjoy 10% off with code DREENA.
Menopause Game Changer: Apollo NeuroI start with this: The Apollo Neuro is a big Menopause GAME CHANGER. Boom! 

I have been using it since May, and have enjoyed so many benefits, from feeling calmer and more focused, to enjoying longer sleep.
menopause game changer video below add your comment
And it’s not just me. Celebs like Kelly (Live with Kelly & Mark) have talked about how Apollo helps them get to sleep more quickly, and stay asleep longer.
My fascia flo clients are also loving Apollo. One in particular said “I wish I had this years sooner”.
But it’s never too late to feel good. So link through and learn how Apollo can also help you feel more at ease, more focused, more rested.
Once you start using the Apollo, you won’t doubt the decision to purchase it. It’s not even that pricey, given the benefits it brings to your daily life. Still, it is an initial expense. So I have arranged a cool $60 discount for you with Apollo. Link here and apply code DREENABURTON.
also watch video below and comment!
Next we look at movements that will be a menopause game changer. These movements will not deplete your (unlike many workout programs). Rather, you will feel strong, energized, and resilient. Let’s go!
Movement #1: Fascia FloAs I mention in the video fascia flo is my daily non-negotiable. Daily. I love it, I love how I feel after my practice, I love all the physical, energetic, and physiological benefits.
I’m shocked we are only scratching the surface of the importance of our fascial health. But I was also shocked 30 years ago when I discovered the benefits of eating plant-based… and others didn’t want to hear about it. As I pioneered vegan recipes back then, I am pioneering fascial health now.
If you don’t want to wait another 10, 20, or 30 years to feel the benefits… discover fascia flo here.
 Movement #2: Bellicon
You may already know that I’ve loved and used my Bellicon for about 15 years. If you want to learn more, this post covers the benefits of a Bellicon in more depth.
If you want a discount on a Bellicon, send me an email.
My Bellicon workouts are never more than 10-15 minutes! I opt for high-intensity sprint interval training, with recovery periods. You can also do lower-impact bouncing for this amount of time and enjoy the benefits of rebounding.

menopause game changer video below add your comment
As I discuss in the video I don’t do lengthy strength-training workouts. Instead, I work with 10-15 minute strength-training videos 3-4x / week. I alternate strength-training with my Bellicon training. Of course, I also do my fascia flo practive every day, and this also offers resistance training benefits.
This is a newer discovery for me, but most definitely a menopause game changer.
I’ve always understood the importance of stimulating the lymphatic system, and we gain lymphatic system benefits with movements on the Bellicon.
 photo credit Adrien King on Unsplash
However, in a recent fascia flo class, one of my clients asked for a class focusing on the lymphatic system. I thought… “huh! yes! let’s do!“… so we did. Since then, I have been working with lymphatic drainage every day.
As my fascia flo client referenced: “no drain, no gain”! So let’s gain those lymphatic drainage benefits. It’s easy, free, and takes less than 10 minutes. If you are a fascia flo member, you can find our lymphatic flo class in the fascia fix area of flos – and I am planning another class for the fall.
As I mentioned in the video if you’d like to learn the lymphatic drainage sequence, please comment here or on the YouTube video. I need to know if it’s important to you. So chime in with your vote. 
The post Menopause Game Changers Revealed! Look & Feel Your Best in Perimenopause and Menopause appeared first on Dreena Burton | Vegan Recipes & Cookbooks.
Dreena Burton's Blog

- Dreena Burton's profile
- 53 followers

