
Michelle Bruhn's Blog: Forks in the Dirt
October 1, 2025
No Dig Garden Clean Up
How to Prep Your Fall Garden the Easy, Earth-Friendly Way
Fall is in the air. Cooler days brings the unmistakable shift in our gardens as the growing season winds down. It’s tempting to grab your rake, pull every plant out by the roots, and “tidy up” before winter hits.
But if you’re aiming for a healthier garden and less work next season, it’s time to embrace no dig garden clean-up. No dig gardening is more than just a trend—it’s a smarter, soil-loving way to garden. And when it comes to fall cleanup, the no dig method gives your garden a natural boost while cutting your workload. Win-win.
What is No Dig Gardening?No dig (or no-till) gardening is exactly what it sounds like: you minimize digging or tilling your soil. Instead of turning the earth, you build rich, living soil by layering organic matter on top—think compost, mulch, and plant material. This protects the structure of the soil, keeps the microbial life thriving, and suppresses weeds.
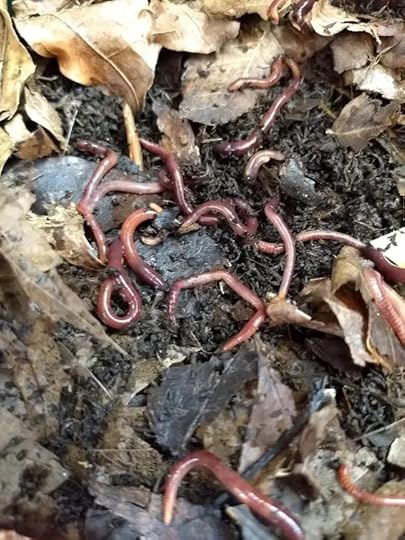
Why does that matter? Because soil isn’t just dirt. It’s a living ecosystem full of microorganisms like fungi, bacteria, worms, and insects that work together to keep your plants healthy. When you dig or till, you disrupt that balance. When you leave it alone, good things start happening.
Fall No Dig Garden Clean-Up 101
Fall is the perfect time to practice no dig garden clean-up techniques. Instead of yanking everything out and starting from bare soil, here’s what you should do instead:
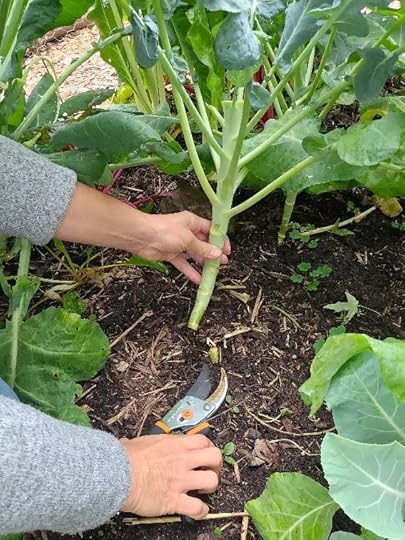
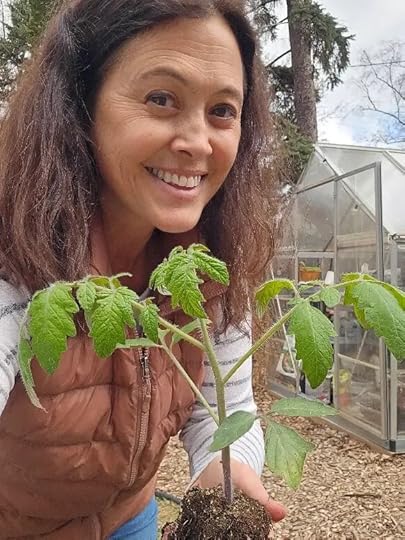
1. Cut, Don’t Pull
Healthy annual plants like broccoli, beans, or sunflowers? Don’t pull them up by the roots. Cut them back at soil level, and leave the roots in the ground.
Why? Those roots are full of organic matter. As they break down over the winter, they feed soil microbes and create natural channels that help aerate the soil. Worms love them. Fungi thrive on them. And your soil structure improves by what the decomposers leave behind. It’s the ultimate set-it-and-forget-it garden technique.
2. Remove Diseased Plants
If any plants showed signs of disease—like blight or wilt—go ahead and remove those completely. But don’t toss them in your compost pile until you know more about what the disease is. I regularly add plants with powdery mildew to my compost pile, as that fungal disease need living plant matter to survive.
Most other diseases are best for the burn pile or the county composting site that keeps their compost piles monitored and hot enough (140-180F) to kill the soil borne pathogens.
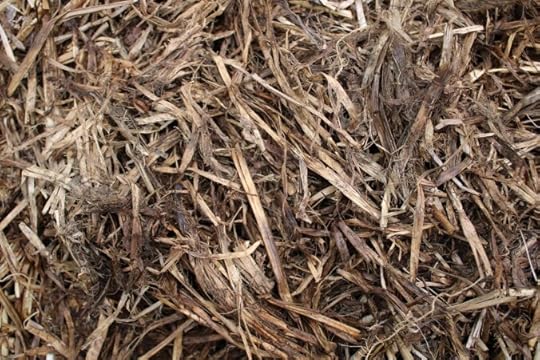
3. Chop and Drop
If your plants are healthy but sprawling, you can chop them into smaller pieces and leave them right on the garden bed. This “chop and drop” technique turns your old plants into mulch, slowly decomposing over the winter and feeding the soil naturally. The best known plant to do this with is Comfrey, as it decomposes quickly and adds tons of nutrients to the soil.
It also gives beneficial insects like beetles and spiders a place to overwinter. A tidy garden might look nice to us, but messy is beautiful to pollinators.
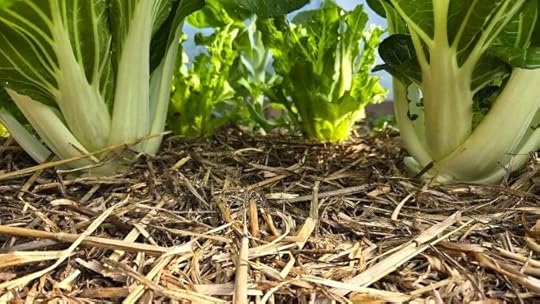
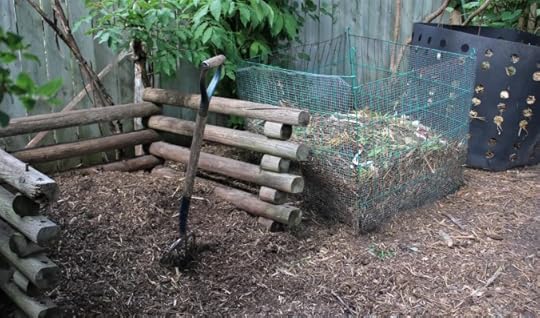
4. Add a Layer of Compost or Mulch
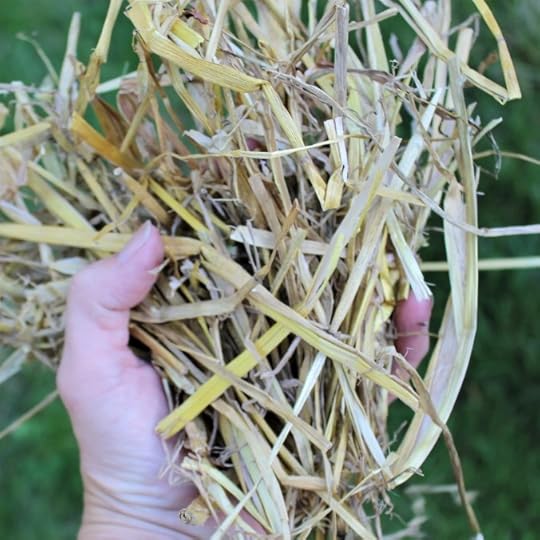
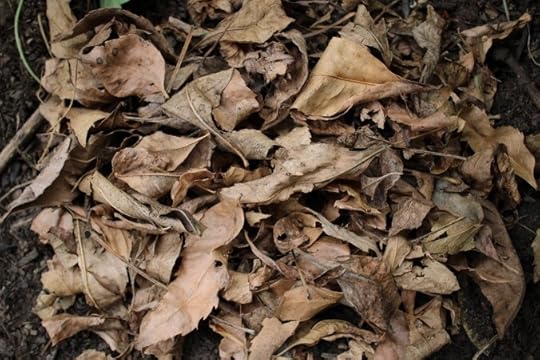
After you’ve cut back your plants, top your garden beds with a layer of shredded leaves, leaf mold or straw—about 1 to 2 inches thick. Organic Mulch not only protects your soil from erosion and weeds, but it also insulates all that microbial life underground. Think of it like tucking your soil in for the winter.
Consider planting a Fall Cover Crop to add nutrients and living roots to your soil.
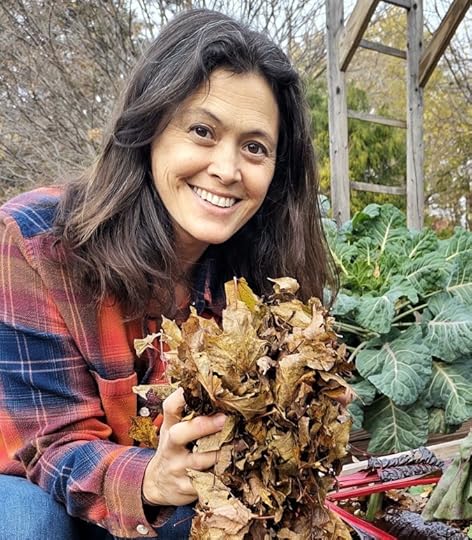
[image error]5. Leave the Leaves (In Moderation)
Fallen leaves are free mulch, rich in carbon and beneficial nutrients. Rake them into your garden beds, especially around perennials. They’ll break down slowly and improve soil structure.
Just don’t smother your plants—aim for a light, fluffy layer so air and water can still move through. I’ll often run over leaves with my mower to help shred them to avoid creating a mat of impenetrable leaves.
A Special Nitrogen NoteLeaving the roots of Legumes like beans, peas, clover and vetch will add serious amounts of nitrogen to your soil as well. These plants form a symbiotic relationship with Rhizobia soil bacteria to form nodules of nitrogen. It is especially important to leave the roots of these plants to keep the fixed nitrogen in the soil.
Below is a photo of an edamame root with fixed nitrogen nodules.
[image error]Why Fall No Dig Cleanup WorksWhen you follow no dig practices in the fall, you’re playing the long game. You’re building a living, breathing soil system that supports plant health, holds moisture, and fights pests—naturally.
Here’s what you’ll notice next spring:
Looser, richer soil that’s easy to plant into.Fewer weeds, since you didn’t expose dormant weed seeds to light.Better moisture retention, thanks to improved soil structure.More worms and beneficial insects, doing the hard work for you.All that, and you didn’t even break a sweat digging.
Less Work, Healthier GardenFall is the time to slow down, reflect, and let nature take the lead. No dig gardening honors that rhythm. So this season, resist the urge to rip everything out and make it look “perfect.”
Instead, cut back healthy annuals at the base, leave the roots in the ground, and layer on compost and mulch. You’re not just cleaning up your garden—you’re investing in it.
Let the soil rest. Let the microbes work. Try gardening more like a forest…
And when spring rolls around, your garden will be more than ready to thrive—with less effort from you.
-Michelle
The post No Dig Garden Clean Up appeared first on Forks in the Dirt.


September 8, 2025
Seed Saving: Vegetables
I started seed saving the year I got behind (way behind) on picking my pole beans. When I found a few (ok, lots) of bean pods that were swelling in their pods and starting to yellow I was in despair at a lost harvest.
But, then a light bulb popped on.
These were not a waste- just a different stage of the plant.
I didn’t have to toss these overripe beans into the compost. I could leave these to grow and save them as dried beans. I could eat them or save to plant for more beans next year.
It was a sublimely empowering moment. One I want you to have too!
I got lucky by stumbling onto starting with one of the easiest vegetable seeds to save. For the first few years I saved mostly bean varieties and native flowers. Over a decade later, I’m still experimenting with saving new seeds. Which is why I’m well suited to pass the torch: if I can do it – you can too!
Why Save SeedsIt connects you with NatureYou can help sustain biodiversitySaves Real Money Plants become better adapted to your local climateSo let’s get started by Saving the Right SeedsIt connects you to your foodSeeds are Beautiful!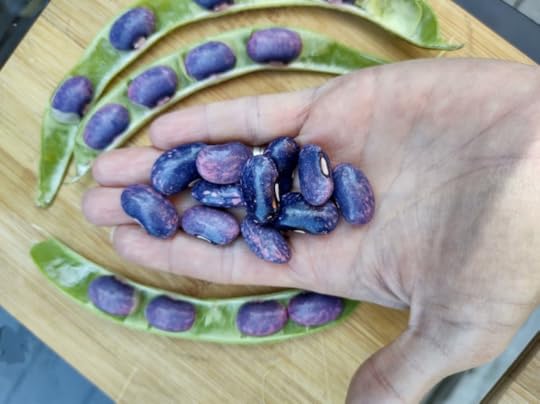 Beginner Seed Saver Tips:Save Seeds on a Dry DaySave Seeds from only the healthiest plantsSave Seeds from Heirloom + Open Pollinated plantsHave envelopes ready and labeled
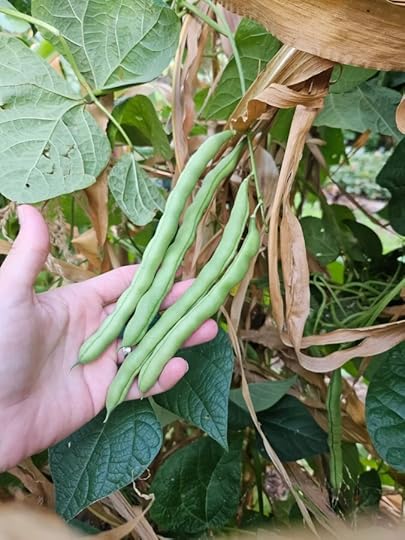 Heirloom vs Hybrid Seeds
You may have heard about the difference between heirloom and hybrid varieties. One of the inherent values of an heirloom plant’s strength lies in its ability to reproduce itself. A bonus is that plants started from saved seeds regrown in the same location tend to produce plants better suited for the exact location they are grown in each season. this is called local adaptation. A plant is said to be fully adapted after about 7 years. Nature truly is amazing!
It is worth starting by finding out if the plants growing in your garden are heirloom or hybrids. Seeds from Hybrid plants will not re-grow the same plant. They will likely revert back to one of the two plants that were combined to make the hybrid.
SEED TYPESSeeds come in several types. Here’s what each name means.
Open PollinatedAny plant that is pollinated naturally by the wind or pollinators. Seeds will produce true-to-type (stable) harvests the following year.Heirloom
Seeds that are open pollinated and have been grown and stable for at least 50 years.Hybrid
Two different plants’ pollen is crossed to produce replicas. Seeds saved and replanted from a hybrid will likely produce characteristics of one or both parents but probably won’t match your previous harvest. Denoted with an “F1” on seed packets.Cultivar
A standardized variety bred for particular traits including uniformity, such as ‘Green Zebra’ tomato.Grex
Seeds that have been crossed multiple times with similar plants. They show genetic variations within a predictable range. Increased resiliency from a small sample of seeds. (More on Grex Seeds HERE.)Landrace
Adapted to a region, from non-standardized, genetically diverse, open pollinated seeds. These are grown to bring out possible genetic variations.
Note: A plant can be all of the following: landrace, grex and open-pollinated. Heirlooms produce true to type so they can be a landrace and open pollinated but not a grex.
 Saving Seeds becomes addicting- so many possibilities open up!Save only the Very Best Seeds
Save seeds from the best plants in your garden- selecting these ‘top performing’ plants will build seed and plants for next year.
This is how us humans domesticated and increased our harvests from wild seeds over the centuries- but it is still worth doing over a few years. After over a decade of saving pole beans mine produce better than the original packet I bought.
Do not save seeds from diseased plants or plants that didn’t thrive in your garden.
Patience with NatureOne thing to keep in mind when starting to save seeds is that we’re really just helping nature along. Waiting long enough for Mother Nature to do her work is a big part of the initial learning curve.
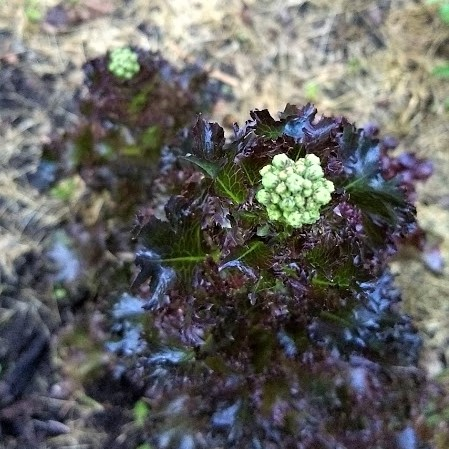
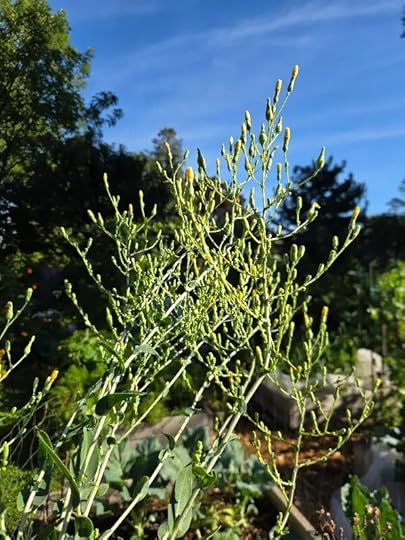 Lettuce take a VERY long time to fully mature, this is flower stage.
Both waiting for the seed to be ripe enough on the plant and waiting long enough for the seed to be fully dry enough to put into storage!
Plants will tell you when their seeds are ready. They give you signs, like color changes or simply starting to fall off the plant. Lettuces for example are like dandelions with their seeds; it becomes obvious.
Not all seeds are as showy with their seed ripeness, which brings me to Heritage Farm Field crew Leader, Rochelle’s advice, “spend a little time learning about the plant you are saving seeds from. Each crop has some specific information on how to work with it- but don’t be afraid to mess up. There are so many easy plants to start with.”
EASY TO SAVE SEEDS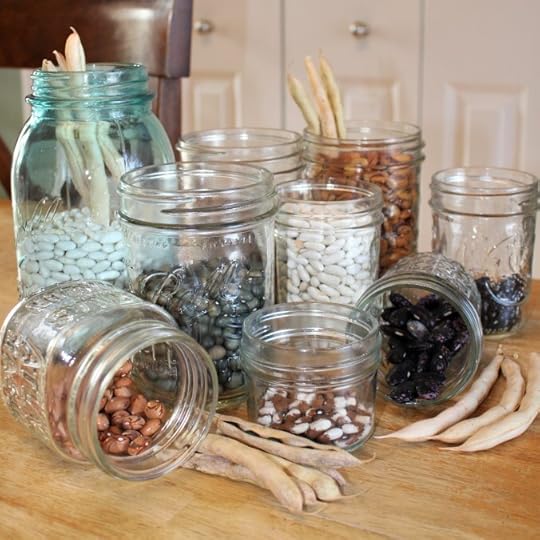 Saving Pea + Bean Seeds
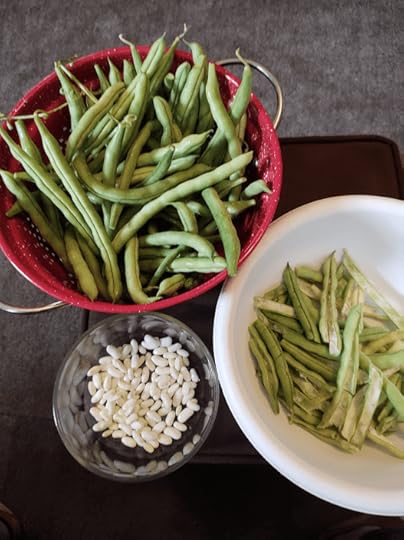
These two have such similar saving techniques we can talk about them together. Save bean and pea seeds on the plant and let them mature rather than eat them.
Peas and Beans are self-pollinating plants. You don’t have to worry about them cross-pollinating and mixing the strains. To save your seed, wait until the peas/beans are brown and dried on the vine. The pods will become papery, turning a yellow to brown color. Ideally, you should be able to hear the dry seeds rattling inside the pods. This is usually about 4 weeks after the peas and beans are ready for eating.

After harvesting these seeds I usually leave them in their pods in a paper bag to dry further in a dry closet until I happen on them in winter and then shell them out, keeping them in paper envelopes or bags. I always say I’m going to be more intentional this season- but if that’s all I’ve done, and it has worked in the past you know you can handle this, too.
At the end of the season, watch for bean rust while waiting for beans to dry on the vine.
Over winter watch for little black bugs (bean weevils) emerging from the bean pods.
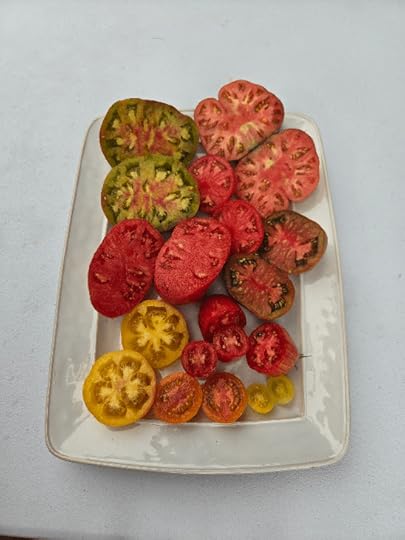
Saving Tomato Seeds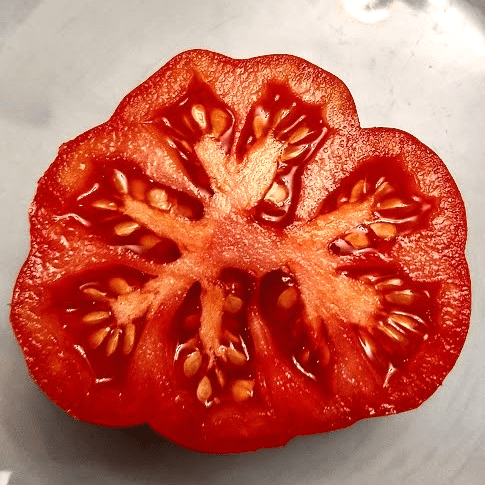
The good news on saving tomato seeds is that you get to save your seeds and eat your tomatoes too! Tomato seeds are ripe the same time as their fruits– Yay!!
To harvest seeds just squish out the juice and seeds into a jar.
There are two main schools of thought on how to best save tomato seeds.
Fermenting then drying -or- just drying.
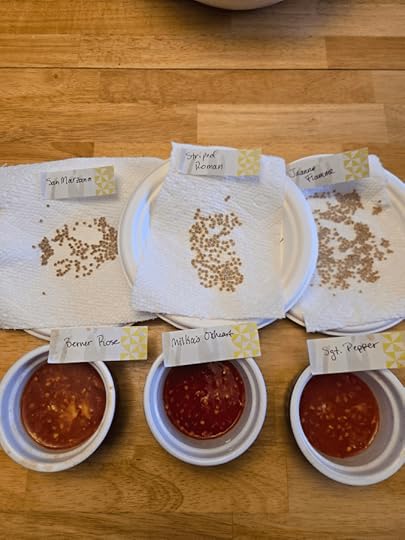 Tomato seeds being fermented, then dried
Anyone who’s eaten a tomato probably knows about the little gelatin glob that encapsulates each seed. This gelatin helps the tomato seed to hold off on germinating by keeping it protected. This layer of protection keeps seed from germinating to quickly.
I like to get rid of the gel by fermenting it away before drying, but some think that drying alone breaks it down enough. To ferment tomato seeds, simply squeeze the tomato seeds + juice into a jar and let sit on a counter for 2-3 days. Rinse and strain off juice until just seeds are left, then transfer to paper towels/paper plates.
I use both methods as the season allows, but do think I get better germination with fermented seeds.
Tomatoes may cross-pollinate with each other, so if you are serious about saving these- plan on growing different varieties on opposite ends of your garden.
 Saving Bell Pepper Seeds
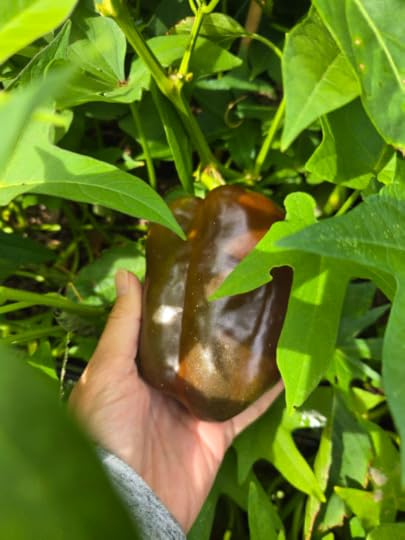
Sweet peppers are one of the simplest seeds to save. The hardest part for northern gardeners like myself, is getting the peppers to full maturity in our growing season. But luckily you just harvest the fruits when fully ripe, you don’t have to wait until they are over-ripe to collect viable seeds.
Simply separate seeds from the ribs, careful not to break the seed coating. Dry on a paper towel for a week or so, then store in a paper envelope.
 Saving Lettuce Seeds
Patience is key when saving lettuce seeds. You’ll need to get your plants started early and let them bolt. Bolting is when the plant sends up flower stalk that blooms and eventually sets seeds.
Then your job is to wait as the tight flowers SLOWLY turn to white fluff – and dry on the plant before harvesting the seeds. The final seed heads remind me of showy little seed poofs just like dandelions.
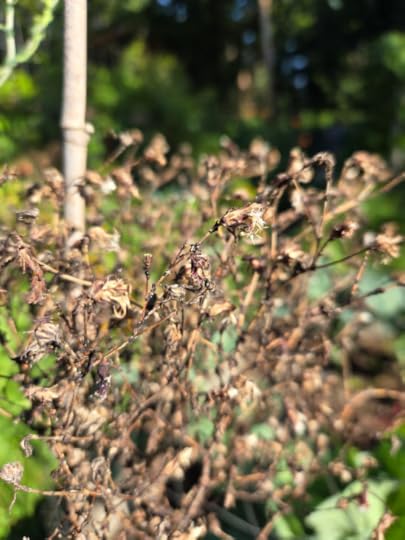
The trick is to catch these seeds at full maturity but before they drop to the soil. If I can remember in time, I try to wrap my seed lettuces in a mesh bag so they can continue to ripen on the plant. Then I chop the plant stalk late into the fall after the plant has died back. That way I can harvest as much seed as possible without it falling to the ground. Lettuce will self seed this way as well.
These are also seeds that you need to wait for dry weather to harvest. You can shake into a bowl or bucket- then blow away the fluff and chaff (extra plant material). One plant will give you enough seeds to share with your entire neighborhood, or a local seed library!
Seed StorageClick HERE for how to save these annual flower seeds.
It is recommended to store them in a glass jar or plastic bag. Air tight containers will hold seeds viable for longer, you just need to make sure they are fully dried out before sealing it to avoid growing mold instead of more food.
I mostly keep them in paper bags or paper envelopes, (or glass jars) but always in a cool dark area.

This SEED VIABILITY CHART from High Mowing Organic Seed Co. shows the typical time that different seeds stay viable for best germination rates.
Seed Savers Exchange is a great place to start if you want to buy savable seeds.
I hope this quick overview inspires you to try and save some seeds- for the first time, or save some new seeds…
What questions do you have? What seeds are you most likely to start saving?
Dig In,
Michelle
The post Seed Saving: Vegetables appeared first on Forks in the Dirt.
September 5, 2025
Seed Saving: Annual Flowers
Seed Saving is something that has made me a better gardener in so many ways. It requires us to be more aware of how our plants are progressing through the season. It makes you see more than just the ‘product’ you’re growing- you see the plant as a self-sustaining entity. It can reproduce itself! For all these reasons and more, seed saving connects you to your garden in new and beautiful ways.
Did you know that saving annual flower seeds is a simple and cost-saving skill to master in your garden? It doesn’t require any special equipment and gives you another ‘harvest’ from your gardens.
Saving seeds is another way gardening helps us work closer with nature. And we need to really pay attention to nature as she moves through the seasons in order to save the best seeds. And being ‘in the moment’ in our gardens is one of things that brings us the most joy, isn’t it!?
So, I’m sharing my favorite annual flower seeds to save. The flowers listed also make amazing companion plants in any vegetable garden, along with adding color to the beautiful bouquets I get to bring inside all season…
More on these flowers as companion plants HERE.
Basics to Successful Seed Saving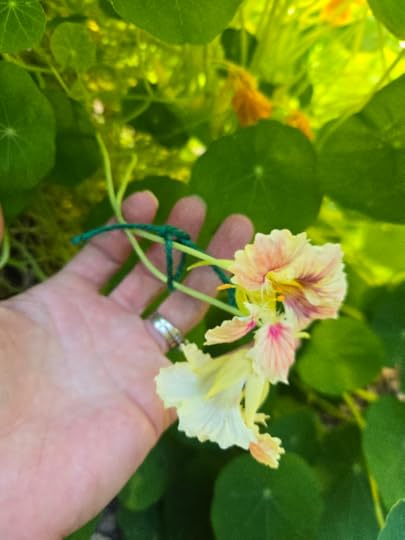 Start with the right seeds– grow open pollinated or heirloom varieties that will come back true to type. Saving seeds from hybrid plants will most likely not grow into the same plants (or flower/fruit) that they came from. More information on which are viable seeds to save HERE.Save seeds from the healthiest plants- Only save seeds from plants and fruits/veggies with traits you want to bring back (earlier, bigger, color, etc.).Mark specific blooms– as colors may fade before you can collect seed.Collect Seeds on dry days– wet seeds can mold when brought inside.Be patient– Saving seeds is mostly intuitive, but researching the specific seed maturity time of plants will help you gather the best seed.
 Saving the best seeds means you’ll have the best luck germinating them next season.
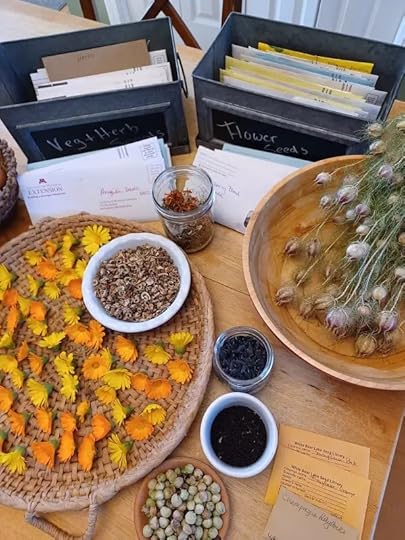
My Favorite + Easiest Annual Flowers to Save SeedsFrom the well-loved marigolds and zinnias to nasturtium and calendula and so many more, let’s see what flowers you can bring back to your garden for FREE next year!
Since these flowers all bloom continually you can deadhead AND leave a few to fully mature into seeds throughout the season.
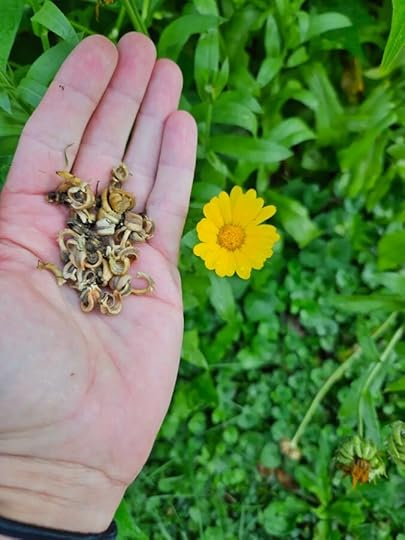 Calendula
These are also known as pot marigold and come in many shades and varieties. These seeds look like little aliens and very unlikely to sprout- but these beauties are easy to harvest and require very little cleaning. Waiting until the seed heads are fully brown and dried on the plant is key. They should basically fall off into your hands or collecting bowl.
Since these flowers bloom continually, you can deadhead- or leave a few to fully mature into seeds throughout the season.
*If you’re growing a few different varieties of calendula, note that they do cross-pollinate, which means that eventually you’ll have a
Viable for 3-6 years
CosmosI love the way these blow in the summer breeze and add such a variety of color to the vegetable garden and border. I find most of the varieties are hybrids, but sensation, radiance and candy stripe have all grown well from home saved seeds for me. Wait for the flower heads to dry completely on the plant, then rub between fingers into a bucket. Then blow away the extra fluff (chaff).
Marigold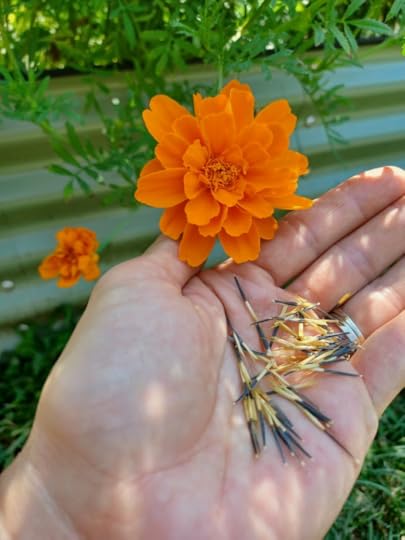
Oh, the marigold, is there any flower that is either loved or hated as intensely? I am a lover, for so many reasons. True marigolds are from the Tagetes family, and they offer a wide array of colors and sizes. I prefer the French marigolds for the full-sized blooms and large (3’x3’) plant size and lemon or tangerine gem for the smaller flowers and (1’x1’) plant size.
These seeds will dry on the plant and stay encapsulated in the involucre- how cool is that word- and that function!? So, they really stay all together until weather and time wear the papery seed package away- it falls to the soil and is ready to grow again. But- we get to play with these and pull them out of their packaging. We’re looking for seeds that are darker/black on the bottom and a straw color on the top. If the seeds aren’t fully mature, they’ll still be lighter in color at the base.
Larger seeds from larger flowers, tiny seeds from the gem series!
Seeds viable for 1-3 years
Nasturtium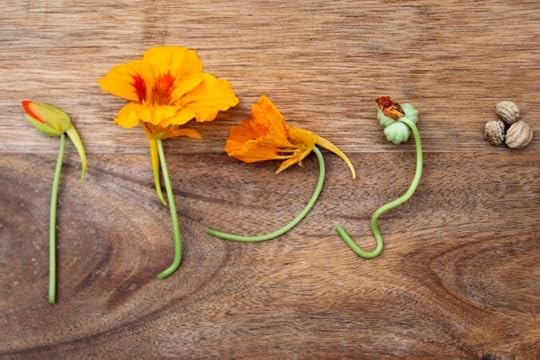
These cascading beauties seem to save their seeds until the end of the season. Seeds form in groups of 2-3 and are attached well to the stem. They are tasty as immature green seeds and make a fun alternative to capers.
But these seeds need to ripen fully and fall off on their own to have the best germination rates. So my practice is to wait until mid-September, then start lifting the mass of blooms and vines up off the ground and picking up the fallen seeds. They look like dried up, wrinkly little brains (as my schoolyard garden kids call out year after year). Make sure these are fully dry before sealing them up.
Seeds viable for 2-5 years
Poppies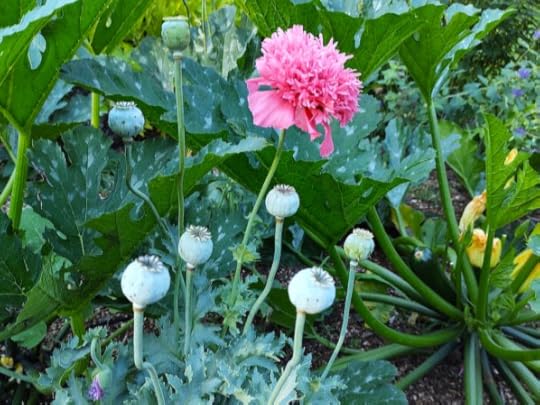
Most poppies are late spring or early summer bloomers, so they mature much earlier in the season, around the end of July. The seed pods are often saved for dry flower decorations as they are so stunning on their own. To harvest seeds, wait until pods are dry and you can hear the seeds shaking around inside. Then either cut or pull up the stem and tip upside down into a bag or bucket and shake.
These black seeds are so tiny they can escape many hand-folded seed envelopes, so be forewarned!
Seeds viable for 4-6 years
Snap Dragon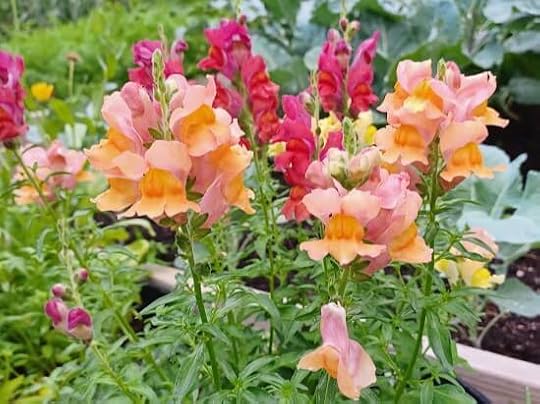
From watching bumblebee butts hang out the back while they’re slurping to the crazy skull like dried pods snap dragons offer a lot for any gardener. They bloom from the bottom to the top of their stems. So the lower seed pods will dry before the tops are ready.
Wait for (at least some of) the seed pods to completely dry on the stalk. Cut off individual seed heads or the whole stem directly into a brown paper bag or bucket. Then gently shake the tiny black seeds free from the rather skull like seed pods.
Seed viable for 3-5 years
Tithonia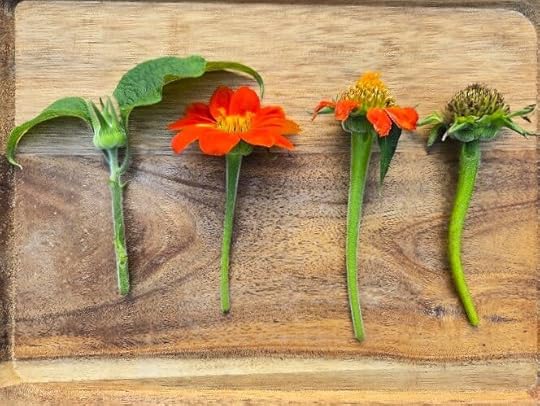
Tithonia (aka Mexican Sunflower) is one of those plants that impresses me every year. They often grow 6-7 feet tall and produce so many large branches laden with blooms that the bees and butterflies love late in the season. These are another flower that do best when the seeds are left to dry fully on the plant.
I snip just below the base of the flowers and drop directly into a brown paper bag. If you plan on handling these at all consider gloves as they are sharp! Shake the bag to help release the seeds from the heads. The seeds themselves resemble little gray arrowheads.
Viable for 2-4 years
Zinnia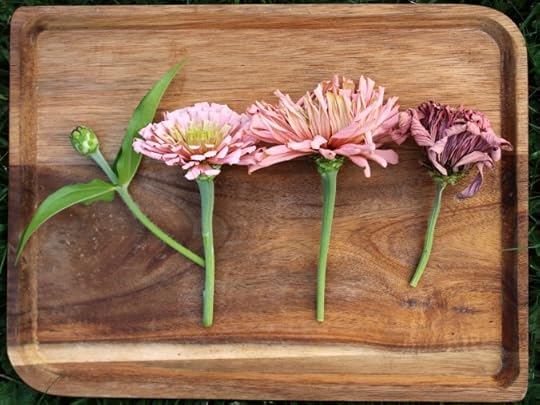
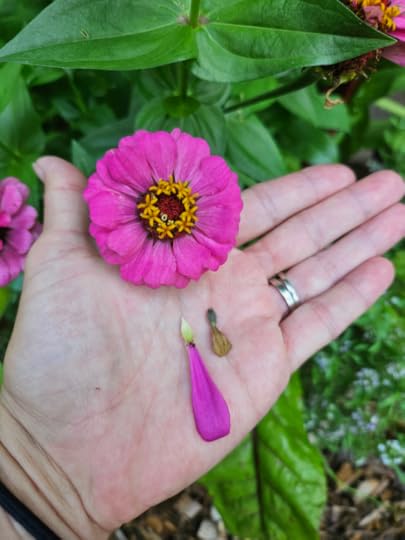
With zinnias you can have your bouquet and save seeds too! As long as the flowers are in full bloom when you cut them, you can enjoy them as cut flowers and then as they fade, remove from water, rinse and hang to dry- and still have great germination rates. I actually find this works better than leaving the flower heads in the garden to mature, because so many birds pick at the flowers and seed heads.
Gently tug from the base of the blooms to separate seeds. I usually hold the flowers upside down for this. You can keep the petals intact or break off depending on your preference.
They won’t always bloom true to color, but tend to stay in the same shades, shapes and sizes from what I have saved and regrown.
Viable for 3 to 5 years
Storing SeedsMake sure seeds are 100% dry before storing in either paper envelopes or an air tight container. I opt for paper envelopes and keep them inside a loose metal tin, in a cool and dry part of my home.
With each flower seed saved you’re adding to the story and resiliency of your garden, and saving money too!
What flower seeds do you want to save first?
Dig into Seed Saving,
Michelle
The post Seed Saving: Annual Flowers appeared first on Forks in the Dirt.
August 19, 2025
Preserving Sweet Corn 3 Ways
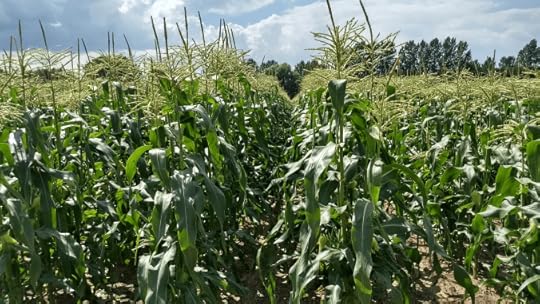
Sweetcorn Season = Peak Summer.
I am a Midwestern gal, through and through. And let me tell you, we take our corn seriously.
That coupled with the growing interest in preserving more of our foods brought about this article. I’ll share my family’s favorite ways to enjoy and preserve this beautiful bountiful crop.
I revere these harvests. I honor them by eating as much local, sustainably raised sweet corn as possible. Then, by putting up some of the summer flavor each year. I freeze, can and ‘relish’ the heck out of this crop- and I want you to be able to savor these flavors all year long too. We’ll get you preserving corn for your family, too.
But, like any homegrown or local food, NOTHING beats Fresh Eating!
Tips for Fresh FeastingEat the day it is picked (or fine, within 48 hours)Do NOT overcook. Love those popping kernels!Boil 3-4 minutes- hold the heat by draining water and letting the lid sit barely askewSteam for 2 minutes- just an inch of water in the bottom of the panGrilling Fresh Sweet Corn- soak in salt water for 30-60 minutes first (if you can). Pull the tassels, or they WILL start on fire. I enjoy both shucked and un-shucked grilled corn. 15 minutes rotating ¾ times on 350-400F grill. Click HERE for more details.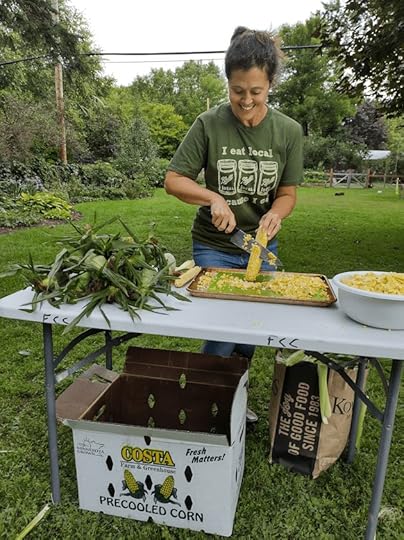 Let’s Get Shucking
For real, shucking corn is a hot topic online! While there are many tricks and hacks that I’ve for shucking corn to remove the silks, I end up going back to the old school ways. I don’t want to microwave my corn or chop off the bottom and waste any kernels. When you’re doing this to 50-60 cobs, a little waste off each cob adds up to a lot of wasted corn!
*A note on disposing the husks* The husks add up to a LOT of ‘green’ organic matter. They can be added to your compost pile, but your pile will benefit from a little chopping and/or ripping to disperse the husks better. You can also bring corn husks to most food scraps collection sites. Just please do not add them to your trash- they add a lot of methane emissions to the landfills.
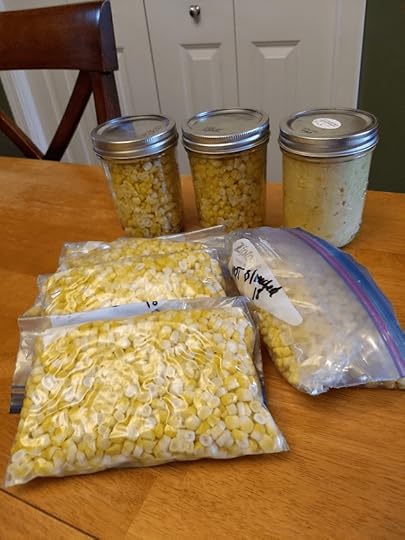 Freezing Sweet Corn
I think freezing sweet corn kernels is the easiest way to preserve corn. If you can, search out corn that is still in its ‘milk stage’. This first pick of a corn crop is usually the sweetest and has a white milky substance that oozes from the kernels. Hence, early-stage corn is referred to as being in the ‘milk stage’. This ‘milkiness’ signals more sugars and less starch. The less starch the better for freezing.
Safest way to freeze is to cut kernels from the cob and parcook. Just a ½ cup water for every 10-12 cups of corn kernels, which is my normal batch. Cook with lid on for 5-6 minutes, stirring once or twice. Then remove lid for another 5 minutes to cook off the water. Spread out to cool (no ice bath) before placing into freezer containers. I’ve used both rigid freezer containers and freezer bags for corn.
I also tested freezing a small bag not blanched or parcooked. It degraded quickly in the freezer, was really starchy when cooked and we ended up giving that to the chickens.
**1 ear of corn = 1 cup of kernels**
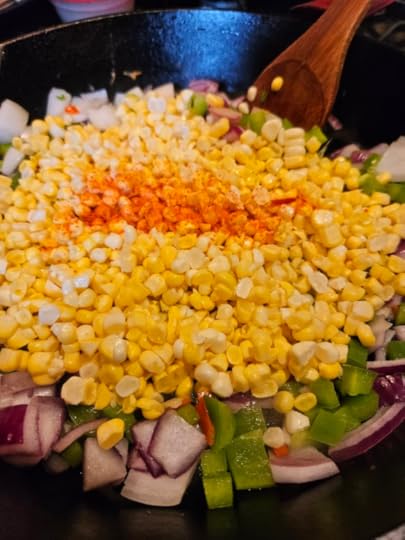
I follow many of Crystal’s recipes in her book, Freeze Fresh. I especially like her frozen Creamy Parmesan Confetti Corn, a great side dish to brighten winter tables. See this recipe being made to the right.
I enjoy a little creamed corn as well. I like freezing the corn ‘milk’ and bits that I get from my ‘second go’ at the cobs is perfect to use in my Corn Chowder Soup recipe.
I usually also freeze one or two bags of corn ON the cob. There’s something special about eating this once or twice in a winter. It pairs perfectly with a pork roast.
To freeze whole corn cobs:
Shuck, then toss whole or halved cobs into boiling water and parcook for 10 minutes. Then submerge into an ice bath until cooled, then drain to remove as much water as possible before placing into freezer bags. These take time and space- which is why I usually only do a few each year but are such a treat.
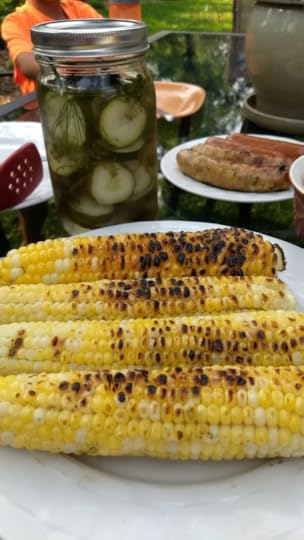
Corn does not have the required acidity levels (like tomatoes) or sugar content (like jellies and jams) to be safely water bath canned on its own. But if you make into a Pickled Corn Relish, you have a great addition to any summer potluck. Only water bath can corn if adding vinegar!
 Pickled Corn Relish with Zucchini Fritters makes a satisfying summer meal!
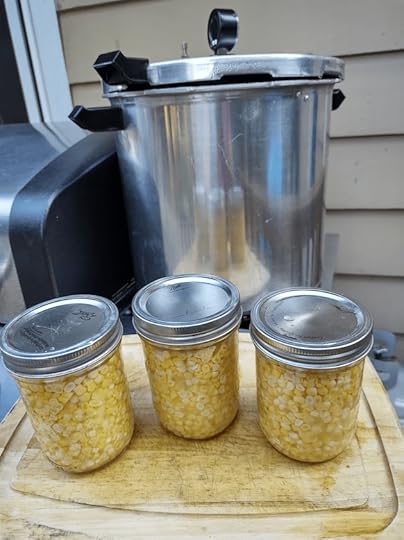 Pressure Canning
Once I started pressure canning, I felt like a real modern-day homesteader. Pressure canning corn and green beans changed how I gardened, and how we eat during the winter. I urge you to try some basic pressure canning recipes to rediscover preserving skills. If you are worried about this, you are not alone. You also have many trusted resources to follow online.
I follow the National Center for Home Food Preservation’s recipes for all my pressure canning. These are well tested recipes that I feel comfortable using. They even have a easy to read guide to using pressure canners for beginners.
Let’s walk you through our process of processing enough corn to last us over winter.
Start to finish it is an all-day project with all hands on deck, but it is enjoyable work, with instant and long lasting rewards.
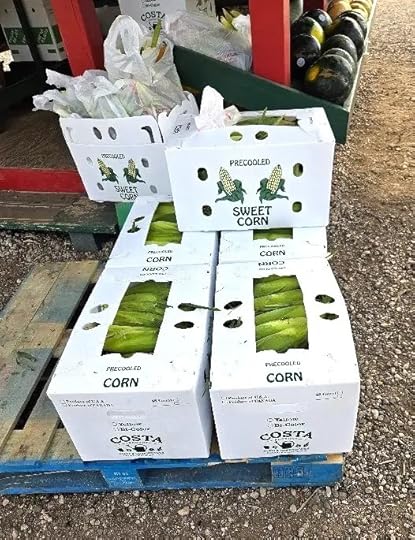
We buy two boxes of sweet corn from our local farmer and get shucking (see early content on shucking). Each box of corn is about the same as a 5-gallon bucket, and two of these equal one bushel. Most pressure canning recipes deal in bushels.
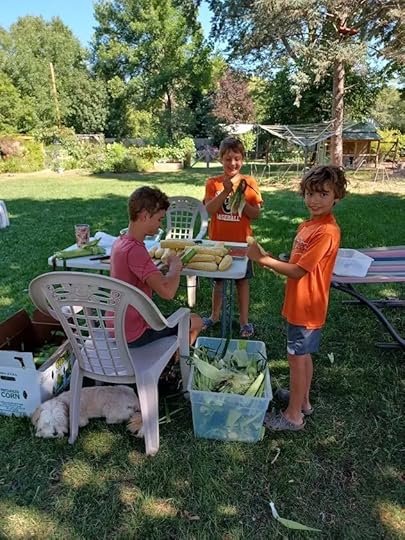
I get my kids – sometimes neighbor kids too – to help with all the shucking. It’s amazing how much work kids will do for some watermelon, which I always get from the farmer when I pick up our corn. A freshly roaster cob or two to eat after helping never hurts either!
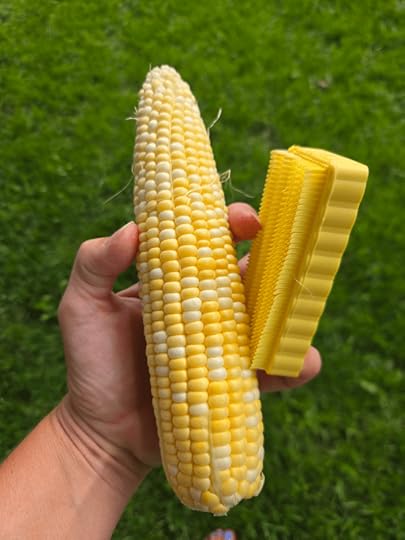
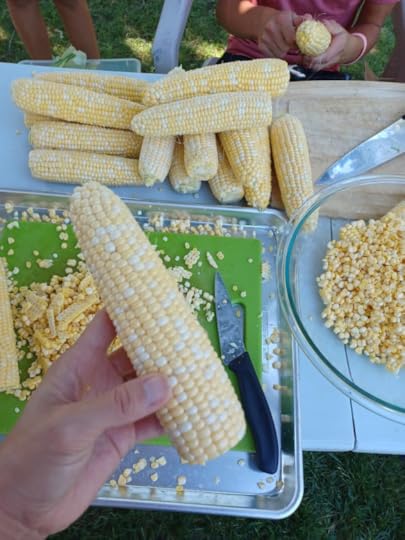
Then I work to remove the silk. This is the slogging part of the project, and my kids are not interested.  A handy gadget, called a De-Silking brush, is worth every penny of the $5-10 you’ll spend.
After the silks are gone, I cut the kernels from the cobs. I’m old school in this step, using a sharp knife and my Nordic Ware Bundt pan to make the process a little easier. I told you I was a Midwest gal. . This pan elevates the cobs making it easier to get to the bottoms and helps catch the kernels. There are many tools out there, I just haven’t found one that works well on all the different sized cobs, so I stick with what I know.
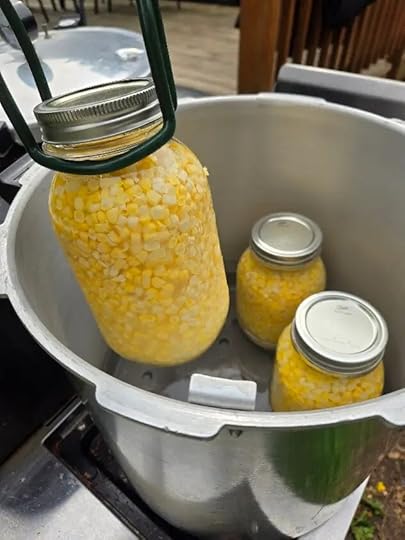
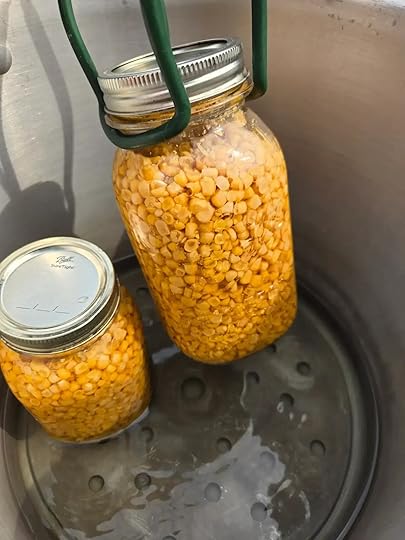
Once you have enough corn prepped to fill your canner, follow the National Center for Home Food Preservation – Pressure Canning Whole Kernel Corn recipe. I prefer the ‘Raw pack’ version because there’s one less step and it gives great corn. Fill loosely with raw kernels, add salt if desired, then add boiling water to the jars, leaving 1” head space. Adjust lids and set into pressure canner, following timing- which is 85 minutes when I’m doing quarts.
Then it is about heating up the water, watching the pressure reading and timing. Just like with water bath canning, you’ll want to set the jars somewhere they can remain for at least 24 hours without disturbing so the seals set on the lids.
I do all my pressure canning outside on my grill’s side burner. This keeps the heat out of my kitchen, and I’m able to let the jars cool off outside as well- plus I’m usually ready to relax outside for a bit after getting the first load into the canner. I do two rounds of 5 quarts. So for 10 large servings of shelf stable corn, plus the extras that I freeze (usually another 4-5 meals). We have enough to see us through to the next summer.
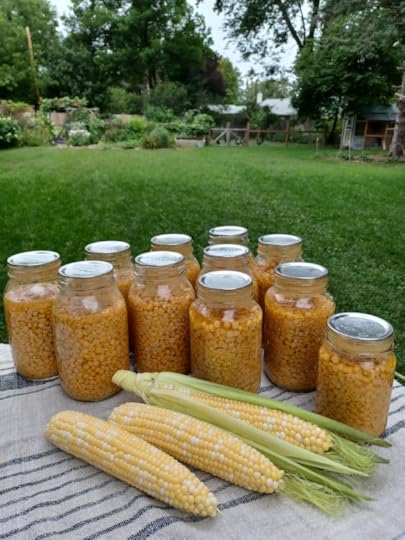
Pressure canned corn is good for one to two years when processed and stored properly.

I use canned corn as a simple side dish, in or in recipes like my favorite Corn Chowder soup. There’s nothing quite like opening the pantry and seeing all the foods you love ready and waiting. Knowing where they came from and what ingredients they contain is also a huge peace of mind.
So, even if you start small and can just one thing this summer, I urge you to try- and see if it doesn’t become one of your favorite granny skills.
Dig in,
Michelle
The post Preserving Sweet Corn 3 Ways appeared first on Forks in the Dirt.
June 30, 2025
Strawberry Vinaigrette Recipe
I love the versatility of strawberries – just enough tart to hold their own, and shine through even in salads!
At this point of summer, even I’m getting tired of the same old salads. But making your own dressings is an easy way to jazz up your salad routine!

It’s also a great way to use up the last of a jar of jam (or honey, or mustard etc…). Plus you skip the icky additives found in so many purchased dressings.
This is a ‘Strawberry Jam’ based recipe, specifically freezer jam, that tastes so much brighter than cooked jam. I usually make a jar of this dressing with the overflow from making freezer jam, or the last dregs of the previous jar…
Find my Strawberry Jam recipe HERE.
If you’re looking for more inspiration on making more of your own items from scratch, I have to recommend Kris Bordessa’s latest book, Attainable Sustainable Pantry.
I mention using white balsamic in this recipe only because when I first went to play with this recipe, I had some on hand. The white balsamic does lighten the flavor and let the strawberry burst through. But you can easily swap out the white for regular balsamic vinegar.
I’ve only ever made this with fresh thyme leaves, but I’m sure you could make with dried thyme. Just give it some time to hang out and add its flavor to the dressing.
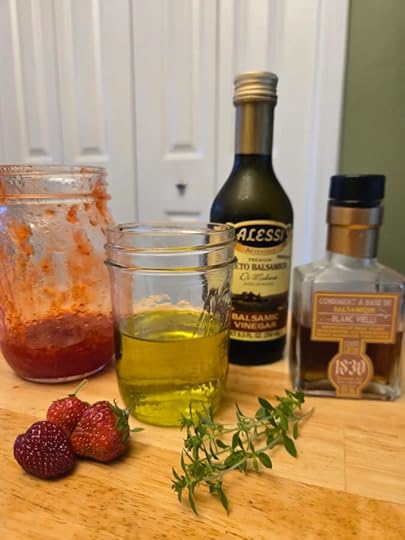 Strawberry Vinaigrette RECIPE4 Tbsp strawberry freezer jam
(see recipe link above)1/4 Cup ripe strawberries1/2 Cup of mild oil (avocado or olive)2 Tbsp white balsamic vinegar
(or use regular balsamic)2 Tbsp white wine vinegar1 Tbsp chopped fresh thyme leavesSalt + pepper to taste
Add all ingredients to a jar. Mash fresh berries with a fork. I like having some bigger pieces of berries in the vinaigrette, but you do you.
You can just ‘shake it till you make it’, until you see the oil and vinegar emulsify. I recommend making sure the lids are on really tight before shaking! You can use a hand held milk frother or a mini-whisk. You could even add this to a blender if you wanted to.

Don’t skip the chopped thyme leaves, its such a great addition to the typical berry vinaigrette.
You can use right away, but it also keeps in the refrigerator two weeks. Shake before using.
More on Growing Strawberries.
I love making small jars of dressing. They’ll perfectly dress one big family sized salad, or a few of my personal sized salads. This recipe can easily be halved to make the most of whatever you have on hand.
Dig In,
Michelle
The post Strawberry Vinaigrette Recipe appeared first on Forks in the Dirt.
June 20, 2025
Strawberry Freezer Jam
This is the strawberry freezer jam that tastes like fresh strawberries!

This recipe is for those of you who’ve made cooked strawberry jam and been disappointed that it’s too sweet and not strawberr-eeey enough.
Now to mention that many national brands of strawberry jam have a long list of unpronounceable ingredients… let’s skip those ingredients and the food miles by making your own.
You can make this with both fresh picked or previously frozen berries. And feel free to use the wonky looking or almost too ripe ones for jam. When you’re growing your own, you’ll likely harvest a few cups to a few pounds a day, and if you want to save up and make a batch of jam, just freeze whatever isn’t eaten at the end of the day and defrost once you’ve got enough berries and time.
More on growing Strawberries HERE.
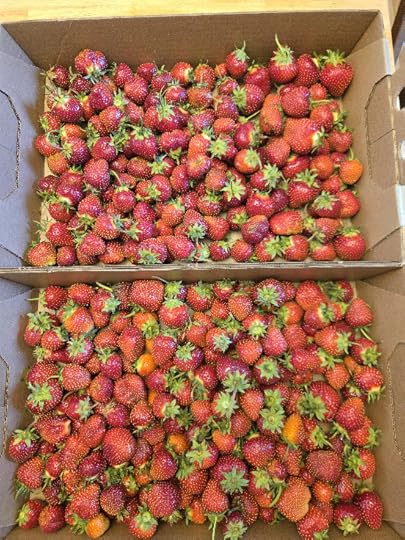
If you go to a Pick Your Own Berry Farm and come home with 16 pounds of berries (yep, happened to me before) this is a great way to preserve that summer sweetened flavor all through winter and right into next spring.
I also love how fast this Strawberry Freezer Jam comes together. It is literally a 10-minute process once the berries are clean.
Technically, you should freeze this jam in plastic freezer containers. And sometimes I do- but I also use freezer safe mason jars. I pack my freezer jam jars into cardboard boxes, so if something does crack it will be contained.
To prepare strawberries, give them a quick rinse and remove the hulls and any extra weird clumps of seeds on the bottoms of the berries (are those berry butts?). Then crush with a potato masher or similar tool. Crushing the fruit really decreases its volume, so I usually end up preparing about 8 cups of cleaned and hulled fruit that gets crushed down to 4 cups of prepared fruit.
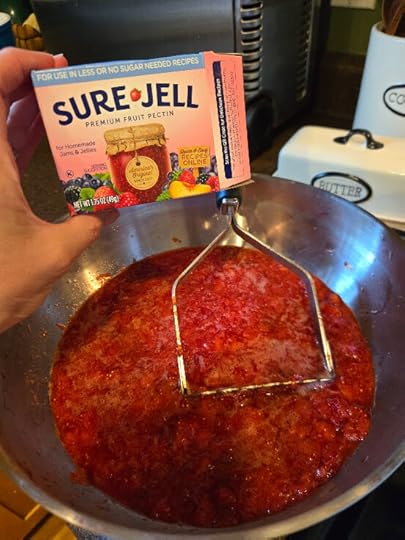 Pick a Pack of Pectin
I love Pomona’s brand pectin for making lower sugar cooked jellies and jams but haven’t had great luck with it for freezer jams. I think it may be affected by the lower amount of cooking time. For freezer jams I usually go with the low-sugar Sure Jell pectin. The different kinds of pectin (high or low-methoxyl) are truly fascinating to me; derived from different foods like citrus peel or apple with different setting times and temps, but that is another rabbit hole for another day…
Strawberry Freezer Jam RecipeIngredients:
4 cups prepared fruit3 cups sugar, measured into separate bowl1 1.75 oz. box pectin Sure Jell (*low sugar)1 cup waterDirections:
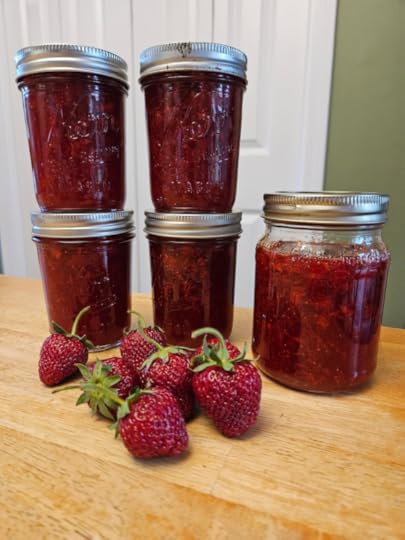
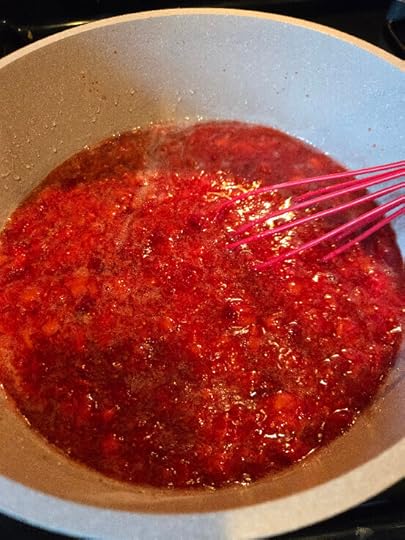 Thoroughly clean six 8-ounce or four 12-ounce containers or (plastic or freezer safe glass) and lids. It never hurts to sanitize jars with boiling water for ten minutes. The plastic containers just wash thoroughly.Prepare the fruit as mentioned above. Measure exactly 4 cups prepared fruit into a separate bowl and set aside. Slowly mix sugar and pectin well in a medium saucepan, then stir in the water. Bring to a boil on medium-high heat, stirring constantly. Once boiling, cook and stir one more minute, then turn off heat and pour in prepared fruit immediately. Stir briskly (I like to use a whisk) for one minute or until well blended.Fill containers quickly to within 1/2 inch of tops. Wipe off rims of jars or containers and cover with lids. Once cooled off, move to refrigerator. You can refrigerate freezer jam up to 3 weeks or freeze up to 1 year.
And somehow, I always end up with a partial jar that makes that goes right into the fridge to enjoy!
I love this strawberry freezer jam on yogurt and granola, smoothies or toast with brie or goat cheese. My kids eat it old school with PB+J.
I hope this has inspired you to make some of your own jam! Whether you grew the berries, picked them or bought them- skipping the many ingredients in store bought jam is better for the flavor and your health!
Dig In,
Michelle
The post Strawberry Freezer Jam appeared first on Forks in the Dirt.
May 18, 2025
Rhubarb Chutney Recipe
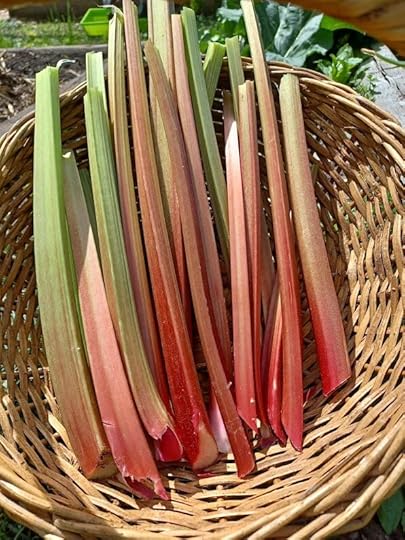
I love rhubarb for so many reasons! This is now my 4th article on rhubarb (and counting) and I think it’s because it is one of the first to arrive in my northern garden that I give so much attention to it! We’re just all so excited to have fresh fruits and veggies to play with again- so here’s a newer favorite way that I’ve found to preserve rhubarb— in rhubarb chutney!
Find more information on Growing Great Rhubarb HERE.
Eating this with grilled pork chops or a spring charcuterie board helps this rhubarb chutney shine. Paired with the goat cheese, crackers and cured meats- along with the first spring greens salad = spring in a meal. But the flavors are also deep enough to work well all summer and into fall.
Another reason I love this chutney recipe, while not for canning, it can last in your refrigerator for months.
*PS- it also makes a great base for salad dressings*
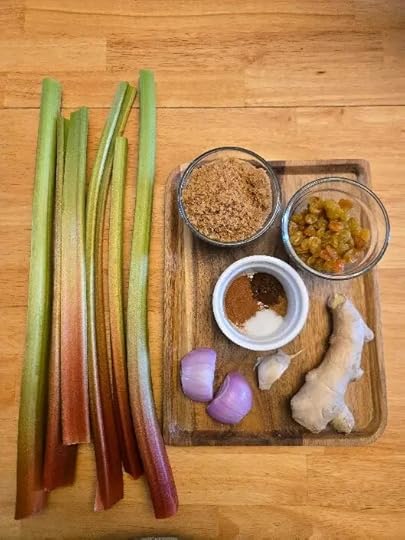 Rhubarb Chutney RecipeIngredients:4 cups copped rhubarb (3 cups)2 cups chopped onion1 cup golden raisins2 cups brown sugar 2 cups apple cider vinegar2 teaspoons fresh grated ginger1 tablespoon salt1 teaspoon cinnamon½ teaspoon ground clovesDash of cuminDash of cayenne or red pepper flakes pepper *if you like a lil spiceDirections:
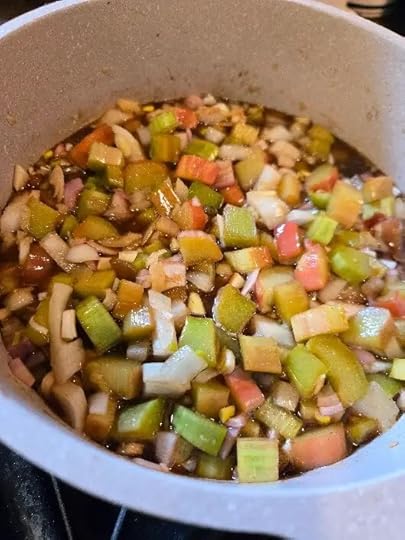
Combine all ingredients except 1 cup of the chopped rhubarb in a non-reactive pot- steer clear of your cast iron here too, as the acidity of the vinegar can mess with it.
Bring to a low simmer for 20 minutes, then mix in the final cup of chopped rhubarb and cook 5 more minutes. This let’s some of the rhubarb hold it’s shape and you can really taste the rhubarb kick in the the sauce.
Let cool and then place into a glass jar and store in the refrigerator for up to 3 months.
*This recipe is not intended for canning.
Recipe can be made with frozen rhubarb and you can freeze this chutney.
Find my other favorite rhubarb recipes linked HERE.
Cheers to another way to preserve the flavors of Rhubarb for all summer long!
-Michelle
The post Rhubarb Chutney Recipe appeared first on Forks in the Dirt.
May 8, 2025
Got Mulch?
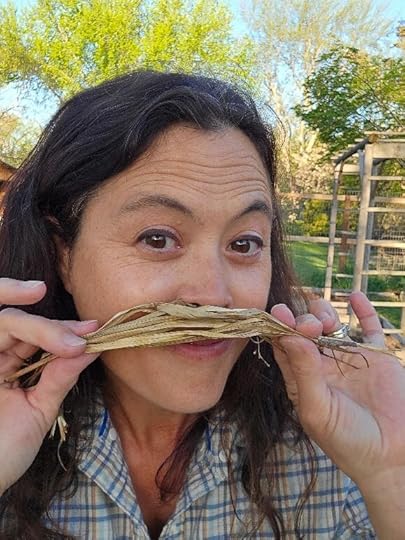 Got Mulch – like the “Got Milk’ Campaign, mulch is something that should be everywhere!
Organic Mulch is the unsung hero of my veggie garden.
Mulch performs garden magic by just lying there looking gorgeous in my garden.
Like a good milk mustache, I see mulch in people’s gardens as an endearing and wholesome quality.
It is one of my secret tools in the garden- I can control so many variables, soil moisture, soil temperature and organic content with an annual addition.
One of the basics of soil health is to ‘keep the soil covered’ and mulch does this and so much more. Specifically, I’m talking about organic mulch, like straw, tree leaves or compost added to the top of the soil (not worked into the soil).
This is a good moment to mention the Law of Return in regard to gardening, which simply reminds us that ‘what comes out of the soil should go back into the soil’.
When we think of how nature grows her gardens, she ensures healthy growth with nutrients and soil life by growing where things are decomposing, and usually under a thick layer of decomposing leaves. We can mimic nature in our own gardens by mulching – one simple way to work towards that balance.
I also like to grow cover crops, usually in the fall, to help keep the soil covered and build soil health. I prefer cover crops that grow quickly and winter kill easily, all while adding nutrients to and improving soil structure.
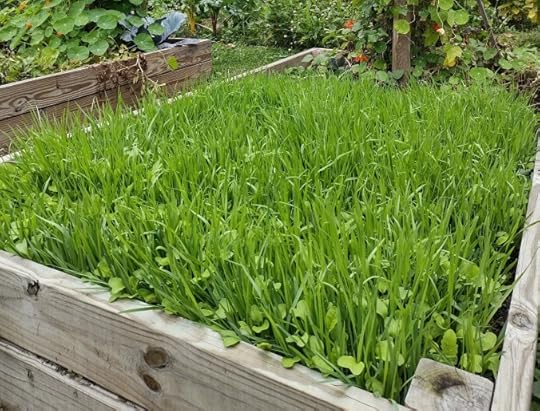 Cover crop of oats peas + radish in a raised bed in fall turns into a layer of mulch for spring.Water Conservation
 I usually don’t have to water my garlic because I leave the thick layer of mulch in place all season.
Mulch also helps hold moisture in the soil by reducing the sun’s extreme drying effect on bare soil. This drying (we’ve all seen the cracks in summer scorched soil) adds to compaction and decreased air and water being able to reach plant roots. If your main goal is to retain moisture you can mulch as deep as a 3” layer. Studies have shown you can reduce water needs by 2/3 with 3” of mulch for woody plants. And I have done 3” deep of wood chips in my perennial beds. But I usually add only a thin covering, ½ – 1” deep to my annual vegetable garden beds, maybe adding more as plants become more established.
*A thin layer of finely shredded leaves, straw or dried grass can really help those shallow direct sown seeds germinate. Adding crumbled straw to carrot, lettuce and beets seeds after direct sowing increases germination rates.
Temperature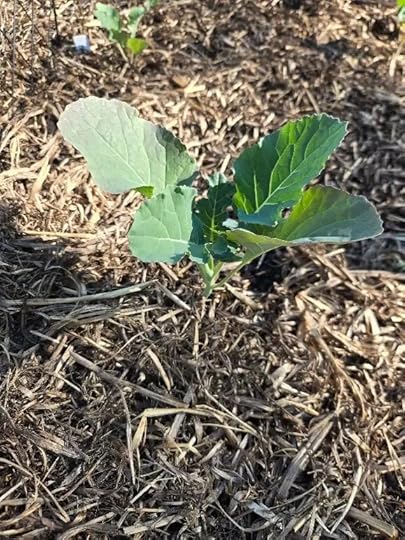
You can also control the temperature underground- where the roots are doing their best to grow – with a layer of mulch. An inch of mulch can reduce summer soil temps by 14F just 2” below the surface. This is key to keeping plant roots from stressing out. Plants prefer slowly fluctuating temperatures to drastic changes. And especially for cool weather crops like lettuce, broccoli and cauliflower, this can keep plants from bolting and buttoning, a common issue for home gardeners working with diminishing shoulder season temperatures.
Reducing WeedsThe original reason many of us started using mulch is the wonderful job it does suppressing weed growth. By keeping the soil surface covered, mulch keeps sunlight from hitting weed seeds, inhibiting their germination. So many benefits, right! This is also a reason to love No Dig Gardening in general.
 I even use extra pine shavings from my chicken bedding for mulch sometimesFavorite Mulches
Straw- I have an in with someone who grows strawbale gardens and I’m able to gather them in the late fall let them decompose further over the winter and use them throughout the following season in my gardens. You can mimic this by bringing home straw bales the summer before you want to use them and wetting them down a few times…
Leaves– we have big, beautiful maple trees that drop A LOT of leaves every fall. We rake about half of them to add to cover in the chicken area, so the soil stays somewhat covered. The rest I mulch with the lawn mower and place in either bags or an open compost bin for use the following season. After a year (usually more) of hanging out in a dark space where fungi do the work of slowly decaying (rather than the faster acting bacteria) these leaves officially become leaf mold.
Compost– I also make a lot of compost every year and do think this is a great way to cover my soil, especially in the fall after cutting away the vegetable plants (and leaving the roots in the ground). I especially prefer the dark compost layer on top of garden beds that I am going to grow early spring crops in- because the near black color helps absorb the sun’s heat and actually warms the soil, preparing it for earlier planting. (I’ve got lots of other spring season extension info, like building a low tunnel, a cattle panel greenhouse, and the best crops to start early.
 Compost areas don’t need to be fancy to work!
Wood Chips- I use wood chips in my perennial flower beds and in some garden pathways, but keep it out of vegetable gardens as it is best kept out of the soil, unless you’re talking about adding a lot of wood, down deep as you would when building a Hügelkultur bed.
When Not to Mulch?If you live in a very wet area keeping too much mulch in your garden can actually keep plant root and leaves too wet promoting diseases like downy mildew, powdery mildew, anthracnose and root rot and provide habitat for slugs and other pests. You know your garden best and as always, your time and attention are the best garden tools.
So, yes I am the neighbor that collects everyone’s leaves.
And has piles of them near my compost area… just waiting to add that layer of goodness to my gardens.
Which mulch do you prefer?
Din In (or under your layer of mulch),
Michelle
The post Got Mulch? appeared first on Forks in the Dirt.
May 1, 2025
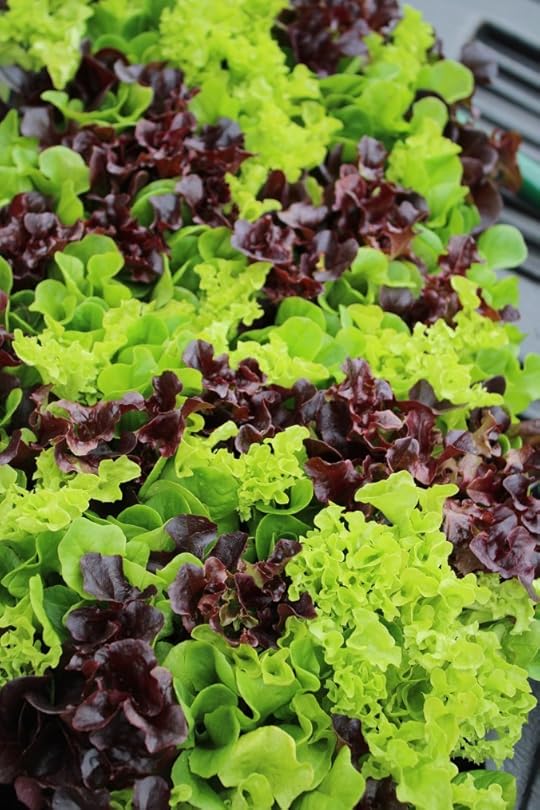
Growing Great Lettuce
‘Lettuce’ Introduce You… How to grow great lettuce and the best salads in town!
We’ll get you harvesting more flavor and crunch from your lettuce patch.
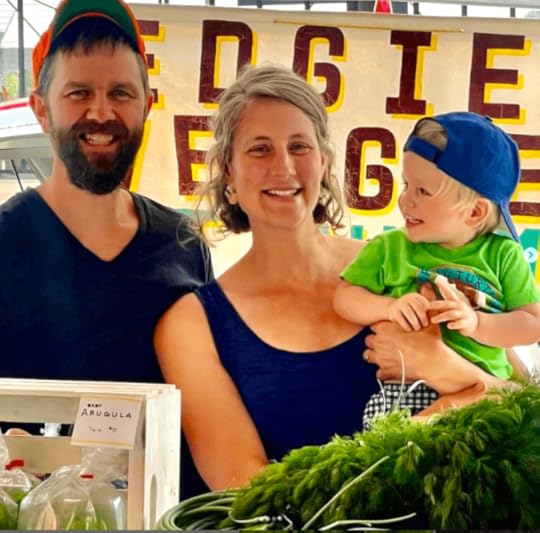
 Jesse Edgington of Edgie’s Veggies
New gardeners are often told to grow salad greens as an easy vegetable crop. This advice is likely linked to the shorter harvest time for most salad greens. But beyond that, lettuce can be tricky for us northern gardeners- especially as climate chaos keeps creeping in.
Lucky for us, we’ve got a salad-centric farmer as our guide. Meet Jesse Edgington of Edgie’s Veggies. He’s an organic urban farmer and salad slinger. He grows in zone 4 around the Twin Cities (you may have seen him at St. Paul’s weekly Farmers Markets) so he’s a pro at pushing the early and late ‘shoulder seasons’ and dealing with those high heat and humidity days that plague many a salad lover.
Here’s what I gleaned from spending a day on his urban farm to help you grow great lettuce.
Lettuce is a Bit of a DivaLettuce wears its lungs on its leaves. Plants have a mechanism that shrinks their cells when it is hot, so even though a leaf looks wilted in the afternoon it may perk up in the evening. Waiting to water will help you keep the roots (only 6” deep) from getting waterlogged.
Here’s what we can do to help harvest luscious baskets of lettuce longer throughout the season.
 Seed Selection
The best harvests start with the best seed varieties. There are so many varieties (Johnny’s Selected Seeds 2023 catalog sells 102!) that offer more crunch, better flavor and increased disease resistance compared to the limp lettuces we’ve all half-heartedly harvested. Check out my Seed Co + Catalog Roundup for smart salad seeds.
Look for traits specific to your needs like faster maturity, heat or cold tolerance, or being slow to bolt. Baby green blends can be ready to harvest in thirty days, while romaine heads generally take over sixty days to fully mature.
Bolting is the natural process of a plant turning energy from plant growth to seed production. In leafy greens, this is triggered by higher temperatures. Once a plant has started to send up that central seed stalk, the leaves become bitter.
Lettuce seeds will germinate between 35F-75F. The sweet spot is 65F, so this is one seed that does not appreciate a heat mat when starting indoors.
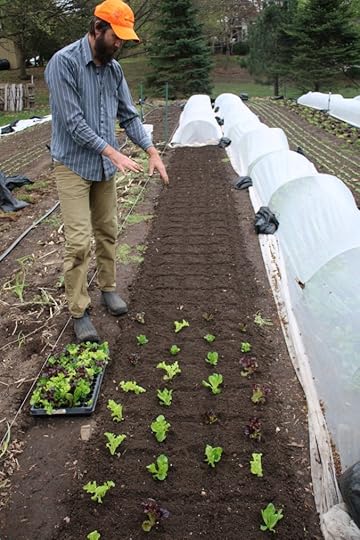 Farmer Jesse talking soil and soil prep at his field.Soil Health
Because Jesse grows a LOT of lettuce in a small space (harvesting between 200-400heads or 40-100lbs per week in the summer), he works with a soil scientist who recommends specific nutrients based on in-depth soil tests.
For the home gardener he recommends following good basic soil principles. Jesse adds, “Starting with healthy soil will give you a leg up and allow you to plant tighter. Crop rotation also helps keep soil-borne diseases in check.”
Soil Health Principles Keep Soil Covered Plant many diverse plant families Disturb Soils as little as possible Grow plants as long as possible throughout the seasonWith Lettuce, Timing is KeyWe can grow multiple successions of lettuces in zone 3,4 and 5 with some planning. For example, starting seeds indoors in early April and transplanting them out under cover (a simple low tunnel or cold frame does wonders) can get you harvesting by the end of May. Continuing to sow seeds every few weeks or even once more by mid-May (directly sown or indoors) will mean more home-grown salads during the heat of summer.
Jesse recommends to “transplant 3–4-week-old seedlings so there’s a bit of space under the outermost leaves,” to prevent bottom rot. “Lettuce is happiest growing when the temperature averages 66F,” says Jesse, “so most lettuces will bolt by mid-July without some shade cover.”
Begin starting lettuce seeds in August for fall harvests. Work backward from first frost dates, keeping in mind that most lettuces require 50-60 days to reach maturity. Most varieties of lettuce can survive temperatures as low as 20F. That said, surviving is different than thriving. They prefer to be kept above freezing, so providing some cover can keep you harvesting weeks later.

Dealing with Heat and Humidity
You can also get a jump start on salads by growing them in containers that you can start inside, and move back inside if the weather turns nasty. Read my full article on Growing a Salad Container Garden.
And for spinach lovers check out my article on Growing Spinach!
Jesse shares, “We’ll often mist for a few minutes on hot summer afternoons to cool off the rows, but we need to do it early enough in the day, so the leaves dry off before nightfall. It is a little counterintuitive, but lettuce hates humidity.”
Humidity can bring disease and lettuces get many of them: Bottom Rot, Downy Mildew, Fusarium Wilt, and Lettuce Mosaic Virus are the most common. A lot of work has been done to breed natural resistance to these issues, so read those seed packet descriptions as most seed companies will list these (BR, DM, FW, LMV) as either low or high resistance levels.
Keep in mind that airflow is especially important when our goal is to eat the leaves and we want to keep the whole plant disease free.
Less PestsFlea beetles are notorious for putting those ‘pin prick’ holes into arugula and radish leaves, and they enjoy lettuce as well. Their damage is mostly cosmetic, with leaves still safe to eat. Aphids feed at the heart of the plant, which is harder to catch so watch closely for signs of aphids early on.
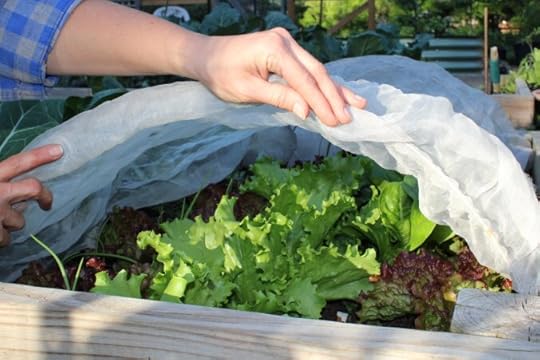
Growing a pest-free garden isn’t an attainable or sustainable goal. But, as Jesse says, “Things can get out of balance so the best organic option for keeping pests from devouring our crops is covering them with netting.”
There are distinctions between insect netting, row cover, and shade cloth and each has a role in growing great greens.
Row covers are typically a spun-bond (not woven) polyester material. These will trap heat, while letting water and light in but keeping bugs out. Shade cloth is woven to let heat escape but still cuts the sun exposure and therefore keeps the temperature down, and bigger bugs out as well. Insect netting will cast some shade and is designed to not let even the tiny insects through.
Each of these materials comes in different weights and lets in a different percentage of sunlight, air, and water. Jesse uses them all. As a home gardener, I have a medium-weight row cover and insect netting and switch between those two. And a few old sheets to add shade as needed.
Harvesting TipsSince lettuce is roughly 96% water, harvesting in the morning before the sun wilts it is best. You can submerge wilted lettuce leaves in cold water to plump them back up a bit. Jesse, admits that plastic bags are great when it comes to keeping lettuce fresh. Keep bagged lettuce in the refrigerator for up to two weeks.
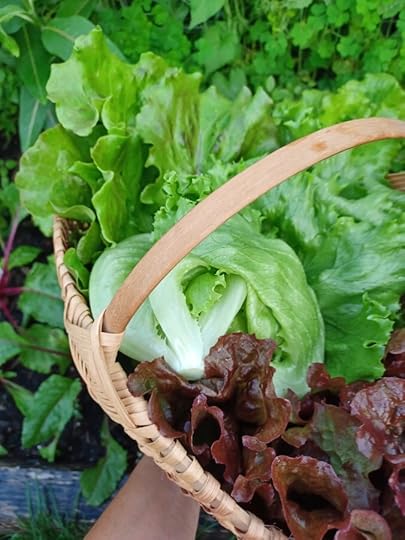
Michelle’s Favorite Lettuce Varieties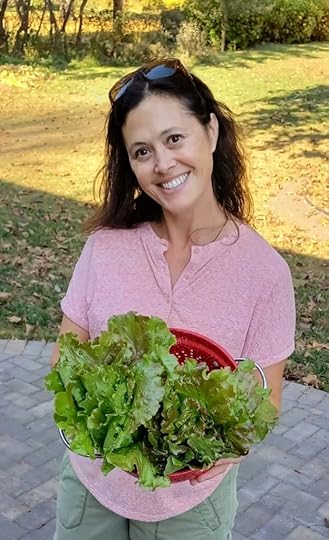
All have a good, sweet flavor, and satisfying crunch and grow well in her zone 4 gardens.
Iceberg –50 daysRed Iceberg– Dark red, super crunchy ribs, decent bolt resistanceSummer Crisp/Batavia – 45-55 daysCanasta – A bronze-blushed plant that was crunchy and bolt resistant.Romaine/Cos – 50-60 daysIntred – A ruby Colored Little Gem, great flavor.Winter Density – A Bib-Romaine that’s super cold hardy and slow to boltJesse’s Variety SpotlightThe lettuce family (Lactuca sativa) holds 30,000 distinct varieties of leafy vegetables. And many beloved salad greens aren’t even included in the lettuce family, like Arugula Eruca vesicaria , Mizuna (Brasica rapa), Kale (Brassica oleracea) and Chicory (Cichorium intybus). Truly endless options to fill that salad bowl!
Salanova is the industry standard for local farmers because the leaves stay ‘baby’ sized and sweet while the plant continues to produce more leaves from the center. It is also an open-formed plant that helps keep diseases and rot at bay. It’s ready to harvest in 50-55 days. The yield is also reported to be 40% higher and holds longer once harvested. The Salanova are a hybrid and specific to the company, Johnny’s Selected Seeds- shop HERE.
You can find Jesse (and family) slinging salad at the downtown St. Paul Farmers Markets on Saturdays and online at edgiesveggies.com
This article originally appeared in the Northern Gardener Magazine.
Dig Into Salad Season!
-Michelle
The post Growing Great Lettuce appeared first on Forks in the Dirt.
April 22, 2025
Happy Earth Day + Happy 8 Years to Forks in the Dirt!
I truly can’t believe I’ve been sharing garden, homestead, farmer, and food stories with you all for eight years now.
Thanks for being part of the movement to heal our earth one garden, homestead, and meal at a time.
In those 8 years lots has changed and much has stayed the same. Locavore is a known word. Farmers markets have exploded. We’re inching towards Victory Garden era numbers of people gardening (but not quantity yet). Climate news has gotten scarier, but many people are doing more.
There are so many reasons to love the earth; she is our home, our shared environment and, “when we protect nature, we are nature protecting itself” as Greta Thunberg said a few years ago.
Or, as Alan Watts puts it, “you didn’t come into this world, you came out of it. Like a wave from the ocean.”
Let that truth roll over you.
Yet our existential debates over coming ‘into’ or ‘out of’ can quickly fade when faced with our current environmental crisis. But then we realize that until we get our relationship with nature is at the center of our striving we’ll continue to fight against rather than with nature. There’s power in those prepositions.
There are so many proven ways (thank to the Indigenous peoples of the world) to work with nature to help tend the soil, grow food we need, raise the animals, and nourish ourselves.

Our current food system is broken, and we’ve known it for decades. Agriculture and land use, as well as the larger global food system, are among the biggest contributors to climate chaos (23-30%). And, as a result, changing these systems would be a leap towards climate solutions.
It starts with eating closer to home. If we could shift an additional half of our food purchases to locally or regionally sourced (instead of the average 1,500 miles it takes foods to get to our home pantries) we could turn the tide.
Read more on Eating Local.
When we decentralize crops and livestock we put the power back into the hands of smaller farmers rather than corporations. And small farmers take better care of the land. In the United States there’s about 2% of the population that farms. That means 98% of us don’t.
So, as a small-scale homesteader, I love doing my part, tending to the tiny slice of the planet I can, and I give a huge nod to our local farmers for all they do. I thank a Farmer three times a day.
But Earth day is wonderfully timed to be seated in the time of Spring Hope. And as a gardener, I am full of that rosy-glassed longing for sun-warmed tomatoes that burst in your mouth. Just don’t remind me of the mosquitos quite yet. 
Here are some of my go-to resources for feeling hopeful about the climate.
Daily Climate
Minnesota Farmers Union
Project Drawdown
Robin Wall Kimmerer’s Books
What are some places you go to for hope for the future our big blue-green planet?
And thanks for letting me dig into local food with you for 8 years.
Cheers to at least 8 more!
Michelle
The post Happy Earth Day + Happy 8 Years to Forks in the Dirt! appeared first on Forks in the Dirt.
Forks in the Dirt

- Michelle Bruhn's profile
- 4 followers

