
Devin Alexander's Blog
July 24, 2026
Arby’s Curly Fries Remake
When I was a kid, I would have eaten any food that was curly: curly fries, chocolate curls, curled carrots, even fusilli pasta. By junior high, I’d found Arby’s Curly Fries to satisfy my curl craving.
Now that I can make them with only a few more calories and fat than I’d get from a baked potato, I indulge in them all the time. My guess is that once you try them, you’ll be hooked, too.
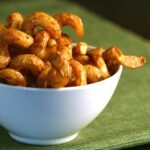 PrintArby’s Curly Fries RemakeCrisp, seasoned curly fries baked instead of fried — only a few more calories and fat than a plain baked potato.Prep Time 15 minutes minutesCook Time 24 minutes minutesServings 1Ingredients1-3/4 teaspoons salt, divided4 russet potatoes (8 ounces each; 2 pounds total), peeledOlive oil spray2-1/2 tablespoons egg substitute1-1/2 tablespoons unbleached or all-purpose flour2 teaspoons paprika1/4 teaspoon cayenne1/8 teaspoon garlic powder1/8 teaspoon onion powderInstructionsBring a large pot of water to a boil over high heat. Add 1 teaspoon salt.Meanwhile, with a twin curl cutter, cut 7 ounces of potato curls, about 2 cups (cover with water and refrigerate the scraps for another recipe). Preheat the oven to 450°F. Lightly mist a small nonstick baking sheet with oil spray.Transfer the potato curls to the boiling water. Cook for exactly 3 minutes but no longer or they will break. Drain in a colander and let cool for about 5 minutes.Meanwhile, in a large mixing bowl, combine the egg substitute, flour, paprika, cayenne, garlic powder, onion powder, and the remaining 3/4 teaspoon salt. Mix until well blended. Add the potatoes and toss with your fingers until coated.Transfer, allowing excess seasoning to drip off, to the baking sheet. Arrange the potatoes, not touching, in a single layer. Lightly mist with oil spray. Bake for 18 to 24 minutes, turning about halfway through, until crisp and cooked through.NotesMakes 1 serving.Per serving: 235 calories, 9g protein, 47g carbohydrates, 2g fat, trace saturated fat, 4g fiber.Before You Start: If you don’t own a twin curl cutter, use straight-cut fries instead — cut 7 ounces (about 2 cups) of 1/4″-thick potato sticks with a chef’s knife and prepare according to the recipe.Reprinted from Fast Food Fix by Devin Alexander © 2006 by Devin Alexander. Permission granted by Rodale, Inc., Emmaus, PA 18098. Photo credit: Lisa Cohen.Get the Book


BBQ Bacon Cheeseburger
The barbecue bacon cheeseburger is usually a guilty pleasure. Here, I’ve combined these favorite flavors in a reasonable-sized burger that’s even more scrumptious because the ingredients are fresh and guilt free. Just don’t cheat when buying the beef—96% lean makes a real difference.
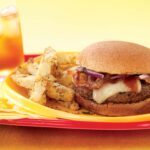 PrintBBQ Bacon CheeseburgerThe barbecue bacon cheeseburger is usually a guilty pleasure. Here, I’ve combined these favorite flavors in a reasonable-sized burger that’s even more scrumptious because the ingredients are fresh and guilt free. Please, though, don’t cheat when buying the beef— 96% lean makes a real difference.Prep Time 20 minutes minutesCook Time 8 minutes minutesServings 1 burgerIngredients4 ounces 96% lean ground beefPinch of salt1 1/2 slices center-cut bacon1 reduced-calorie hamburger bun1/2 ounce light Swiss cheese slivers1-2 tablespoons red onion slivers2 teaspoons barbecue sauceInstructionsPack the beef tightly together with your hands, and then shape it into a 4-inch-diameter patty on a sheet of wax paper. Sprinkle lightly with salt on both sides, and then place in the freezer for 5 minutes (to help the patty keep its shape).Preheat a grill to high.Cut the whole bacon strip in half crosswise. Lay the 3 half strips side by side in a small nonstick skillet over medium heat. Cook, flipping them every couple of minutes, until crispy and well done, 6 to 8 minutes. Transfer the bacon to a paper towel-lined plate to drain.Meanwhile, remove the patty from the freezer and place it on the grill. Cook for 1 to 2 minutes per side for medium rare, or until the desired doneness is reached. Toast the bun halves on an upper grill rack for 30 seconds to 1 minute, watching them carefully. Place the cheese on top of the burger for the last few seconds of cooking so it just begins to melt.Add the patty to the toasted bun bottom. Lay the bacon strips side by side over the top. Place the onion over that. Spread the barbecue sauce evenly over the inside of the top half of the bun. Place the bun top atop the sandwich. Serve immediately.NotesPer burger: 304 calories, 33 g protein, 23 g carbohydrates, 10 g fat, 4 g saturated fat, 75 mg cholesterol, 3 g fiber, 752 mg sodiumRecipe taken from Devin Alexander’s THE MOST DECADENT DIET EVER! Copyright © 2008 by Devin Alexander published by Broadway Books, a division of Random House Inc.Photo Credit: Theresa RaffettoGet the Book
Sinless Yet Sinful Sticky Buns
Ooey, gooey, and out-of-control drippy! That’s what I think of when I think “sticky bun”. So how could they be in a diet book? And if they are, how can they be good? Well, rest assured this is a recipe to try. Yes, it takes more time than most others in the book. But even my friends with small children who’ve never worked with yeast before report having made these over and over. They claim to always be the star of their mommies groups when the other moms learn that these decadent treats are so low in fat and calories. And my friend John, who’s quite the bachelor and had never cooked before trying my recipes, had success on the first attempt. Be careful not to add too much flour to the dough or on your work surface. The dough should stick just a tiny bit so you can roll it out thin. Otherwise, it will bounce back too much. You should, however, definitely flour the rolling pin. You don’t want that to stick at all. But please don’t let this intimidate you. I promise it really is easy!
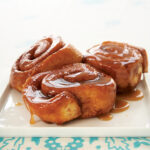 PrintSinless Yet Sinful Sticky BunsOoey, gooey, and out-of-control drippy! That’s what I think of when I think “sticky bun”. So how could they be in a diet book? And if they are, how can they be good? Well, rest assured this is a recipe to try. Yes, it takes more time than most others in the book. But even my friends with small children who’ve never worked with yeast before report having made these over and over. They claim to always be the star of their mommies groups when the other moms learn that these decadent treats are so low in fat and calories. And my friend John, who’s quite the bachelor and had never cooked before trying my recipes, had success on the first attempt. Be careful not to add too much flour to the dough or on your work surface. The dough should stick just a tiny bit so you can roll it out thin. Otherwise, it will bounce back too much. You should, however, definitely flour the rolling pin. You don’t want that to stick at all. But please don’t let this intimidate you. I promise it really is easy!Servings 20 sticky bunsIngredients1 cup fat-free milk1/3 cup light brown sugar, not packed1 tablespoon light butter1/4 cup fat-free, artificially sweetened vanilla yogurt1 large egg1 large egg white1 package (1/4 ounce) active dry yeast3-3/4 cups + up to 4 tablespoons unbleached all-purpose flour, plus more for dusting1-1/2 teaspoons ground cinnamon1/2 teaspoon saltButter-flavored cooking spray1 recipe Cinnamon Filling (see recipe)1 recipe Sticky Topping (see recipe)InstructionsCombine the milk, brown sugar, and butter in a medium microwave-safe bowl. Microwave on high for about 2 minutes, until the milk is hot (130°F). Whisk in the yogurt and continue whisking until the sugar dissolves (some small lumps of yogurt may be visible). Add the egg and egg white. Whisk to mix well. Add the yeast and whisk in until dissolved.Combine 3-3/4 cups flour, the cinnamon, and the salt in the bowl of a stand mixer fitted with a dough hook, or in a large mixing bowl. Mix with the hook, or stir by hand with a wooden spoon. Pour in the milk mixture, then mix on medium or stir vigorously until well combined. The mixture will be very sticky. One tablespoon at a time, add up to 4 tablespoons of the remaining flour, mixing or stirring to incorporate the flour into the dough until it is just a bit sticky.Turn the dough onto a floured work surface. Add more flour, no more than 1 tablespoon at a time, if needed, as you knead the dough until it is smooth and elastic, about 5 minutes. The dough should be soft and barely sticky.Lightly mist a large bowl with spray. Place the dough in the bowl and mist the top of it with spray. Then cover the bowl tightly with plastic wrap. Allow the dough to rise for about 1 hour, or until doubled in size. Meanwhile, prepare the Cinnamon Filling and the Sticky Topping.When the dough has doubled, gently punch it down and place it on the lightly floured surface. Knead for 1 minute. Cover with the plastic wrap and allow it to rest for 10 minutes.Lightly mist a 13 x 9-inch ovenproof glass baking dish with spray. Stir the Sticky Topping just enough to recombine the ingredients, then pour it into the bottom of the baking dish. Set aside.Cut the dough in half. Return half of it to the bowl and re-cover it. Use a floured rolling pin (don’t reflour the work surface if at all possible) to roll the remaining piece of dough into a 24 x 7-inch rectangle, making sure the ends are as wide and as long as the center. Use a butter knife to spread half of the reserved butter for the Cinnamon Filling evenly over the dough. Sprinkle half of the brown sugar mixture evenly over the top. Starting at one longer side, roll the dough snugly in jelly-roll fashion into a log. Cut the log into 10 equal rounds. Place each round, spiral side up, evenly spaced, in the dish on top of the Sticky Topping. Repeat with the second half of the dough and add the rounds to the dish. Lightly mist a piece of plastic wrap with spray and use it to cover the dish. Refrigerate for 1 hour, or until the sticky buns have risen.Preheat the oven to 350°F.Uncover the dish and bake for 21 to 25 minutes, or until just barely golden brown on top and a tiny bit doughy in the very center. Run a butter knife around the sides of the dish to loosen the sticky buns. Turn the hot buns out onto a platter. Cool for about 30 minutes. Brush any of the topping pooling on the platter over the buns, or pull them apart and dip them in it. Serve immediately.NotesMakes about 20 sticky buns.
Want the components on their own? Get the full recipes for Cinnamon Filling and Sticky Topping.
Move First, Think Later
You can’t think your way into momentum. I’ve tried. I have sat with a legal pad and a perfectly good plan and gotten exactly nowhere, because the thing I needed next wasn’t written on the pad. It couldn’t have been. I didn’t have it yet.
Let me be clear about what I don’t mean, because “move first” is not “wing it.”
I plan obsessively. I am the person who once dragged a friend to a Backyard Burger in Nashville with a ruler and a food scale — weighing the patties, measuring the cheese, every sauce on the side — because I refused to guess at a recipe. I don’t move without a plan. I build the plan first. That is the whole job.
But a plan is a hypothesis. And a hypothesis doesn’t become a strategy until something in the real world pushes back on it.
That is what the movement is for. It isn’t a substitute for thinking. It’s how you get the information your thinking needs. You cannot architect your way out of a room you’ve never walked into.
So when I’m stuck, I cook. When I’m overwhelmed, I work out. When I don’t know the next step, I do the smallest next thing instead of waiting to feel ready for the big one. And somewhere in the doing, the next piece of the puzzle turns up — not because I stopped planning, but because I finally had something real to plan with.
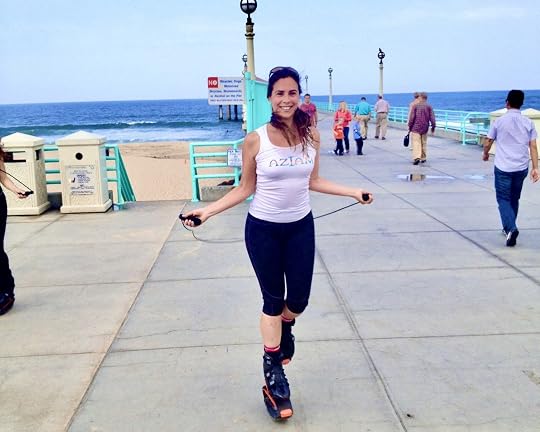 Kangoo Jumps on the Manhattan Beach pier. Moving before I had the answer.
Your body isn’t separate from your success. Most days it’s the only part of you willing to start. And starting is what turns a plan you’re staring at into a plan you’re actually building.
Move first. The thinking doesn’t get skipped. It gets sharper.
Meatball Lovers’ Must-Have Family-Sized Meatball Parmesan Sub
This sub is so jam-packed with meatballs, no one will ever guess it came from a healthy cookbook. In fact, it has so many meatballs, it’s almost hard to get them all stuffed into the baguette—just the way I love it!
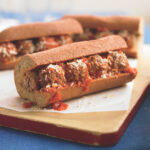 PrintMeatball Lovers’ Must-Have Family-Sized Meatball Parmesan SubThis sub is so jam-packed with meatballs, no one will ever guess it came from a healthy cookbook. In fact, it has so many meatballs, it’s almost hard to get them all stuffed into the baguette—just the way I love it!Prep Time 15 minutes minutesCook Time 10 minutes minutesServings 4 servingsIngredients1 (8-ounce) whole wheat or multigrain baguetteNew Favorite Meatballs (see recipe)1 1/2 cups Main Event Marinara Sauce (see recipe)1 1/2 tablespoons grated reduced-fat Parmesan cheeseInstructionsPreheat the oven to 400°F.Cut a piece of aluminum foil a couple of inches longer than the baguette. Turn the baguette on its side and cut the entire length, not cutting all the way through, as you would cut a roll to make a sandwich.Wrap the baguette in the foil so it is completely covered. Place the baguette in the oven to warm, about 10 minutes.Meanwhile, in a medium nonstick saucepan over low heat, or in a large microwave-safe bowl or dish in the microwave, reheat the meatballs in the sauce until hot.Unwrap the baguette. Open it carefully, being sure not to burn yourself or break apart the 2 halves. Spoon the warmed meatballs and sauce into the baguette. Sprinkle the Parmesan evenly over the meatballs.Cut crosswise into 4 equal sandwiches and serve.NotesPer serving: 395 calories, 34 g protein, 48 g carbohydrates, 8 g fat (2 g saturated), 63 mg cholesterol, 6 g fiber, 644 mg sodiumReprinted from The Biggest Loser Family Cookbook by Chef Devin Alexander and the Biggest Loser Experts and Cast © 2009 by Universal Studios Licensing LLLP. The Biggest Loser (TM) and NBC Studios, Inc., and Reveille LLC. Permission granted by Rodale, Inc., Emmaus, PA 18098.Photo Credit: Mitch Mandel
This sub is built from two other recipes on the blog: my New Favorite Meatballs and Main Event Marinara Sauce—both worth making on their own too!
Get the BookChocolate Chip Pancakes
Aaah, chocolate for breakfast, what could be more heavenly? One of my downfalls has always been warm chocolate chip cookies. I just love those slightly melty chips! This recipe is my solution to that chocolate chip craving, guilt-free. These pancakes are chock full of chocolate chips, so I actually prefer them without butter. But if you like a more buttery taste with just a hint of chips, use only 1 tablespoon of chips and spread 1 teaspoon of light butter over the top of each pancake. You’ll add 17 calories and 2 g of fat per teaspoon. You’ll also notice that the recipe calls for very little syrup. Each teaspoon has 17 calories and 0 g of fat. If you love syrup and want to add more, you can. Just try them first and then add only as little as you possibly can to feel that you’re eating a truly decadent meal. Being a true chocolate lover, I prefer them exactly as is. If you’re harried like most, you can double or triple this recipe with great success. The batter will keep in your refrigerator for up to 3 days, which will save time in the mornings.
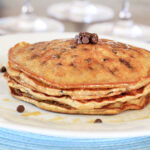 PrintChocolate Chip PancakesAaah, chocolate for breakfast, what could be more heavenly? One of my downfalls has always been warm chocolate chip cookies. I just love those slightly melty chips! This recipe is my solution to that chocolate chip craving, guilt-free. These pancakes are chock full of chocolate chips, so I actually prefer them without butter. But if you like a more buttery taste with just a hint of chips, use only 1 tablespoon of chips and spread 1 teaspoon of light butter over the top of each pancake. You’ll add 17 calories and 2 g of fat per teaspoon. You’ll also notice that the recipe calls for very little syrup. Each teaspoon has 17 calories and 0 g of fat. If you love syrup and want to add more, you can. Just try them first and then add only as little as you possibly can to feel that you’re eating a truly decadent meal. Being a true chocolate lover, I prefer them exactly as is. If you’re harried like most, you can double or triple this recipe with great success. The batter will keep in your refrigerator for up to 3 days, which will save time in the mornings.Servings 2 servings (2 pancakes each)Ingredients1 egg white, lightly beaten1/2 cup low-fat buttermilk1/2 cup whole-grain oat flour1/2 teaspoon baking soda1/4 teaspoon vanilla extract1/8 teaspoon salt2 tablespoons water3 tablespoons mini semisweet chocolate chips4 teaspoons light or sugar-free maple syrup, for servingInstructionsPreheat the oven to 200°F.In a small mixing bowl, whisk together the egg white, buttermilk, flour, baking soda, vanilla, and salt. Stir in the water until well incorporated. Then stir in the chocolate chips and let the batter sit for 10 minutes.Heat a large nonstick skillet over medium-high heat. When a spritz of water causes the skillet to sizzle, working in batches and re-spraying the pan between each batch, pour 1/4 cup of batter per pancake onto the skillet. Cook them for about 2 minutes until there are bubbles on top and the bottom is golden brown. Flip the pancake(s) and cook them about another 2 minutes until they are golden brown on the bottom. Transfer the finished pancake(s) to an ovenproof plate, cover with foil, and keep them warm in the oven until they are all cooked. Serve them immediately with 1 teaspoon of syrup per pancake.NotesEach (2 pancake) portion has: 209 calories, 8 g protein, 31 g carbohydrates, 6 g fat, 3 g saturated fat, 5 mg cholesterol, 3 g fiber, 544 mg sodiumYou save: 218 calories, 17 g fat, 3 g saturated fat
Traditional serving: 427 calories, 9 g protein, 51 g carbohydrates, 23 g fat, 6 g saturated fat, 117 mg cholesterol, 470 mg sodium
Five-Minute Supreme Breakfast Nachos
These nachos are the result of a leisurely Sunday morning date by the beach. Devin’s date ordered breakfast nachos at a little cafe, and while she skipped the deep-fried chips herself, she loved the dish enough to create a much healthier version — one you’re likely to like just as much.
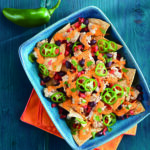 PrintFive-Minute Supreme Breakfast NachosThese nachos are the result of a leisurely Sunday morning date by the beach. Devin’s date ordered breakfast nachos at a little cafe, and while she skipped the deep-fried chips herself, she loved the dish enough to create a much healthier version — one you’re likely to like just as much.Servings 2 servingsIngredients1 ounce lightly salted baked tortilla chips2 tablespoons salsa verde1 1/2 tablespoons red taco sauce2 tablespoons plus 2 teaspoons jarred, natural cheese sauceOlive oil spray4 large eggsSalt and pepper, to taste3/4 cup coarsely chopped tomatoesInstructionsSpread half of the tortilla chips evenly in the bottom of a medium shallow bowl.Combine the salsa and taco sauce in a small microwave-safe bowl.Pour the cheese sauce into a second small microwave-safe bowl.Cook the eggs in a pan. As they cook, keep mixing them and break up the bigger pieces until they are “scrambled.”Remove the salsa mixture and cheese sauce when they are hot (be careful not to overcook the cheese — it won’t melt).Spread half of the scrambled eggs over the chips. Then drizzle half of the cheese sauce over that. Spread the second layer of tortillas on top, followed by the remaining eggs and the remaining cheese sauce. Spoon the salsa mixture evenly over the center. Sprinkle the tomatoes evenly over the top of the salsa mixture. Serve immediately.NotesEach serving has: 292 calories, 20 g protein, 38 g carbohydrates, 5 g fat, 2 g saturated fat, 5 mg cholesterol, 4 g fiber, 812 mg sodium.
Show Up When Others Don’t
Relentless Visibility sounds bigger than it is. It isn’t about being aggressive, or being everywhere at once.
It’s the resume actually driven to your future employer in some special way, instead of just emailed in. It’s the calendar appointment I’ve always suggested all of my clients keep once a week, to remind them to do something just a tiny bit more bold than is comfortable. The letter written to someone who’s never met you.
It’s just showing up — in person, on time, with intention — when everyone else assumed the door was already closed.
 YouTube Space, Los Angeles.
Dark Chocolate Layer Cake with Chocolate Buttercream Frosting
When my first cookbook, Fast Food Fix, came out, reporters were constantly trying to get me to admit that I still have a secret fast food longing. They would say, “Come on, you must cheat from time to time with the real deal.” But the truth was, I just didn’t and I still don’t — once I re-created those flavors, the cravings went away completely.
They would never believe me until I confessed that I have yet to win the war with my cravings for fudge cake. This recipe is a little homage to my love for rich chocolate layer cake — the food that is still my joy and my nemesis. Thus the reason it made the cover of this book.
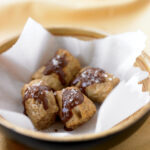 PrintDark Chocolate Layer Cake with Chocolate Buttercream FrostingA rich chocolate layer cake made with whole-grain oat flour for extra fiber. This one was the cover recipe of the book it comes from — a little homage to a lifelong love of rich chocolate layer cake.Prep Time 20 minutes minutesCook Time 18 minutes minutesServings 14IngredientsFor the CakeButter-flavored cooking spray1 1/2 cups whole-grain oat flour1 cup unsweetened cocoa powder1 teaspoon baking powder1 teaspoon baking soda1/4 teaspoon very finely ground espresso beans3/4 teaspoon salt1 cup low-fat buttermilk1 teaspoon white vinegar2 teaspoons vanilla extract4 large egg whites2 cups unpacked light or dark brown sugar1 cup fat-free, artificially-sweetened vanilla yogurt1 recipe Chocolate Buttercream Frosting (below)Chocolate Buttercream Frosting1/4 cup + 2 tablespoons light butter (stick, not tub), room temperature1/4 cup + 2 tablespoons light cream cheese, room temperature2 teaspoons vanilla extractPinch salt2 3/4 cups powdered sugar1/2 cup unsweetened cocoa powder1/2 tablespoon fat-free milkInstructionsFor the CakePreheat the oven to 350°F. Cut two 9-inch circles of parchment to line the bottoms of two 9-inch nonstick cake pans (trace the pans for ease). Lay the parchment in the pans. Lightly mist the papers and the sides of the pans with spray.In a medium mixing bowl, sift together the flour, cocoa powder, baking powder, baking soda, espresso, and salt.In a large mixing bowl, using a sturdy whisk (an electric mixer can be used, but be careful not to over mix), mix the buttermilk, vinegar, and vanilla until well combined. Whisk in the egg whites, the sugar, and the yogurt and continue mixing until blended. Gradually stir in the dry ingredients until just smooth. Divide the batter evenly among the pans. Bake the cakes about 16 to 18 minutes, or until a toothpick in the center comes out dry (a few crumbs are okay).Cool the cakes side by side on a wire cooling rack in the pans for 10 minutes. Then carefully flip the cakes onto the rack. If the cakes stick to the sides of the pans, gently run a butter knife around the rims of the pans to loosen them.Meanwhile, prepare the Chocolate Buttercream Frosting.When the cakes are completely cool, place one cake, flat side down, on a serving platter. Spread 3/4 cup of the frosting over the top of the cake. Top it with the second cake, flat side down. Spread the remaining frosting evenly over the top and sides of the cake. Slice the cake into 14 equal wedges. Serve immediately or store in an airtight plastic container for up to 3 days in the refrigerator.Chocolate Buttercream FrostingAdd the butter, cream cheese, vanilla, and salt to a large mixing bowl. Using an electric mixer fitted with beaters, beat them on high speed until smooth.Add half of the powdered sugar. Beat on low speed until well combined. Beat in the remaining powdered sugar then the cocoa powder until combined.Add the milk and then beat on high speed until fluffy. Tightly wrap the frosting with plastic wrap until the cakes are cooled (do not refrigerate it before icing the cake). Makes 2 1/4 cups.NotesMakes 14 servings.Per serving: 294 calories, 6g protein, 59g carbohydrates, 6g fat, 3g saturated fat, 11mg cholesterol, 4g fiber, 384mg sodium.Reprinted from The Most Decadent Diet Ever! by Devin Alexander © 2008 by Devin Alexander, published by Broadway Books, a division of Random House Inc.
Want to make a big batch of the frosting on its own? Get the full recipe here.
Get the BookDrippin’ Kickin’ Burger
Buy the burgers pre-shaped to save time. If your grocery store meat case doesn’t have the 96% lean patties, check the freezer section.
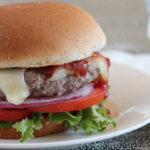 PrintDrippin’ Kickin’ BurgerBuy the burgers pre-shaped to save time. If your grocery store meat case doesn’t have the 96% lean patties, check the freezer section.Servings 1 servingIngredients2 tablespoons chili sauce1/8 teaspoon hot-pepper sauce, or more to taste4 ounces 96% lean ground beef hamburger pattySalt and pepper, to taste3/4 ounce light Swiss cheese, slivers1 whole wheat or whole grain hamburger bunBaby spring mix1 (1/4-inch thick) large tomato slice1 very thin slice red onionInstructionsPreheat a grill to high heat. In a small, microwave-safe bowl, mix the chili sauce and hot pepper sauce.Season both sides of the patty with salt and pepper. Grill it about 1-2 minutes per side for medium rare or until desired doneness is reached. During the last minute of cooking, add the cheese to the patty, and, if desired, toast the bun by placing the insides, face down, on a top grill rack or away from the flame until just toasted.Meanwhile, microwave the chili sauce mixture on low, about 15-30 seconds until just hot.Place the bun bottom on a serving plate. Add the lettuce, tomato then onion followed by the burger. Spoon the sauce over the burger. Add the bun top. Serve immediately.Notes378 calories, 35 g protein, 38 g carbohydrates, 10 g fat, 4 g saturated fat, 70 mg cholesterol, 3 g fiber, 742 mg sodium.
Devin Alexander's Blog

- Devin Alexander's profile
- 10 followers
