Audrey Knight's Blog
July 15, 2021
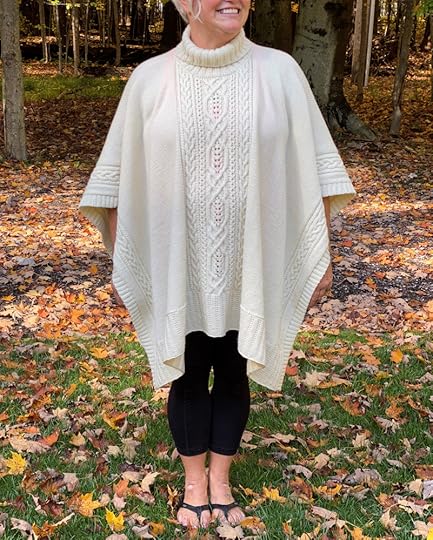
Inishmore Poncho
Let me introduce you to my Inishmore Poncho pattern!
It all started before the pandemic. I adore cables and was messing around with swatches, playing with different combinations and yarns. Finally, just the right cables and just the right yarn came together and the Inishmore Poncho was born.
This poncho is not just “one size fits most”. I offer it in FOUR sizes, each carefully proportioned to fall at the mid- to upper-thigh in length, and just around the elbow in width. I even researched body proportions (radius vs humerous in the arm) so I could calculate the right width for each size. The neckline width is also proportional to create the right look for any body type.
Worked in DK-weight yarn, the poncho is constructed in two pieces, front and back, which are easily seamed together with a 3-needle bind-off. I created this poncho with the simply incredible Arbor yarn from Brooklyn Tweed. The yarn is my new favorite for cable work. It lends fabulous stitch definition and has a nice feel. I love that it’s made in the USA. I used a traditional natural color called Hammock for the pattern.
Early on, I worked up the poncho in a color (Wreath) that was discontinued. I usually shy away from photos that show a color that’s no longer available, but I’m going out on a limb here so you can see how nice the stitch definition is in the front cable:

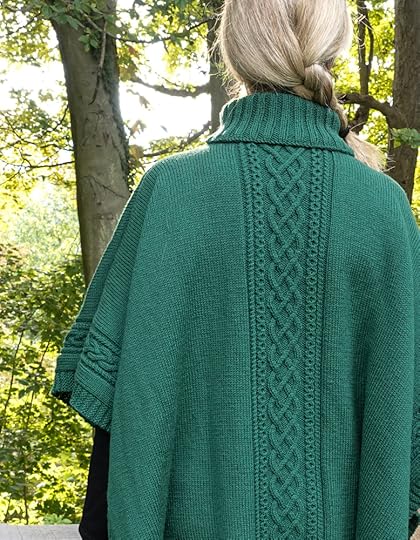
I don’t know about you, but when I’m on the way out the door I don’t want to have to think too hard about what side is the front when I’m putting on my poncho. The neck is shaped, so I wanted to make sure the two sides were easy to identify. That’s why I used a different, but also very pretty, cable in the back (here again in the discontinued Wreath color):
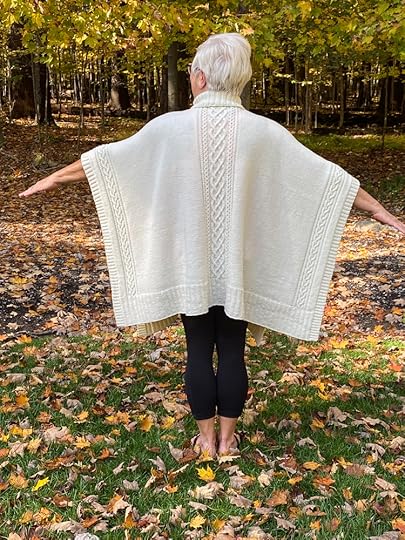
The Inishmore Poncho is a wonderful accessory for Fall. It’s just enough to keep away the chill while hiking among golden-colored leaves, picking pumpkins out of the local patch, or gathering around one last fire in the fire pit before the snow flies. Find it here in my AudKnits Designs store on Ravelry.


July 13, 2021
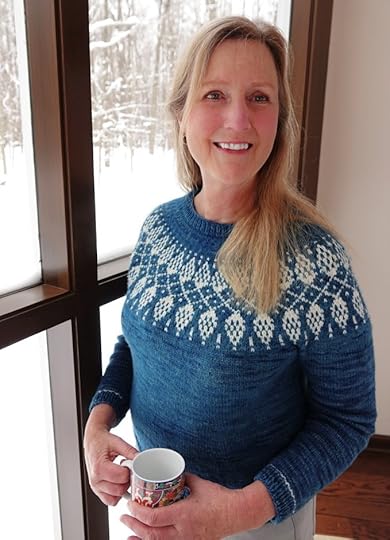
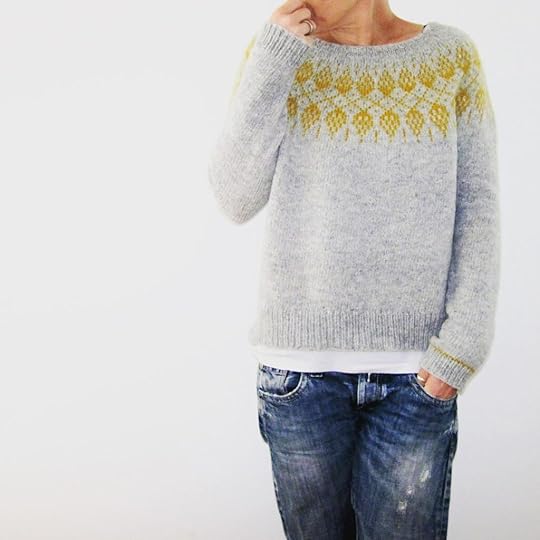
Humulus
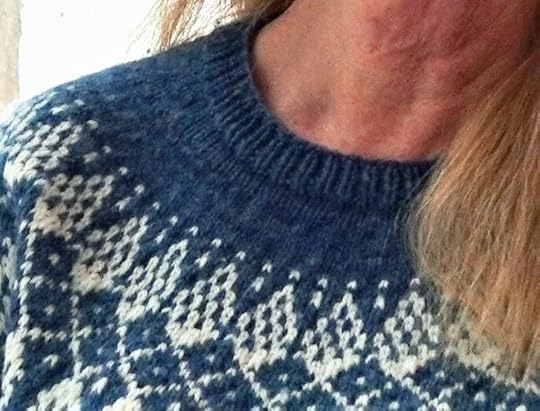
It’s been a long time since I’ve posted here. I wanted to show you my finished Humulus sweater. I completed it during the snowy winter, and it was just right for wearing in cold weather. I really like it!
As you may remember, I added structure to the sweater by creating “built in” shoulder seams and adding the neckline ribbing from a cast-on round.
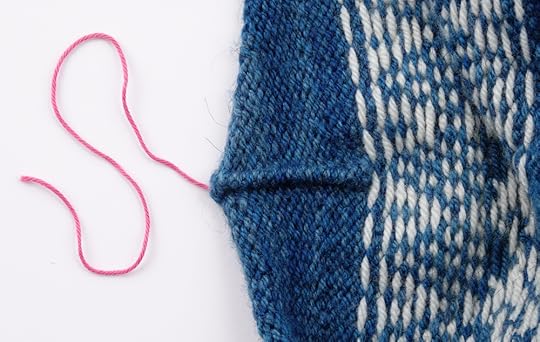
I used the mattress stitch to create a shoulder seam, using the extra stitches I’d added to the shoulders when I started. Here’s the shoulder seam, about halfway done, worked here in a contrasting color just to make it easy to see:
When the seam had been worked all the way to the end (where the extra shoulder stitches were decreased out) I gently pulled the seaming yarn, closing the stitches so the seam is invisible. On the inside of the sweater it looks like this, while on the outside you can’t see it at all:
I absolutely love the stability this seam gives to my sweater. In the past I’ve been disappointed when my top-down seamless sweaters stretch out over time, drooping farther and farther down my shoulders. Not a good look! By inserting this easy little seam, my Humulus sweater has retained its shape.
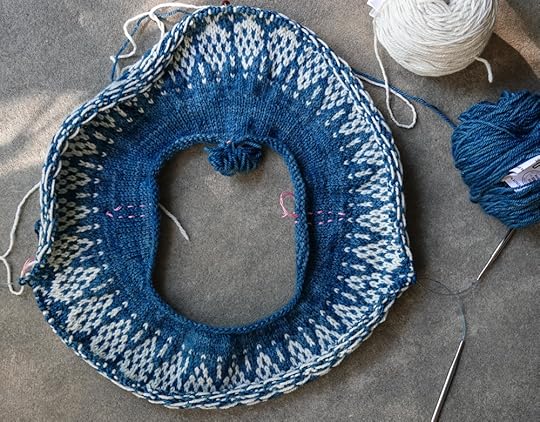
My next beef with some top-down sweaters is the neck stretching out. The neck has to carry the weight of the sweater, so if its worked all the way from the ribbing down with no reinforcement, it’s bound to sag. To cure this I casted on the sweater at the place where the bottom of the neck ribbing would have been. I made sure I added a round that would be used later to pick up stitches for the ribbing to be worked upward. I tested the cast on to make sure it’d go over my head. When I finished the rest of the sweater I came back to the neck and picked up stitches for the ribbing. You can see I picked the stitches up just below the cast on.
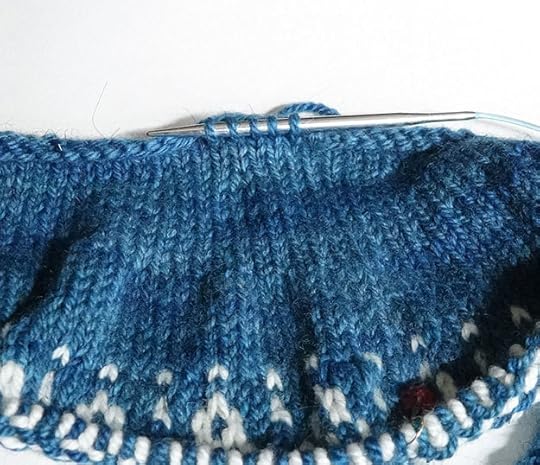
I made sure to pick the stitches up into the right-side-up “v” of the stitch so when I knitted the stitch it smoothly continued the column of stitches.
The result is a neckline that looks lovely while also serving the practical purpose of keeping its shape.
Maybe you’ll try these techniques next time you knit a top-down sweater!
October 2, 2020
Adding Shoulder Seams – Humulus
You might remember from my previous post that I started the yoke for the Humulus sweater. I altered the pattern’s instructions for starting the neckline and added extra stitches at the shoulders so I could create shoulder “seams” for stability. I love creating structure so the sweater doesn’t get droopy over time!
Here’s the yoke so far:
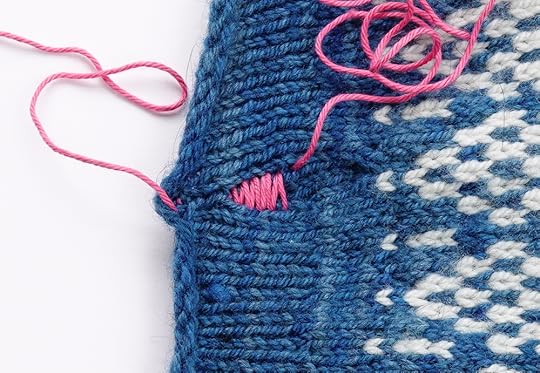
I outlined the two stitches I added for each shoulder seam in pink to make them easy for you to see.
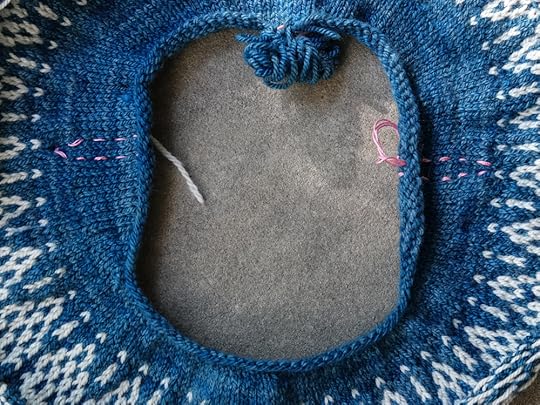
Once I use the mattress stitch on these, they will disappear on right side, while forming a nice seam for strength on the wrong side. Again, it’s important to remember not to include these in the pattern’s overall stitch count.
I have a lot of knitting still to go on this sweater. I’ll finish these “seams” and add the neckline ribbing toward the end.
The post Adding Shoulder Seams – Humulus appeared first on AudKnits.
September 27, 2020
Top Down Mods – Humulus
Something that drives me crazy about top-down sweaters is that – at least on me – they tend to stretch around the neck and droop from the shoulders as time goes on. This is because there are no seams to create structure. The weight of the sweater drags everything down.
As my readers may remember, I found a solution to this in some experiments with the Tea Leaves Cardigan. The details will be different for Humulus, but the idea’s the same. I posted about the neckline and edging, adding shoulder seams, and adding the neck edging. For the Humulus sweater I’m starting, the first thing to address is the neckline.
Instead of following the pattern, which starts with neck ribbing and continues seamlessly down the the yoke, I skip the ribbing (for now). I cast on at the top of the yoke, which will create structure in the neckline when the sweater is done. Using a long-tail cast-on, there’s a bumpy side and a smooth side. When stitches are picked up later, it’s important that the cast-on’s smooth side faces out:
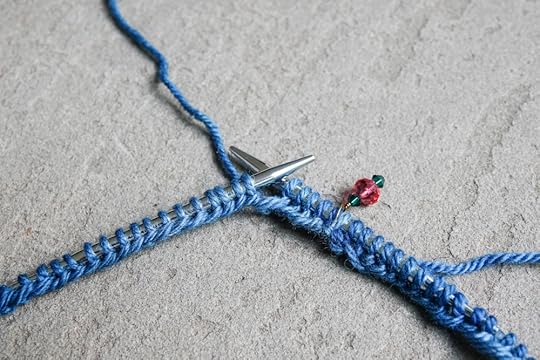
Next I’ll knit a row that I’ll later use to pick up stitches for the neck’s ribbing.
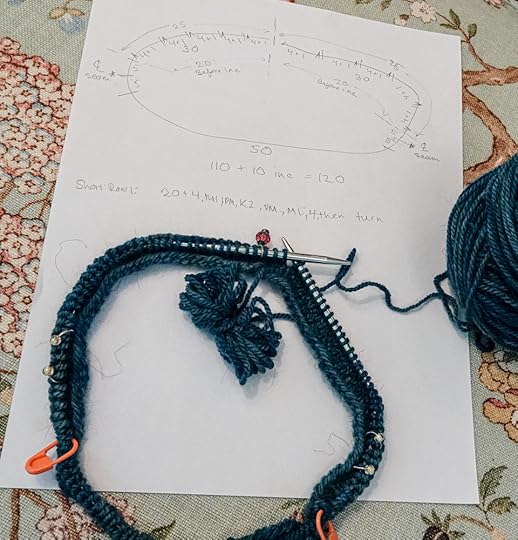
It takes a bit of planning, but to me it is well worth the effort to add seams to the shoulders. After all the time I put into knitting a sweater, I want it to look its best – I certainly don’t want it to get droopy! Right away I’m going to need to figure out where to add the seam stitches for the shoulders. Humulus is tricky, with short row shaping and a bunch of increases to contend with. One morning – after plenty of coffee – I simply drew the pattern on a piece of paper to visualize it and did a bit of math. Then it was easy to figure out where the center of each shoulder was going to be.
What you’re seeing here are orange stitch markers at the short row turning points, and two pairs of white markers where I added in the two shoulder seam stitches. Once you’ve added in the two seam stitches, it’s important to not include them in the pattern’s stitch count. When seamed, they disappear and so should be treated as if they’re not there.
I’ll include these seam stitches as I work the sweater’s yoke. Before long it’ll be time to use a mattress seam on them when it’s time to start the yoke’s pretty stranded design.
Next time, after I’ve worked the yoke, I’ll show you just where the added seam stitches figure into the shoulders.
The post Top Down Mods – Humulus appeared first on AudKnits.
August 26, 2020
Swatching in the Round – Humulus
I’ve been eyeing the sweet Humulus sweater by Isabell Kraemer for the longest time. Here’s the pattern photo:
I’ve been practicing my stranding skills and think I might finally be able to tackle this. The first order of business, of course, is a swatch.
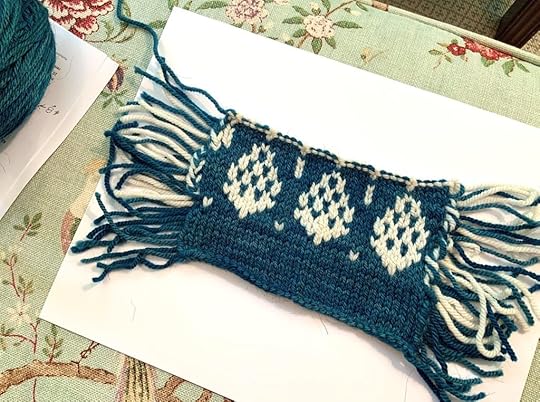
If this looks like a crazy mess, let me explain….This sweater is worked in the round, so I made a swatch in the round. Some people call it “speed swatching” because instead of making the entire swatch in the round, forming a big tube, you work a row, then slide the stitches to other end of your circular needle, bring the working yarn very loosely across the back, and then start a new row. This is a much faster method, since you’re only working about half the number of stitches. If you’ve never done it that way before, I recommend this tutorial by Webs:
When the knitting is complete you cut the long yarns that travel around the back, forming the sort of “fringe” at either end. Mine is sloppy, but a neatly made swatch looks like an adorable little rug. A nifty trick I learned from a friend is to knit the first and last stitch through the back loop on every row. Otherwise when you cut the long strands in half the edge stitches will be very loose. The twisted stitches hold the cut ends in place.
Now that I’ve got gauge, I’m ready to cast on!
The post Swatching in the Round – Humulus appeared first on AudKnits.
July 24, 2020
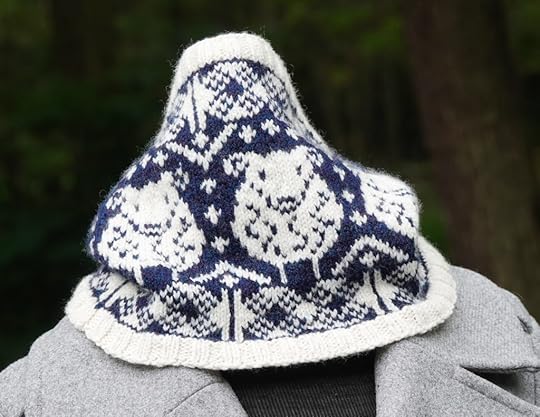
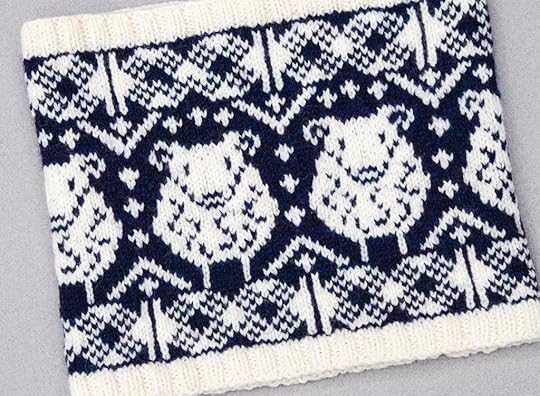
Stranding the Dewlap Cowl
I have struggled for years with stranding, the colorwork technique which uses two or more colors in a single row of knitting. Despite my best efforts my stitches tend to be uneven and puckery. I envy friends whose stranded projects fly off the needles with such perfect tension it seems they’ve already been blocked!
I hate to admit defeat, so once in a while I make another stab at a stranded project. That’s how I ended up knitting the cute Dewlap Cowl designed by Ann Kingstone.
While I’ve gotten a little bit better, it’s clear that I’m going to need more practice.
I was nearly done with the cowl when I discovered a YouTube video which really clicked for me. It’s a simple tutorial for stranded knitting and made me realize I need to pay more attention to the stitches on my right needle. It made all the difference for the last few rows of my cowl! Maybe you’d like it too:
I think I’ll try one more dk weight pattern. Then if I get the hang of it, my goal is to try any of the beautiful sweater patterns worked in a smaller gauge. That’d be one way to make pandemic-time productive!
Resources:
Ann Kingston The designer’s website is a real treat! Her blog offers fascinating looks into history, she offers her books and patterns for sale, and has several useful tutorials.
Kelbourne Woolens Scout A 100% wool, dk weight yarn. The heathered colors give lovely dimension.
The Clubkidknitters channel is a colorful playground of all sorts of fun colorwork techniques.
The post Stranding the Dewlap Cowl appeared first on AudKnits.
February 16, 2020
French Cancan Shawl
I’m always looking for a good travel project. Cassie, the owner of the wonderful Ply Yarn in Wimberley Texas, had the perfect suggestion. The French Cancan shawl by Mademoiselle C starts out with a simple garter crescent. A braided cable edging is then worked perpendicularly to the body, attaching with a k2tog from one edge stitch and one body stitch as you go.
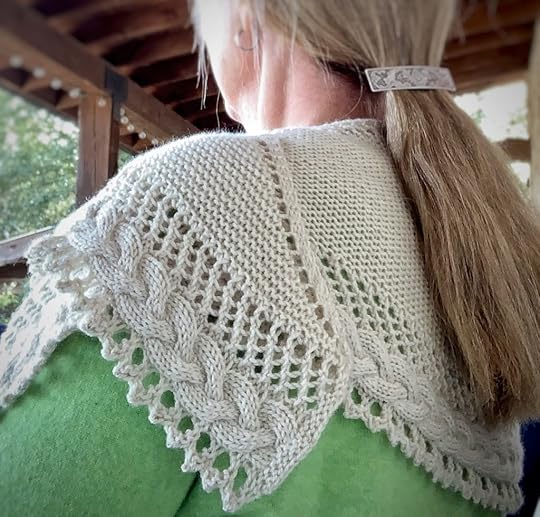
Anzula Cricket is a super yummy yarn that was just right for this little shawl. It’s mostly superwash wool, but has a bit of nylon that lends good stitch definition to the cables. Best of all is the touch of cashmere which makes the shawl comfy around my neck, and warm enough to be cozy on a chilly evening.
The post French Cancan Shawl appeared first on AudKnits.
December 19, 2019
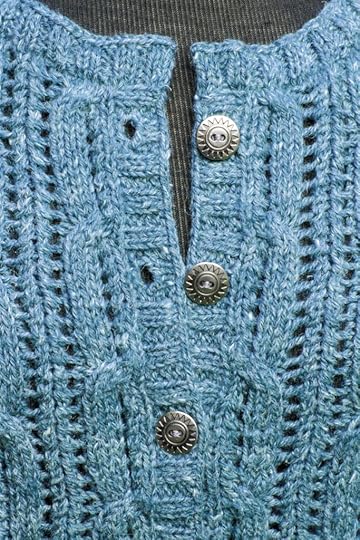
Acer Cardigan
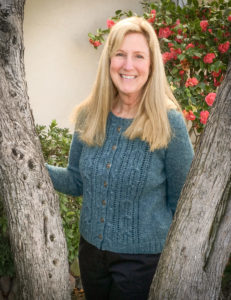
I thoroughly enjoyed making the Acer Cardigan designed by Amy Christoffers. With lovely yarnover and cable motifs, it kept my interest. As I learn nifty little tricks to add polish to my knitting, I love to incorporate them into knitting sweaters.
“Acer” knit up fairly quickly using worsted weight yarn. I chose Rowan’s Hemp Tweed in the teal color. The yarn’s tweedy-ness is subtle enough to enhance, rather than detract from, the stitch pattern. And while some tweed yarns feel like a bale of hay, Hemp Tweed has a nice hand and the sweater is just soft enough that I can wear it next to skin.
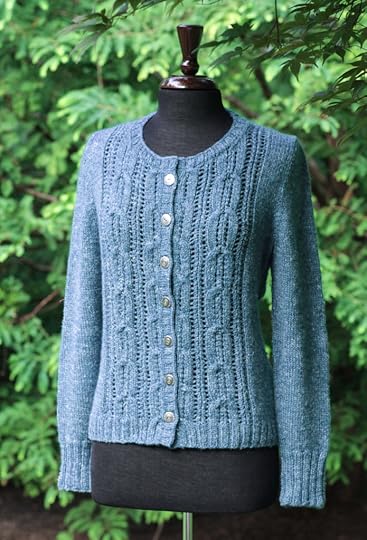
Since I’ve become so enamored with my fusion of Custom Fit and the kind of shaping used by Ysolda Teague in her Blank Canvas sweater pattern, I used my “hippy shaping” to create just the right fit for my Acer Cardigan. I created hourglass shaping on the front and back of the sweater, to give the illusion of an hourglass figure which my actual body certainly does not have. Then I forced the extra hip shaping to the sides of the sweater. It makes the hip shaping appear less severe.
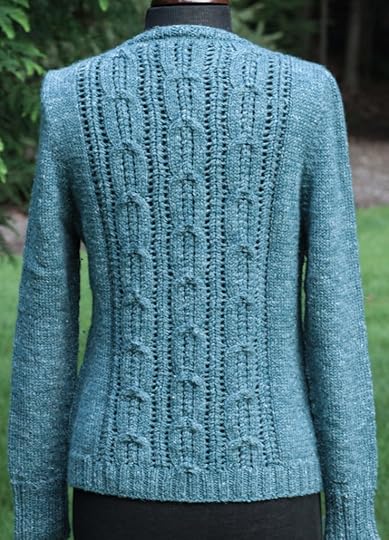
I also altered the sweater by adding some length and adding short rows to the upper back. I used decreases in the corners where the back shoulder stitches meet the bound-off back to make the neck band lie flat. I explained this technique in detail in my blog post for the Drumlin sweater.
A new-to-me idea that I tried in setting in the sleeve was to very loosely sew the underarm seam with dental floss as a guide. It’s much easier to pull out errant dental floss than it is yarn if the sleeve stitches don’t line up with the body stitches. It was so easy to follow the floss with the seaming yarn – the columns of stitches lined up perfectly with each other!
Typically, when I wear my hand-knit sweaters buttoned up, the buttons pull out toward the outer edge of the buttonhole band, making them look off-center. A little trick I used on this sweater was to cheat the buttonhole one stitch toward the body of the sweater. If you look closely, you can see that the buttonhole is just a bit closer to the inside edge of the band. When buttoned, the button appears perfectly centered.
I just love to learn little techniques that add up to a sweater that I enjoy wearing!
Resources:
If you’re not already a member of TKGA, I highly recommend it. I love Arenda Holladay’s articles on seaming, in the members-only section. I use her “Seams Part 3” article as a reminder every time I seam a sweater.
The post Acer Cardigan appeared first on AudKnits.
November 14, 2019
A Simple Little Shawl
If you’re like me, you sometimes yearn for a very simple project to knit. Such was the case with the Antarktis shawl by Janina Kallio.
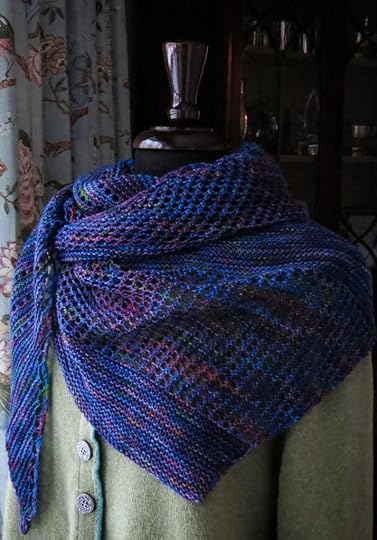
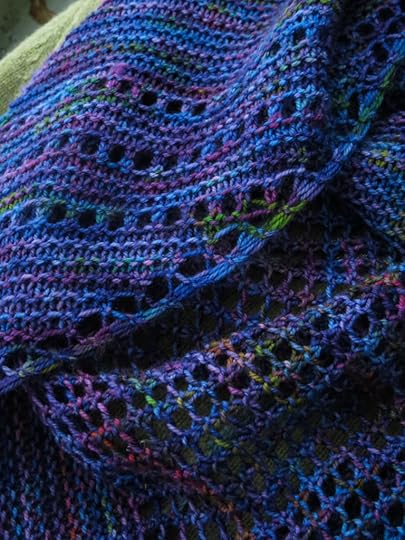
Taking a number of flights over a few weeks’ time, I was glad to have this very easy shawl to bring with me. I am easily entertained by color, so using some lovely variegated Madelinetosh Twist Light made the knitting fun. A small project like this is just right for air travel. The pattern is all garter stitch and eyelets, so it was also just right to work on while knitting in a group of friends – our joyous laughter didn’t cause me to lose my place.
While I have enough shawls to last a lifetime, I still enjoy making new ones. This will be just right for cool days when I want a bit of warmth around my neck and a little splash of color.
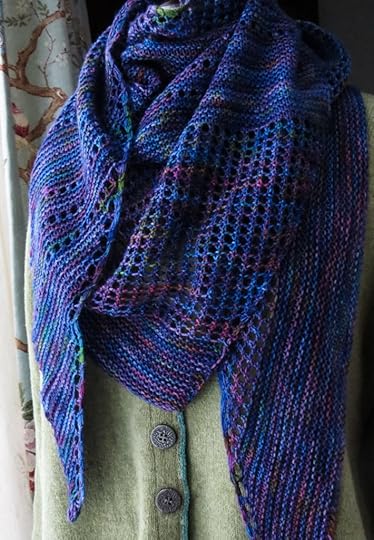 I wanted to make a bigger shawl than the pattern’s finished dimensions so I added extra rows to some of the sections and used about half an additional skein.
The post A Simple Little Shawl appeared first on AudKnits.
November 5, 2019
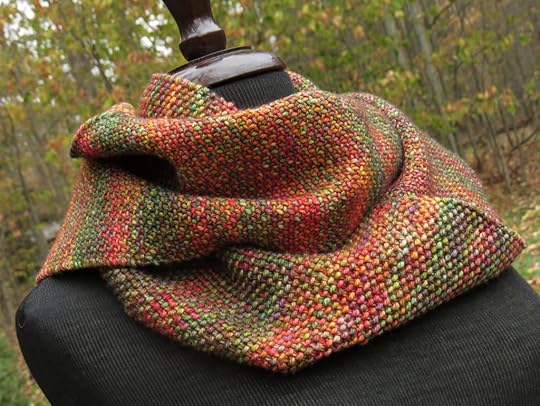
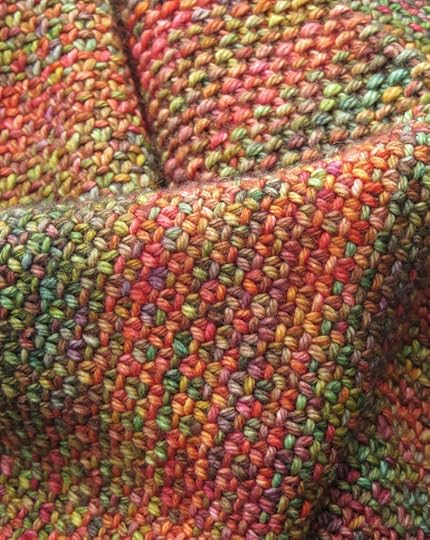
Another Yummy Reversible Linen Stitch Scarf
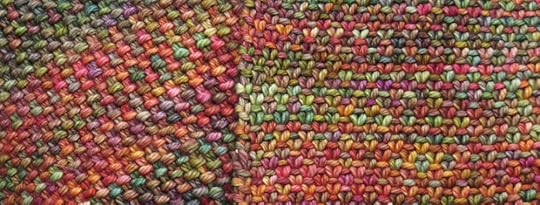
When I see some luscious variegated yarn, I love to make the Linen Stitch scarf from my book Reversible Scarves: Curing the Wrong Side Blues . One side ends up with a woven texture and the other bumpy, with tiny pops of color. Either side is pretty, no matter how the scarf is worn.
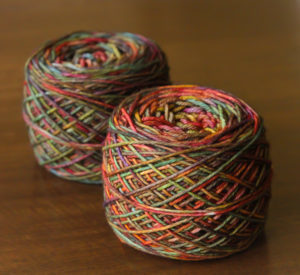
One of my favorite yarns to use with this pattern is Malabrigo Rios, this time in the Diana colorway. Like many hand-dyed yarns, different skeins of the same color can be vastly different. Here are the two balls of the Diana colorway that I used. You can see that one is predominantly green, while the other is predominantly red.
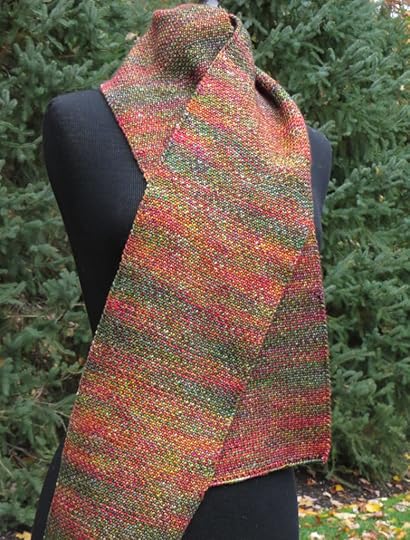
There are a couple of ways to handle the different colors. One is to carry both colors up the length of the scarf, alternating balls of yarn every two rows. That gives a homogeneous blend. For this scarf, though, I wanted each color to shine so I alternated balls about every 3″, giving a subtle striped effect.
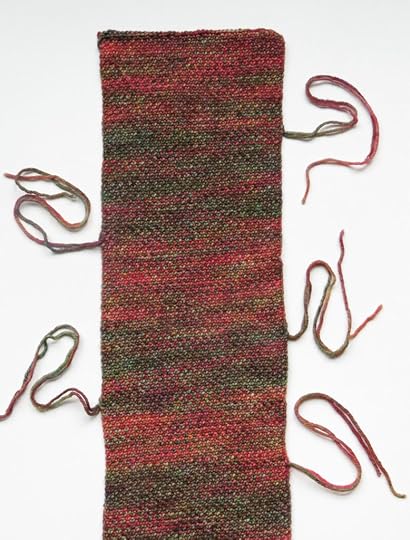
Sure there were a bunch of tails to weave in, but it was easy to run them down the edge and was well worth the effort.
Rios is a great choice for scarves since it’s soft.
This scarf measures 7.5″ x 60″ and used two full skeins. I used US #10 needles, which gave a nice drape.
The post Another Yummy Reversible Linen Stitch Scarf appeared first on AudKnits.