Kelly Barth's Blog
June 1, 2022
How To Find Customers
Are you having trouble finding new customers for your small business? I know from experience that It can feel impossible to get noticed online, so today I’m sharing how to find customers using my favorite methods to build an audience. In this post, I’ll share my favorite methods for finding new customers for my own online brand, Cabooties. I’ll also give you some advice on how to keep your new customers engaged once you’ve found them without spending a ton of money on ads. Whether you’re just starting out or looking to expand your customer base, read on to build your audience today!
How to Find Customers OverviewWhen you first start an eCommerce business, it often feels like you’re an invisible fish in a vast ocean. You KNOW customers are all around you, but it feels impossible to capture their attention. There are lots of ways to build an audience and drive traffic to your website but my favorites are:
CollaborationsSocial Media (Free and Paid)Search Engine Optimization (SEO)Email Marketing (For keeping in touch) Collaborations
The best way to find an audience of people for your product or brand is to borrow someone else’s. Partner with an influence, similar business (someone who serves the same customer as you, not a competitor), or existing customer to spread the word about your small business. You can pay for these partnerships, trade goods in exchange for promotion, or do a partnered promotion with another business.
 Social Media
When you think of sharing a message online, social media is probably the first thing that comes to mind. The most popular platforms for sharing your business and finding new customers are:
FacebookInstagramYoutubeTiktokTwitterPinterestBefore you get overwhelmed though, I want you to think about where your perfect customer is most likely to spend her time, and focus your efforts there. With social media consistency is key. Building momentum is hard, and building it back after taking time off from posting can be even harder on some platforms. Swipe my free social media planner now, or invest in a tool like SmarterQueue to make sure your feed is always full and fresh. Tap here for an extended free trial of SmarterQueue.
Paid Social AdsWhile it is totally possible to build your brand on social media for free, it takes a LOT of time and work. If you want to get in front of potential customers fast, I recommend adding Facebook (and/or Instagram) ads to your social media strategy. If you don’t have a big budget, try Reach, Engagement, or Traffic ads to get your posts in front of as many people as possible for the least amount of money.
 SEO
SEODo you love to write? Does your product require a little bit of education, or solve a problem? Then Search Engine Optimization could be a great strategy for you! SEO is free, but it does require an investment of time. You’ll want to:
Determine what keywords your audience is using to find you (using a tool like Google Analytics)Optimize your titles, image alt text, and meta descriptions to include your target keywordYou can take this strategy one step forward by adding a keyword-rich blog to your site.
 Email Marketing
Once you have someone’s attention, you’ll want to make sure you can contact them again without paying for additional advertising. You can ask them to follow you on social media, but we all know the algorithm gets the final say in who sees your post. If you want to guarantee your message will land in front of your customer, there is no better tool than email. I personally love Klaviyo for collecting emails, creating automations, and staying in touch. Use email opt-in forms or a pop-up on your site to collect your customer’s contact info. Remember, people are more likely to sign up for your list if you offer them value in return!
Learn moreIf you found this brief overview helpful and want to go deeper. I’d love for you to join me in my free small business blueprint course. In this course, we’ll cover
What to sell and who to sell it toWher to sellSocial MediaEmail MarketingPaid Traffic and SEOEnroll for Free
The post How To Find Customers first appeared on Kelly Barth | Mentorship for makers.


Getting Started with Brand Reps and Affiliate Marketing
If you’re a small business owner who’s looking to get started with brand reps and affiliate marketing, you’ve come to the right place! In this post, I’ll give you an overview of what brand reps, ambassadors, and affiliates are, and I’ll also provide some tips on how I use brand reps and referrals in my own handmade business, Cabooties. So whether you’re just starting out or looking for tips to expand your referral program, let’s get started!
Affiliate Marketing OverviewAffiliate marketing sounds fancy, but it’s actually pretty simple: an influencer promotes a product in exchange for a fee, store credit, or free product. You can even partner with other businesses in your niche. After more than 5 years of working with brand reps and referrals for my handmade brand, I can confidently say that they have been the most consistent, cost-effective method for spreading the word about my small business.
As a small business owner, affiliate marketing is a great way to increase your reach and raise brand awareness without breaking the bank. It has low upfront costs, but it helps you build trust with your brand reps’ audiences and can drive traffic to your site. There are a few ways you can implement this kind of marketing without investing too much money upfront, including:
Brand Rep or Ambassador Program (managed manually)Affiliate Program (managed with an app like Affiliately)Referral Program (managed with an app like Yotpo Loyalty)I’ll walk through these options to give you an idea of which one might be best for you.
 Brand Rep or Ambassador Program
Brand reps and ambassadors are social media influencers who promote your products and share your shop with their friends and followers.
In this kind of relationship, your business provides products at no cost, in exchange for promotion and/or photos. You can also give them a discount code to share with their followers to encourage them to buy and to help track the efficacy of their referrals.
This is a mutual partnership. Both parties should benefit and neither one should be taken advantage of.
When entering into a relationship with your new reps, it’s important to set clear expectations so they know exactly what they’ll need to do if they agree to join your program. Make sure that what you’re asking them to do is in line with the kind of content they already create (don’t expect amazing videos from someone who only posts photos or professional images from someone who only snaps candids with their phone).
To find brand reps, I recommend starting with your existing customers because they already know, like, and trust you. If you have a customer who loves to share your brand online, invite them to join your team! If you’re just starting out, scroll Instagram for accounts that match your target customer and that have images that fit your brand style, and reach out to them with an invitation to collaborate. (Be sure to follow and engage with their account first so you don’t come off as spammy). Influencers with more followers obviously have a bigger audience, but I personally prefer to work with micro-influencers with 5-20k hyper-engaged followers. They tend to be less expensive to work with, and more dedicated to supporting your brand.
 Affiliate Program
In traditional affiliate marketing, publishers earn a commission by promoting a product or service made by another retailer or advertiser. The affiliate receives a payout for providing a specific result to the retailer or advertiser. Typically, that result is a sale.
For small businesses, the easiest way to use an affiliate program is by using an app like Affiliately or ShareASale. (I prefer Affililately for Shopify stores because of the pricing model).
To launch your affiliate program, you’ll need to find blogs or influencers who are willing to link to your website. I recommend searching for your competitors, or for complimentary products to see what blogs are already featuring them. Reach out to those publishers to see if they would be willing to expand their existing articles to include a link to your products as well.
Referral ProgramThis method relies on your existing customers to evangelize for your brand and works best if you’ve already made a few sales. You’ll set up an app on your website (I use Yotpo Loyalty at Cabooties) but there are lots of options. The app will automatically give your customers a link to share with their friends and followers. The people they share your brand with will receive a discount toward their order, and they’ll receive some kind of reward (like store credit) whenever their link is used to make a purchase.
Affiliate Marketing Wrap UpAs you work to find the perfect audience for your small business, it can be hard to build up momentum. Affiliate marketing, brand reps, and referrals are a great low-cost way to get the ball rolling and get eyeballs on your products and services. I’m always bringing you new, free resources to help build and grow your small business. Be sure to subscribe so you don’t miss out!
The post Getting Started with Brand Reps and Affiliate Marketing first appeared on Kelly Barth | Mentorship for makers.
May 22, 2022
Handmade Wholesale How To For Beginners
Are you a maker who is looking to sell your handmade items to stores? If so, you’re in luck! In this blog post, I’ll share everything you need to know about wholesaling your handmade items. We’ll cover topics such as how to find buyers, how to price your items, and how to package your products for sale. Whether you’re just getting started or you’re looking for more tips, read on for the best advice on handmade wholesale selling!
Pricing for Handmade WholesaleBefore you get too far into your journey as a wholesaler, it’s time for a reality check. Not every handmade item is a viable wholesale product. If there isn’t enough room in your profit margin for both you and your stockists to make enough money to support your businesses AND cut you a paycheck, then wholesale may not be the right option for you. Don’t know if your margins are cut out for wholesale? That’s OK! I’ve created a handy calculator to help you figure it out.
Before we begin, you need to gather a little bit of information about your product. You’ll need to know:
how much your supplies cost (list the full price, even if you bought your supplies at a discount)how long it takes you to make each item (be generous with your timing here)your hourly labor cost, or what you pay your production team if you have one (Don’t be tempted to put $0! Leave yourself wiggle room to hire help if you haven’t already)the margin you’ll offer your stockists (Keystone margins of 50% are standard in most industries, but some may offer less. You may need to research your competitors on this one)Once you’ve gathered up all your numbers, type them into this handy pricing calculator and let the magic begin:
form_structure_1=[[{"form_identifier":"","name":"fieldname3","shortlabel":"","index":0,"ftype":"fcurrency","userhelp":"At full price, even if you bought it on sale!","userhelpTooltip":false,"tooltipIcon":false,"csslayout":"","title":"Cost of Materials","predefined":"","predefinedClick":false,"required":false,"exclude":false,"readonly":false,"numberpad":false,"size":"small","currencySymbol":"$","currencyText":"USD","thousandSeparator":",","centSeparator":".","noCents":false,"min":"","max":"","formatDynamically":false,"twoDecimals":false,"fBuild":{},"parent":""},{"form_identifier":"","name":"fieldname4","shortlabel":"","index":1,"ftype":"fnumber","userhelp":"(30 minutes=.5, 15 minutes = .25)","userhelpTooltip":false,"tooltipIcon":false,"csslayout":"","title":"Hours to make your product ","predefined":"","predefinedClick":false,"required":false,"exclude":false,"readonly":false,"numberpad":false,"size":"small","thousandSeparator":"","decimalSymbol":".","min":"0","max":"","formatDynamically":false,"dformat":"number","formats":["digits","number","percent"],"fBuild":{},"parent":""},{"form_identifier":"","name":"fieldname5","shortlabel":"","index":2,"ftype":"fcurrency","userhelp":"Based on 1 hour of work","userhelpTooltip":false,"tooltipIcon":false,"csslayout":"","title":"Hourly wage","predefined":"","predefinedClick":false,"required":false,"exclude":false,"readonly":false,"numberpad":false,"size":"small","currencySymbol":"$","currencyText":"USD","thousandSeparator":",","centSeparator":".","noCents":false,"min":"","max":"","formatDynamically":false,"twoDecimals":false,"fBuild":{},"parent":""},{"form_identifier":"","name":"fieldname7","shortlabel":"","index":3,"ftype":"fcurrency","userhelp":"Fixed fees like credit card fees, marketplace selling fees, etc.","userhelpTooltip":false,"tooltipIcon":false,"csslayout":"","title":"Miscellaneous Expenses","predefined":"0","predefinedClick":true,"required":false,"exclude":false,"readonly":false,"numberpad":false,"size":"small","currencySymbol":"$","currencyText":"USD","thousandSeparator":",","centSeparator":".","noCents":false,"min":"","max":"","formatDynamically":false,"twoDecimals":false,"fBuild":{},"parent":""},{"form_identifier":"","name":"fieldname6","shortlabel":"","index":4,"ftype":"fcurrency","userhelp":"(recommend 30% of labor cost + materials cost)","userhelpTooltip":false,"tooltipIcon":false,"csslayout":"","title":"Built in Profit ","predefined":"","predefinedClick":false,"required":false,"exclude":false,"readonly":false,"numberpad":false,"size":"small","currencySymbol":"$","currencyText":"USD","thousandSeparator":",","centSeparator":".","noCents":false,"min":"","max":"","formatDynamically":false,"twoDecimals":false,"fBuild":{},"parent":""},{"dependencies":[{"rule":"","complex":false,"fields":[""]}],"form_identifier":"","name":"fieldname1","shortlabel":"","index":5,"ftype":"fCalculated","userhelp":"Calculated for you based on your cost and desired profit","userhelpTooltip":false,"tooltipIcon":false,"csslayout":"","title":"Wholesale Price","predefined":"","required":false,"exclude":false,"size":"medium","eq":"(fieldname5*fieldname4)+fieldname3+fieldname6","min":"","max":"","suffix":"","prefix":"","decimalsymbol":".","groupingsymbol":"","readonly":true,"currency":false,"noEvalIfManual":true,"formatDynamically":false,"hidefield":false,"fBuild":{},"parent":""},{"form_identifier":"","name":"fieldname8","shortlabel":"","index":6,"ftype":"fnumber","userhelp":"the \u0022discount\u0022 you offer your stockists","userhelpTooltip":false,"tooltipIcon":false,"csslayout":"","title":"Wholesale Margin","predefined":"","predefinedClick":false,"required":false,"exclude":false,"readonly":false,"numberpad":false,"size":"small","thousandSeparator":"","decimalSymbol":".","min":"1","max":"100","formatDynamically":false,"dformat":"percent","formats":["digits","number","percent"],"fBuild":{},"parent":""},{"dependencies":[{"rule":"","complex":false,"fields":[""]}],"form_identifier":"","name":"fieldname9","shortlabel":"","index":7,"ftype":"fCalculated","userhelp":"Makers Suggested Retail Price, Calculated for you automatically","userhelpTooltip":false,"tooltipIcon":false,"csslayout":"","title":"MSRP","predefined":"","required":false,"exclude":false,"size":"medium","eq":"fieldname1\/(1-fieldname8)","min":"","max":"","suffix":"","prefix":"","decimalsymbol":".","groupingsymbol":"","readonly":true,"currency":false,"noEvalIfManual":true,"formatDynamically":false,"hidefield":false,"fBuild":{},"parent":""}],{"0":{"title":"Wholesale Price Calculator","description":"Price your handmade goods to sell","formlayout":"top_aligned","formtemplate":"cp_cff_11","evalequations":1,"evalequationsevent":2,"loading_animation":0,"autocomplete":1,"persistence":0,"animate_form":0,"customstyles":""},"formid":"cp_calculatedfieldsf_pform_1"}];
Once you’ve added all your numbers to the calculator, it will pop out an MSRP, or “Makers Suggested Retail Price” for you. This should match the retail price you offer on your website, at craft fairs, etc. If it’s less than what you typically sell your products at, congrats! Your product is perfect for wholesale. If it’s much more than your typical resale price, you have some decisions to make.
 What To Do If Your Product Doesn’t Support Wholesale Pricing
If your current retail price doesn’t support selling at wholesale, you can do a few things:
Raise your retail price to include your wholesale margin This option is great because it puts a little more money in your pocket whenever you make a sale. If you have to significantly raise your prices, you’ll want to check out your competition to see if it’s likely that you’ll be able to continue to successfully sell your products at this higher price point.Decrease your costsIs it possible to decrease your materials cost, or add efficiencies to your process so you can make your product faster?Decrease your wholesale marginThis option is tempting but proceed with caution. Some wholesale marketplaces require a 50% margin for wholesale listings, and it will be harder to compete with retailers offering similar products if your margins are much lower than theirs. Remember, your prospective stockists are running businesses with high overheads. If they can’t cover their expenses and earn a paycheck in the margins you’re offering, they won’t be placing an order with you.Don’t sell this product at wholesaleYou don’t have to wholesale every item you make. It’s OK to select a few higher-margin items to offer to retailers while reserving your lower-margin items for your direct customers only.Set Your Wholesale TermsIf you’re feeling a little queasy about your wholesale price, it’s time to start thinking about what will make it all worth it – selling in bulk! In addition to your wholesale price, you’ll also need to determine your minimum order size. There are a few ways you can do this:
Case PacksThis is especially ideal for consumable items like cosmetics and candles. You’ll group similar items into packs that will help your retailers put together a cohesive display for their customers. For example, you may choose to wholesale your candles in packs of 4 by scent and size. Quantity MinimumsIdeal for items with lots of SKUs in a similar price range (like clothing with sizes), you can allow your retailer to mix and match any items they like as long as they buy a minimum total number of items. You can set separate MOQ’s for first-time and returning customersMinimum Order ValueSimilar to the minimum order quantity, you can also allow your retailer to purchase any item assortment they wish as long as they spend a certain dollar amount on a single order. You can set separate MOV’s for first-time and returning customersAs you determine your minimum order size, you’ll want to keep two things in mind. First of all, what is the smallest order you’ll need in order to make selling wholesale worth it? Second, you’ll most likely be working with small boutiques and mom-and-pop shops that don’t have large budgets or unlimited shelf space. What is the smallest assortment of products that will allow them to create a cohesive display for their customers?
You may also be asked for payment terms like net 60 or net 90. If you offer these terms to your stockist, they’ll have 60 or 90 days after they order to remit payment. If you aren’t able to support net terms, it’s OK to say no. If you sell on marketplaces like Faire, they will handle this for you and you can choose to be paid immediately.
Where to Find Handmade Wholesale BuyersThere is no shortage of retailers looking for unique, handmade items to sell in their stores. Now that you’ve got your pricing and terms ready for wholesale, it’s time to make some connections. The easiest, and least time-consuming way to meet potential retailers is on wholesale marketplace sites like Faire, Handshake, and Tundra. If you’re selling on Etsy, you can also add “wholesale” to your tags and descriptions, and let potential retailers know that they can contact you for your wholesale pricing and terms. If you have your own website, you can also create a separate wholesale portal exclusively for your stockists, If you’re on Instagram, start adding #wholesale and #handmadewholesale to your posts. Boutique retailers love browsing social media for unique, new items to offer their shoppers. Finally, you can research retailers that you’d like to work with and approach them directly. This is the most time-consuming approach, but it will allow you to pick and choose the stockists that excite you most.
What to Include in Your Handmade Wholesale Product ListingsWhen you create wholesale listings for your products, you’ll want to keep in mind that these listings should look very different than your regular website or Etsy shop listings. Be sure to include
Your MSRP and Wholesale MarkupYour minimum order sizeNet terms if you offer themHow your products will be packaged for sale (retailers want to know what their shelves will look like with your items on them)Relevant information that will help the retailer sell your item (display tips, expiration dates, which sizes sell the best, etc.)Lead times – are your items ready to ship, or will they be made to order? Be sure to leave yourself ample time to fill a large order. It’s obviously better to ship early than late.You Got Your First Wholesale Order! Now WhatNow it’s time to make your products if you haven’t already, pack them up, and ship them out. Make sure your packaging matches the photos from your listing, and that you box your order up nicely. If your retailer enjoys the unboxing experience, they’ll be more likely to place a reorder with you. You’ll want to include a packing slip, and any relevant safety information (like a CPC for children’s products) It’s also a good idea to include a friendly note for your new stockist and any tips or tricks that may help them sell your product faster.
Following Up With Your New RetailerAs soon as you ship your first wholesale order, the work towards earning a reorder begins. A week or so after you ship your order, reach out to your retailer to thank them for their order. If there is any information you can provide that will help them display or sell your items more effectively this is a great time to share that information with them as well. Whenever you release new items, it’s a great opportunity to reconnect with your stockist to encourage them to refresh their shelves. If you don’t release new products often, you can still reach out to your existing wholesale accounts a few times a year to see if they have any feedback or questions and assist them with restocking their inventory. If you sell on Faire, you can take advantage of their marketing automations to keep up with your clients.

That’s it! I hope you’re feeling confident about selling your handmade goods at wholesale now, and that you found some helpful tips along the way. If you’re looking for more resources, be sure to subscribe to my email list below. I send out regular updates packed with information and advice specifically tailored for handmade businesses like yours. And of course, if you have any questions or need help getting started, don’t hesitate to reach out to me or drop a comment below. I love connecting with small business owners and I’m always happy to offer advice and support.

The post Handmade Wholesale How To For Beginners first appeared on Kelly Barth | Mentorship for makers.
May 9, 2022
How to Start a Handmade Business Lesson 1
Hello friend! You’ve arrived at the first lesson in a free course about how to start a handmade business on Etsy and Shopify. In this course we’ll cover everything you need to know to plan, build, and grow your craft business online.
Did you stumble on this course without enrolling? That’s OK! Tap here to enroll now.
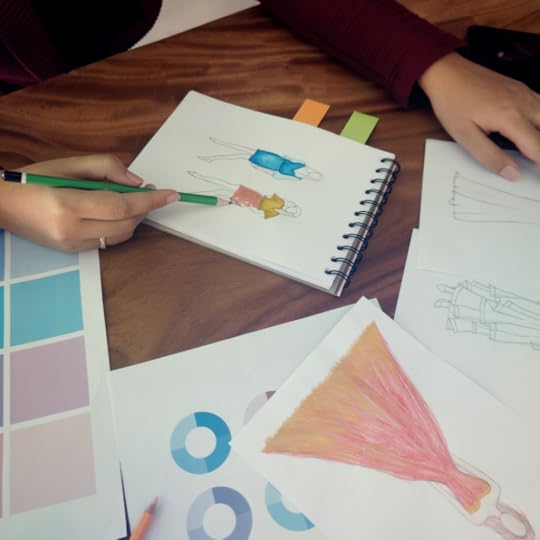
How to start a handmade business video lesson:Enroll in the course to receive your Perfect Customer PDFFind your audienceWho are you perfect people? When considering your audience you should lay out their demographic information, and a short description of their interests and daily activities. Consider what they need, and what their typical challenges are. Once you’ve outlined these core areas, consider what opportunities you have as a maker to fill their needs and solve their challenges. Don’t forget to give your person a name! When you make your ideal customer feel real, it will be easier to serve her with your product offering, and with your marketing efforts.
When you find the right people, they’ll be willing to pay what you’re worth for all the hard work that goes into making your products
What to sellAs a maker, you have the unique ability to solve your perfect customer’s problems and meet her needs. Think about your skills and talents and brainstorm what you can specialize in that will make your idea customer fall in love with you.
Don’t offer EVERYTHING your customer may want – what can you offer that they can’t find anywhere else? What do they like that you can improve on?
How To Start a Handmade Business Part 2will land in your inbox tomorrow! In this lesson, we’ll learn WHERE to sell to hit your goals. If you aren’t already enrolled, tap here to sign up to receive the rest of the lessons in this series.

The post How to Start a Handmade Business Lesson 1 first appeared on Kelly Barth.
How to Start a Handmade Business
Are you a maker ready to share your creations with the world? Have you been dreaming of building an online business, but don’t know where to start? Maybe you already sell at craft fairs and markets, but you want to bring your business online. You’re in the right place! In this series, I’m going to walk you through how to start a handmade business step by step. When we’re done, you’ll know exactly what you need to do to launch the creative brand you’ve been imagining.
It’s free to enroll, just drop your contact info below and I’ll send a new lesson to your inbox daily!
In this course:Lesson 1: What to sell and who to sell it to
Lesson 2: Where to sell
Lesson 3: Social Media
Lesson 4: Email Marketing
Lesson 5: Paid Traffic and SEO
Enroll in “How to Start a Handmade Business” now!I can’t wait to help you plan, build, and grow your handmade business!
The post How to Start a Handmade Business first appeared on Kelly Barth.
May 2, 2022
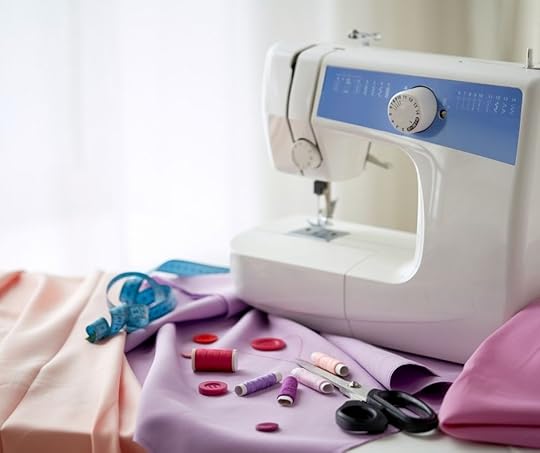
My Favorite Sewing Tools
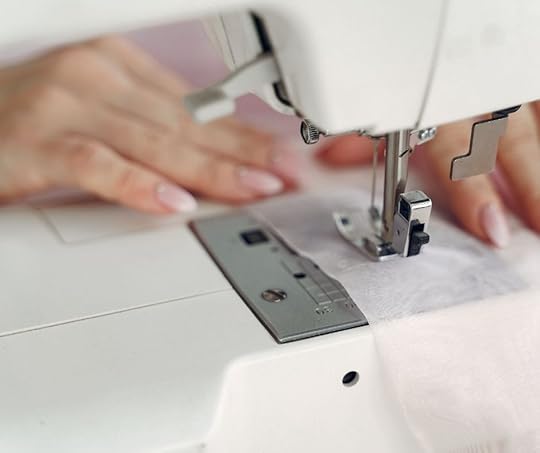
Have you ever wondered what the best sewing tools are? Or maybe you’re just getting started with sewing and don’t know where to begin. Well, wonder no more! today, I’m going to share my favorite tools for sewing. these are all tools that I use on a regular basis and that have helped me become a better sewist. So whether you’re just starting out or you’ve been sewing for years, I hope you find this helpful!
Sewing MachinesMy favorite sewing machine for beginners is the Brother CS6000i. It’s inexpensive but has every stitch you’ll ever need, and double needle capacity too. Whether you’re learning to sew apparel, or dabbling in home decor, this machine is a great place to start.
My favorite workhorse quilting machine is the one I use to sew Cabooties baby shoes every day. The Juki TL 2010Q is an amazing machine that is great for sewing through thick fabric. I’ve had mine for years and it’s still going strong.
My favorite serger is equally suited to beginners and experienced sewists alike. The brother 1034d is the perfect machine for finishing internal seams and sewing professional looking garments quickly and easily. A serger is not a replacement for a sewing machine, but it is an important tool to have in your arsenal if you want your makes to be professional and polished.
If you’re selling garments, you may also want to invest in a coverstitch machine to give your hems a professional touch. I highly recommend the Juki MCS-1500. Keep in mind, a coverstitch will likely be the last machine you add to your collection as the only thing it can do is hem garments.
Cutting ToolsWhen it comes to cutting fabric, you’ll want a nice pair of fabric scissors (that never, ever touch paper!) and a 45mm rotary cutter. It’s also nice to have a pair of lightweight snips for cutting stray threads. I am a big fan of Fiskars brand cutting tools. If you really want to treat yourself, check out my favorite electric scissors for cutting through several layers of fabric in one pass – perfect if you’re sewing multiple garments to sell in your Etsy shop or website.
 Other handy sewing tools
Your sewing machine and cutting tools are the main pieces of equipment you’ll need to get started. However, there are a few other handy items you’ll enjoy having in your sewing space. I personally can’t live without my:
36″ cutting matQuilting ruler (great for any straight cuts, not just for quilters!)Wonder ClipsPin cushion waste bin for spare threads and scrapsThread stand (for using big spools of thread in your regular sewing machine)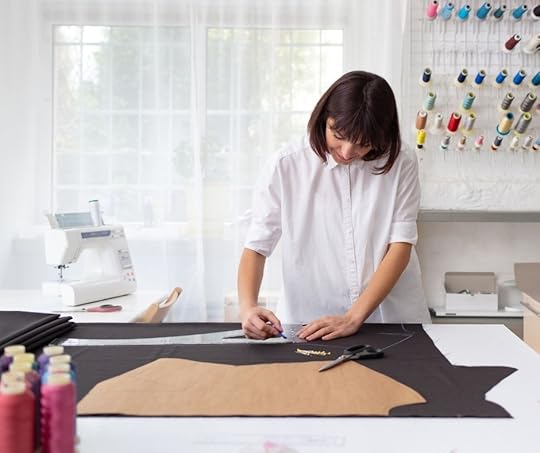
Did I leave any of your favorite tools off the list? Let me know in the comments so we can check out your must-have sewing equipment.
What’s next?Now that you’ve started gathering up your tools, check out my tips for sewing to sell online and build the Etsy shop or eCommerce store of your dreams!
The post My Favorite Sewing Tools first appeared on Kelly Barth.
Learn how to sew so you can sell on Etsy
Do you love to sew? Or perhaps you’re a crafter learning to expand your maker toolbox? Are you looking for a way to make some extra money? If so, then you may want to consider selling your sewing creations on Etsy. Etsy is a platform where artists and crafters can sell their handmade items to the world. In this blog post, I share with you my favorite sewing resources so that you can start selling your own creations on Etsy. So, whether you are a beginner or an experienced sewer, read on – and learn how to start sewing today!
 Getting Started
Before you start, you’ll want to gather up all your tools. I wrote about the importance of choosing the right sewing tools for your Etsy shop or small business in this article, but we’ll cover the basics here too. You’ll need a sewing machine (I like this one for beginners), fabric scissors, and a sewing pattern or tutorial. The pattern will tell you what kinds of fabric and notions you’ll need. You may also want to have a pair of snips, a rotary cutter, and clips or pins handy.
 Learn the Basics (and beyond)
The internet is FULL of amazing sewing tutorials. I like to start with a sewing pattern, and if I come to a technique I haven’t mastered yet, I’ll head over to Youtube to watch the masters at work. If you’re totally new to sewing or want to learn a new skill (like pattern drafting or draping), I highly recommend SkillShare. Check out their library of sewing classes here. If you like what you see, use code Annual30AFF to save 30% on a year’s membership.
[image error] Choose your first project
If you’ve never sewn before, it’s a good idea to start with something simple. If you’re thinking of starting a home decor business, a simple project like a pillowcase is a great place to start. If you want to jump right into sewing clothing, a dolman tee is a great first project.
 Start Selling Online
Now that you know the basics, you’re ready to set up shop! You have lots of options when it comes to selling your makes online (like Amazon Handmade and Shopify) but I really love Etsy for new sellers because it’s so easy to get started. When you’re ready to get started selling, use this link and the good people at Etsy will set you up with 40 free listings to get you on your way!
Grow your businessWant to learn more about building the perfect handmade business on Etsy, Shopify, or wherever else you decide to plant your virtual brand? Check out this article, and make sure you’re on my email list because I’ll keep dropping amazing lessons in your inbox for FREE to get you set up on Etsy, selling like a pro!
This post contains affiliate links. If you click a link and make a purchase, I may receive a small commission.
The post Learn how to sew so you can sell on Etsy first appeared on Kelly Barth.
April 27, 2022
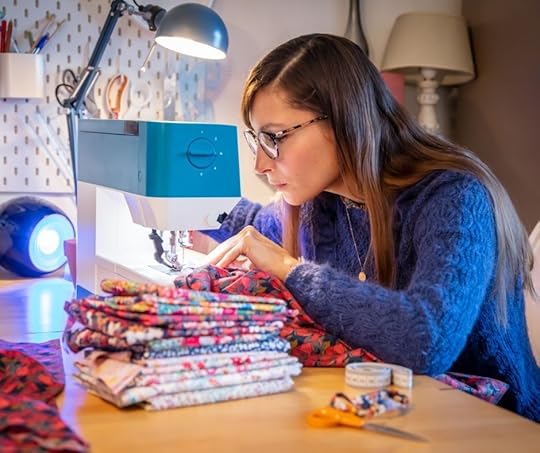
Start Sewing to Sell Online in 7 Steps
Are you thinking about starting your own small business? Perhaps you’re considering sewing to sell online? If so, you’re in good company! Sewing is a great way to make a little extra money, and with the right planning and preparation, you can create an income while doing what you love on your own schedule. In this post, we’ll walk you through the steps necessary to start selling your sewn creations. Let’s get started!
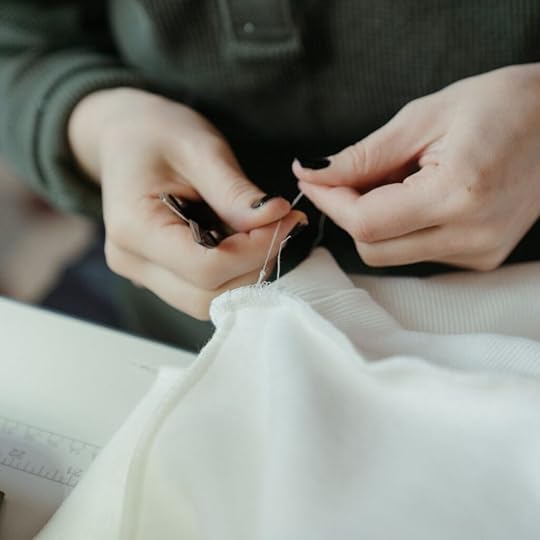 1) Perfect your sewing technique
If you want to sell your handmade goods online, the first thing you need to do is perfect your technique. Your loved ones will forgive a few skipped stitches, unfinished seams, or a few loose threads, but paying customers will not. Make sure you have all the technical know-how you need to please your customers and keep them coming back for more. Luckily, there are lots of great resources on the internet. My go-to for learning new skills and perfecting old ones is Skillshare. They have lots of expert-led classes on sewing skills and techniques to turn you into a pro in no time. You can also find lots of free resources on Youtube, Tiktok, and any other platform where makes share videos. Prefer to learn in person? Check out your local fabric shop or sewing machine dealer. They often have classes you can take with sewing professionals in your area.
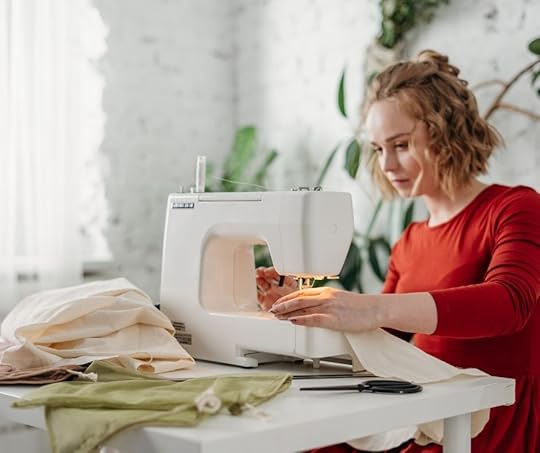
 2) Get the right sewing tools
 Next, you’ll want to gather the tools you need to work efficiently. You can find inexpensive sewing machines on Amazon, Target, Walmart, and more but beware – you will get what you pay for. These machines are GREAT for learning how to sew, and sewing at home as a hobby. However, when you start sewing daily for your customers, these machines will likely wear out quickly. For my own small business, Cabooties, I LOVE my Juki TL2010Q. It only sews straight stitches (so it’s not ideal if you want to sew and sell stretchy, knit garments) but it’s a workhorse and it’s FAST. After 5 years this machine is still going strong. I also highly recommend in a serger to finish your seams, and a coverstitch for hemming if you will be selling clothing items (however a double needle on your regular sewing machine will work fine in a pinch too. In addition to sewing machines, you’ll also want plenty of needles, bobbins, the right fabric cutter (rotary cutters and electric scissors are two of my favorites), and a good seam ripper too.
3) Define your perfect customerThe next thing you’ll want to do is define your target customer and evaluate what she is shopping for. Once you know WHO you’re sewing for, it will be much easier to decide WHAT to sew and sell online. Imagine your ideal customer and jot down these details:
Man or womanHow old they areWhere do they shopDo they have kidsDo they have petsAre they funny or seriousPop culture references they enjoy: movies, shows, music, favorite celebrities, etc. 4) Define what makes you unique
Now that you have a customer in mind, it’s time to think about YOU! What makes you different? Trying to sew and sell the same things as everyone else is a recipe for disaster, you’ll be stuck working from one step behind the makers who inspire you. Instead, think about what makes you DIFFERENT. What can you sew that will make your customers think of your brand before they ever see your brand name? What could you bring to the craft fair that you know no one else will have in their booth? What is your ideal customer searching for that she can’t find in the store right now? Whether you establish your individuality through colors and prints, a quirky sense of humor, or a new style no one has seen before if you can answer this question your customers are sure to love you for it.
 5) Determine your core pieces
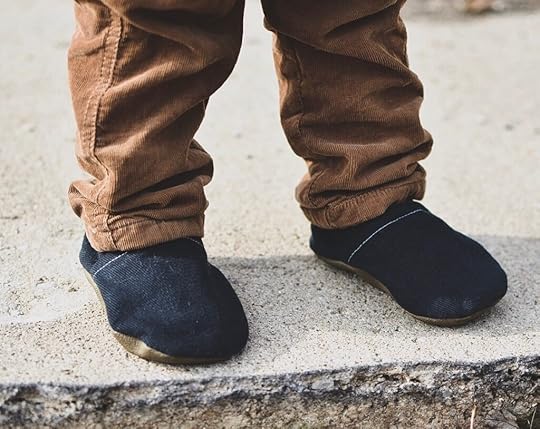
One of the main things that make selling online different from selling in person, is that you don’t need to carry lots of different kinds of items. In fact, small business websites with TOO many choices are actually overwhelming to shoppers and tend to have lower conversion rates. Instead, choose between one and five items that you are confident making and become an expert. Choose your core pieces carefully with your perfect customer in mind. For instance, my handmade business, Cabooties, serves busy moms of babies and new walkers. I have one core item that I’ve become known for: baby shoes. That’s it. Another maker business that does this really well is Sweet As April. Her ideal customer is eco-conscience moms with young children. Her one product: bonnets made from upcycled fabric. What unique, hard-to-find can you offer your perfect customer?
 6) Create a legal business entity
This step is one people like to skip because it’s not fun and can be a little bit scary at first. However, this step is vital if you want to build a legitimate handmade business that can support your family. And surprisingly, it’s really not that hard. The process for this varies depending on where you live, but here’s a quick look at what you’ll need to do:
Choose a nameThis step is important, so take your time to get it right!Once you come up with a name you like, google it to make sure you can get the website address. If you can’t, move on. You may be tempted to try something similar, but that will just create confusion for your customers and a potential legal headache later on.If the .com address is available, make sure no one holds a trademark for your new name. Register with your federal, state, and local governmentDon’t use a third-party service, go directly to the source. You can tell if you’re working with a legitimate agency because they’ll have a .gov website address. If you need help with this process, the Small Business Administration has lots of resources for new, US-based businesses to help you get started. Build your online presenceYou have lots of options here. For selling handmade goods online, I prefer to build a standalone website on Shopify, but you can also set up shop on Etsy, Amazon Handmade, Faire, and lots of others. Get set up on the social media platforms of your choice, including Facebook, Instagram, Tiktok, Pinterest, and Twitter (it’s OK to focus on just one or two!) 7) Keep up with current trends
Now that you have your tools, your ideal customer, your unique identity, your core offering, and a legal business you are finally ready to start sewing goods to sell! Whether you’re sewing quilts, clothing, toys, home decor, or anything else it’s always a good idea to keep an eye on current trends. Just because your perfect customer loves something today, doesn’t mean they’ll love it forever. This doesn’t mean you need to be buying or drafting new patterns and adding new items constantly, you can just tweak your core offering to keep up with your customers’ current tastes, and add a little bit of “newness” to your website. At Cabooties we like to offer seasonal prints and on-trend colors for our customers several times throughout the year. I also recommend keeping an eye on Pantone’s color of the year and taking a walk around your customer’s favorite retailers (like Target) to see what they’re bringing in and moving out.
Pro tip: A fun way to watch trends and fabric shop at the same time is to follow along with Spoonflower’s design challenges. Even if you aren’t into surface design, their challenges are a great way to gauge what is popular right now.
So, there you have it! Seven simple steps to follow to help get your sewing business off the ground. Of course, this is just a basic overview and I would love to provide more detailed information or answer any questions you may have. Be sure to sign up to receive my emails – I’ll be sending out more tips in the coming weeks on topics like setting up an online shop, perfecting your technique, gathering the right tools, and defining your target customer. Stay tuned for more helpful advice soon!

Disclaimer: This article contains affiliate links. If you click on a link and make a purchase, I may earn a small commission. But don’t worry, I only share things I’ve tried and love, and I know you’ll love them too!
The post Start Sewing to Sell Online in 7 Steps first appeared on Kelly Barth.
Sewing to Sell Online in 7 Steps
Are you thinking about starting your own sewing business? If so, you’re in good company! Sewing is a great way to make a little extra money, and with the right planning and preparation, you can create an income while doing what you love on your own schedule. In this post, we’ll walk you through the steps necessary to start selling your sewn creations. Let’s get started!
1) Perfect your sewing techniqueIf you want to sell your handmade goods online, the first thing you need to do is perfect your technique. Your loved ones will forgive a few skipped stitches, unfinished seams, or a few loose threads, but paying customers will not. Make sure you have all the technical know-how you need to please your customers and keep them coming back for more. Luckily, there are lots of great resources on the internet. My go-to for learning new skills and perfecting old ones is Skillshare. They have lots of expert-led classes on sewing skills and techniques to turn you into a pro in no time. You can also find lots of free resources on Youtube, Tiktok, and any other platform where makes share videos. Prefer to learn in person? Check out your local fabric shop or sewing machine dealer. They often have classes you can take with sewing professionals in your area.
2) Get the right sewing tools Next, you’ll want to gather the tools you need to work efficiently. You can find inexpensive sewing machines on Amazon, Target, Walmart, and more but beware – you will get what you pay for. These machines are GREAT for learning how to sew, and sewing at home as a hobby. However, when you start sewing daily for your customers, these machines will likely wear out quickly. For my own small business, Cabooties, I LOVE my Juki TL2010Q. It only sews straight stitches (so it’s not ideal if you want to sew and sell stretchy, knit garments) but it’s a workhorse and it’s FAST. After 5 years this machine is still going strong. I also highly recommend in a serger to finish your seams, and a coverstitch for hemming if you will be selling clothing items (however a double needle on your regular sewing machine will work fine in a pinch too. In addition to sewing machines, you’ll also want plenty of needles, bobbins, the right fabric cutter (rotary cutters and electric scissors are two of my favorites) and a good seam ripper too.
3) Define your perfect customerThe next thing you’ll want to do is define your target customer and evaluate what she is shopping for. Once you know WHO you’re sewing for, it will be much easier to decide WHAT to sew and sell online. Imagine your ideal customer and jot down these details:
Man or womanHow old they areWhere do they shopDo they have kidsDo they have petsAre they funny or seriousPop culture references they enjoy: movies, shows, music, favorite celebrities, etc.4) Define what makes you uniqueNow that you have a customer in mind, it’s time to think about YOU! What makes you different? Trying to sew and sell the same things as everyone else is a recipe for disaster, you’ll be stuck working from one step behind the makers who inspire you. Instead, think about what makes you DIFFERENT. What can you sew that will make your customers think of your brand before they ever see your brand name? What could you bring to the craft fair that you know no one else will have in their booth? What is your ideal customer searching for that she can’t find in the store right now? Whether you establish your individuality through colors and prints, a quirky sense of humor, or a new style no one has seen before, if you can answer this question your customers are sure to love you for it.
5) Determine your core piecesOne of the main things that makes selling online different from selling in person, is that you don’t need to carry lots of different kinds of items. In fact, small business websites with TOO many choices are actually overwhelming to shoppers and tend to have lower conversion rates. Instead, choose between one and five items that you are confident making and become an experct. Choose your core pieces carefully with your perfect customer in mind. For instance, my handmade business, Cabooties, serves busy moms of babies and new walkers. I have one core item that I’ve become known for: baby shoes. That’s it. Another maker business that does this really well is Sweet As April. Her ideal customer is eco-conscience moms with young children. Her one product: bonnets made from upcycled fabric. What unique, hard to find can you offer your perfect customer?
6) Create a legal business entityThis step is one people like to skip, becuase it’s not fun and can be a little bit scary at first. However, this step is vital if you want to build a legitimate handmade business that can support your family. And surprisingly, it’s really not that hard. The process for this varies depending on where you live, but here’s a quick look at what you’ll need to do:
Choose a nameThis step is important, so take your time to get it right!Once you come up with a name you like, google it to make sure you can get the website address. If you can’t, move on. You may be tempted to try something similar, but that will just create confusion for your customers and a potential legal headache later on.If the .com address is available, make sure no one holds a trademark for your new name. Register with your federal, state, and local governmentDon’t use a third party service, go directly to the source. You can tell if you’re working with a legitimate agency because they’ll have a .gov website address. If you need help with this process, the Small Business Administration has lots of resources for new, US based businesses to help you get started. Build your online presenceYou have lots of options here. For selling handmade goods online, I prefer to build a standalone website on shopify, but you can also set up shop on Etsy, Amazon Handmade, Faire, and lots of others. Get set up on the social media platforms of your choice, including Facebook, Instagram, Tiktok, Pinterest, and Twitter (it’s OK to focus on just one or two!)7) Keep up with current trendsNow that you have your tools, your ideal customer, your unique identity, your core offering, and a legal business you are finally ready to start sewing goods to sell! Whether you’re sewing quilts, clothing, toys, home decor, or anything else it’s always a good idea to keep an eye on current trends. Just because your perfect customer loves something today, doesn’t mean they’ll love it forever. This doesn’t mean you need to be buying or drafting new patterns and adding new items constantly, you can just tweak your core offering to keep up with your customers current tastes, and add a little bit of “newness” to your website. At Cabooties we like to offer seasonal prints and on-trend colors for our customers several times throughout the year. I also recommend keeping an eye on Pantone’s color of the year, and taking a walk around your customer’s favorite retailers (like Target) to see what they’re bringing in and moving out.
Pro tip: A fun way to watch trends and fabric shop at the same time is to follow along with Spoonflower’s design challenges. Even if you aren’t into surface design, their challenges are a great way to gauge what is popular right now.
So, there you have it! Seven simple steps to follow to help get your sewing business off the ground. Of course, this is just a basic overview and I would love to provide more detailed information or answer any questions you may have. Be sure to sign up to receive my emails – I’ll be sending out more tips in the coming weeks on topics like setting up an online shop, perfecting your technique, gathering the right tools, and defining your target customer. Stay tuned for more helpful advice soon!
Disclaimer: This article contains affiliate links. If you click on a link and make a purchase, I may earn a small commission. But don’t worry, I only share things I’ve tried and love, and I know you’ll love them too!
April 25, 2022
What to Make to Sell Like a Pro
Do you own or want to start a handmade business? If so, you know the struggle of deciding what to make to sell online. The choices are seemingly endless, and it can be hard to predict exactly what your customers will want and when they want it. This blog post will give you an overview of the key dates to keep in mind for your business and help you figure out when to buy materials and make new inventory so you can be there when your customer needs you.
Make a Game PlanIt can be overwhelming to plan your year. There are seemingly endless holidays you can purchase or create products for, and it’s easy to get overwhelmed. But don’t worry, today I’m sharing with you one of my very favorite planning tools, my seasonal marketing calendar!
Get started by making a list of holidays that are important to your business. I love this calendar from my friends at Printful because it’s a very comprehensive list of all the holidays you may want to commemorate in your small business, but it’s a long list and you may need some help narrowing it down. So today, I’m sharing with you the tool I use to plan for my own eCommerce business, Cabooties.
Download the BlueprintTo grab my proven plan for what to make and sell, just drop your email below. You can choose from the prefilled PDF version of this tool (my favorite) but in case you need more flexibility I’ll send you a blank Canva template too!
Here’s a quick rundown of what I like to launch and clearance each month. There are lots of other holidays and special occasions that are not included on this list. Please feel free to add and omit selling occasions based on what is relevant to your audience.
What to Make to Sell Each Month:January: Launch Valentines and St. Patrick’s Day; Clearance Winter and Holiday
February: Launch Spring and Easter (the date for Easter changes each year so plan accordingly!); Clearance Valentines Day
March: Launch Spring and Easter (if it falls in April); Clearance St. Patrick’s Day
April: Launch Wedding, Graduation, and/or Mother’s Day (whichever fit your business. I concentrate on Mother’s Day); Clearance Easter
May: Launch Patriotic prints (for Memorial Day in the USA), and Father’s Day; Clearance Memorial Day (or keep it around for Fourth of July) and Spring
June: Launch Swim and Summer; Clearance Father’s Day and Graduation
July: Launch Back to school and Summer; Clearance Patriotic/Fourth of July
August: Launch Fall; Clearance Summer
September: Launch Halloween; Clearance Back to School
October: Launch Thanksgiving and Winter; Clearance Wedding and Fall
November: Launch Christmas, Hannukah (the dates of this holiday vary, check your calendar!), Black Friday; Clearance Halloween
December: Launch New Years; Clearance Thanksgiving, Christmas
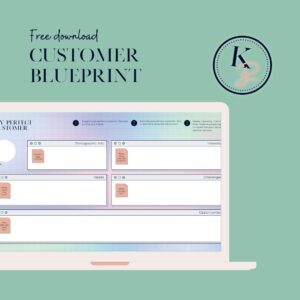
Define Your AudienceStill stuck? Let’s take a step back. If this look at the calendar didn’t prepare you to take action, then there’s a good chance you don’t know “WHO” you’re selling to yet. Before we can decide on the “WHAT”, we need to define the “WHO” in your business, so I have a BONUS freebie for you! Drop your email below and I’ll send you the perfect customer blueprint.
Who is your perfect customer? When considering your audience you should lay out their demographic information, and a short description of their interests and daily activities. Consider what they need, and what their typical challenges are. Once you’ve outlined these core areas, consider what opportunities you have as a maker to fill their needs and solve their challenges. Don’t forget to give your person a name! When you make your ideal customer feel real, it will be easier to serve her with your product offering, and with your marketing efforts.
When you find the right people, they’ll be willing to pay what you’re worth for all the hard work that goes into making your products
Once you’ve filled in your worksheets and created a game plan, share what you’ll sell in the comments below!
The post What to Make to Sell Like a Pro first appeared on Kelly Barth | Mentorship for makers.