
Marc Spagnuolo's Blog
October 31, 2025
4 Clever Tools: Flexible Sanders, A Marking Gauge, Roller Guides, & Sander Lights | Tools Unleashed
Welcome to another episode of Tools Unleashed, where we take a first look at interesting and innovative tools you might not have discovered yet. These aren���t deep-dive reviews ��� just honest first impressions from the shop floor. In this episode, I explore four products that promise to make sanding, marking, guiding, and lighting a little easier.
Dura-Gold Firm & Flex Longboard Sanding BlockPrice: $29.99
Where to Purchase:
If you���re tired of making flexible sanding strips in your shop, the Dura-Gold Firm and Flex Longboard Sanding Block might become your new favorite smoothing companion. Made of medium-density polyurethane foam and plastic, this bright yellow block strikes a perfect balance between firm and flexible. It’s ideal for smoothing curves of nearly any radius.
Its hand plane-style design (complete with tote and knob) feels natural in the hand, and it uses hook-and-loop sandpaper, meaning you can swap grits in seconds without messy adhesive. For anyone who���s ever fought with spray glue and worn-out sanding strips, this is a serious upgrade.
And if you want to make your own flexible sanding strip instead, here’s a video for you.
Marc���s take: ���I���ll never mess around with homemade flexible sanding strips again ��� longboards are where it���s at.���
JessEm Wood Saber Marking GaugePrice: $122.99
Where to Purchase: JessEm Tools
As a self-proclaimed marking gauge collector, I was immediately intrigued by the Wood Saber Marking Gauge, a stainless steel and aluminum beauty that weighs just over a pound. It���s built like a tank but feels incredibly comfortable in the hand, especially for those of us with larger hands.
Inside, a spring-loaded ball bearing allows half-inch increments, while the spindle provides micro-adjustments at 1/256th-inch per line. It���s overkill ��� but in the best possible way. The micro-adjustable precision means you can set an exact measurements with confidence.
Marc says, ���This level of precision might be unnecessary for most hand tool users, but it���s just so fun to use. If you���re in the ���take my money��� crowd, you already know this one���s for you.���
Sponsor Break: Woodcraft���s All-in-One Sharpening SystemWood River Honing GuideWood River 3 Pc Diamond Stone SetKeeping your tools sharp is as important as buying them, and Woodcraft makes that easy with their All-in-One Sharpening Solution. The set includes three diamond stones that can be used wet or dry, and each stone is removable for versatility.
Paired with the WoodRiver honing guide, it delivers smooth, controlled bevels in no time. Marc demonstrates the setup on a plane iron, achieving an impressively clean cut in walnut even after just 1,000 grit.
You can find this sharpening kit and plenty more tools to keep your edges crisp at your local Woodcraft store or online at woodcraft.com.
VAD Concepts Roller GuidePrice: $75 (single), $170 (dual set with spacer)
Where to Purchase: VAD Concepts
Designed and made by Matthew Valentine of Michigan, the VAD Concepts Roller Guide is a precision 3D-printed accessory that fits any standard miter slot. It works much like a featherboard, applying spring-loaded pressure to keep your workpiece snug against the fence.
Each roller has about 3/8″ of travel, allowing it to accommodate slightly uneven stock. The tool���s modular design means you can stack rollers for taller workpieces, and they���re even available in a range of colors.
Marc notes the similarity to the Harvey Compass RG-2, a previously reviewed tool, but applauds the VAD version for supporting small independent makers. It���s a versatile, clever solution for safer, smoother cuts.
Dutton Tools Sander LightPrice: $49
Where to Purchase: Dutton Tools
The Sander Light from Dutton Tools, crafted by Josh Hayes in Florida, brings a simple but brilliant idea to life: LED lighting for your sander. Designed for popular sander models, it snaps on easily and projects bright, even light directly on your work surface.
By casting shadows across the grain, it exposes missed sanding marks and surface flaws ��� especially useful before finishing. Marc found it most effective in dim lighting, mimicking the ���raking light��� technique used to reveal imperfections.
It comes with a 16-foot power cable (which can be zip-tied alongside your sander cord or hose) and can be detached when not in use. Dutton also makes light kits for the Festool Domino and Lamello, helping improve visibility on precision joinery tools as well.
Marc���s verdict: ���If your eyesight isn���t what it used to be, or you just want perfect surface prep, this is a fantastic upgrade.���
The post 4 Clever Tools: Flexible Sanders, A Marking Gauge, Roller Guides, & Sander Lights | Tools Unleashed appeared first on The Wood Whisperer.


October 17, 2025
Receptacle Picks, Wiring Tips and Much More | Ask TWW

Looking to grab that Bent Lamination course with Philip Morley? Sign Up Today!��
Should I hear wood touching the back of my table saw blade?Anwer: Ideally, no. In a perfect setup the front of the blade does the cutting and the work exits cleanly past the rear teeth. If you hear scraping or see burning, check for blade flatness, runout, or fence parallelism.
Quick tune up,
1, Align the fence parallel to the blade using a dial indicator or a scrap dowel against the same tooth at the front and back.
2, Make a test cut and listen, look for burning, and feel for contact.
3, If needed, add a tiny amount of toe-out by setting the fence one to three thousandths wider at the back, which will reduce contact with the rear teeth.
4, Avoid the calibration rabbit hole, test cuts tell the truth.
Answer: Use SketchUp���s free web version. Draw the room footprint, then pull in tool models from 3D Warehouse. If a tool is not available, make a box with the correct footprint and height. Turn tools into components so you can slide them around and try different layouts. Keeping a human scale figure in the model helps you visualize clearances and workflow.
Router table recommendations for a serious upgrade?Answer: Top tier tables from the usual suspects are all quite good, pick by features that matter to you. Look closely at dust collection, micro-adjustment options, fence design, and total footprint. I have used several premium setups. Micro-adjust is great, but watch for fences that get bulky or mechanisms that limit full depth travel. I am currently moving back to a refined JessEm table to test their latest height wheel, dust box, micro-adjust, and a 3 1/4 HP motor.
Best way to make thin strips around one sixteenth of an inch?Answer: Use the table saw with a stop, not a planer. Most planers will not go that thin safely, even with a sled. On the saw, set a stop block on the far side of the blade to the exact thickness you want, reference the workpiece to the stop, then move the fence as needed for each cut. You will need to reset between cuts, so expect minor variation, but surfaces will come off the saw cleaner and the process is safer for thin stock. The stop I used in the video is the Magswitch Universal Featherboard Pro.
Bonus Content
Planing Thin Strips SafelyCutting Thin Strips at the Table SawHow do you choose plugs and receptacles for a wood shop?Answer: Keep things consistent and think in circuits, not individual tools. I focus on the receptacle standard first, then make sure plugs match. If the prong configuration is the same, the tool will work in that receptacle.
120 volt circuits
I use NEMA 5-20R receptacles. Any 120 volt tool with a 15 amp or 20 amp plug will fit.
If your shop has 15 amp circuits, use NEMA 5-15R.
Do not cut a 20 amp plug and replace it with a 15 amp plug, that is unsafe and will trip breakers or worse.
Wiring for 120 volt
High draw tools belong on 20 amp circuits, 12 gauge wire, and 20 amp breakers.
My shop uses 12 gauge across all 120 volt lines with no 15 amp circuits.
240 volt circuits
NEMA 6-20R for 20 amp tools. If a tool ships without a plug, I install an industrial 6-20, durable and easy to wire.
NEMA L6-30R for 30 amp ceiling drops, the twist-lock keeps the connection secure overhead.
General Safety Rule: match the whole chain!
Plug, receptacle, wire gauge, and breaker must all be rated for the same amperage. A tool that peaks at 16 amps should be on a 20 amp plug and receptacle, 12 gauge wire, and a 20 amp breaker. Any weak link invites heat and fire risk.
Friendly disclaimer, I am not an electrician. Follow local code and consult a licensed pro when in doubt.
What glue roller do you use?Answer: Search for a brayer. I use a standard 4-inch brayer with a soft rubber roller and a 4-inch pop-in brayer whose roller removes for easy cleaning. The pop-in loosens a bit with age but mine is about fifteen years old and still works fine. Use them with any glue, just clean them promptly.
Thanks for watching!If you want to submit questions for a future Ask TWW, join our YouTube Members area or support us on Patreon. I also post short behind-the-scenes clips in a series called Grain of Truth, quick tips, small victories, and a little bit of shop philosophy. Your support means a lot. See you next time.
The post Receptacle Picks, Wiring Tips and Much More | Ask TWW appeared first on The Wood Whisperer.
September 12, 2025
How 15 Students Helped Me Build a Better Barstool
Want to learn how to make one of these yourself? Check out our bar stool woodworking course!��
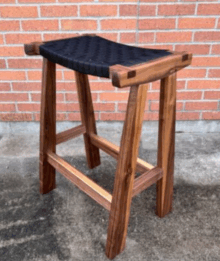
Every woodworking project has a story, and this one begins with a bar stool designed for our own kitchen remodel. What started as a personal build soon turned into something much bigger ��� a design refined through teaching 16 students and building 21 stools in our Firehouse shop.
As we worked through the project together, the design evolved. Small adjustments, like reinforcing the seat joint with two Dominoes instead of one, made the stool safer, stronger, and easier for students to build. These refinements turned the project into a perfect teaching opportunity and laid the foundation for our bar stool woodworking course.
Now, you can follow along with the complete build from start to finish in our professionally filmed online class. The bar stool woodworking course includes detailed video lessons, downloadable plans, and step-by-step guidance so you can build a beautiful, durable stool for your own home. Whether you���re a hobbyist looking to refine your joinery skills or a seasoned woodworker searching for a rewarding project, this course gives you everything you need to succeed.
 Join the course today and build your own bar stool with confidence.
The post How 15 Students Helped Me Build a Better Barstool appeared first on The Wood Whisperer.
August 29, 2025
I Turned an Old Playground Into a Raised Garden Bed
Don’t miss the pre-order pricing on my latest course, the Counter-Height Bar Stool. Pre-Order Now!��
Sometimes the best woodworking projects don���t start with a fresh pile of lumber ��� they start with something old and worn out that���s just begging for a second life. In our case, that ���something��� was a weathered backyard playground that came with our house. It was rickety, faded, and more of an eyesore than a safe play structure. Instead of tearing it down and hauling it off to the dump, I saw an opportunity: what if I could turn this neglected playset into something useful?
That���s how the idea for a raised garden bed from old playground materials was born. By carefully dismantling the playset and sorting through the boards, I was able to salvage solid pieces of lumber. Of course, I had to make sure the wood wasn���t pressure-treated (which can be unsafe for growing food). After some research and testing, I confirmed the boards were untreated and safe to use.
Once I had my materials, it was just a matter of cutting them down to size, building the frame, and securing everything together. The end result? A sturdy, attractive raised garden bed from old playground wood that now produces fresh vegetables ��� and adds beauty to the yard where an eyesore once stood.
This project was not only about woodworking, but also about sustainability. Upcycling existing materials keeps them out of landfills and gives them a new purpose. It���s proof that with a little creativity and effort, you can transform something useless into something valuable.
Products UsedGlue RollerTitebond 3Titebond Instant BondTotal Boat High Performance EpoxyHigh Density FillerDark Mission Brown TranstintGarden SealJessEm Dowel JigMerle ClampVideos ReferencesOutdoor Finishes Real World ResultsRubio DurogritSpecial thanks to Kevin over at Epic Gardening for his helpful advice!
The post I Turned an Old Playground Into a Raised Garden Bed appeared first on The Wood Whisperer.
August 13, 2025
Marc���s Counter Height Bar Stool ��� Now an Online Course!
Marc���s popular Counter Height Bar Stool workshop is no longer just for those who could attend in person at the beginning of this year ��� it���s now available as a self-paced online class you can take from anywhere!

This project blends style, comfort, and durability into a single build. Marc will guide you through every step, from selecting materials to putting the final finish on your stool. Whether you���re a beginner looking to grow your skills or an experienced woodworker seeking a new challenge, this course will leave you with a beautiful, functional piece of furniture you can be proud of.
What You���ll LearnHow to design a stool that���s both comfortable and attractive
Joinery techniques that keep furniture strong for years
How to shape and sculpt for an ergonomic seat and back
Tips for working with angled joinery so everything fits perfectly
Preparing the surface and applying a finish that lasts
By the end, you���ll have the know-how to build a single stool or a matching set for your home.
When It���s AvailableThe online course will go live September 5, 2025, giving you full access to detailed video lessons and downloadable plans. You can start any time and move at your own pace.
Don���t Want to Build One Yourself?Marc has made a small batch of up to three finished Counter Height Bar Stools available for purchase.
You can see them here: Counter Height Bar Stool ��� TWW Store
Free local pickup
Shipping available ��� contact nicole@thewoodwhisperer.com for a quote for crate delivery.
Whether you want to build it yourself or buy one handmade by Marc, this is a great chance to bring a timeless piece into your home.
Reserve Your Spot in the Online Course and save big!
The post Marc���s Counter Height Bar Stool ��� Now an Online Course! appeared first on The Wood Whisperer.
July 25, 2025
You Need This! (Probably) | Mobile Clamp Wall
Get the plan for the Mobile Clamp Wall here!
Sign up for the Counter Height Bar Stool Course!
Let���s face it���there���s no such thing as too many clamps. But finding a place to put them all? That���s the real challenge. In this project, I build a mobile clamp wall that holds 54 parallel clamps, 14 F-style clamps, and 16 pipe/bar clamps���with room to grow. It also features pegboard sides for bonus storage and rolls smoothly around the shop on heavy-duty casters.
The build was done in a weekend using home center materials, with inspiration from Becca from Southern Pine Design. I walk through every step, from cutting outriggers and gluing angled supports to planning clamp layouts and adding shelf brackets strong enough to hold a small car, or at least a ridiculous number of clamps.
This mobile clamp wall is part practical shop upgrade, part excuse to use the phrase ���show you my rack��� without getting banned from YouTube. If your clamp collection is outgrowing your wall space, or you just want a fun and functional weekend project, this rolling clamp wall might be just what your shop needs.
If you’re looking for alternative options, check out my previous wall-hanging parallel clamp storage solution.
Important LinksShelf BracketsWood River F-Style Clamp RackWood River Pipe Clamp RackThe post You Need This! (Probably) | Mobile Clamp Wall appeared first on The Wood Whisperer.
July 11, 2025
My First Epoxy Pour – Mistakes Were Made!
In this light-hearted woodworking adventure, I take on a unique commission from a local neighbor who needed help finishing an epoxy inlay on a massive mantle. Although epoxy work isn’t exactly my go-to specialty, I agreed to tackle the project, mainly for the challenge. And let���s face it, there would be a lot of potential for hilarity. This is, admittedly, my first epoxy pour. The most I’ve done with epoxy in the past was using it to fill knots, using it as a sealer, and making small resin art frames.
The mantle features a hand-carved “river” design inspired by the Legend of Zelda, specifically of the Rist Peninsula. The client created the initial shape using a Dremel. Before pouring the epoxy, I decided to refine the carving with power carving tools to smooth the edges and even out the depth. After some careful prep and color mixing, I poured the shimmering blue resin, layer by layer, to bring the carved river to life. That is, only after a disastrous start.
Despite some nerves and a few minor mishaps, the end result of my first epoxy pour is a dazzling epoxy-filled Zelda-themed mantle���and a reminder that sometimes saying ���yes��� to a project outside your wheelhouse can be surprisingly rewarding. And while I made mistakes, I found great value in learning hard lessons just by getting started!
Products Shown in the Video (affiliate links):Shabebe Deep Pour EpoxyArm R Seal SatinFuji Spray HVLP TurbineMilwaukee Die GrinderCarbide Burr (Round)Carbide Burr (Oval)BackSide SandpaperMakrs Stain Pads Use Code TWW for 15% OFF!
The post My First Epoxy Pour – Mistakes Were Made! appeared first on The Wood Whisperer.
July 5, 2025
You still have time! Use FIREWORKS25 and get 40% selected Guild Courses!
Hey friends!
It���s time to celebrate our independence��� from full-priced woodworking courses! We���re lighting up your inbox with a deal that���s hotter than a sparkler in July:
��

 Get 40% OFF ONE COURSE with code at checkout: FIREWORKS25��
 �����TWWGuild.com���
This explosive offer is good through July 6th and applies to nearly all Guild courses,��with just a few exceptions. (These were released within the last year and are still fresh out of��the woodworking oven.)
 �����Hand-Cut Dovetails: A Beginner���s Journey�������� an amazing course with Rob Cosman that half the proceeds go to�����The Purple Heart Project���
�����Under Table Saw Storage Cabinet�������� Marc takes you on a detailed journey to build this amazing addition to your tablesaw.
��Frank Strazza���s�����Fundamentals of Hand Tool Woodworking�����and�����Intro to Marquetry���
But wait, there���s more!��Our newest project, the�����Counter Height Bar Stool���, is now available for pre-order (which means it���s already on sale!).��While it���s not part of this sale,�����Guild+ subscribers�����save an additional 5% on ALL courses, all the time, so if you���re in that club, you still score.
 Need help deciding what to grab? Here are some of the most popular courses in Guild history:
��������The Morley Lounge Chair�������� An elegant, modern chair build packed with joinery goodness and pro-level techniques.
��������The Split-Top Roubo Workbench�������� Want a bench that lasts a lifetime? This is our flagship project, and thousands of woodworkers have tackled it with pride.
����������The Tool Cabinet with Matt Cremona�������� A beautiful and practical project with curves, drawers, and a whole lotta character.
��������The Shaker Table�������� A classic gateway project to fine woodworking with mortise and tenon joinery and tapered legs. Don���t know where to start, this is a perfect course to try.
��������The Gaming Dining Table�������� Whether you���re hosting a holiday dinner or a heated board game night, this table transforms with style and functionality. Bonus: check out the�����free video for the dice towe���r on the main site!
��������Intro to Bowl Turning with Ashley Harwood�������� Want to dip your toes into woodturning? Ashley���s clear, approachable style makes this the perfect starting point for spinning up beautiful bowls on the lathe.
Check out almost 80 detailed courses here:�����TWWGuild.com���
This deal��will��blow up in a few days (July 7th), so grab a course, light a sparkler, and build something awesome this summer (or just watch something awesome, nothing wrong with that either 
Stay safe, build well, and don���t blow off a finger!
Marc
The post You still have time! Use FIREWORKS25 and get 40% selected Guild Courses! appeared first on The Wood Whisperer.
July 3, 2025
Wait? The Woodworking Morning Show?
Ya, it’s a whole thing, you’ll have to be there to hear the story. The show will feature questions from Patreon and YouTube and anything on your mind.
We are still on a new channel, so help us out so you don’t miss out on any live shows and subscribe! https://www.youtube.com/@thespagshow
The post Wait? The Woodworking Morning Show? appeared first on The Wood Whisperer.
June 27, 2025
The Easiest Way to Clean Saw Blades & Router Bits
Woodcraft and Priority Bicycles
Purchase the Ultrasonic Cleaner shown in this video for only $35! (as of June 2025) – This is an Amazon Affiliate link
Let���s be honest���cleaning saw blades and router bits is one of those shop chores nobody looks forward to. You know it needs to be done, but soaking in degreaser and scrubbing each individual tooth feels more like punishment than maintenance. The mess, the fumes, the procrastination���it all adds up until your ���dull��� blade turns out to be just dirty and underperforming. In fact, here’s an old video from 2012 showing how I used to do it: How to Clean Blades & Bits
Here���s the deal: if you want your tooling to last and your cuts to stay crisp, regular cleaning is a must. But that doesn���t mean it has to be miserable.
Enter the ultrasonic cleaner!This little countertop gadget, commonly used for jewelry, bike parts, and car bits, has quietly become the easiest way to clean saw blades & router bits in my shop. It uses high-frequency sound waves to blast away pitch, resin, and gunk, all while you sit back and relax (or let’s be real, go sharpen something else or check Instagram).
Just mix a simple water-based cleaning solution like Zep Industrial or Simple Green Pro, pop your bits or blades into the bath, and let the cleaner do its thing. In 5���10 minutes, your tools come out looking shockingly fresh, with zero scrubbing and no chemical war zone left behind.
In the video, I break down:
Why gunk buildup causes more issues than you think (hint: heat + friction = damage)
Why your ���dull��� blade might just be dirty
How ultrasonic cleaning works (it���s oddly satisfying)
What solution and settings I used
The dramatic before-and-after results that���ll make you rethink your whole cleaning routine
Bottom line? If you���re tired of scraping gunk by hand, the easiest way to clean saw blades & router bits is probably already sitting in someone���s garage���or waiting in your online cart. This simple upgrade has already changed the way I care for my tools, and it might just do the same for you. And remember, after you clean your blades and bits, be sure to coat them with something to protect from rust, like Blade Coat!��
Shown in the Video Ultrasonic Cleaner ($35 on Amazon as of 6/25)
Simple Green Pro (This is a good alternative to what I used)
Larger Ultrasonic Cleaner (This is the one I’d buy if budget wasn’t a concern)
The post The Easiest Way to Clean Saw Blades & Router Bits appeared first on The Wood Whisperer.


