Dan Eldredge's Blog
August 31, 2017
COMMAND: Northern Inferno Scenario 15: Fail Safe Part 3
 World War III continues to escalate out of control. Boston and New York have been devastated by nuclear weapons. Retaliatory Strikes have been ordered by the National Military Command Center, targeting several Soviet power stations, shipyards, naval bases, and one major population center, the city of Arkhangelsk.
In Parts One and Two of this nightmare scenario a pair of B-52s went rogue and had to be shot down by US interceptors. The remainder proceed on their mission. The B-52s used dozens of AGM-69A SRAMs, 200kT nuclear missiles, to "suppress" Soviet air defenses, including SAM sites and interceptor bases. One of these strikes takes out the naval administrative city of Severomorsk, a primary target. But the majority of targets still exist and must be destroyed.
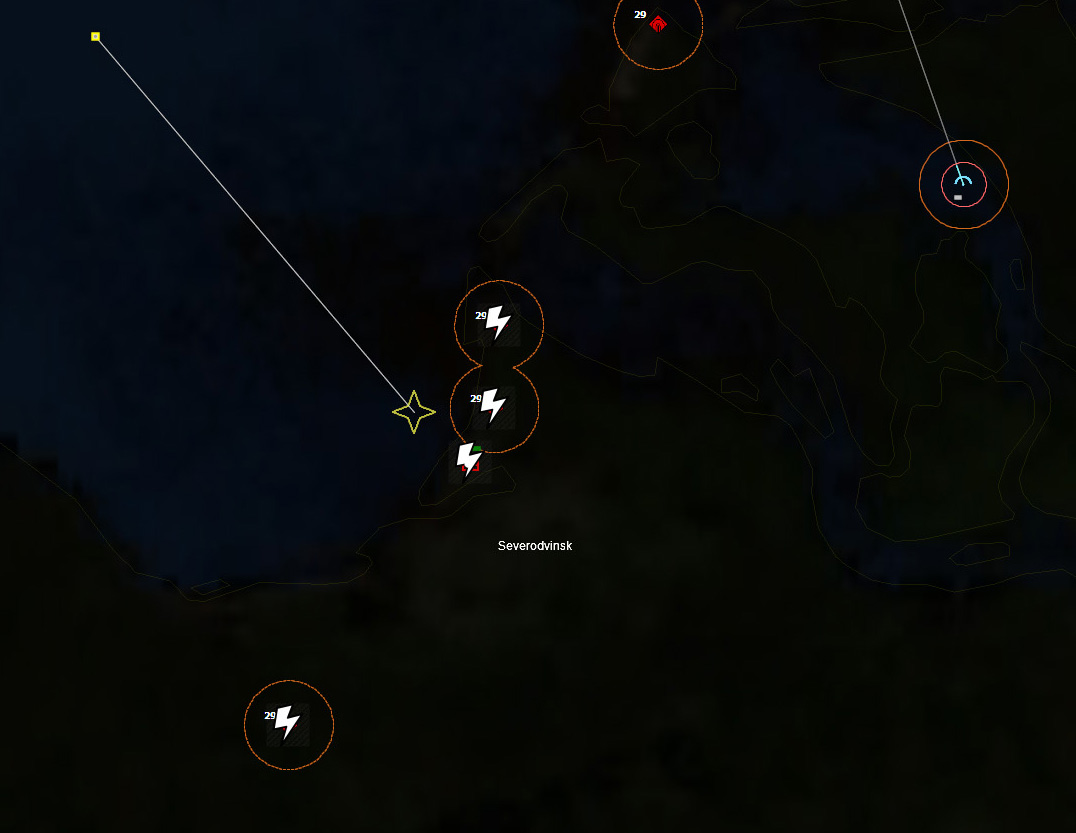
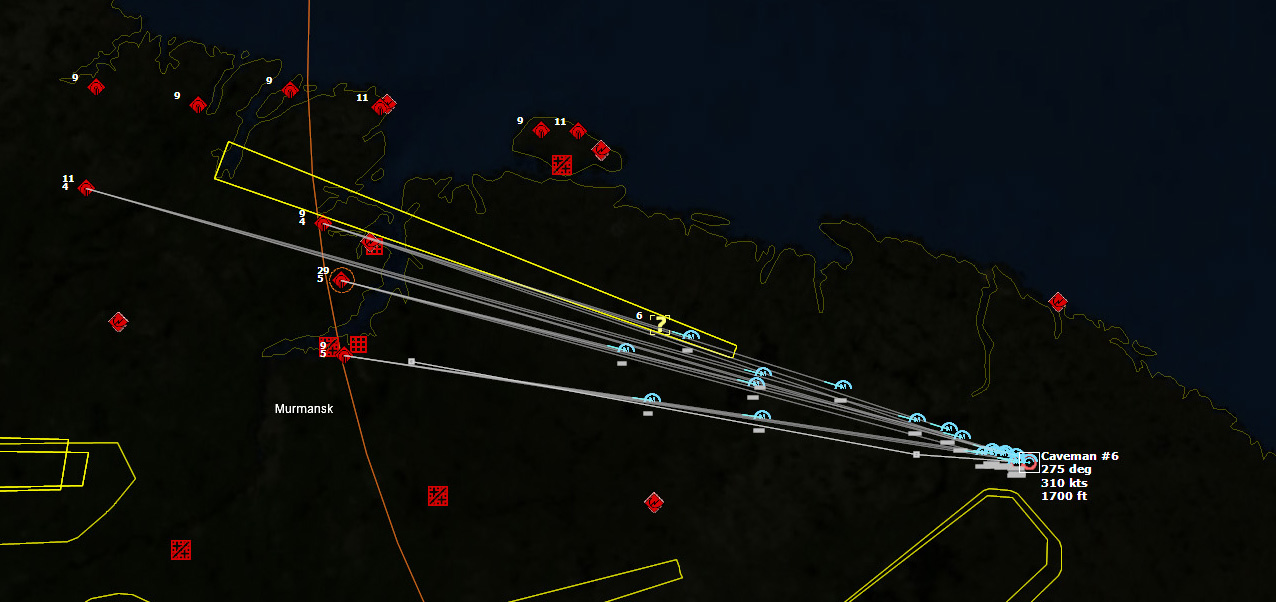
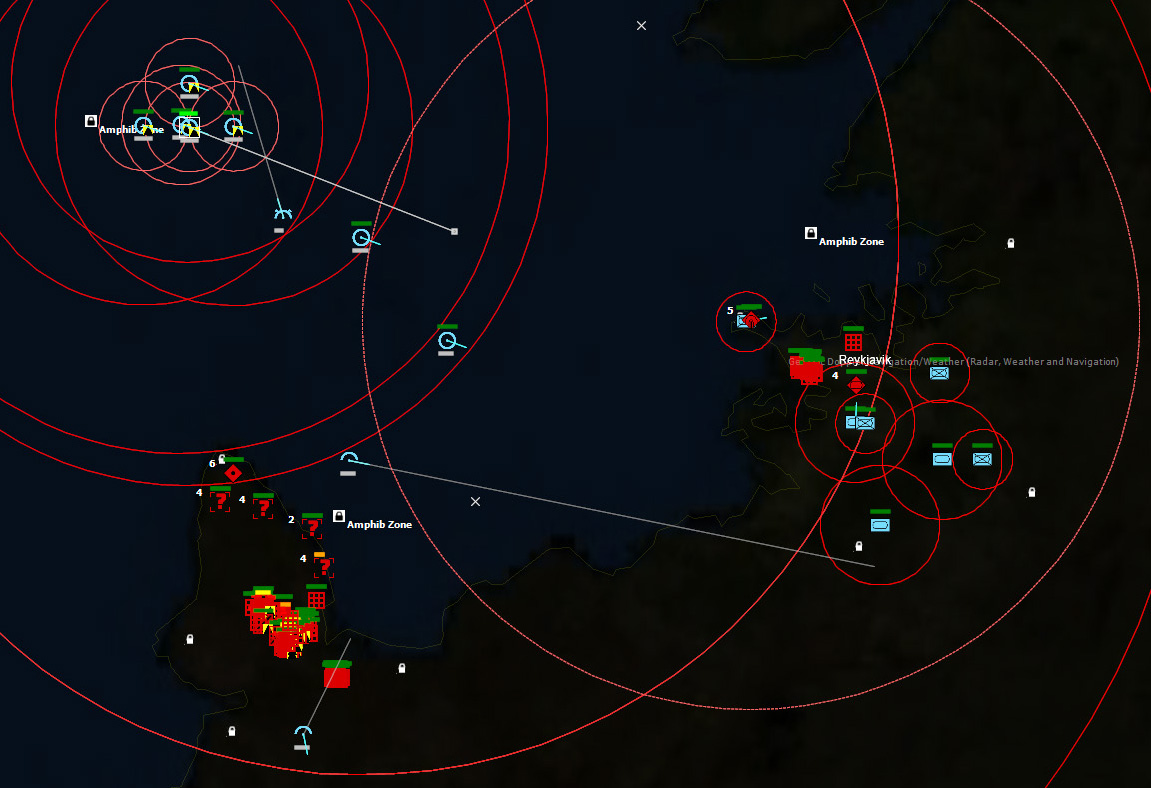
An AGM-69A SRAM takes out an SAM site near to Polyarnyi Naval Base, and the 200kT warhead is sufficient to take out the naval base. Caveman 6 is left without primary or secondary targets. I redirect the flight back out to sea to head for home, and hopefully to lure some interceptors along with it.
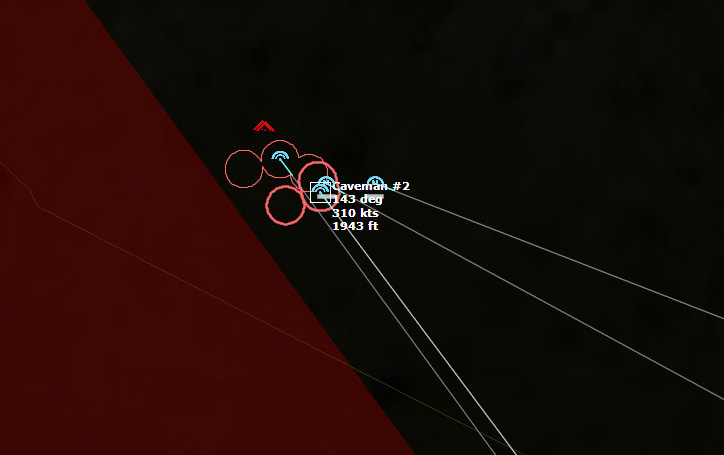
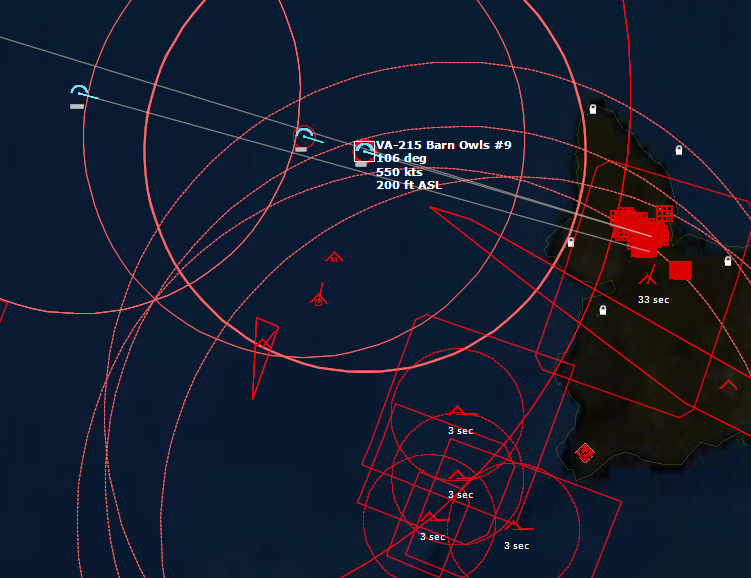
Caveman 2 reaches 5nm from its target, the Upper Tuloma Hydro-electric Power Plant. Interceptors are close behind, but are unable to fire their missiles due to limitations of their radars. Radar issues do not affect the tail gunners of the B-52s however, and they shoot down a Yak-28P Firebar and a Su-15MF Flagon D. Caveman 2 climbs to 2000ft to begin its attack run.
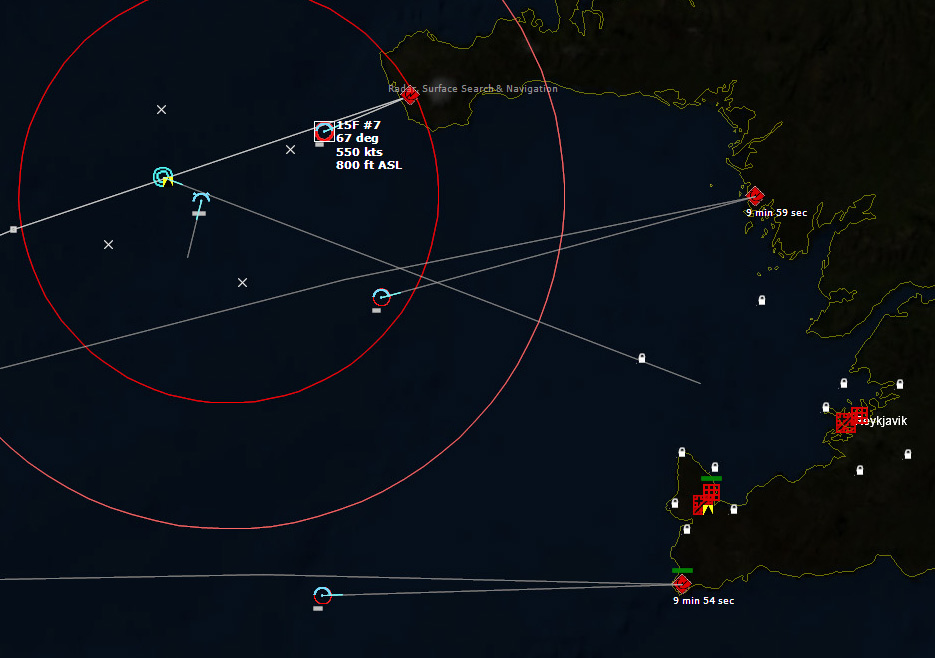
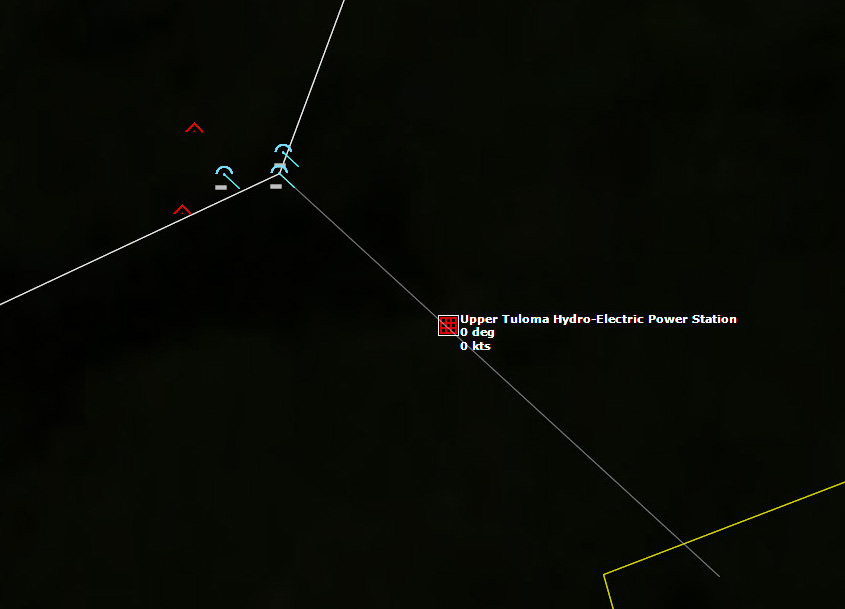 Caveman 2 approaches its targetLess than a mile from the drop point, an Su-15 Flagon gets into missile launch position and fires.
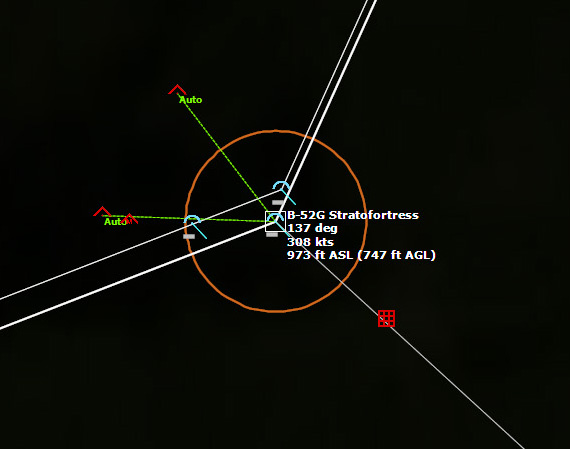 The Soviet interceptors makes a last ditch effort to prevent the drop.One of the B-52s is shot down.
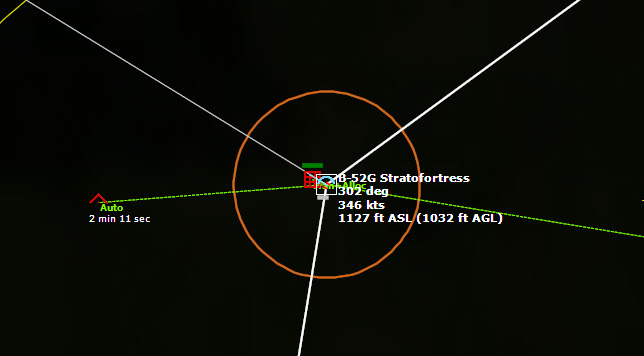
 One of the B-52s is shot down.The lead B-52 is shot down seconds later as well, leaving a single B-52. The survivor is too low to drop the bombs, so it is forced to make another pass.
Three more Yak-28P Firebars are shot down by the ever-busy B-52 tail-gunners.
034451Z Bombs away.
 Bombs away on Upper Tuloma Hydro-electric Power Plant.When the B-52 gets 8nm away from the power station, the 1.45MT nuclear bombs detonate.
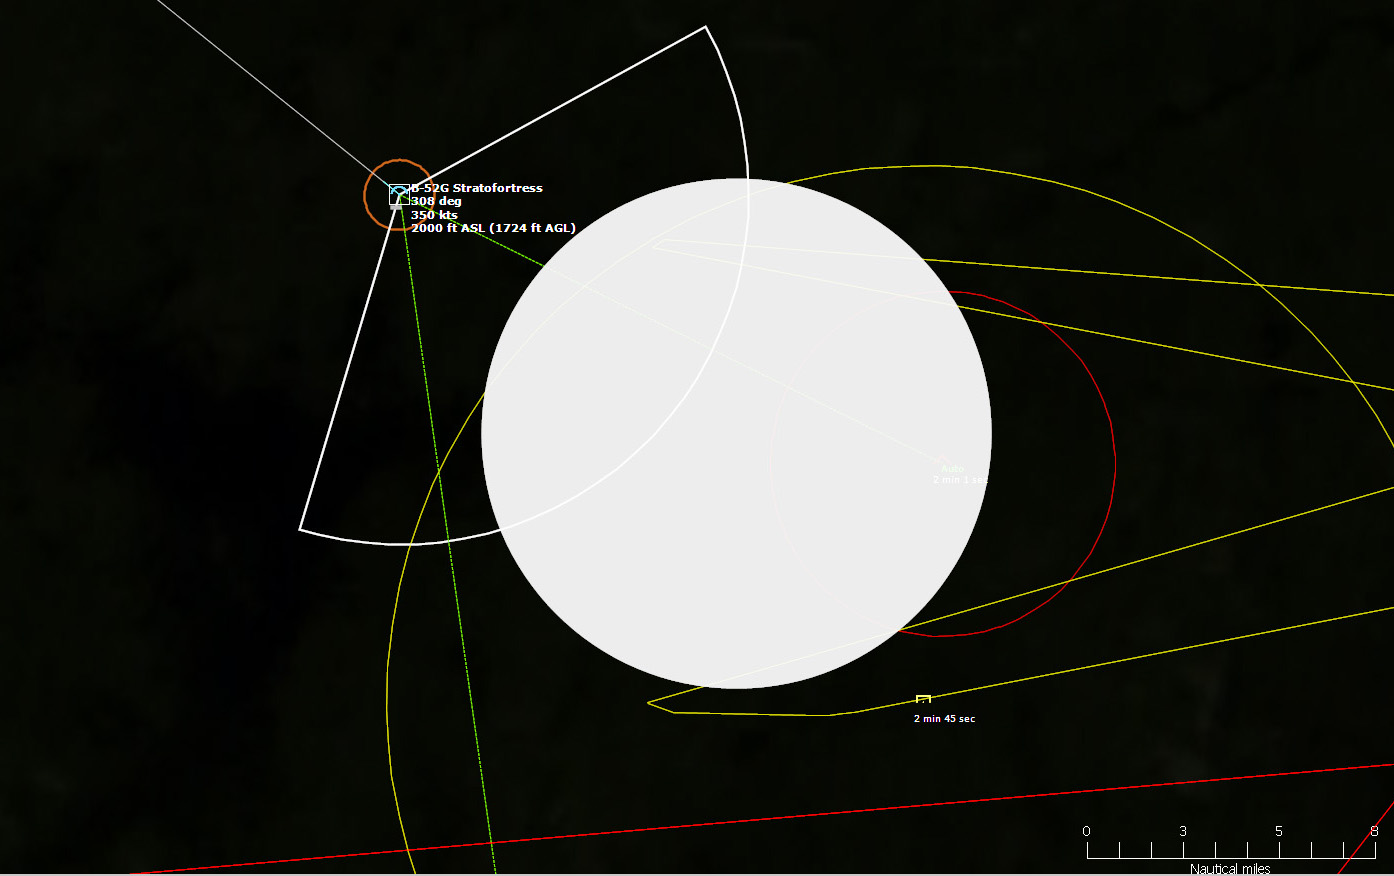 Upper Tuloma Hydro-electric Power Station is destroyed.040059Z Caveman 3 approaches to within 10nm of its target, Iova Hydro-Electric Power Station. There are no SAMs in the area, and for the moment there does not appear to be any interceptors in pursuit. Caveman 3 climbs to 2000ft in preparation for its attack run.
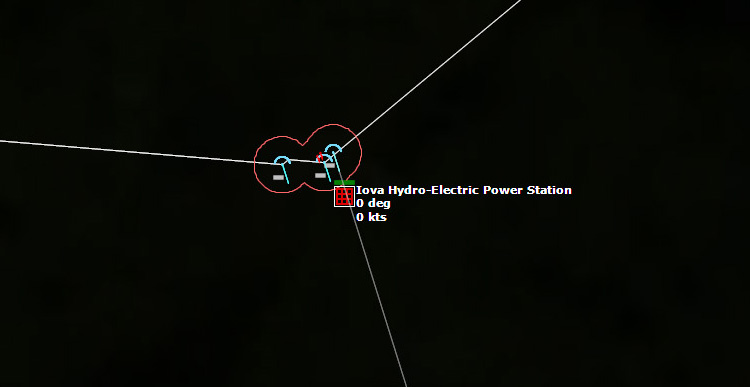 Bombs away.040228Z Bombs away.
In the meantime, Caveman 1 kills a Tu-128 Fiddler A with its tailgunners.
040351Z Iova Hydro-Electric Power Station is destroyed.
 Iova Hydro-Electric Power Station is destroyed.After passing beyond Iova Hydro-Electric Power Station, Caveman 3 launches six AGM-69A SRAMs against Poduzheme [PVO Interceptor Base], before dropping altitude and turning north to get out of there.
Unfortunately, one of the Stratofortresses is shot down by a trailing Soviet interceptor.
 Another B-52 is lost.040928Z Poduzheme is hit and destroyed.
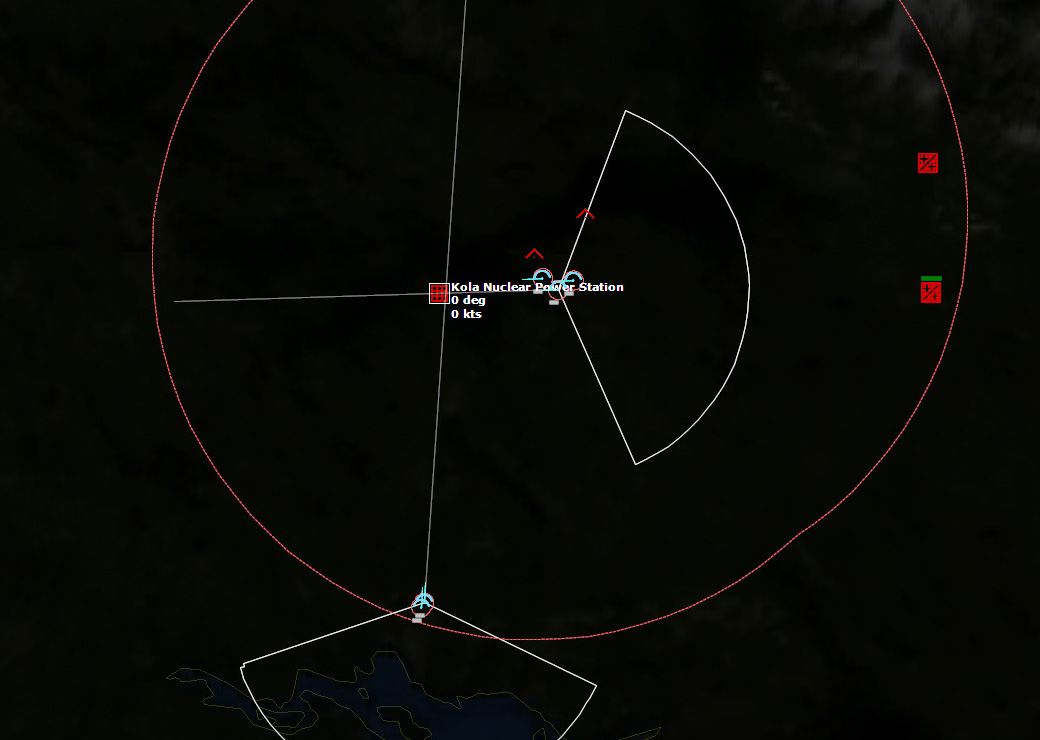
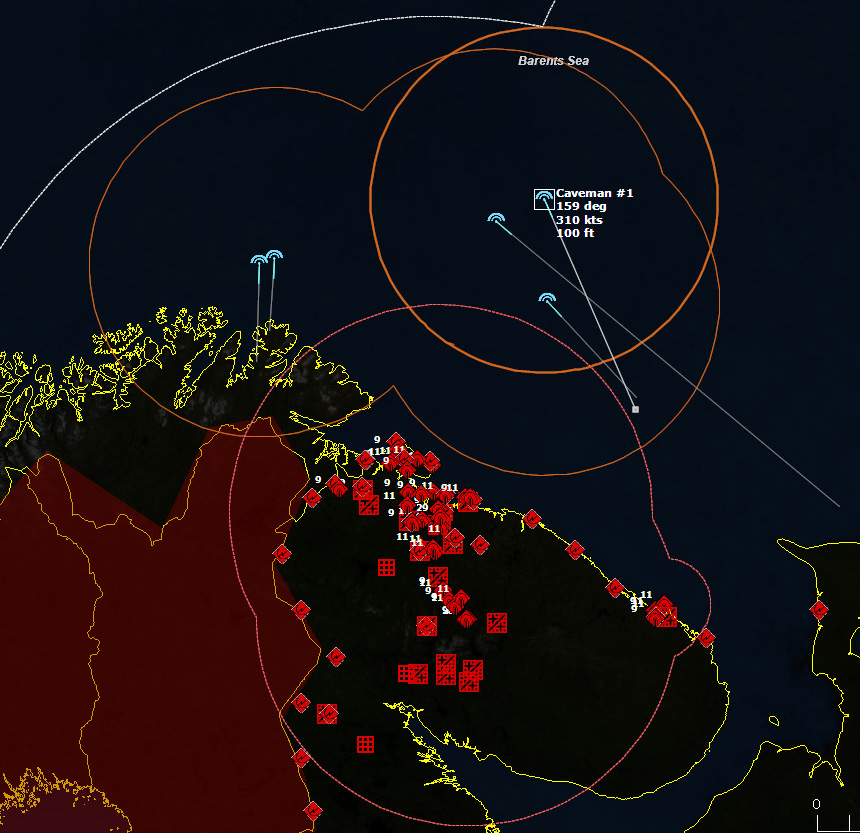
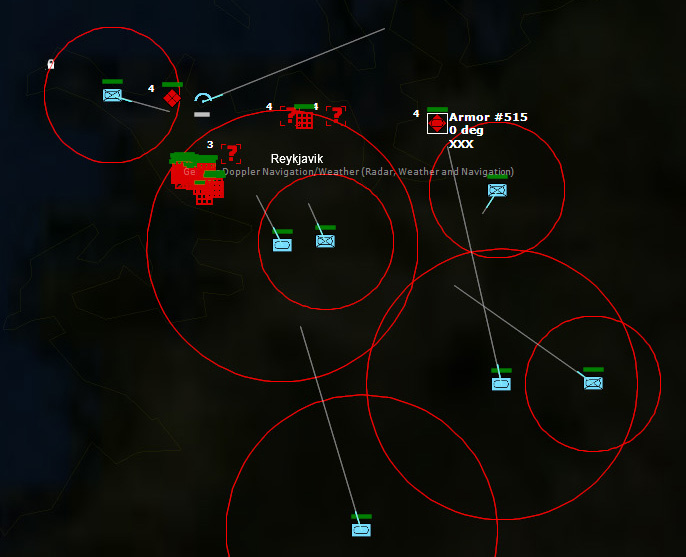
041501Z Caveman 1 is within 20nm of its target, Kola Nuclear Power Station, but it is being pursued by two Tu-128 Fiddler As. It is possible that by the time they gets into range of its bombs, they might get shot down. However, Caveman 3 is returning from its own target, and is some 26nm from Kola Nuclear Power Station. If Caveman 1 fails, Caveman 3 will pick up the slack.
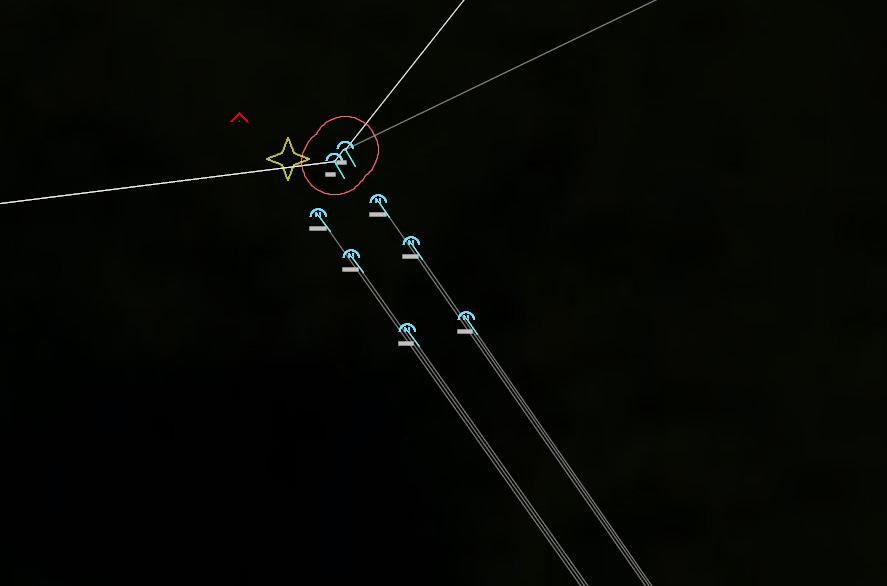
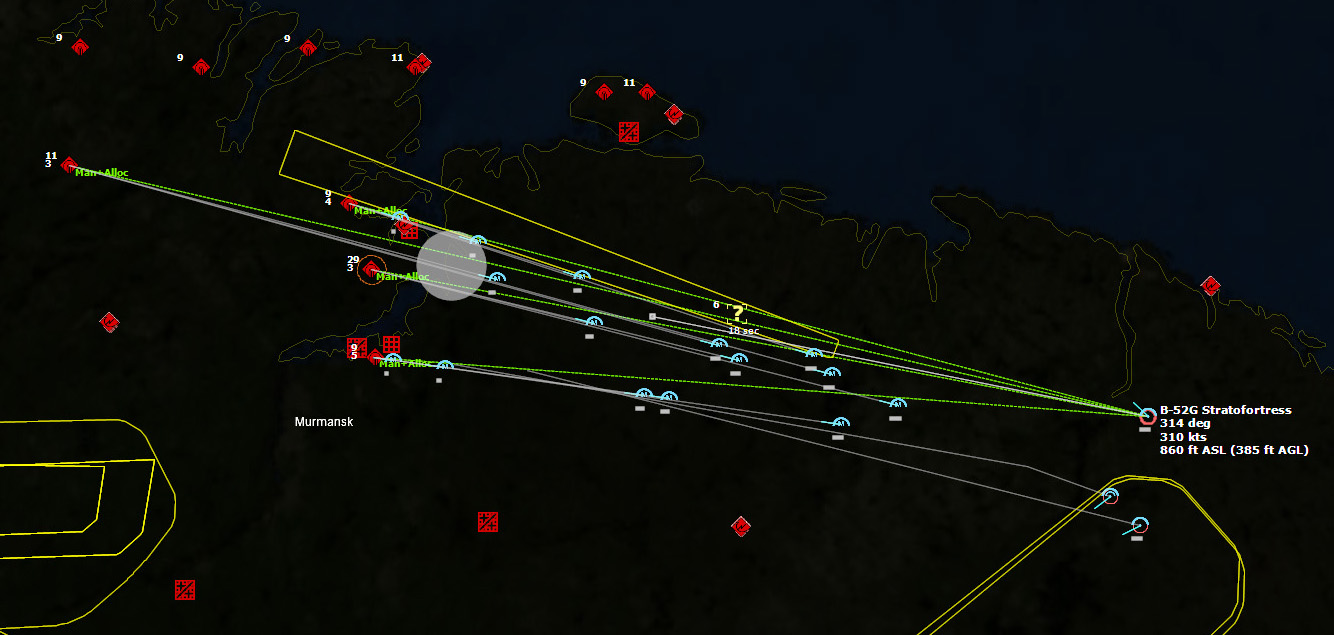
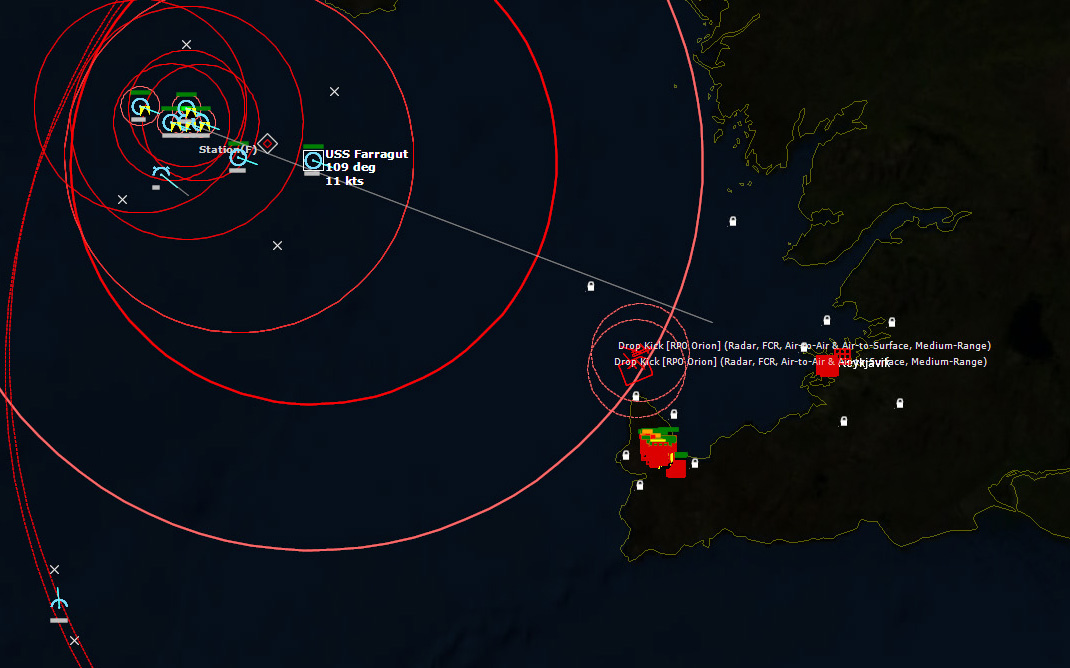
 Caveman 1 on its bombing run with Caveman 3 in support.041800Z Bombs away.
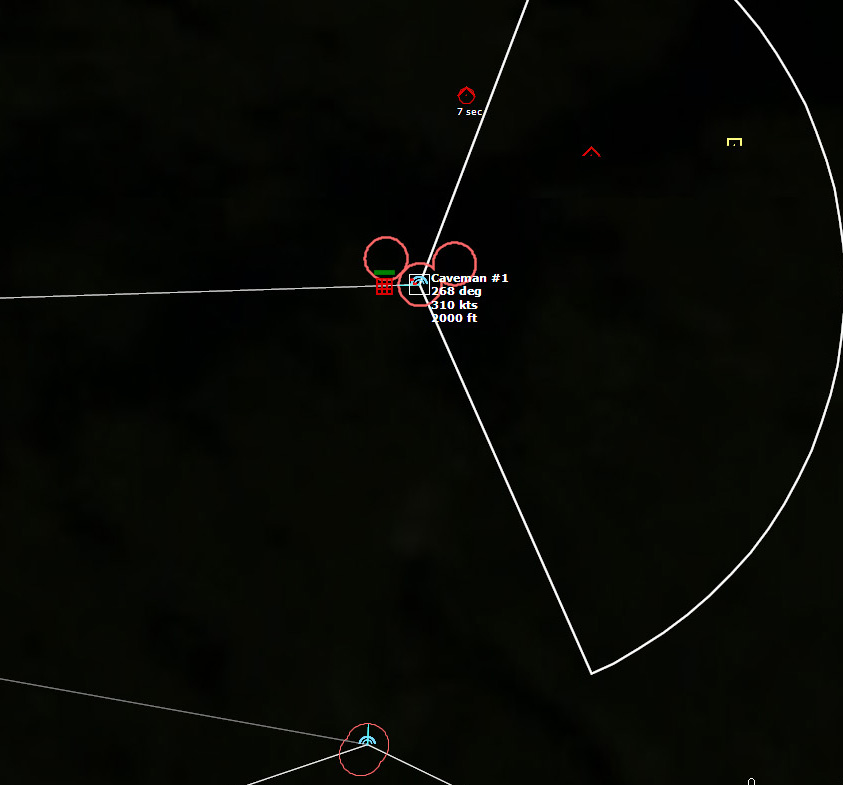 Bombs away on Kola Nuclear Power Station.Caveman 1 and 3 immediately maneuver to get out of there. Caveman 1 detects a pair of SAMs launched after it--probably nuclear SAMs, and immediately the group splits up into individual bombers and scatters.
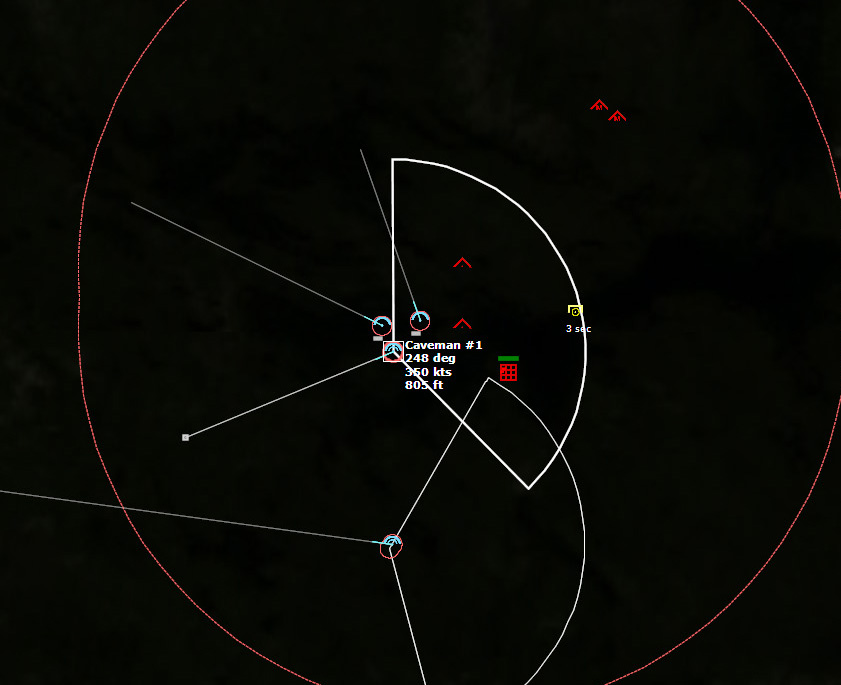 SAMs inbound!The SAMs fall short. Then the nuke goes off, and Kola Nuclear Power Station is destroyed. A pursuing Tu-128 Fiddler A is destroyed in the blast.
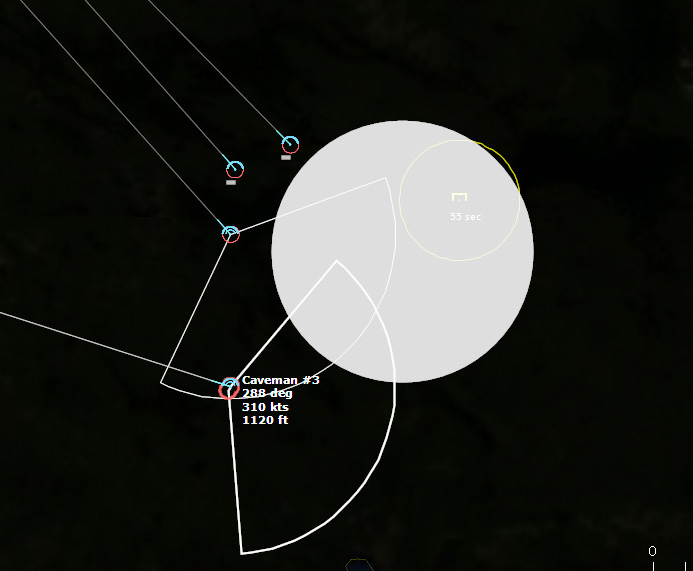 Kola Nuclear Power Station is destroyed.Caveman 1 and Caveman 3 both turn for home.
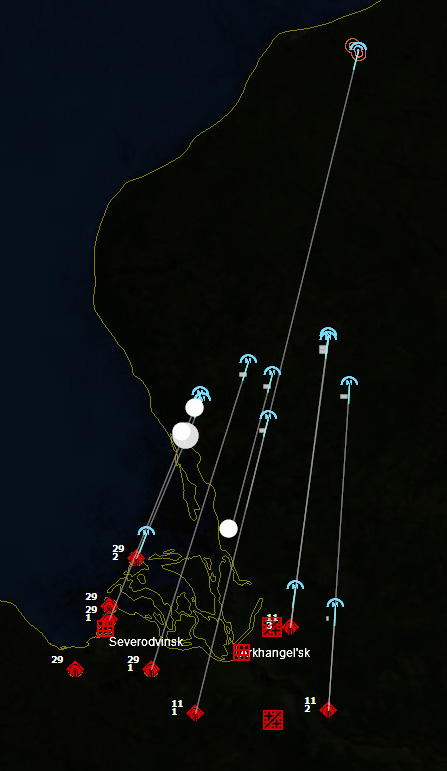
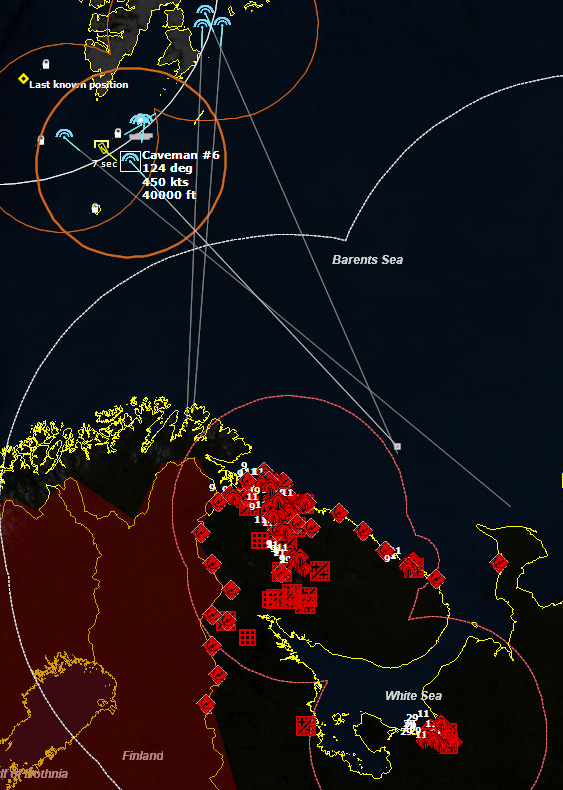
Caveman 4, meanwhile, has the most difficult mission of all, taking out Severodvinsk and Arkangelsk. They are protected by no less than 15 SA-5b Gammon battalions, each with 12 25kT nuclear SAMs, for a total of 180 nuclear SAMs. In addition to that are four SA-2f Guideline battalions, totaling 24 more SAMs. As such, Caveman 4 launches all of its 24 SRAMs at the SAM batteries in an attempt to punch through. Climbing to launch altitude is risky, but it has to be done.
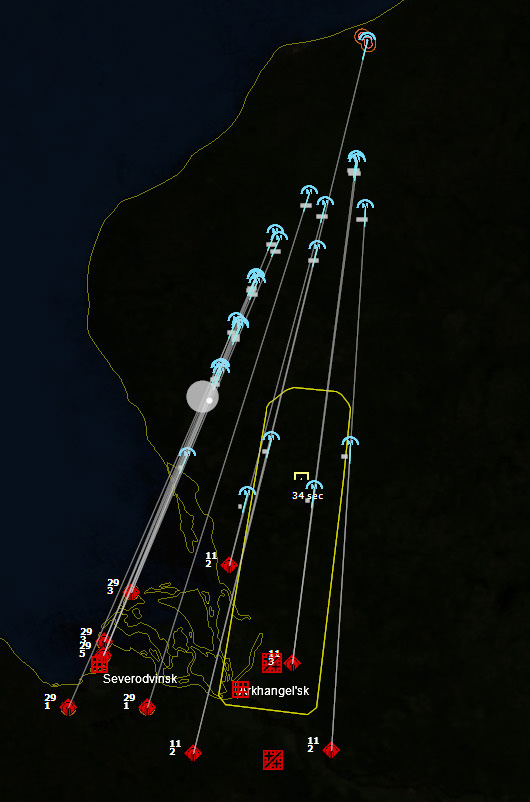 Missiles away!After they all have launched, I realize that I should have fired a few at Talagi [PVO Interceptor Base], but it is too late now. There are three SRAMs launched towards the SA-2 battalion next to it, so there's a small chance I'll get it.
Nuclear SAMs fill the sky--I cannot see them, but I can see their effects as they detonate to take out my SRAMs.
042039Z One of the SA-2f Guideline sites is hit.
 Nuclear explosions fill the dawn sky north of Arkhangelsk.The SA-2f Guideline site next to Talagi is hit.
When it's all over, two SA-2f sites are taken out, and one SA-5b site. Arkhangelsk still has plenty of defenses left. Caveman 4 splits into three individual aircraft, two headed for the primary target Severodvinsk, and one for the secondary target Arkhangelsk.
Interceptors are launched from Talagi.
Over the Kola Peninsula, Caveman 1 and 3 continue their egress, shooting down three Su-9B Fishpots, four Su-15MF Flagon Ds, and one Yak-28P Firebar.
An Su-15 Flagon then proceeds to shoot down both B-52s remaining in Caveman 3.
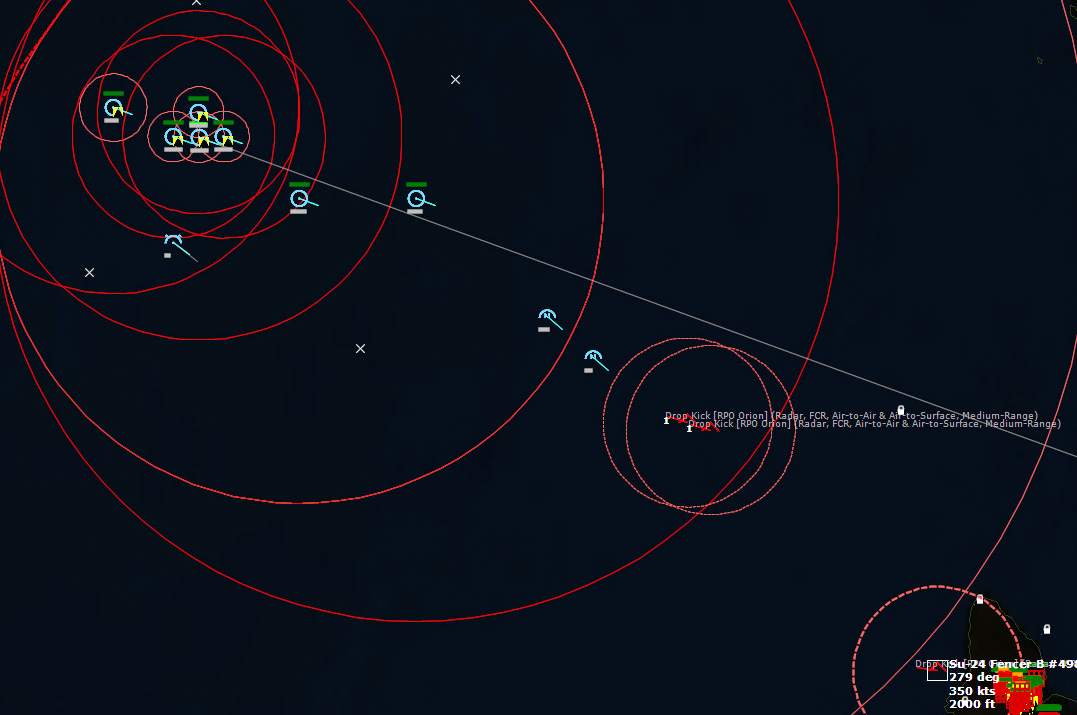
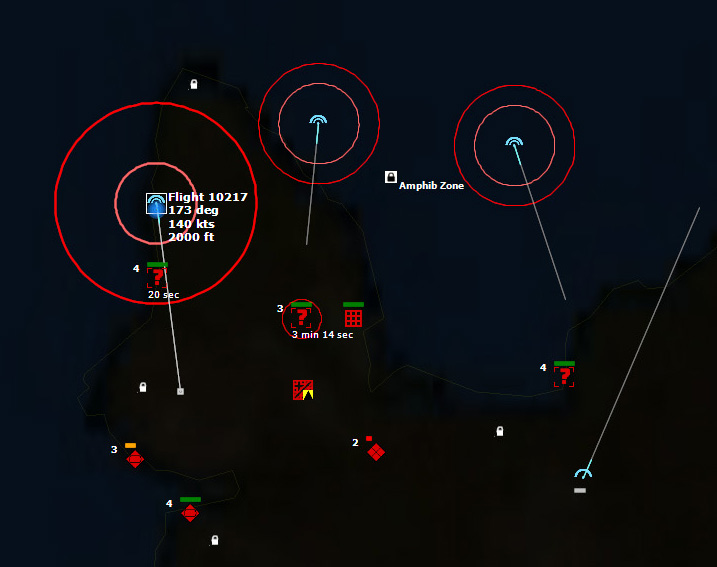
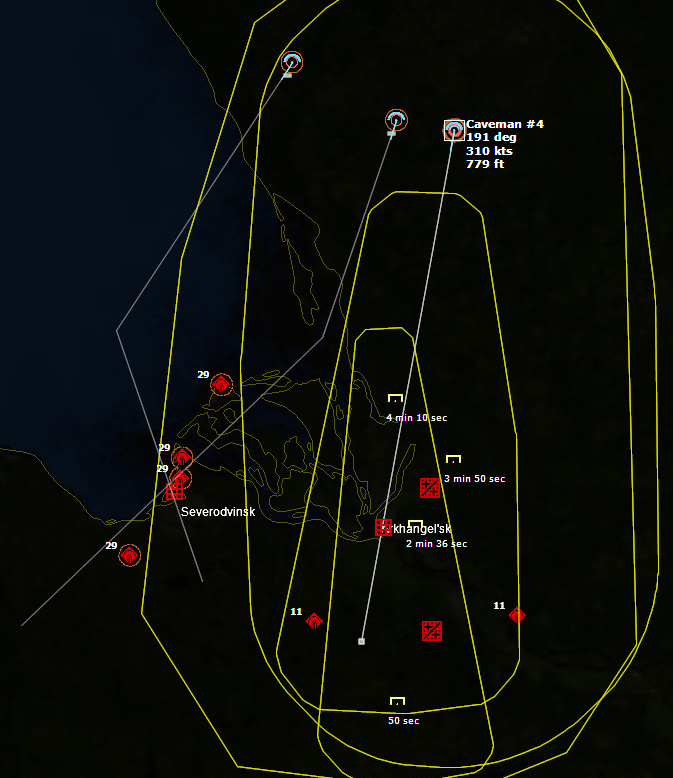 Caveman 4 closes to within 40nm of its targets.043438Z Caveman 4 approaches to within 15nm of Arkhangelsk.
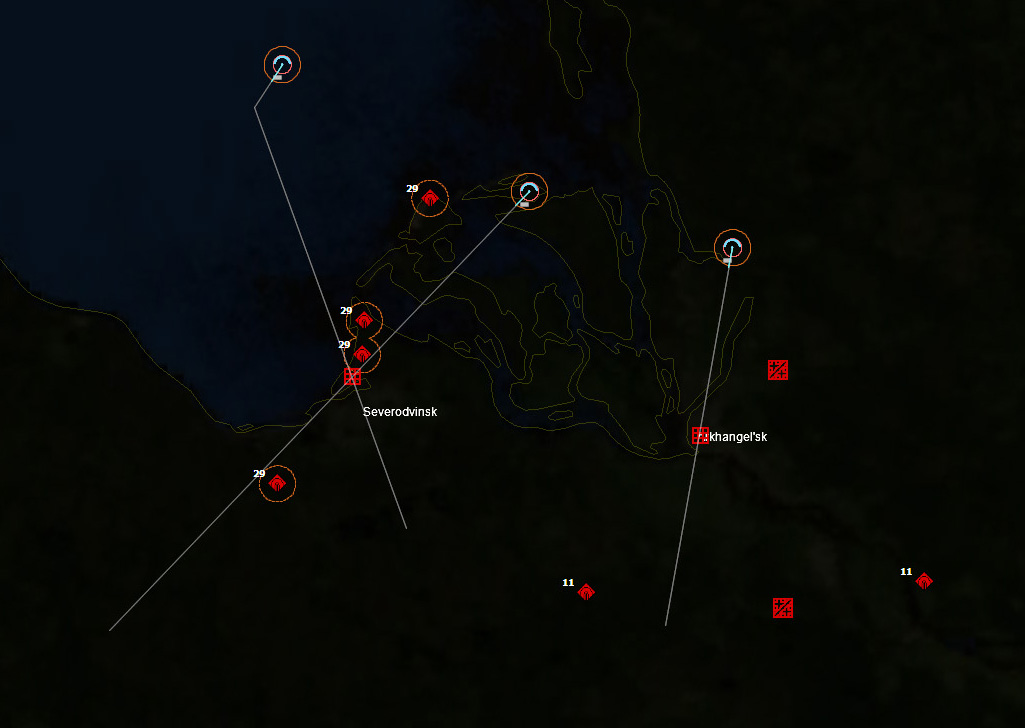 The endgame.Caveman 1 loses a Stratofortress to a missile from an Su-15 Flagon.
043719Z Bombs away over Arkhangelsk. Two 1.45MT nuclear bombs fall upon the city. The half-million citizens of Arkhangelsk, although they don't realize it, are already dead.
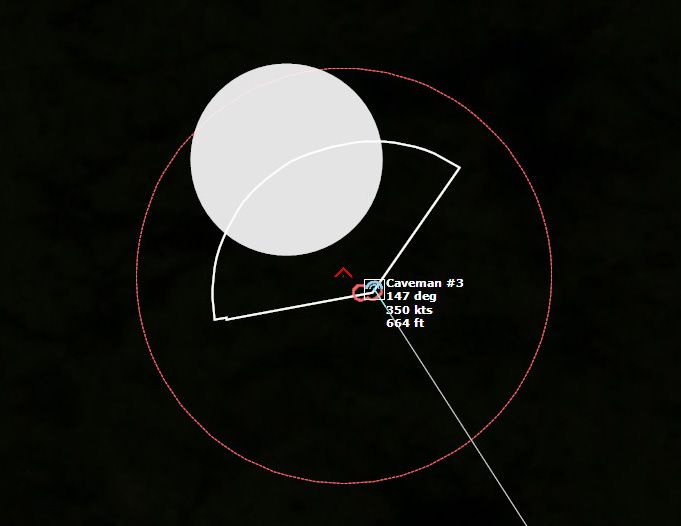
A nuclear SAM is launched at the B-52 that just dropped on Arkhangelsk, but it's already too late. The B-52 dives to the deck, fleeing the city at 350kts.
The second B-52 approaches Severodvinsk, but due to a misjudgment, fails to climb to the release altitude in time to drop the bomb. Which is why I have the backup.
 Arkhangelsk is destroyed.043851Z Arkhangelsk is destroyed.
I screw up again with the "backup" bomber going after Severodvinsk, so I have to send them in for another pass.
044254Z Bombs away over Severodvinsk.
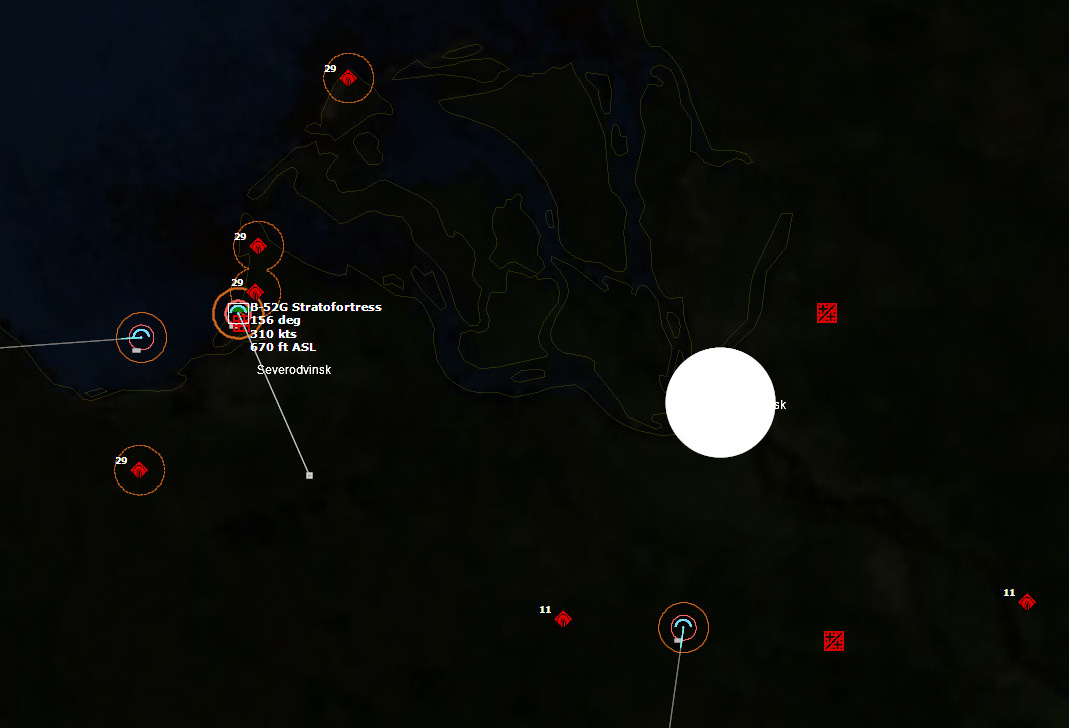
044320Z A nuclear SAM is launched at the B-52 that dropped over Severodvinsk, which dives to 100ft ASL. The SAM tracks and just as it hits, the shockwave sets off the 1.45MT bombs over Severodvinsk. They got the bomber, but didn't save the city.
 The bomb detonates over Severodvinsk.
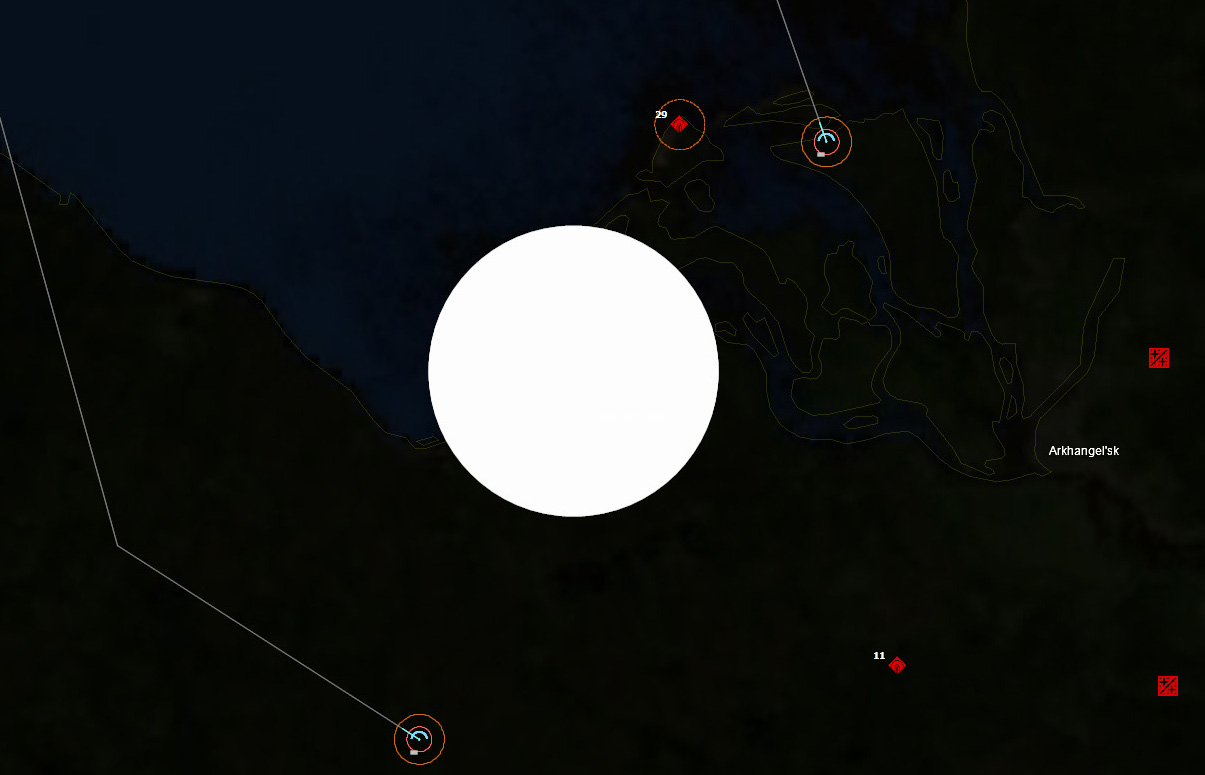 Severodvinsk is destroyed.
All surviving B-52s attempt to get home, but for Caveman 4, fuel is running low. Tu-128 Fiddlers show up on their tails as they attempt to get out.
060259Z Bingo fuel, one of the B-52s from Caveman 4 is forced to increase altitude. Tu-128 Fiddlers pounce. The B-52 makes a great effort, and evades 11 air-to-air missiles before it is finally shot down.
123515Z After multiple refuelings, the last B-52 returns home to Thule. 7 out 15 survived. The mission is over.
Conclusion
And then...
Soviet forces have now hit West Germany hard in a vicious exchange of nuclear-tipped SRBMs on both sides, and they are still pouring through the Fulda Gap and the North German Plain. West Berlin falls to the Russian Army. World War III is now fully engaged as Soviet nuclear warheads hit European cities and industrial areas. Bombers attacking London are stopped by the RAF, but the city is destroyed by a firestorm caused by Soviet MRBMs raining down on it.
President Ford orders all America's nuclear forces into action, utilizing preliminary plans laid out in the National Security Council's NSC 162/2 directive. US B-52 and FB-111 bombers are launched towards their targets in the Soviet Union. Russian Tu-95 and 3M bombers are launched simultaneously and swarm over the Canadian frontier.
Over 200 warheads are detonated in Russia; 27 reach their targets in the United States, specifically Washington D.C., New York, Chicago, Los Angeles, Seattle, Spokane, and eighteen military bases including ICBM Sites (most in the North, but including the Norfolk shipyards and bases in Virginia). In Russia, over two dozen Soviet cities are blasted, and nearly as many major military sites.
Top leaders like Yuri Andropov (Chariman of the KGB) and Mikhail Gorbachev (First Secretary to the Supreme Soviet) are killed at military bunkers in Western Russia; Soviet Premier Leonid Brezhnev survived.
Some 80% of American and 90% of Soviet strategic forces are destroyed in the initial days of the war. By November it is estimated that the Soviets have less than a dozen nuclear-capable bombers and very few operational ICBMs and SLBMs remaining. At the same time, some forty American B-52s are operational.
Nuclear exchange has so far been limited to the United States, the Soviet Union and Europe. Surviving NATO forces and WESTPAC units are deploying to counter the remaining Soviet threat. The world stands on the brink of extinction...
"Beware the beast Man, for he is the Devil's pawn. Alone among God's primates, he kills for sport or lust or greed, he will murder his brother to possess his brother's land. Let him not breed in great numbers, for he will make a desert of his home and yours. Shun him; drive him back into his jungle lair, for he is the harbinger of death..."
-The Lawgiver (as spoken by Cornelius in Planet of the Apes)
Trimuph (that's ironic...)
Score: 7000
SIDE: Soviet Union
===========================================================
LOSSES:
-------------------------------
1x Runway (2000m)
1x Single-Unit Airfield (1x 1401-2000m Runway)
16x SA-3b Goa Quad Rail
36x SA-7a Grail [9K32 Strela-2] MANPADS
4x Vehicle (Flat Face B [P-19])
4x Vehicle (Low Blow [SNR-125])
60x Yak-28P Firebar
2x Radar (Thin Skin A HF [PRV-9])
48x SA-2f Guideline Mod 1/2 Single Rail
8x Vehicle (Fan Song F [RSNA-75M])
8x Vehicle (Spoon Rest C [P-12])
2x Radar (Bar Lock A [P-37])
5x Runway (4000m)
5x Single-Unit Airfield (1x 3201-4000m Runway)
99x Su-15MF Flagon D
29x Su-9B Fishpot
2x Radar (Spoon Rest C [P-12])
1x Radar (Back Net [P-80])
1x Radar (Tall King A [P-14])
4x Marker (City)
30x 23mm ZU-23-2
5x Building (Odd Pair HF [PRV-13])
15x Building (Square Pair [5N62])
90x SA-5b Gammon Single Rail
5x Building (Tall King C [P-14])
2x Structure (Power Station - Hydro-Electric)
9x Tu-128 Fiddler A
1x Structure (Power Station - Nuclear)
EXPENDITURES:
------------------
2x AA-1a Alkali Mod 2 [RS-2US]
4x AA-3 Anab C [R-98R, SARH]
74x SA-5b Gammon [5V28, 25kT Nuclear]
24x SA-3b Goa [5V27, V-601P]
28x SA-2f Guideline Mod 1 [S-75M2 Volkhov, 5YA23 / V-759]
1x AA-3 Advanced Anab E [R-98MR, SARH]
9x AA-5 Ash A [R-4R, SARH]
8x AA-8 Aphid [R-60T]
4x AA-5 Ash B [R-4T, IR]
SIDE: NATO
===========================================================
LOSSES:
-------------------------------
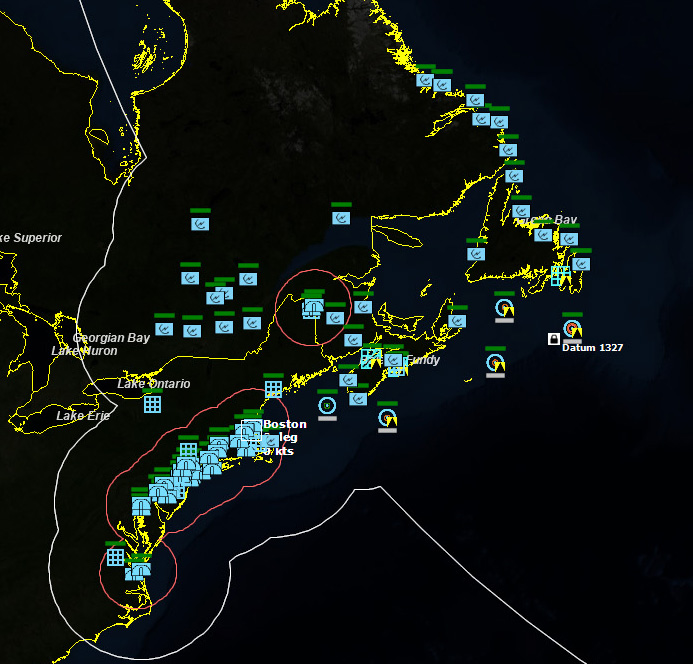
1x F-101B Voodoo
8x B-52G Stratofortress
EXPENDITURES:
------------------
4x AIR-2A Genie [1.5kT Nuclear]
2x AIM-4G Falcon [IR]
74x AGM-69A SRAM [200kT Nuclear]
10x Generic Chaff Salvo [8x Cartridges]
51x 12.7mm/50 MG Burst [160 rnds]
12x Generic Flare Salvo [4x Cartridges, Single Spectral]
10x B28 Strategic Bomb [1.45mT Nuclear]
SIDE: NATO Non Compliant
===========================================================
LOSSES:
-------------------------------
3x B-52G Stratofortress
EXPENDITURES:
------------------
1x Generic Flare Salvo [4x Cartridges, Single Spectral]
1x Generic Chaff Salvo [8x Cartridges]
SIDE: NATO Capital Cities
===========================================================
LOSSES:
-------------------------------
EXPENDITURES:
------------------
SIDE: NATO First Strike MRBM Forces
===========================================================
LOSSES:
-------------------------------
EXPENDITURES:
------------------
SIDE: NATO Air Defence
===========================================================
LOSSES:
-------------------------------
EXPENDITURES:
------------------


August 30, 2017
COMMAND: Northern Inferno Scenario 15: Fail Safe Part 2
In Part One of this nightmare scenario, the war continues to escalate out of control. Boston and New York have been devastated by nuclear weapons. Retaliatory Strikes have been ordered by the National Military Command Center, targeting several Soviet power stations, shipyards, naval bases, and one major population center, the city of Arkhangelsk.This is disconcerting news at best. The alert B-52s move towards their targets, but then one B-52 flight is found to be non-compliant with orders. The US Air Defense fighters are ordered to seek out the non-compliant B-52s and destroy them. Two of the three non-compliant B-52s are found apparently returning to base and are reluctantly shot down, with the loss of one F-101B Voodoo interceptor that got caught in the blast of his own weapon. The last B-52 is apparently continuing onto his target. Whichever way he is going, I can't stop him because I have no fighters with enough fuel to reach him. In the meantime, the remaining B-52s proceed to their targets.
 The strike continuesAs the Cavemen approach the limits of Soviet Air Search Radar coverage, I drop them down to minimum altitude, a mere 100ft ASL.
  The B-52s enter Soviet Radar coverage.024500Z Still no response from any Soviet air defenses, although I suspect I will detect Soviet interceptors only once they begin shooting down my bombers.
030000Z Still no visible response from the Soviet air defenses, although I see in the message log that Buff 3, the third B-52 from the non-compliant Caveman 5 flight, is hit by an AA-1a Alkali.
 Still closing in.030840Z Caveman 2 and 3 go feet dry over northern Norway.
 B-52s go feet dry.031747Z The Radar warning receivers of the B-52s light off due to Soviet aircraft.
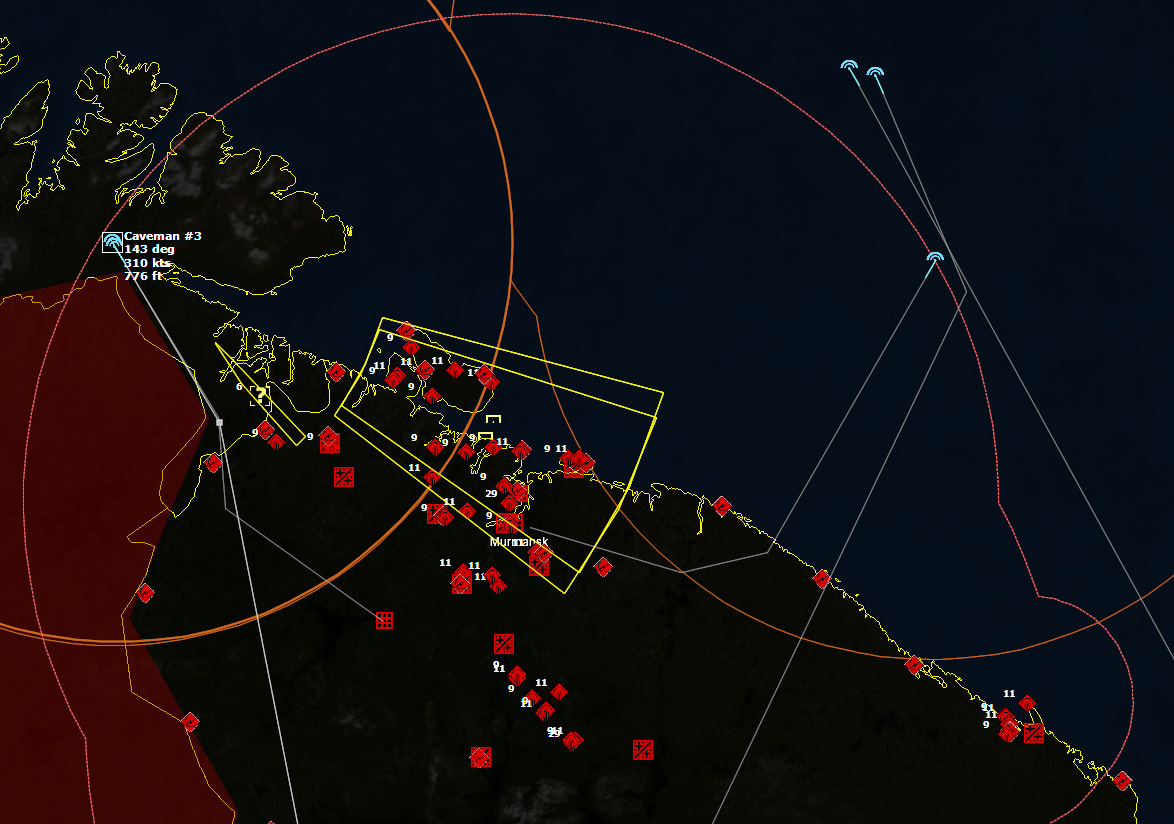 Bogeys detectedI doubt they have detected the B-52s yet, considering how low they are flying. But decision time is approaching. While my B-52s fly at 100ft AGL, they can get closer without being detected. However, if I am to fire my AGM-69A SRAMs to suppress SAM sites and interceptor airfields, I need to climb to 1000ft, practically guaranteeing their detection. For now I'll try to get closer before launching any SRAMs.
There are now six interceptors detected, and I suspect they might be closing in. I decide to have Caveman 2 climb and launch SRAMs at a few targets.
Just as I begin to get off missiles, I detect bogeys on my tail at close range.
 Bandits on our tail!I launch SRAMs as fast as I can, but eventually the trailing bandits, identified as Su-15MF Flagon Ds, launch missiles. Fortunately the missiles miss, and the B-52s in Caveman 2 dive low again.
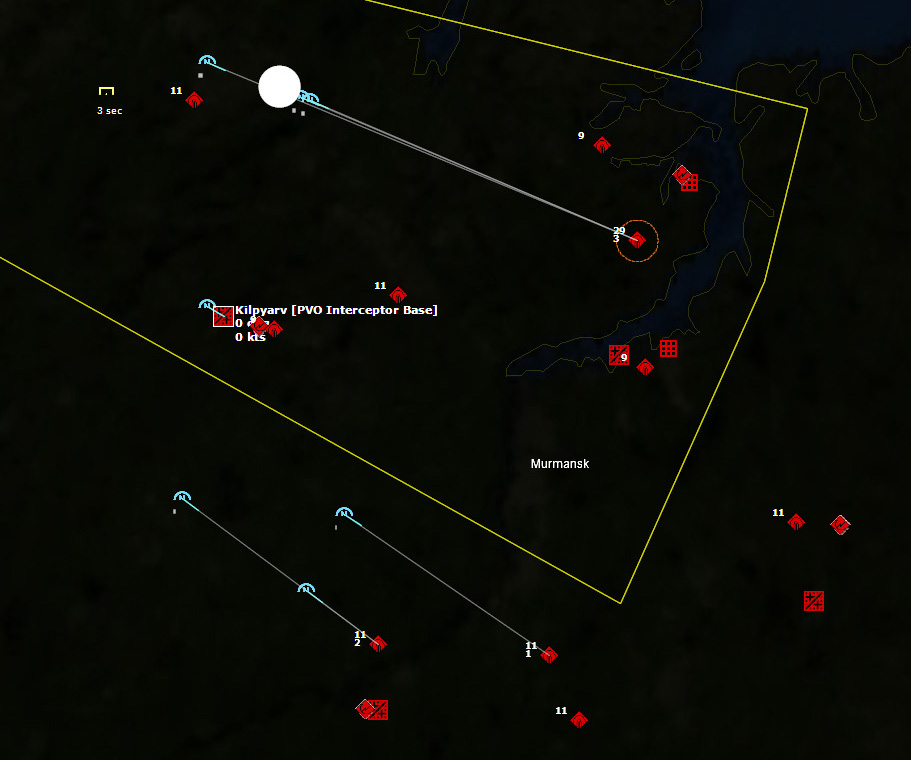
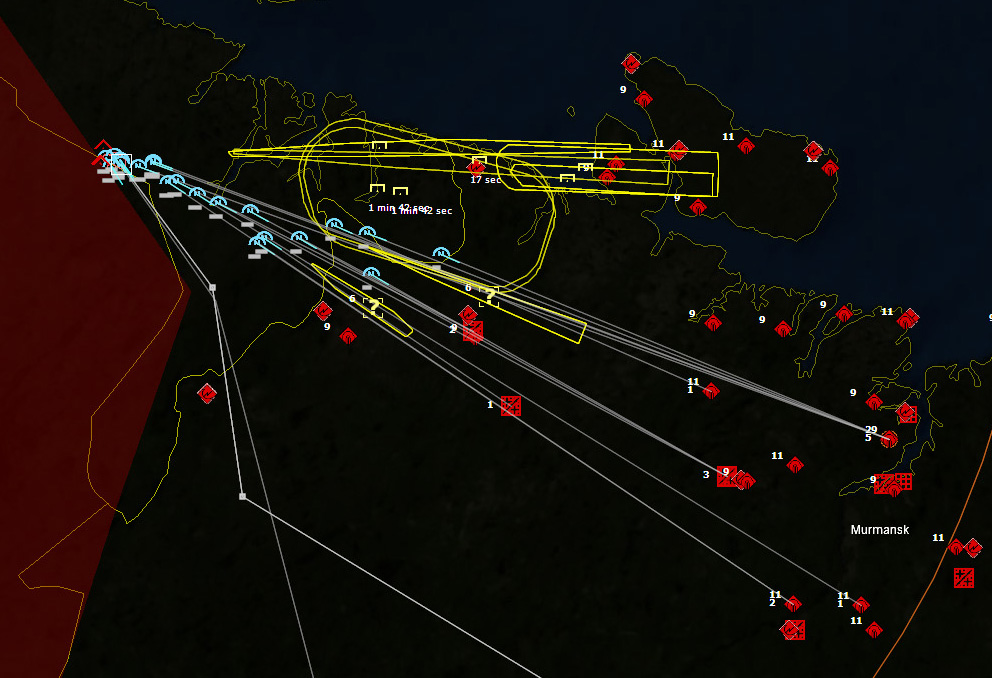 Fifteen SRAMs are in the air.Fifteen SRAMs are in the air, aimed at seven targets: 5 at a SA-5b Gammon battalion (with nuclear SAMs), 4 at SA-2f Guideline batteries, 3 at Kilpyarv [PVO interceptor Base], 1 at Koskha Yar [Diversionary Base, Tactical], and 2 at Luostari [Helicopter / Diversionary Base].
 B-52 with SRAMs on the wingsThe SRAMs climb to 65000ft and accelerate to 2650kts. I doubt that much can intercept them except perhaps the nuclear SAMs of the SA-5b Gammon battalions.
 SA-5 Gammon032542Z The first nuclear SAM intercepts its target, and the first nuclear fireball of the night detonates 65000 feet over the Kola Peninsula.
 The first SA-5f connects with its SRAM targetA few seconds later, another SRAM is taken out by a nuclear SAM, very close to the first impact. The other missiles continue to close into their targets.
 The second SRAM is taken outSA-3s attempt to take out diving SRAMs, but have almost no chance to hit them. Luostari [Helicopter / Diversionary Base] is hit first, and vanishes into a nuclear fireball. At nearly the same time, one of the B-52s in Caveman 3 shoots down a pursuing Yak-28P Firebar with its tail gun.
 Another SRAM is destroyed, as is Luostari air field.The sole SRAM targeted on Koshka Yar misses the runway by about 3000ft, and apparently fails to detonate. The first of three SRAMs targeted on Kilpyarv [PVO Interceptor Base] misses by a similar amount and also fails to detonate. The second SRAM targeted on Kilpyarv is shot down by an SA-3b Goa less than a mile from the base in a one-in-a-million shot (well, one in a hundred, anyway).
 A second Firebar is shot down by the B-52s in Caveman 3.
As the three remaining SRAMs targeted on the SA-5b Gammon nuclear SAM site close in, one 25kT Nuclear SAM misses, detonating harmlessly, while another malfunctions.
 The last SRAMs close in on their targets.The third (and final) SRAM targetted on Kilpyarv misses by half a mile...and fails to detonate. One of the SRAMs targeted at a SA-2f Guideline battery hits its target. More nuclear SAMs are launched, and manage to take out the three remaining SRAMs targeted on the SA-5 battalions. At the very least, they've reduced the nuclear SAM magazines somewhat.
Another Firebar is shot down, and seconds later the last SRAM detonates and destroys a SA-2 site.
032849Z Caveman 2 climbs again and launches six more SRAMs, and a Firebar launches more missiles at them. In the meantime, the B-52s from Caveman 3 shoot down yet another Firebar, and again, fortunately, the Firebar's missile misses its target.
A nuclear SAM misses an SRAM, detonating behind it, but another nuclear SAM takes out the one SRAM targeting the SAM battalions. One of the SRAMs scores a hit on Koshka Yar, destroying it.
Four SRAMs are left, two targeting Kilpyarv, which has been launching every fighter available, and one each targeting SA-2 SAM sites. Finally, after another SRAM misses Kilpyarv far enough that it doesn't detonate, the last SRAM targeted against it hits (well, misses by only 1550ft), which is enough to detonate and destroy the air base.
 A SAM site (right) and Kilpyarv (left) are finally hitThree more Firebars are shot down. The fact that the Soviet interceptors cannot engage the B-52s when they are flying this low is what's keeping them alive. An Su-15 Flagon and an Su-9B Fishpot are shot down. The tailgunners are truly raking in the kills.
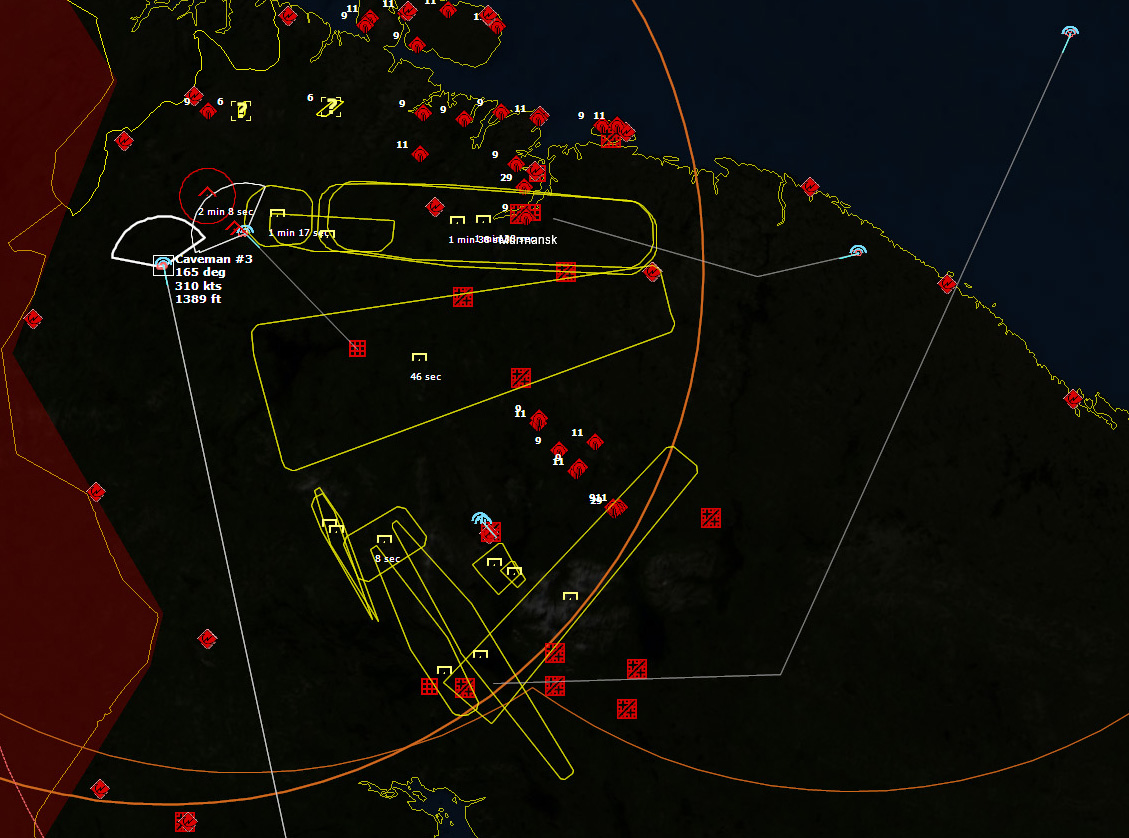 Getting closer.033621Z Caveman 2 is 33nm from its target, the Upper Tuloma Hydro-Electric Power Station. The flight briefly popped up to launch two SRAMs at Monchegorsk [PVO Interceptor Base], which had recently launched multiple fighters. The first SRAM hits and Monchegorsk is destroyed.
Caveman 3 climbs to launch altitude to fire three SRAMs at Afrikanda [PVO Interceptor Base], before diving down low again.
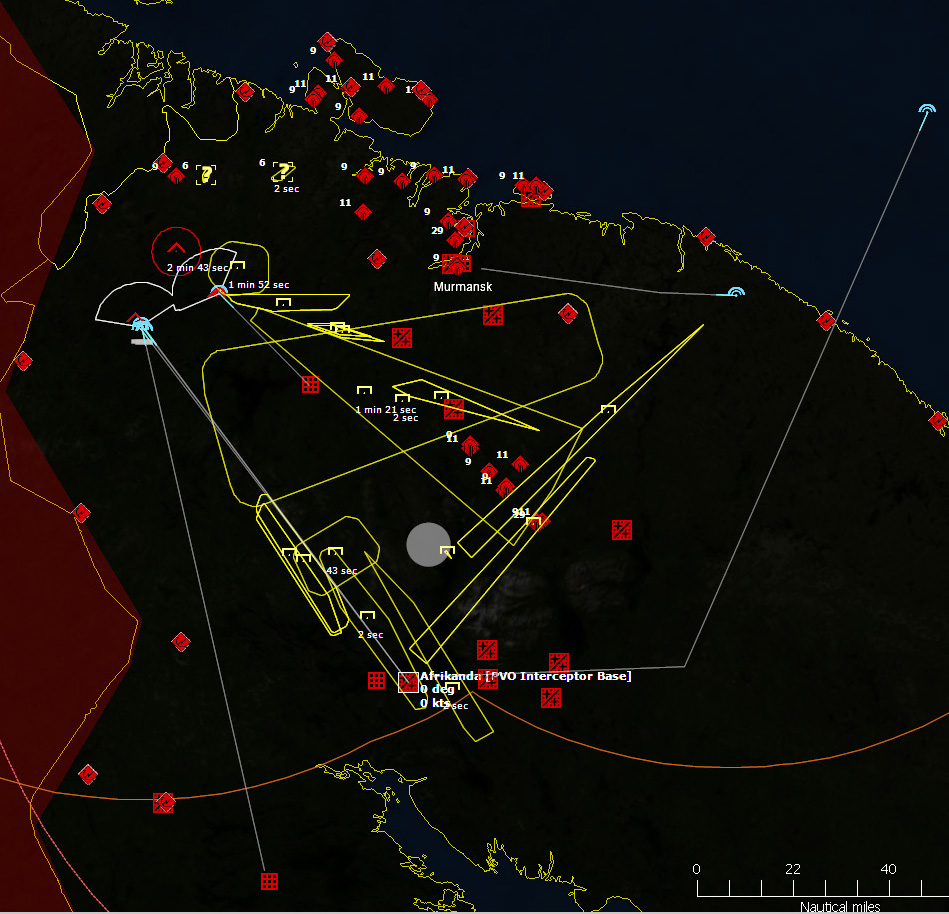 Caveman 3 launches SRAMs against AfrikandaThree more Flagons are shot down.
033837Z Caveman 6 launches a massive salvo of SRAMs against SAM sites around Severomorsk and Polyarnyi.
 Caveman 6 launches SRAMsI detect a SAM headed for Caveman 6. I had hoped that the SA-5 nuclear SAM batteries would be distracted by all the SRAMs I'm throwing at them, but apparently they managed to send one at the B-52s. I immediate split the flight of three into individual planes and have them scatter and dive. Hopefully I won't lose them all.
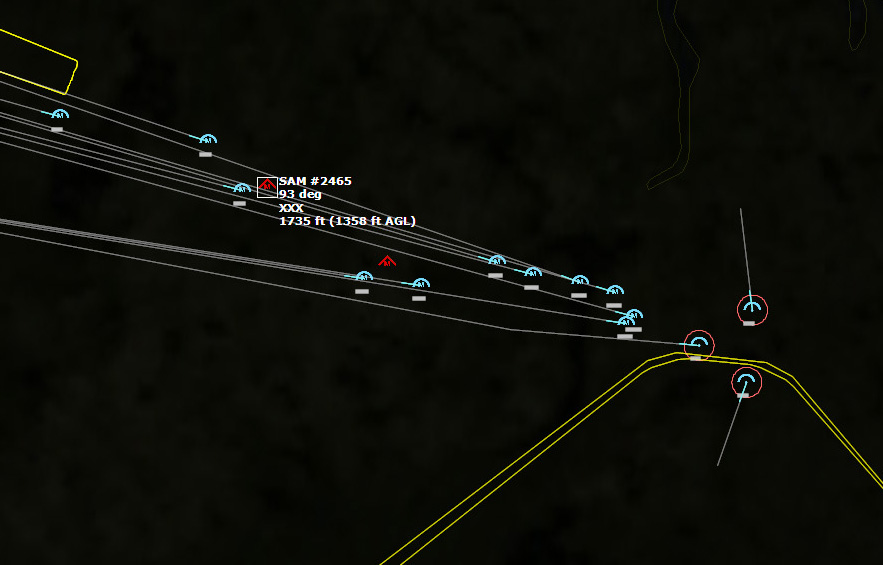 The B-52s scatter as the SAMs close in.I lose contact with one of the SAMs, but the other two close in. My B-52s are two miles apart and continue to separate, hopefully they will have separation enough to survive.
The tactic works. All three B-52s manage to survive. Meanwhile, the SRAMs close in relentlessly.
 The B-52s survive and the SRAMs appear to be about to overwhelm their targets.The SA-3 battery next to Severomorsk is hit by the first SRAM, despite desperate salvos of SA-3s to bring it down. Four more are inbound to that target.
 Multiple nuclear SAMs destroy inbound SRAMs, but also Severomorsk is destroyed in the 200kT nuclear fireball.The SRAM that hit the SA-3 site next to Severomorsk, being a 200kT weapon, is sufficient to completely destroy Severomorsk. The B-52 go after their secondary target of Polyarnyi instead.
To the south, the SRAMs impact Afrikanda [PVO Interceptor Base], wiping it out.
034050Z The last SRAMs launched by Caveman 6 impact, wiping out multiple SAMs site. The area around Murmansk and Severomorsk is swamped by mushroom clouds and burning buildings and trees. The way is clear for Caveman 6 to move in and bomb Polyarny.
Meanwhile, Caveman 2 has closed to within 10nm of its target, Upper Tuloma Hydro-electric Power Plant.
To be continued...
August 29, 2017
COMMAND: Northern Inferno Scenario 15: Fail Safe Part 1
IntroductionThe line has been crossed: Soviet submarine-launched ballistic missiles have detonated in the heart of New York and downtown Boston Mass, incinerating over 40,000 residents in just 15 seconds. More than 50 percent of the population living within a 1-mile radius of the explosions is either dead or gravely injured.
NATO officials were horrified. But they were also confused: Once the launched missiles were detected, an all-out Soviet nuclear strike was expected. Instead, only 6 SLBMs were launched and no other launches were detected. What is going on?
Premier Leonid Brezhnev has been on the hot line to Air Force One and the US President, the Soviet Premier pleading it was a rogue SSBN which had disobeyed orders and the launch was not authorised.
The whole world is on a knife edge. Is the Cold War suddenly going to get a whole lot warmer?
Orders for Cmdr NATO Forces
Situation
The unauthorised launch of a limited Soviet SLBM strike on the United States has surprised NATO.
Pershing 1A ballistic missiles have now deployed to pre-assigned positions in West Germany; Likewise Soviet MRBMs and SRBMs have also deployed along the borders. NATO forces continue to hold the line in the Central Front but are falling back due to the onslaught of Soviet armoured divisions. The only thing able to stem the tide is limited nuclear strikes against them.
The 325th Bombardment Squadron with B-52G Stratofortresses have been flying Chrome Dome (airborne alert) race-tracks over the last few days with associated support tankers, and are now awaiting their EAMs (Emergency Action Message) with orders to strike.
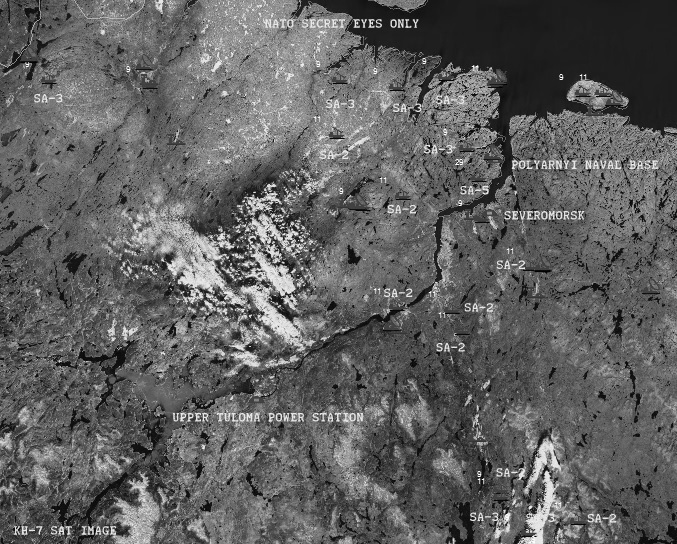 Recon imagery of Polyarnyi, Severomorsk, and Upper Tuloma power stationEnemy Forces
SAM Systems : SA-2F Guideline, SA-3B Goa, SA-5B Gammon, SA-7 Grail.
AAA systems : 100mm KS-19, 23mm ZSU.
Air : Tu-128 Fiddler, Su-15TM Flagon, Su-9 Fishpot B, Yak-28P Firebar
Surface : unknown.
Subsurface : unknown
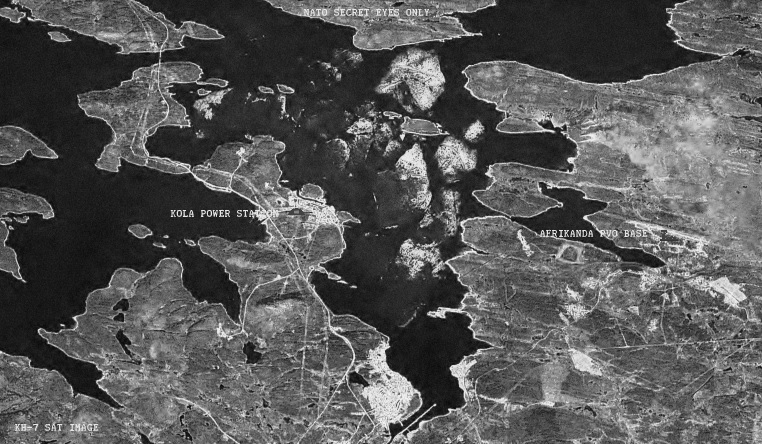 Recon imagery of Kola power station and Afrikanda PVO airbaseFriendly Forces
Thule Air Base:
43rd ARS (KC-135A Stratotanker) 960th AEWCS (EC-121H Warning Star) 179th FIS-ANG (F-101B Voodoo) Strategic Air Command (airborne) : 325th BS (B-52G Stratofortress)
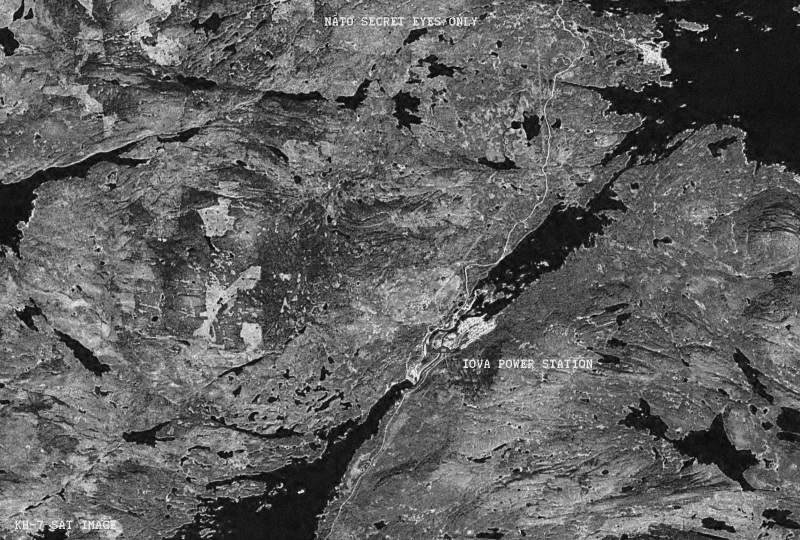 Recon imagery of Iova power stationMissionConduct nuclear strikes as directed by NMCC.
Execution
On receipt of EAMs, carry out assigned strikes as ordered.
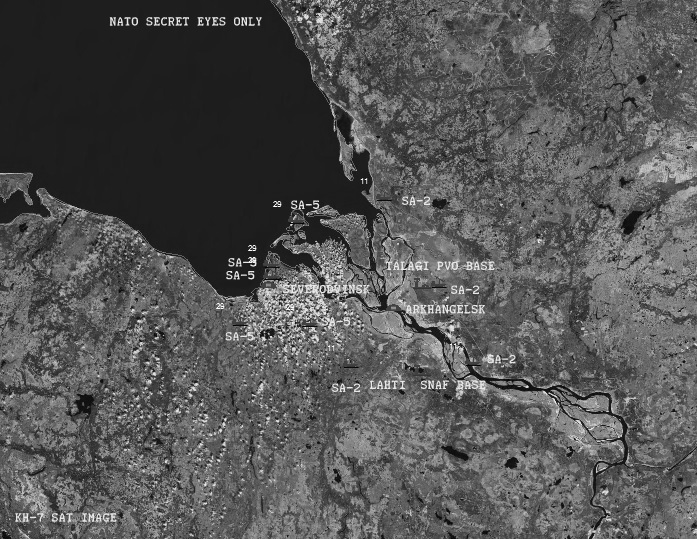 Recon imagery of Severodvisk and Arkhangelsk target areaCommand and EMCON
Command: NMCC
EMCON: ALPHA-Limited Emissions
October 20, 1975 0100Z
Last scenario I said took it personally that the Soviets were targeting Boston (and New York). Now they've actually nuked them. This is beyond the pale.
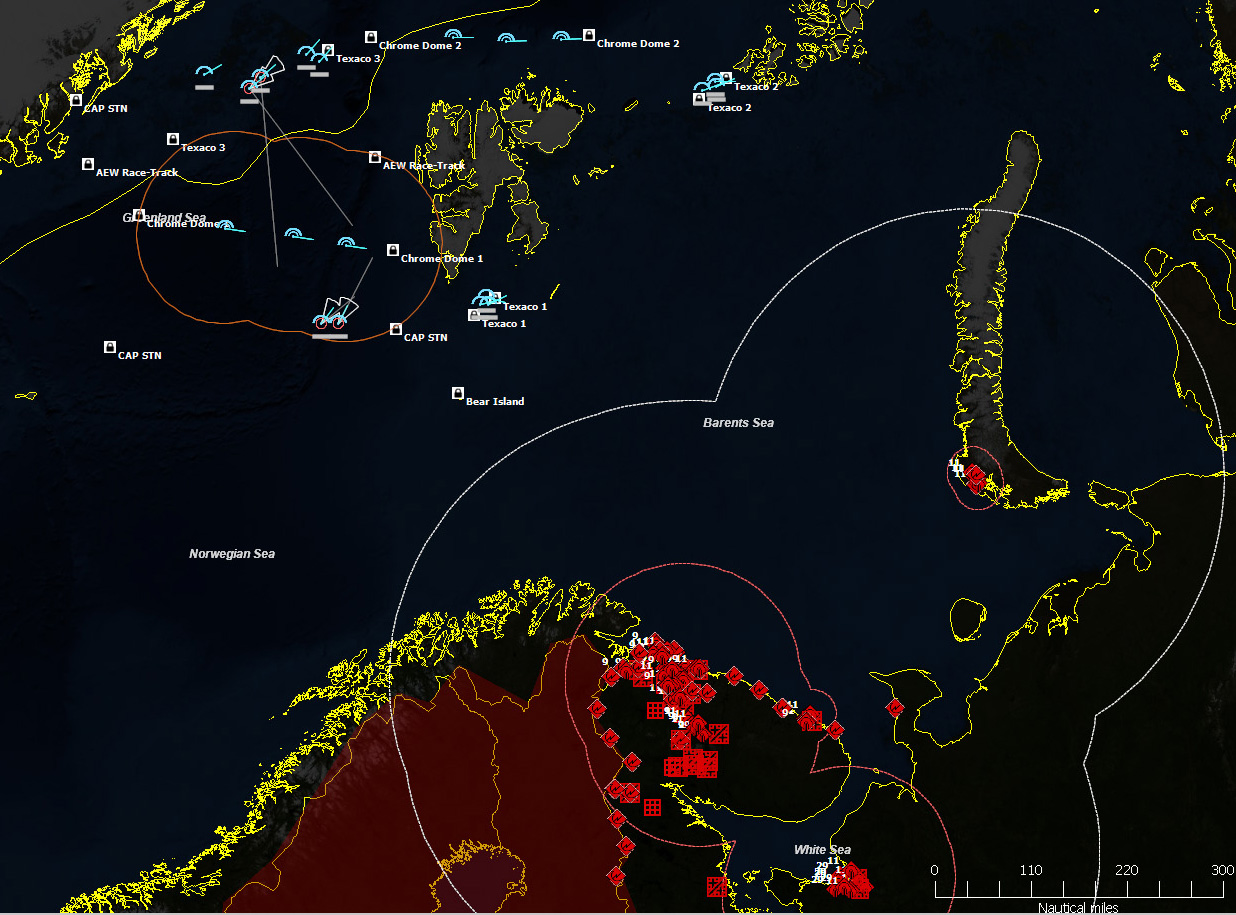 Operation Chrome Dome is in effect.Then I scan the map a little bit.
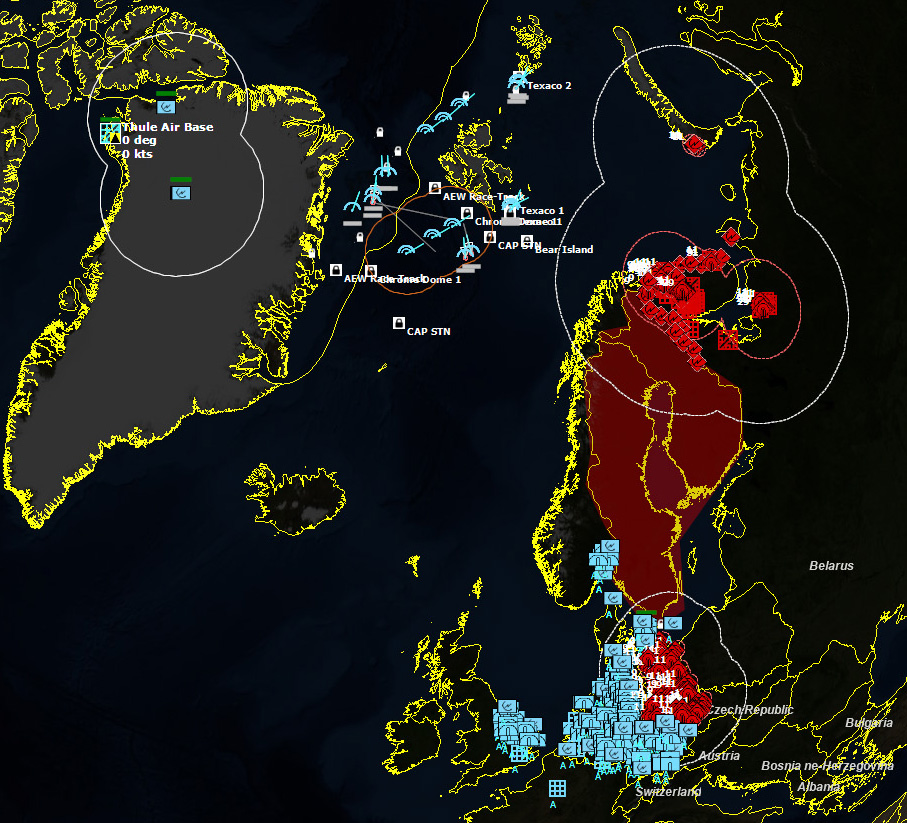 The Cold War has gone hotI have the impression that things are going to get a bit sticky on the Central Front.
 Armed and Ready013000Z
FLASH EAM FLASH EAM FLASH EAM FLASH EAM FLASH EAM FLASH FM NMCCTO CAVEMAN #1/GIANT LANCE TARGET ALLOCATION/001//PRIMARY TARGET/POSN/67 32N 032 30E/KOLA NUCLEAR POWER STATION//PRIMARY WEAPON ALLOCATION 1/TWO B-28 1.45MT//PRIMARY WEAPON ALLOCATION 2/AGM-69A SRAM TO BE USED FOR SEAD AND AIRFIELD SURPRESSION//SECONDARY TARGET/NIL//SECONDARY WEAPON ALLOCATION 1/NIL//SECONDARY WEAPON ALLOCATION 2/NIL//AUTHENTICATION/CAVEMAN #1/MIKE ALPHA BRAVO ONE ZULU/FLASH EAM FLASH EAM FLASH EAM FLASH EAM FLASH EAM FLASH EAM
013100ZFLASH EAM FLASH EAM FLASH EAM FLASH EAM FLASH EAM FLASH EAM
FM NMCC
TO CAVEMAN #2
/GIANT LANCE TARGET ALLOCATION/002/
/PRIMARY TARGET/POSN/68 35.27N 031 42.40E/UPPER TULOMA HYDRO ELECTRIC POWER STATION/
/PRIMARY WEAPON ALLOCATION 1/TWO B-28 1.45MT/
/PRIMARY WEAPON ALLOCATION 2/AGM-69A SRAM TO BE USED FOR SEAD AND AIRFIELD SURPRESSION/
/SECONDARY TARGET/NIL/
/ECONDARY WEAPON ALLOCATION 1/NIL/
/SECONDARY WEAPON ALLOCATION 2/NIL/
/AUTHENTICATION/CAVEMAN#2/NOVEMBER BRAVO CHARLIE TWO ALPHA/
FLASH EAM FLASH EAM FLASH EAM FLASH EAM FLASH EAM FLASH EAM
I suspect that at 1 minute intervals, each of my B-52G flights will be receiving orders.
"AGM-69A SRAM TO BE USED FOR SEAD AND AIRFIELD SURPRESSION." At 200kT a pop, and eight AGM-69As per B-52, this means we're talking about 144 200kT nukes...as mere suppression. The Kola peninsula is going to be glowing...
013200Z
FLASH EAM FLASH EAM FLASH EAM FLASH EAM FLASH EAM FLASH EAM
FM NMCC
TO CAVEMAN #3
/GIANT LANCE TARGET ALLOCATION/003/
/PRIMARY TARGET/POSN/66 39.10N 031 21.21E//IOVA HYDRO ELECTRIC POWER STATION/
/PRIMARY WEAPON ALLOCATION 1/TWO B-28 1.45MT/
/PRIMARY WEAPON ALLOCATION 2/AGM-69A SRAM TO BE USED FOR SEAD AND AIRFIELD SURPRESSION/
/SECONDARY TARGET/NIL/
/SECONDARY WEAPON ALLOCATION 1/NIL/
/SECONDARY WEAPON ALLOCATION 2/NIL
/AUTHENTICATION/CAVEMAN #3/OSCAR CHARLIE DELTA THREE BRAVO/
FLASH EAM FLASH EAM FLASH EAM FLASH EAM FLASH EAM FLASH EAM
013300Z
FLASH EAM FLASH EAM FLASH EAM FLASH EAM FLASH EAM FLASH EAM
FM NMCC
TO CAVEMAN #4
/GIANT LANCE TARGET ALLOCATION/004/
/PRIMARY TARGET/POSN/64 35.23N 039 45.49E/SEVERODVINSK/
/PRIMARY WEAPON ALLOCATION 1/TWO B-28 1.45MT/
/PRIMARY WEAPON ALLOCATION 2/AGM-69A SRAM TO BE USED FOR SEAD AND AIRFIELD SURPRESSION/
/SECONDARY TARGET/NIL/
/SECONDARY WEAPON ALLOCATION 1/NIL/
/SECONDARY WEAPON ALLOCATION 2/NIL
/AUTHENTICATION/CAVEMAN #4/PAPA DELTA ECHO FOUR CHARLIE/
FLASH EAM FLASH EAM FLASH EAM FLASH EAM FLASH EAM FLASH EAM
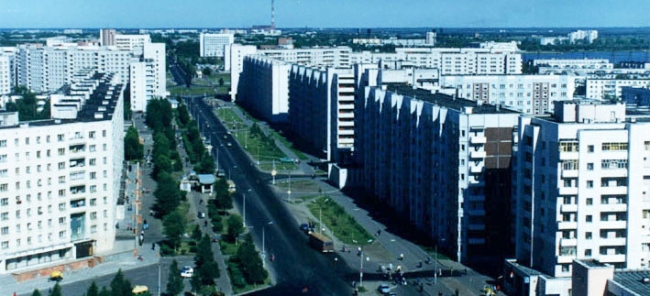
Severodvinsk is not a power plant but rather a naval shipyard. Unfortunately it's also a city of over 200,000 people. Getting orders like this is sobering to say the least.
 Severdvinsk013400Z
FLASH EAM FLASH EAM FLASH EAM FLASH EAM FLASH EAM FLASH EAM
FM NMCC
TO CAVEMAN #5
/GIANT LANCE TARGET ALLOCATION/005/
/PRIMARY TARGET/POSN/64 31.44N 040 32.23E/ARKHANGELSK/
/PRIMARY WEAPON ALLOCATION 1/TWO B-28 1.45MT/
/PRIMARY WEAPON ALLOCATION 2/AGM-69A SRAM TO BE USED FOR SEAD AND AIRFIELD SURPRESSION/
/SECONDARY TARGET/NIL/
/SECONDARY WEAPON ALLOCATION 1/NIL/
/SECONDARY WEAPON ALLOCATION 2/NIL
/AUTHENTICATION/CAVEMAN #5/QUEBEC ECHO ZULU SEVEN VICTOR/
FLASH EAM FLASH EAM FLASH EAM FLASH EAM FLASH EAM FLASH EAM
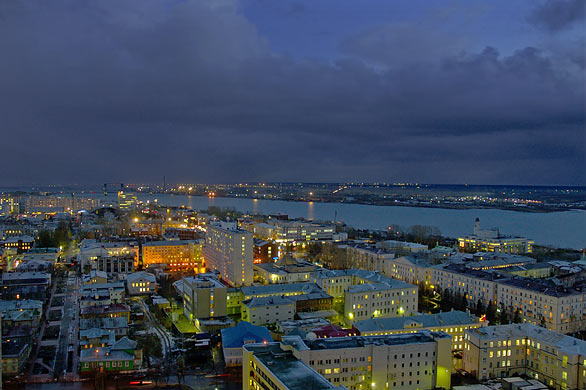
Arkhangelsk. Nearly half a million people.
 Arkhangelsk013500Z
FLASH EAM FLASH EAM FLASH EAM FLASH EAM FLASH EAM FLASH EAM
FM NMCC
TO CAVEMAN #6
/GIANT LANCE TARGET ALLOCATION/006/
/PRIMARY TARGET/POSN/69 04.06N 033 24.42E/SEVEROMORSK/
/PRIMARY WEAPON ALLOCATION 1/TWO B-28 1.45MT/
/PRIMARY WEAPON ALLOCATION 2/AGM-69A SRAM TO BE USED FOR SEAD AND AIRFIELD SURPRESSION/
/SECONDARY TARGET/POSN/69 11.56N 033 28.01E/POLYARNYI NAVAL BASE/
/SECONDARY WEAPON ALLOCATION 1/TWO B-28 1.45MT/
/SECONDARY WEAPON ALLOCATION 2/AGM-69A SRAM TO BE USED FOR SEAD AND AIRFIELD SURPRESSION/
/AUTHENTICATION/CAVEMAN #6/TANGO GOLF SIERRA TWO XRAY/
FLASH EAM FLASH EAM FLASH EAM FLASH EAM FLASH EAM FLASH EAM
Already devastated by a nuclear bomb when it was attacked by British bombers, Severomorsk, the main administrative base of the Northern Fleet, is going to be hit again.
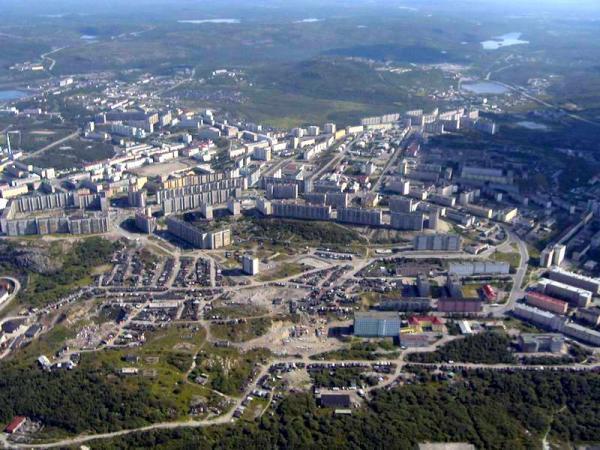 SeveromorskNearby Murmansk will undoubtedly be devastated as well. Nearly another half-million people between the two of them.
 Given their targets, the 18 B-52G begin their flights towards their targets.014000Z
Caveman 5, the B-52G group that was just tasked to target Arkhangelsk, disappears off my scope. What the hell just happened?
014500Z
FLASH EAM FLASH EAM FLASH EAM FLASH EAM FLASH EAM FLASH
FM NMCC
TO 179TH FIS
/NON COMPLIANT CAVEMAN #5 /001/
/179TH FIS TO DETECT LOCATE DESTROY CAVEMAN #5 FLT/ /AUTHENTICATION/179TH FIS/BRAVO XRAY CHARLIE FOUR DELTA/
FLASH EAM FLASH EAM FLASH EAM FLASH EAM FLASH EAM FLASH EAM
Oh, shit.
A dozen possibilities flash through my mind, going from bad to worse. Just a communications problem? A refusal to carry out the orders? All three B-52s destroyed? A rogue crew intent on bombing an unauthorized target? A rogue crew intent on bombing a friendly target? A compromised crew controlled by the Soviets?
More worrisome is that it is not a single B-52 that vanished, but rather all three in a flight. They could be working together, working independently...they could all be going in different directions...
I directly my airborne fighters to the last known position of Caveman 5, but the nearest one is 100nm away. I also instruct my EC-121 H Warning Star to light off its radar. Caveman 5 should be within radar range.
014525Z Contact!
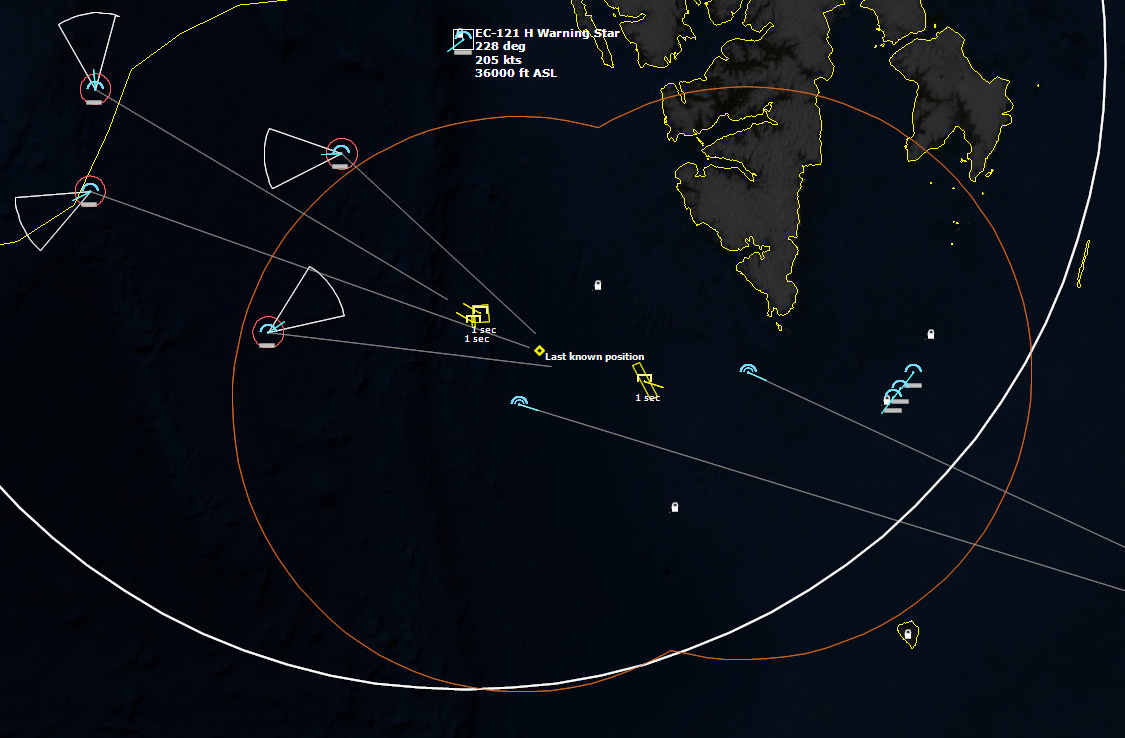 Contact! I have all three B-52s on radarOne of the B-52s appears to be heading toward its target as ordered, while the other two appear to be headed back towards Thule.
This leaves me with a conundrum. Do I still have to kill all three? For all I know, one received the order and is continuing on the mission, while the other two had to abort for some reason.
014659Z I send one of my F-101B Voodoo fighters to afterburner to go after the B-52 that still appears to be on the mission...and almost immediately it goes Bingo and turns around for home. I have plenty of tankers in the air, so this isn't a disaster...but then I find out that Voodoos are not mid-air refueling capable! It looks like there's no way I can intercept the B-52 that's continuing on. I might not even be able to intercept the two B-52s that appear to be heading home.
So I cut the throttles of all my fighters, and make an intercept course to hopefully loiter and lie in wait for the returning B-52s. I also launch two more fighters from Thule for good measure.
015003Z
FLASH EAM FLASH EAM FLASH EAM FLASH EAM FLASH EAM FLASH EAM
FM NMCC
TO CAVEMAN #4
/GIANT LANCE TARGET ALLOCATION/004/
/PRIMARY TARGET/POSN/64 35.23N 039 45.49E/SEVERODVINSK/
/PRIMARY WEAPON ALLOCATION 1/TWO B-28 1.45MT/
/PRIMARY WEAPON ALLOCATION 2/AGM-69A SRAM TO BE USED FOR SEAD AND AIRFIELD SURPRESSION/
/SECONDARY TARGET/64 31.44N 040 32.23E/ARKHANGELSK/
/SECONDARY WEAPON ALLOCATION 1/TWO B-28 1.45MT/
/SECONDARY WEAPON ALLOCATION 2/AGM-69A SRAM TO BE USED FOR SEAD AND AIRFIELD SURPRESSION/
/AUTHENTICATION/CAVEMAN #4/ZULU CHARLIE FOXTROT EIGHT MIKE/
FLASH EAM FLASH EAM FLASH EAM FLASH EAM FLASH EAM FLASH EAM
With Caveman 5 non-compliant, Caveman 4 is tasked to take on its target as a secondary target.
 F-101B Voodoo015536Z One of the F-101B Voodoos gets close enough to positively ID the aircraft as B-52Gs. Still uneasy about his orders, he takes a deep breath and pulls the trigger, launching a AIR-2A Genie nuclear missile.
 Genie away.In the event, the Voodoo is far too close to the target when he fires the missile, and is destroyed by the blast. The remaining Voodoos close in and destroy the second B-52G as well. All three remaining Voodoos are nearly out of fuel, and have no chance of catching up to the last B-52, which apparently is continuing onto its target anyway. Hopefully I'll be able to figure out what is going on before it's too late. In the meantime, I need to shepherd my other flights to their targets.
To be continued...
August 23, 2017
COMMAND: Northern Inferno Scenario 14: Needle in a Haystack
 Introduction
With Iceland back under NATO control, the remnants of the Soviet forces are slowly been mopped up or have surrendered to USMC forces.
The Soviet Premier Brezhnev has now ordered Soviet strategic nuclear forces to a high state of readiness, likewise NATO has followed suit with the United States now at DEFCON 2, the highest alert state since the Cuban Missile Crisis.
Peace talks are at a stalemate after an attempted assassination on the US Ambassador in Geneva, with the Soviets blaming a right wing faction of the European Alliance for this.
Over the last 12 hours, there has been a number of unconfirmed reports by fishing boats off the east coast of Nova Scotia of periscope sightings of submarines, and one sighting of a submarine diving. In the latter case the fishing boat's skipper, an ex-Canadian Navy submariner, recognised it as a Hotel-class SSBN.
If such a submarine is allowed to roam in these waters, the US will be under constant threat of a sudden decapitation nuclear strike. Accordingly, Canadian and US forces have rapidly deployed to the area to close the net on this latest sighting.
Situation
Last known position of possible Hotel SSBN is 6 hrs old. All available NATO units have deployed to the general location to search and sink the submarine. Intelligence from a trusted source in the Kremlin has indicated that the Hotel is on a first strike mission with possible targets of Boston and New York.
President Gerald Ford is now airborne in Air Force One with destination unknown. NORAD is now at DEFCON 2 with B-52s flying Chrome Dome (airborne alert) race-tracks over Greenland, awaiting strike orders.
Soviet strategic forces are also at their highest alert level, with increased deployments of mobile MRBMs and SRBMs in East Germany.
Enemy Forces
Subsurface : Hotel Class SSBN
Friendly Forces
NAS Argentia : VP-30 Pro's Nest (P-3C Orion)
CFB Greenwood : 415 Sqn (CP-107 Argus Mk.1)
CFB Shearwater : 423 Sqn (CH-124A Heltas SeaKing)
Naval forces : HMCS Annapolis DDH, HMCS Assiniboine DDH, HMCS Iroquois DDH, HMCS Margaree DDH, HMCS Terra Nova DDE.
Mission
Locate, classify and destroy any Soviet submarine in your area.
Execution
1. Investigate Datum 1327 0 Position 045 00N 054 57.23W - Error 1nm, Speed 5 kts, Time 190200ZOCT75.
2. Use Argus and Orion LR MPA to sanitize the area of operations.
3. DDHs and DDEs and associated helicopters to localise and classify subsurface contacts. Any contacts free to be attacked, including unknowns.
Command and EMCON
Command: CFB Greenwood
EMCON: Alpha-limited emissions
October 19, 1975 0800Z
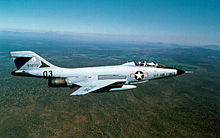
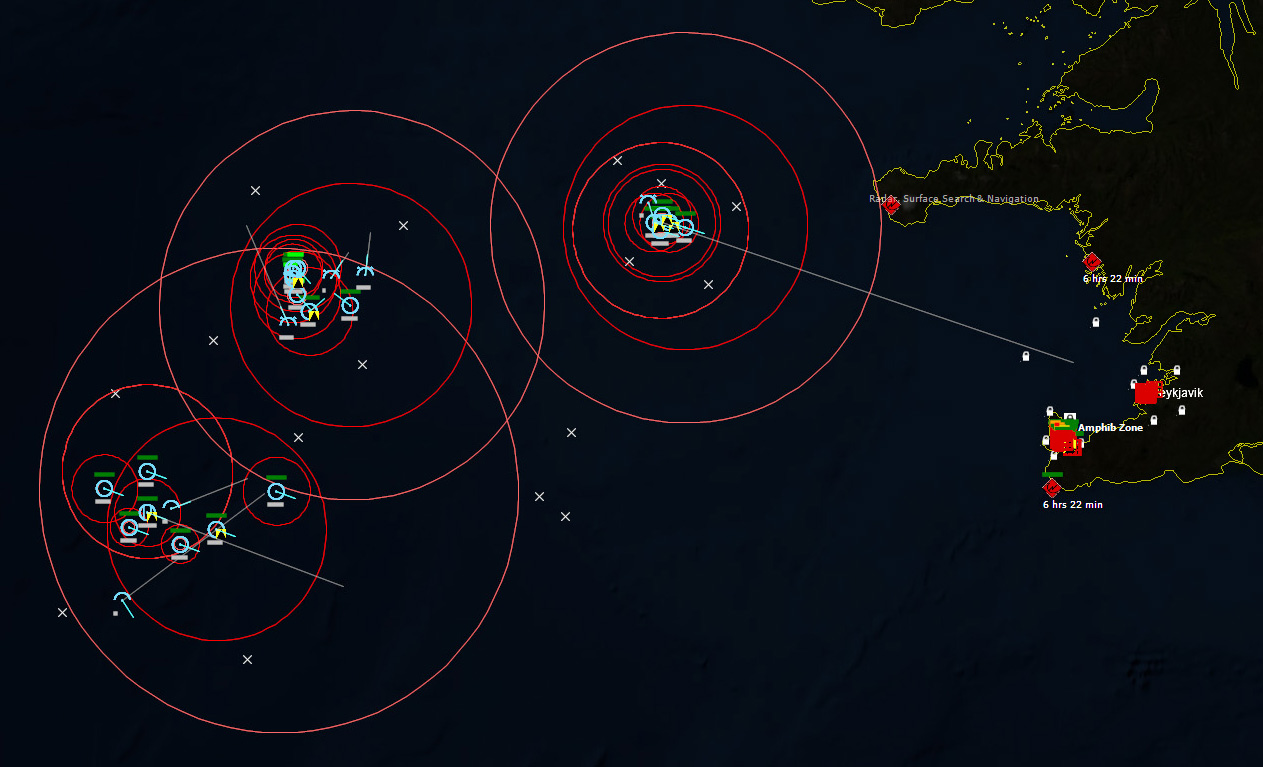
 Initial Positions"The Hotel is on a first first strike mission with possible targets of Boston and New York." As a Massachusetts boy, that makes it personal to me. I see that "Mikes Pad" is a location on the map near Boston...hell, I could put Dan's Pad near to Boston as well. I don't want my home state to get nuked, so I'm going to find that Hotel and send it to the bottom.
 Hotel-class submarineThe last known position of the Hotel is at Datum 1327, six hours ago, speed 5kts. In six hours, the Hotel could travel 30nm, and I assume it is heading southwest, so I will concentrate my search in that area.
I set up my patrols of Sea Kings, P-3B Orions, and CP-107 Arguses, and the waiting begins.
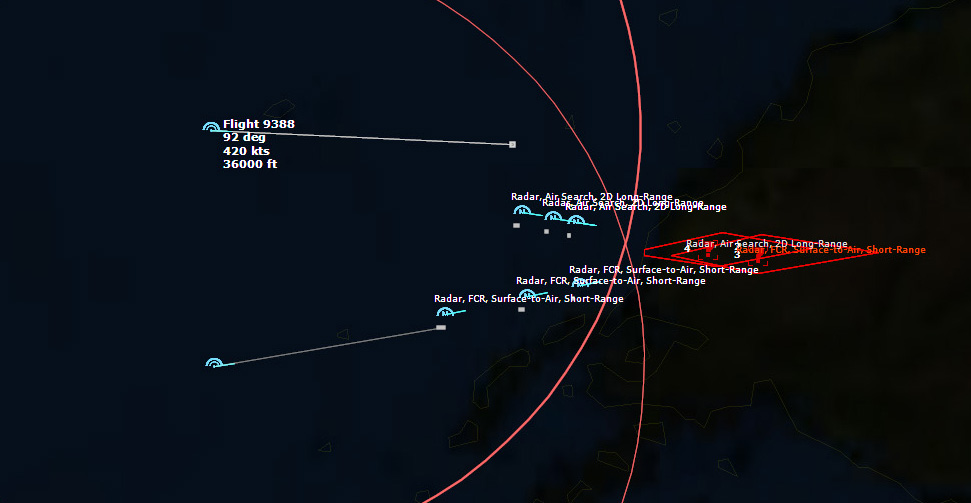
 P-3B Orion082958Z Contact! A P-3B Orion out of Argentia detects a submarine contact. I immediately declare it hostile and begin prosecution.
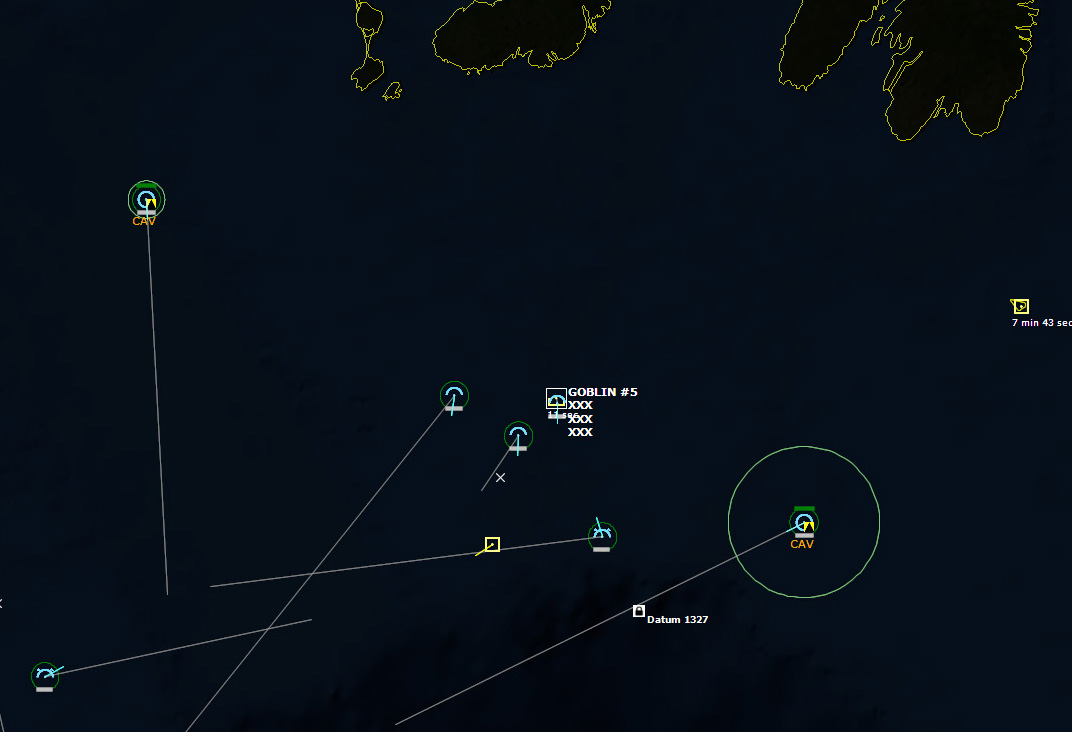 Contact!My P-3B drops a torpedo, which misses the target.
 First torpedo drop.
Not messing around, a second P-3B shows up and drops a B57 Multipurpose Sub Bomb [20kT Nuclear].
And just like that, it's over.
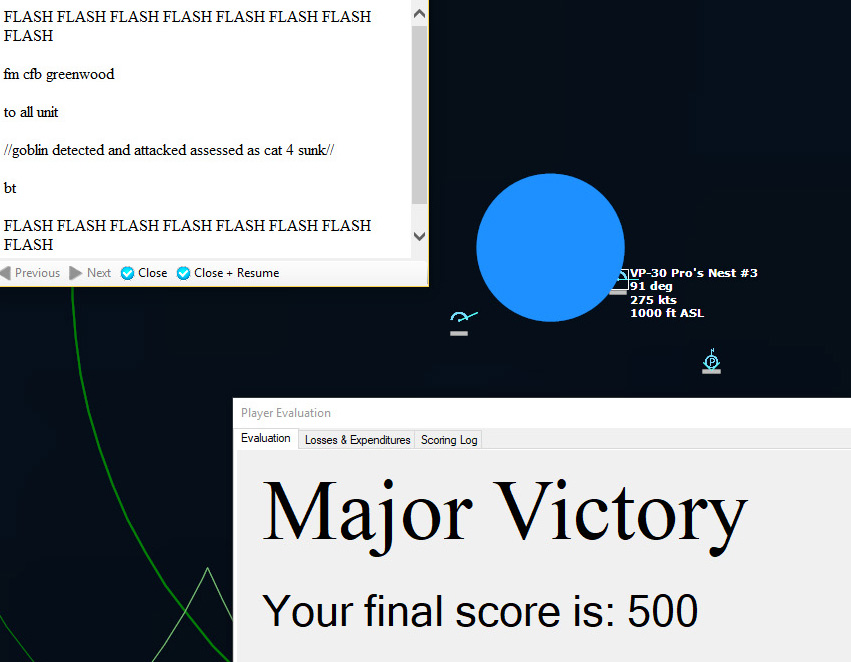 And it's over...
See? You threaten Boston, you die.
Major Victory
Score: 500
SIDE: Soviet Union
===========================================================
LOSSES:
-------------------------------
1x PLARB-701 Hotel III
EXPENDITURES:
------------------
------------------
2x Generic Acoustic Decoy
SIDE: Nato
===========================================================
LOSSES:
-------------------------------
EXPENDITURES:
------------------
1x AN/SSQ-41B Jezebel LOFAR
1x AN/SSQ-41A Jezebel LOFAR
1x Mk46 LWT Mod 2
1x AN/SSQ-50B CASS
1x B57 Multipurpose Sub Bomb [20kT Nuclear]
SIDE: Biological
===========================================================
LOSSES:
-------------------------------
EXPENDITURES:
------------------
SIDE: Neutral Fishing Boats
===========================================================
LOSSES:
-------------------------------
EXPENDITURES:
------------------
August 18, 2017
COMMAND: Northern Inferno Scenario 13: Deliverance Part 5
In Parts One, Two, Three and Four of this scenario, the NATO surface groups tasked with retaking Iceland from the Soviets have undergone some severe trials. They have been sustaining incessant air attacks from Keflavik and also cruise missile attacks from Soviet submarines. The damage has been extensive, including the loss of one ship and several others heavily damaged. But the USS Oriskany and the FS Clemenceau managed to launch counterstrikes.The strikes hit Keflavik hard, and is sufficient to severely curtail flight operations. In fact, the Soviets manage to get a few MiG-23 Floggers airborne as a CAP, but that's it. Follow-up strikes on Keflavik suppresses its air defenses and manages to destroy many more aircraft on the ground. The way is clear now for the amphibious assault.
It is the middle of the night, and my AEW aircraft is currently refueling. I launch some Shrike-armed A-7s in an attempt to go after Soviet Radar stations in the hopes of eliminating them to aid in the invasion.
 The Amphibious Assault Group closes to within 100nm of the objective011532Z My A-7s launch their Shrikes, and the radar site attempts to defend itself by firing SA-8b Geckos.
 Magnum!The Shrikes take out a Long Track [P-40] Radar set, and also an SA-8b Gecko Mod-0 [9A33BM2] TELAR. The A-7s proceed to southern Iceland, where another Long Track radar is set up. This Radar apparently does not have any SAMs to protect it, so it is an easy kill.
014703Z On the way back home, I detect a fighter launching from Keflavik, undoubtedly to intercept my returning A-7s. My A-7s soon find themselves in a dogfight northwest of Keflavik.
 Dogfighting MiG-23sThe MiGs engage in a turning fight with my A-7s at low altitude, and unfortunately I lose one A-7 to an AA-8 Aphid. Annoyed with this, USS Farragut launches a SAM at one of the MiGs. The shot down A-7's wingman kills a MiG-23 with a Sidewinder. The second MiG shoots down another A-7, but is in turn shot down by a head-on gun pass by one of the two remaining A-7s.
015400Z There are three Surface Search/Navigation Radars active, so I launch an Etendard against each one from Clemenceau. Little by little I will roll back Soviet assets in preparation for the assault.
 The Etendards close in on their targets.One by one the radars are all destroyed.
024500Z I detect a submarine uncomfortably close to the Iowa amphibious group.
 Submarine contact!I slow down the Iowa group from Cruise to Creep until I deal with this threat. My Sea Sprite from USS Spruance drops a Mk46 on the submarine, which turns out to be a Foxtrot, and damages it. USS Farragut finishes it off with an ASROC.
013337Z I detect a bogey airborne over Keflavik, and from its radar signature, it's clear that its a Su-24 Fencer B. I immediately direct Oriskany to launch a pair of F-8s. The Fencer is almost in range of Farragut's SAMs. Then I detect another bogey being launched.
 Two Su-24s launch from Keflavik.Farragut lights off its radars.
And then I detect another contact launching at Keflavik, yet another Fencer, followed a short time later by another.
Farragut launches SAMs.
 Birds away.It takes four SAMs, but the first two Fencers are killed. Farragut then engages the second pair of Fencers. Five SAMs later, and they are downed. Farragut has 11 RIM-67As left. USS Sellers has 24 RIM-66As in case any get by Farragut.
Two more Fencers take off from Keflavik, and they are shot down, one by a SAM, one by a Sidewinder.
Two more Fencers take off (#7 and #8, if you're counting). The F-8s are loitering right next to Keflavik now, so one is shot down by a Sidewinder almost immediately. The second is shot down by a SAM.
No new launches are detected, so perhaps that's it for now.
063937Z The sky lightens over Iceland, and the Iowa group is less than five miles from entering the Amphib Zone. Time to begin the strikes. I launch a pair of recon Etendards from Clemenceau. Once they are well on their way, I launch six more Etendards to attack any targets that the Etendards discover.
070327Z As the Amphibious Group enters the Amphib Zone, Pensacola and Shreveport begin landing troops ashore.
 The Amphibious Assault has begunThe HQ AAV Plt A Coy attacks the SA-6 Gainful Battery northwest of Reykjavik. USMC armored units maneuver to engage targets around Reykjavik as well. The SAM battery is quickly taken out.
070403Z USS Iowa opens fire with its 16" guns on an artillery position north of Keflavik, causing some light damage to to the guns but more importantly causing the Soviet gun crews to wet themselves.
 The battles rages around ReykjavikAt Reykjavik the US Marines devastate the Soviet Naval Infantry, rolling over them.
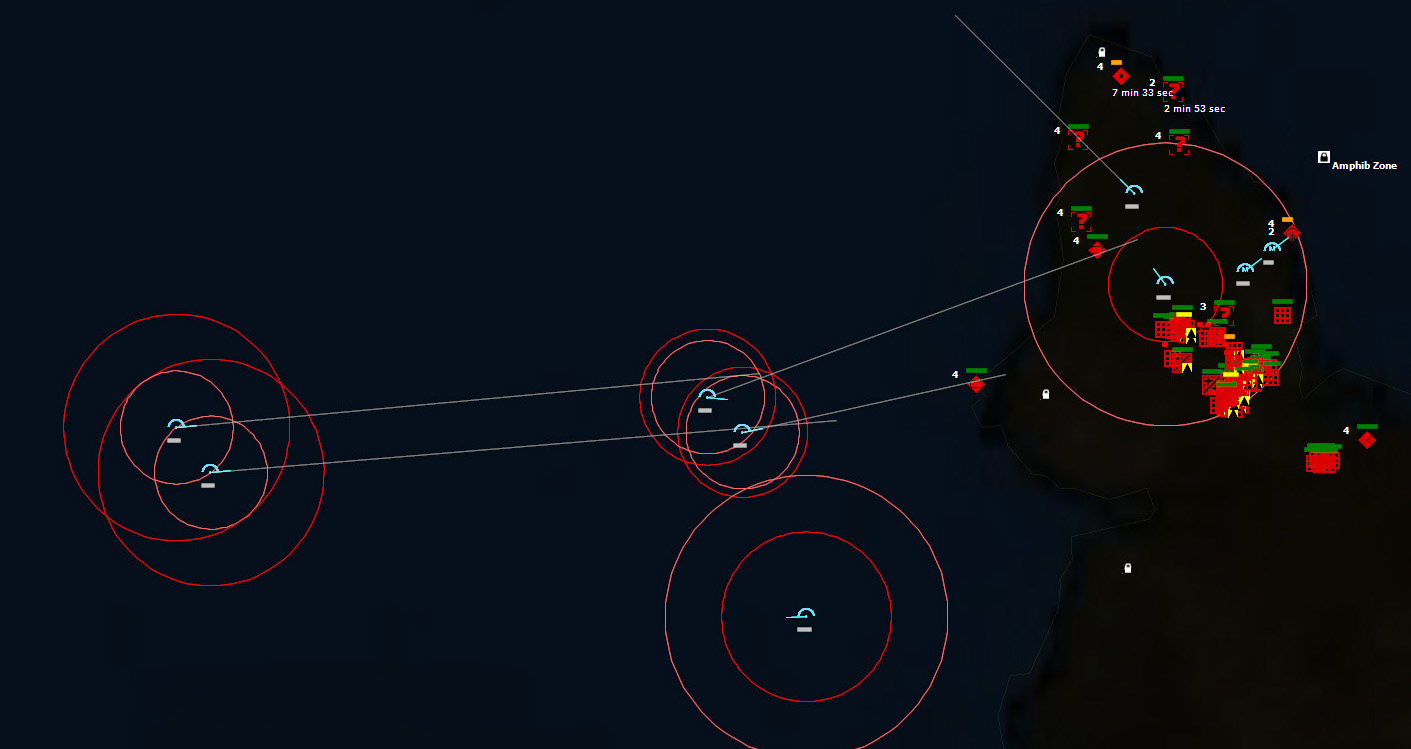 Airstrikes underway at KeflavikAt Keflavik, I lose a Recon Etendard and a strike Etendard to a ZSU-23-4 that has plagued me from my first strikes on Iceland twelve hours ago, but a second Etendard finally takes it out.
071928Z The initial airstrikes over, I decide to begin the air assault. I launch Sea Cobras from USS Iowa and send them to Keflavik. Other helos begin to take off and I direct them to Landing Zone One (Reykjavik)
 Sea Cobras arrive on the scene, bringing deathThe Cobras devastate the remaining ground forces around Keflavik, clearing the way for unopposed landings. Iceland is now in NATO hands.
Minor Victory
Score: 750
Conclusion
This was a harrowing scenario. After taking the beating that I did from Soviet aircraft, I was very concerned about being able to complete the mission. While my own strike was inbound to Keflavik, I looked on the forum and saw a thread about this scenario where the poster was having difficulties and a commenter said that the "trick" was to simply not get detected by the Soviets. If only. I was dreading another scenario like Scenario 8: Damn the torpedoes! where if you get detected you have essentially no chance to win...but you don't realize it until hours of playing later when your fleet gets pounded. In Damn the Torpedoes I had to replay the mission seven times before I identified everything I had to do to ensure a win--and I still had to get lucky. "Winning" that way feels like cheating to me.
This leads to a philosophy I have about games/simulations--I tend to dislike games where I have to do everything perfectly in order to win. That is to say, games where I have to repeat things over and over until I know what's going to happen in a scenario ahead of time so I can preempt everything on a subsequent attempt...and only once all those things are known is it possible to win.
I much prefer games where if I make a mistake, I can play through the difficulties those mistakes cause and potentially recover from them. Deliverance was one such scenario. I did get detected by the Soviets early on, and paid for it by sustaining massive airstrikes causing multiple ship losses. Although bloodied, I still managed to complete the mission. This was much more satisfying, and honestly, I feel it is more realistic. There are players who talk about plowing through scenarios without suffering a single casualty, and that's great for them. For myself, I play COMMAND not to "crush" scenarios to see if I can achieve the maximum possible score, but rather to see if I can get through the scenario at all on the first attempt. In war, bad stuff happens, and the winner is the one who recovers from setbacks and keeps on fighting.
SIDE: Soviet Union
===========================================================
LOSSES:
-------------------------------
12x 152mm/34 2S3 M1973 Akatsiya
4x 23mm ZSU-23-4 Shilka
40x 7.62mm MG/Unguided Infantry Anti Tank Weapon
1x A/C Hangar (2x Large Aircraft)
26x MiG-23M Flogger B
30x MiG-27 Flogger D
3x PL-641 Foxtrot
2x PLARK-670M Charlie II [Skat-M]
20x PT-76B Amphibious Tank
3x Radar (Generic Surface Search Radar)
2x Radar (Long Track [P-40])
8x SA-6a Gainful [2P25] TEL
15x SA-7b Grail [9K32M Strela-2M] MANPADS
1x SA-8b Gecko Mod-0 [9A33BM2] TELAR
4x SA-9b Gaskin [BRDM-2] TEL 2
29x Su-24 Fencer B
4x Tu-95RT Bear D
2x Vehicle (Straight Flush [1S91])
EXPENDITURES:
------------------
5x 23mm AM-23 x 2 Burst [50 rnds]
3x 23mm AM-23 x 2 Burst [50 rnds]
27x 23mm Gsh-23L Burst [40 rnds]
1x 23mm Gsh-6-23 [50 rnds]
67x 23mm ZSU-23-4 Shilka Burst [50 rnds]
3x 30mm Gsh-6-30 Burst [50 rnds]
48x AA-7 Apex A [R-23R, SARH]
12x AA-8 Aphid [R-60T]
29x AS-12 Kegler [Kh-25MP, ARM]
60x AS-9 Kyle [Kh-28]
11x Generic Acoustic Decoy
20x Generic Chaff Salvo [4x Cartridges]
10x Generic Flare Salvo [2x Cartridges, Single Spectral]
8x Generic Flare Salvo [4x Cartridges, Single Spectral]
15x SA-6a Gainful [9M336]
43x SA-7b Grail [9M32M]
20x SA-8b Gecko Mod-0 [9M33M2]
22x SA-9b Gaskin [9M31M]
16x SS-N-9 Siren [P-120 Malakhit, 200kT Nuclear]
SIDE: NATO
===========================================================
LOSSES:
-------------------------------
11x A-7B Corsair II
2x CG 16 Leahy
1x DDG 2 Charles F. Adams
1x E-1B Tracer
5x Etendard IVM
1x Etendard IVP
4x F-8E(FN) Crusader [Le Crouze]
3x F-8J Crusader
1x RF-8G Crusader
2x SH-2D Seasprite
EXPENDITURES:
------------------
4x 100mm/55 Model 1968 PFHE
116x 105mm L7A3 APFSDS-T
116x 105mm L7A3 HE
112x 105mm L7A3 HEAT
56x 12.7mm/50 MG Burst [10 rnds]
8x 127mm/54 HE-CVT [HiFrag]
8x 20mm M197 Burst [25 rnds]
3x 20mm Mk12 x 2 [50 rnds]
20x 20mm Mk12 x 4 [100 rnds]
3x 406mm/50 Triple AP Salvo [3 rnds]
3x 406mm/50 Triple HiCap Salvo [3 rnds]
173x 40mm Mk19 Grenade
24x 76mm/50 Twin Frag Burst [2 rnds]
20x AGM-45B Shrike [ARM]
8x AGM-62B Walleye II ER/DL
16x AIM-9G Sidewinder
26x AIM-9H Sidewinder
280x AN/SSQ-47 Julie Active Range-Only
8x AS.30
16x BGM-71B TOW
8x CBU-59/B APAM [717 x BLU-77/B Dual-Purpose Bomblets]
108x DSTV 4L LOFAR [TSM 8010]
17x Generic Chaff Salvo [5x Cartridges]
12x Generic Flare Salvo [3x Cartridges, Single Spectral]
208x HYDRA 70mm Rocket
10x Masurca Mk2 Mod 3
12x Mk20 Rockeye II CB [247 x Mk118 Dual Purpose Bomblets]
16x Mk46 LWT Mod 2
54x Mk82 500lb Snakeeye
24x Mk83 1000lb LDGP
6x R.550 Magic 1
40x RIM-66A SM-1MR Blk IV
158x RIM-67A SM-1ER
1x RUR-5A Mod 4 ASROC RTT [Mk46 Mod 2]
792x SNEB 68mm Rocket
20x T.200 400kg GPB
72x T.25 250kg GPB
SIDE: Biological
===========================================================
LOSSES:
-------------------------------
EXPENDITURES:
------------------
August 17, 2017
COMMAND: Northern Inferno Scenario 13: Deliverance Part 4
In Parts One, Two, and Three of this scenario, the NATO surface groups tasked with retaking Iceland from the Soviets have undergone some severe trials. They have been sustaining incessant air attacks from Keflavik and also cruise missile attacks from Soviet submarines. The damage has been extensive, including the loss of one ship and several others heavily damaged. But the USS Oriskany and the FS Clemenceau managed to launch a counterstrike.The strike hits Keflavik hard, destroying several aircraft on the ground and damaging all of the Runway Access Points in hopes of putting the airfield out of action. Every Runway Access Point is damaged, but it remains to be seen if they are damaged enough to curtail flight operations. If the Soviets manage to get off another strike against my surface groups, I'm in serious trouble.
I have launched an F-8J Crusader from Oriskany to attempt to take out a Tu-95 Bear that has been spying on my surface groups. I also launch a RF-8G Crusader to do recon over Keflavik to see if it can do more BDA.
111809Z First there's some good news as my ASW helos from Oriskany finally close in and kill a Foxtrot that has been shadowing me.
112503Z More good news is that my F-8J Crusader successfully takes out the Tu-95RT Bear D. The Crusader still has three Sidewinders left, so I decide to keep him in airborne in case the Soviets decide to launch another Bear.
113508Z My RF-8G Crusader recons Keflavik, detecting many ground units defending the base, and after wandering a little too close to some SAM launchers, has to dodge eight SAMs. But fortunately it survives, and continues at a more respectful distance.
 Many ground units detected.After another circle of the area, I send it towards Reykjavik, and it immediately comes under fire from an SA-6 Gainful. Fortunately it dodges the pair of SAMs launched at it. After another quick flyby, I send the Crusader home.
120249Z Crap. My E-1B Tracer detects a pair of aircraft launching from Keflavik, which is very bad news. It means that my attempt to disable the airfield was unsuccessful. It also means that it's only a matter of time before the Soviets launch another strike at me.
120708Z One of my Sea Kings sinks a Charlie II submarine that was getting uncomfortably close to the Iowa group.
124348Z For a while now I have detected a submarine contact by its radar emissions. It has been too far away to post a threat, but I sent a RF-8G Crusader to investigate, and it turns out it's an SSR. SSR? A recon sub? I scan the database and determine that it is probably a Whiskey Canvas Bag, a radar picket submarine.
130000Z I've been watching my damaged ships for a while. The major fire on USS Harry E. Yarnell is now severe, which does not bode well for it. The USS Oriskany, on the other hand, had a severe fire which is now only major, which implies that the fire fighters on board are starting to get it under control, which is very good news.
131500Z USS Lang has sealed all leaks, and its severe fire is reduced to major, which is also good news. USS Semmes on the other hand, sealed its leaks as well, but its fire has increased from minor to major.
140724Z A Sea King from Oriskany sinks another Charlie II submarine. By this time Oriskany has also managed to reduce its fire from major to minor.
It is not all good news, however. Minutes later I get a message from Yarnell. While it has sealed the leaks, the fires rage out of control, and the captain is forced to order Abandon Ship.
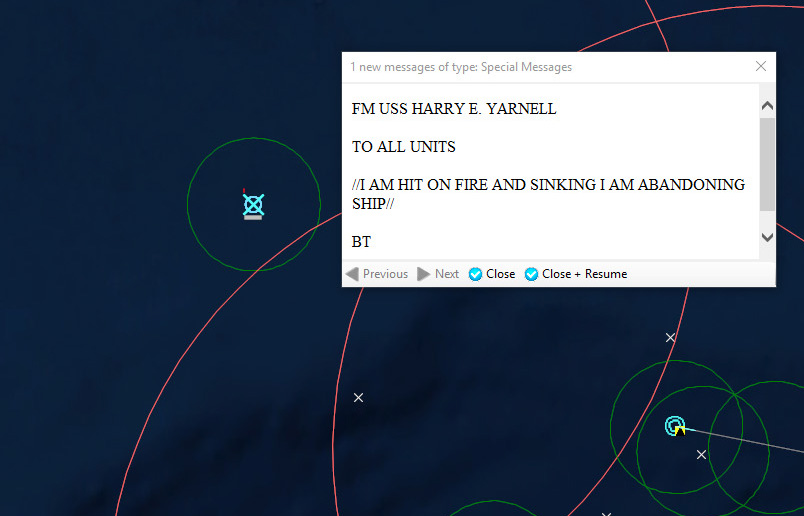 USS Harry E. Yarnell sinks.
142749Z My E-1B Tracer detects another pair of aircraft launching from Keflavik. I hope it's more CAP aircraft and not the beginning of a strike. After a few minutes, it does appear to be a CAP. Whew. Over an hour until the first of my strike aircraft will be ready again, and more than two hours until the majority of my strike aircraft will be ready.
150401Z USS Oriskany has extinguished all fires, which is a big relief. USS Semmes however, still has a major fire, which is soon upgraded to severe, and I anticipate that the ship will soon be abandoned. USS Lang successfully extinguishes all fires, and sets a course for Semmes in an attempt to assist with fire fighting or rescue operations. It is still damaged, however, so it can only make five knots, which means it will be two hours before it can reach Semmes.
152116Z One of my F-8J Crusaders shoots down another Tu-95RT Bear D.
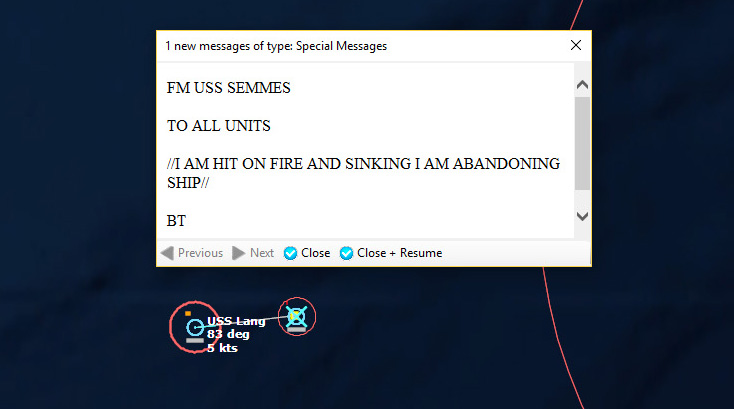 USS Semmes sinks154059Z As expected, USS Semmes is forced to abandon ship.
171819Z Early on in this mission, the Soviet CAP consisted of three flights of two aircraft, all patrolling a sector around Keflavik. Counting the shootdowns and strikes upon Keflavik, I've taken out sixteen MiG-23s. After the strikes, they have only managed two-ship CAPs, and the last one is a single-ship. This would imply that they only have seven MiG-23s left and are following the 1/3 rule. It's also consistent with them starting the battle with a regiment of some 24 aircraft.
Many of my aircraft are now ready for a second strike, and also with the Soviets only having one aircraft airborne, this is the ideal time to strike.
I have a little breathing space since the airfield is already damaged, so I can plan a little more methodically and also worry a little more about force protection.
In southern Iceland the Soviets have emplaced a Long Track [P-40] air search radar that is serving as their primary early warning radar and also a mobile air search radar near Hvammsfjordur that I will take out. I will use my Shrike armed A-7 in an attempt to take them out.
Following that I will launch an RF-8G Crusader to do recon and BDA. Then my strikes will consist of launching my Walleye-armed A-7s to go after the Runway Access Points again. After the last strike they were in the following condition:
Runway Access Point 1: Heavy Damage and Major Fire (and a destroyed MiG-23 blocking it)
Runway Access Point 2: Light Damage
Runway Access Point 3: Heavy Damage and a Minor Fire
Runway Access Point 4: Light Damage
Runway Access Point 5: Heavy Damage and a Major Fire
Runway Access Point 6: Heavy Damage and a Severe Fire
However, I am sure the Soviets are attempting to repair them, and also they have managed to get a CAP up, so the airfield is still partially operational. I have to keep hitting it to make sure it stays only partially operational, if at all.
After that, I will launch my strikers in an attempt to reduce the number of SAMs and AAA in the area. The losses I took during the first strike were too much, and if I am to keep striking, I need to perform some SEAD.
172500Z I begin launching aircraft for the strike.
 The strike is inbound174432Z The single MiG-23 Flogger flying CAP detects and launches missiles against my two F-8E Crusaders detailed to take him out.
Two more bogies are detected at Keflavik. I guess the Soviets have detected the raid and are now sending up what they can to stop it.
 The Soviets respond to the strikeThe two new MiG-23s join the dogfight and begin firing radar-guided missiles. One of the Floggers is shot down by a R.550 Magic.
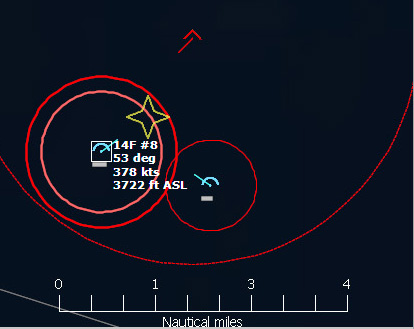 A second Flogger is shot downSeconds later, the same F-8E shoots down the last MiG in a head on pass with his guns. The skies are clear...for the moment.
My Shrike-armed A-7 launches a pair of Shrikes at the 2D Long-Range Air Search Radar at Hvammsfjordur, but they are both shot down by SA-8 Geckos. The A-7 launches its second pair of Shrikes, but they are also shot down.
 Walleyes away!
 The first Walleye is a direct hitOne of the Walleyes is shot down and another misses, but there are other hits. My RF-8G Crusader flies over the area to spot targets, and comes under wave after wave of SAMs, and every time it evades, it seems to evade right into the path of several other SAM sites. Eventually, it is shot down by a ZSU-23-4. Fortunately, it locates many of these targets for the strike aircraft to attack.
 Strikers converge on Keflavik from multiple directionsThe first A-7 to arrive attempts to drop some cluster bombs on a SA-7b Grail site, but can't locate it, and is promptly shot down by it.
The second A-7 manages to spot his SA-7b target and takes it out with Mk20 Rockeyes. The third takes out an SA-9 Gaskin, but is shot down as well.
Two Etendards arrive, and each one takes out its intended targets of an SA-7b Grail and a SA-9b Gaskin, and miraculously both live to tell about it.
Two more Etendards are next, and go after another SA-7b Grail and a ZSU-23-4, and both are successful.
Next is two A-7s with Mk83 1000lb bombs, and they go after Runway Access Points, one of them scoring a direct hit, the other a near miss.
Another A-7 arrives, does BDA on the two Runway Access Points his fellow pilots hit (Heavy Damage, Severe Fire and Heavy Damage, Major Fire), and then drops his Mk82 Snakeeyes 500lb bombs on a Tarmac Space and takes out a MiG-23 and a pair of Su-24 Fencers.
The next Etendard takes out a pair of Su-24s and a MiG-27 with its 400kg bombs.
The next pair of Etendards launch their AS.30 missiles against hangars, taking out two MiG-23s, two MiG-27s, and one Su-24.
Three more Etendards arrive, shooting their SNEB 68mm rockets at more aircraft on the ground, killing ten Su-24 Fencers, two MiG-23 Floggers, and two MiG-27 Floggers.
All in all, not a bad strike.
The later waves in the strike did not run into any anti-air fire to speak of, so it looks like Keflavik is suppressed. All in all, my aircraft killed tally is:
24x MiG-23M Flogger B
30x MiG-27 Flogger D
21x Su-24 Fencer B
A significant chunk of aircraft. My next strikes will scan for any surviving aircraft on the ground, take out any remaining hangars, go after radars, and starting pounding the Soviet ground forces in preparation for the amphibious assault.
185025Z My amphibious fleet is 174nm from its zone by Iceland, and moving at 14kts, I should get there in just under 13 hours, or around 0530 local time, so it will be an assault at dawn.
191506Z I detect another Recon Bear to the north, and I send an F-8J Crusader to take it out, killing it with a Sidewinder. That's three Bears down.
200849Z My E-1B Tracer detects a bogey over Keflavik. So despite all my efforts, the airfield isn't completely neutralized. Two minutes later I detect a second bogey. They begin circling Keflavik, so they are clearly an attempt at a CAP again.
230907Z I shoot down another Recon Bear to the north. My E-1B Tracer--my only E-1B Tracer, finally goes Bingo and heads for home. This means I have some three hours without any AEW support. But it is the dead of the night, and since I keep shooting down their Recon planes, I'm counting on the fact that they can't really do anything to hurt me now.
Come morning will come the amphibious assault, assuming all goes well...
To be continued...
August 16, 2017
COMMAND: Northern Inferno Scenario 13: Deliverance Part 3
In Parts One and Two of this scenario, the NATO surface groups tasked with retaking Iceland from the Soviets have undergone some severe trials. They have been sustaining incessant air attacks from Keflavik and also cruise missile attacks from Soviet submarines. The damage has been extensive, including the loss of one ship and several others heavily damaged. But the USS Oriskany and the FS Clemenceau have managed to launch a counterstrike, which is due to attack soon.The NATO F-8 Crusaders have proven to be no match for Soviet MiG-23 Floggers with their radar guided missiles, and so the air battle has been difficult. The current strike against Keflavik was launched without air cover as none of the fighters are available to escort it, but it could not be helped. The airfield simply has to be taken out of action immediately.
 The NATO strikes are inbound for KeflavikThe strike continues to close in on Keflavik. The Etendards begin topping off their fuel from their tankers before continuing their strike.
 102100Z In a rare bit of good news, a Sea Sprite from USS Spruance sinks a Foxtrot submarine that has been threatening my surface groups. Earlier a Sea King from Oriskany damaged it, and finally the Sea Sprite finishes it off.
102310Z Closer to Keflavik, the Soviet CAP has become aware of the presence of my strike, and move to intercept.
 The Soviet CAP respondsThis was not unexpected, I just hope that my strikes are able to get through.
The first four missiles miss. My first strikers are seven miles out flying 550kts at 200ft. They are armed with cluster bombs, and their target is aircraft on the ground.
 The first A-7s go feet dry.Multiple SAM launches are detected.
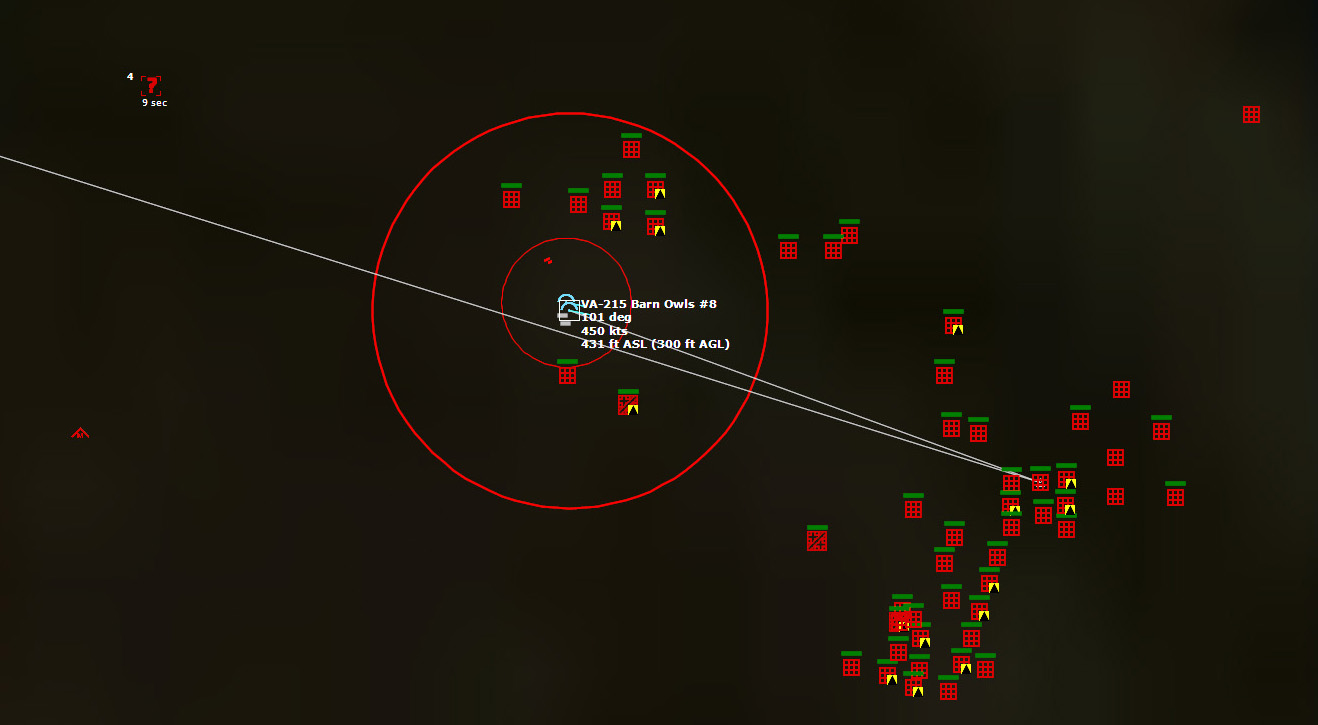 Bombs away!Multiple tarmac spaces have aircraft on them. Moving at 450kts, its difficult to redirect the A-7s to go after ones occupied by aircraft as opposed to ones that are not.
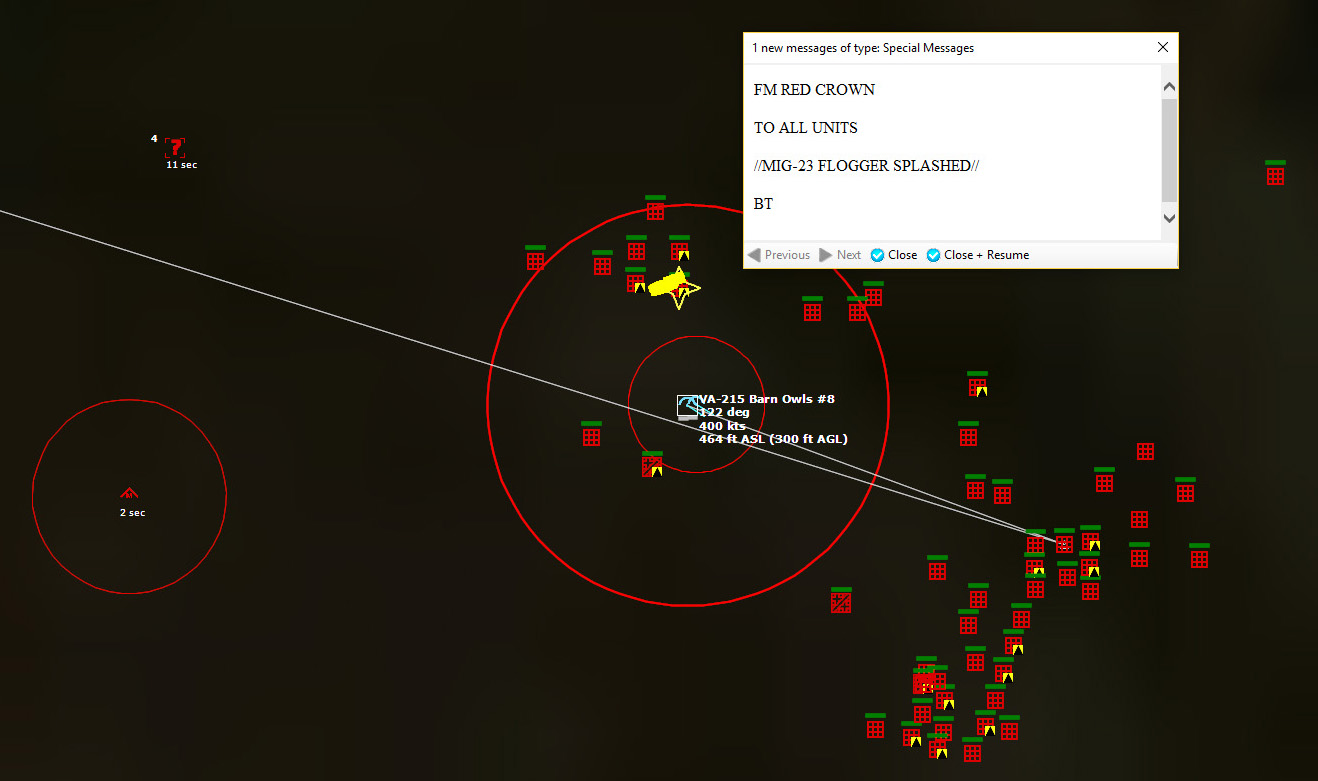 That's a hit!On target.
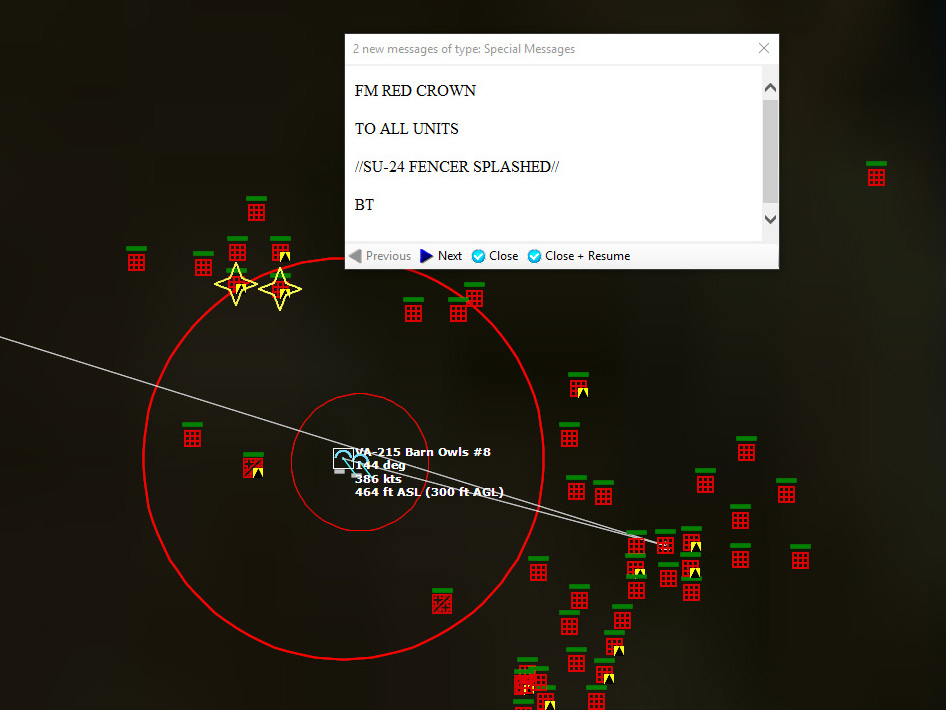 And more hits. Beautiful.The trailing A-7 is shot down by a short range missile from a Flogger. My second A-7 drops its cluster bombs as it comes under fire from a ZSU-23.
 Bombs away!
 More hits!Multiple MiG-23s are destroyed. Fantastic. Another of the A-7s is destroyed by an SA-6a Gainful, and the third is shot down by an SA-7b Grail.
My next A-7s begin firing Shrikes at SAMs in the area.
 Magnum!The first two Shrikes misses by a mile. (well, 503ft and 895ft).
As my other strikers move in, more MiG-23s from the CAP respond, launching missiles. One of the A-7s is shot down. An SA-6 battery turns on its radar, and shoots down one of my Shrike-armed A-7s, but not before the A-7 gets off a pair of Shrikes in return. One malfunctions (of course), but the other hits a Straight Flush and destroys it.
The MiGs launch missile after missile against the A-7s. Two more A-7s are shot down. Soon after, the MiGs stop firing missiles, which makes me think that they might all be Winchester...they certainly fire enough missiles...
103056Z An A-7 drops his load of 18 Mk82 500lb Snakeeyes. Several of them hit the intended Runway Access point, and do heavy damage to it. An SA-7 and an SA-9 chase after him as he egresses, but he successfully dodges them.
Another pair of A-7s is next, each carrying 6 Mk83 1000lb bombs. Just as they get into position to attack, a MiG fires a pair of missiles at them, and they are forced to turn away. They dodge those two missiles, but again, SAMs begin launching all over the place. The A-7s successfully dodge them, and drop their bombs.
 Bombs away!They take some anti-aircraft fire, but manage to get their bombs off. It's uncertain how good of a job they did.
My Shrike armed A-7 manages to take out two Floggers as they are turning on their final approach to the runway at Keflavik.
Now that my A-7s are out of bombs, I direct those that have Sidewinders to cover the Etendards as they make their attack runs. There are a pair of MiGs that have just launched from Keflavik, and I send my A-7s in pursuit. They manage to shoot down two more MiGs.
 Targets hitThe first four Etendards attack. Two are armed with rockets. One of them is shot down just as it launches rockets, but it succeeds in destroying a pair of Su-24 Fencers on the ground. The other is destroyed by AA fire.
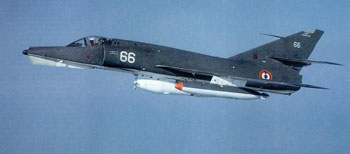 Dassault EtendardThe second pair drop their 400kg bombs on a runway access point, damaging it.
The next pair drop their bombs on a runway access point, followed by another pair who do the same thing, also managing to catch a hapless MiG-23 on the access point at the time.
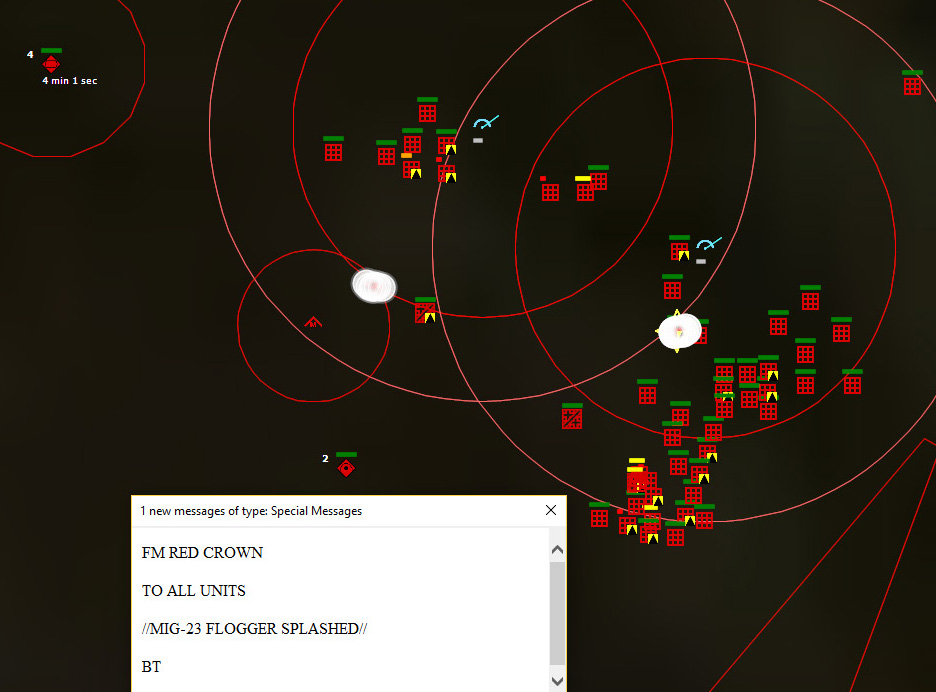 More targets hit.Next are a pair of Etendards with rockets, which launch at a pair of tarmac spaces with several aircraft each on them.
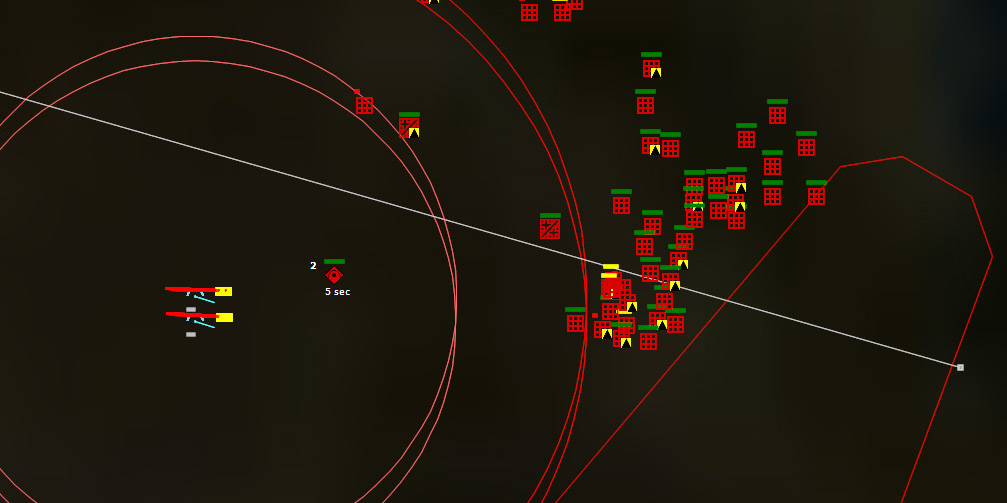 Rockets away!Direct hit. Two Su-24 Fencers are hit, two MiG-23s are hit, and three MiG-27s are hit.
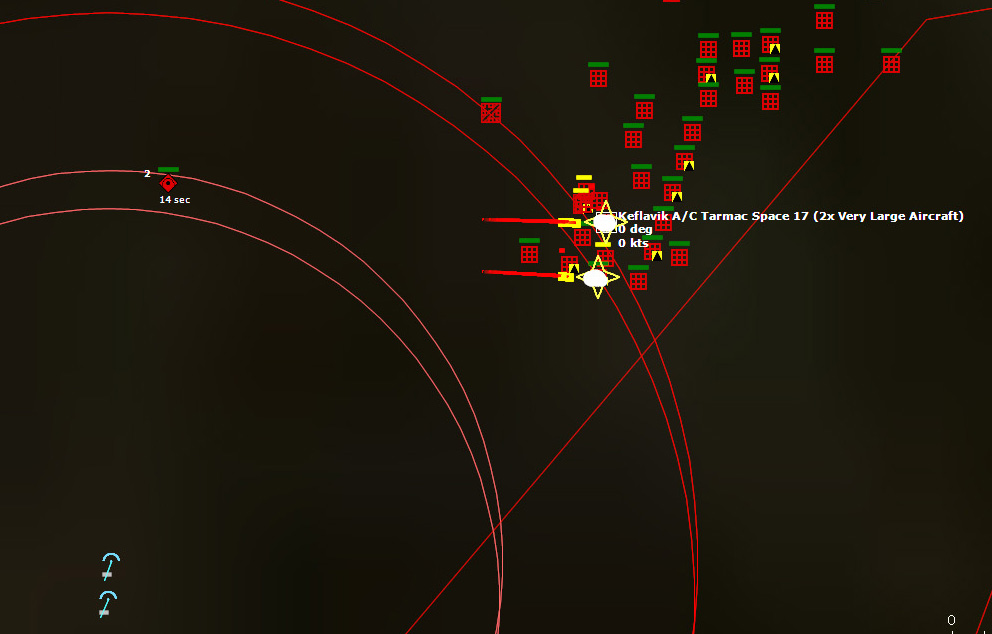 Rockets impact the grounded Soviet aircraftNext up is an A-7 which drops a pair of Walleyes, one for Runway Access Point 3, and one on Runway Access Point 4, the only two access points that haven't been hit yet. I originally had three A-7s with Walleyes, but inexplicably they all aborted the mission right after takeoff, and I only noticed it once two of them had already landed--the last one was on final approach to Oriskany so I quickly ordered him to get back on the job and attack. Good thing I did, too.
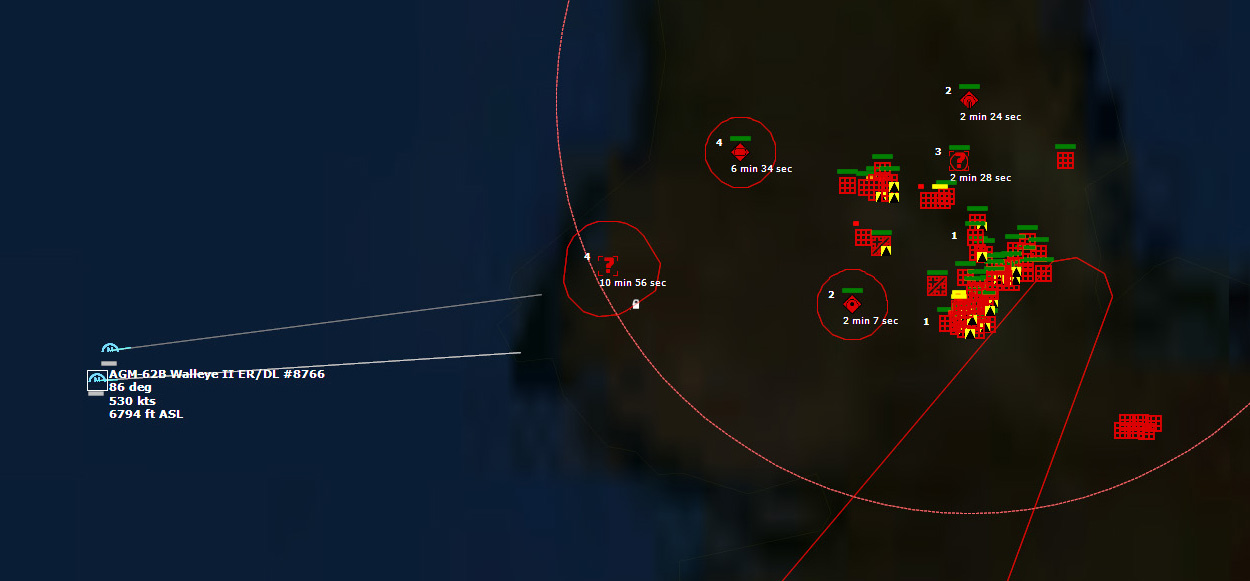 Walleyes away!One of the Walleyes is shot down by a ZSU-23-4 Shilka, while the others impact Runway Access Point 3, causing a severe fire.
That leaves just Runway Access Point 4, at which I direct my last two Etendards. They are armed with 400kg bombs, which I hope are enough to put it out of action.
The first Etendard gets his bombs off, which come close but miss the target, and then it is promptly shot down by an SA-9b Gaskin. The second Etendard gets his bombs off.
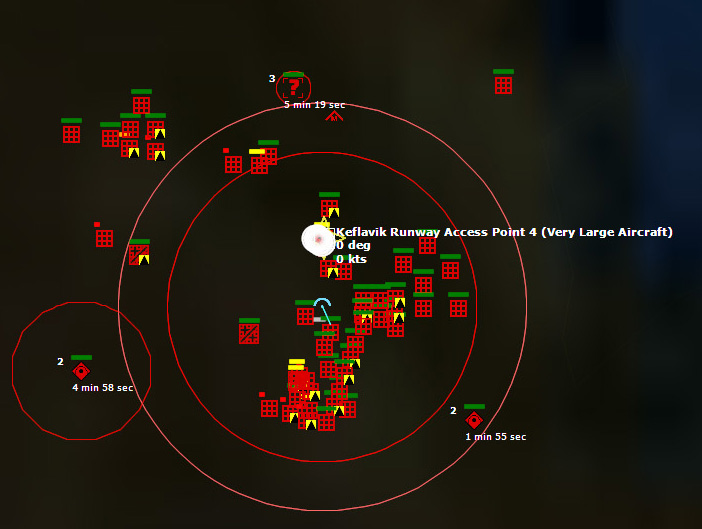 More near missesAgain there are no direct hits, but they land close enough to do some minor damage. The Etendard is promptly shot down by a ZSU-23-4.
The strikes are over. All surviving aircraft return to their carriers. In the strike I lost 7 A-7Bs and 4 Etendard IVMs, which is more than I wanted to lose. However, I destroyed 6 Su-24 Fencer Bs on the ground, 3 additional MiG-27 Flogger Ds on the ground, and a dozen or so MiG-23s. This is all good news, but the real question is did I put the airfield out of commission? From the latest BDA I have, here's the damage:
Runway Access Point 1: Heavy Damage and Major Fire (and a destroyed MiG-23 blocking it)
Runway Access Point 2: Light Damage
Runway Access Point 3: Heavy Damage and a Minor Fire
Runway Access Point 4: Light Damage
Runway Access Point 5: Heavy Damage and a Major Fire
Runway Access Point 6: Heavy Damage and a Severe Fire
Whether or not that's sufficient to put Keflavik out of action remains to be seen. If it's not and the Soviets manage to launch another strike against the Oriskany or Iowa groups, I'm in trouble.
To be continued...
August 15, 2017
COMMAND: Northern Inferno Scenario 13: Deliverance Part 2
 In Part One of this scenario, my surface groups set a course for Keflavik to retake Iceland from the Soviet occupation. The Soviets want to keep it, however, so immediately I had to start fending off air attacks. The first raid cost me some F-8 Crusaders, but I wiped it out before it could launch any missiles. The second raid was nearly wiped out, but managed to get off some missiles and damage the USS Harry E. Yarnell, a Leahy-class cruiser defending the Iowa group, significantly reducing the air defense capability of that group.
And now, with all of my fighters refueling and rearming, a third raid is inbound, the largest of them all. If I can take out the raiding aircraft, I will have severely reduced the striking power of the Soviets, leaving Iceland open for my own strikes. But first, I have to survive...
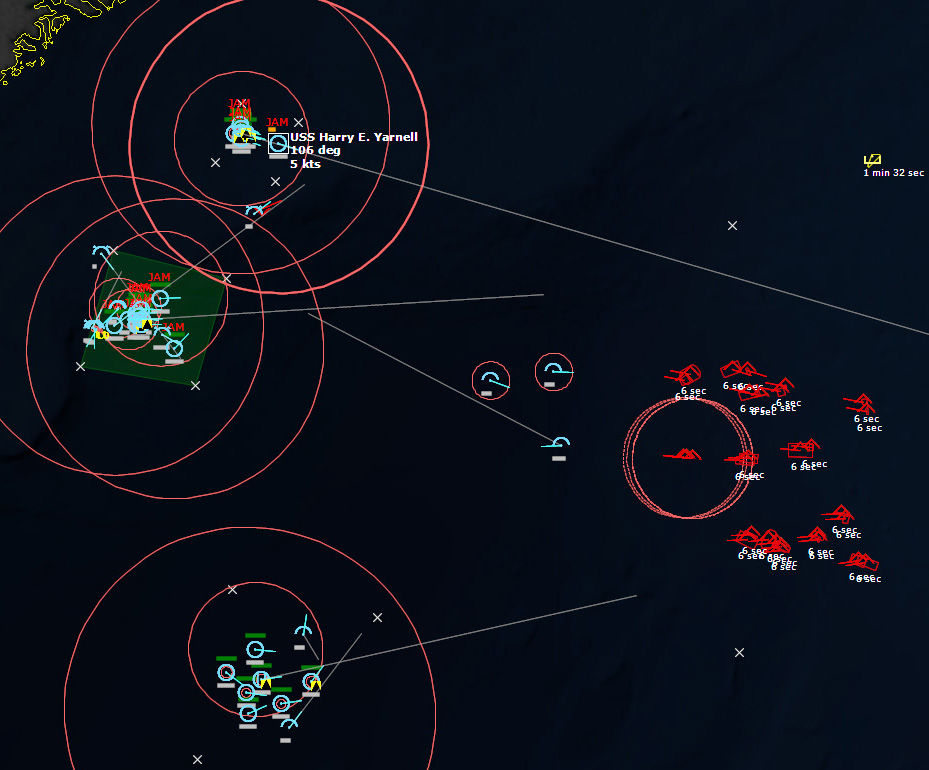 A large raid is inbound to attack the NATO fleetsA massive raid is inbound to my fleets, and I have essentially no fighters available to stop it. I light off Clemenceau group's radars, in the hopes of distracting some of the raiders away from the other two groups.
It appears that my E-1B Tracer is being targeted by some MiG-23 escorts, so I shut off its radar and have it dive to the deck in hopes of preserving it, but it is painfully slow. I launch another Tracer from Oriskany but will keep it closer to home.
092243Z My two French F-8E Crusaders approach the MiG-23s in the hopes of protecting the E-1B Tracer, and the MiGs launch missiles at them. One of the Crusaders is shot down, and again I am reminded at how much the Crusaders are outmatched by the MiG-23s. With the MiGs having radar guided missiles, the Crusaders don't stand a chance against them.
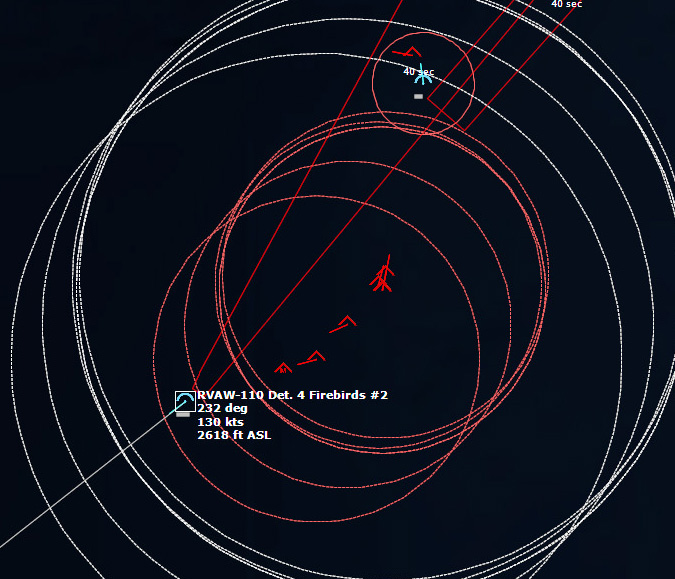 The MiG-23s go after my E-1B TracerThe Crusader's sacrifice is in vain, as a pair of MiGs turn back and go after the E-1B Tracer, now flying low and at top speed, but it has no chance of outrunning the MiGs.
Dropping below 100ft ASL, the Tracer succeeds in evading the first two AA-7 Apex As. The second Crusader, on the other hand, is engaged in a desperate dogfight with four MiG-23s. After dodging several missiles, the Crusader is shot down.
The Tracer, on the other hand, is giving its Flogger pursuers a run for their money as they have difficulty engaging it when it is flying at a mere 80 feet altitude.
The relief Tracer, staying over the Oriskany group, climbs steadily and lights off its radar early in hopes of picking up the raid. It does, and also detects multiple missile launches. The Vampires appear to be heading towards the Oriskany group, which is preferable to them heading towards the Iowa group.
 A lot more raiders than I want to deal with.Some of the earliest launched Vampires, a quartet of AS-9 Kyles, run out of energy and self-destruct. The launching aircraft must have launched them far too early, which is some welcome news. The fact that they are Kyles means the launching aircraft are Su-24 Fencers, since MiG-27s don't carry them.
 Su-24 Fencer093031Z By now some of the MiG-23s are turning for home. My French F-8Es are attempting to engage some of the Fencers headed towards Clemenceau, but their R.550 Magics are incapable of engaging targets flying at 200ft ASL. Great.
The good news is that for the moment, my Tracer looks like it might survive, and I hope I didn't speak too soon.
Four more AS-9 Kyles run out of energy and self-destruct.
USS Dale begins launching SAMs at more approaching Kyles.
I sent my my French F-8Es in pursuit of some retreating MiG-23s because they couldn't engage the very low flying Fencers. Fortunately, they catch up and manage to shoot down two before they run out of Magics.
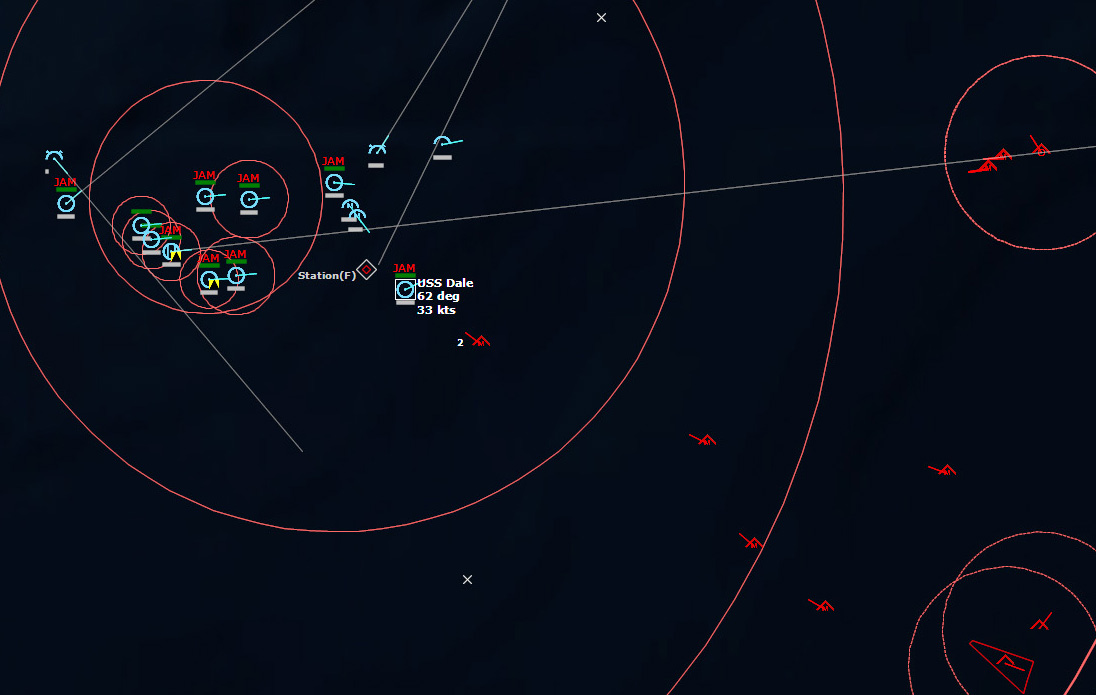 USS Dale is in troubleUSS Dale launches SAMs left and right, shooting down many AS-9s, but it is getting low in SAMs. USS Semmes assists by launching its own, but one is getting uncomfortably close.
At a range of under 3 miles, Dale succeeds in shooting down a Kyle, but it is down to ten RIM-67A SM-1ERs. The next one comes in, and Dale is hit. The damage appears to be restricted to Dale's helo pad, as its radars are still active. But there are still six Vampires inbound, and more strike aircraft on the way from the southeast. USS Dewey begins launching SAMs.
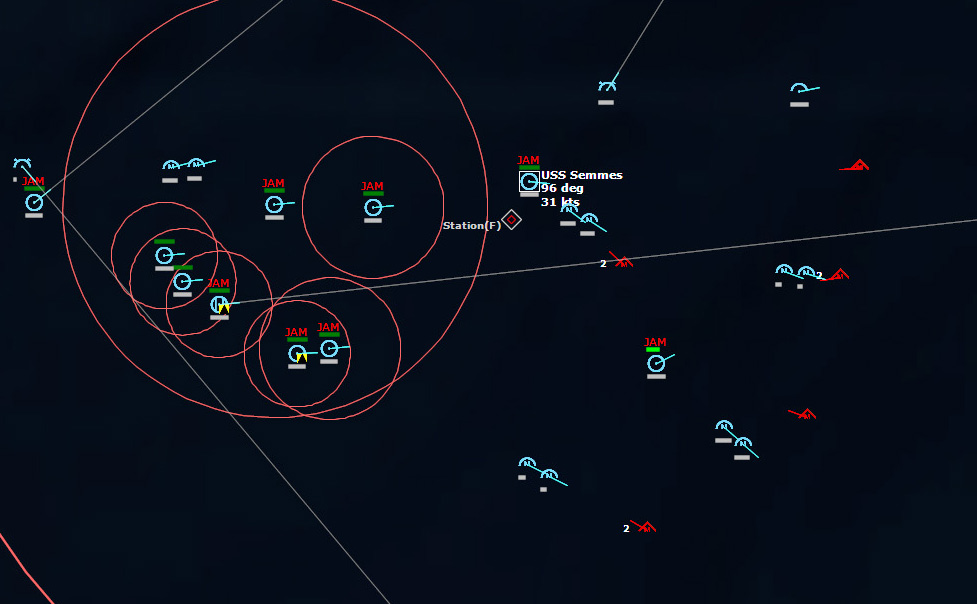 Missiles all over the place...As it stands, it looks like one Kyle is headed towards Dale, possibly three towards Semmes, and two more headed for Oriskany and her close escorts.
A Kyle misses USS Semmes by 298ft, lightly damaging her AN/SPG-53F [Mk68 GFCS, Radar]. Two more Kyles are inbound.
Another Kyle misses USS Dale by 46ft, giving her some blast damage, but she's still in the fight.
Three Vampires are left in the first wave, two inbound for Semmes and one headed for either USS Robert A. Owens or USS Voge.
Of the two Vampires targetting Semmes, one malfunctions and the other misses by 32ft, damaging her. Her 324mm Mk32 TT Triple is heavily damaged, and her AN/SPG-53F [Mk68 GFCS, Radar] is destroyed. Fortunately that's just the fire control radar for her gun systems, so her SAMs are still able to fire.
 USS SemmesThe bad news is that another wave of eleven Kyles are inbound, and worse, my Tracer has detected another air raid from Keflavik, consisting of at least ten aircraft. I'm starting to think that the Soviets have stationed their entire air force at Keflavik. By my estimates, they must have a regiment of MiG-23s, and maybe three regiments of attack aircraft (Fencers and Floggers), for a total of some 84 aircraft. I'm beginning to think NATO was by no means ready to take back Iceland...
My fighters won't be ready to launch for over an hour, but when they are, I need to do a massive Alpha Strike against Keflavik. If survive these raids, I need to take out Keflavik's ability to launch more raids, because I certainly won't survive them. The way things are going, I'm far from certain I'll survive this one.
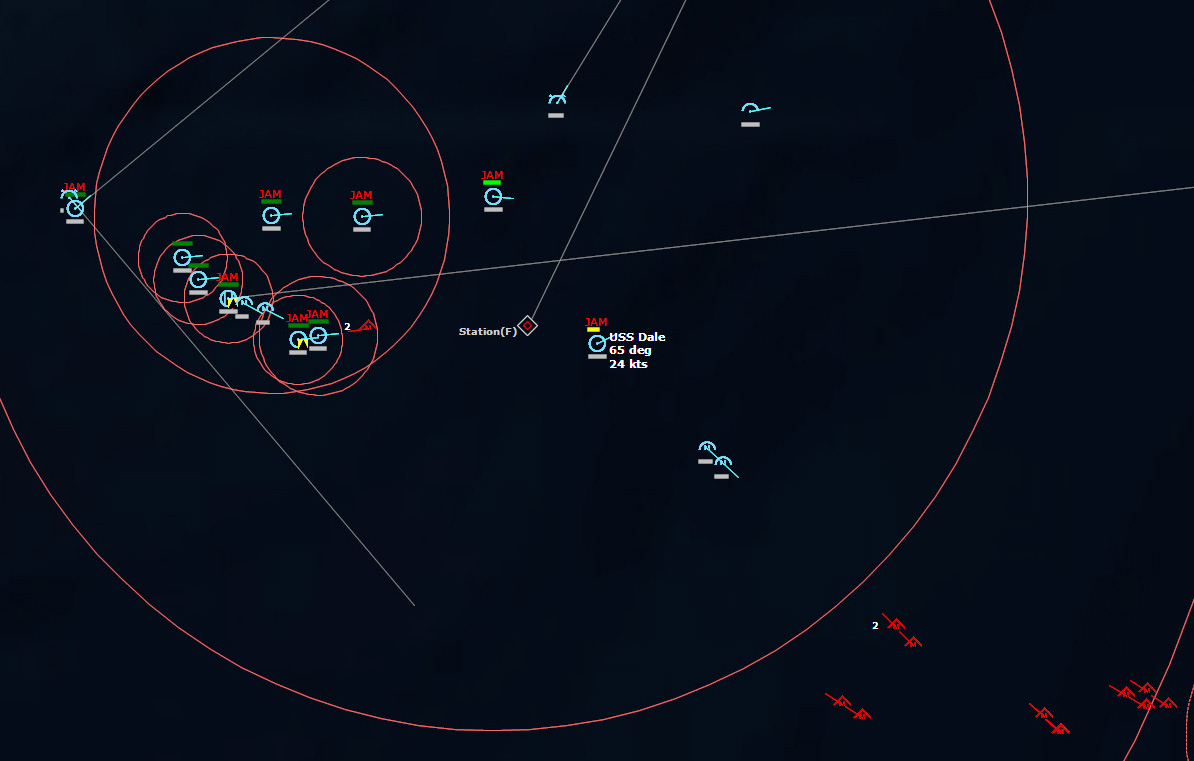 More and more Vampires...A Kyle misses USS Robert A. Owens by 59ft, delivering blast damage and heavily damaging its AN/SPG-35 [Mk56 GFCS].
 Dale shoots her last SAM, but there are still six Kyles inbound. She fires his 76mm gun, to no effect.
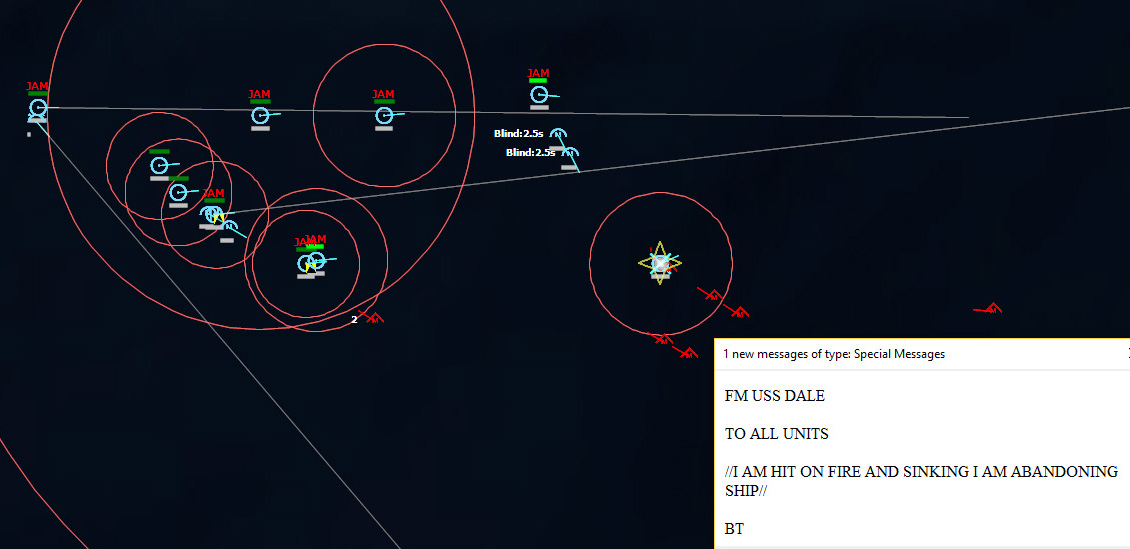 USS Dale sinksThe first Kyle hits Dale, heavily damaging her, and the second blows the ship apart.
Then a Kyle impacts USS Oriskany, damaging her and lightly damaging her AN/SPS-37. Kyles intended for the sinking USS Dale change course and search for other targets, among them the Oriskany. USS Dewey and USS Semmes, rapidly running out of SAMs, continue to fire at the inbounds.
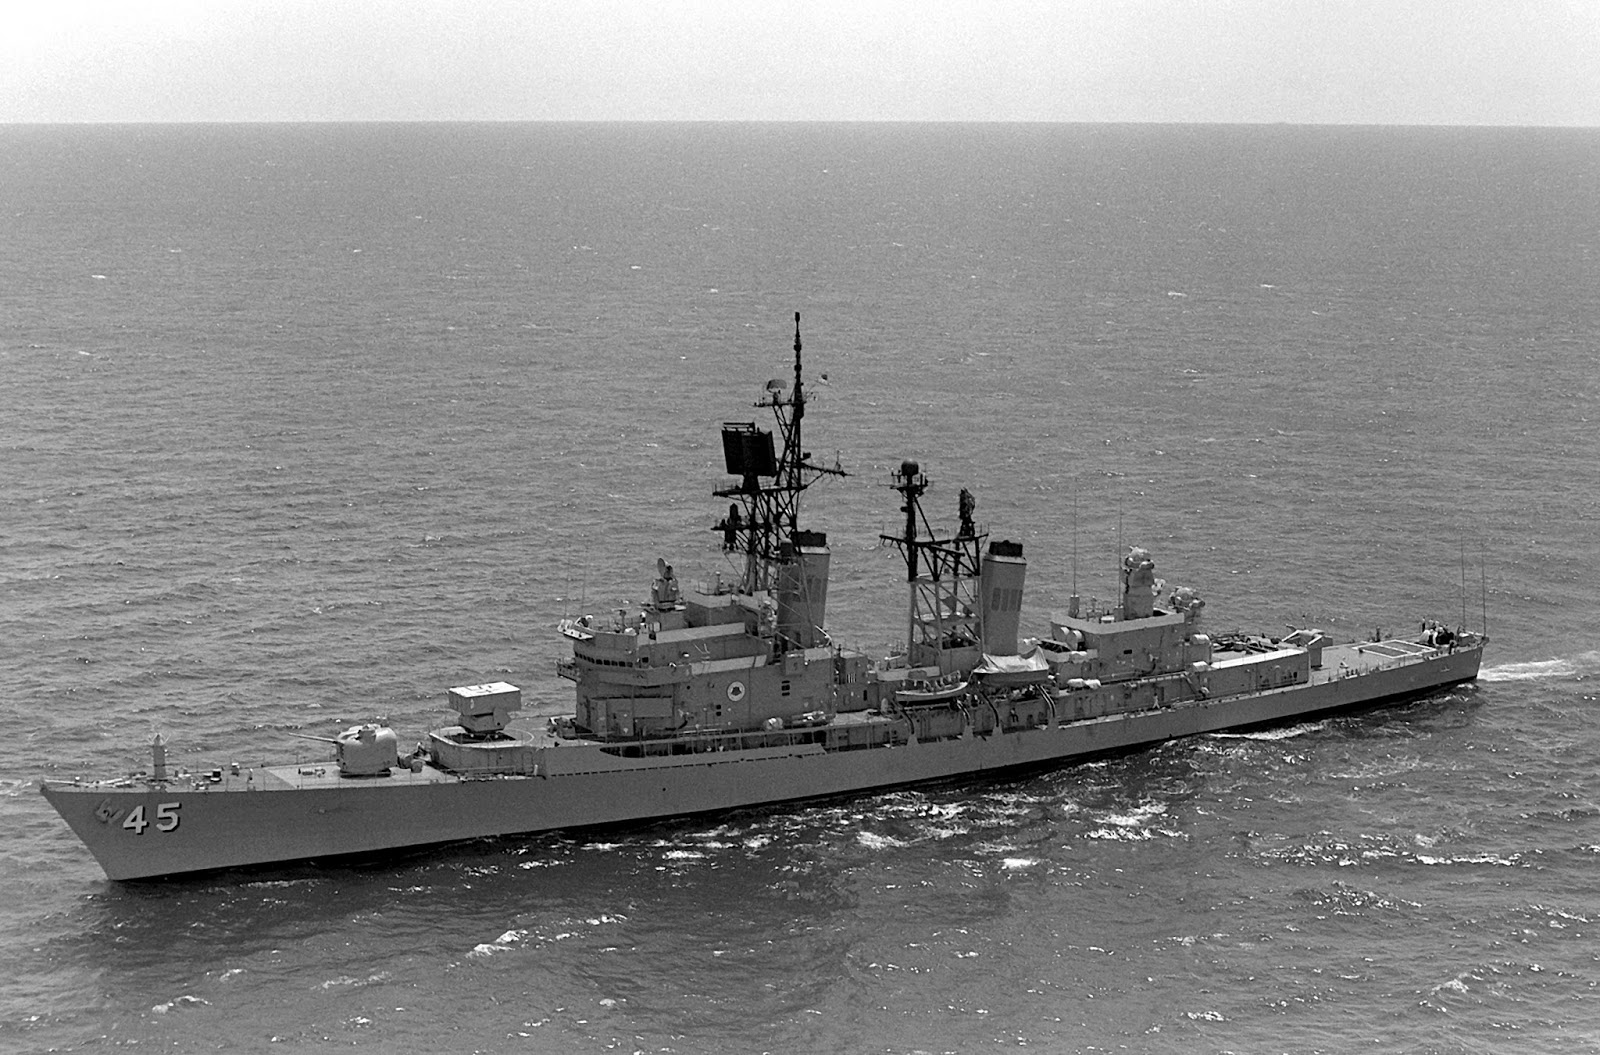 USS DeweyUSS Semmes is hit by another Kyle, delivering more blast damage and damaging its AN/SPS-39. A Kyle hits USS Lang, severely damaging her, and another Kyle hits Oriskany, causing a severe fire.
Lang suffers a near miss, Dewey shoots down a Kyle at a range of under three miles, and the final Kyle in this wave, headed for Oriskany, runs out of energy and self-destructs two miles from the carrier.
I decide I can't wait any longer. If the next strike (now numbering sixteen aircraft) launches its missiles (and there's no reason to think it won't), I won't be able to strike Keflavik at all. I launch everything I have available at Keflavik. There will be no fighter escort...but it can't be helped.
The majority of my strike will go for the Runway Access Points at Keflavik, while the remainder, armed with cluster munitions and rockets, will go for Tarmac spaces in the hopes of hitting aircraft on the ground.
The last pair of Su-24 Fencers gets off their missiles, and Dewey and Semmes launch SAMs. One gets through and hits Semmes, dealing severe damage, including fire and flooding. Semmes is likely doomed. Another Kyle hits USS William R. Rush, dealing light damage. Dewey is the sole remaining SAM armed ship in the group, and it has only 8 SAMs left.
Despite a severe fire, Oriskany manages to launch its A-7 strike aircraft, and Clemenceau launches its Etendards. (I was surprised that Oriskany had no problems with flight operations (both launch and recovery) of aircraft despite the fire. Perhaps the fire was below decks and downwind? In any event, I'm not complaining)
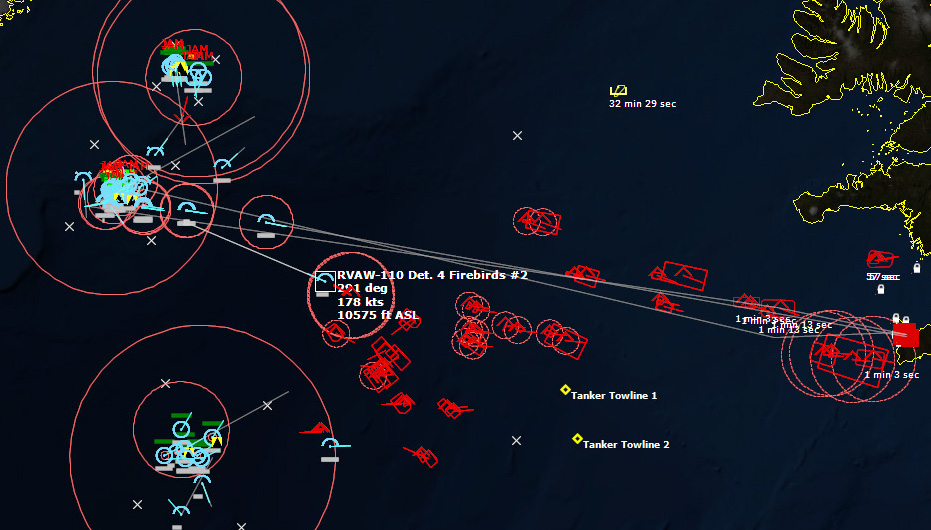 Dozens of Soviet aircraft fill the skyOne of my E-1B Tracers, without any F-8 Crusaders to sacrifice themselves in its stead, is chased down by MiG-23s and shot down.
Clemenceau detects several Vampires headed its way. Hopefully the Suffren can handle them. As the Vampires approach, I wonder why Suffren isn't firing at them as they are well within range, and then I find to my dismay that the Suffren's Masurca Mk2 Mod3's can't engage them when they are below 100ft. Fortunately, to my immense relief, several of the Vampires, AS-9 Kyles, run out of energy and self-destruct well short of the targets. Unfortunately, more Kyles are on the way. My only consolation at this point is that I'm relieved that they aren't going after the Oriskany or Iowa groups.
Suffren is able to engage a few of the Vampires, but unfortunately keeps losing contact as the Vampires descend below 100ft, and Suffren's SAMs lose track and cannot engage. The Vampires continue in, unperturbed. Several AS-12 Keglers close in on FS Tourville, but fortunately they self-destruct just short of her.
101308Z My strikes are well on the way to Keflavik, shadowing the returning Soviet strike. My surface fleets have taken some serious punches. In the Iowa group, USS Harry E. Yarnell has a major fire and major flooding. In the Oriskany group, USS Semmes has a minor fire and minor flooding. USS Lang has a severe fire and minor flooding. USS Robert A. Owens is lightly damaged. USS Dale is sunk. And USS Oriskany herself has a severe fire, but has been able to conduct air operations.
Whether my Keflavik strike will deal sufficient damage to allow the mission to continue remains to be seen...
To be continued....
August 14, 2017
COMMAND: Northern Inferno Scenario 13: Deliverance Part 1
 Introduction
Over the last few weeks intense fighting has broken out along all fronts in Europe. NATO forces in Germany are fighting a delaying action in the Fulda Gap area, halting Soviet armour and mechanized units but with heavy loss in men and equipment.
Massive naval engagements, including US and UK carrier groups, have resulted in the loss of HMS Ark Royal and US carriers. On the other hand the Soviet Red Banner Northern Fleet has been practically decimated in the Norwegian Sea and North Cape area. Both sides are reaching the end of their reserves.
Soviet-occupied Iceland over the recent few months has been under constant attack by NATO Forces. Even after these attacks the airfields are still operational, but restricted in their ability to launch or recover anything larger than a Su-24 Fencer or MiG-23 Flogger. The remains of the 61st Kirkinesskaya Red Banner Marine Brigade are dug in around Reykjavik and Reykjanesbaer near Keflavik.
Iceland still remains a thorn in NATO's side. The Oriskany CVBG, Clemenceau CVBG and the Iowa MEU have been ordered to retake Iceland. All forces are now in position to the west of Iceland to conduct an air- and sea-borne assault to retake the island.
Whoever prevails, the rocky western shores are sure to turn bloody red...
NOTE: This scenario includes the USS Iowa configured as a "Heavy Assault Amphibious Battleship", from a conversion proposed in 1966.
Situation
Iceland over the last few weeks has been under constant attack by NATO forces. Even after these attacks the airfields are still operational, but restricted in their ability to launch or recover anything larger than an Su-24 Fencer or MiG-23 Flogger. The remains of the 61st Kirkinesskaya Red Banner Marine Brigade are dug in around Reykjavik and Reykjanesbaer near Keflavik.
NATO task groups have been ordered to retake Iceland at all costs.
Enemy Forces
Air : MiG-23 Flogger, Su-24 Fencer.
SAM / AAA : SA-6 Gainful, SA-7 Grail, SA-9 Gaskin, ZSU-23.
Surface : Unknown.
Subsurface : Unknown.
Land Forces : 61st Kirkinesskaya Red Banner Marine Brigade
874th Marine Battalion 1611th Self-propelled Artillery Battalion 1617th Anti-aircraft Missile and Artillery Battalion Friendly Forces
Task Group 20.01 : USS Oriskany CV, USS Dale CG, USS Dewey DDG, USS Semmes DDG, USS William R. Rush DD, USS Robert A. Owens DD, USS Voge FFH, USS Lang FFH, USS Truckee AO, USS Butte AE.
Task Group 20.02 : USS Iowa BB, USS Harry E. Yarnell CG, USS Farragut DDG, USS Sellers DDG, USS Spruance DD, USS Pensacola LSD, USS Plymouth Rock, LSD, USS Shreveport LPD.
Task Group 20.03 : FS Clemenceau CV, FS Du Chayla DDG, FS Suffren DDG, FS Maille-Breze DD, FS Torville FFH, FS Le Bearnais FFL, FS Le Savoyard FFL.
26th Marine Amphibious Unit Embarked in Task Group 20.02
3rd Battalion 2nd Marines 2nd Tank Battalion 2nd Assault Amphibian Battalion Mission
Remove Soviet presence on Iceland and establish NATO control over the island.
Execution
1. Safe transit of Task Group 20.02 to area marked "Amphib Zone".
2. Task Group 20.01 and Task Group 20.03 to support Task Group 20.02 against air, surface and subsurface threats and engage as required.
3. Neutralize Soviet presence on Iceland with destruction of land forces and air assets.
 Recon imagery of Keflavik airbaseLanding Zone One Force Allocation:
1. USS Shreveport once in Amphib Zone will deploy LVT-7 A Company.
2. Alpha and Bravo Company with 1st, Second Mortar and Redeye Sections will be landed by:
UH-1N Huey HML-367 #1 UH-1N Huey HML-367 #2 CH-46F Sea Knight HMM-764 #1 CH-46F Sea Knight HMM-764 #2 CH-46F Sea Knight HMM-764 #3 CH-46F Sea Knight HMM-764 #4 CH-46F Sea Knight HMM-764 #5 CH-46F Sea Knight HMM-764 #6 CH-46F Sea Knight HMM-764 #7 CH-46F Sea Knight HMM-764 #8 CH-46F Sea Knight HMM-764 #9 CH-46F Sea Knight HMM-764 #10 CH-53D Sea Stallion HMH-361 #1 CH-53D Sea Stallion HMH-361 #2 Landing Zone Two Force Allocation:
1. USS Pensacola once in Amphib Zone will deploy M60A1 Tank Platoons.
2. Charlie Company with 1st, Second Mortar and Redeye Sections will be landed by:
UH-1N Huey HML-367 #3 UH-1N Huey HML-367 #4 CH-46F Sea Knight HMM-764 #11 CH-46F Sea Knight HMM-764 #12 CH-46F Sea Knight HMM-764 #13 CH-46F Sea Knight HMM-764 #14 CH-46F Sea Knight HMM-764 #15 CH-53D Sea Stallion HMH-361 #3 CH-53D Sea Stallion HMH-361 #4 Command and EMCON
Command: USS Iowa.
EMCON: Alpha-limited emissions.
October 15, 1975, 0600Z
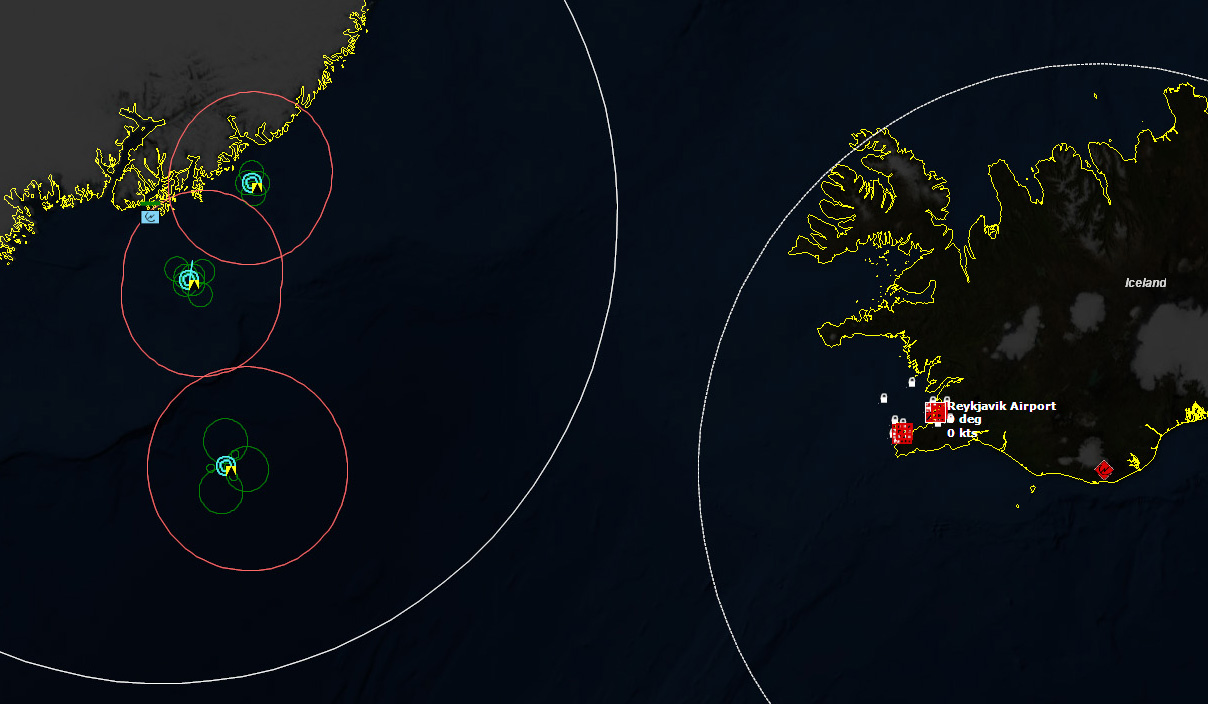 Initial positionsFirst thing I have to do is get the Task Groups sorted. I quickly find out that the Task Groups on the map aren't the same as the ones in the briefing. The briefing states the that the Oriskany Task Group is 20.01, while on the map it's 20.03. Same for the other two, the briefing says that the Iowa group is 20.02, while it's really 20.04, and Clemenceau's 20.03 is really 20.05.
Now that that's figured out, I can start planning stuff. The Iowa group will make a beeline to the Amphib Zone. The other two groups will maneuver on parallel courses. All three will commence ASW operations immediately, and I will begin to plan my strikes on Keflavik and Reykjavik, starting with fighter sweeps to eliminate any air assets.
063222Z I detect a Tu-95RT Bear D to the northeast. I launch a pair of F-8s from the Oriskany to go after it.
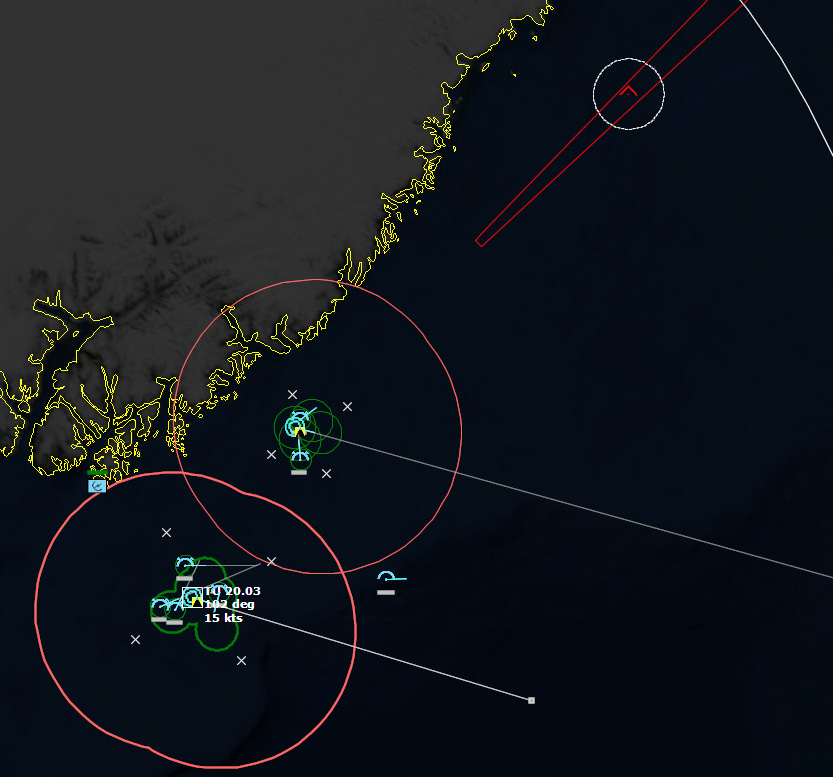 Contact!064749Z My E-1B Tracer, still on its way to its station, detects a pair of bogeys over northwest Iceland.
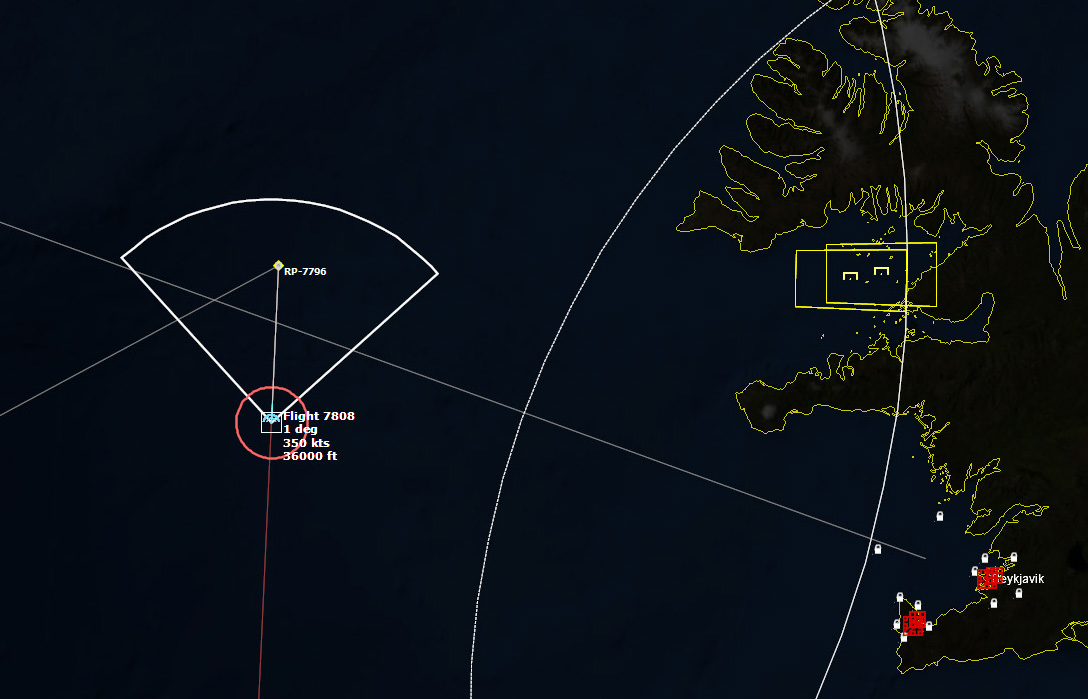 Two more contacts.065329Z Two more bogeys are detected, just north of Keflavik; I wonder if this is the beginning of a strike against my surface groups, or if it just fighters.
The two groups of fighters appear to be circling, so perhaps they are just a CAP.
070226Z My E-1B Tracer detects a submarine contact with its AN/APR-9, which is a passive sensor, it perhaps the submarine is using its radar on the surface?
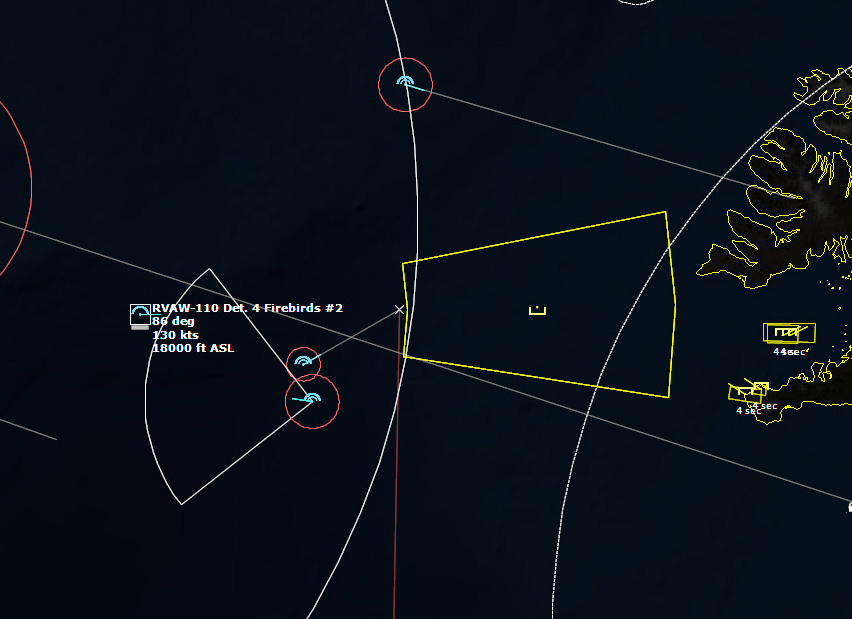 A submarine using its surface search radar?I spot two more aircraft over Iceland, so there are now six, and they appear to be flying a patrol over western Iceland. I'm still waiting for most of my aircraft to be readied, and my task groups have a long way to go, so going after them isn't urgent.
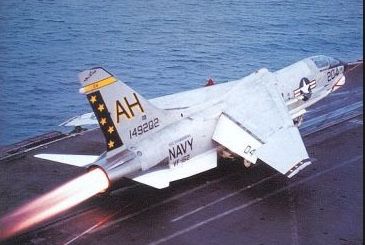 F-8 Crusader launching
075000Z A large raid appears to be forming at Keflavik. Most of my fighters aren't ready yet, and it will be over an hour until they are, which will probably be too late. I can launch what I have, however, and hope that I can at least thin it out.
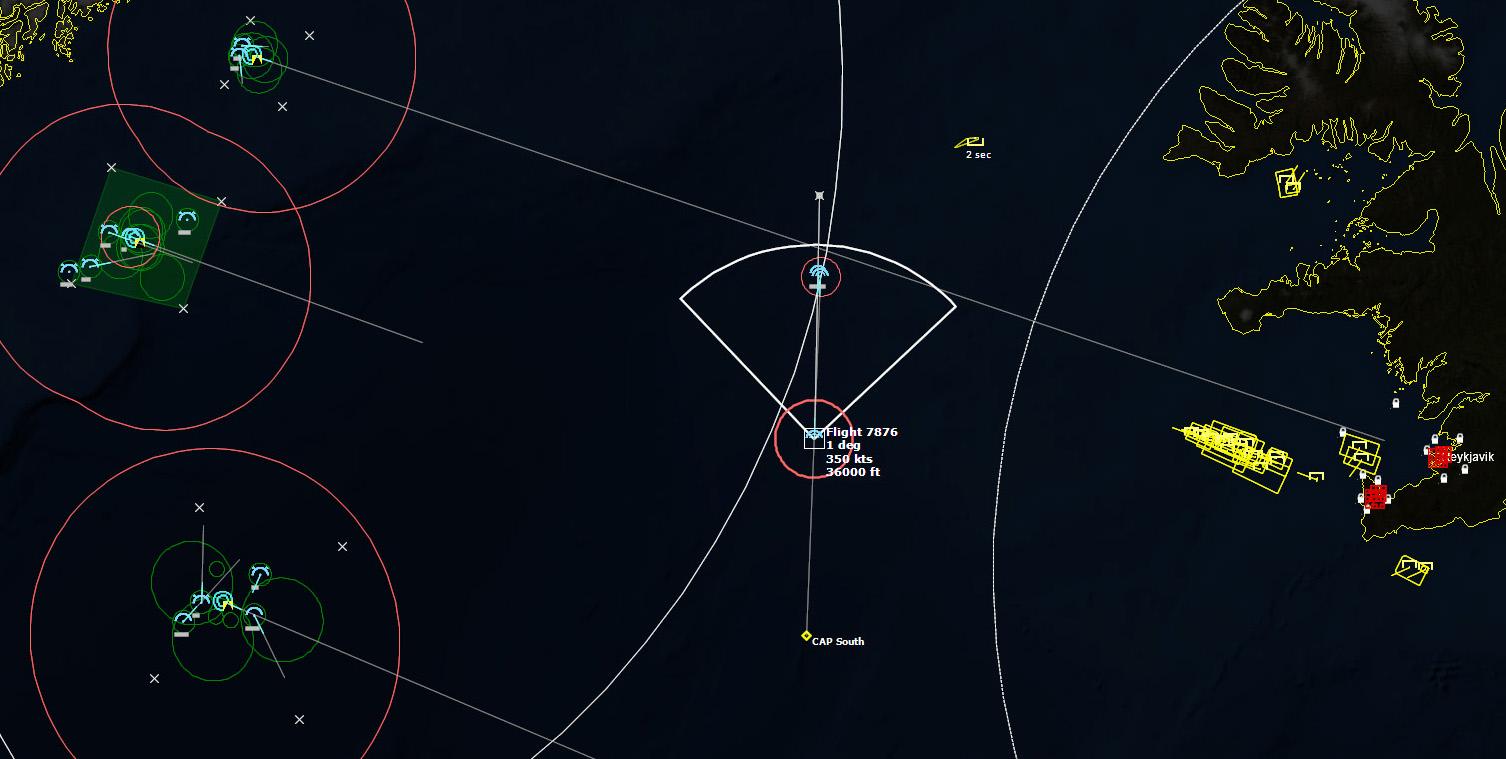 A large raid launches from Keflavik075131Z To the north one of my F-8 Crusaders intercepts the Tu-95RT Bear D on its patrol. (the first pair I sent ran out of fuel early, so I sent them home, and this one is a subsequent one I send alone)
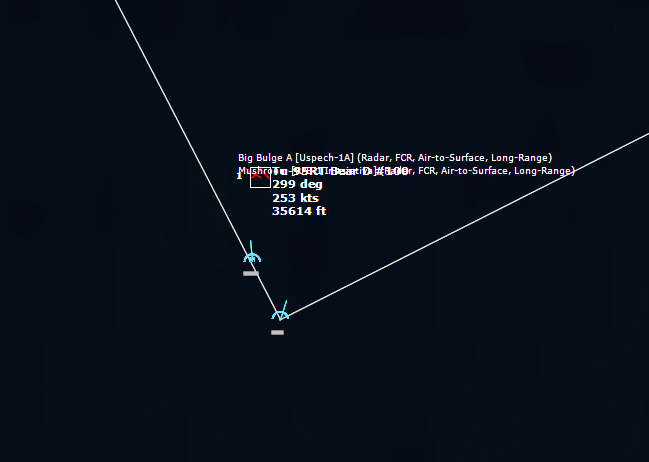 Fox Two!Unbelievably, the Crusader misses with all four of its Sidewinders. After two guns passes that are also failures, the Crusader returns home, its tail between its legs.
To the south, my CAP begins to engage the approaching raid.
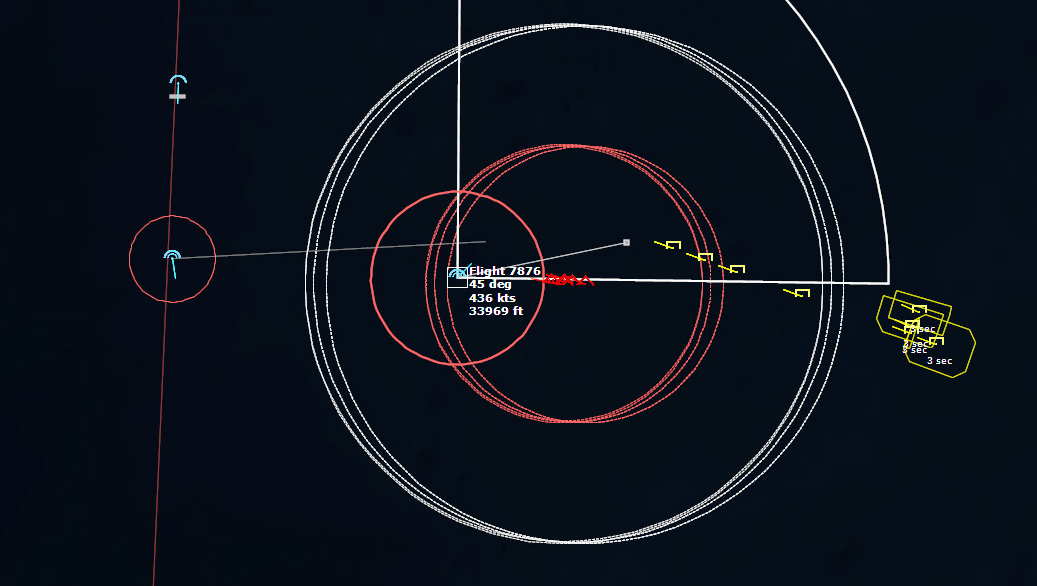 The CAP runs into the raid's MiG-23 escortsUnfortunately the MiG-23 Flogger escorts have longer ranged missiles than the F-8 Crusaders, so my fighters are at a disadvantage. The first two missiles miss. The second pair of missiles take out one of the Crusaders.
Two French Crusaders from Clemenceau arrive on the scene. The American Crusader is bingo fuel, and so has to RTB, not a very pleasant situation with a half a dozen MiGs on your tail. The MiGs open fire on the French Crusaders, which dodge the first pair of missiles. Then the second American Crusader's luck runs out and it is shot down.
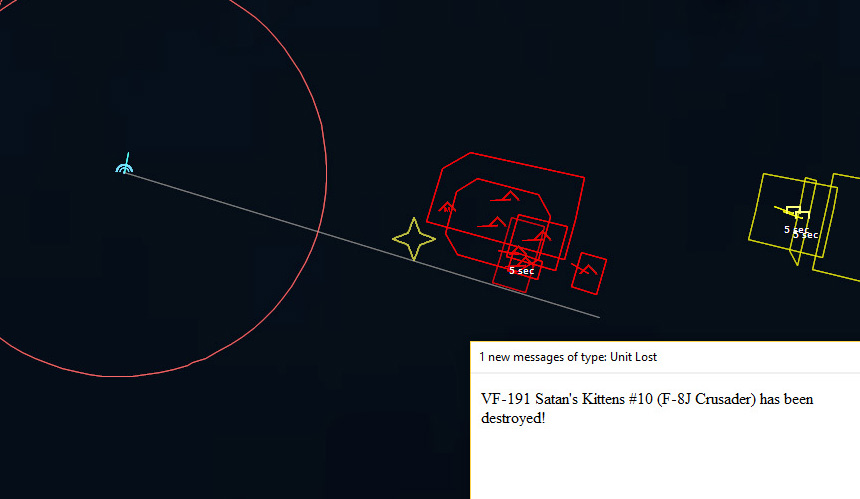 The second F-8 Crusader is shot downRight now I'm thinking that some F-4s or better yet, F-14s would be very welcome...
The French Crusaders dodge a second pair of missiles, and the third, and then a seventh missile.
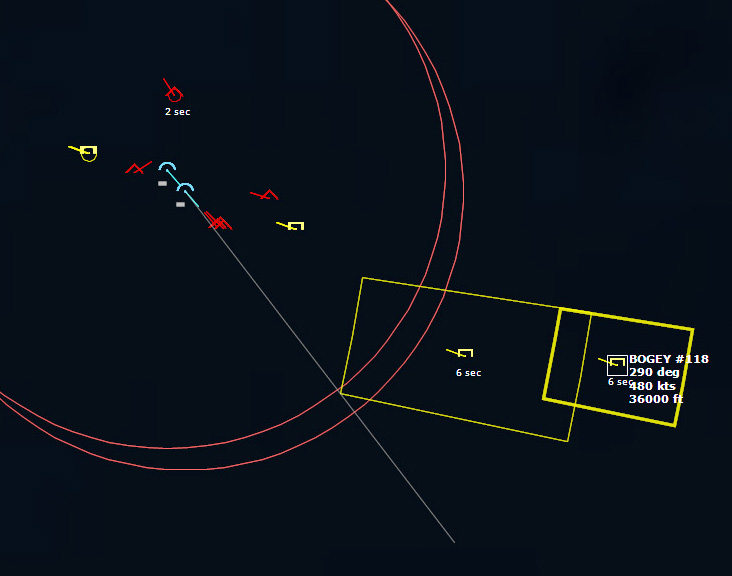 The French Crusaders are caught in a furballOne of the French Crusaders is shot down, but then seconds later its wingman shoots down a Flogger. Seconds after that, the second French Crusader is shot down.
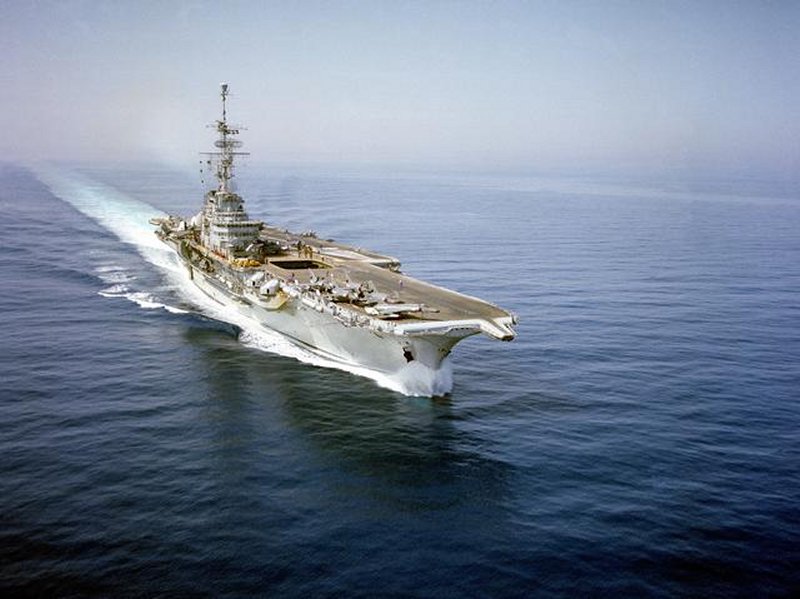 French aircraft carrier ClemenceauIn the meantime, Clemenceau launches the all of its Crusaders that are ready (2), and Oriskany launches all of its Crusaders that are ready (3). The E-1B Tracer, with no air cover, turns tail and goes to full military power, a mere 210kts. Fortunately, it looks like the MiG-23 escorts are all RTB, leaving the strike package unprotected. Hopefully my next wave of fighters will do better.
The Oriskany Crusaders intercept the strike package and shoot down a MiG-27 Flogger.
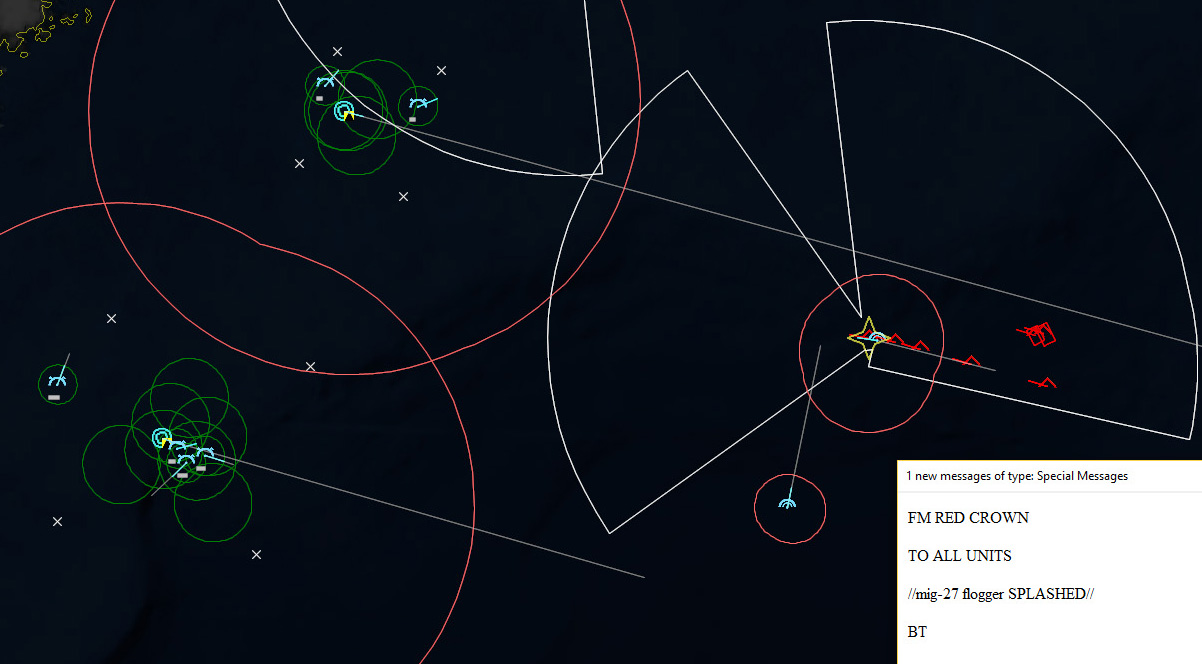 Splash OneIn rapid succession the Crusaders gut the strike package, shooting down ten more MiG-27s. That leaves one single Flogger left for the pair of French Crusaders that arrive on the scene. The French Crusaders have difficulty locating the Flogger with their inferior radar, which closes uncomfortably close to the Iowa group. The Iowa group lights off its radar. USS Harry E. Yarnell fires a RIM-67A at the Flogger, bringing it down.
 However, lighting off the group's radars might have had an unintended consequence, as multiple vampires are detected. Possibly from a submarine that has been lying in wait, and the radar emissions from the surface group tipped it off.
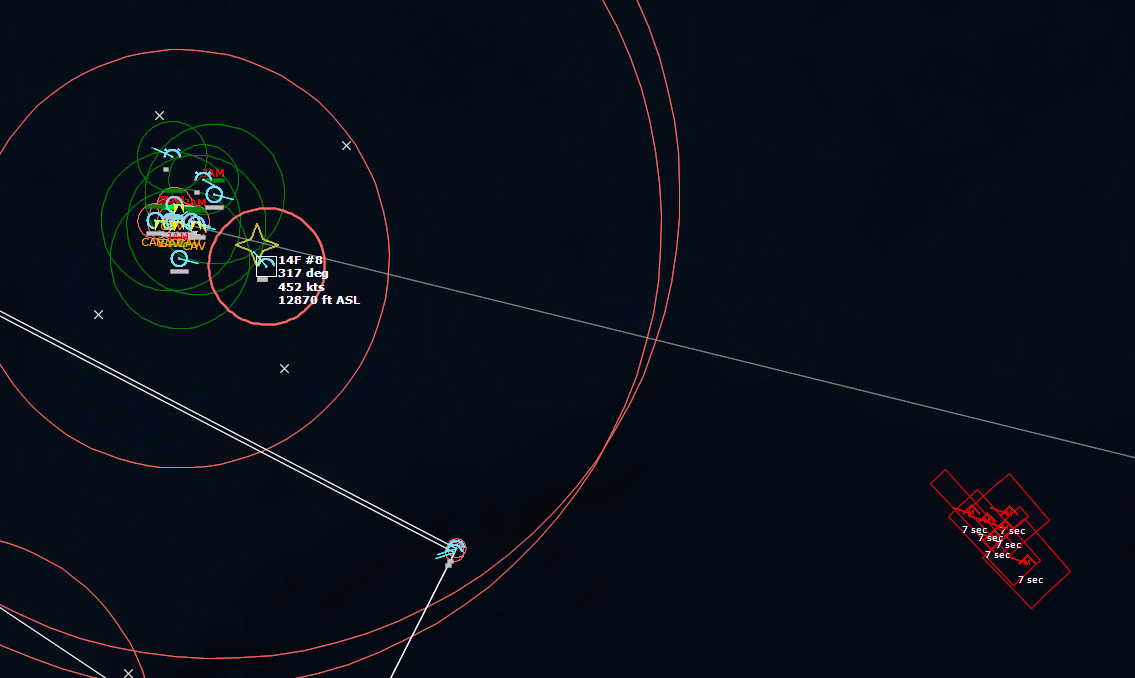 Vampire! Vampire!Eight vampires are inbound. Once they get in range, USS Harry E. Yarnell and USS Farragut begin firing SAMs.
  Eight Vampires inboundSoon after, USS Sellers also fires its SAMs. Most of the SAMs are shot down, but one gets relatively close to Sellers, and a volley from both Sellers and Yarnell bring it down.
If the Soviets just launched a strike, their MiG-23 escorts will be out of action for several hours, so it behooves me to launch my own strike on Keflavik as soon as possible. But...
083445Z My E-1B Tracer detects multiple aircraft taking off from Keflavik. I wonder if this is relief for the CAP, or if another strike is forming up. If it's a strike, my ships will be on their own, as all the fighter aircraft are still being readied.
The Iowa group's radars have already been lit off, so I know that the Soviets know where it is. I decide to do the same to the Oriskany group, in the hopes that additional targets will make it more difficult for the Soviets to decide which target is more high-value.
Over the next several minutes my Tracer detects many more aircraft launching from Keflavik, so this is definitely looking like another strike.
In the meantime, I detect a pair of cruise missiles heading north west in the general direction of the Iowa group.
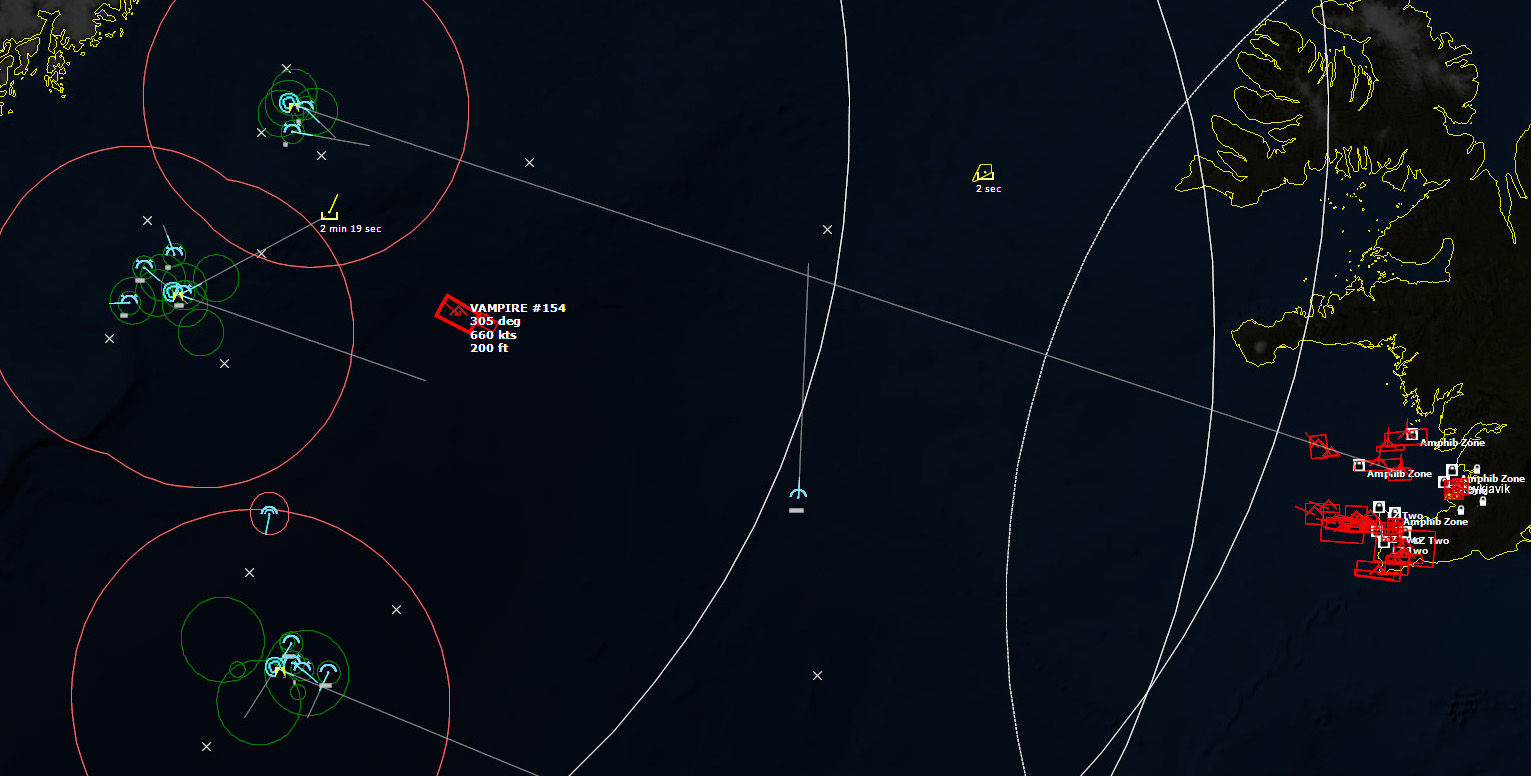 Another strike forms up near KeflavikThe strike package appears to be twelve aircraft, and based on their speeds, I think it might consist of ten MiG-27 Flogger D attack aircraft with two MiG-23 escorts.
The strike is closing at 480kts, and it is still ten minutes or so until I can launch any fighters...
090000Z The strike is closing in, and based on its course, it's unclear that it knows which target its going after. Six F-8 Crusaders on Oriskany are ready, so I scramble them and send them after the strike.
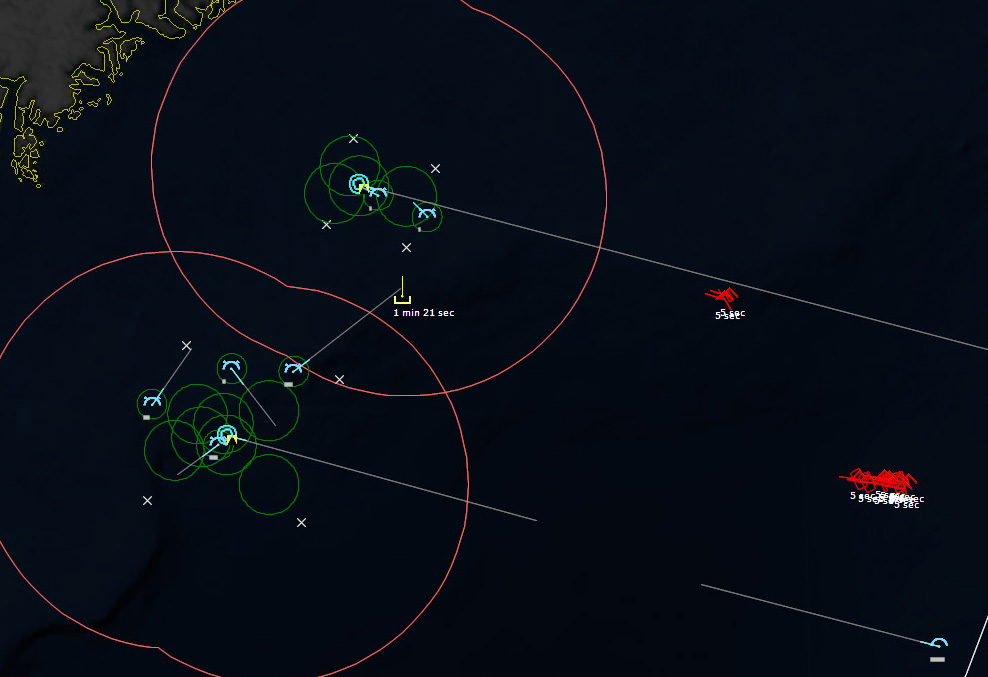 The strike is closing inThen something comes to me. The first strike package consisted of twelve MiG-27s with half a dozen MiG-23 escorts. The second is twelve aircraft, with a group of ten moving at 480kts at 200 feet, its target uncertain, and a pair of aircraft moving at 580kts at 200 feet towards the Iowa group. At first I thought they were more MiG-23 escorts, but they aren't acting like escorts. If they were, they'd be closer to the strike group, and higher in altitude... I begin to suspect they are more MiG-27s... I quickly scan the database, and discover what I feared. MiG-27s are nuclear capable. They can carry the RN-40 30kT tactical nuclear bomb. Given how profligate the Soviets have been with nuclear weapons in this war, I would be foolish to discount the possibility that they are trying again.
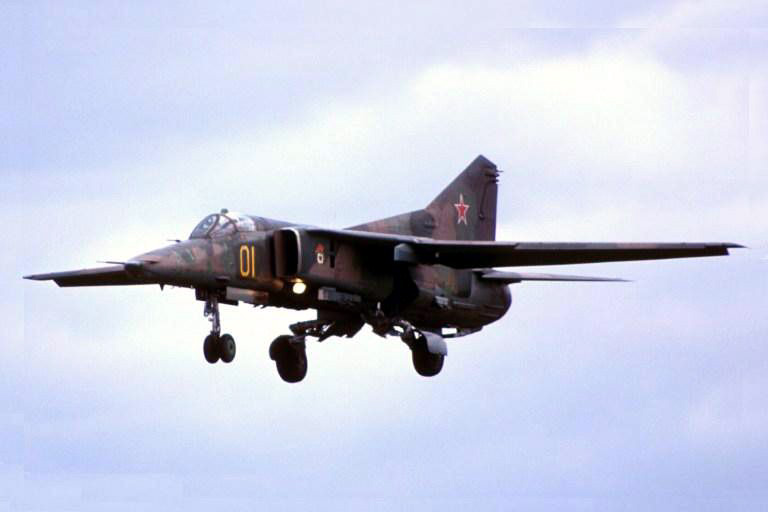 MiG-27 FloggerStill, I can't help but think that attacking the Iowa group, with its three SAM ships, is something of a suicide mission. That doesn't mean I won't take the threat seriously, however.
090333Z The first pair of F-8 Crusaders is airborne, and they immediately go to afterburner. USS Harry E. Yarnell begins launching SAMs. The main group of Soviet strike fighters changes course northwest, apparently going after the Iowa group. To top if off, my E-1B Tracer picks up what is looking to be another strike launching from Keflavik.
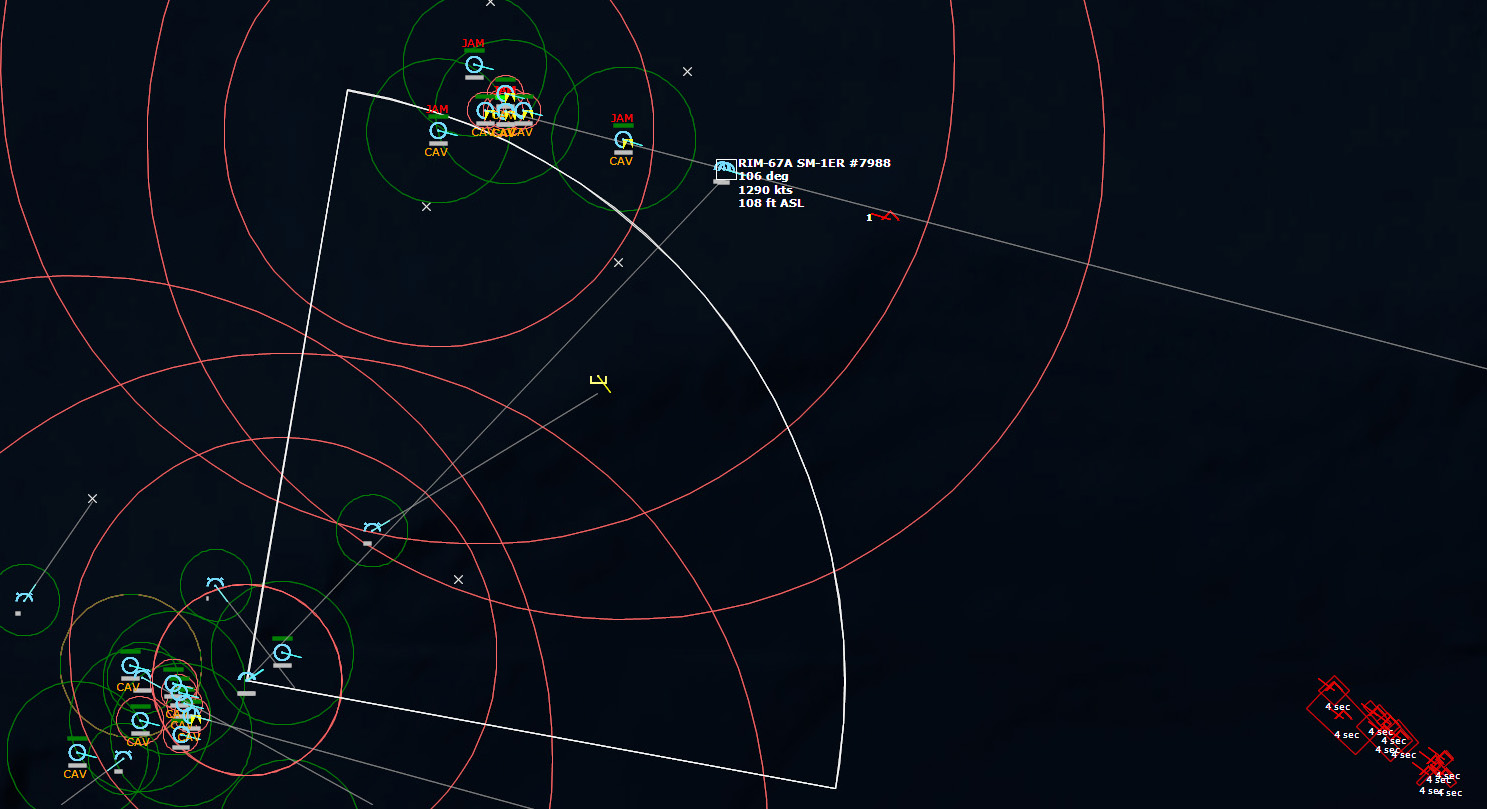 Yarnell launches SAMs at the first two strike aircraft, while the second package approaches from the southeast. The two strike aircraft break right and left as the SAMs approach, successfully evading them. Yarnell immediately launches two more SAMs. The second pair of SAMs miss as well, and both aircraft turn away. Did they launch missiles? Looking at the database again, it's possible they launched AS-12 Kegler anti-radiation missiles, which have a 20nm range, and they just barely got that close to Yarnell before turning away.
The new strike that my Tracer has detected is shaping up to be pretty scary--I detect no less than 28 aircraft headed my way. But right now I have to deal with the first raid.
 USS Henry E. YarnellBy now I would have expected that if the first two fighters launched missiles, I would have detected them by now. However, The MiG-27 Flogger has a 270nm strike radius loadout with the AS-12 Kegler. I quickly measure the distance from where they turned around back to Keflavik...it's almost exactly 270nm. So perhaps they didn't launch, but rather they're bingo!
I ID the first of the strikers now closing in as MiG-27s. My first F-8s are getting into firing position, and Yarnell begins firing SAMs. Yarnell shoots down one, but as one Flogger reaches 14nm away, it launches a Vampire.
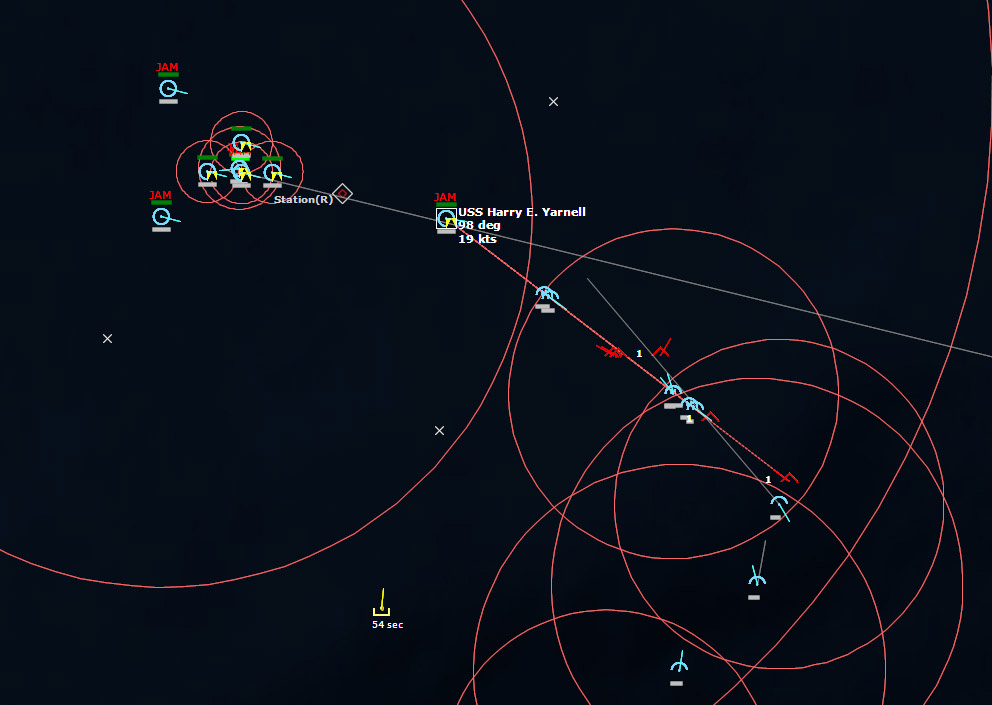 Missiles are filling the sky.The SAMs are succeeding in shooting down MiGs, but unfortunately, they're getting their missiles off. Farragut and Sellers add their SAMs to the fray, going after the Vampires while Yarnell continues firing on the MiGs.
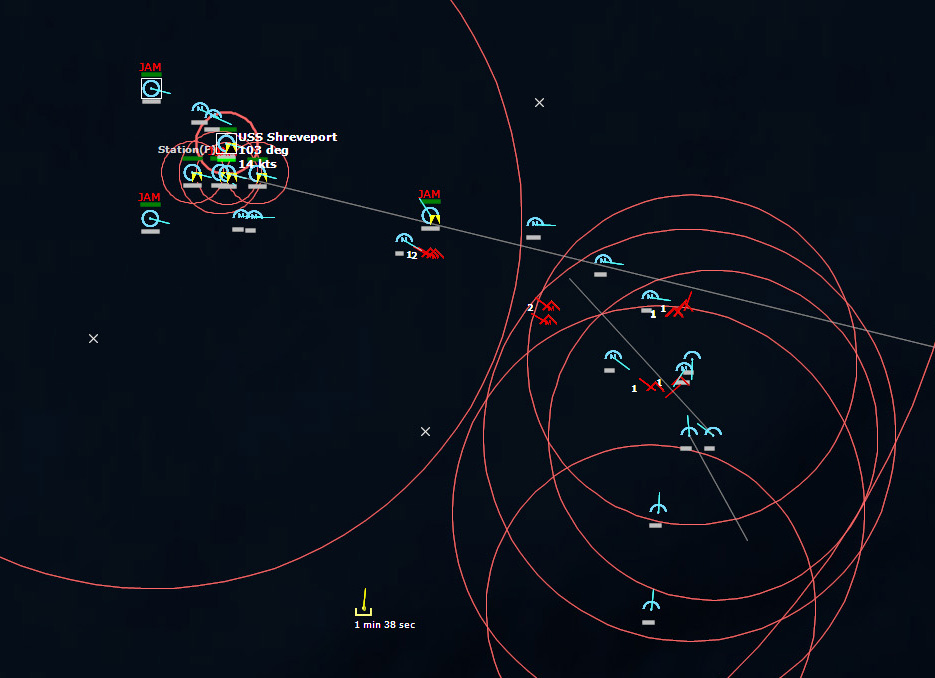 The Vampires close in...My Crusaders launch Sidewinders at the Floggers, but have very poor luck in hitting anything. Two Vampires close in on Yarnell, which resorts to firing its guns, while two SAMs from Farragut come to help.
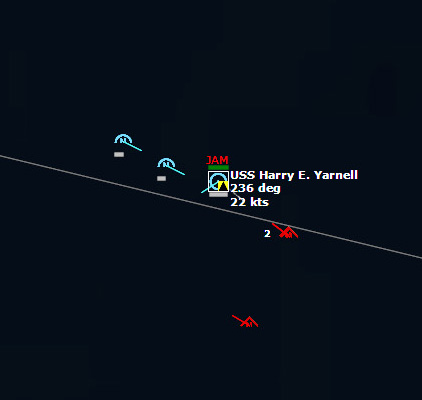 Yarnell is in serious danger...The SAMs miss, and Yarnell is hit by two Keglers. At the same instant, one of the F-8 Crusaders is shot down by a Flogger. So far, the fighters have been utterly useless in breaking up the attack.
Yarnell is set ablaze and suffers damage to its UHF radios and some of its radar systems.
Damage Report:
324mm Mk32 TT Triple: Damaged
AN/SPG-55B [Mk76 Mod 8 FCS]: Destroyed
AN/SPG-55B [Mk76 Mod 8 FCS]: Destroyed
AN/SPG-55B [Mk76 Mod 8 FCS]: Damaged
AN/SPS-43: Damaged
UHF Radio [Secure]: Damaged
UHF Radio [Unsecure]: Damaged
Open Parking (1x Medium Aircraft(12.1-18m Long)): Operation, Reduced Capacity
Pad (1x Medium Aircraft (12.1-18m Long)): Operational, Reduced Capacity
Yarnell still has one AN/SPG-55B still operational, so she can still fire SAMs, which she proceeds to do. But two more missiles are inbound to Yarnell, and her capacity to protect herself is greatly reduced. Yarnell is hit again. Both of the Sea Sprites are destroyed, and Yarnell suffers a major fire and minor flooding.
Damage Report:
324mm Mk32 TT Triple: Damaged
324mm Mk32 TT Triple: Damaged
Redeye MANPADS: Damaged
AN/SPG-55B [Mk76 Mod 8 FCS]: Destroyed
AN/SPG-55B [Mk76 Mod 8 FCS]: Damaged
AN/SPG-55B [Mk76 Mod 8 FCS]: Destroyed
AN/SPG-55B [Mk76 Mod 8 FCS]: Damaged
AN/SPS-43: Damaged
AN/WLR-1: Damaged
AN/SQD-23: Damaged
HF Radio [Secure]: Damaged
UHF Radio [Secure]: Damaged
VHF Radio [Secure]: Damaged
UHF Radio [Unsecure]: Damaged
Open Parking (1x Medium Aircraft(12.1-18m Long)): Operation, Reduced Capacity
Pad (1x Medium Aircraft (12.1-18m Long)): Operational, Reduced Capacity
Finally the Crusaders start shooting down MiGs, with the help of Farragut and Sellers. Ten Floggers are shot down in total, bringing the total to 22 MiG-27 Flogger Ds shot down so far. At least those ones won't be striking again. Yarnell slows down and detachs from the group, as now it has its own problems and can no longer fight. The Iowa group slows to 5 kts so it can reform, with Farragut accelerating to moving to position along the primary air defense axis. I direct the Oriskany group to change course to converge with Iowa to provide some more protection.
But I have a new raid to worry about, which looks to be thirty aircraft. And not only that. During the fight to defend Iowa, several cruise missiles, probably submarine launched, are sent after the Oriskany group.
 Cruise missiles close in on the Oriskany group, while a massive new raid approaches from the eastThe leading two cruise missiles veer off course and go into search mode, fortunately their course is nowhere near the Oriskany. SAMs launched from USS Dale shoot down one, and the second apparently self-destructs...in a 200kT nuclear fireball!
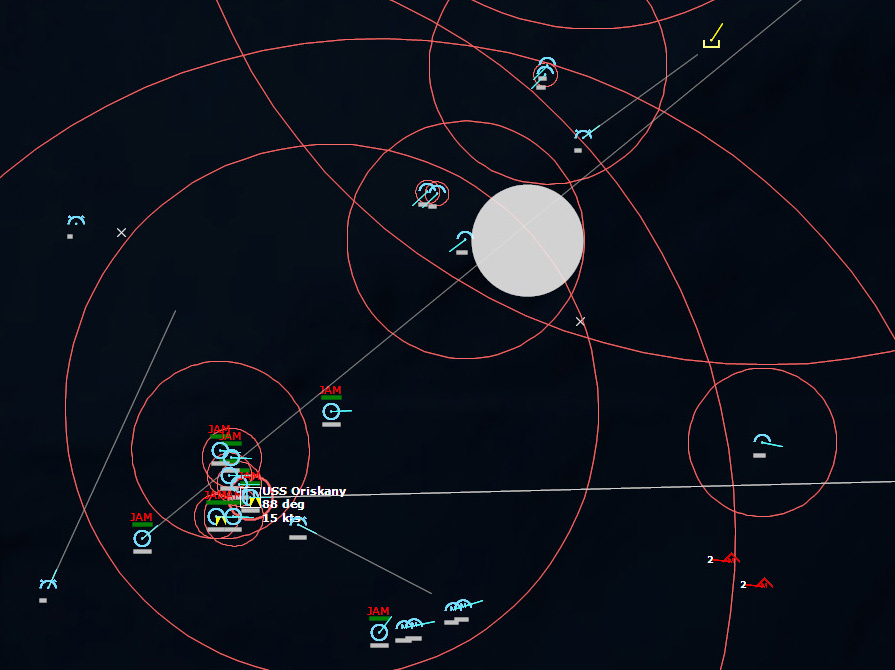 The cruise missile, an SS-N-9 Siren [P-120 Malakhit, 200kT Nuclear] detonates over the open ocean.One of the F-8 Crusaders, RTB Winchester, is barely far enough away to survive the blast. This development makes it critical that I shoot down the two cruise missiles still inbound. Both cruise missiles turn northwest again, and Dale shoots down one. If the second continues on its present course, it will not be a danger and will likely self-destruct like the other one did. Then another SAM from Dale takes it out.
This raid is over, but an even bigger one is on the way...
To be continued...
August 9, 2017
COMMAND: Northern Inferno Scenario 12: Hunter or Hunted
IntroductionWith the continuing war heading towards a stalemate, peace talks are now underway in Geneva.
Meanwhile the Red Banner Fleet has deployed its flagship, the STOVL carrier Kiev, with heavy escort into the Norwegian Sea.
Soviet forces have now fallen back to within 40nm of the border in Norway, after suffering continuous strikes by NATO carrier battle groups.
The NATO carriers themselves have also pulled back to Jan Mayen island, to lick their wounds after murderous strikes by Soviet bombers using nuclear-tipped AS-4 missiles. With the Kiev on the prowl, the only units available to tackle her are a small force of UK and US nuclear submarines which now stand in their path.
The Silent Service is now tasked to silence the pride of the Northern Fleet.Orders for Cmdr NATO Forces
Situation
Remaining NATO surface forces have withdrawn to the safety of Jan Mayen Island after continuous strikes against them by SNA Badger and Backfire bombers.
With the Kiev group's position only 12 hours old in the vicinity of southern Spitsbergen, the only units in her path, HMS Courageous, USS Narwhal and USS Tinosa have been ordered to intercept and sink the Kiev battle group.
Enemy Forces
Surface : Kiev CVHG, Kynda CG, Kresta II CG, Kanin DDG, Krivak I FFG, Poti Mod FFL, Petya II FFL.
Air : Ka-25 Hormone,Yak-38 Forger.
Subsurface : Possible SSN escorts with Kiev group.
Friendly Forces
HMS Courageous SSN
USS Narwhal SSN
USS Tinosa SSN
Sondrestrom Air Base : 343rd Recon Sqn (RC-135W Rivet Joint)
Mission
1. Proceed to the last known reported position of the Kiev group; locate, classify and sink the Kiev and her escorts. The Kiev is the primary target.
2. Use of Nuclear ASW/ASuW weapons is authorised.
Execution
1. All SSNs are to close to the last known position of the Kiev group and form a trip-wire line, then locate and engage.
2. Kiev group last known course 235; speed 15 knots.
3. Use RC-135W Rivet Joint to locate and classify Soviet units.
Command and EMCON
Command: COMSUBLANT
EMCON: Alpha-limited emissions.
October 8, 1975 0500Z
Compared to the last scenario, this one is relatively straightforward. All I have to do is find the Kiev Battle group and sink the Kiev. Straightforward does not mean easy, however.
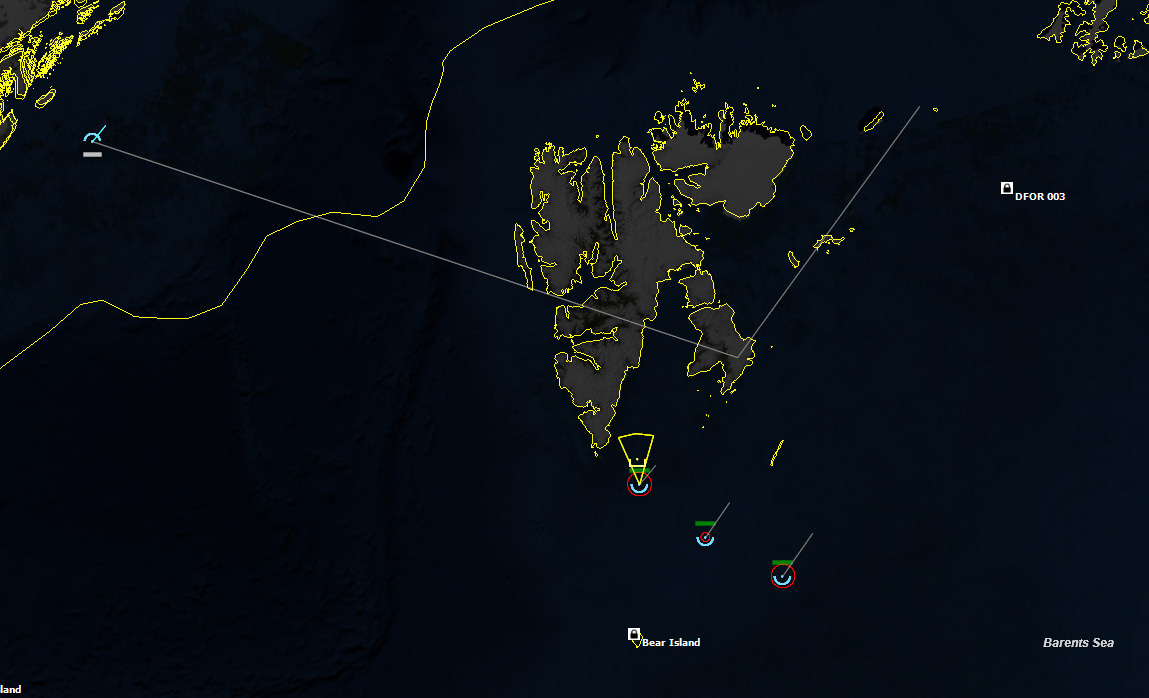 Initial positionsFrom northwest to southeast my submarines are USS Narwhal, HMS Courageous, and USS Tinosa. Almost immediately Narwhal detects a contact to the north. I set all three subarmines to 5kts, creeping towards where I can hopefully detect the Kiev. I may end up needing to increase speed, but at least at the beginning, caution is warranted. My RC-135W Rivet Joint will be listening for any emissions from the Kiev group.
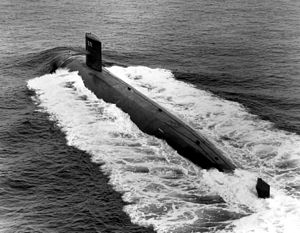 USS NarwhalNarwhal's contact quickly resolves into Biologics, so at least I don't have to worry about engaging a Soviet SSN so quickly.
053229Z Far sooner than I anticipated, my Rivet Joint detects surface contacts south of Spitzbergen.
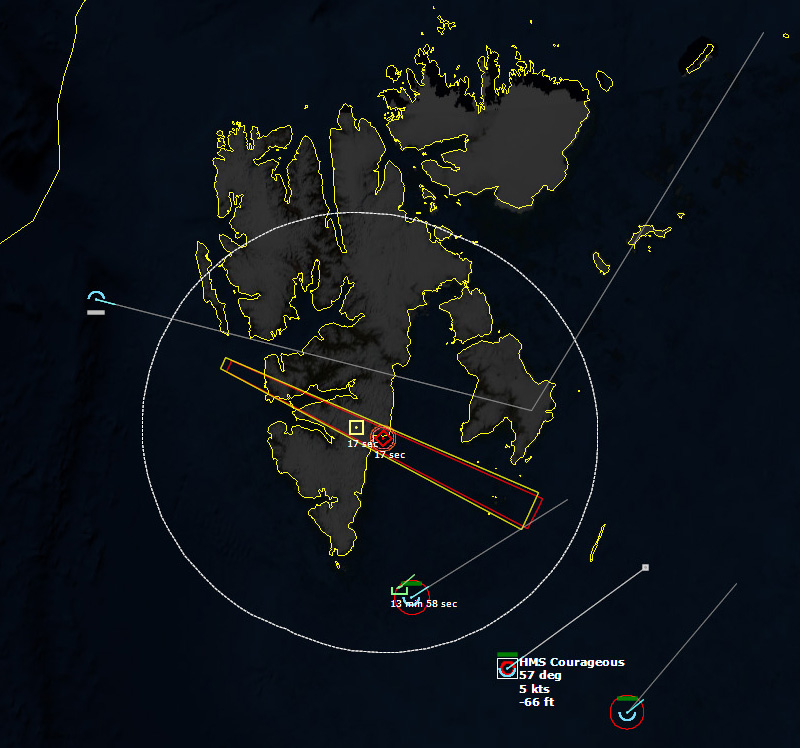 Contact!One of the contacts is quickly identified as a Krivak I frigate. It's possible that these ships are just pickets, so the Kiev group could be much farther off.
 Kiev-class Aircraft Carrier053629Z The contacts are localized and two more are found. One of them is a MPK Poti Mod, a fast patrol-craft.
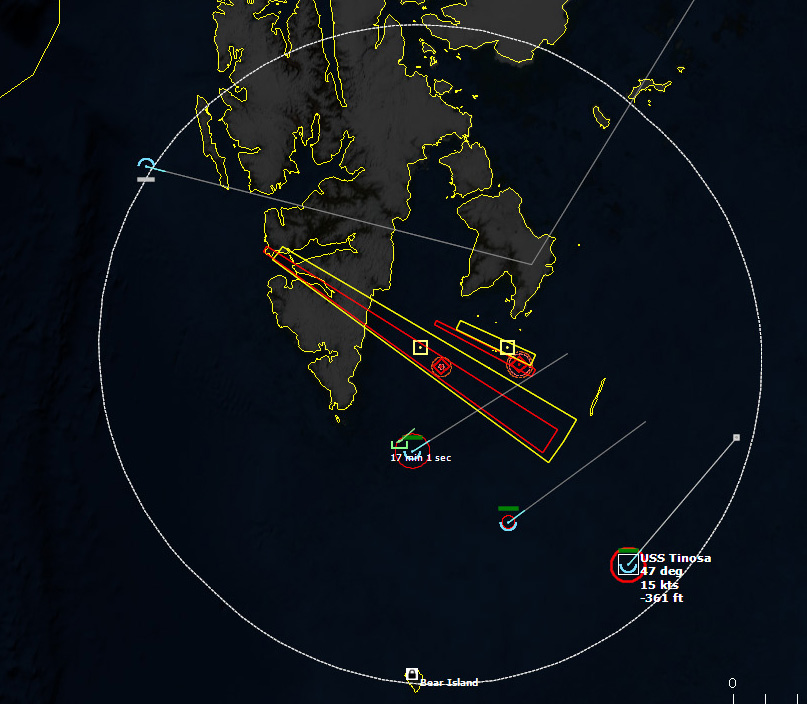 More contactsAnother contact is made, and another MPK Poti Mod is identified. Now I have three MPK Poti Mods and one Krivak I, and Narwhal is headed right in the middle of them. I then detect a DDG.
054500Z
FLASH / FLASH / FLASH/ FLASH
FM COMSUBLANT
TO ALL UNITS
//DFOR 003 UPDATE 001//
//DFOR 003/POSN/77 52N 030 24E/235T/15 KTS/080500Z//
BT
I mark the updated position on my map. It looks like the Soviet Fleet is coming right for me.
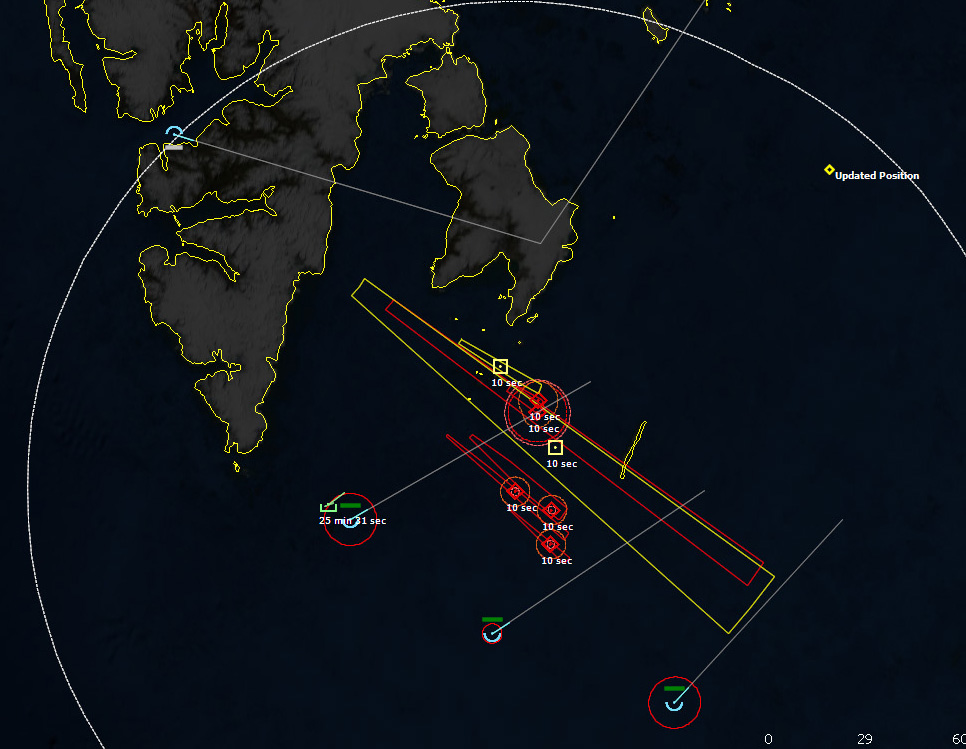 Position updatedAs my Rivet Joint gets closer, it picks up more contacts. Several are identified as SKR Petya II corvettes.
 055149Z Contact! My Rivet Joint picks up two airborne bogeys--probably Yak-38 Forgers from the Kiev. Hopefully they haven't picked up my Rivet Joint.
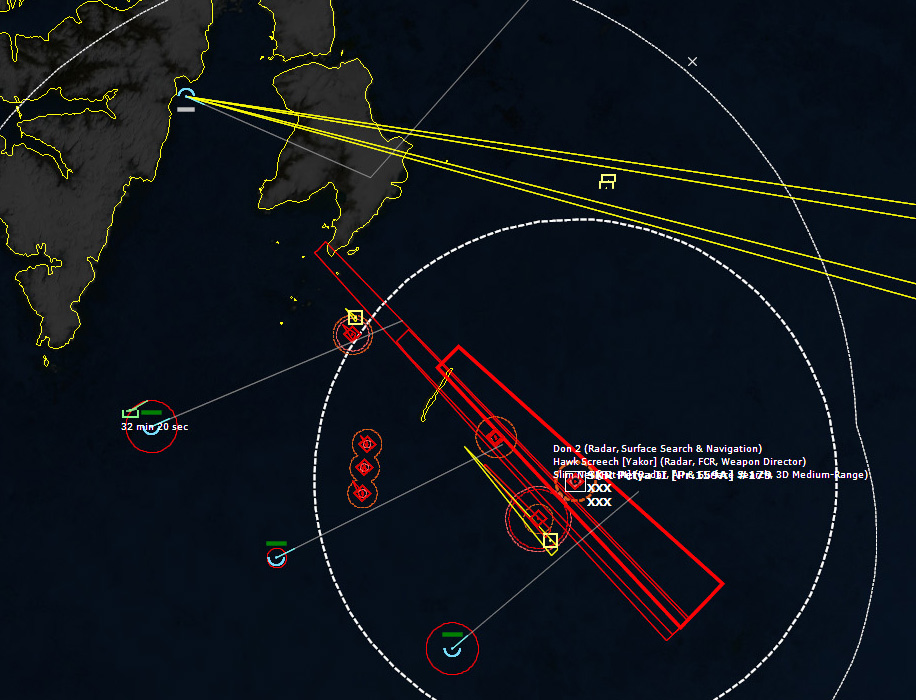 Lots and lots of contactsThe airborne contacts are classified as Yak-38 Forger As, as I suspected. I adjust the course of my Rivet Joint to get a better bearing on them.
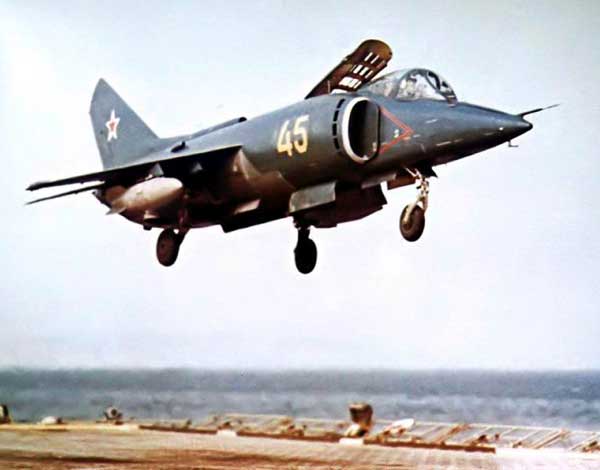 Yak-38 Forger060000Z The Forgers are definitely coming after my Rivet Joint, so I start maneuvering away. I know the Forgers do not have long legs, but I should keep my distance. Once I get out of the radar range of the Soviet DDG, I lose contact with the Forgers, who I hope have decided to RTB.
As things stand, I have identified four groups of ships. To the north is BPK Kanin DDG and a SKR Krivak I. Just south of them are three MPK Poti Mods. Southeast of them are another BPK Kanin and SKR Krivak I, and southeast of them are three SKR Petya IIs. I suspect that this is just a screening force.
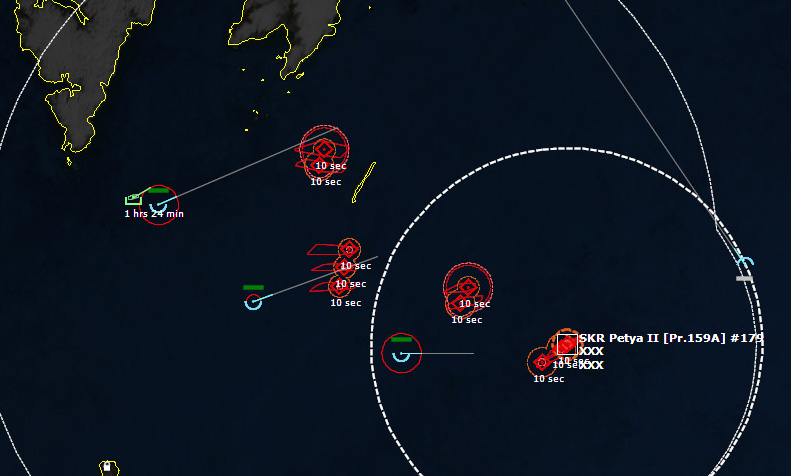 Four surface groups, but no Kiev...yet.For the next two hours, my Rivet Joint circles the surface groups, attempting to keep its distance, but there's no sign of the Kiev. I do detect more Yaks in the air. Again I keep my distance, and the Yaks, although they pursue me, eventually give up. An hour after that, more Yaks. I am beginning to suspect that the Kiev is in fact here, but keeping emissions silent, hoping to slip by.
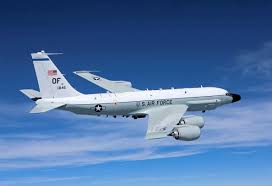 RC-135 Rivet Joint100000Z I decide to send my submarines above the layer to see if they can detect anything. They are all moving at 5kts, so hopefully they will be able to detect something.
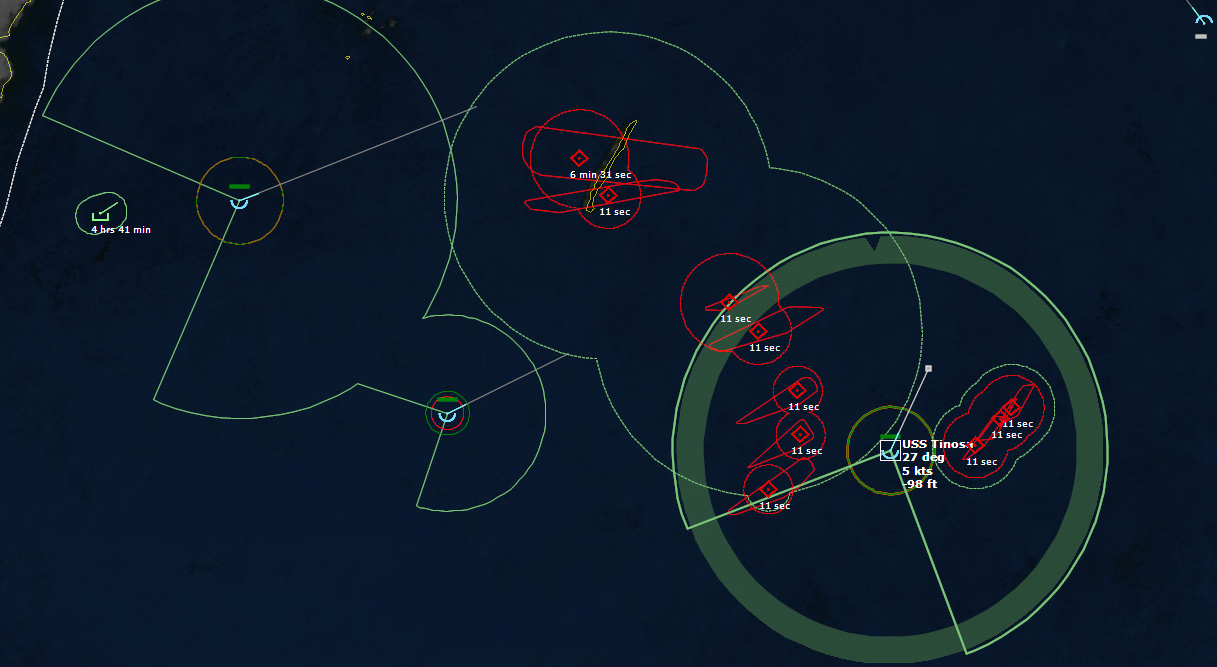 The submarines go shallow and listen.114200Z Narwhal hears explosions--its being depth charged! I immediately cut throttle to 5kts (I temporarily set it to ten), and go deep from where I was, which was just under the layer. I head south to evade. Several minutes later, two more depth charges are dropped. In all the depth charges are close, missing only by hundreds of feet (239 and 332ft). At -640ft, I go to 15kts, hoping to get out of the area. And then I detect a bogey overhead, using its high frequency sonar. I go to full speed and turn east to evade. More depth charges are dropped, and I turn southwest.
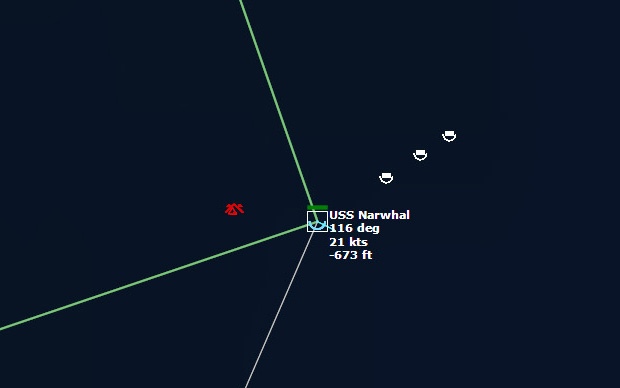 Narwhal is under attackUSS Narwhal is the most silent submarine in the US fleet, so I am confused as to how she was detected. But nevertheless, she has been, and so I have no choice but to run.
I don't run long.
 USS Narwhal, pride of the US fleet, is sunk.The third barrage of depth charges sinks the Narwhal, and 107 crewmen go down with her. From detection to her sinking took less than five minutes.
120809Z The next time I detect a Yak it is northwest of the rest of the Soviet ships, so I suspect that the Kiev is trying to slip by. I send Courageous and Tinosa headed in that direction, hoping that I'm not going on a wild goose chase. With Narwhal sunk there by a helo, it furthers my suspicion that there's something important over there.
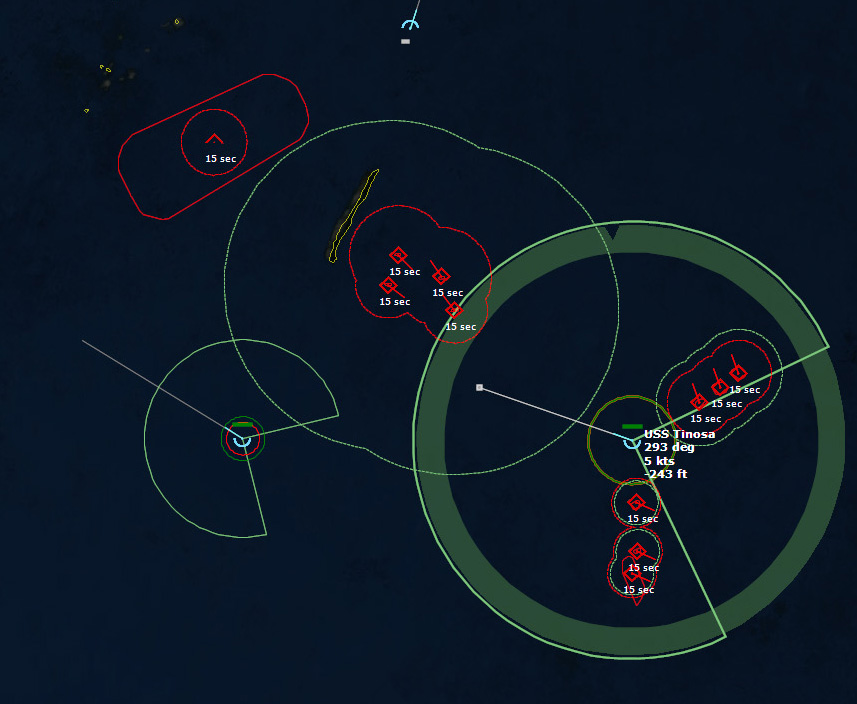 Another Yak-38 Forger is detectedMy Rivet Joint has to run for its life, all the way north of Spitzbergen, but eventually outdistances the Forgers.
132149Z My second Rivet Joint arrives on station, and I detect two more Yaks. I'm hoping that with two Rivet joints in the area, I can pinpoint their origin better, and lock down where the Kiev is.
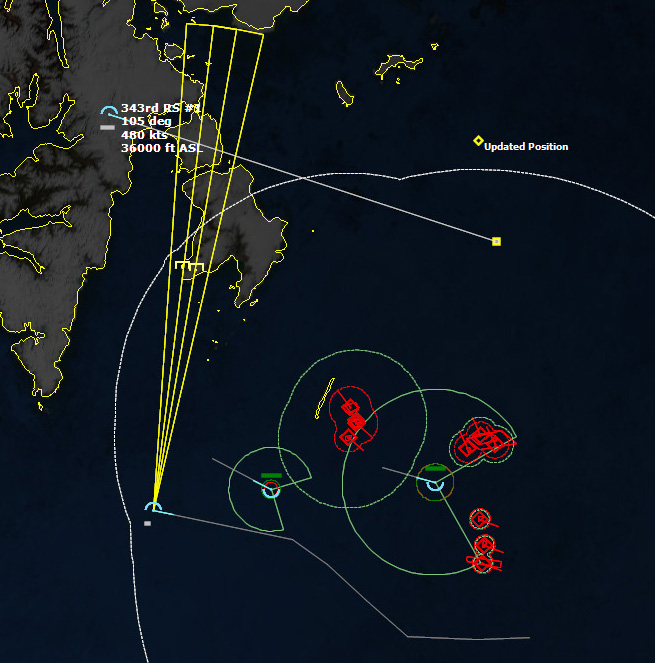 Come on, Rivet Joints, triangulate it...The location of the Yaks is narrowed down, and I place a reference point and send my two subs right for it. Narwhal would have been in great position to attack...provided that is in fact where the Kiev is. I worry that the Courageous and the Tinosa won't be able to catch up.
 HMS CourageousI search for hours, and every so often I lure Yaks to take off and go after my Rivet Joints, which then evade, but it gives me updates on the position of the Kiev. Finally, it appears that the Kiev is so far ahead, I am forced to send the Courageous deep and to flank speed (thankfully deep enough so it doesn't cavitate) in an attempt to catch up. Tinosa is caught in shallower water so I can't risk it going fast, and thus lags far behind.
031941Z Courageous must be getting close...and it could be the end. It detects a high frequency sonar. I immediately slow down and change course, hoping to lose the contact. I suspect, however, that since I have been detected, Courageous is probably doomed.
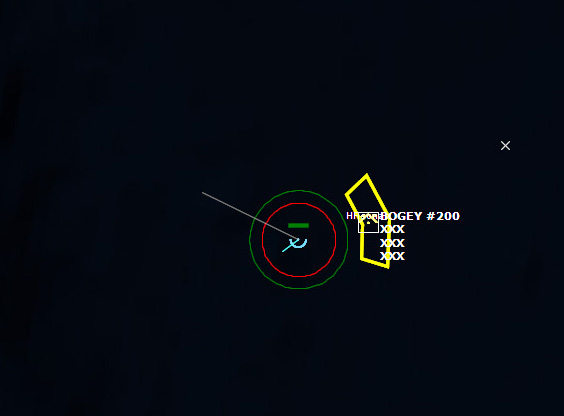 Courageous is detected.I lose contact with the helo, and I hope I have evaded it. I ascend to just above the layer to listen. I decide to risk going up to periscope depth. I scan the horizon...and nothing.
After a long time of detecting absolutely nothing on sonar, I decide to stir the pot and have my Rivet Joint light off its radar. It's only useful for ground mapping, but maybe it's enough to lure more Yaks into the air.
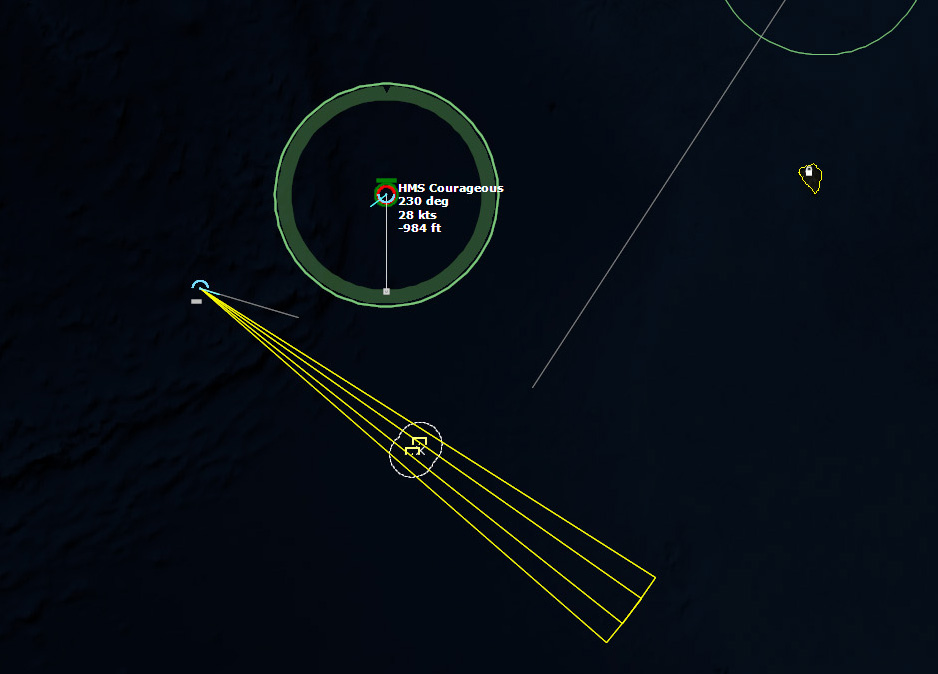 Bingo.It works, and soon I detect Yaks in the air to the southeast. The Kiev group must have changed course to the south somewhat. My Rivet Joint goes to full military power to evade, while Courageous and Tinosa alter course.
051026Z Torpedo in the water! Courageous detects a torpedo, and initiates a radical turn and change of depth to evade. I do not have high hopes about this...
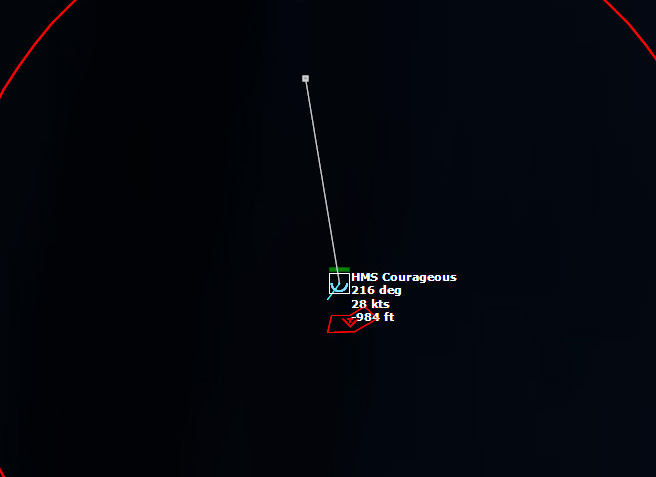 Torpedo in the water!Amazingly, the torpedo misses. I immediately cut speed and change course again, hoping to disappear in the water.
It doesn't work. A depth charge explodes nearby, and then another torpedo is detected. I go to flank speed and dive.
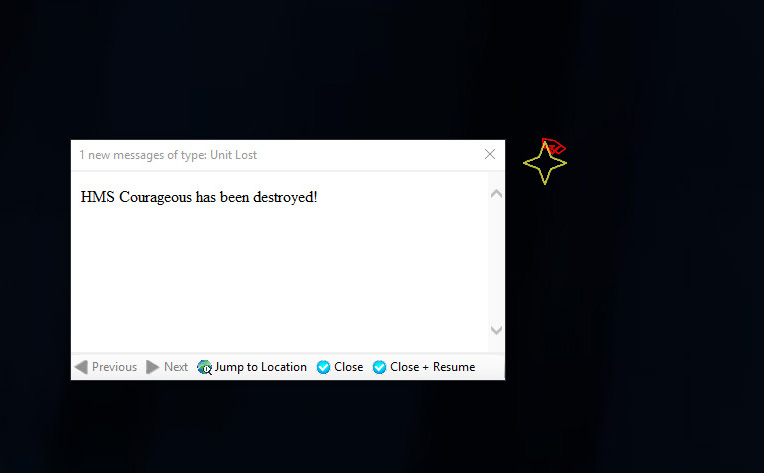 Courageous sinksThat doesn't work either. The depth charge sinks Courageous. And with her went my best hopes of even finding the Kiev.
Conclusion
This was a frustrating scenario. Clearly what happened was that the Kiev group steamed right towards the Narwhal, detected her, sank her, and kept right on going. As soon as Narwhal was sunk, so were my chances of winning the scenario. The flash message sent early in the scenario gave me a warning that the Kiev was heading my way (you could draw a straight line through the initial position, to the updated position, and it would lead you directly on top of Narwhal. But with the loads of contacts I had made further south, I assumed that all those Soviet vessels were a screen to Kiev, when in truth they were nothing but a distraction. While I was focused on identifying those ships, the Kiev slipped by to the north, very close to Spitzbergen. In the end, my best method of detecting Kiev turned out to be the fire control radars of Kiev's Yak-38 Forgers. I would send in my Rivet Joint as a lure, the Soviets would take the bait and launch Forgers to intercept it, and that would update me on Kiev's position. My Rivet Joint would flee, and when the Forgers broke off pursuit, I'd send the Rivet Joint back in.
I was hoping to have a miraculous comeback and have Courageous sink the Kiev, but it was not to be. Like the Narwhal, it was sunk far from Kiev, not getting the slightest indication that the Kiev group was anywhere nearby, and was destroyed quickly. So much for NATO submarines being "quiet."
I replayed the scenario five times with the foreknowledge of what was going to happen. Each time I rigged Narwhal for ultraquiet and just sat in ambush, waiting and listening (sometimes above the layer, sometimes below). Four times in a row Narwhal, despite being moving at 5 kts or less, was sunk without detecting anything at all. Itjust sat there, the most silent submarine in the US inventory...and then "Torpedo in the water!" and within seconds she was dead.
On my fifth attempt at the scenario, incredibly I actually detected some Soviet ships. I stayed quiet as the Soviets were at the edge of range of Narwhal's torpedoes. I knew that if I fired a torpedo too early the Soviet ships would flee and the torpedo would run out of fuel. So I waited for them to get a ilttle closer. And then...torpedo in the water! Narwhal was being attacked again. I snapshotted a torpedo at the largest Soviet contact and then went full evasion. The evasion didn't help, and Narwhal was hit and sunk...again. But my torpedo ran on...and at the extreme end of its range, hit its target, which by pure luck was the Kiev. The hit caused flooding, and eventually Kiev sank...and I won the scenario.
Obviously driving a real nuclear submarine takes skill, but in this scenario it sure didn't feel like it. I had looked forward to the scenario playing out somewhat differently: My submarines would creep along until I detected the Kiev group (with some help from the Rivet Joint), skillfully maneuver to lie in wait, approach in stealth, the tension building, positively identify the Kiev, and then execute a torpedo attack and run in the hopes of evading their retaliation. Instead I really felt like I was just playing it over and over again, sitting at the keyboard doing nothing but waiting around, hoping that this time I would get lucky.
SIDE: Soviet Union
===========================================================
LOSSES:
-------------------------------
8x Ka-25BSh Hormone A
EXPENDITURES:
------------------
555x RGB-1 [NATO BM-1, Search, Passive Omni]
12x PLAB-250 Depth Charge
2x AT-1M [NATO E45-75A]
1x Depth Charge [Aerial, 80kT Nuclear]
SIDE: NATO
===========================================================
LOSSES:
-------------------------------
1x SSN 671 Narwhal
1x HMS Courageous
EXPENDITURES:
------------------
SIDE: Biological
===========================================================
LOSSES:
-------------------------------
EXPENDITURES:
------------------