Elyse Major's Blog
April 13, 2022
my instagram account was hacked

hello!
I’m sending this to further broadcast the message that on April 2, 2022 my elyse.press.major Instagram account was hacked.
How it started
Someone I’m connected to on social media, who I’d written about years ago for a national magazine, obviously had their account hacked. I received a DM from the alleged friend on Instagram asking if I could help them get in the process to have their account verified (that little blue check mark). “Sure, how can I help?” In a momentary distracted lapse of judgment, I provided a requested screenshot which included my birthday, mobile phone number, and email address. I should’ve known better. Within minutes, I was locked out of my account, and soon the hacker began posting photos of mansions and cars – all encouraging others to invest in Bitcoin. Many friends could tell this couldn’t be me but some followers pursued!
How it’s going
At the time of the hack, my account had about 4500 followers and judging by the steady stream of texts, emails, and DMs received since 4/2, the hacker is on the loose with the same “can you please help me get my account verified” scam. Despite my postings of warnings and alerts to social media, friends and followers are falling for it and being hassled. Meanwhile, I try daily to get back into the account, failing miserably each time. At least seven video selfies have been denied. I even got back into the account twice and changed all of the contact information (phone number from Nigeria!) but when I went to post, I was asked to provide my new password (which I did), and was immediately booted out once again. My latest steps: submit a requested photo of myself holding a paper with a code written on it. Nope. Install Google Authenticator and get a set of codes to use as back-up. Nope.
I am extremely frustrated not only about the situation but about social media and how much it matters to all of us. There’s been good and there’s been harm and damage, and obviously even the small clubhouses in which we feel ownership, are not ours.
As of this posting, if you receive a message from "me" at elyse.press.major – please ignore or report. I have a new account at elyse.elizabeth.major and will be playing in that clubhouse until further notice.
Be well + alert, tinkerers!
xo
elyse


August 2, 2020
let's make a sail boat in a jar

The idea is to craft a small sailboat and place it in a jar... or just display as-is.

Here's how it appeared in my second book {an all-time fave layout/photo). Today's version is even simpler as we're leaving the jar lid as-is and skipping adding beads as frothy waves, but of course, the options are yours!
You will need:JarGluePaperScissorsShort craft sticksToothpicks


I am using gift wrap from

Snip the tip off one end of the toothpick so that it is flat; glue it to the craft stick.

Judge what size you'd like the sail to be. Fold a piece of paper in half and cut out a triangle. Voila! You know have a template. Slide over folded paper for same sized sails every time.

Cut a small slit inside the fold of your sail so that it can slip over the toothpick mast; lightly apply glue, fold shut, and gently seal.

Now you're sailing!

So cute, right!? Tip: The little sail boats also make adorable place settings, party favors, table decor.

So easy and fun you could end up making an entire fleet for a little lockdown regatta!
Happy tinkering + please stay safe at home + well!
xo
elyse
Find me on Instagram at or Facebook
July 26, 2020
let's make a cooking measurement magnet

You will need:
Jar lid
Glue
Magnet (or low-tack tape)
Paper
Pencil
Scissors
 I looked up the cooking measurements I wanted and typed them into a Word document. You may click and download the image above, then print, or create your own. You could also hand-write on to a piece of paper.
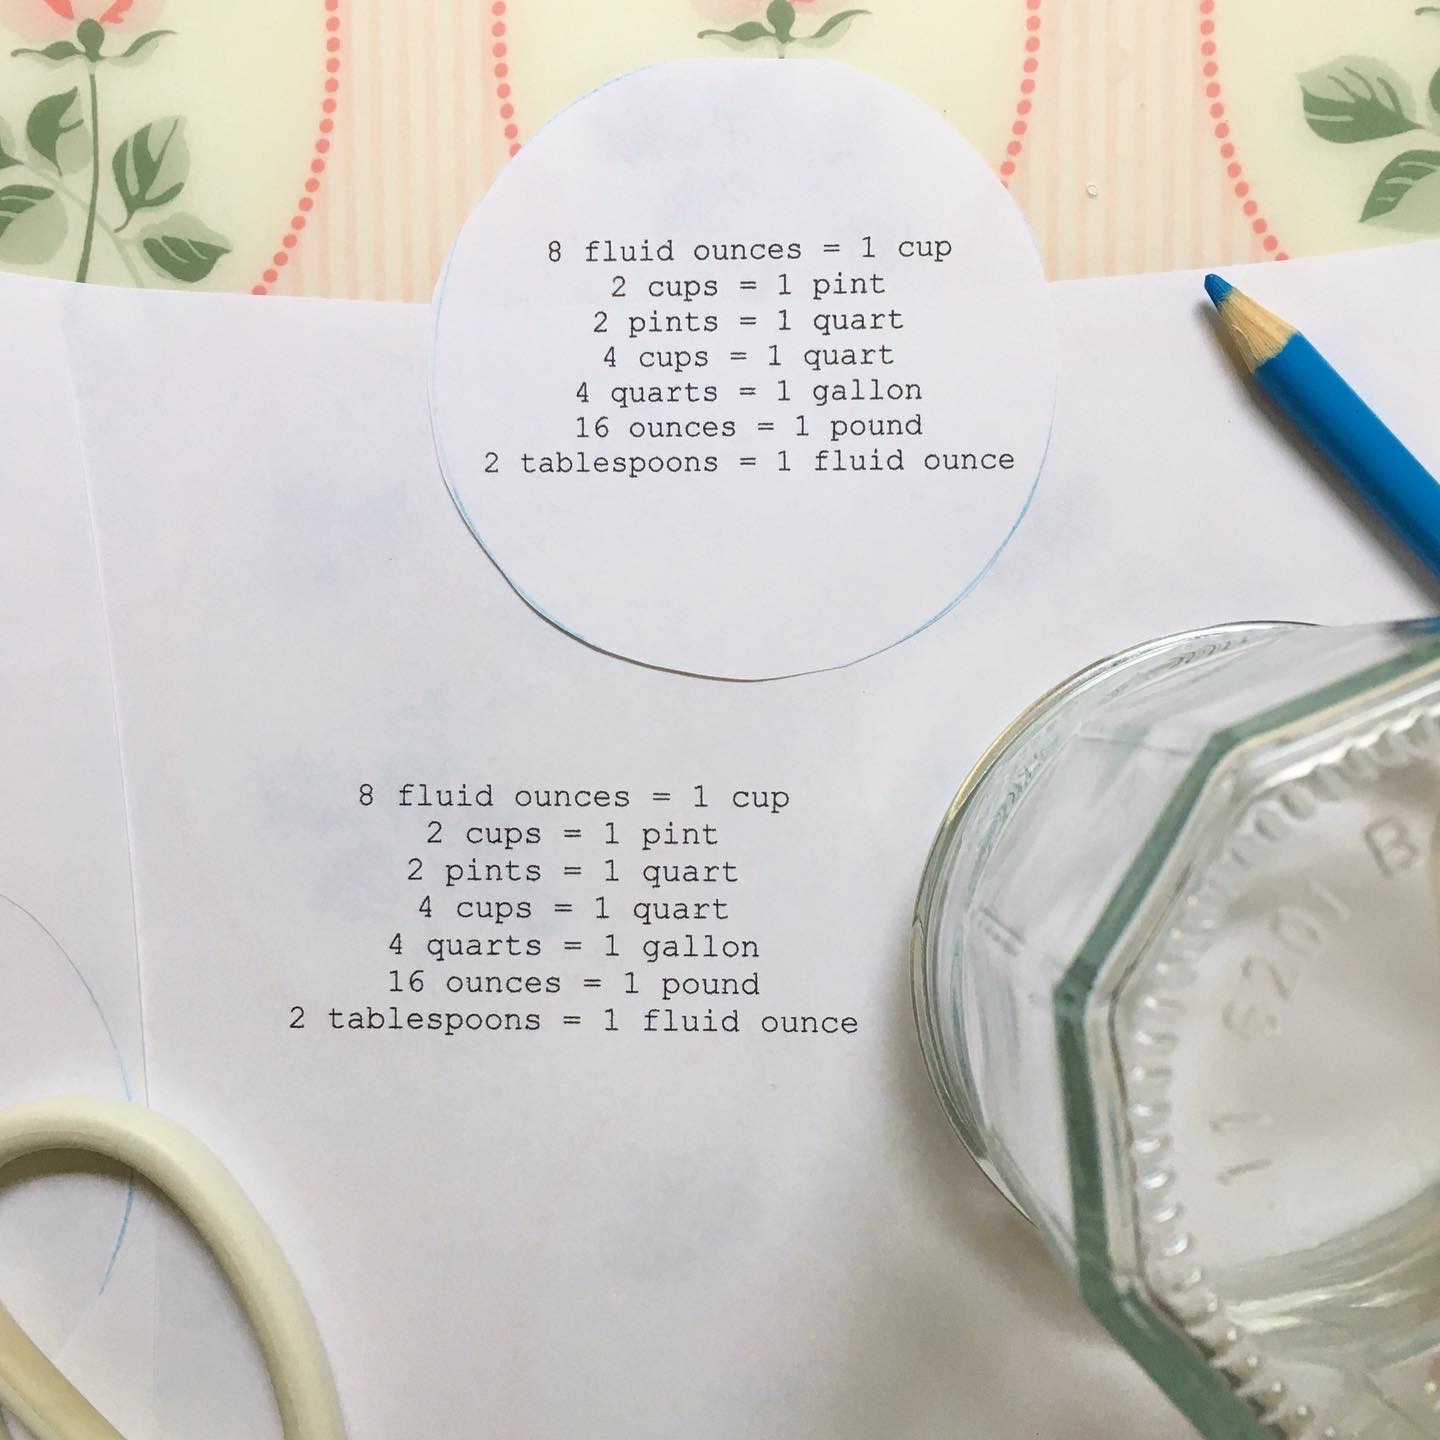
One one document, I tried two different type sizes (11 and 12) leaving plenty of space to cut around the text.

Instead of using a math compass, this time I flipped the jar over around the text, traced lightly with a pencil, and cut out the circle.

First I glued a plain white circle to act as a base, helping to make the circle with the text look brighter against a white background.

Finally, glue a magnet to the back and keep on the fridge! I couldn't find a stray magnet so my "kitchen helper" is stuck on with a loop of painter's tape (low-tack making it easy to remove anytime).

I'm terrible at remembering this pints-to-quart stuff so I think this is going to come in very handy!
Happy tinkering + please stay safe at home + well!
xo
elyse
Find me on Instagram at or Facebook
July 19, 2020
let's make coasters
You will need:
Jar lids (I'm using lids from Bonne Maman preserves)
Cotton fabric
Math compass
Paper
Scissors

In a nutshell – or a lid – the goal is to cut a circle of fabric to fit the inside of a lid.

Tracing the lid won't give the best fit so I decided to get out the ol' math compass.

Position the point of the math compass to the center of the lid and then extend the arm holding the pencil close the inner edge.

Keeping the math compass "frozen" in position, move it over to a piece of paper {I'm using this cute handy pad from E. Frances}, position point-down and rotate the pencil to draw a circle. Cut out the circle to be your template. Use your template to cut as many fabric circles as you'd like. No math compass? No worries. Trace the bottom of a glass similar in size to your jar lid or just estimate – it will be fine.

Place the fabric circles into the lids and voila! Your summer coasters are complete.

I chose NOT to glue the fabric to the lids to keep them easy to remove to replace and wash, if needed.

If you are swooning over the fabric, I've had it for a while and it is Rambling Rose, Cherries, Blue from Tanya Whelan.

So cute, easy and fun, right!? Happy tinkering + please stay safe at home + well!
xo
elyse
Find me on Instagram at or Facebook
July 11, 2020
let's make a jar lid wreath

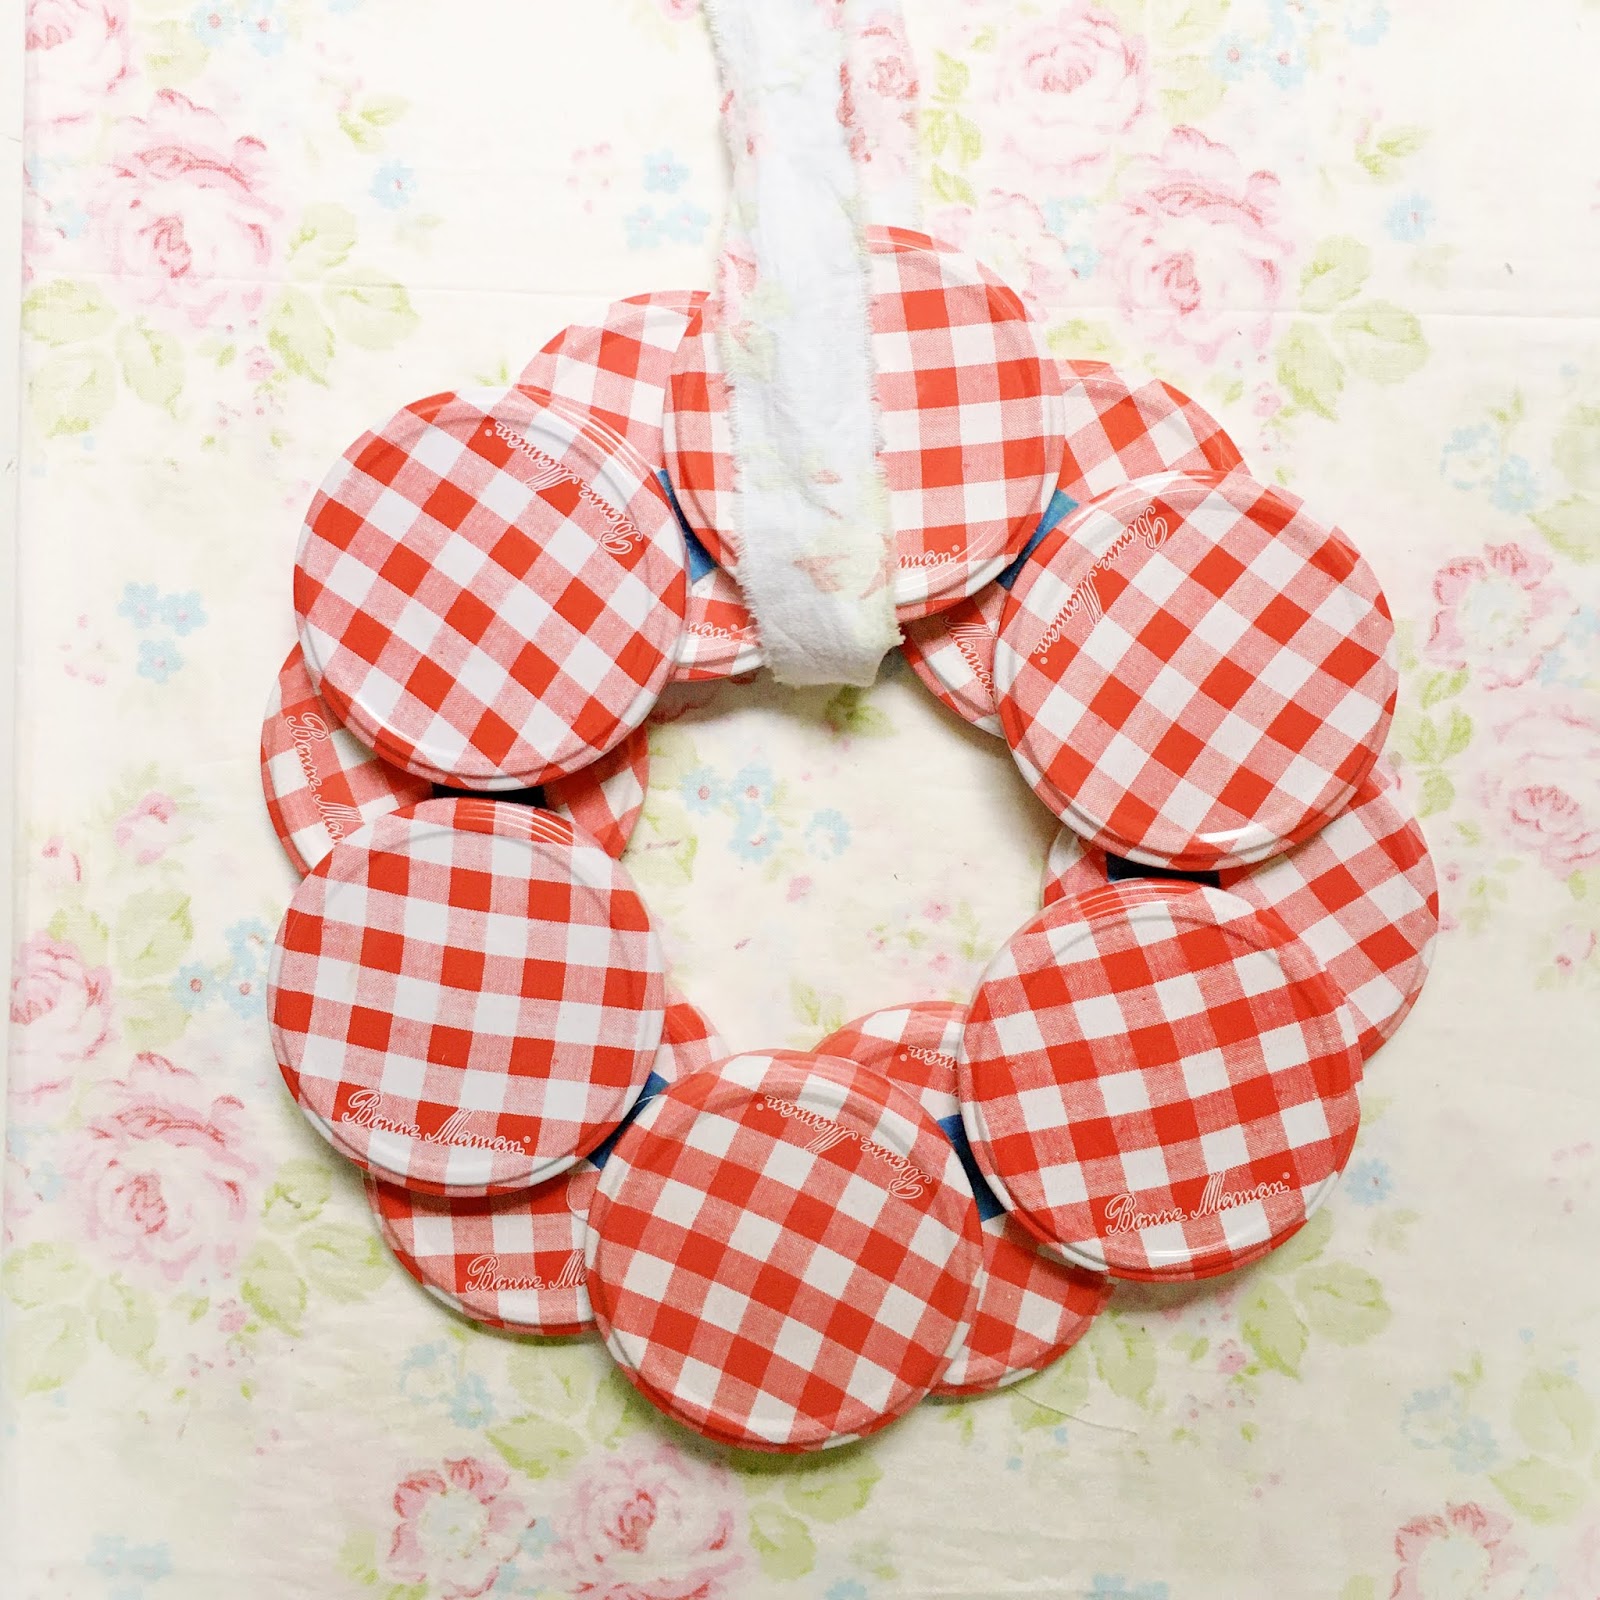
I decided to make a wreath. I first tried overlapping the lids and hot-gluing them together but the glue didn't hold and things got messy. Still, next, I tried hot-gluing lids to an embroidery hoop which served as a round base – didn't work. I then tried fashioning a web of tape to the back of the wreath shape – didn't work.
I decided to try super glue aka Loctite Instant Adhesive QuickTite. It was my first time using the stuff and as a messy crafter, I was nervous about gluing my fingers together. While I did get it all over my fingertips (which washed away in a couple of days) it did indeed bond the lids together.
You will need:6-12 jar lidsLoctite Instant Adhesive QuickTitePainter's tape

Rather than overlapping all lids, I made a daisy shape and it worked, so I glued another = two daisies.

I placed one daisy over the other and rotated it slightly. When it was positioned how I wanted it, I taped the two daisies in place with painter's tape – knowing I wanted to flip it all over for gluing so that any gluey spots would be hidden. I used painter's tape so that it would be easy to remove.

{I'm not one for perfection with my crafting and that's why I refer to it as tinkering}

I added glue to spots where lids connected, pressed gently, and rotated to glue the next spot.

Once all the gluing was done, I removed the tape from the front. It worked! The little metal wreath was complete, shown hanging from a trip of fabric.

The gingham makes it charming for the summertime but also for holiday decorating. But let's not get ahead of ourselves!
Happy tinkering + please stay safe at home + well!
xo
elyse
Find me on Instagram at or Facebook
July 5, 2020
let's make faux milk glass

This project originally appeared in my first book, my baby girl, Tinkered Treasures on page 70 as "painted jars" but because the result resembles milk glass, I decided just now to change the name for this post. Brazen, I know! While milk glass is typically white, depending on what paint you have on hand, you can make your own rules.
You will need:
Jar with lid
Paint (interior house, or craft)
Optional:
Pretty paper, scissors, glue
Trimming

As always begin with a glass jar that is clean and dry. The object of the game is to cover the interior of the jar with a thin coat of paint and let it dry, so you don't want to pour in too much, although you can always pour excess back out.

Return lid to jar and roll around to cover inside with paint until no glass is exposed.
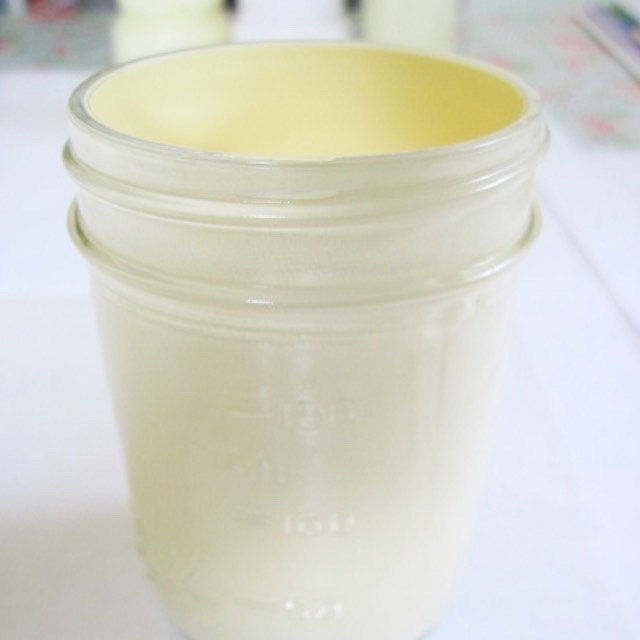
Leave jar open and allow the paint inside to dry.

Cut out a motif from a favorite paper and affix to the outside of the jar using a bit of glue.

Add trimming and secure with glue, if you like, or leave plain. The jars are best used to hold dry objects; I generally tuck a cupcake wrapper inside to serve as a liner.

Now that I've rethought this project as milk glass, I want to make some using white paint or a jadeite shade of mixed white and green! Turquoise would be fun, too.
Happy tinkering + please stay safe at home + well!
xo
elyse
If you haven't already, find me on Instagram at https://www.instagram.com/elyse.press.major/ or Facebook at https://www.facebook.com/ElyseMajorTinkeredTreasures
*Looking for copies of my books? Please consider first checking your local independent bookstore or try Barnes & Noble before buying from a big retailer like Amazon. Shop small, buy local.
June 28, 2020
let's make coastal accents with seashell pasta

One of these things is not like the other. Can you guess which one? It's the can – covered in sea shell pasta and spray painted white!
You will need:
A base (tin can, flat frame, foam wreath, etc.)
Seashell pasta
School glue
White spray paint
Attach shells with glue, let dry, and then bring outside to give a few coats of white spray paint. Here's a step-by-step from the Camp Tinker archives: click here.

Here's a mirror from IKEA given the seashell pasta treatment.
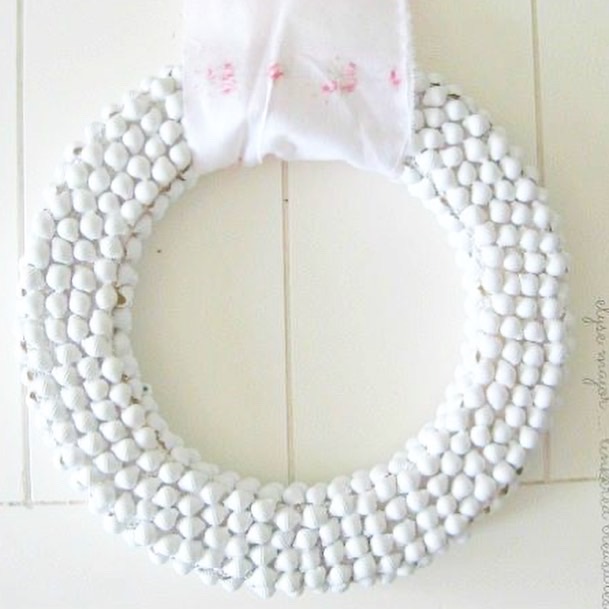
This project was meant to be in my second book Seaside Tinkered Treasures but didn't make the trek to the UK in one piece despite two shipping attempts! Use the same application of shell pasta and glue and white spray paint on a styrofoam wreath form.

People mistake this for real shells most every time! Use to hold pens, flowers, plastic cutlery... what a fun idea to decorate for the Fourth of July!
Happy tinkering + please stay safe at home + well!
xo
elyse
*Looking for copies of my books? Please consider first checking your local independent bookstore or try Barnes & Noble before buying from a big retailer like Amazon. Shop small, buy local.
June 21, 2020
let's make cottage style god's eyes
Welcome to Camp Tinker! Today we're making that staple of summertime arts and crafts: the God's Eye or Ojo de Dios. To give it cottage style or a shabby spin, we're using strips of cotton fabric instead of yarn or twine resulting in a rustic home accent.

You will need:
2 sticks or twigs
Scissors
Scraps of fabric

I foraged around outside and found a nice thin stick which I snapped into two equal pieces.

Prep
Next, I snipped the edge of a length of fabric and tore a strip about a half inch wide. You will need many of these strips – which you can prep by tearing all at once – or rip along as you go. Tie each fabric end to the next and knot resulting in a single long strip. Place the sticks into an equal cross. Tie the fabric strip into a knot at the center of one of the sticks

Working clockwise from the center knot, wrap the fabric around the stick, rotate and do the same to the next stick. Once you begin to get the hang of it, it will be like turning a steering wheel, wrapping the fabric around and under as you go.

I hope these images will help but if they don't – there are many tutorials to be found with a simple Google search. They will most likely use yarn but the method is the same.
I didn't want my finished piece to be too large, so I snapped all four branch ends. Once completed, I knotted the final strip to another piece hidden in the back. Tie a final fabric strip to one of the sticks and knot into a loop for hanging.

The resulting woven pattern is very pretty. I used a few different fabrics, mostly pinks and whites with rose motifs, but the possibilities are endless.
Happy tinkering + please stay safe at home + well, campers!
 established july 2, 2012xo
elyse
June 14, 2020
let's make a desk set from wallpaper

Rather than my recreating the post here, let's go on a field trip!
http://blog.lauraashleyusa.com/pretty-organized-wallpaper-desk-supplies/
No wallpaper? Use your favorite paper for any of these projects {but it sure is pretty!}.
Happy tinkering + please stay safe at home + well!
xo
elyse
PS
Find me on Instagram at @elyse.press.major
June 7, 2020
let's make postcards

This project starts humbly using thin cardboard boxes from food and drink packaging.

You will need:
Empty cardboard package
Glue
Paper
Ruler
Scissors
Tape
Most postcards seem to measure at 4x6 inches so I hunted through the recycling bin and found boxes from graham crackers and seltzer that were graphically pleasing on their own. I flattened the boxes, opened them up at the seams, and then measured and cut into 4x6" rectangles.

Using an existing postcard as my guide, I flipped each card to the brown cardboard side and drew a line to set aside space for postage and the recipient's address. If you like the graphics on the front, your postcard is ready to write and send.

I decided to cover the packaging side with white paper to conceal the graphics, creating a blank canvas on which to decorate with a collage of paper scraps and stickers.

When you make things with paper, even the scrappy mess is pretty!

I added a few stickers to my collage, too. Be sure that any paper flaps are secured with glue or even clear tape so that your masterpiece doesn't arrive torn.
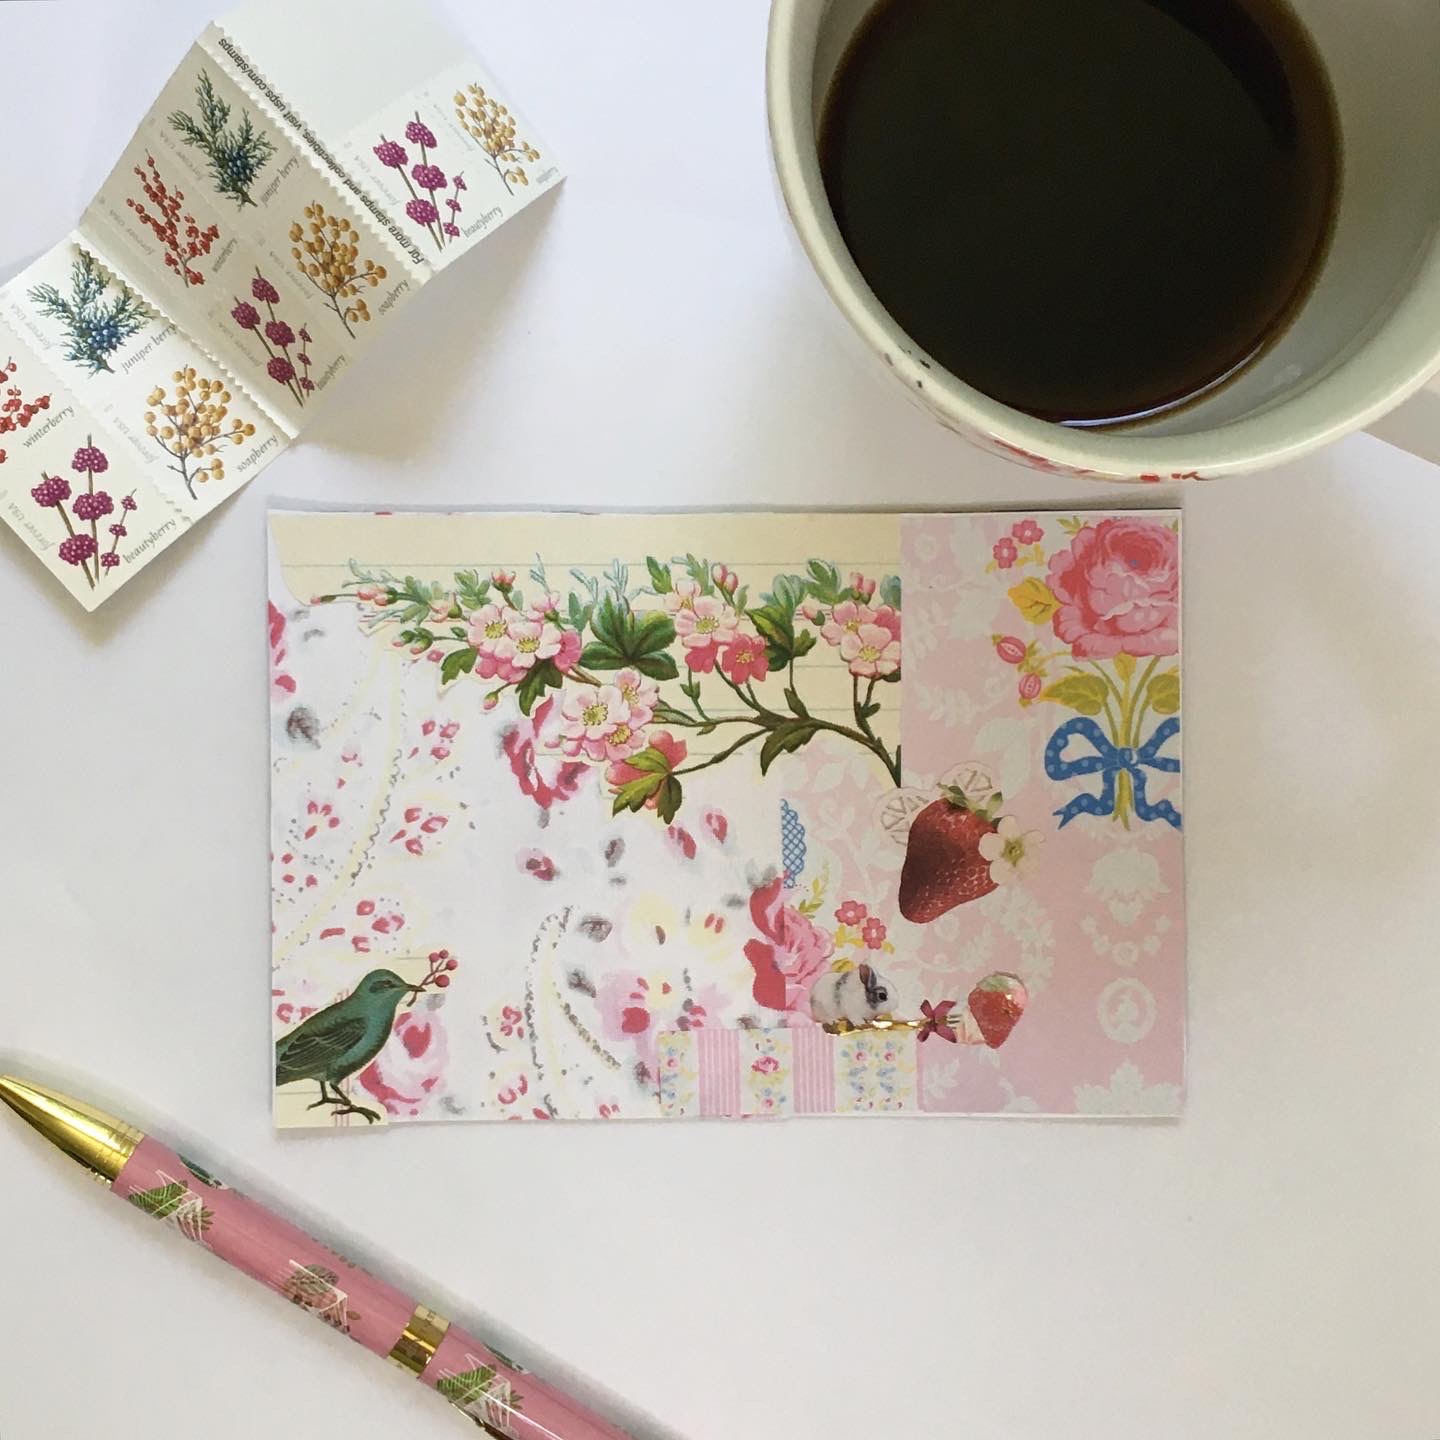
You can even buy post card stamps online.

This project appears in my second book Seaside Tinkered Treasures (CICO Books) as Cracker Box Postcards on page 80.
Surprise someone with a postcard. I'm sure they'll be glad you did.
Happy tinkering + please stay safe at home + well!
xo
elyse
*Looking for copies of my books? Please consider first checking your local independent bookstore or try Barnes & Noble before buying from a big retailer like Amazon. Shop small, buy local.