Stacey D. Atkinson's Blog
December 30, 2016
Printing Options for Your Self-Published Book
Are you ready to print your book but confused by all the options available to self-published authors today? Well, the good thing is that you have so many options because it wasn’t that long ago when independent authors had very little control over the price and quality of printing their books. Now, however, there are many digital printers to choose from, with some even offering limited distribution as well.
Local printer
Support the local economy by going local! If you live in or near a city, then you have a good chance of having access to a few digital printing companies. You can likely find their websites online, but I would also encourage you to go to their stores and get a quote on pricing and see samples of their work (e.g., paper options, glossy and matter cover finishes).
Use Google or LinkedIn to search for printers in your city
Talk to other local authors and ask where they had their books printed
Online printing companies
If you live in Canada or the United States, there are several online printing companies that offer decent printing services, fees and delivery. These companies cater specifically to independent authors, and they offer easy, step-by-step instructions on how to prepare your files for printing, proof the final versions, and place your orders. Consider these companies:
Bookbaby
Createsapce
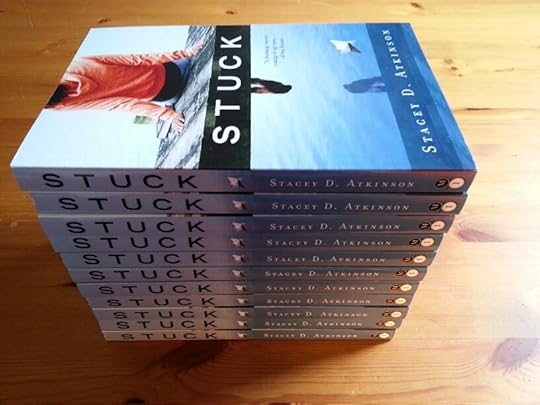
Example of books printed by CreateSpace.
Publish an e-book (print-free!)
Skip the printing altogether and publish an e-book instead. This means you won't have to worry about printing your book at all. Instead, you can work with an e-book designer to turn your manuscript into digital files (epub and mobi) that can be read on all e-reader devices, such as Kindle and Kobo. Consider these companies:
Smashwords
KDP (Kindle Direct Publishing)
Happy publishing!
Stacey
This blog post is based on the content in Lesson 6: Printing a Book, in the How to Publish a Book online course offered by editor Stacey D. Atkinson of Mirror Image Publishing.


September 14, 2016
Should You DIY or Hire a Pro for Your Book Cover Design?
If you are planning to self-publish a book and have now reached the design phase, you’re probably asking yourself two questions:
Should I hire a professional designer to create my book cover? or
Should I dust off my design skills and give it a go myself?
What is the right answer? Well, you can approach it either way—hire a pro or DIY—it all depends on your publishing goal.
What kind of book cover design do you need?
The book cover design for your print book includes a front cover, back cover, and spine. For an ebook, it just includes a front cover and a separate book description for your metadata or book selling page. Overall, you'll want to include the following in the book cover design process:
Ensure the book cover looks professional, e.g., a nicely designed image or illustration and fonts, and all copyrighted images have been licensed for your use.
Ensure the design meets the book’s specifications, e.g., a fiction book might have a book trim size of 8 x 5.5 inches.
Ensure the design meets the printer’s specification, e g., saved as a PDF with embedded fonts and flattened images.
Ensure you have well-written and edited content for the cover, e.g., front cover quotes; back cover book summary and publisher information.
Should you hire a pro?
If you want to see your book on a bookstore shelf someday, either in a bricks-and-mortar store or an online store, then you should spend your money wisely and hire a designer to create your book cover. If you want your book to compete with mainstream books coming out of New York publishing houses, then your cover has to look just as good as those books. You can find a book designer in a few different ways:
Word of mouth
Search online for designers’ websites or social media sites
Look for book covers you really like and contact the designers of those books
LinkedIn, e.g., search for “designer” and the name of your city
Search the “find a designer” tab on the website GDC, Canada’s National Association for Design Professionals
Search the designer directory of AIGA, the Professional Association for Design in the United States
Additionally, if you are on a budget, you can consider online freelancer sites such as 99Designs or Upwork.
Should you DIY?
If you write for the fun of it and your main goal is to share your book with family and friends, then consider saving your money and creating a free cover design by using a template. Or if you or someone in your family has design skills, then consider designing your own cover.
To get started, check out these resources:
Createspace, a major self-publishing company run by Amazon, provides several resources for self-publishers. They offer a guide to creating a cover PDF for your book, custom templates, and a free cover creator service.
Or you can consider designing your own book cover from scratch by watching YouTube tutorials or by reading books like Book Design Made Simple by Fiona Raven, which offers a step-by-step guide to designing and typesetting your own book.
As you can see, there are all kinds of options out there for book cover design based on your publishing goals and budget.
Happy publishing!
This blog post is based on the content in Lesson 5 : Designing a Book Cover , in the How to Publish a Book online course offered by editor Stacey D. Atkinson of Mirror Image Publishing.
August 16, 2016
Simple Book Design Tips, Part 1
Whether you decide to design your own paperback book or hire a professional to do it, you should have a pretty good idea of how you want it to look and feel. There are all kinds of decisions to make in the book design process, including the font type and size and the page layout. Here are some tips to help you through the design phase on the way to publishing your book.
Choose a Desktop Publishing Program
You can design your book in Pages (Mac) or MS Word (PC), which are great programs for people using a template or those who have pretty good skills using word processing software. If you hire a designer though, you can expect him or her to use desktop publishing software:
InDesign is a powerful desktop publishing program in which you can design book interiors, pamphlets, posters, and more, by placing text and images into the InDesign file. You may hear the term “native file” being used, and this means a file that’s in its original format, such as the InDesign extension INDD.
QuarkXPress is another popular design software used in publishing, with a file extension QXD.
Choose a Book Trim Size
The trim is the width by height of your printed book. To help you decide the size of your book, take a look in your bookshelf or at the bookstore for some books in your genre, and take note of their sizes. For example, a common fiction novel size is 5.25 x 8 cm.
Choose a Font Type and Size
The fonts are the typefaces you choose, which can differ in type and size between paragraphs and headings. For example, a chapter title might be Garamond font size 14 and bolded, while the paragraphs might be set to Garamond font size 11.
Choose the Images
You can include photographs, illustrations, tables, or even doodles in your book if you want. However, images placed in a book usually require some special attention. You'll have to decide the size of the image on the page, which can also affect image quality. You'll have to decide placement of the image on the page: a single image per page or a smaller image with text wrapped around it. And you'll want to include a proper caption and credit line for each one too.
Don’t forget to format the images as per your printer’s specs. For example, here’s what Createspace printers advise on their website:
Images may be CMYK or RGB color. All images should be sized at 100%, flattened to one layer, and placed in your document at a minimum resolution of 300 DPI.
(CKMY refers to a four-colour printing process, RGB are the colours displayed by a computer screen, and DPI means dots per inch.)
Proofing Your Book
Once the interior design is complete, you'll want to review the book file very carefully as a PDF, visually inspecting each page to make sure the page numbering is correct, the chapters start on new pages, the running heads and margins are in place, the images are properly placed with the right captions, the fonts are the right size, etc.
After this review, or proofread, you’ll want to order a proof of your book—that is, a single copy of the book that you can hold in your hand and flip through each page to ensure it looks exactly as you planned and to review the print quality. You may want to ask a few others to review the proof as well.
While it may feel like there is a lot of “proofing” going on, just remember that it’s a lot easier to fix a mistake at this stage then after you place an order for a box of books! The proofing stage may add a few extra weeks onto your time line, but it’s worth it to spend the time making sure your book is error-free.
Happy publishing!
This blog post is based on the content in Lesson 4: Designing a Book Interior, in the How to Publish a Book online course offered by Stacey D. Atkinson of Mirror Image Publishing.
July 15, 2016
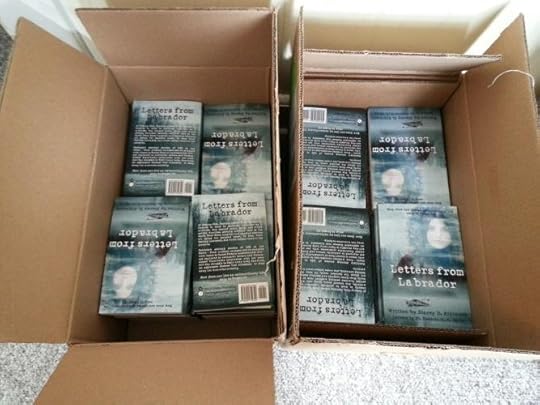
Goodreads Giveway: Win a free copy of Letters from Labrador
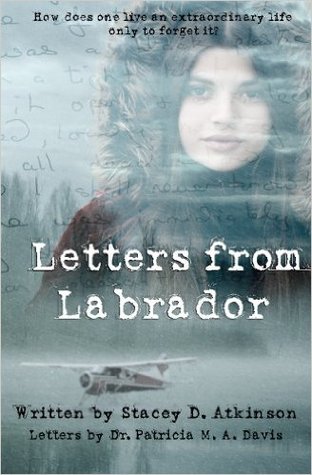
Letters from Labrador
by Stacey D. Atkinson
Giveaway ends July 24, 2016.
See the giveaway details at Goodreads.
Enter Giveaway
July 5, 2016
5 Ways an Editor Can Help You Avoid Costly Mistakes
People often struggle with the idea of hiring an editor. After all, who knows better than you do about what you meant to write, right? Well, you would be amazed at how many little mistakes end up in business and marketing copy and author manuscripts.
Often our mistakes are slight or comical and, hopefully, forgettable. For example, I once wrote that a helicopter pilot was holding a flip chart in his hand as he performed a safety check. So…did you catch the mistake? I said he was holding a “flip chart,” which should have read a “clip board.” A flip chart is one of those gigantic pads of paper that sit on an easel for writing on during boardroom meetings. I laughed out loud when this was brought to my attention by my editor. (Yes, even editors need editors sometimes).
Unfortunately, some mistakes are costly, and these are the ones you want to avoid completely. Here are five ways an editor can keep you out of trouble:
Copyright Infringement
Using text or images that you don’t have permission to use can get you into hot water. An editor can help you determine when a copyright owner’s permission is needed (based on the intent and type of use of the content you are borrowing) and when the content is in the public domain (when permission is not necessary).
Libel
By writing a false statement about someone, you can damage a person’s reputation, which is cause for libel. So if you are writing a memoir that includes a shady character, an editor can flag possible areas of libel so that you can make sure the wording is exactly correct and accurate.
Offensive Language
As society evolves, so does its languages. An editor can help make sure that you’re using today’s terms and that you are not inadvertently writing something in an offensive way. For example, we always put people first, so we would say “a person with a disability,” not “a disabled.”
Plagiarism
Even though you wouldn’t intentionally use someone else’s words without permission, it happens. It’s easy to get caught up in copying great content from a study online and temporarily pasting it into your own draft chapter. Then you get busy, you don’t look at your draft chapter for over a month, and by that time you’ve completely forgotten that the words were not your own. Now editors are not clairvoyant, but they are trained to notice a few clues that a passage might not be from the author’s original thought, such as a shift in vocabulary and a change in paragraph and font styles.
Fact Checking
While fact checking is typically the responsibility of the author, an editor can flag for you any facts, such as dates or odd spellings of names, that might seem off so that you can double check the facts with your sources. Or you can ask an editor to quote you for an edit and a fact check of your work.
As you can see from the above items, having an editor review your work before it’s published is a great way for you to be confident that your words, ideas, and images will not inadvertently offend your readers.
Happy writing!
This blog post is based on the content in Lesson 3: Editing a Book, in the How to Publish a Book online course offered by Stacey D. Atkinson of Mirror Image Publishing.
June 7, 2016
Is Your Book Complete? Welcome to the World of Front and End Matter
If you’re a writer, chances are you’ve been working away evenings and weekends to write, rewrite, and review all the chapters in your book. You’ve agonized over wording and character development and tension points along the way. Now that you’re ready to hand your work over to an editor to polish up, there’s still one more task left to do—write the front matter and end matter for your book.
Here’s a test for you. Grab a book from around your house and flip through it. As you do, notice all the pages that come before the first chapter and after the last chapter. This beginning material is called the front matter, and the material found at the back of the book is called the end matter (or back matter). It’s important content to have in your book, so make sure to leave some time in your production schedule to write it and review it.
Front Matter
Here are some pages that you might find in the front matter of a book:
A half title page containing the book title and the author’s name
A copyright page containing an ISBN book identifier
A dedication page (e.g., For my mom)
A foreword page containing an introductory note that is not written by the author
A preface page containing an introductory note that is written by the author and usually gives brief acknowledgements
An epigraph (quote) at the beginning of a book (or chapters) to express a feeling about the work
Endorsements or blurbs from notable people
End Matter
Here are some pages that you might find in the end matter:
An author bio with your website address
An epilogue, of afterword, to summarize what happens after the story is over—a conclusion
A glossary with a list of key terms and their definitions
End notes as references and research, listed numerically and linking to specific sentences in your book, usually found in certain nonfiction books
An acknowledgement page where you thank family and friends
An appendix for additional information that didn’t make the cut to be in the book
An index to provide readers with an alphabetical list of key terms—good for business books, cookbook, etc.
A bibliography for listing all the books referenced when writing your book
So there you have it. While your chapters are off to the editor for fine tuning, take the downtime to start assembling your front and end matter. This way, when your editor returns your chapters for your final review, you will have this extra content ready to send her for review.
This blog is based on content in the How to Publish a Book online course.
May 4, 2016
3 Questions to Ask Yourself Before You Self-Publish a Book
So you wanna write and publish a book? Well, you're in luck because self-publishing services have come a long way, and you have plenty of options to choose from. But before you fully commit to the idea of self-publishing, you need to first ask yourself three questions.
If you have been working tirelessly over evenings and weekends to achieve a lifelong goal of writing a book, then congratulations to you for finishing a complete manuscript draft. While there are still a few more steps to go, such as editing and design, you should take the time to acknowledge what you've achieved so far, as well as take a moment to think about the approach you'll take to publish your book.
Some people prefer to find a publisher for their manuscript (which is not so easy to do). They want a team of experienced book-industry people who can handle the business side of publishing and get the book into the marketplace. Other authors prefer to maintain more control over the process and choose a path toward self-publishing. Either way there are pros and cons. Here are some questions to help you decide which path is right for you.
3 Questions to Ask Yourself Before You Self-Publish a Book
1. Why are you writing a book?
Your motivation for writing a book can determine whether or not you self-publish. If your answers are among the following then you may want to consider self-publishing:
I want to sell my book at my speaking events.
I want to write a memoir for my family to read.
I want to test the waters; I'm not sure if people are going to like my book.
I write in a niche genre.
In other words, it sounds like you anticipate minimal book distribution (in stores), and you want some control over ordering and inventory so that you have copies of the book when you need them.
However, if your answers are among the following, then you may want to consider traditional publishing:
I want to see my book on bookstore shelves.
I want to achieve high sales and possibly write full time.
I want to achieve recognition as a writer.
It's hard to achieve bookstore distribution (where the stores actually order and stock your book) and high sales unless you have a team to support you and a healthy marketing budget. So if this sounds like something you want, then seeking out a publisher might be the path for you.
2. Do you have an entrepreneurial drive?
Are you the type of person who enjoys learning new things, taking control, and finishing projects that you start? Do you have a healthy split personality so that one day you can be a writer and the next day a salesperson? Do you enjoy building something from nothing? If this sounds like you, then you may be a great candidate for self-publishing because it takes a lot of commitment to tackle tasks you've never done before (like hire a book designer or launch a Twitter campaign), and you need to maintain a positive attitude in order to not get overwhelmed.
On the flip side, are you a deep thinker who takes his or her time to make decisions and likes to thoroughly research a topic before reacting? Do you love to write and wish that was all you had to do? Do you prefer teamwork to discuss ideas and finish projects? Do you hate logistics, number crunching, and planning? If this sounds like you, then you might prefer to find a publisher with people who can work on all the various aspects of publishing a book, including marketing and sales.
3. What kind of book are you writing?
Are you writing a book in a niche genre and you're not sure there's a market for it? Are you writing a memoir that you think your family and friends would enjoy? Are you writing a manual or course book? Are you writing a collection of poems? If there is a potential lack of mass appeal for your book, then it's likely that a publisher would not want to invest in a book project with limited reach.
Conversely, if you are writing a book with a new spin on a popular topic, or if you have been writing for a while and built up a following on social media, then a publisher may be very interested in your book project because it has the possibility of piquing the interest of many readers.
At the end of the day, you'll have to listen to your gut feeling to help you chose the right publishing path for you. Trying to convince publishers of your book's merit can lead to deflating rejection letters, while self-publishing your book can be a strain on your bank account and project management skills.
However, just know that there are options for you, so don't give up! Keep doing your research, and soon enough you'll be able to decide on the the right way to publish a book...for you.
This article is based on content in Lesson 1 of How to Publish a Book (available starting May 8), written by freelance writer and editor Stacey D. Atkinson.
April 21, 2016
Hello, April, I'm back!
Dear readers,
I've been writing, editing, planning, travelling, worrying, hustling, scheduling, freelancing, nail-biting, volunteering, and on and on, from December 2015 (my last blog post) until now. So, alas, several months have gone by without a blog post (gasp). But the good thing is that during that break, I came up with lots of new things I want to write about, and I will be revving up my blogging again in the coming weeks.
So yes, you will be seeing my triumphant return to the blogosphere in the very near future (cue horns).
Patience is a virtue they say.
:)
Stacey
December 12, 2015
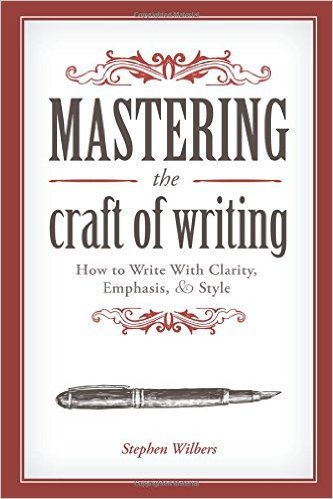
How to master the craft of writing
A few years ago, I won honourable mention at a Writer's Digest writing competition, and the prize was a gift certificate to their bookstore. Admittedly, I wasn't sure if I would find anything useful there (I think I was mixing them up with Reader's Digest), but I ended up buying several books on the topics of character development, plot and story development, and in particular, Mastering the Craft of Writing: How to Write with Clarity, Emphasis, and Style by Stephen Wilbers. I'm happy to say that this book has cemented itself on my shelf of writing implements and style guides, and it is now a go-to writing resource for me. Here's why.
Author Stephen Wilbers is a writing consultant, a writing teacher at the University of Minnesota's Technological Leadership Institute, and a PhD with a doctoral dissertation on the Iowa Writers' Workshop. So yah, he's bona fide. And he sure can tell us a thing or two about writing.
In his book Mastering the Craft of Writing, Wilbers presents 52 practical lessons to improve your writing. The idea is to spend a week on each technique so that by the end of the year you've had a nice and easy ride on the learning train. But of course I had to read the book over a weekend, because once I got started, it was too hard to stop. His lessons and his own writing technique are just so damn good. It's like eating my mom's homemade shortbread cookies at Christmas time...Can't. Stop.
Wilbers starts you off with some easy lessons, which nicely lift your confidence, to where you're saying, "I got this." Then by the middle of the book, he adds complexity to the lessons, making you think a little harder, testing your writing knowledge and skills, to where you're saying, "Okay, this makes sense." But by the end of the book, he's talking about techniques you've never heard of before, and you're like "Whaaaaat the...?" and you feel like you know nothing at all, all over again.
So as a warning to you, reading the book is a bit of a confidence inflater and deflater at the same time, but it's definitely worth your time, and you'll always have the book as a resource to turn to whenever you need a little pick-me-up for writing prompts. Here are some examples of the great lessons you'll find in the book.
The "I got this" Lessons
Week 3: Appeal to the Senses
This lesson opens with "To write vividly and memorably, appeal to the senses. As Anton Chekhov advises 'Don't tell me the moon is shining; show me the glint of the light on the broken glass.'" So as you can see, it highlights the essential "show, don't tell" technique that every writer should understand and use, especially in creative writing.
Week 8: Delete That for Rhythm and Flow; Retain That for Clarity
This lesson shows how easy it is for thatery and whichery to sneak into our everyday writing, attempting to bloat our sentences and cause our readers the hardship of sifting through unnecessary words. For example, you want to delete that for brevity. Compare "I recommend that you take my advice" with "I recommend you take my advice." Now compare the following sentence, where you would leave in that to avoid ambiguity: "I recognize that your friend may be right" with "I recognize your friend may be right."
The "Okay, this makes sense" Lessons
Week 24: Delight Your Readers with the Classic Setup
This lesson demonstrates how the one-two combination has a natural appeal. Wilbers explains, "The first sentence makes a statement; the second sentence undercuts it." Here's an example: "I love deadlines. I love the whooshing noise they make as they go by."
Week 34: Start with Something Old; End with Something New
The idea here is that the first time information is presented, it's new information. All subsequent references to that idea are old information, and therefore should be presented at the beginning of the following sentence, not at the ending, where it's prime real estate for impact.
For example, here we see how the idea of "eliminating common errors" becomes old information once it is introduced:"You need to eliminate common errors in your writing. Your credibility will be undermined by errors in grammar, word choice, and punctuation."
Now compare it with this example, where in the second sentence we've moved the old idea of "eliminating common errors" to the beginning, to allow the new idea of "credibility" to land at the end: "You need to eliminate common errors in your writing. Errors in grammar, word choice, and punctuation will undermine your credibility." Do you hear the difference?
The "Whaaaaat the..." Lessons
Week 41: Cross Things Up with Antimetabole and Chiasmus
This lesson introduces us to the techniques of the great Greek philosophers and debaters, such as Plato and Aristotle. Wilbers explains it as follows: Antimetabole is the repetition of words in reverse order, as in "Everyone who loves his country is a patriot, but not every patriot loves his country." Chiasmus is the repetition of grammatical structures without repetition of the same words or phrases, as in "It's hard to make time, but to waste it is easy."
Week 43: Create Rhythm with Anadiplosis and Isocolon
Similar to week 41, this lesson explains a bit about word play. The anadiplosis technique is when you repeat the last word of one clause at the beginning of the next, as in "What we need is love; love is what we need." Similarly, the isocolon technique is when you repeat the same grammatical structure and the same number of syllables, as in "How to succeed at business: Have a vision, know your values, and work like crazy."
As you can see from the examples above, there are many ways to improve your writing--some easy, some challenging. But we owe it to ourselves to understand these techniques and to look for ways to use them in our work to not only grow and stretch our own brains, but to learn to write with clarity, emphasis, and style.
Stacey D. Atkinson is a freelance editor and author of Stuc k , a novel she published via her independent company Mirror Image Publishing.
October 31, 2015
Finding inspiration in renaissance Italy
This month I journeyed to Italy on vacation to experience firsthand the renaissance art and architecture of Venice and Rome (I'll have to get to Florence next time!). Not surprisingly, I came home feeling inspired to be a better writer and editor.
There is an art to writing and editing--a sensibility and familiarity with words that runs deeper than grammar rules. I believe the search for this innate wordsmithing is a lifelong ambition of reading, writing, editing...repeat--all while getting better and closer to nurturing your truly authentic author voice.
I recently gave a presentation on editing for self-published authors, hosted by Capital Crime Writers and the Ottawa Public Library. The audience was engaged as they tried to work out the cost-benefit of spending money on hiring an editor while bound to a self-published author's budget. And while I regaled the virtues of editors and how they can improve a manuscript, it was my co-presenter, author Linda Poitevin, who rightly reminded us that it is the author's authentic voice that reigns and must not be lost in the process of getting a manuscript ready for publishing. So true.
To find one's authentic voice is a journey through doubt and fear and a daily testing of one's confidence. It's easy to be a copycat; it's truly divine to be original.
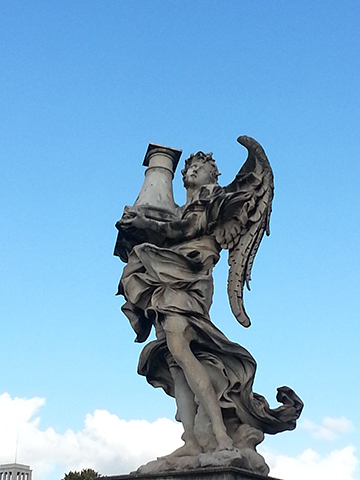
Bernini sculpture on Ponte Sant'Angelo, Rome.
Back to Rome, while I was there I passed the magnificent Bernini sculptures en route to the Vatican Basilica and Museum, where I took a guided tour that included the Sistine Chapel. We learned of Michelangelo's unheralded accomplishments of bringing a truly unique style of renaissance art to the world--one that saw him transfer his deep knowledge of marble sculpting to the tip of his paintbrush to create lifelike portraits and scenes on the walls of the Vatican. Previously, as a young man, he'd also been praised for his sculpture Pietà, depicting the body of Jesus on the lap of his mother, Mary, which now sits at the entrance to the Vatican Basilica. At the age of 24, he'd already found his artistic voice.
Inspired by Michelangelo's incredible work, Raphael began to introduce these lifelike attributes to his own paintings in the pope apartments.

Grand hallway, Vatican Museum, Rome.
The following day in Rome, I visited the Keats-Shelley House museum at the base of the Spanish Steps, which were at one time a popular hangout spot for discussing politics and art. Keats would listen to these animated conversations from his upstairs window, even as he became overcome with tuberculosis and lay weak in his deathbed at the age of 25. He'd already found his author voice and is known today as one of the principle writers of the Romantic period.
Now that I'm back in Canada, surrounded by trees and frosty landscapes as we head into winter, I'm going to keep refining my voice. And the best way I know of to strengthen it is to keep being inspired by great artists and authors and to keep writing, writing, writing...
Stacey D. Atkinson is a freelance editor and author of Stuc k , a novel she published via her independent company Mirror Image Publishing.