My Makes: The Dottie Angel Frock
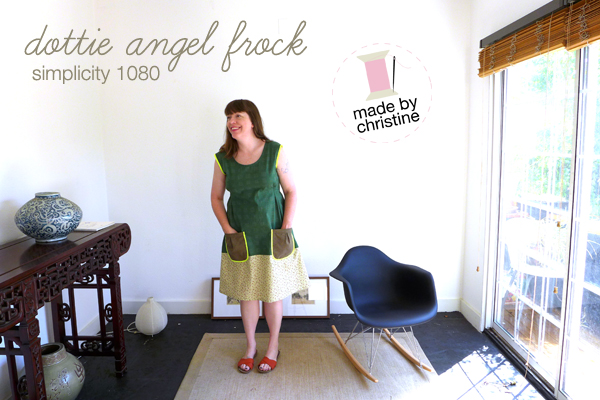
While I was away on vacation I picked up a handful of patterns and started to develop my post-vacation sewing plans. I have always been a fan of the grannie chic style that Dottie Angel has made her signature, so when I saw that she was releasing her famous Frock as a sewing pattern with Simplicity (Simplicity #1080), I didn't hesitate and jumped to buy it immediately.
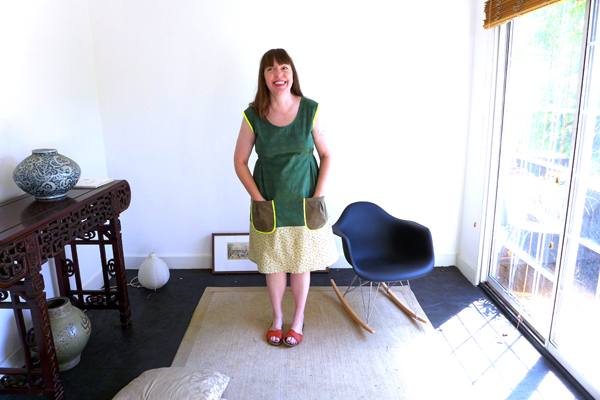
My personal tastes swing from hippie grannie to chic Parisian, depending on the situation and my mood. This garment allowed me to go deep into the one far side of my tastes and satisfy my hippie grannie to the fullest. Is it the most flattering of looks? No, but that's not the point to me with these kinds of frocks. It's about homespun comfort and everyday ease. And for that, it's a huge success in my book.
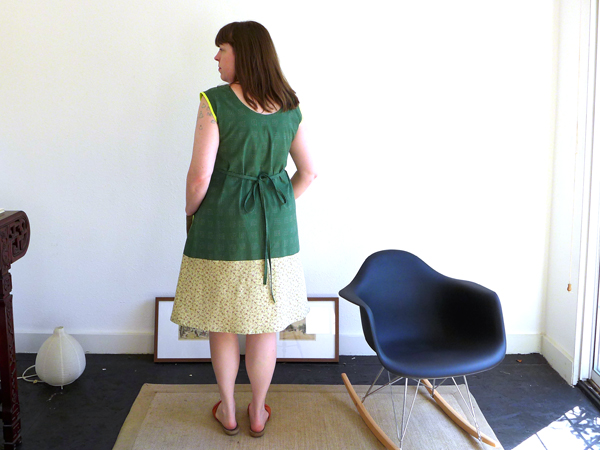
If you're not familiar with the garment, the front features two top stitched pleats on the left and right of center, which have a tie sewn into them that wraps around to the back to cinch in the back of the dress. I found my tie was plenty long to wrap around to the front to place the bow in the front if I wanted to, but I liked it best in the back.
The pleats are quite high on the front of the dress, so I would check to see where they land on your body before sewing them. I am rather short waisted and these hit me right under my bust for an empire fit. If you prefer them at your waist, or if you're more busty than I am (38B) I would suggest lowering them. The original images show them high on the body like an empire fit, but keep in mind they are quite high.
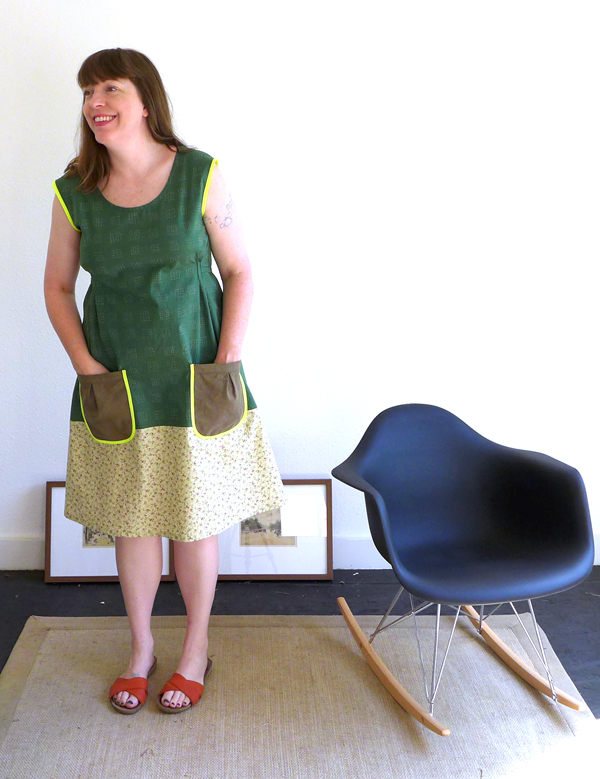
The front features the signature Dottie Angel pleated pockets that are set on top of the optional contrast band at the bottom. The length is a midi length, meant to hit mid-calf. The sleeves are kimono sleeves that are formed in the shoulder seams, so there are no actual sleeves to put on.
I wanted to play with a mix of retro-inspired fabrics to keep with the original feel of the garment, but also tried to keep it somewhat current. The fabrics I picked were Ghost Saltines in Evergreen by Kim Kight for Cotton + Steel for the top, a scrap of

As with any garment, I try to follow the instructions the first time around, but this garment proved really tough in that department right from the get go. The end result I love, but I did make a ton of changes and will make a few more in my next go around.

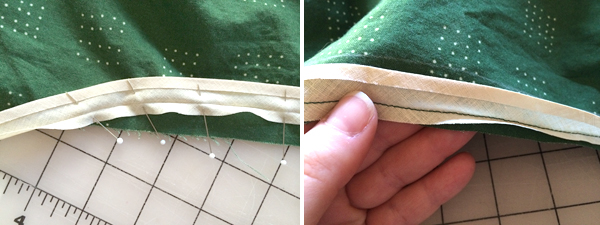
The first change was how I attached the binding to the pockets. As pictured above, the patch pockets are trimmed in 1/4" double fold bias binding. The instructions have you sandwich the binding on the edge of the pocket, baste it in place, then sew them in place close to the inner edge of the binding. I didn't do them this way for two reasons. First, this would mean that the distance from the inside of the binding to the edge would be like a flap, so if you go this way you might want to do another row of stitching at the actual pocket edge. And second, I prefer to sew my binding around like a wrap instead of a sandwich.
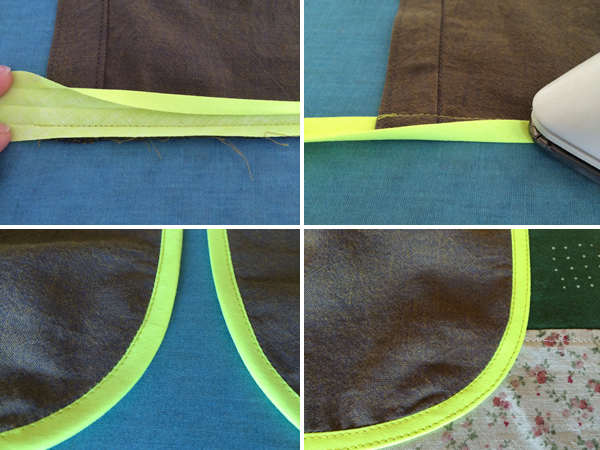
I did my pocket binding as pictured above. Step 1- sew the binding to the right side of the pocket, stitching in the first fold. Step 2- wrap the binding to the wrong side, pressing it to the edge of the stitching. Step 3- stitch the binding in place at the inner edge. Step 4- then sew the pockets to the dress at the outer edge of the binding.
The other changes I made to the dress involved the length, the sleeves, and the interior finishing. For the length, I am 5'4" and this hit me really at an unflattering spot. I usually prefer things at my knee, but I wanted to keep the midi skirt feel to this dress, while being as flattering as possible. I took 2" off the lower contrast panel during cutting, and another 1" after finishing the dress. I also did a simple double fold topstitched hem instead of finishing the hem with bias binding.
The interior of the dress calls for every seam to be sewn, trimmed, covered with bias binding that's basted to the inside, then top stitched on both sides of the seam on the right side. I found this to be a little excessive and potentially bulky, especially where the pockets intersect with the seam of the lower band, so I did just regular straight stitched seams with a trimmed and zigzagged edge. The side seams instructs you to sew them as French seams, which again I found to be a bit unnecessary. I know why they do this, because you've at that point already finished the sleeves and this creates a finished edge in the armpit, but at that point I had already changed my sleeves and so a French seam was no longer necessary.
Speaking of the sleeves, this seems to be the big point of confusion by those I've seen make this dress, and reading the instructions, I totally understand why. I did one sleeve as instructed and documented it.
Step 1- the single fold bias tape is pinned to the sleeve opening, tapering to the edge of the fabric at the dots. Step 2- sew the binding to the sleeve in the first fold, then trim the excess away. As a patternmaker, it always confuses me when the garments are to be reshaped this way. Why not just design the sleeve in this shape so the binding can be sewn to the edge? Anyway, moving on...

Step 3- Before you roll the binding to the inside, I marked the fold line on the right side of the dress with water soluble pencil so I could roll that to the inside after I sewed the binding on. Step 4- fold on the fold line, and pin in place. This will taper to the edge of the fabric.

Step 5- baste the sleeve in place by sewing at the edge of the bias binding. Step 6- top stitch the binding in place by sewing on the right side of the fabric. Then remove the baste stitches. I then pressed it over a ham and basted the side seam to the mark on the pattern to see how the sleeve would fit. And how did it look?
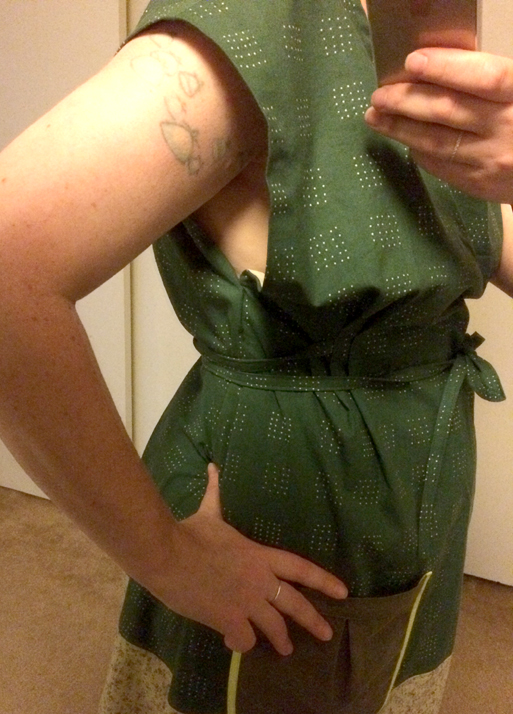
Terrible! Also, sorry for the late-night mirror selfie, but I wanted to document this moment. Aside from the obvious, which is that the armhole was way too low and totally showing my boobs, I also didn't like the sleeves on my body, which is common for me with this style of sleeve. I am small across my shoulders and this kind of sleeve often looks goofy on me. But to keep with the integrity of the dress, I wanted to give it a go. Needless to say, this had to change! I also saw at this point that the overall size was just too big. I made a medium based on the body and finished measurements, but I ended up trimming 1/2" off both sides of the front and back, so I will sew up a small next time.
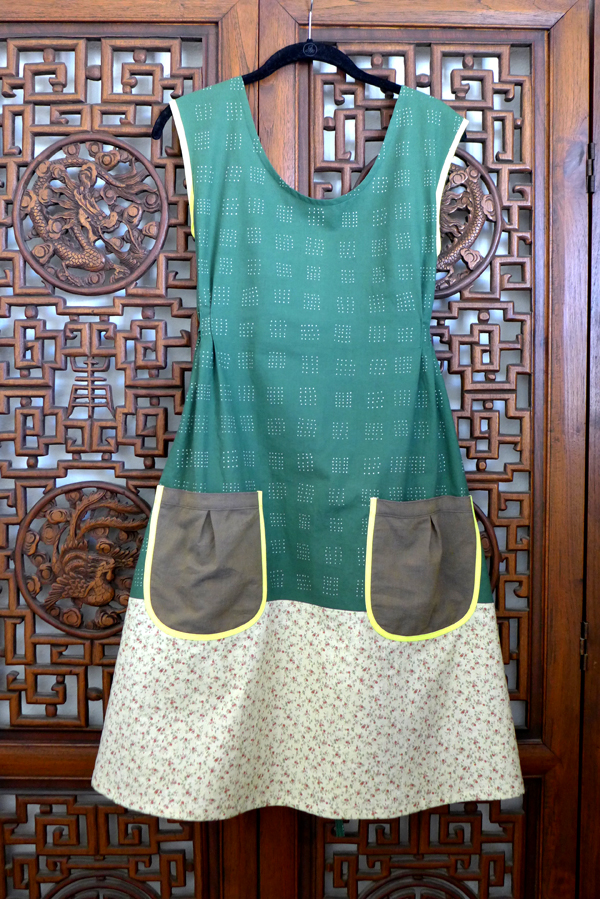
So after all that sleeve nonsense, I ended up trimming off the sleeves all together. And yet, as you can see in the photos, they still go beyond my shoulders. I cut off 3 1/2" at the widest point of the shoulder, and turned it more into a tank. At this point I had to selvage the sleeves, so I simply sewed up the side seams of the dress and bound the armholes in bias binding. I thought I'd roll with the neon binding I already had going to give it a little bit of a pop.

In the end, I love this dress. I'm thinking of this as a wearable muslin since I didn't make a real muslin, but it's very wearable indeed. Changes I will make next time in addition to making the small and shortening the length a little bit more will be to just reshape the sleeves to be a proper tank, and raising the back a bit too as the scoop is a little too low for me. But this is just personal taste and nothing about the pattern at all. Next version I will try it without the pockets and in a less grannie fabric, as I can see this being a really great staple for hot summer days, or with a cardigan in the fall and winter, and made up in solid black or navy could be very chic and classic.


No comments have been added yet.