The Ultimate Guide to Going Paperless at Home
Do you have piles of papers or filing cabinets bursting at the seams? Maybe you’ve dreamed of going paperless, but the idea of scanning everything and sorting it into your computer sounds way too intimidating.
I created this guide to help you go paperless in your home as painlessly as possible.
Most of us donât aspire to create our own personal Library of Congress. We donât want elaborate folder hierarchies or extensive metadata to maintain for each file. Instead, we simply need an efficient system that helps us locate important documents when neededâwhile keeping our homes free from unnecessary clutter.
Hereâs what weâre going to create today:
A small physical file box with folders for your important filesA physical inbox for papersA system for scanning and organizing files on your computerA regular cadence for purging & organizing your physical filesThis system revolves around a three step framework:
Capture (Daily)File (Weekly)Purge (Yearly)
Now letâs talk about how to get you there.
The Tools Youâll NeedA Physical File Box & FoldersIn my opinion, this should be as small as possible. Over time, you wonât need to keep many physical files, and having a smaller box is a helpful constraint to avoid hoarding.
 Firebox / Safe
Some documentsâlike passports, birth certificates, and Social Security cardsâyouâll want to store in a firebox. Preferably, choose one that is also waterproof. Even if your area isnât prone to flooding, if thereâs a fire, the firefighters will likely flood your home putting it out.

This is a decent waterproof fire safe from SentrySafe, but they come in all shapes and sizes.
A Physical InboxThis is a paper tray youâll use to collect documents that need to be processed.
 Computer File System with Backups
Since we’re moving paperless, we need to have an organized and trustworthy place to store our digital paper files.
I use an iCloud subscription on my Mac that encrypts and syncs my Documents folder to the cloud. If I can’t access my computer for whatever reason, I can recover my files from there. It’s also nice because they are accessible from a phone as well.
You can also use Microsoft OneDrive, Dropbox, or an external hard drive you back up your computer.
Ideally, you’ll want to follow a 3â2-1 backup strategy for important files. That’s 3 copies of your data, in two different media, with one copy stored in a separate location. Personally, in addition to my iCloud backup, I also backup to a local hard drive and to the cloud via Backblazeâjust to be safe.
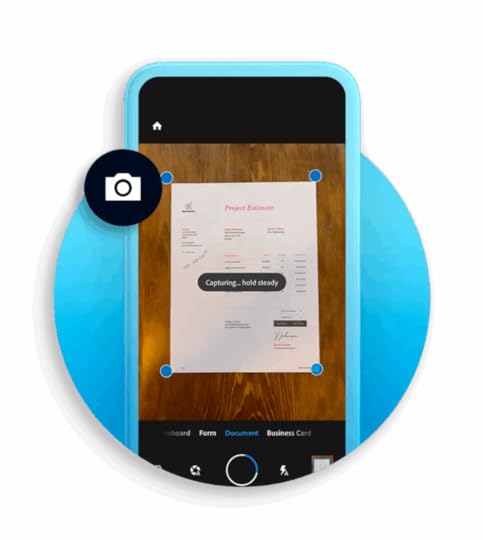
Scanner or Scanning App on Your PhoneYou can use a fancy flatbed scanner or just use your phone to scan documents. Adobe Scan is a great app for this (available on both iOS and Android).
 Optional: A Paper Shredder
If you end up purging a lot of old documents, thereâs probably some sensitive info you donât want to just toss in the trashâespecially tax documents. If you have access to a shredder at work, ask for permission to use it (thatâs what Iâve done in the past). Or you might just want to pick up a paper shredder to keep at home.
The Initial SetupOnce youâve got your tools, itâs time to set up your system, create your folder structure, and start putting files in their proper places.
This part can get tricky, so Iâll give you a step-by-step plan to make it simple and help you tackle the project in manageable chunks.
Weâre going to deal with physical files first, since our goal is to go paperless. But along the way, weâll be creating a more organized digital file system to scan intoâand eventually migrate your existing digital files into that system, too.
Step 1: Gather All Physical FilesIf youâve got piles of paper, old file cabinets, or things stuffed away in drawers, nowâs the time to get it all out. Weâre going to find a home for everythingâand get rid of most of those papers in the process!
Step 2: Purge, Keep, ScanWeâll take two passes on most of your physical files. In this first pass, the goal is just to make three piles. Weâre not categorizing or filing anything yet.
These are the three piles you’ll be making:
Purge – Files you can easily get again online, or it’s outside the required retention period, toss it.Scan & Keep – Files that would be difficult or costly to replace, and for which you may need the original.Scan & Shred – Files you aren’t legally required to retain in physical form, but you can imagine needing them later.
Here’s a PDF checklist with examples that you can print off to help you with this step:
Paperless ChecklistDownloadStep 3: Organize Your Scan & Keep FilesNow that youâve completed your first pass, set the purge pile aside (we’ll be adding to this later, so save the actual shredding until the end). We’re going to go through both the Scan & Keep pile a second time and begin sorting them into folders.
This is where people often get stuck. The temptation is to create a bunch of folders upfront and try to anticipate everything you might need. But you only need folders for what you currently have. You can always add more categories and folders later.
Go through the Scan & Keep pile and group similar documents together.Sticky notes can help at this stage, so youâre not committing to folder names just yet.Once youâre happy with the groupings, write your category names on your folders.Then file the Scan & Keep documents into their proper folders.Doesnât that feel great?
Step 4: Organize Your Scan & Shred FilesNow letâs tackle your Scan & Shred pileâand this is also the time to set up your digital file system.
In your computerâs Documents folder (or wherever you plan to store your digital files), create the same folder names you used in your physical filing system.Go through your Scan & Shred pile as you did with the Scan & Keep pile. Group similar items using sticky notes. Some categories may overlap, and others may be new.Add any new category names as folders on your computer.Place each stack into your physical inbox, separated by category. Step 5: The Initial ScanYou now have two groups to scan: the Scan & Keep files (now in your file box) and the Scan & Shred files (in your inbox).
Start with the Scan & Keep files. Try to scan these in one sitting, or if you are interrupted, leave a note in your filebox where you stopped so when you come back to it you know where you left off. Many may not need scanningâfor example, if you can already access them online or have existing digital copies. If you do, simply download or move them to the appropriate folder. Scan just whatever you think may be necessary to keep a digital copy of. Then move on to the Scan & Shred files. You can chip away at these gradually. Theyâre already categorized in your inbox. If it’s a big pile, put on a podcast, sermon, or audiobook and aim for 30 minutes a day until itâs done.As you scan each file, move the digital version to its appropriate folder. Then toss the physical paper in the Purge pile for shredding.
Step 6: ShredNow itâs time to discard everything from your Purge pile and your completed Scan & Shred pile. You can use your own shredder, borrow one at work, or use a paid shredding service like FedEx Office.
Maintaining the SystemCongratulationsâyouâre paperless!
Youâve done the hard work. Youâve built your file system, found a home for everything, and cleared out the clutter.
But the key is to keep the piles from growing back. Thatâs where the 3-step maintenance routine comes in:
Capture (Daily)File (Weekly)Purge (Yearly)1. CaptureWhenever you receive a new paper document that may need to be saved, place it in your physical inbox. You donât have to decide what to do with it right awayâjust capture it for processing later.
2. FileOnce a weekâideally during your weekly reviewâgo through each paper in your inbox and ask:
âDo I need to keep this?â If not, toss it.âDo I need a paper copy?â If yes, scan it, then file both the digital and paper versions. If not, just scan it, save it in the proper digital folder, and toss the original.3. PurgeYouâll inevitably end up storing more paper than necessary, some files will become irrelevant, and youâll need to make space for new ones.
I recommend doing a purge once a year. The best time I’ve found is right after tax season. You’re already going through your files, why not clear things out as long as you’re in there.
Just repeat the step-by-step process from above. It wonât be nearly as painful the second time since you should have far fewer papers to sort through. This annual purge is the way to keep your system tidy and functional.
ConclusionHopefully, this step-by-step guide has given you the confidence to tackle that intimidating pile of papers. Just follow the plan, take it one step at a time, and youâll soon be enjoying the freedom of the paperless life.