
Dragonscale Iaito

An 80-year-old martial artist who was learning batto-jutsu to help him recover from a stroke gifted me a daisho (a long- and short-sword set, katana and wakizashi) after he had to quit, because I had renovated the wakizashi for him. I felt really bad that he couldn’t keep practicing, and was very touched by his gesture.
I had just begun to learn to use an airbrush, and I thought about what to do with the katana. I wanted to learn how to paint metal-flake candy colors, and I also wanted to try a fish-scale stencil technique I’d seen. I figured, why not combine them? I was worried it would end up looking like an airbrushed 70s Chevy van, so I decided to rein it in a bit and did some sketches. Wish I had pix of those, because it’d be fun to show how badly I draw. I definitely see these things in my head and not on paper.
To be honest, the katana (an iaito, a non-sharp practice sword) was in pretty bad shape. The saya (scabbard) had three cracks running from the koiguchi (opening) to the kurigata (the knob that holds the cord):

The blade looked like it had tried to kill a woodchipper:
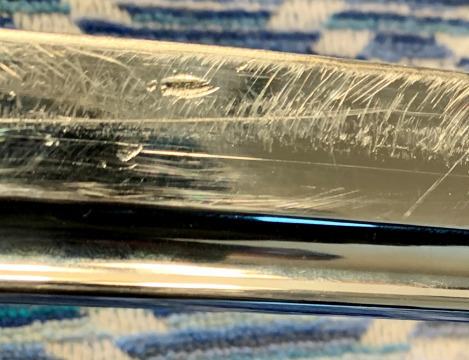
Well. Been there before! I disassembled it and got to work.
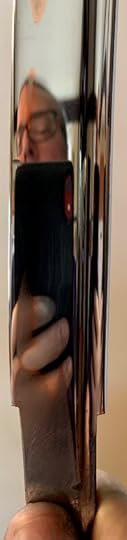
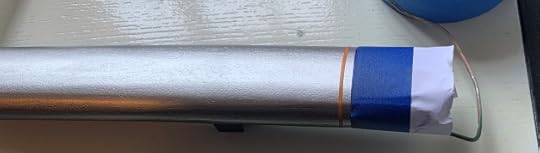
I smoothed the blade edge with a rattail file, sanded the sides with a palm sander and grits from 400 to 2500 lubed with vegetable oil. (You should use better stuff for better swords, but this here was total mall ninja territory.) Final polish with Peek and Mother’s Mag & Aluminum Polish, which I now swear by. You can see one of the copper veins in the cheap alloy blade at the top of the pic:
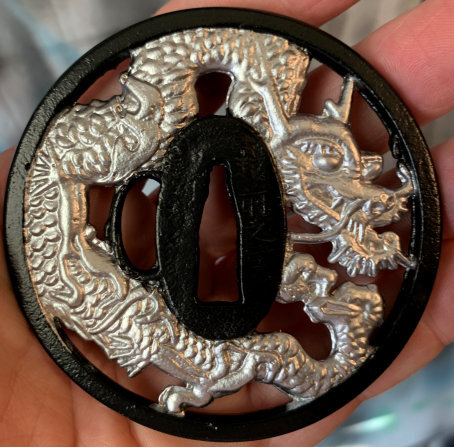
I cleaned the tsuba (hand guard), fittings, and habaki with Brasso and a wire brush. I airbrushed the tsuba and fittings jet black, and polished the habaki with Peek.
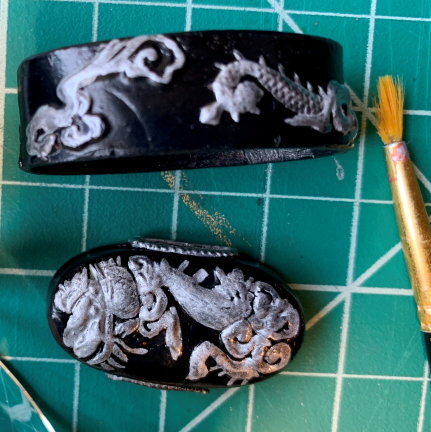
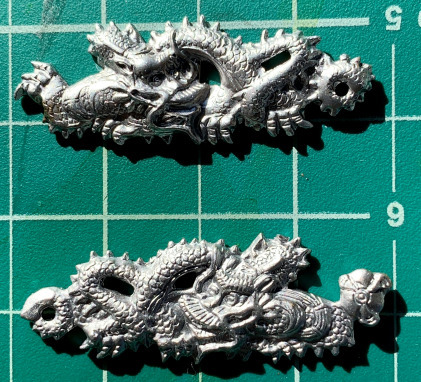
I brush-painted the fuchi & koshira (handle caps) decorations silver. The molding is so bad I’m not positive what they depict. Something dragonish.
I masked off the tsuba, then airbrushed it and the menuki a brushed-aluminum color that I like a lot. I figured this thing was gonna be calling enough attention to itself that a silvery silver would be, um, gilding the lily.

I pulled the ito (handle wrap) and cheap plastic samegawa (ray skin) from the tsuka (handle):

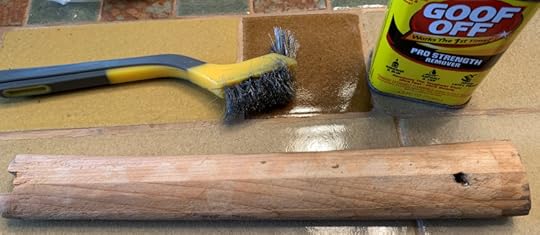
Most of the wood was tacky from adhesives. I think they’d not only glued down the samegawa, but sprayed something like Super 77 to make the cheap shoelace ito stick. I used lots of Goof Off and a wire brush to get back to bare wood:
I’d decided to paint the plastic samegawa, and I wanted it to be flush with the tsuka so that it wouldn’t have that line humping down the length of the wrap. Plus I didn’t want the plastic edges to show. So I marked out a recess with a box cutter and chiseled it out, then smoothed it with my then-new Wen rotary tool.

I put paper over the recess and traced out its shape by pressing a fingernail along the edge. I cut that out, then used it as a template to reshape the samegawa to fit.


Now the fun part! I sanded the saya down to bare wood, starting with 100 grit and ending with 400 (I think).

I cleaned off the dust with a wet rag and then coated the saya with PVA mixed 1:1 with water.
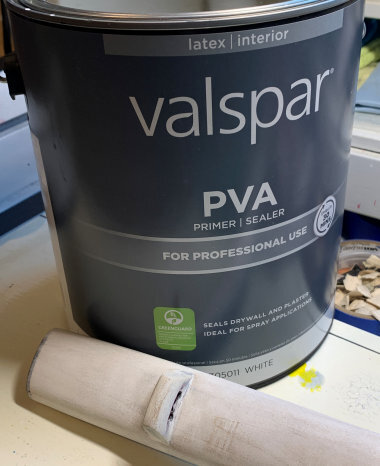
The wood in these cheaper swords tends to be porous composite, and the PVA helps seal it so that it doesn’t drink up the paint. It also acts as a filler for minor scratches and gives a smoother pre-primer surface. I let it sit overnight and then sanded smooth.
I primered it black and then airbrushed with three coats of metallic silver. Candy colors get both their sparkle and their sense of depth from an undercoat of metal-flake.
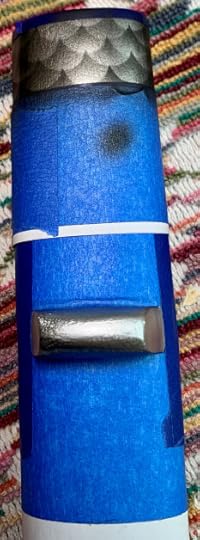
I used fineline tape to mark out bands near the koiguchi, and to mark out a panel border in the saya’s bottom third. When all the painting was done I would pull these and have — fingers crossed — nice clean silver borders. I also masked off around the kurigata because I was going to paint it straight-up candy.

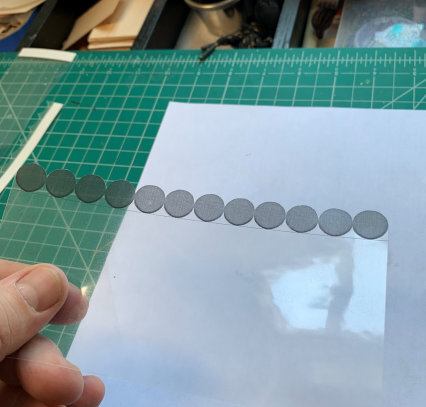
I made a fish-scale stencil by making a row of dots in PaintShop Pro and printing them onto 3M transparency film. I X-acto’d off the top half of the dot row (didn’t have a Cricut plotter yet) and poof! — stencil!
I practiced the scale effect on paper before committing to the saya. It’s fairly easy: Lay down the stencil and lightly airbrush across the top, spraying at about a 45-degree angle. Then offset the stencil so that the taper points touch the centers of the dots at their tops. Lightly spray again. Lather, rinse, repeat.
[image error]
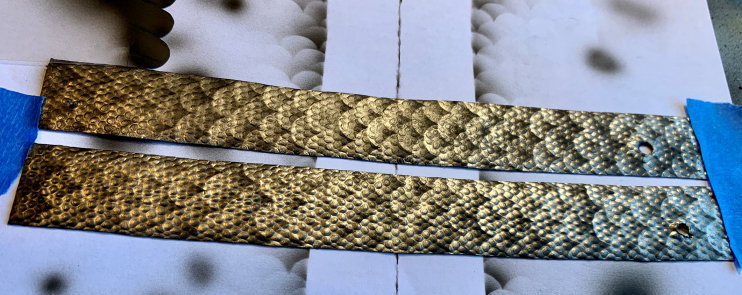
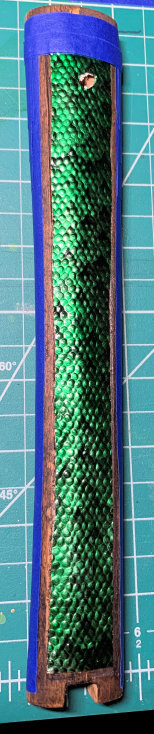
I scaled the marked panel and a band near the koiguchi. I also scaled the samegawa, but I screwed up and had the scales going the wrong direction (I’d already cut the pieces to fit the tsuka). D’oh.

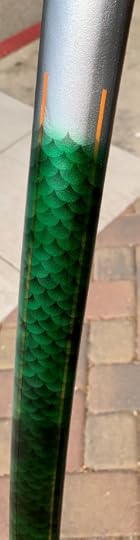
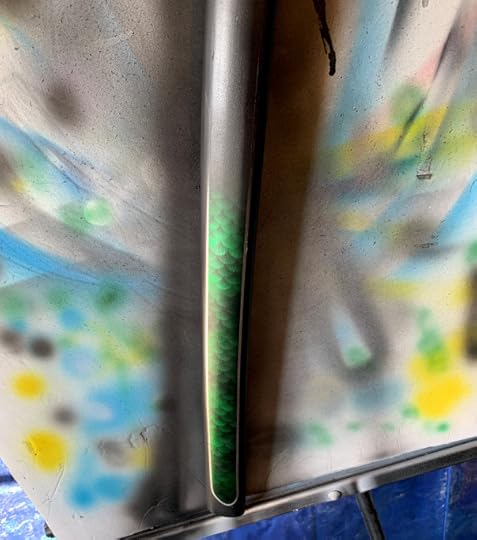
I liked just the black over the silver so much that I thought about sticking with that. But nope: It’s candy or bust. So here comes the emerald green candy:
[image error]
It’s notoriously hard to get an even tone with candies, but I was painting small areas that already had a lot of shading variation, so I wasn’t too worried. And I was jazzed how it was looking.
I sprayed Createx Bleed Checker over the candy to keep the layers from leeching (yeah, apparently they do that sometimes), then sprayed Createx UVLS Gloss as an intercoat. Then I masked off the green-scaled areas with masking tape. The bleed checker and intercoat would also minimize the chance of the masking tape pulling off the thin and more delicate candy paint.
Then I sprayed the whole saya jet black:

I pulled the mask and fineline tape from the scaled panels and did a jet-black fade. I wanted the scales and border to kind of emerge from the black:
I carefully removed the rest of the masking and fineline tape from around the koiguchi and kurigata — and oh man was I a happy camper (click the below pic for the full-sized image):

I was still using a very cheap airbrush and it didn’t handle Createx glosscoat very well, so I bristle-brushed Minwax gloss polyurethane and hung it in an old gym locker I bought for this purpose.
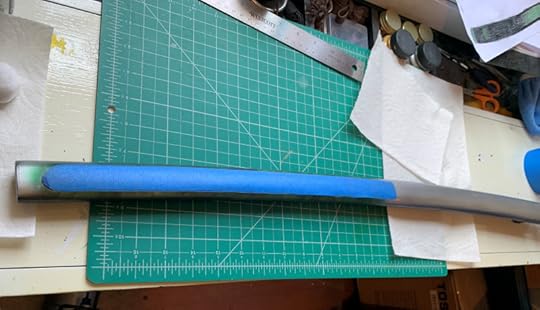
While it cured I finished up the tsuka. I glued the samegawa in place, wrapped them tight with the crappy ito I’d removed, and let them sit overnight. Then I stained the wood because I thought the lighter-wood contrast wouldn’t look good where it might show against the dark green samegawa and black ito:

I used masking tape to build out the sides and the fuchi end so that the ito would be flush with the fuchi when I wrapped it:
There’s an entire art to handle-wrapping, called tsuka-maki. I knew I’d never come close to what the experts could do, but I had to learn it at least serviceably if I was going to be taking swords apart, repairing, and customizing them.
I did the tsuka-maki at my very customized craft desk. Since this was one of my first attempts, I wasn’t about to use $150 worth of silk wrapping. Instead I used a $10 synthetic ito from eBay. Despite my customizing, this is still a cheap, thrashed sword. I was kinda lipsticking a pig here, and I was new at it, so $150 lipstick seemed a bit much.

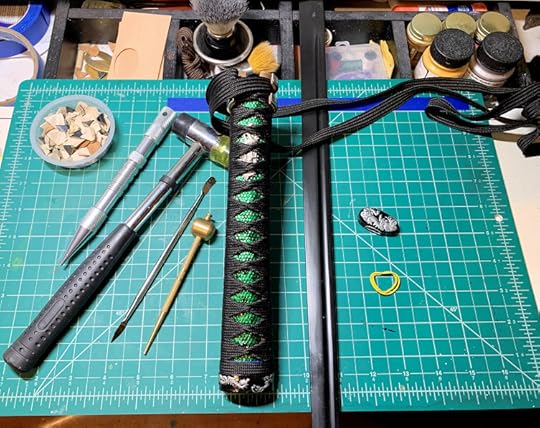
The ito mostly hid the fact that the scales are going the wrong way (oopsy!), and I was really happy with how the brushed-aluminum menuki looked against the black and green.

I lacquered the ito (brushed urethane onto it to stiffen it & reduce wear). Next day I put it all together. That’s a real moment of truth, because I really don’t know how it’ll look or fit until the very last step. I find it nerve-wracking and exciting.
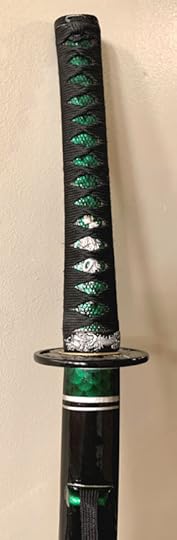
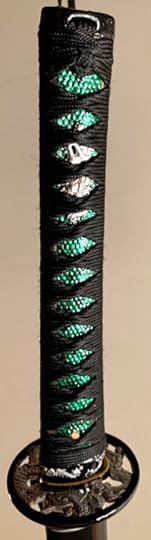


I haven’t gotten a good picture of how much the clearcoat makes the candy color and metal-flake pop, and how much more depth it gives. I polished with Johnson wax and a final layer of Nu Finish.
My worries that this iaito would look too gift-shop-kitsch/anime/Chevy van were a thing of the past: I’m really happy with how it turned out!


Steven R. Boyett's Blog

- Steven R. Boyett's profile
- 111 followers

