
The pond
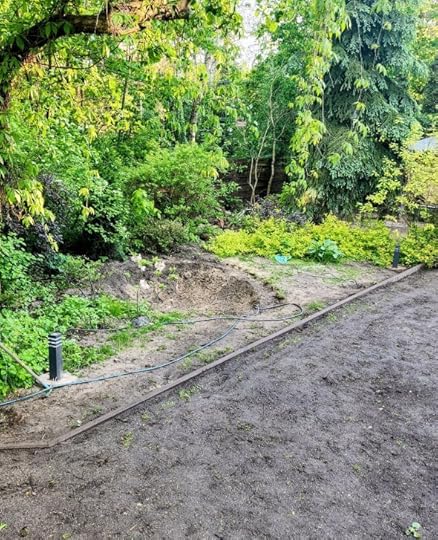
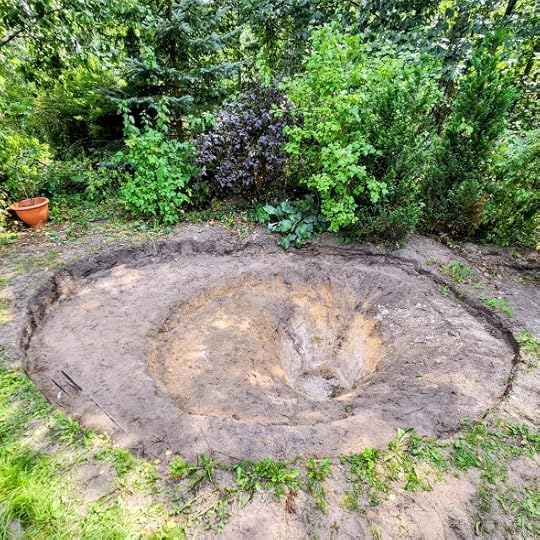
This post details at length how I have built a pond over the last three months. This came about because writing ground-breaking science fiction novels wasn’t difficult enough, so the vast glob of natural idiocy buried deep in my subconscious decided I should take on a project even more challenging. Therefore, do please grab a mug/cup/glass of your preferred beverage, pull up a chair, and read all about the laughter and the tears; the triumphs and the disasters; the victories and the defeats; and the moments of doubt and of revelation, as this hole in the ground in July…
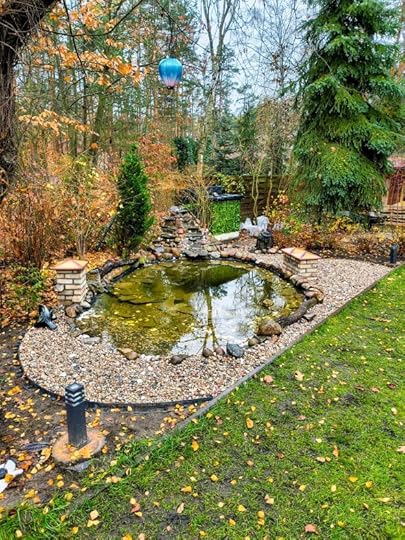
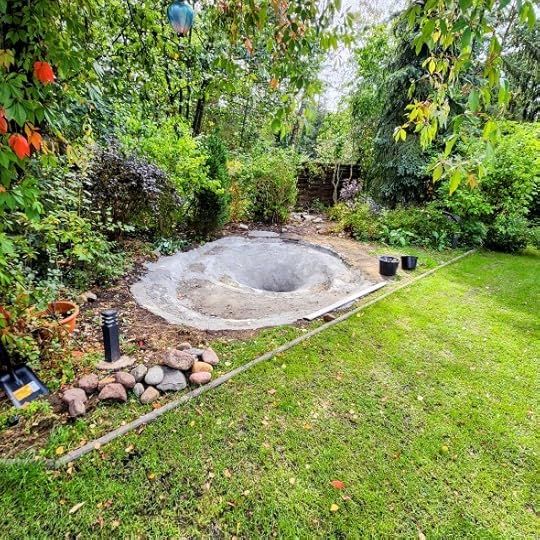
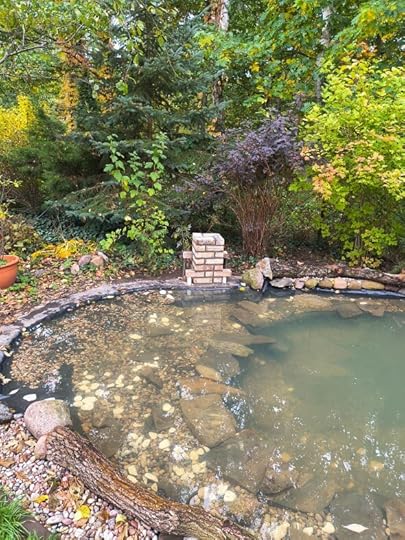
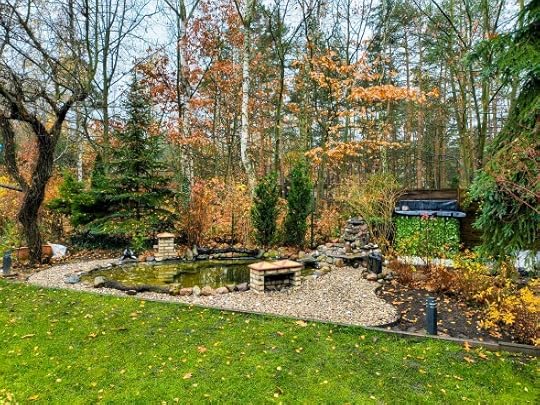
…became this pond today:
The decision
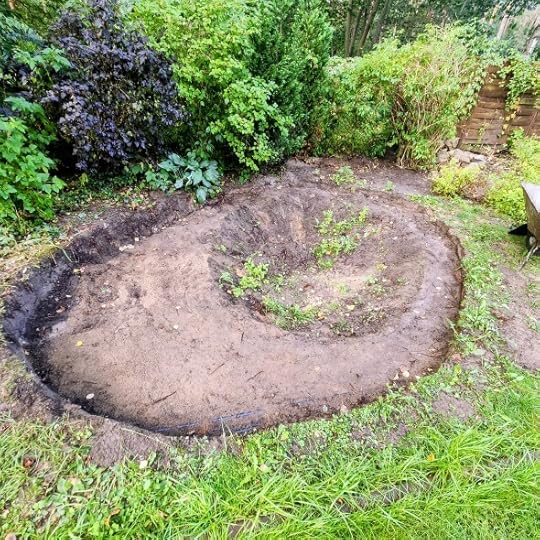
In the spring, we had some workmen in to make improvements in the back garden. They laid some edging stones to separate the grass from the flower beds, and then sowed a new lawn. Mrs James got them to dig a small hole off to one side, “in case we decide to have a pond”. In late July, I had the house to myself for a few days and stared at the hole, now with weeds spreading and the remains of a red squirrel one of the cats had killed lying forlornly in the dirt.
It could not remain like that.
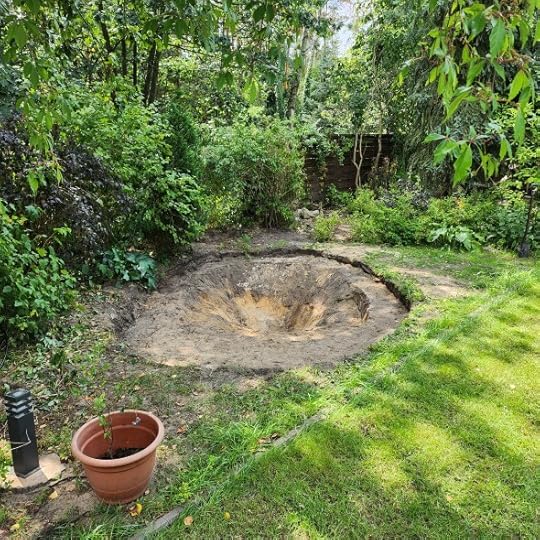
I asked myself: do I fill the hole in and plant some shrubs, or do I build a pond? I knew the answer at once, and a voice in my head urged: if you’re going to build a pond, make it big enough and build it only once. So, without proper planning—thus making myself a hostage to future unavoidable costs—I dug a pond that would be appropriate to the size of the garden. At that point, I thought that finishing the project by the end of September would be a breeze. Happy times.
The hole
If you decide to build a pond, take some advice: cost the entire project before you dig the first sod. I didn’t, and it would prove to be a pricey mistake.
With the digging done, research showed that the safest way to proceed was to wire and concrete the hole. This would prevent roots from surrounding shrubs and trees piercing the liner. As luck would have it, I had a load of chicken wire stashed away from a couple of years ago when we let the hens roam in most of the garden.
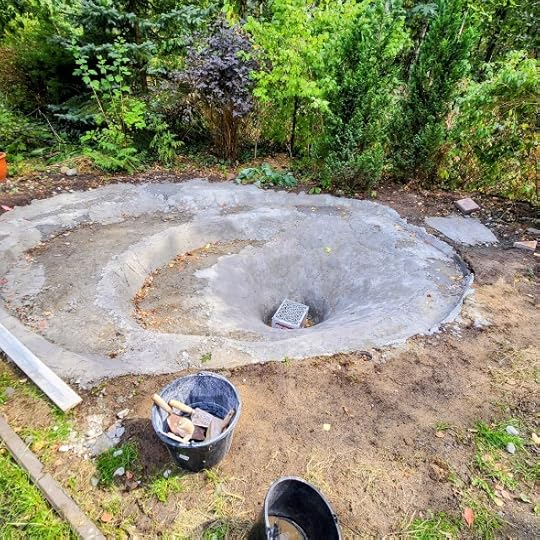
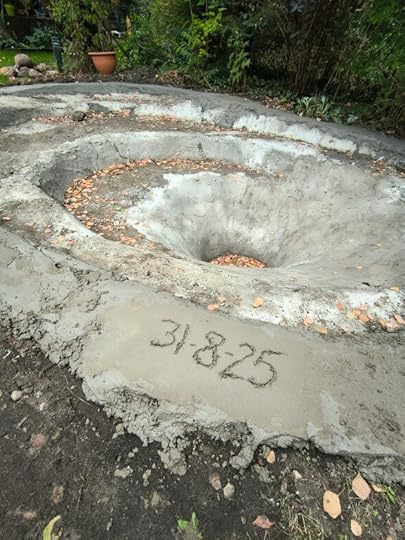
Once the kids and I had concreted the hole (I got them on the cement mixer and loading me out while I stood in the bowl-shaped bottom :)), I realised I needed to concrete a level surface ledge. At the beginning, Mrs James and I had used a water level to get an approximation of how the ground lay, but now I fell back on my trusty two-metre straight-edge and small spirit level to methodically move around the top lip. I also thought it was high time to leave some evidence for future generations not only that I had been here, but also when:
Then it was time to get the liner. There are many types, but the generally accepted best is called EPDM. Imagine the rubber that bicycle innertubes are made from, only a heavy 1.25mm thick. It’s slippery. It weighs a ton. It’s expensive. And I needed 80 square metres of the stuff. To make matters worse, I miscalculated slightly, and bought more than I needed. It cost an eye-watering EUR 1,300 (I will give all figures in EUR). Eldest Daughter and Mrs James helped to get it in place:
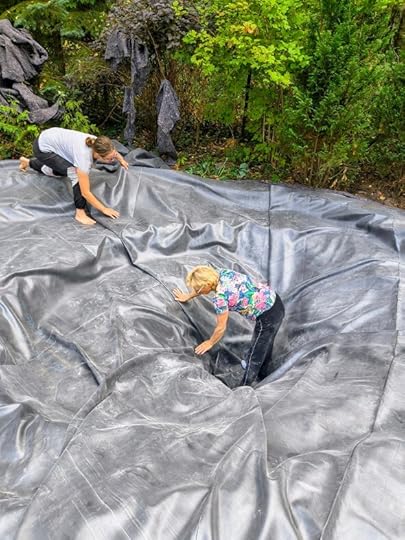
However, my miscalculation has left me with a strip of EPDM 2.8m wide by 8.8m long. So if you know anyone who’s building a small canal in their garden, tell them there’s some spare liner going cheap at my place. Thanks.
The Mauser
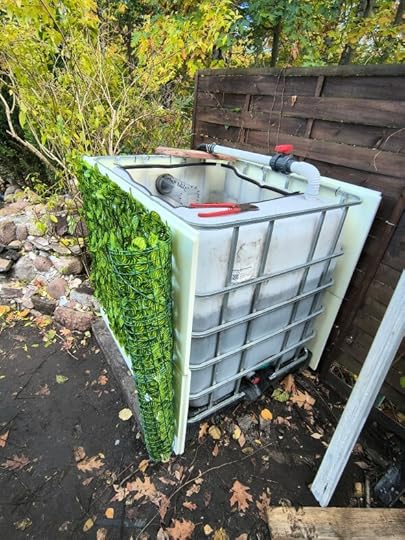
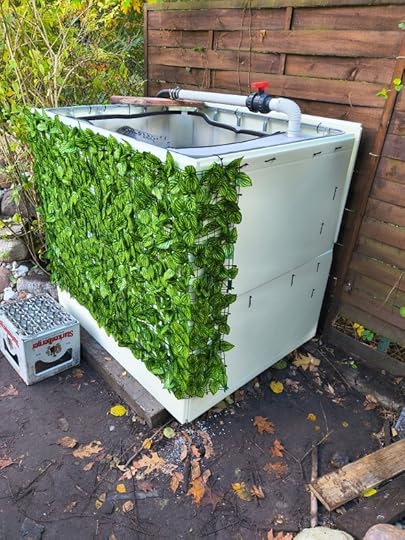
A pond is essentially a “water circuit”. A pump sits in it and sends the water to a filter. The filter removes impurities and then clean water returns to the pond, often via a feature like a waterfall. Sounds simple, doesn’t it? Research offered up several options for the filter, but I decided to copy my next door neighbour and get one of these:
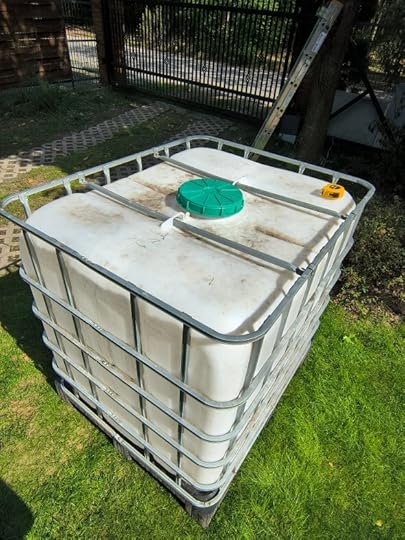
The advantage here is that a biofilter of this size needs almost no maintenance. If you get a small filter of the kind pond-specialist companies will sell you, you’ll have to clean the media inside it once a week (more often in summer). But by constructing a biofilter inside this beast, my pond should be maintenance-free for years. The media is made up of small, expanded clay balls called LECA, on which “good bacteria” grow as they consume nitrogen and other impurities from the pond water as it passes through. This is an important consideration if, for example, you plan to continue taking summer vacations and don’t want to come back to a dirty pond full of dead fish. On the other hand, the inflow and outflow arrangement inside the Mauser required many hours of patient work:
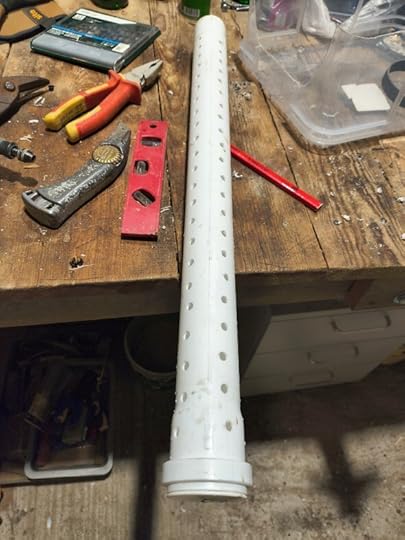
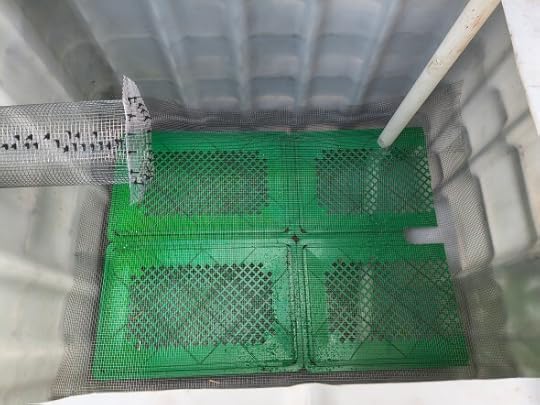
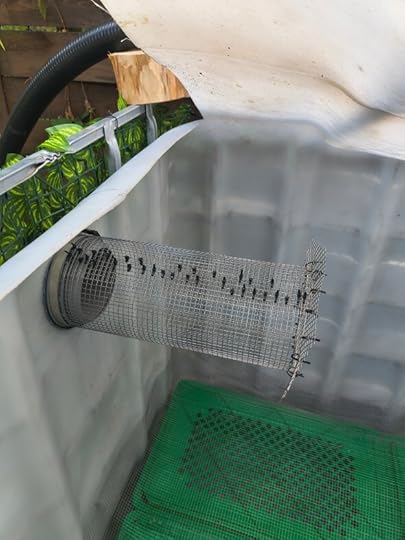
In the above image, covering the outflow pipe is galvanised wire mesh with 6mm holes. The balls of LECA are from 8mm to 20mm in size, and obviously must not be able to get into the pond.
The waterfall
As with the pond itself, the waterfall had to be commensurate with its surroundings, and here I had a problem: all of the videos I’d watched on YouTube showed burly guys chucking rocks about that must’ve weighed tons, and sometimes using a mini-digger. All I had were the stones we’d collected from fields, riverbeds and mountains over 20+ years of vacations. Given the spiralling costs, I could not justify expenditure on that scale, and in any case, I wanted to do the work myself. Fortunately, we had rubble left over from various other projects so, layer by layer, I poured concrete on rubble interspersed with more wire, until I had the outline of a feature and a height that would suit the outlet flow from the Mauser.
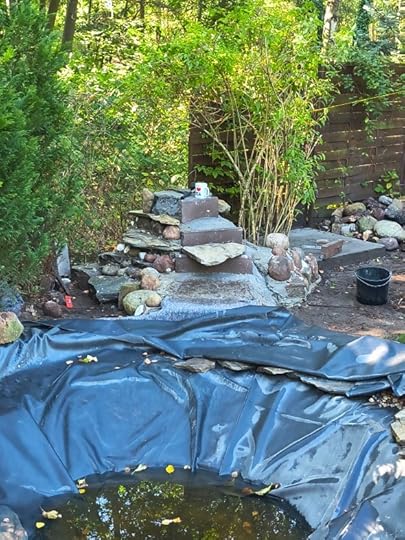
The problems only really began when I put everything together. Firstly, my key focus had been on the filter: when the thing was full of 250 litres of LECA, there would be no going back—the internal plumbing simply had to work. The waterfall became the artsy-fartsy part of the project. I knocked up wheelbarrow-fulls of sand and cement, and set slate and stones at my whim, not realising I was building in one particular headache.
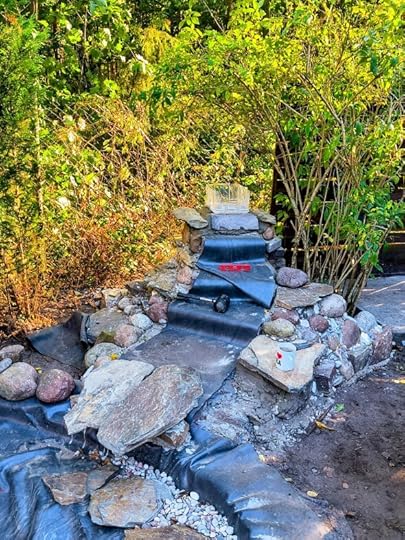
At last, I connected everything up. The Aquael ECO 15,000 pump (EUR 200) sat on the lower ledge with a 50mm flexi-pipe running along the back fence, behind the waterfall, and up to the top of the Mauser. After passing the ball-valve, the “circuit” then turned 90 degrees down to the bottom of the Mauser, exiting through that perforated pipe you saw earlier. The water then rose through the LECA to leave the Mauser via the 110mm outflow pipe, whose other end rested on the lip of the header box at the top of the waterfall. But the waterfall leaked. A lot. And I would need two attempts to fix it. There’s no need to dwell on my head-slapping lapse of concentration, but you can see in the picture above that the joint between the clear plastic header box and the stones was bound to haemorrhage water. Isn’t hindsight a wonderful thing?
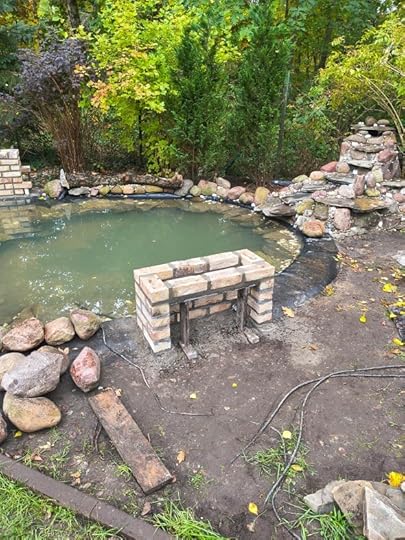
The brick hide
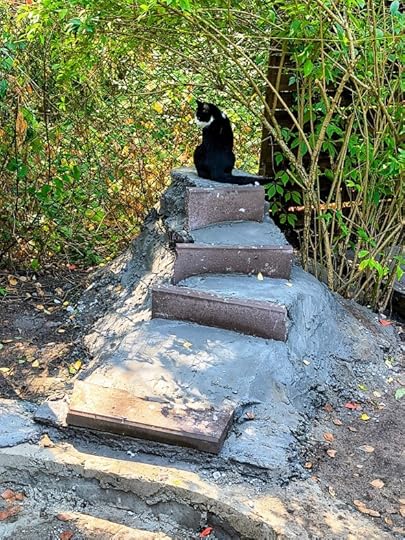
Last year, we had some electricians in to wire lights around the garden. They also left a length of exposed cable out of the ground, “in case we decided to have a pond”. However, the cable was now in the wrong place. Ideally, you want to keep your electrics out of sight, hidden somewhere around the edge of the pond where no one goes. But this was now impossible, so I decided I had to make a feature and build a devoted hide that would house a few power points for the pump, heater and anything else I needed to plug in. I went to a renown Warsaw brick manufacturer and blew a cool EUR 250 on just 60 bricks and three coping stones. Once again, I bought too many so made another small feature on the opposite side to try and give a little bit of symmetry.
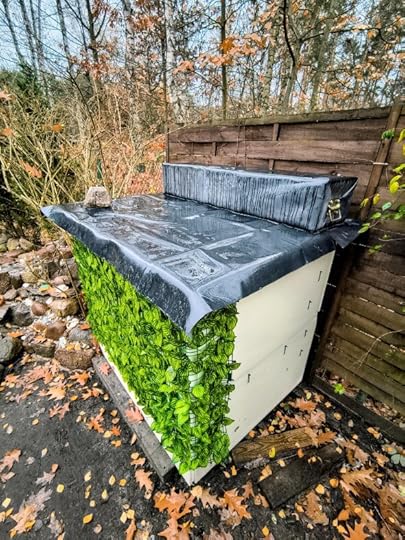
The insulation
Then, a new issue came up: winter. This year would not be a problem because the pond will not have any fish, but future years would need a solution. This led to me removing the camouflage and cladding the Mauser in 30mm polystyrene, the external type that weighs nothing but which is as hard as nails. And yes, pond heaters are available at a price. A high price. For which I have a year to save up.

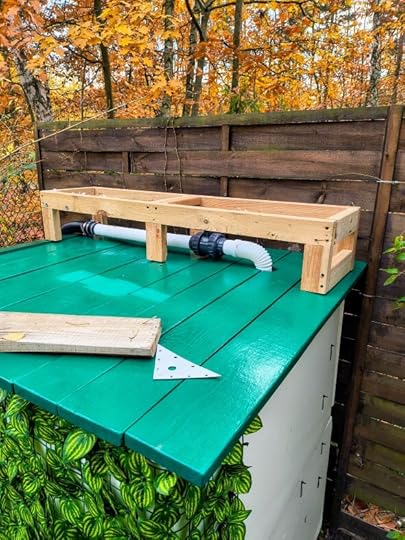
The lid of the Mauser
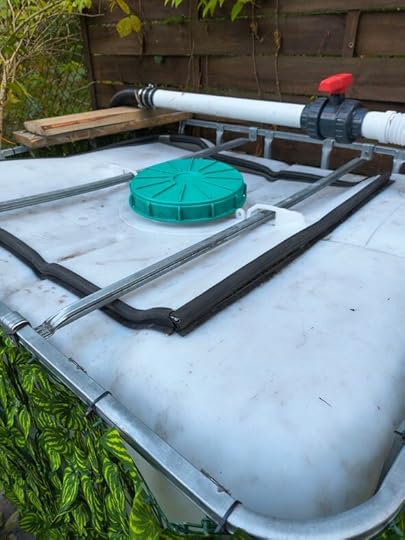
Something else began bugging me: to fit the plumbing and put the LECA inside the Mauser, I’d been obliged to cut a large section out of the top. I naïvely thought it would just sit right back on. But no:
Even edged with metal reinforced EPDM lining, it would not just snuggle back into its hole.
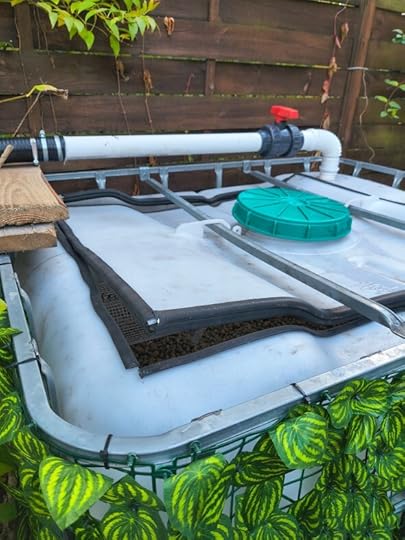
So, I grabbed some lengths of shuttering wood I still had from when a neighbour gave a load away a few years ago, and cut, sanded, and primed them. Two coats of decent all-weather paint and I had a proper lid. Then, we had a storm. Twigs and branches from a dead silver birch next door came raining down and it suddenly became clear that the inflow pipe with the ball-valve was at risk of damage and also needed protecting. Fortunately, I had some batons I saved when I took an old bed to pieces last year, and was able to use those to make this:
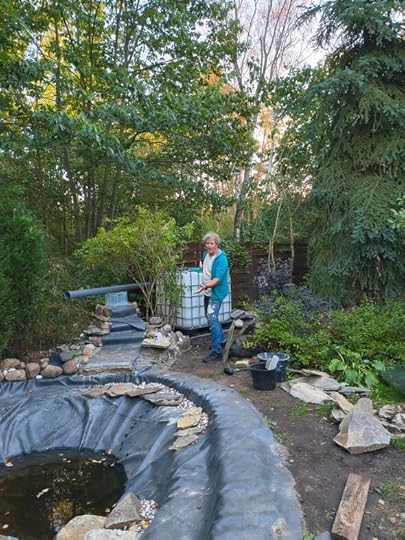
So, now, the Mauser looks like this, properly insulated and protected against most of the elements:
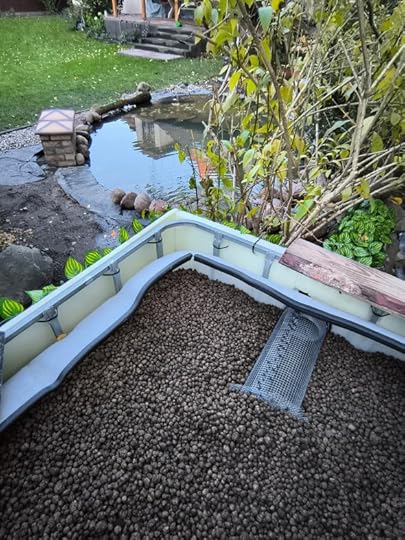
The project then moved to the finishing-touches phase, washing and loading out the stones and pebbles while fighting every day to keep the pond free of leaves, until today. Of course, the best is yet to come. When spring rolls around next year, I plan to introduce the first fish and plants.
Overall, I’ll put this project down as one where I almost bit off more than I could chew—but not quite. The entire total cost I estimate at around EUR 2,500-2,750. For every unexpected or underestimated amount, there were wins, including EUR 100 for the second-hand Mauser and buying two tons of small stones and pea shingle more cheaply from a builder’s merchant, which meant I had to drill holes in an old wheelbarrow to wash the mud and clay off them before I could put them in and around the pond. In addition, I had stuff lying around I was able to use to avoid having to buy materials. Other costs included EUR 100 for the pieces of slate, EUR 100 for the LECA, EUR 50 for the inflow pipe from the pump to the Mauser, and EUR 30 for the ball-value.
However, the biggest saving was the labour. Pond building is an expensive business. I considered and discarded a few design options because the prices of the specialist equipment were ridiculously extortionate (EUR 300 just for a glorified plastic waste-paper bin?), and I shudder to think how much a firm of professionals would charge to construct the pond I’ve just built. In addition, the Mauser biofilter is a pretty bespoke solution to keeping your pond maintenance-free, and I’m not sure professional pond-builders would be prepared to offer it. From their perspective, giving you the smallest filter would make their job easier, and they hardly care if you’re stuck cleaning your filter out every week once they’ve built your pond and got your money.
If I had researched the project before I began, I would’ve undoubtedly built a smaller pond. But, on the other hand, by proceeding in wilful ignorance in July, I have ended up, more or less, with the pond I decided to aim for.
In any case, the one thing I am proud of is that, after weeks of waiting, working and sweating, it transpired that I got the entire circumference of the pond to within just 1cm of level. And for that, I can forgive my pure idiocy when building the waterfall.
You can bet that next year, I’ll post more pictures of this pond as it grows in. Thanks for reading and take care, peeps!


