David Lebovitz's Blog
October 19, 2025
ready for dessert: behind-the-scenes, baking tips, and errata
There’s a lot going on when you write a cookbook. You begin with an idea, then spend a year or two testing and developing recipes. Once the first draft is done, it goes through a developmental edit where the editor gives feedback on what you’ve done so far and offers up changes, ideas, or things to reconsider.
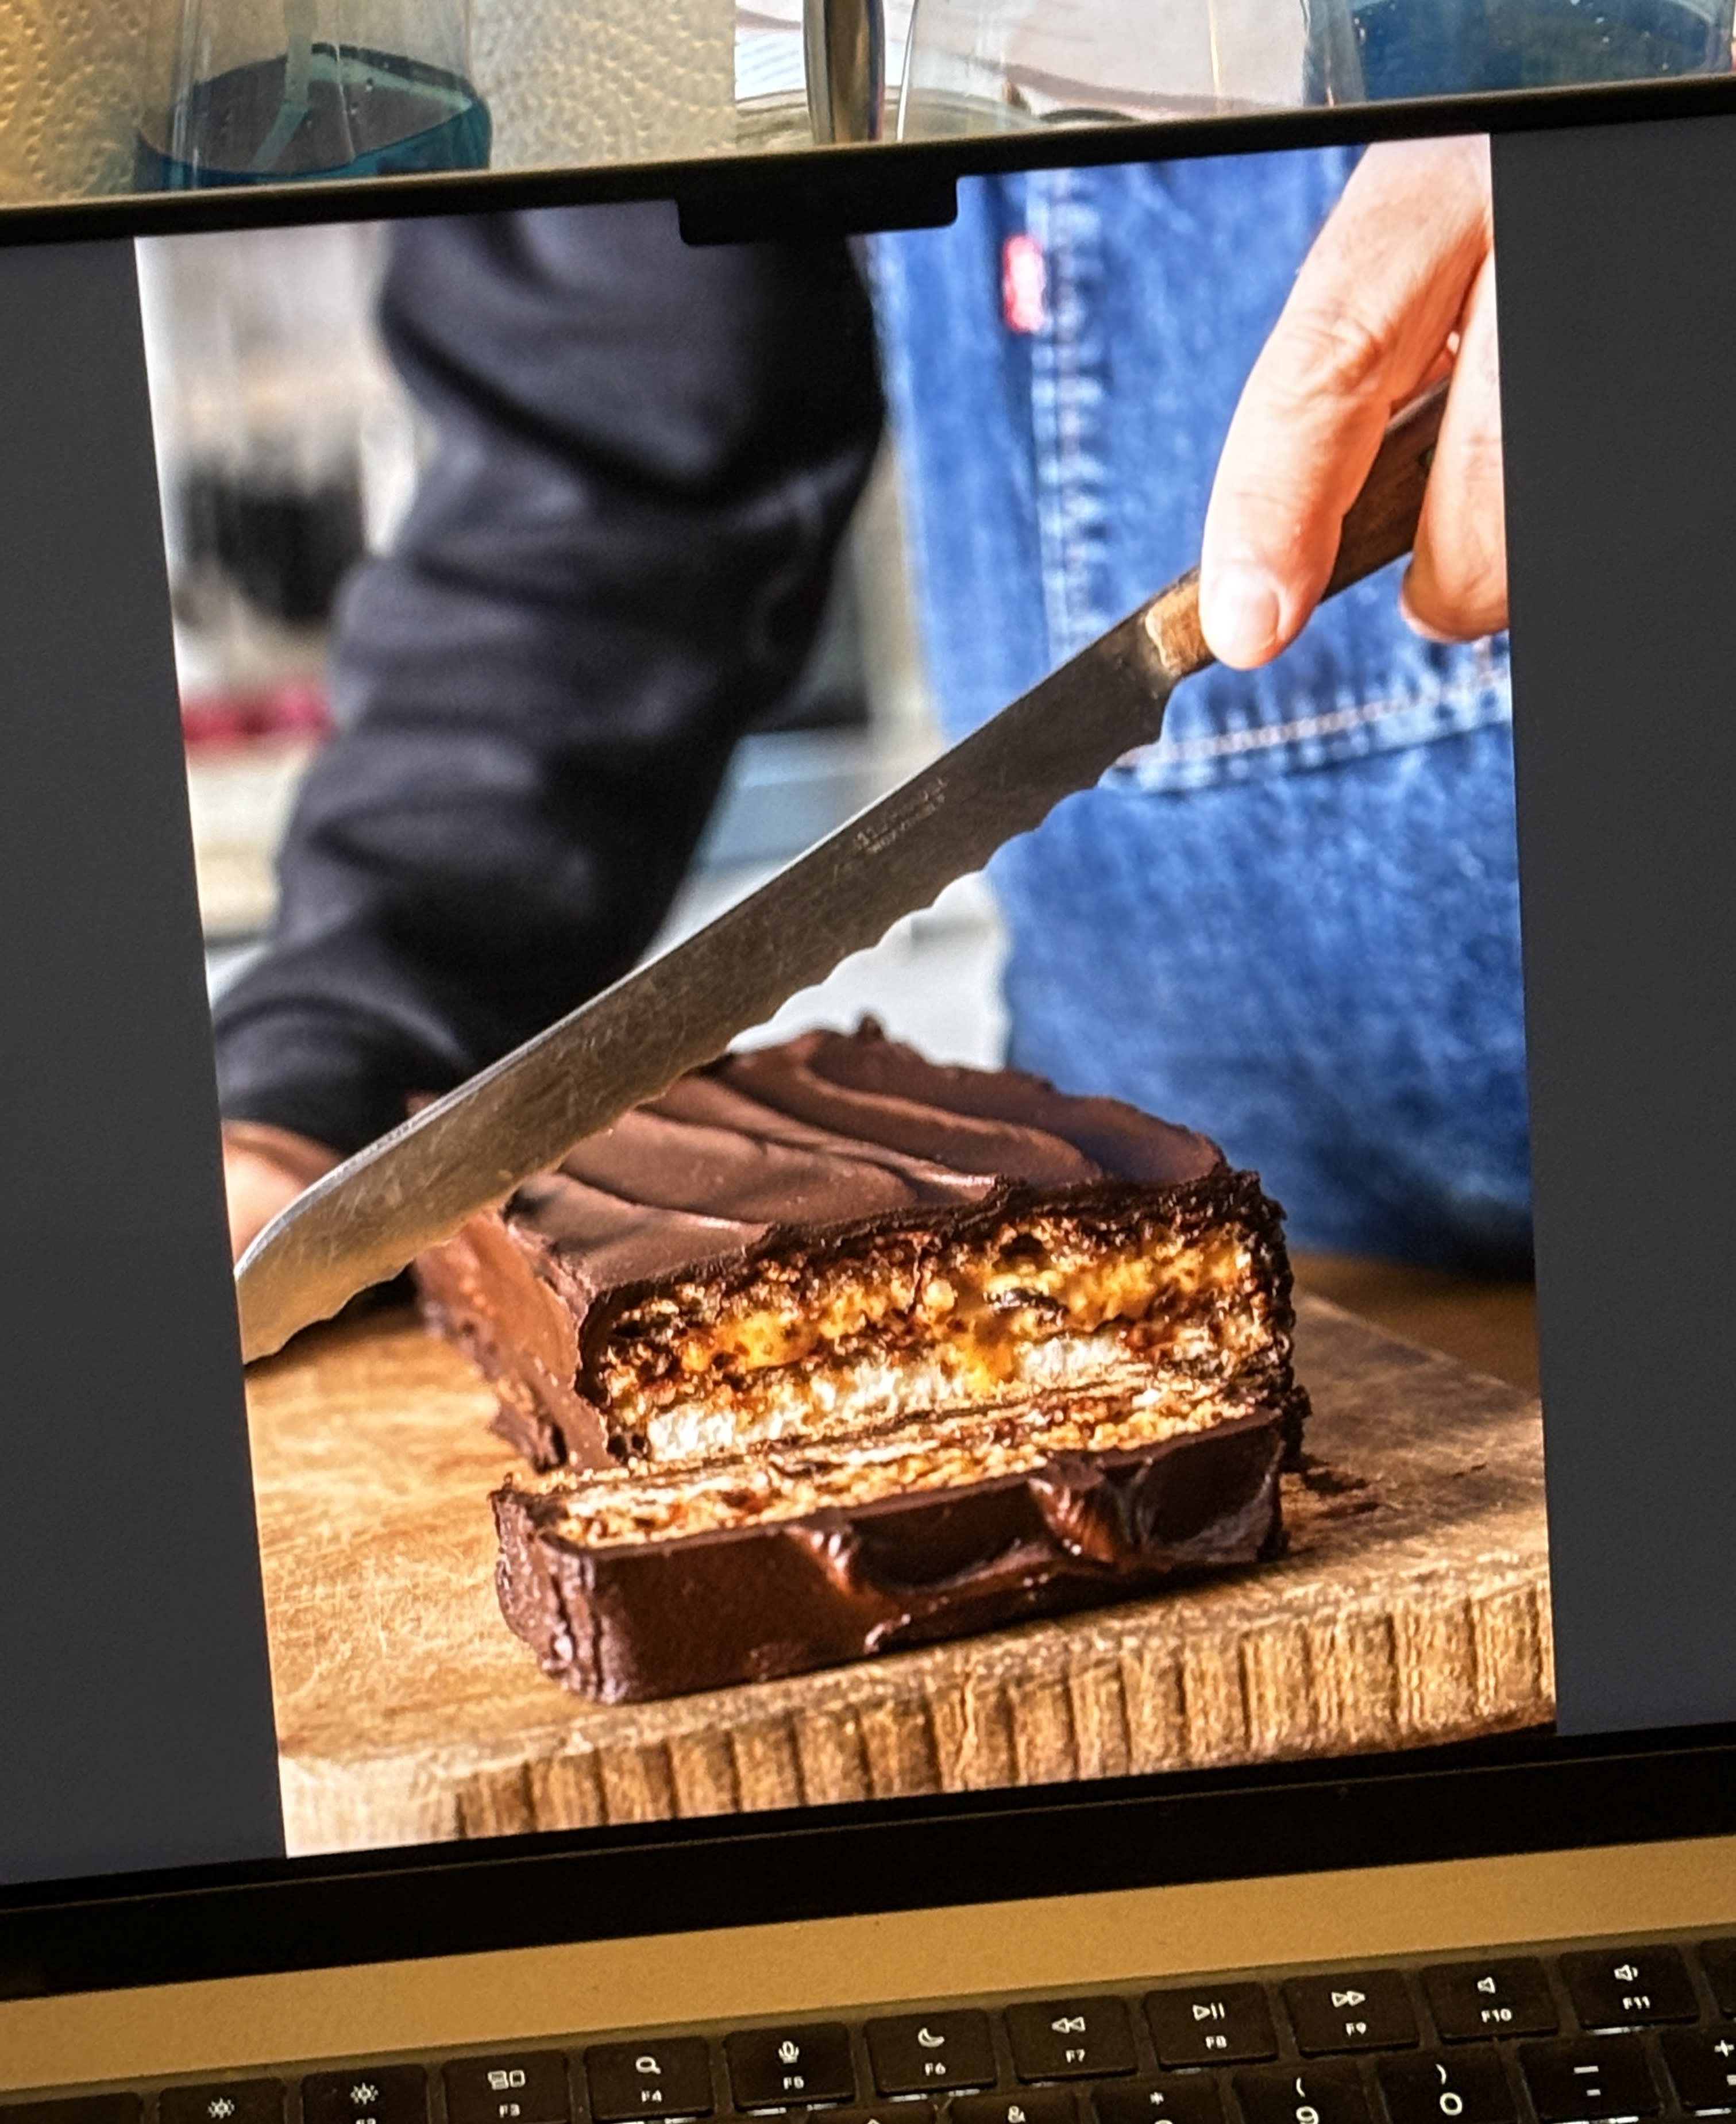 One of my favorite pictures from Ready for Dessert: Slicing the Marjolaine, which is also one of my favorite recipes in the book. (Photo by Ed Anderson)
After you’ve implemented those (or not), it then goes to a copy editor who checks grammar and spelling, as well as scans the recipes for omissions or gaffes, such as forgetting to say when to add an ingredient, and checks your metric conversions. I’ve seen more and more books lately that also credit an “Americanizer,” who presumably takes on that last task, since conversions are a big lift. I kid you not. I’m pretty sure I could write two cookbooks a year if we all used the same system of measurement.
The book then goes to a production editor, who makes sure everything is in the right place, then to a proofreader. (Not all publishers do all these steps. Mine does.) During the process, cookbook authors often send recipes to testers to give the recipes a go and get feedback. Some authors have people develop recipes but I give a tester the finished recipe and get feedback on that.
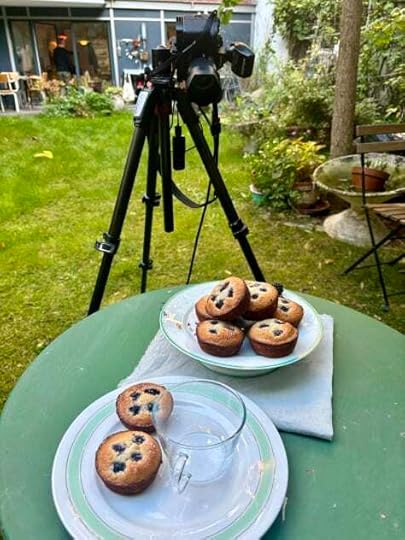 Shooting some of the desserts in our backyard.
If the book is going to be photographed, food stylists generally make the recipes for the photos, although in some cases, the author does. (Which I’ve done.) But it’s a very big job organizing and planning the shoot, then gathering all the ingredients and making everything, which is especially challenging if you plan to shoot five different photos a day. Then there’s the cleanup afterward.
I was fortunate to have George Dolese and Elisabet der Nederlanden working as a team on my book since there were a lot of photos to shoot in 2 1/2 weeks. That’s a very long shoot, but my publisher wanted a lot of photos so we, along with photographer Ed Anderson, delivered.
George arrived with a 7-inch (18cm) thick notebook, and I was startled to see how organized he was. We’d corresponded a lot before he came to Paris, and he asked me what he should bring from the U.S. I said parchment paper circles, natural cocoa powder, Lazzaroni amaretti cookies (why can’t we get those here? Romain has been devouring the leftovers…), almond paste, and chocolate chips — among other things.

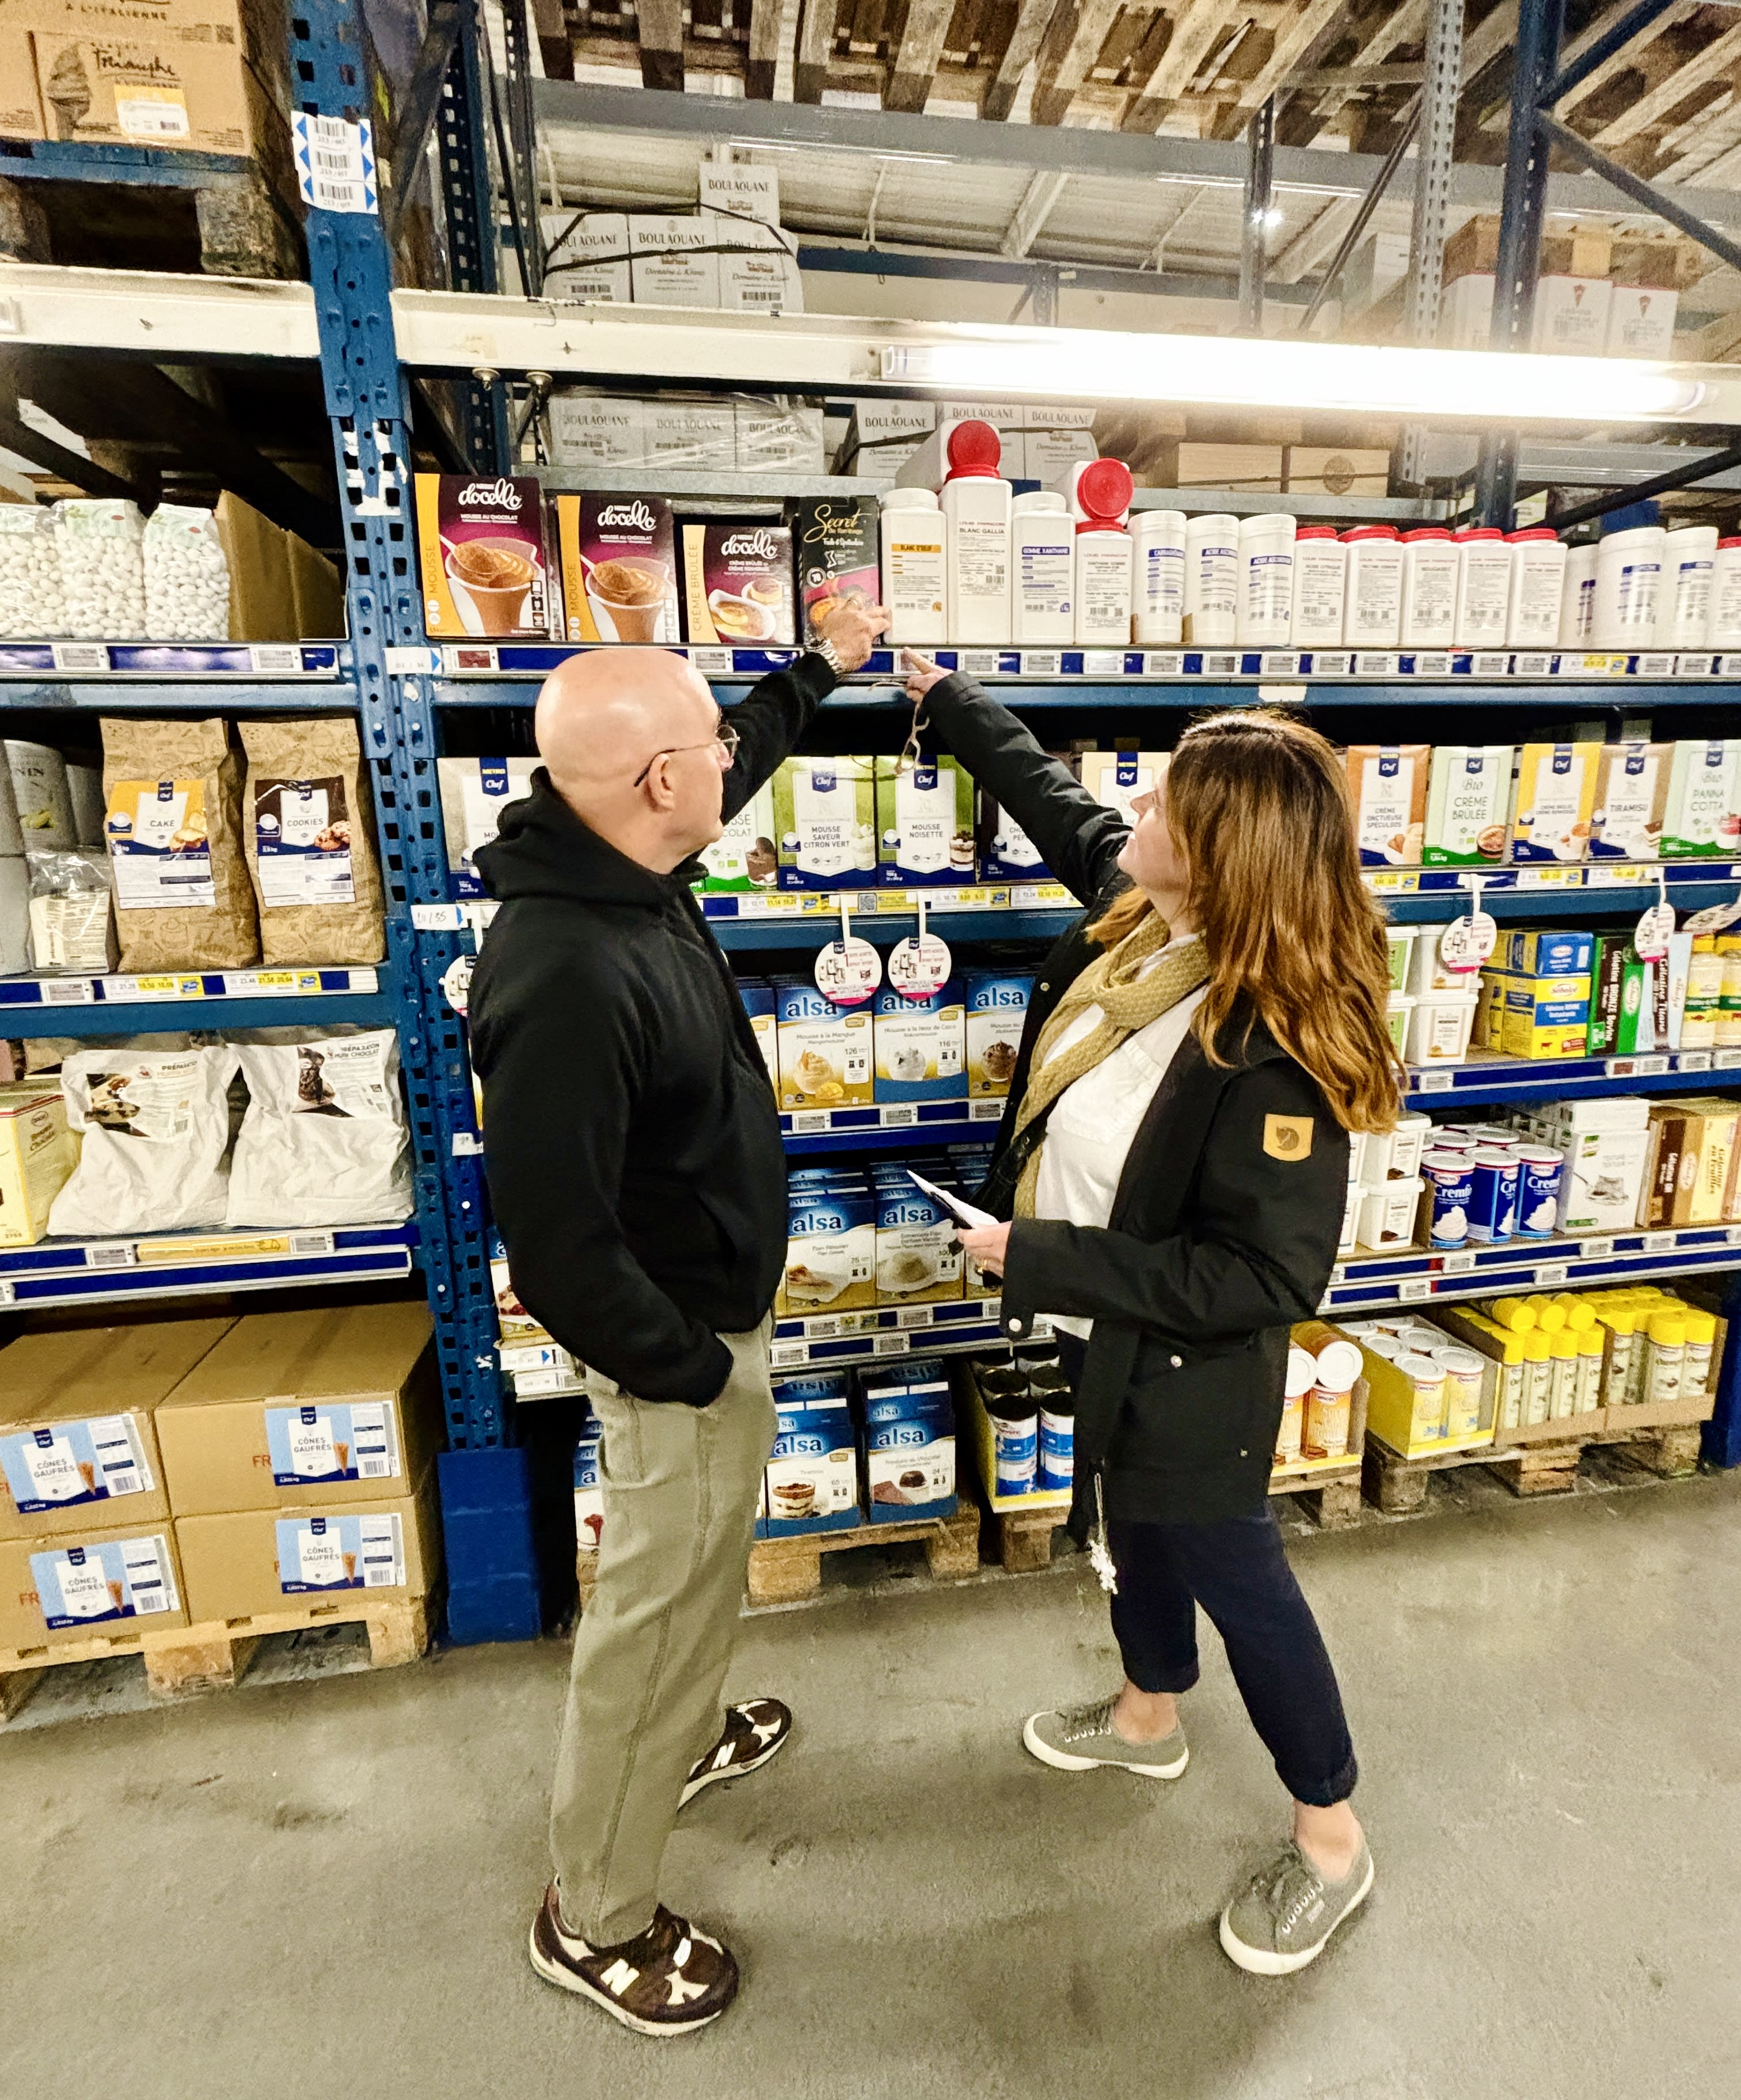
When George and Elisabet arrived, armed with massive shopping lists, I took them to a Grand Frais supermarket outside of Paris. For some reason there are no Grand Frais supermarkets in Paris, but they have a remarkable selection of everything, including aisles and aisles of every kind of fruit you can imagine, as well as a massive cheese aisle, a butcher, and shelves of nuts and baking ingredients.
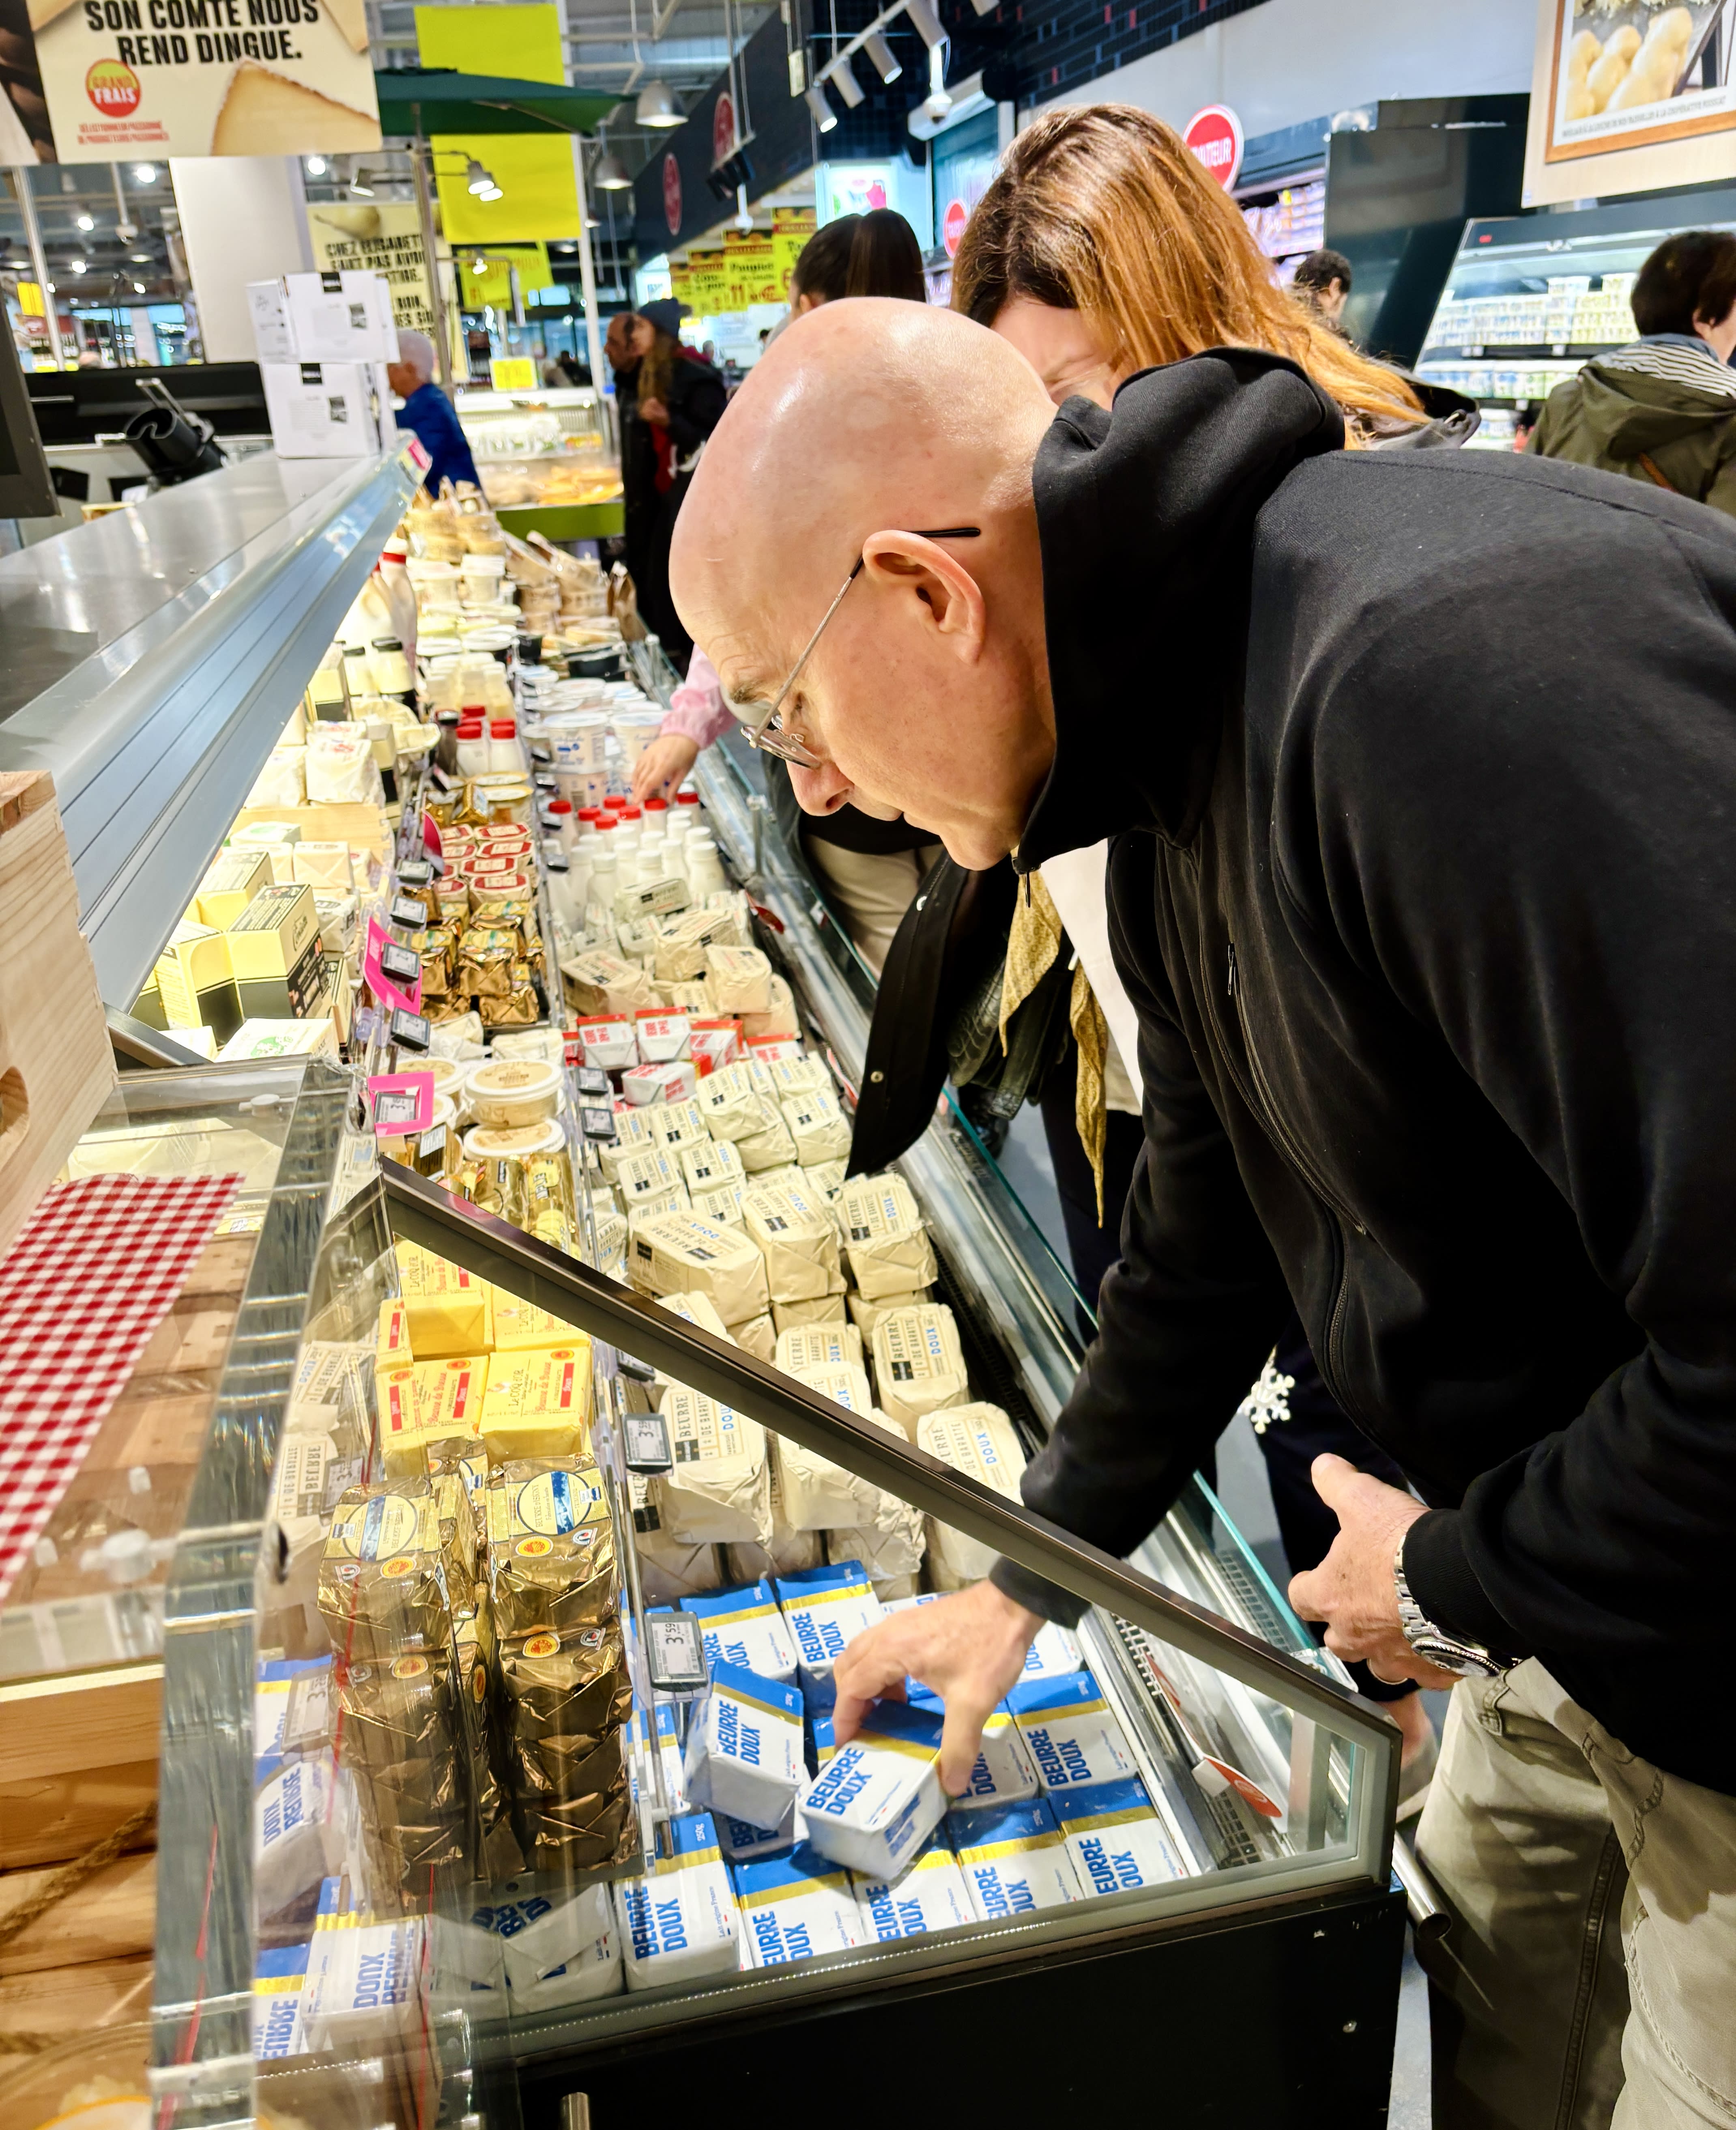 Buying (lots of) butter at Grand Frais.
I also took them to Metro, a membership-only store that requires you to have a resale license. Elisabet is a particularly avid baker and went a little nuts in the baking aisles. She was especially wowed by all the various sugars available in France, from dark, moist cassonade (cane sugar) to crunchy pearl sugar.
Food stylists are invariably pros at cooking and often give valuable feedback if they run into any issues with the recipes. To be honest, food stylists do a better job than most of us can to make food look good for the camera. No one working on cookbooks uses fake food or anything like that, although when shooting pictures for the first edition of Room for Dessert (I was the food stylist on it), which became Ready for Dessert, I couldn’t find Concord grapes for the pie since it wasn’t grape season. A food stylist friend suggested that since it was only for a photo, I should use black olives. I used regular grapes instead and zhuzhed them up with some grape jelly for color.
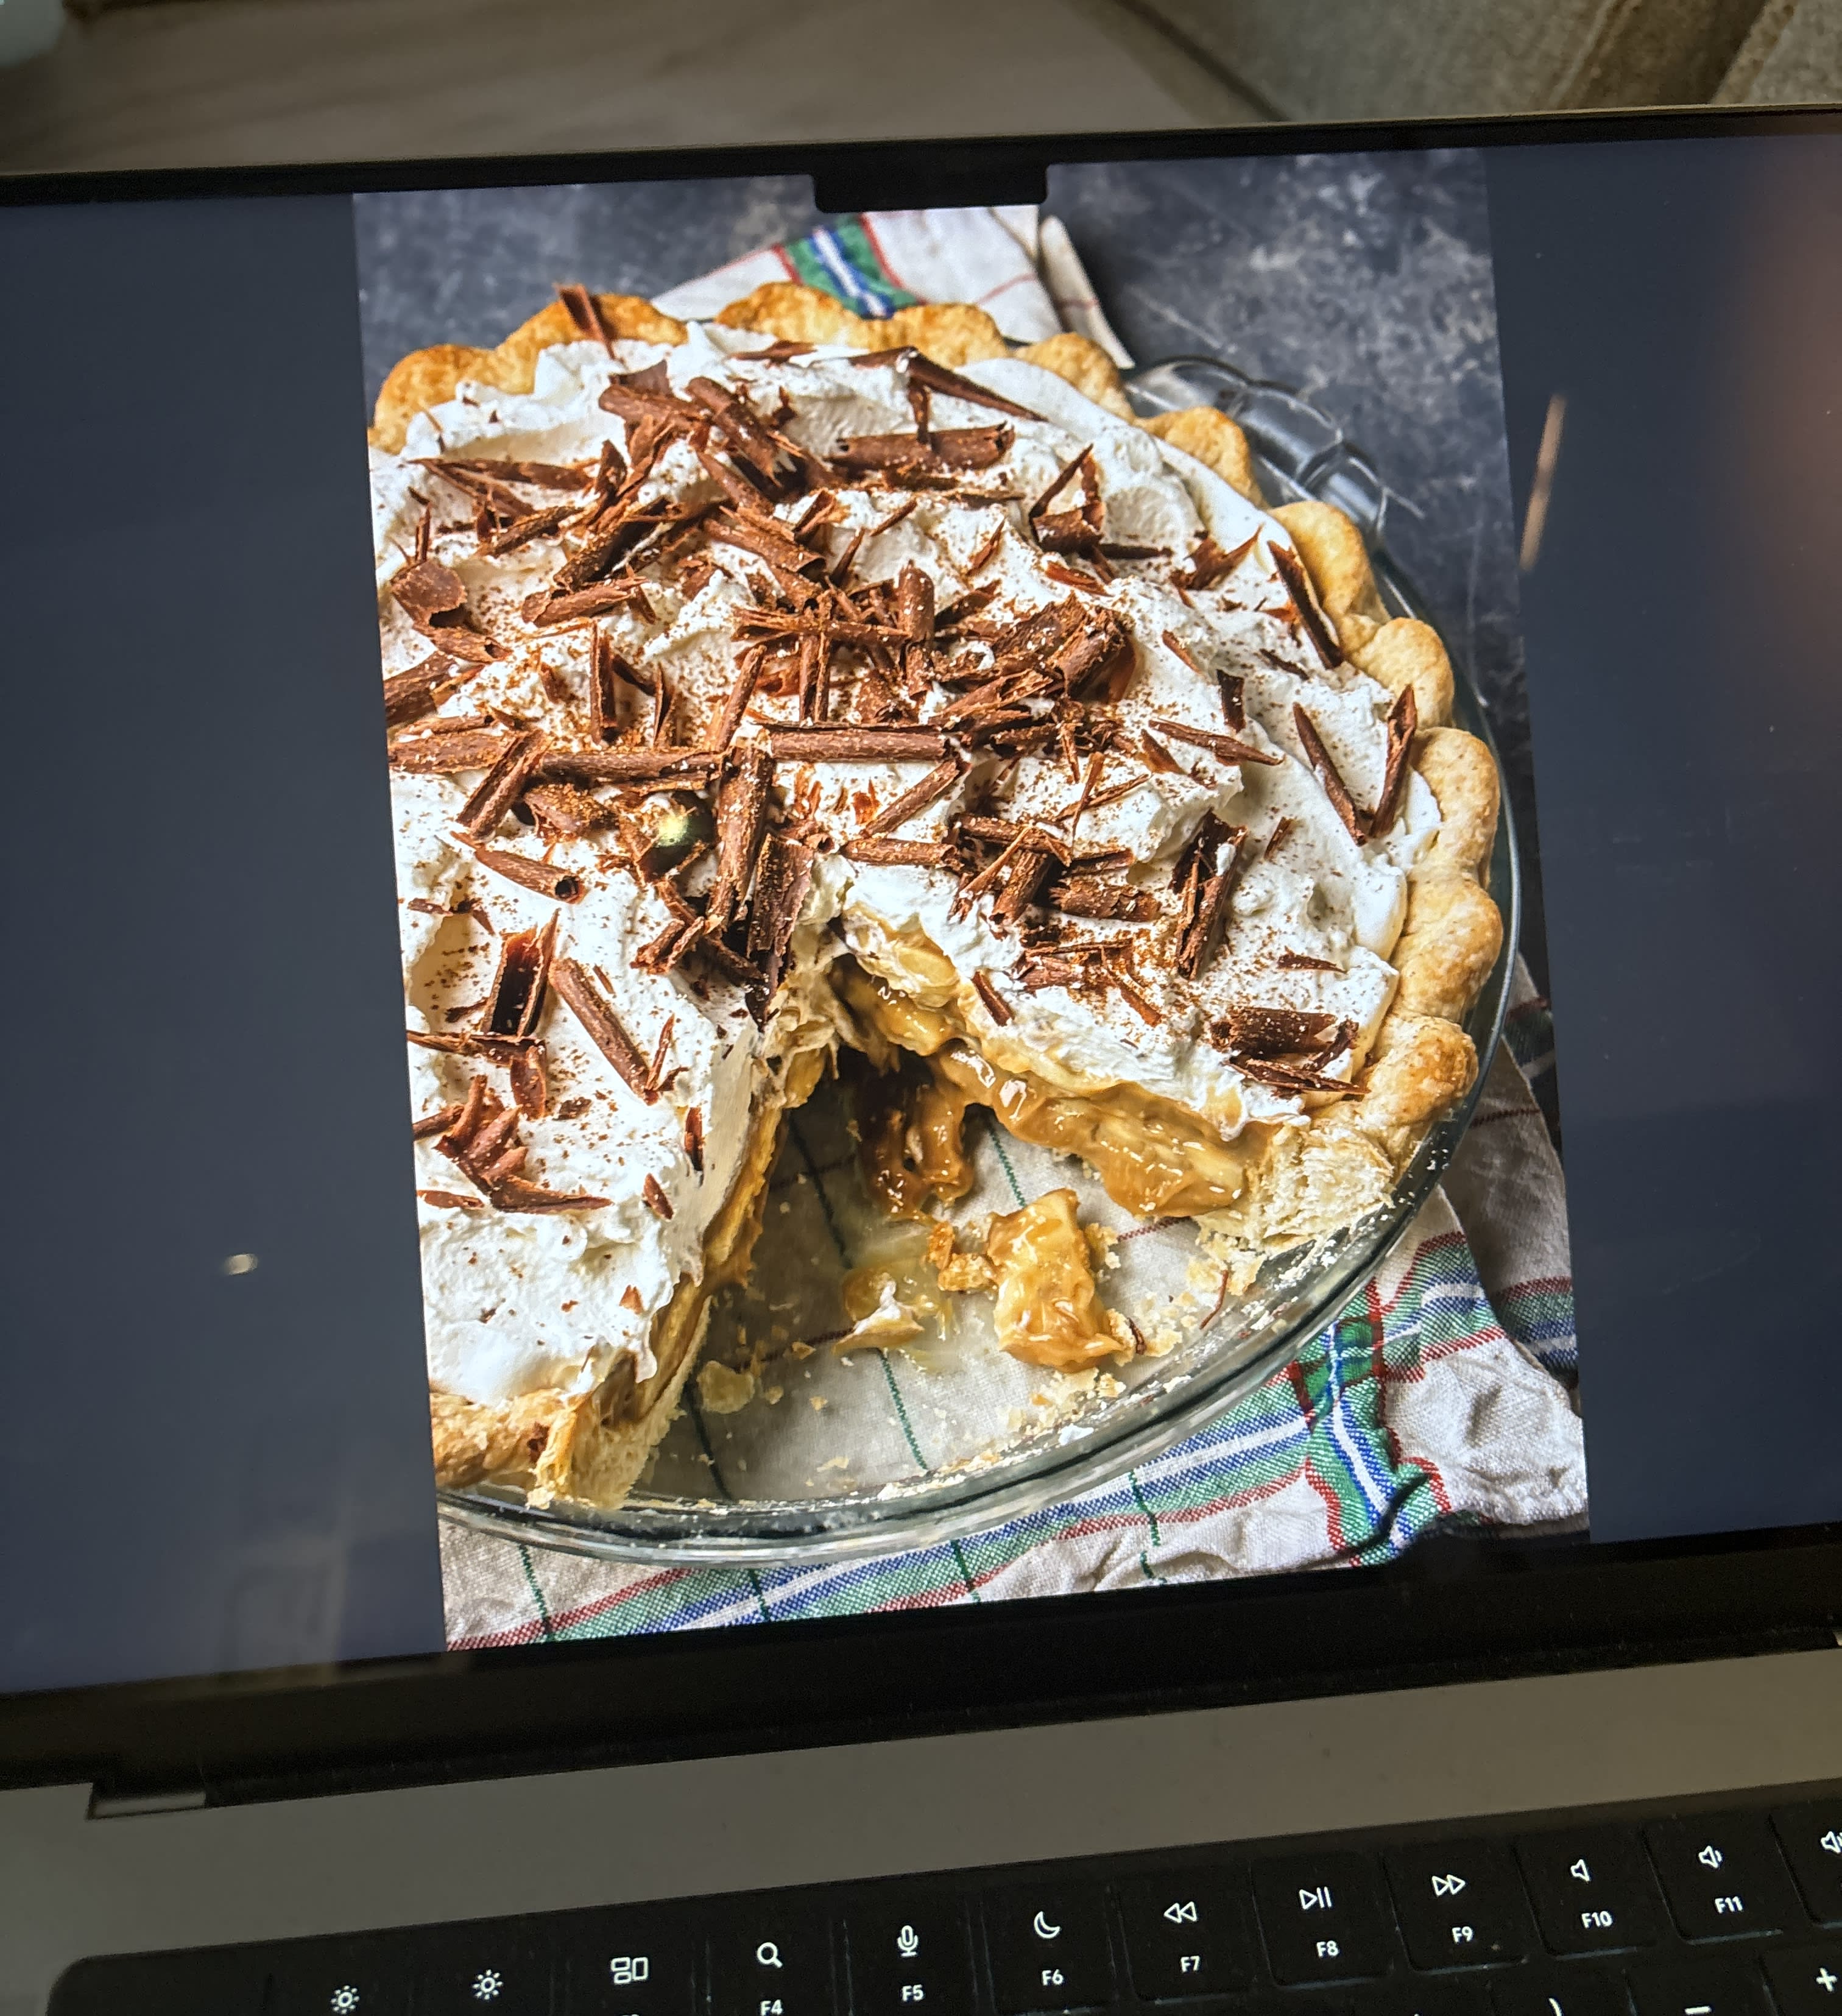 Banana butterscotch cream pie, page 100. (Photo by Ed Anderson)
Once the book is laid out and designed, with everything in place, the publisher sends a PDF of the book to the author to check and make sure everything’s A-OK. Then it’s off to the printer, and when you get the final book in your hands, you notice that tablespoon in one recipe is spelled “tablespooon.” (Which happened to me in another book.)
 Photographer Ed Anderson and I took a coffee break when shooting out and about in Paris, here in the Place des Vosges. I had hot chocolate!
As the great Maida Heatter called them, “gremlins” get into cookbooks, no matter how hard you try to keep them out. Also, as someone who likes to tinker with recipes, I sometimes find different ways to make them. Books also have limited space, so it’s nice we have the internet to fill things in, as I’m doing here.
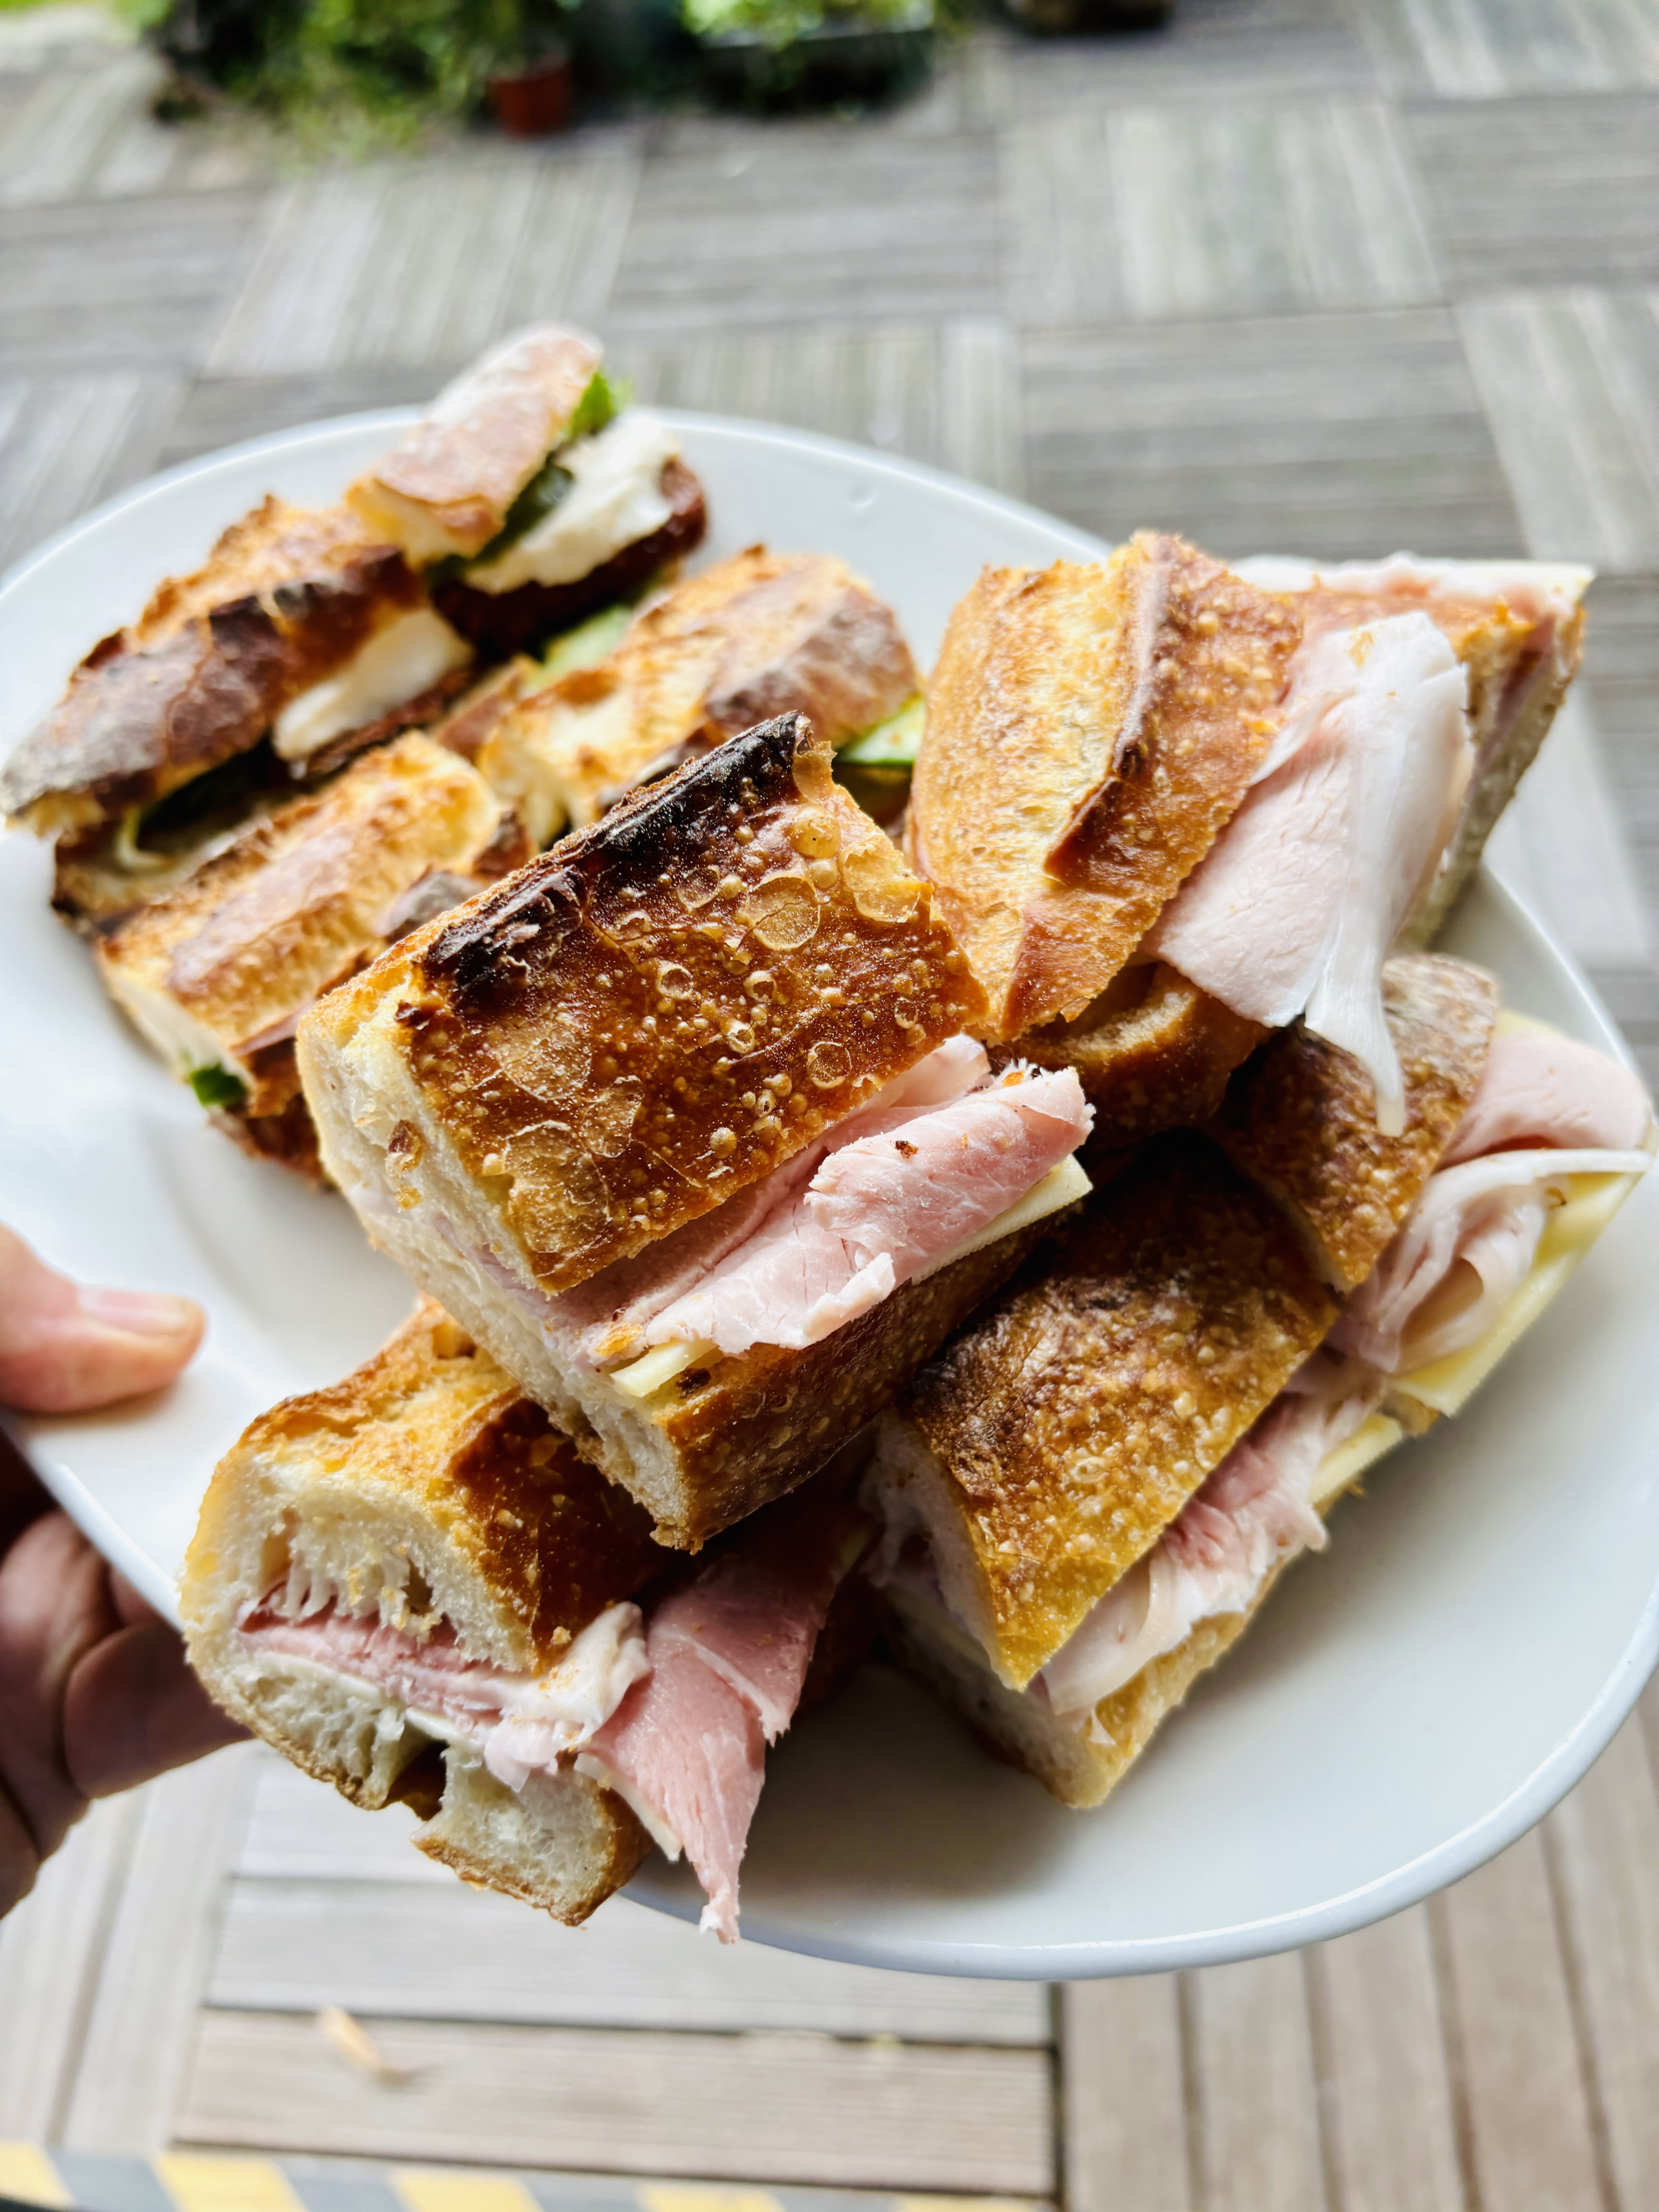 During the photo shoots, I was sometimes tasked with “staff meal.” I kept things pretty French for the crew, and jambon-beurre (ham and butter) sandwiches became the most requested meal…and I was happy to oblige.

Ready for Dessert Recipe Notes & Errata
Here are some additional notes about the recipes, including a few tips on baking times, a little errata the thickness of a cookie recipe, and an bonus recipe, that’s on the cover of the book.
– For the Easy jam tart (page 121), if the dough is a bit too sticky to press into the pan, put the pan with the pastry in it in the refrigerator or freezer for a few minutes to firm the pastry up.
– When making the Peanut butter and jelly linzertorte (page 103), if the ropes that you’re rolling by hand to place over the top break, it’s ok to place the pieces on top of the tart and simply pinch them together. They’ll bake up beautifully. While a lattice topping is traditional on linzertorte (which is really a tart), baker Jessie Sheehan suggested that the dough could be crumbled over the top of the tart, which I’m going to try the next time I make it.
– For the Panna cotta recipe (page 161) you can reduce the amount of sugar to 1/4 cup (50g), and you can omit the cinnamon and lemon zest if you want them with those flavorings in them.
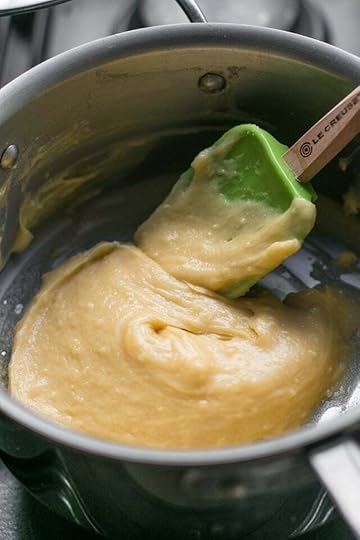
– For the Pâte à choux recipe (page 276), the yield will vary depending on the size you pipe the dough. You may get twenty puffs if you pipe them larger, which is fine!
I also like to play with the temperature of the oven, depending on how I feel that day. Life isn’t always cut-and-dry, and neither is pastry dough. And as I’ve said before, recipes aren’t set in stone. If they were, cookbooks would be very, very heavy.
While the baking temperature in the first printing of the book has you baking the puffs at 425ºF (220ºC), I’m wondering if that’s too high for people? I like my puffs very crispy so that’s fine with me. But if yours are getting too dark for your taste, you can take them out before the recommended baking time. Similarly, you don’t need to keep them in the turned-off oven for 5 minutes after baking.
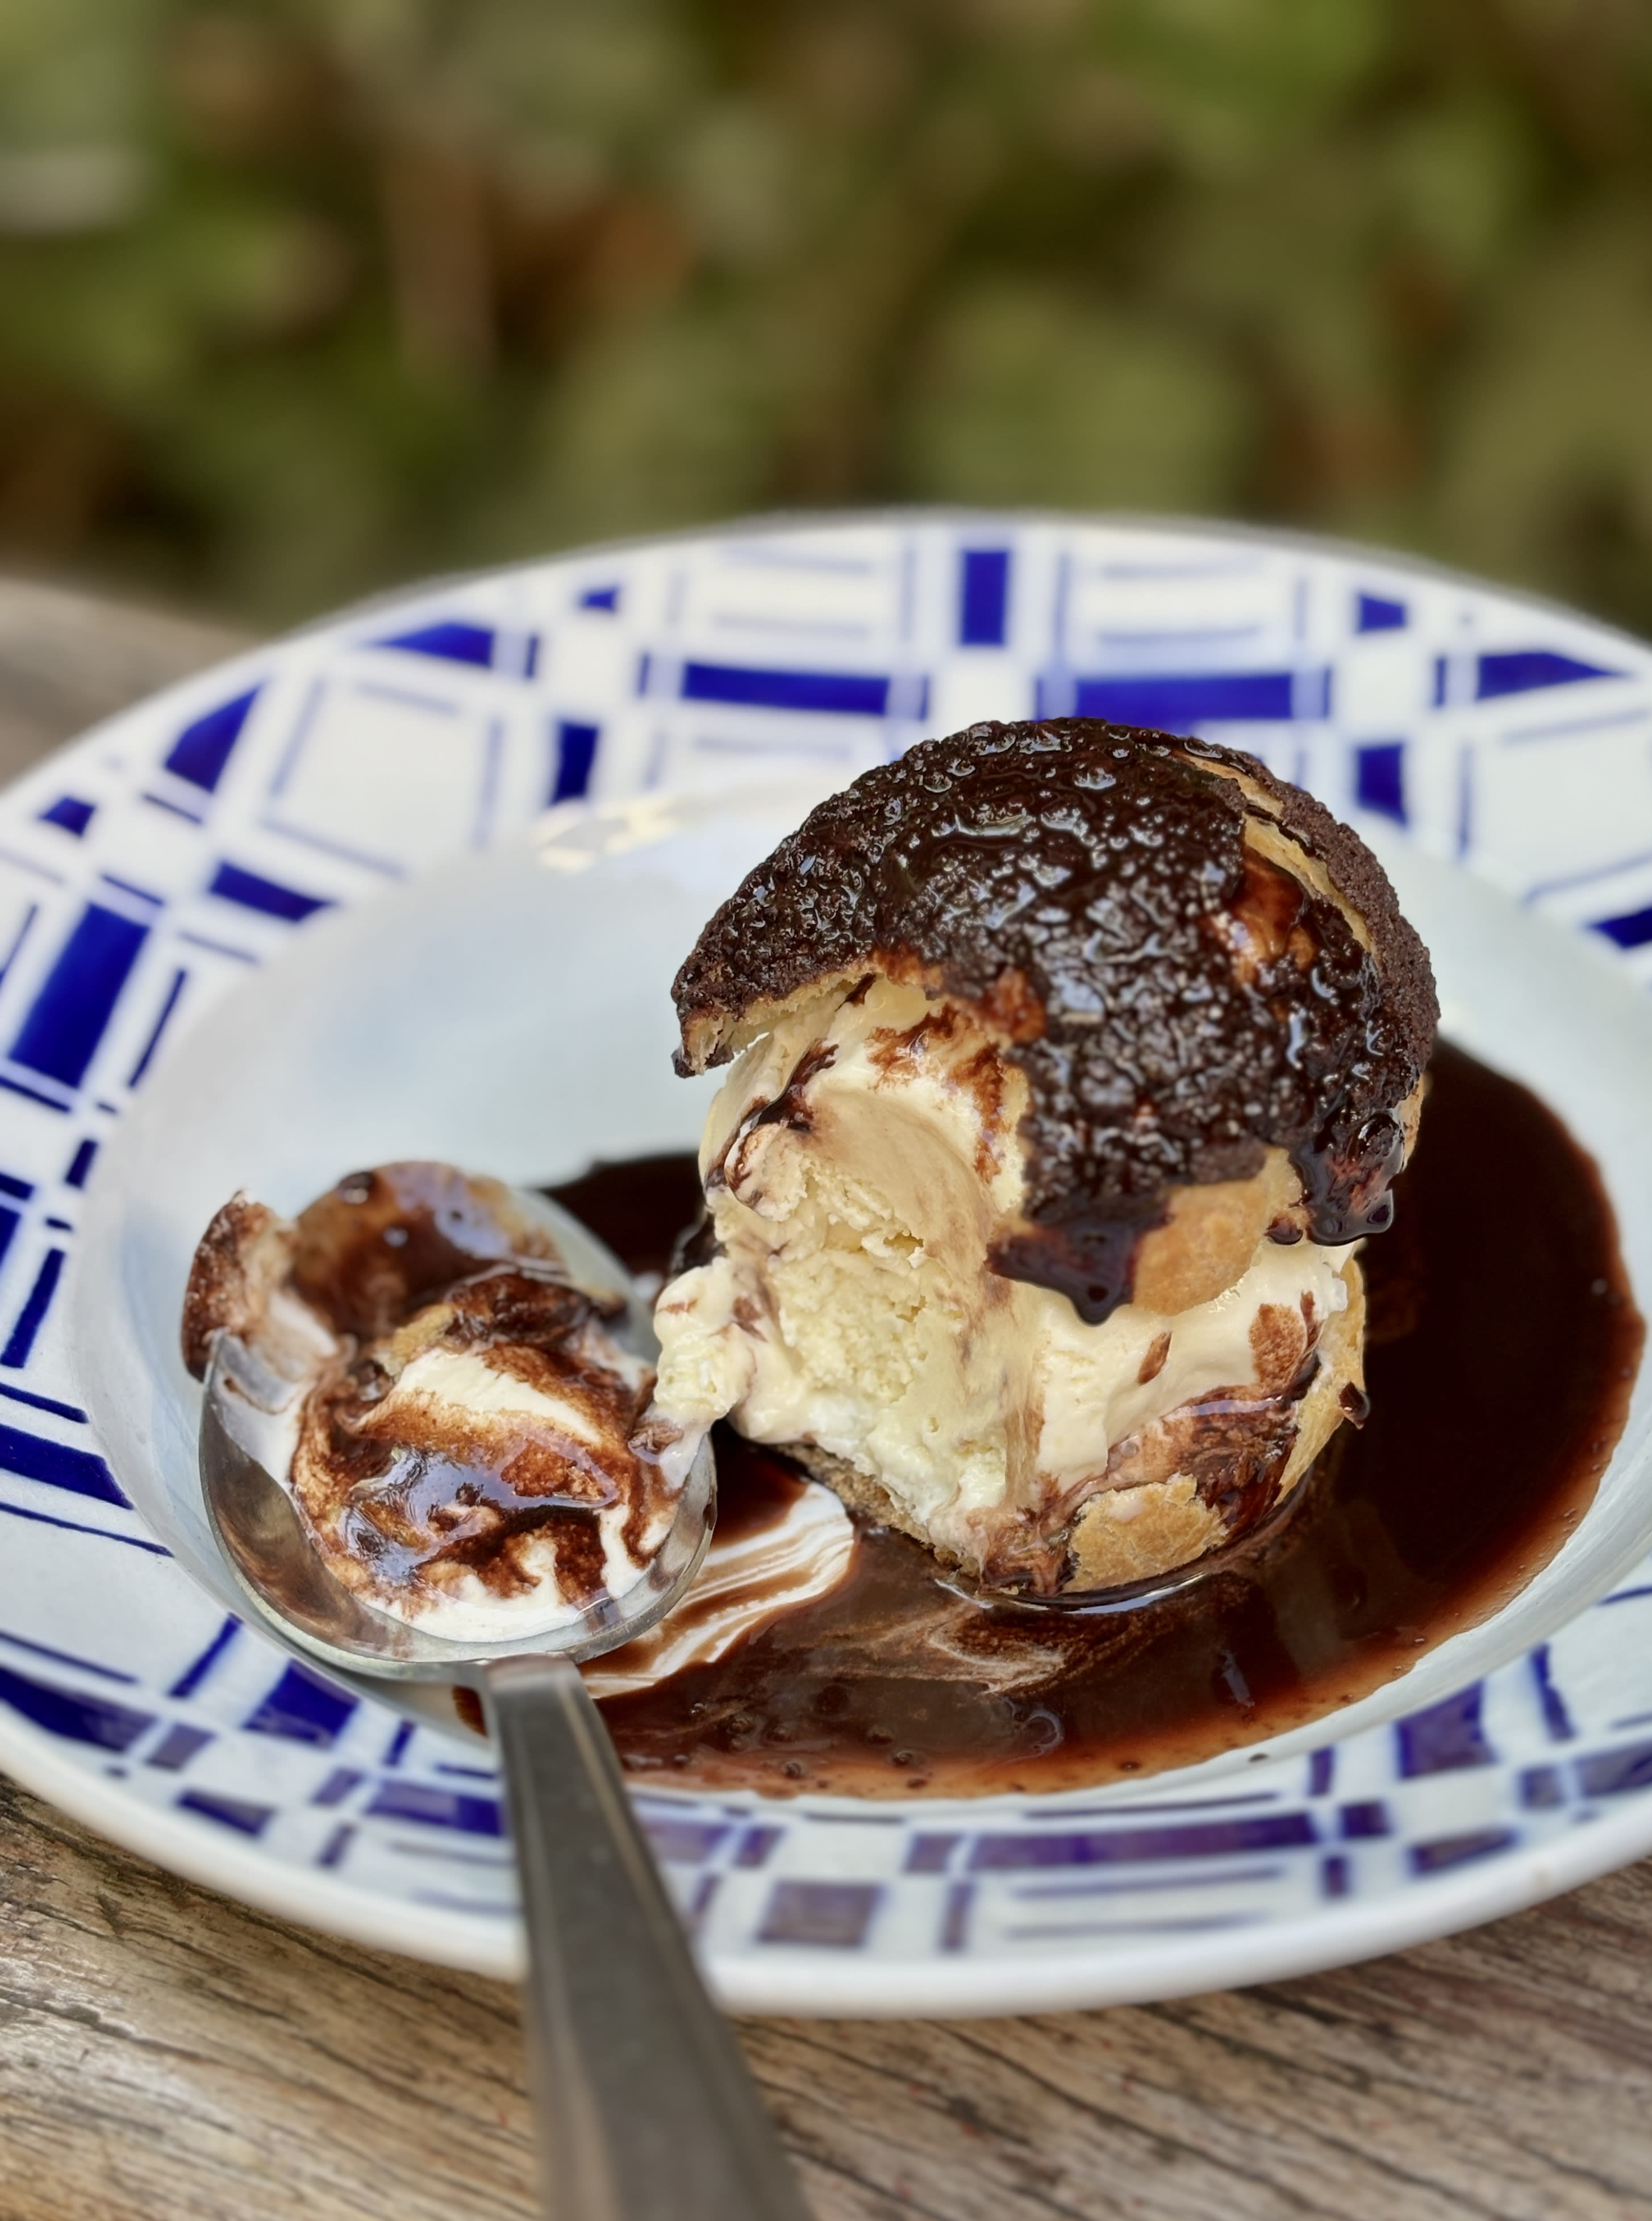
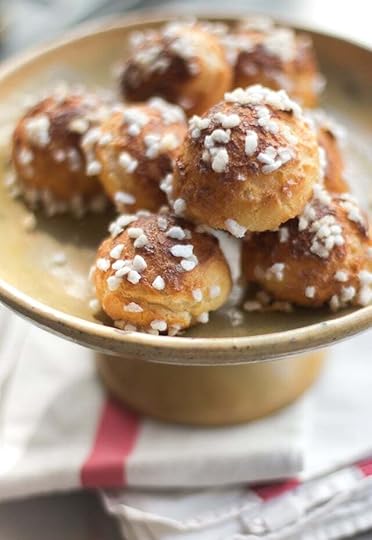
Another way I prepare pâte à choux puffs is to bake them in a 425ºF (220ºC) oven for 5 minutes, then turn the oven down to 375ºF (190ºC) and bake them until they’re golden brown. You can see the difference here:
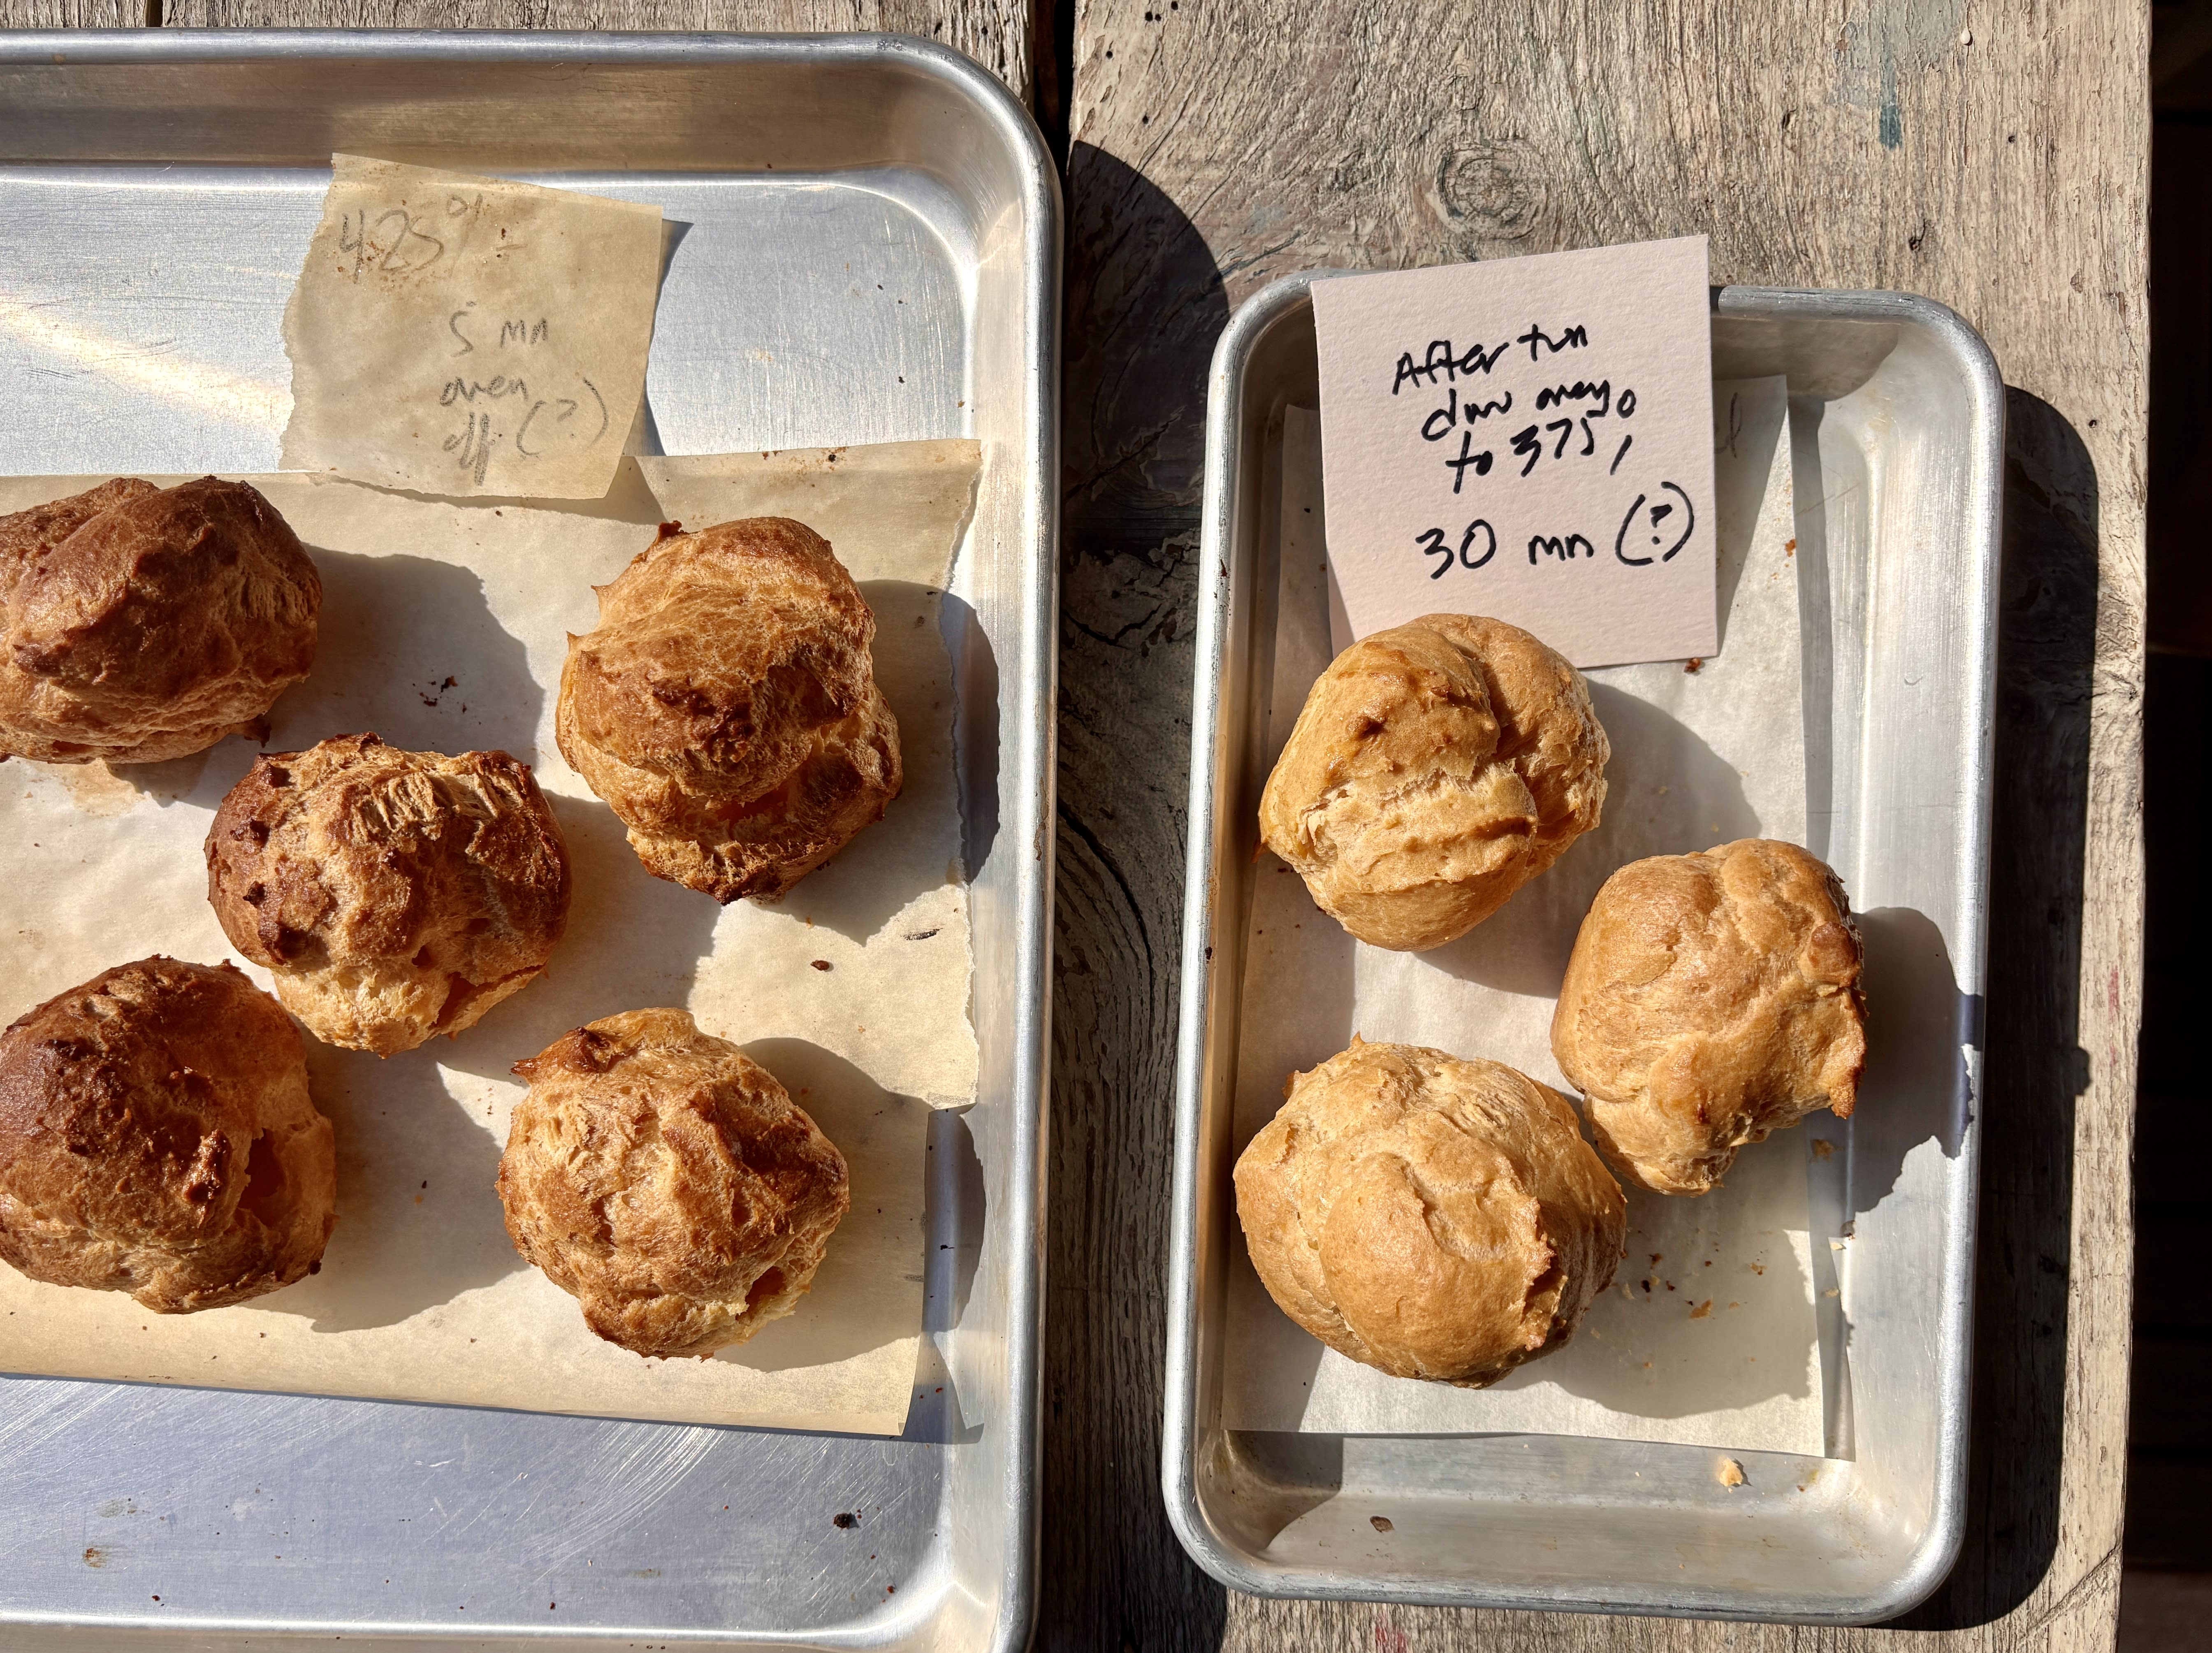 On the left, baked at 425ºF/220ºC only (as the recipe appears in the book). On the right, puffs that were baked for 5 minutes in a 425ºF/220ºC oven, then turned down to 375ºF/190ºC.
When baking, always use visual clues to check for doneness, rather than strictly adhering to a baking time. When I baked professionally, we used a timer to remind us that something was in the oven. We never relied on it to tell us when something was done.
– When rolling out the dough for the Orange poppyseed sandwich cookies (page 246), the dough should be rolled 1/4 inch (6mm) thick, rather than the 1/2 inch in the book. I find the baking time of 12 minutes is just right for me, but if you like the cookies a little darker, I did a test at 14 minutes, shown below:
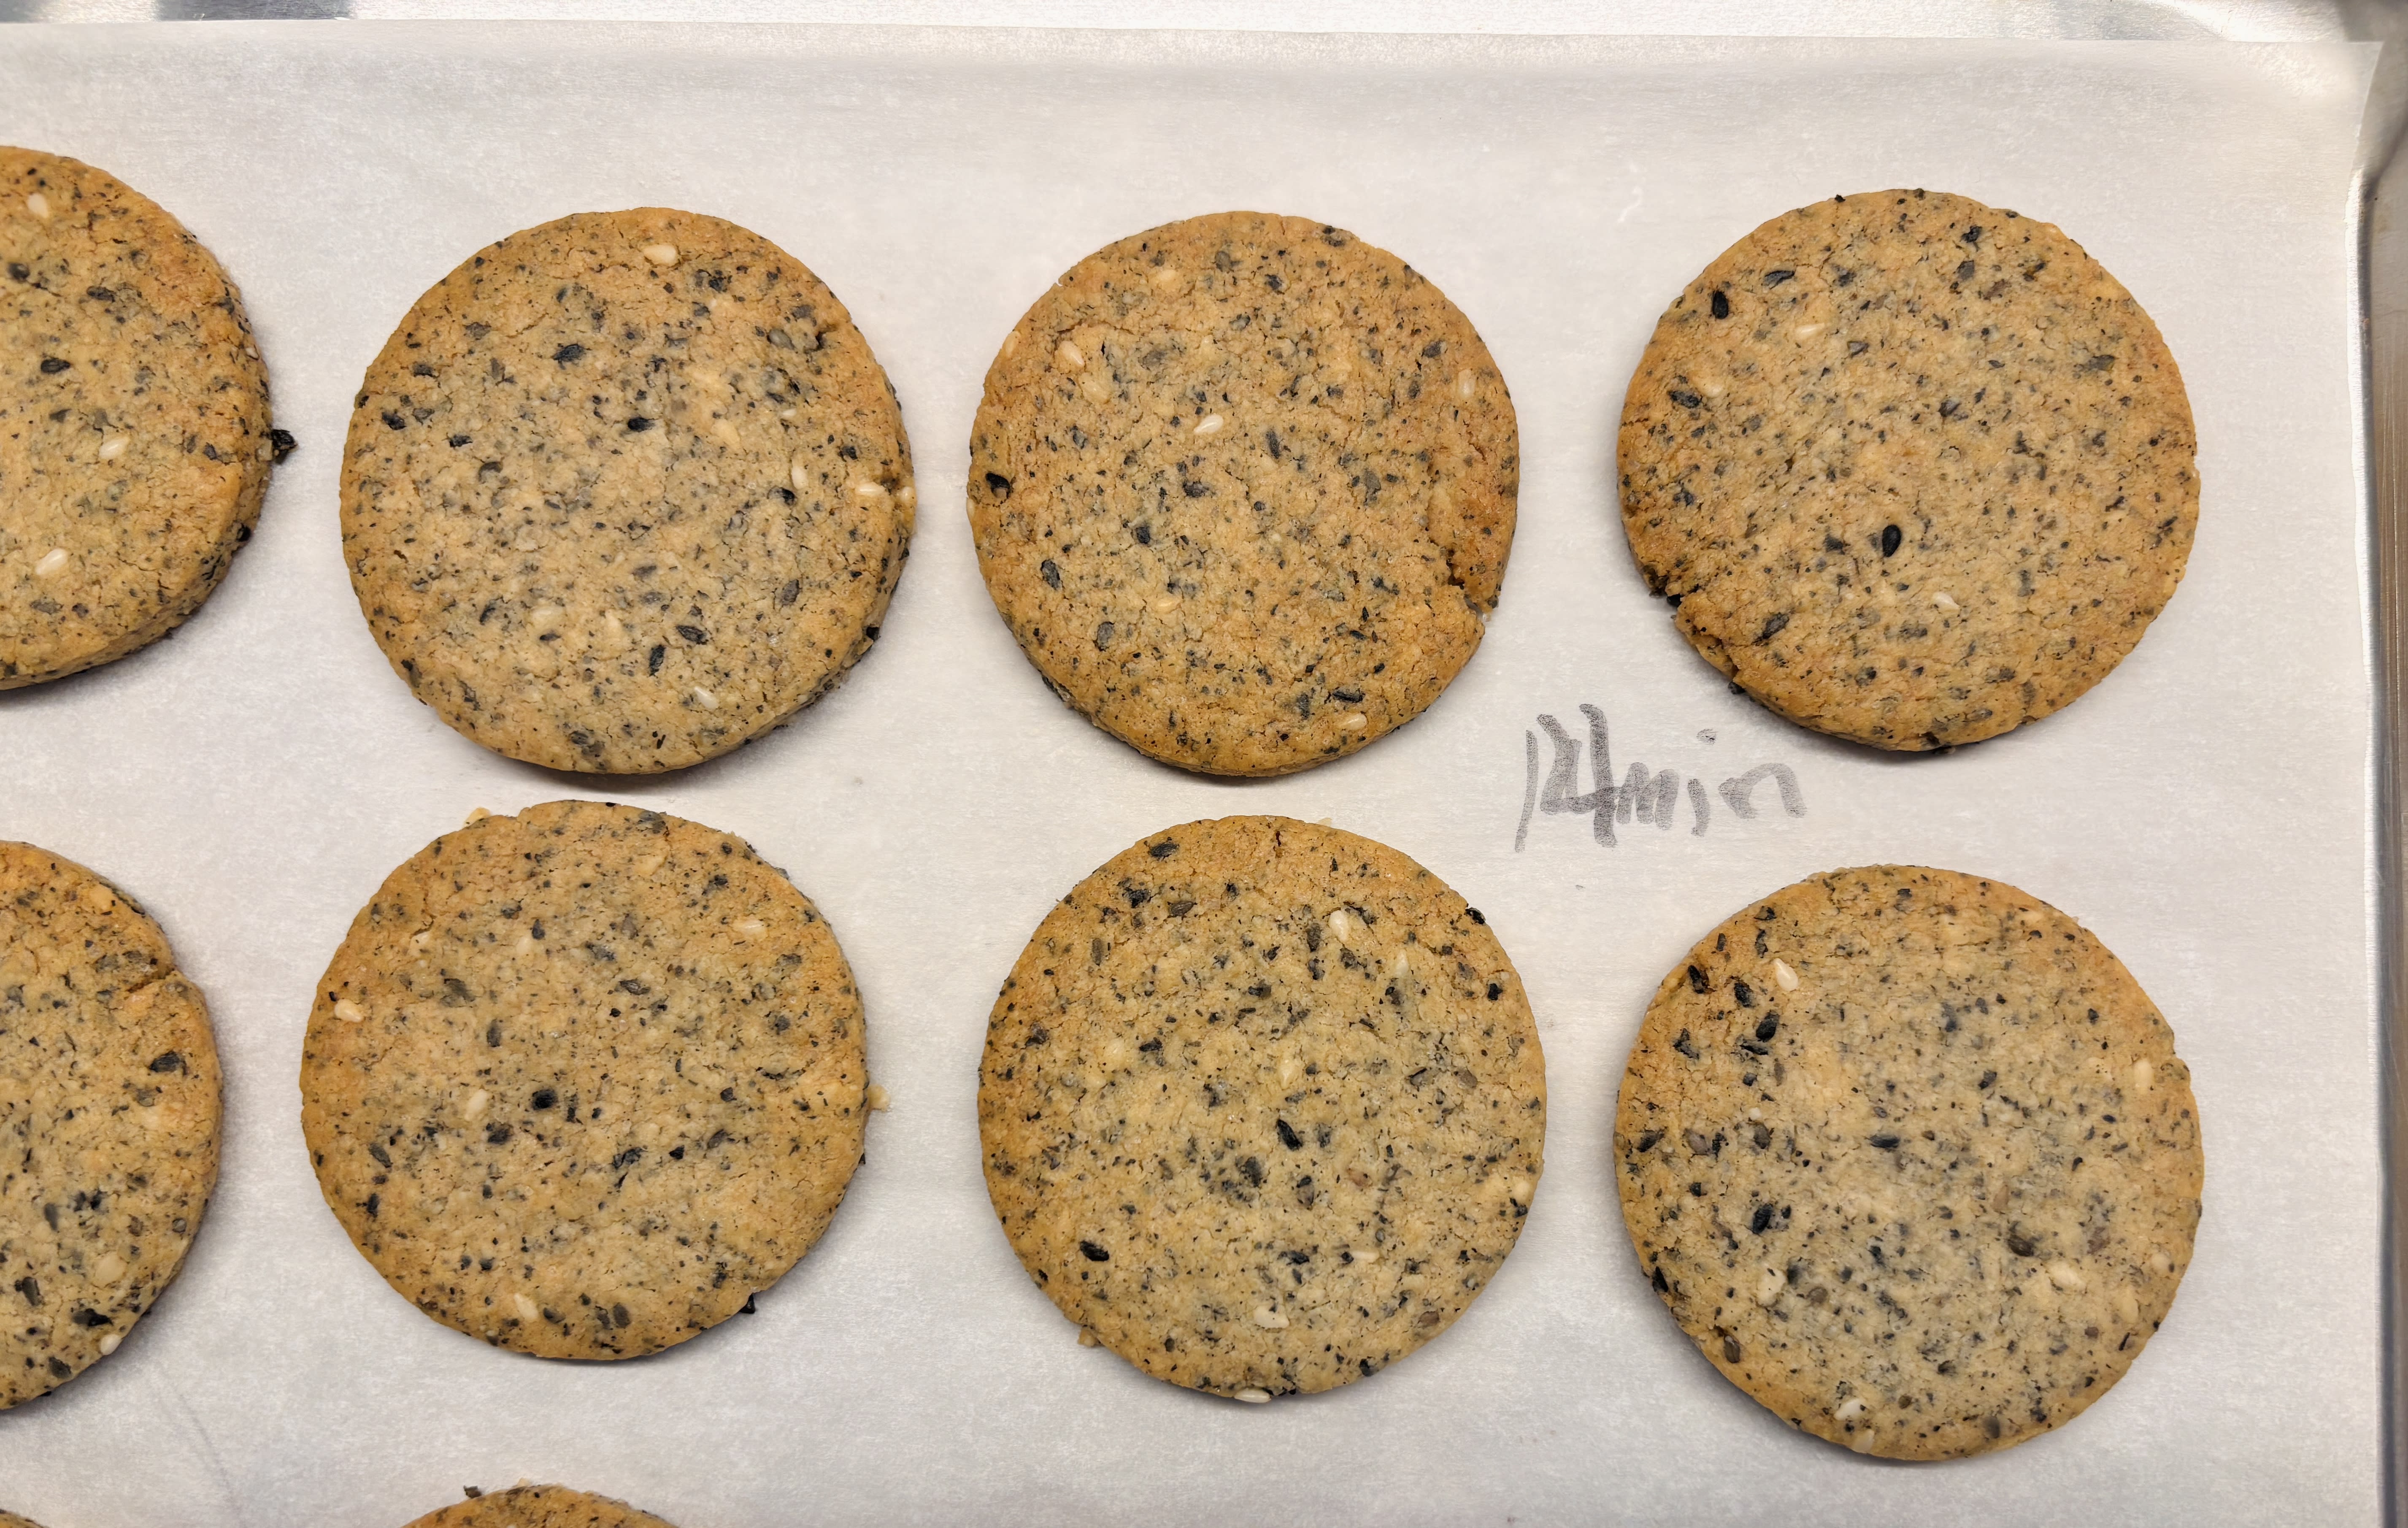 These were baked for 14 minutes; at 12 minutes, they’ll be lighter. The darker ones are crispier but the lighter ones meld more smoothly with the filling.
In the book, I gave a chocolate and chocolate-hazelnut options for filling the cookies, if you’d prefer to do that instead of using jam. But you can also fill them with Salted butter caramel sauce (page 283) that’s cooled until it’s thick and spreadable. And in place of poppyseeds, you can use very coarsely ground black or white sesame seeds instead. Or leave them whole! You’ve got options.
 Poppyseed cookies filled with salted butter caramel.
– I’ve been playing with the Butternut squash pie (page 96), which is a great holiday treat. Some have said that it makes a bit too much filling for the dough. I recast the recipe so there’s no leftover filling, and you can get that here.

Sharp-eyed readers might notice the profiteroles on the cover of the book, from Grand Brasserie in Paris, have a layer of craquelin over the top. So I thought I’d share a recipe for chocolate craquelin.
This recipe is based on my craquelin recipe, which I retoggled to make them chocolate. You can get the chocolate craquelin recipe here.
Enjoy!


October 16, 2025
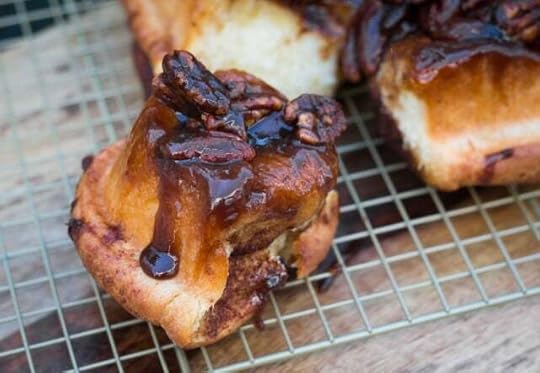
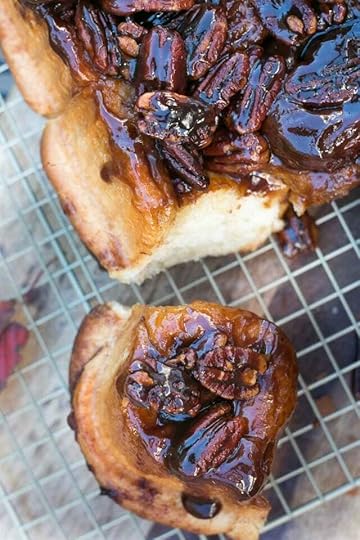
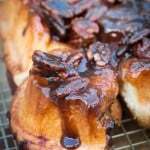
Maple Pecan Sticky Buns

I’ve never been a huge fan of sticky buns because I find many of them teeth-screamingly sweet. That said, these dial down the sweetness in favor of flavor, courtesy of two of my favorite things: pecans and maple syrup. And having the two swaddled in a butterscotch-like caramel seems to make each one taste even better than they do on their own.
I was intrigued by a new baking book, The New Sugar & Spice by Samantha Seneviratne, whose subtitle promises recipes for “bolder baking,” which immediately caught my interest. I don’t need to wow me with innovation – tweaking classics is often good enough. The wheel can only be reinvented so many times and no need to repair something that doesn’t need fixing.
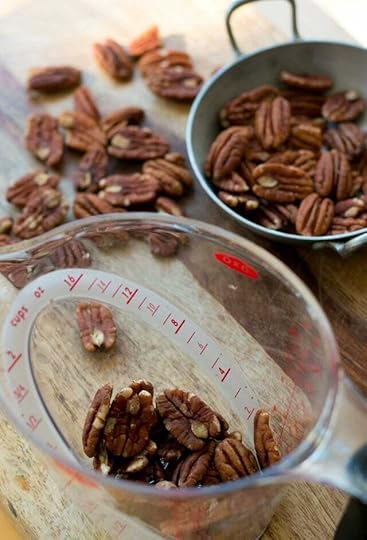
It’s unfortunate that I am hooked on both, and like other expats, maple syrup and pecans are two things that we tend to hoard. Sirop d’érable (maple syrup) is available in Paris, the best bottles are sold at natural food stores, and pecans are around, although I often find them not quite at their freshest by the time they’ve hit the store shelves. So I lug those back with me. Fortunately, on occasion, I’m treated to bags by visiting friends and guests. Thank goodness I now have an American-sized freezer.
Well…to be honest, I used to hide them in the freezer, but since I’m a compulsive nibbler, I was getting tired of teething on frozen pecans. So I gave up and started keeping them in a drawer, which means easier access to these precious beauties.
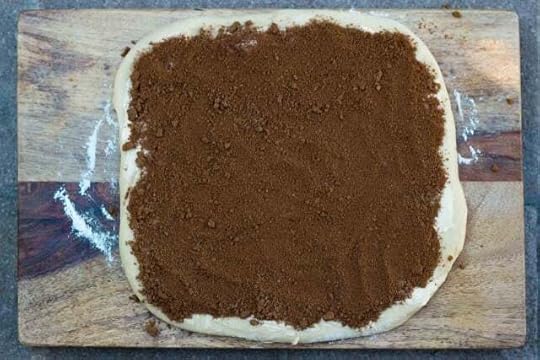
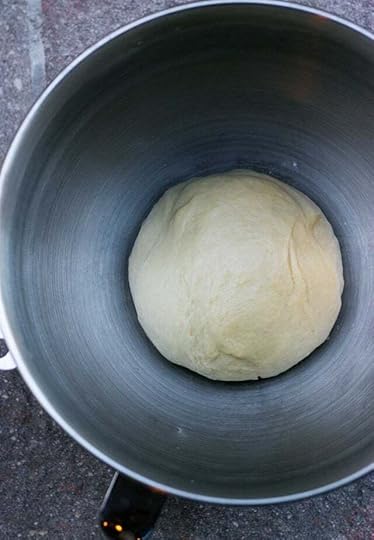
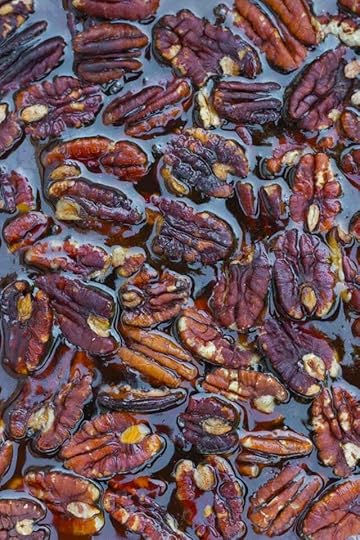
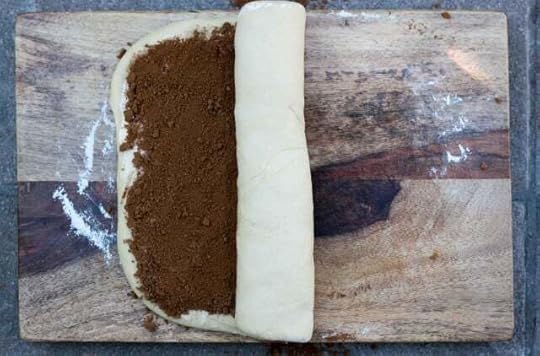
Sticky buns are very easy to make. You start with a simple yeasted dough, softened with milk. Once it rises, you strew the rolled out dough with a mixture of brown sugar and cinnamon. Then comes the fun part: Rolling them up!
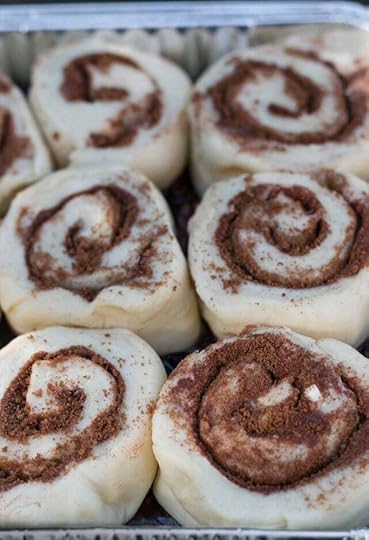
The doughy roll then gets sliced into spiraled wheels. Watching them rise in the pan – then rise even further in the oven, is one of the great joys in life. Eating them, of course, is the best part. But if you’ve got kids (or even a middle-aged man, like me), this is a really fun project for a weekend or during a holiday break.
While I was making these, I posted a live video on Snapchat, which is a fun way to share short videos that I’ve been playing around with. The downside is that I got so involved with shooting and sharing that I neglected to chop the pecans before using them, as you can see in the pictures. On Snapchat, posts and videos disappear after twenty-four hours – so when it’s gone, it’s gone! But you can follow me on Snapchat for other tips, future videos and a soupçon of occasional goofiness at davidlebovitz.
As much as I’m freaked out by new technologies, the old ones tend to vex people, too. Folks get freaked out by candy thermometers, but if you use one, you can get your caramel precisely to where it should be. I “went rogue” and didn’t use one, and my sticky buns got a touch too dark, which I liked for the “on the edge” flavor, but resulted in a sticky bun glaze that was less-runny that what some might be used to. So if you have one, you should put that candy thermometer to use when making these sticky buns.
The result of my morning of baking was a tray full of sticky buns that were great for a mid-morning snack but not bad for bringing to a meeting later that evening, which I did. The next day, people raved about them. I’ve got a few other “bold” recipes bookmarked from Samantha’s gorgeous book. And I’m going to make sure my stock of pecans doesn’t run too low, because I’ll be making these again in the near future.
 PrintMaple Pecan Sticky BunsAdapted from The New Sugar & Spice by Samantha SeneviratneThe original recipe calls for baking eight spirals in a 9-inch (23cm) round pan, but I wanted to get nine smaller ones, so used an 8-inch (20cm) square pan and cut the rolled up dough into nine disks. You can do either. Note: Do not use a springform pan for this recipe. Because of the maple caramel, the pan may leak. Even if you wrap it well with foil, caramel may seep out and you don’t want the lovely maple-accented glaze on foil. You want it on your sticky buns.The original recipe also called for a mix of walnuts and pecans, and I opted for all pecans since they’re one of life’s great luxuries to me. But you can swap out any nuts as you wish. There was also 1/2 cup (80g) of raisins added to the caramel along with the pecans, which I omitted as well, although you’re welcome to add them, or another dried fruit, like cranberries or sour cherries.You’ll also note the recipe calls for bread flour. Its higher protein content means that you’ll have better gluten formation and sturdier bread, or buns, as in this case. Most well-stocked supermarkets carry it or you can buy it . You can replicate it by replacing 1 1/2 teaspoons of all-purpose flour with 1 1/2 teaspoons of vital wheat gluten, per cup, or 140g, of all-purpose flour. (In France, I use T65 organic flour and add vital wheat gluten, which is available in natural food stores.)Course SnackIngredientsFor the dough6 tablespoons unsalted butter cubed2/3 cups (160ml) whole or lowfat milk3 tablespoons granulated sugar1 3/4 teaspoon active dry yeast1 large egg2 1/2 cups (320g) bread flour1/2 teaspoon kosher or sea saltFor the topping6 tablespoons (3 ounces, 85g) unsalted butter1/4 cup (45g) dark brown sugar1/4 cup (60ml) maple syrup (dark amber)1/2 teaspoon kosher or sea salt1 cup (140g) pecans lightly toasted and coarsely choppedFor the filling1/4 cup (45g) dark brown sugar2 tablespoons ground cinnamon1/2 teaspoon kosher or sea salt3 tablespoons (1 1/2 ounces, 42g) butter salted or unsalted, at room temperatureInstructionsTo make the dough, warm the butter, milk and sugar in a small saucepan. Pour into the bowl of a stand mixer and let stand until slightly tepid. (You can make this without a stand mixer. If so, pour the milk mixture into a medium bowl.) Sprinkle the yeast over the milk, stir gently, and let sit in a warm place until it starts to bubble, about 10 to 15 minutes.Mix in the egg, flour, and salt, and knead with the paddle or dough hook at low-to-medium speed until smooth and elastic, about 5 minutes. (If kneading by hand, it may take a bit longer.) Knead the dough a few times with your hand until it’s a smooth ball, place it back in the bowl and cover the bowl with a kitchen towel. Let rise in a warm place until doubled, about 1 to 1 ½ hours. Time can vary, and it may take longer, or less time.While the dough is rising, make the topping. Lightly butter a 9-inch (23cm) round or 8-inch (20cm) square cake pan. Heat the butter, brown sugar, maple syrup and salt in a small saucepan fitted with a candy thermometer and cook over medium heat until the mixture comes to a boil. When it gets foamy, after a minute or so, when a few of the bubbles start to get larger, remove from heat. (Samantha notes in her book that if using a thermometer, the temperature should read 212ºF (100ºC).Pour the maple caramel into the prepared cake pan and strew the pecans over the caramel. Set aside.To make the filling, mix the brown sugar, cinnamon and salt in a small bowl. Set aside.When the dough has risen, knead the dough a couple of times on a lightly floured countertop and roll it into a 10-inch (25cm) square. Spread the softened butter over the dough and sprinkle evenly with the filling mixture. Roll up the dough as tightly as possible and using a serrated knife, cut the dough into 8 or 9 slices. If using a square pan, cut into 9. If using a round pan, cut into 8. Place them in the pan with the cut side up. Cover loosely with plastic wrap or a clean, lint-free kitchen towel, and let rise until almost doubled, about 1 hour.Ten minutes before you’re ready to bake the sticky buns, preheat the oven to 375ºF (190ºC). Place the pan of sticky buns on a baking sheet lined with foil (to catch any overflow drips or spill) and bake until the center roll is lightly browned on top and it doesn’t feel soft when you press it with your finger, 25 to 30 minutes.Remove the rolls from the oven. Let cool for 5 minutes then run a knife around the outside (if possible, as the buns may have overtaken the rims), then tip the sticky buns out onto a cooling rack or serving platter.NotesServing and storage: Sticky buns are always best served warm, and the day they are made but are fine the next day. If you wish, you can keep them well-wrapped for a few days, rewarming them in a low oven, wrapped in foil until heated through. They can be frozen for up to two months.
Related Posts
Ingredients for American Baking in Paris
Ingredient Ingredients and Substitutions
Vegan Sticky Buns (Minimalist Baker)
Gluten-Free Sticky Buns (Faithfully Gluten-Free)
September 24, 2025
Paris book launch and booksigning of ready for dessert!
I’ll be at AXS design, one of my favorite shops in Paris, celebrating the release of Ready for Dessert on Sept 30th from 5:30 to 7pm.

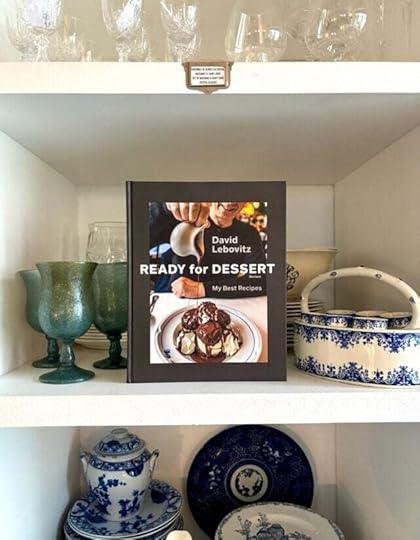
AXS is filled with treasures, including French dinnerware, glasses and linens, and lots more. They were kind enough to lend me some of their beautiful items for the photos in book, so I’m thrilled they’re hosting the book launch and signing. Books will be available for purchase and I’ll be on hand to personalize them for you.
Thanks to Comté for providing samples of French cheese for the event.
See you there!

June 1, 2025
paris book event – june 29, 2025

Join me and my friend Jane Bertch in Paris on Sunday, June 29th, for a booksigning event from 3pm to 4:30pm at La Cuisine Paris at 78 Quai de l’Hôtel de Ville (4th).
I’ll be signing paperback copies of my books L’Appart and The Sweet Life in Paris, and Jane will be signing copies of her memoir of opening a cooking school in Paris, The French Ingredient.

Note that books are in limited supply and you are welcome to bring books you’ve purchased elsewhere. Please note that the venue is not able to take credit card payments on-site.
Stop by and say hi!
April 8, 2025
Get my new book ready for dessert…now available!
It’s almost ready!
Coming this Fall is the new, completely revised edition of Ready for Dessert: My Best Recipes.
[It’s now available at ==> Bookshop, Amazon, Barnes & Noble and at the links below.]
When my publisher told me they wanted a new edition of the book, I decided to revise the book completely, from top to bottom. Ready for Dessert is a compilation of my favorite recipes, so I knew that I wanted to keep my signature Chocolate chip cookies, the Chocolate-cherry biscotti accented with black pepper, and classic Black & white cookies, along with everyone’s favorite, the Fresh ginger cake, as well as a tangy Lemon semifreddo, and the recipe for the Coconut layer cake I made for Alice Waters’ father on his birthday every year.
To sweeten the pot, I added brand-new recipes to Ready for Dessert, favorites culled from my kitchen in Paris, including Île flottante (inspired by the version I always order at a favorite local bistro), a very special Riz au lait (rice pudding) topped with crunchy, candied nuts and salted butter caramel sauce, buttery Palets Breton cookies, and my version of the iconic, and irresistible (truly!), Maple tart from Tapisserie in Paris, the pastry shop of the highly-regarded restaurant Septime, so you can make it at home.
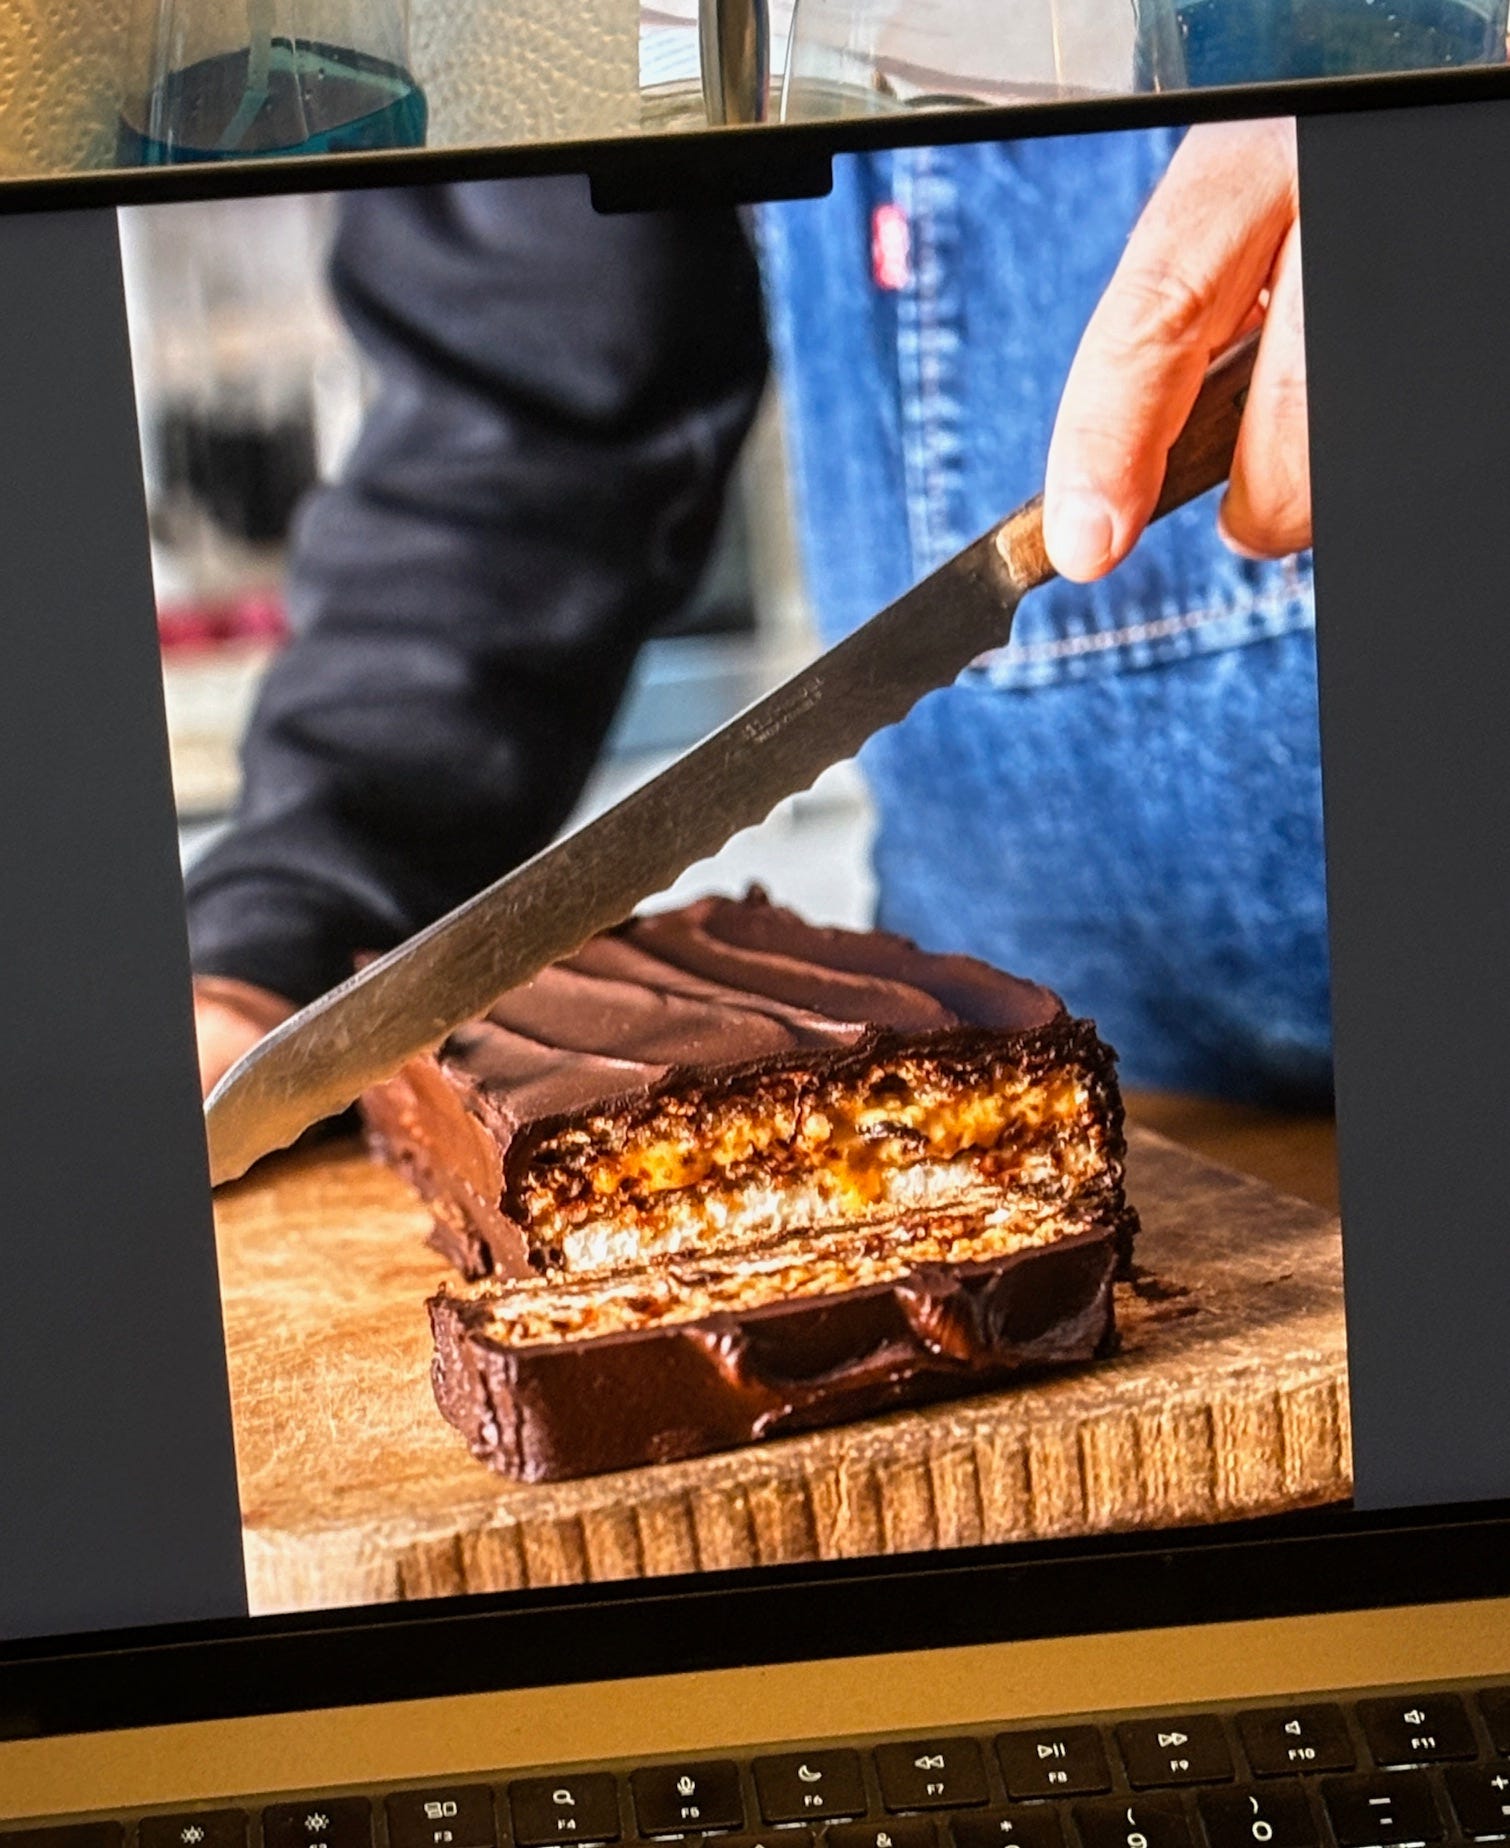 One of my favorite pictures (and recipes) from the new edition of Ready for Dessert is the Marjolaine cake. We made several of these cakes for the photo shoot and gave leftovers to the local butcher shop – and now I’m their favorite customer.
Award-winning photographer Ed Anderson, who photographed my books, My Paris Kitchen, Drinking French, and The Perfect Scoop, returned to Paris to shoot the pictures for the book, in my kitchen and backyard, as well as out-and-about in the city. Another bonus was that I got to work with two of my favorite food stylists, Elisabet der Nederlanden and George Dolese. We had a blast shopping in Paris for ingredients, and making the recipes in my kitchen, then eating them as well.
When the food stylists end up devouring your recipes during a photo shoot, that’s the highest compliment a cookbook author can have. They bake and cook food all day long, so are picky about what they eat. (And boy, did they eat!) I also invited friends to come by and join us, so you’ll find guests shots in the book as well.
The all-new edition of Ready for Dessert is now available at your local independent bookseller and online.
Below are some bookstores and online retailers where you can order the book:
| Amazon | Bookshop.org | Now Serving | Barnes & Noble | Omnivore | Book Larder | Kitchen Arts & Letters | Bold Fork | Books are Magic | Amazon France | Powell’s
| RJ Julia | Strand | Smith & Son Paris | Amazon UK | Archestratus | Politics and Prose | Vivienne Culinary Books | Book Passage | Elliot Bay | Village Books | East End Books | Indigo Canada | Amazon Australia | Shakespeare and Company Paris |
my new book, ready for dessert, is available for pre-order!
It’s almost ready!
Coming this Fall is the new, completely revised edition of Ready for Dessert: My Best Recipes.
[It’s now available for preorder ==> Bookshop, Amazon, Barnes & Noble and at the links below.]
When my publisher told me they wanted a new edition of the book, I decided to revise the book completely, from top to bottom. Ready for Dessert is a compilation of my favorite recipes, so I knew that I wanted to keep my signature Chocolate chip cookies, the Chocolate-cherry biscotti accented with black pepper, and classic Black & white cookies, along with everyone’s favorite, the Fresh ginger cake, as well as a tangy Lemon semifreddo, and the recipe for the Coconut layer cake I made for Alice Waters’ father on his birthday every year.
To sweeten the pot, I added brand-new recipes to Ready for Dessert, favorites culled from my kitchen in Paris, including Île flottante (inspired by the version I always order at a favorite local bistro), a very special Riz au lait (rice pudding) topped with crunchy, candied nuts and salted butter caramel sauce, buttery Palets Breton cookies, and my version of the iconic, and irresistible (truly!), Maple tart from Tapisserie in Paris, the pastry shop of the highly-regarded restaurant Septime, so you can make it at home.
One of my favorite pictures (and recipes) from the new edition of Ready for Dessert is the Marjolaine cake. We made several of these cakes for the photo shoot and gave leftovers to the local butcher shop – and now I’m their favorite customer.Award-winning photographer Ed Anderson, who photographed my books, My Paris Kitchen, Drinking French, and The Perfect Scoop, returned to Paris to shoot the pictures for the book, in my kitchen and backyard, as well as out-and-about in the city. Another bonus was that I got to work with two of my favorite food stylists, Elisabet der Nederlanden and George Dolese. We had a blast shopping in Paris for ingredients, and making the recipes in my kitchen, then eating them as well.
When the food stylists end up devouring your recipes during a photo shoot, that’s the highest compliment a cookbook author can have. They bake and cook food all day long, so are picky about what they eat. (And boy, did they eat!) I also invited friends to come by and join us, so you’ll find guests shots in the book as well.
The all-new edition of Ready for Dessert will be available September 30th, and is now available for pre-order at your local independent bookseller and online.
Below are some bookstores and online retailers where you can pre-order the book:
| Amazon | Bookshop.org | Now Serving | Barnes & Noble | Omnivore | Book Larder | Kitchen Arts & Letters | Bold Fork | Books are Magic | Amazon France | Powell’s
| RJ Julia | Strand | Smith & Son Paris | Amazon UK | Archestratus | Politics and Prose | Vivienne Culinary Books | Book Passage | Elliot Bay | Village Books | East End Books | Indigo Canada | Amazon Australia |
To be one of the first people to get a copy, pre-order your book today!
ready for dessert – all new, and revised!
It’s almost ready!
Coming this Fall is the new, completely revised edition of Ready for Dessert: My Best Recipes.
[It’s now available for preorder ==> Bookshop, Amazon, Barnes & Noble and at the links below.]
When my publisher told me they wanted a new edition of the book, I decided to revise the book completely, from top to bottom. Ready for Dessert is a compilation of my favorite recipes, so I knew that I wanted to keep my signature Chocolate chip cookies, the Chocolate-cherry biscotti accented with black pepper, and classic Black & white cookies, along with everyone’s favorite, the Fresh ginger cake, as well as a tangy Lemon semifreddo, and the recipe for the Coconut layer cake I made for Alice Waters’ father on his birthday every year.
To sweeten the pot, I added brand-new recipes to Ready for Dessert, favorites culled from my kitchen in Paris, including Île flottante (inspired by the version I always order at a favorite local bistro), a very special Riz au lait (rice pudding) topped with crunchy, candied nuts and salted butter caramel sauce, buttery Palets Breton cookies, and my version of the iconic, and irresistible (truly!), Maple tart from Tapisserie in Paris, the pastry shop of the highly-regarded restaurant Septime, so you can make it at home.
One of my favorite pictures (and recipes) from the new edition of Ready for Dessert is the Marjolaine cake. We made several of these cakes for the photo shoot and gave leftovers to the local butcher shop – and now I’m their favorite customer.Award-winning photographer Ed Anderson, who photographed my books, My Paris Kitchen, Drinking French, and The Perfect Scoop, returned to Paris to shoot the pictures for the book, in my kitchen and backyard, as well as out-and-about in the city. Another bonus was that I got to work with two of my favorite food stylists, Elisabet der Nederlanden and George Dolese. We had a blast shopping in Paris for ingredients, and making the recipes in my kitchen, then eating them as well.
When the food stylists end up devouring your recipes during a photo shoot, that’s the highest compliment a cookbook author can have. They bake and cook food all day long, so are picky about what they eat. (And boy, did they eat!) I also invited friends to come by and join us, so you’ll find guests shots in the book as well.
The all-new edition of Ready for Dessert will be available September 30th, and is now available for pre-order at your local independent bookseller and online.
Below are some bookstores and online retailers where you can pre-order the book:
| Barnes & Noble | Bookshop.org | Now Serving | Omnivore | Amazon | Book Larder | Kitchen Arts & Letters | Bold Fork | Books are Magic | Amazon France | Powell’s |
| RJ Julia | Strand | Smith & Son Paris | Amazon UK | Archestratus | Politics and Prose |
To be one of the first people to get a copy, pre-order your book today!
February 17, 2025
Chouquettes: French Cream Puff Recipe
Dinner in Paris generally starts at 8 pm, especially in restaurants, and I get ravenously hungry between lunch and dinner.

Parisians do dine rather late – often not until 9:30 pm or later, and that’s an awfully long stretch. So French people visit their local pâtisserie for an afternoon snack, known as le goûter, although nowadays Parisians often call it le snack.
Le snack is often nothing more than a buttery financier or a tender madeleine. At home, French children at home are often given a split piece of baguette with a bar of dark chocolate tucked inside to keep them happy until dinner.
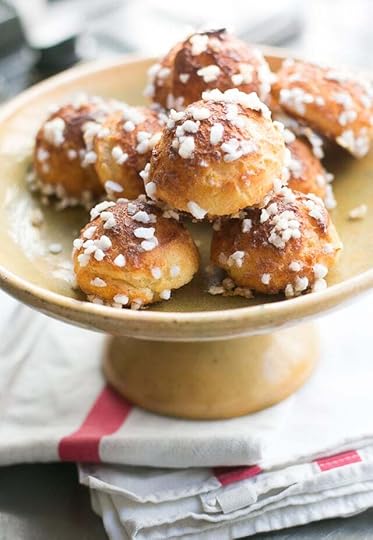
But my snack of choice is invariably les chouquettes: Cream puffs covered with crunchy nuggets of sugar, then baked until golden-brown. The eggy, pillowy puffs are piled uneventfully behind the counter and sold in crisp little paper sacks, each one holding about 100 grams, or about 10. I found that engaging the counter person in a few words of niceties will often mean that before the ends of the bag are twisted shut, an extra puff will be tossed in as a little gift for l’américain.
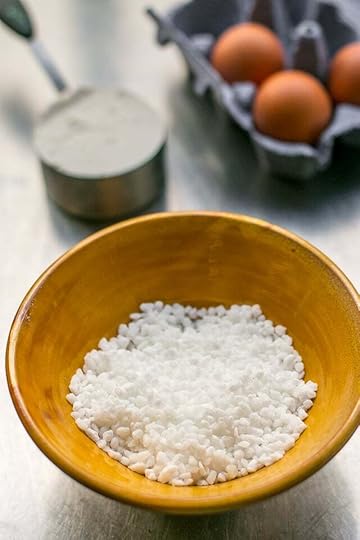
Nothing is easier to make than chouquettes and you can bake them right with ingredients you likely already have on hand. The only thing you’ll need to find is pearl sugar, which gives the puffs their signature crunch. Some tell me you can buy it at Ikea stores, or you can find it at King Arthur or on Amazon[image error]">Amazon. If you have sugar cubes, you can crush those up into rough chunks and use those, although they’re not quite the same. And if you’re like me, and like chocolate, you could press some chocolate chips into a few of the puffs before baking.
This is one of my favorite of all French snacks and I can polish away a whole bag, or tray, in no time. These are best made and eaten right away, or later the same day – if they last that long!
 PrintChouquettesFrom The Sweet Life in ParisShaping the mounds of dough is easiest to do with a pastry bag, although you can use two spoons or a spring-loaded ice cream scoop.Pearl sugar is available in the U.S .from King Arthur and at G. Detou in Paris, and is also available from French companies such as Daddy (called perles de sucre) and Vahiné (sucre chouquettes). You can approximate pearl sugar by crushing sugar cubes in a sturdy zip-top freezer bag with a rolling pin or hammer.Course DessertCuisine FrenchServings 6 servingsIngredients1 cup (250ml) water1/2 teaspoon salt2 teaspoons sugar6 tablespoons (90g) unsalted butter cut into small chunks1 cup (140g) flour4 large eggs at room temperatureGlaze: 1 egg yolk mixed with 1 teaspoon milkPearl sugarInstructionsPreheat the oven to 425 degrees (220 C.) Line a baking sheet with parchment paper or a silicone baking mat. (Depending on the size of your baking sheets, it may take two.)Heat the water, salt, sugar, and butter in a small saucepan, stirring, until the butter is melted. Remove from heat and dump all the flour in at once. Put the pan back on the heat and stir rapidly until the mixture is smooth and pulls away from the sides of the pan.Allow dough to cool for two minutes, then briskly beat in the eggs, one at a time, until smooth and shiny.Using two spoons, scoop up a mound of dough with one spoon roughly the size of an unshelled walnut, and scrape it off with the other spoon onto the baking sheet. You can also use a pastry bag fitted with a plain 1/2-inch tip and pipe them.Place the mounds evenly-spaced apart on the baking sheet(s). Brush the top of each mound with some of the egg glaze then press the pearl sugar over the top and sides of each mound. Use a lot. Once the puffs expand rise, you’ll appreciate the extra effort (and sugar.)Bake the cream puffs until puffed and well-browned, about 25 to 30 minutes. If they get too dark midway through baking, lower the heat of the oven to 375ºF (190ºC) and continue baking. (If you want to make them crispier, you can poke a hole in the side with a knife after you take them out of the oven to let the steam escape.)NotesStorage: The cream puffs are best eaten the same day they’re made. Once cooled, they can be frozen in a zip-top freezer bag for up to one month. Defrost at room temperature, then warm briefly on a baking sheet in a moderate oven, until crisp.
February 4, 2025
egg substitutes
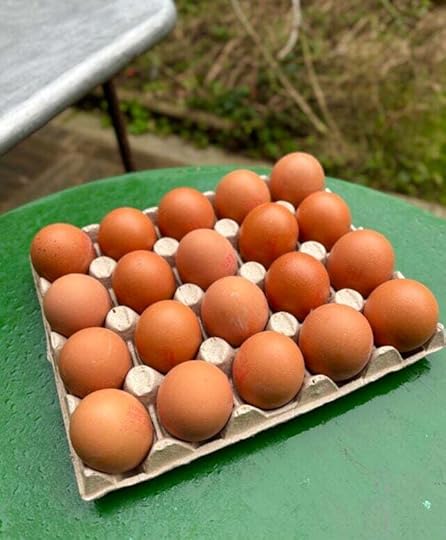
In some places, eggs are in short supply. For bakers, that may present a problem for us. But the folks at King Arthur Baking have provided an excellent guidelines to using egg substitutes, with tips for using everything from seltzer and flax seeds, to chickpea liquid and fruit puree, so you can keep on baking.
Check out their detailed guide to egg substitutions guide here!
January 19, 2025
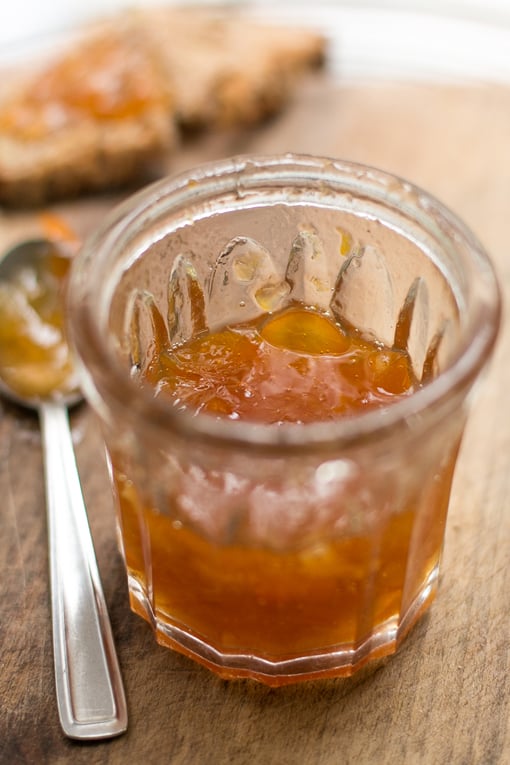
Kumquat Marmalade
I’ve been on a marmalade bender lately. Well, it’s actually been for the last few weeks. Winter, of course, is marmalade season and the markets in Paris are heaped with citrus: Corsican clementines, pretty yellow bergamots, hefty pink grapefruits from Florida (although some infer appellations from elsewhere – namely, the Louvre), leafy lemons from Nice, and lots and lots of oranges.
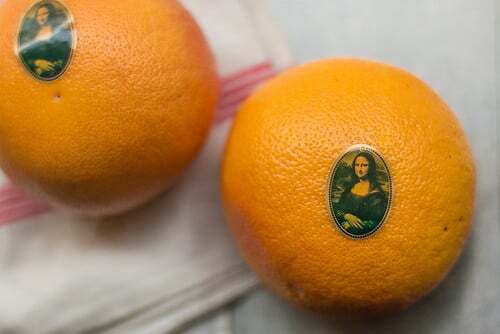
The stands are so piled up that it’s not uncommon to be walking down the aisle and have an orange roll off of the piles and land on your foot. (Which is why it is a good idea to wash any fruit before you use it.) This means I’ve got so many jars of marmalade, that when my friend Luisa stopped by and saw the jars piled on top of a shelf in my bedroom, she said “I’ve doing the same thing ” at her apartment in Berlin. Sometimes I think jam-making could be classified as an epidemic and if so, there’s ample evidence that I’m ready for an intervention.
While kumquats were once classified with their look-alike citrus brethren and sistern (admittedly, it can be hard to tell as it’s difficult to get a look under their navels), they are now placed in another genus category (Fortunella), even though they share many characteristics of citrus fruits.
One of those characteristics is that they are winter fruits. And another is that they are très bon pour la santé (good for your health), containing lots of vitamin C. And they also make you feel happier, since not only does their tangy-bitter flavor brighten up even the darkest of winter day, nothing makes me happier than to wake up in the morning and gaze at my shelf of marmalade first thing in the morning.
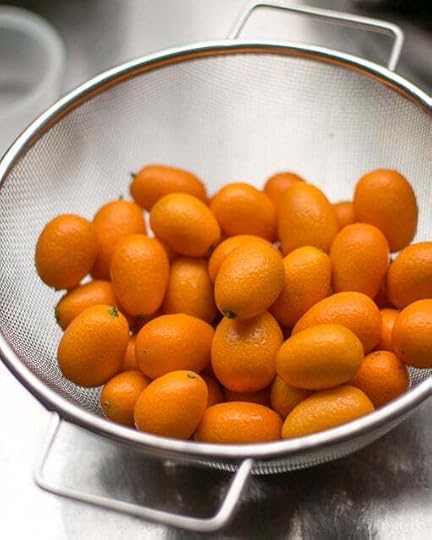
I was especially happy when I was doing my shopping at the outdoor market and came across a big bin of kumquats. I scooped up a nice-sized bag of them and brought them home, where they patiently waited in the refrigerator until I decided what to do with them.
Originally I’d considered giving them a quick-candying and strewing them over poached prunes with a scoop of ice cream. But I ended up sticking my fingers into the bowl of prunes a few too many times during the week and ended up with a small puddle of cinnamon-spiced dark syrup pooled in the bottom of a container in my refrigerator, which I didn’t think would go with anything.
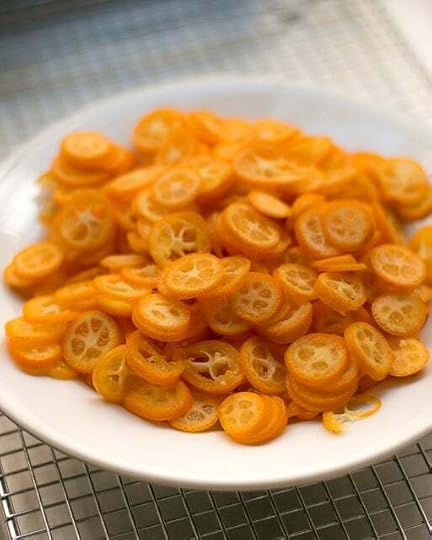
So I decided to get out my little serrated knife, slice up my Fortunella fruits, and make marmalade. I added a couple of lemons not just to bulk it up, but because I thought with the added sugar, the marmalade would benefit from some extra acidity.
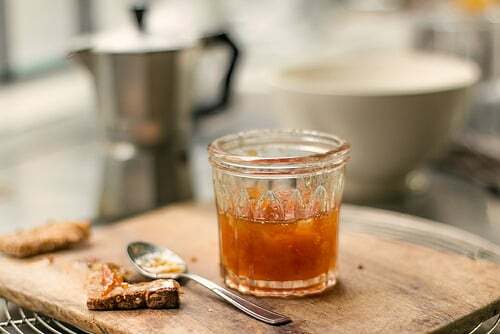
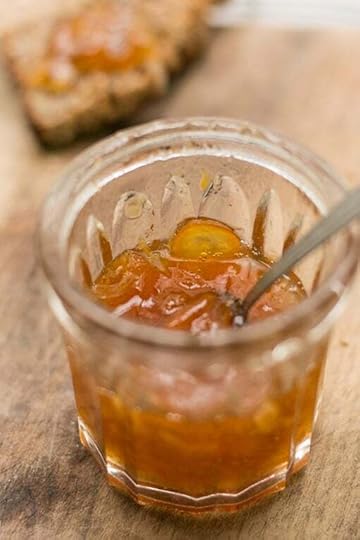
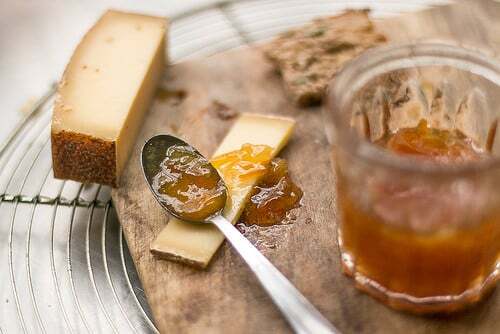
I normally spoon my marmalades on morning toast, but after I made this batch, I had cleaned up the kitchen and was going to reward myself to a nice bowl of split pea soup for lunch with some Comté cheese and – like most good ideas (and a few of the bad ones) – it suddenly occurred to me that the tart marmalade might be nice with the nutty cheese I was cutting into batons.
And sure enough, it was. Fortunately I have three nice jars of marmalade to add to my collection. So far this year I’ve made Seville orange marmalade (eight jars) and four jars of mixed marmalade, using the bergamots and citron that were plucked off a tree in Sicily. After all that slicing, seeding, and simmering, the last pot of marmalade has been jarred and stored; they’ll last me through the winter. And if I am prudent, a number of spring and summer mornings as well.
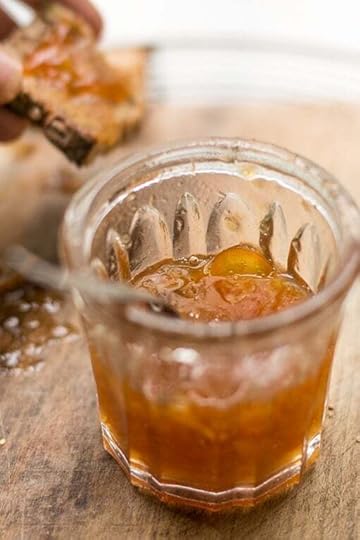
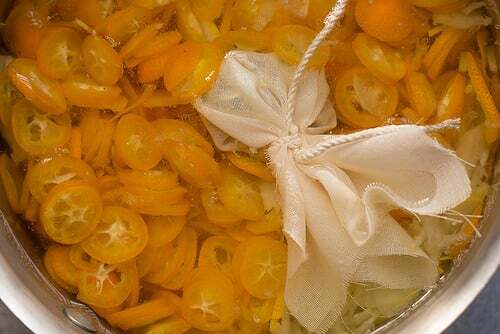
 PrintKumquat MarmaladeMany of the little rings of kumquats will, unfortunately, come apart as you cook the marmalade. The reward, however, is gorgeous jars of tangy marmalade that you’ll be happy to spread on your morning toast or serve with a bit of cheese after dinner. I served mine with Comté, but a nice goat cheese or another nutty mountain cheese, like Gruyère, would pair nicely with it.
It takes a bit of patience to slice and pluck out all the seeds from the kumquats, but you can get 2 to 3 jars of marmalade for your efforts. I use a small serrated knife to slice off the stem end, then start slicing the kumquats crosswise, until I get close to the center. Finally, I stick the tip of the knife into the area where the seeds are and slip them into a small bowl. Because the seeds are rather large, any that you miss you can usually find just by doing a little scanning of your pile of sliced kumquats.
I use oval Nagami kumquats, which are more puckery than the round Meiwi kumquats, which you sometimes come across. Do try to get organic or unsprayed fruit from your local market or natural food store. The kirsch is optional, but it does nicely round out the flavor of the marmalade. You can substitute another liquor, such as gin, Grand Marnier or Cointreau, light rum, or a dash of brandy. Or it can be omitted, if you wish.Ingredients2 lemons stemmed, halved lengthwise, seeded, and very thinly sliced1 pound (450g) kumquats stemmed, seeded, and slicedReserve the seeds from the lemon and kumquats5 1/2 cups (1.3L) water2 cups (400g) sugarpinch of saltOptional: 1/2 teaspoon kirsch or other liquorInstructionsPut the lemon slices in a large non-reactive pot. Cover with cold water and bring to a boil. Reduce the heat and simmer until the lemons are translucent, about 5 minutes. Drain. (Discard the water.)Put the blanched lemons back in the pot. Tie the seeds from the lemons and kumquats securely in a piece of cheesecloth and add the seed sack to the pot along with the sliced kumquats and water. Bring to a boil; remove from heat, cover, and let stand 24 hours.The next day, put a small plate in the freezer.Add the sugar and salt to the pot, and cook the marmalade for 30 to 45 minutes over medium heat. Remove the bag of seeds and when it’s cool enough to handle, squeeze the seeds in the cheesecloth using your hands or place it in a ladle and press it with the back of a soup spoon (being careful not to break the fabric and release the seeds) over the jam pot to so the pectin goes directly into the marmalade mixture.Continue cooking until it has reached the jelling point, about 220ºF (104ºC) degrees, if using a candy thermometer. To test the marmalade, turn off the heat and put a small amount on the plate that has been chilled in the freezer and briefly return it to the freezer. Check it in a few minutes; it should be slightly jelled and will wrinkle a bit when you slide your finger through it. If not, continue to cook until it wrinkles slightly on the chilled plate when you nudge it.Remove from heat, then stir in the kirsch (if using), and ladle the mixture into clean jars.NotesNote: I store my jams and marmalades in a cool place, often the refrigerator if not planning to use them within a few weeks. if you wish to can or preserve them, you can check out these canning tips.
Related Recipes
Kumquat Marmalade (Recipe Girl)
Kumquat Marmalade with Star Anise (Drizzle & Dip)
Sunday Morning Kumquat Jam (Amateur Gourmet)
Small Batch Kumquat Marmalade (Food in Jars)
Maple Kumquat Marmalade (A Bloggable Feast)