Marie Bostwick's Blog
August 3, 2026
10 Fresh Corn Recipes to Celebrate Corn Season

Is there anything that says summer quite like fresh corn?
August is officially here, which means we’ve kicked off the season for sweet corn – and that means it’s the perfect time to gather up some favorite fresh corn recipes. Right now the good stuff is piled high at the farm stand, stacked in the grocery bins, and, if you’re lucky, coming straight out of the backyard garden. It’s sweet, it’s juicy, and for a few glorious weeks, it’s just about perfect.
So this week, I thought I’d round up some of my very favorite corn recipes. A few are my own tried-and-true keepers, and the rest are gems from food bloggers I love. Whether you like yours slathered in butter on the cob, tossed into a bright summer salad, or folded into something warm and cheesy, there’s a little something here for everyone.
Grab an ear – or a dozen – and let’s get cooking!
How to Pick and Store Fresh CornBefore we get to the recipes, a quick word on choosing the sweetest corn, because it really does make all the difference. Look for ears with bright green husks that are snug and slightly damp, not dried out or yellowing. The silks peeking out the top should be pale gold and a little sticky rather than brown and brittle. Give the ear a gentle squeeze; you want to feel plump, rounded kernels all the way to the tip.
Corn is at its sweetest the day it’s picked, so try to use it quickly. If you need to hold it a day or two, keep the husks on and store the ears in the refrigerator. And if you find yourself with more than you can eat (a happy problem this time of year), simply blanch the ears, cut the kernels from the cob, and freeze them for a little taste of summer come winter.
Now, on to the good part!
Butter Bath Corn
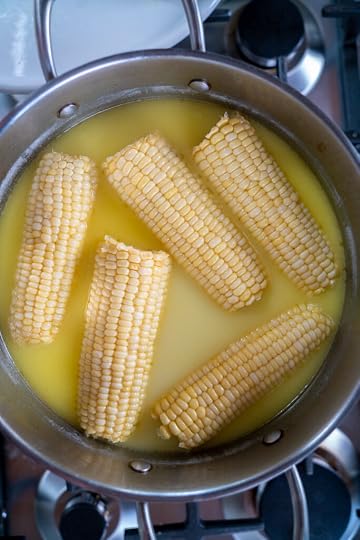
From Kristy Norrell at 12 Tomatoes
Just when I thought I knew every way to cook an ear of corn, along came this one to prove me wrong. Instead of plain boiling water, the ears take a quick soak in a simmering bath of milk, butter, and salt. About eight minutes later, you’ve got corn that’s extra tender, a touch sweeter, and rich enough that you’ll barely need to butter it at the table.
Garlic Butter Grilled Corn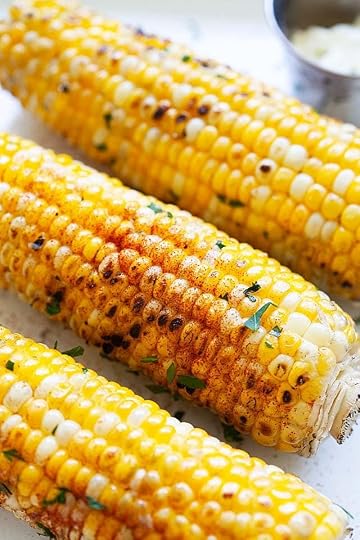
Photo courtesy of Rasa Malaysai
From Bee at Rasa Malaysia
If your summer isn’t complete without the smell of corn charring on the grill, this one’s for you. The magic is a quick compound butter, fresh garlic, parsley, and salt whipped together, that melts right into those warm, blistered kernels. Bee even suggests keeping a batch of the garlic butter stashed in the freezer, which strikes me as very good planning.
Homemade Elotes (Mexican Street Corn)
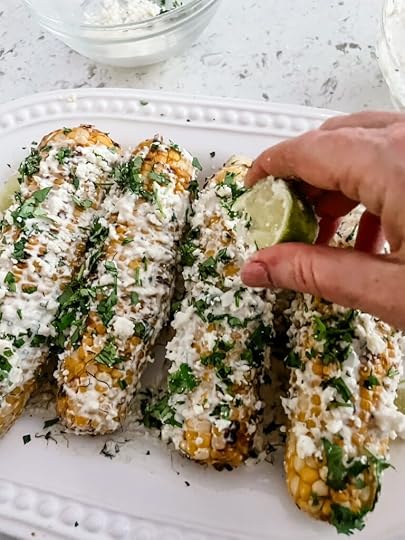
One of mine
You knew I couldn’t do a corn roundup without including these! During the five years my family and I lived in Mexico, elotes were hands-down my favorite. Grilled corn smothered in a creamy, tangy, just-a-little-spicy sauce and showered with salty cotija cheese. The best part? You don’t need a passport to enjoy them. You can have a plateful sizzling off your own grill this very weekend.
Korean Corn Cheese
Photo courtesy of Spoon Fork Pig
From Jenny Park at Spoon Fork Bacon
File this one under “dangerously good.” Sweet corn gets folded together with mozzarella, a little mayo, and green onion, then cooked until it’s melty, gooey, and utterly irresistible. Jenny serves it as either a side dish or a scoopable dip, and it comes together in under twenty minutes. Set out a bowl at your next cookout and watch it disappear.
Homemade Creamed Corn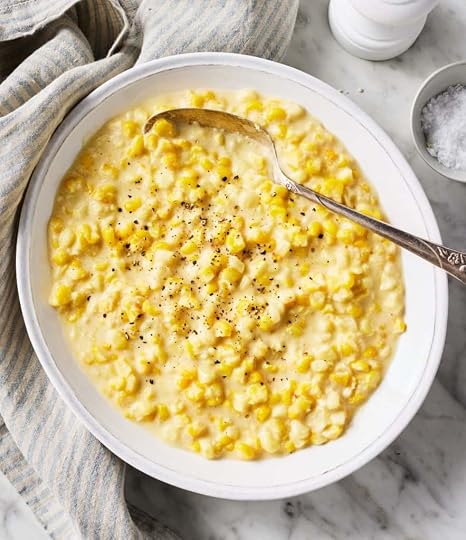
Photo courtesy of Love and Lemons
From Jeanine Donofrio at Love and Lemons
Let’s all agree, here and now, to leave the canned stuff on the shelf. This homemade version starts with a simple roux, turns silky with a splash of milk and a handful of Parmesan, and lets those sweet summer kernels truly shine. It’s cozy, it’s comforting, and it’s the kind of side dish that makes an ordinary weeknight dinner feel a little more special.
Cucumber, Corn and Tomato Salad with Easy Avocado Dressing
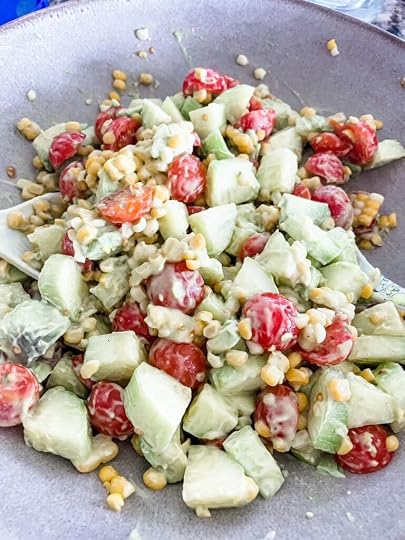
One of mine
This is my answer to the eternal question, “Can I bring something?” It’s crunchy and colorful, it holds up beautifully without any lettuce to wilt, and the creamy avocado-lime dressing pulls the whole thing together. Best of all, you can prep most of it the night before, which is exactly why it’s become my go-to for potlucks, picnics, and book club.
Summer Corn Salad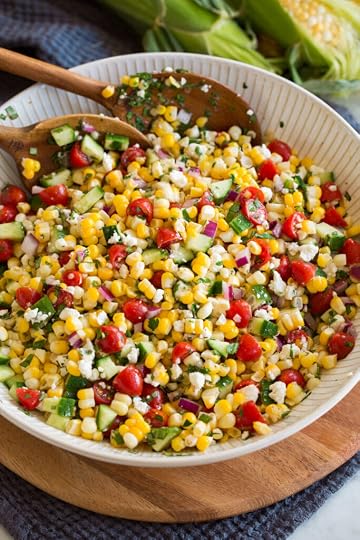
Photo courtesy of Classy Cooking
From Jaclyn at Cooking Classy
Here’s a fresh, feta-flecked salad that tastes like summer on a fork that lends a different flavor profile to mine above. Jaclyn tosses sweet corn with grape tomatoes, cucumber, red onion, and plenty of fresh herbs, then brightens the whole bowl with a honey-kissed vinaigrette. It’s lovely alongside anything off the grill – and I won’t tell anyone if you eat the leftovers straight from the fridge for lunch.
Thai-Inspired Corn Salad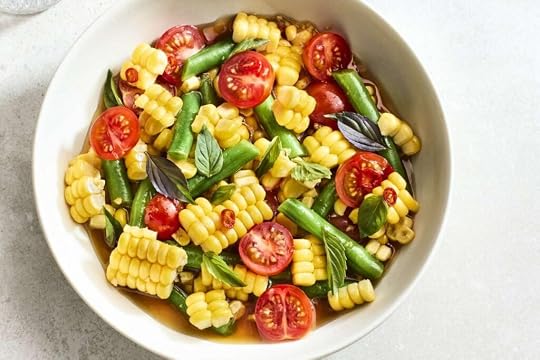
Photo courtesy of Food and Wine
From Food & Wine
When you’re in the mood to take your corn somewhere a little more adventurous, this salad delivers. Charred kernels meet cherry tomatoes and a gentle kick of fresh chile, all draped in a creamy coconut-lime dressing with just the right savory edge. A generous shower of crispy fried shallots over the top makes it downright impossible to stop eating.
Savory Corn and Zucchini Fritters
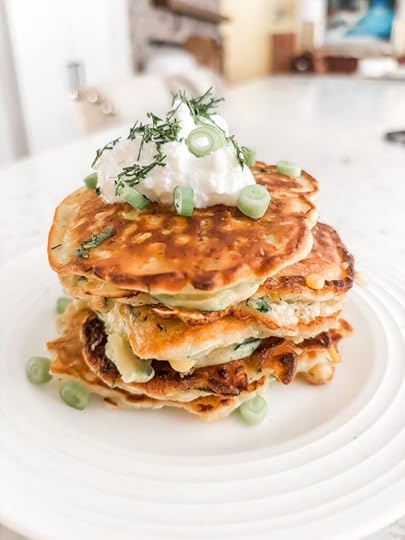
One of mine
When the garden (or the farmers’ market) is overflowing with corn and zucchini, this is what I make. These little fritters are crisp at the edges, tender in the middle, and flecked with fresh dill. Top them with a dollop of tangy Greek yogurt, and they’re right at home as a light supper, an appetizer, or a side dish next to a grilled protein. And if you happen to have veggie-averse kiddos, they’re a rather sneaky way to get everyone eating their vegetables.
Buttermilk Cornbread with Fresh Corn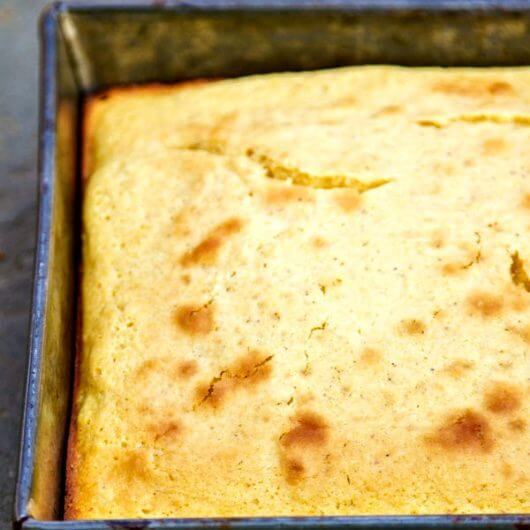
Photo courtesy of the Wicked Noodle
From The Wicked Noodle
No corn celebration would be complete without a warm pan of cornbread. This buttermilk version bakes up moist and just slightly sweet, with fresh kernels folded right into the batter for little bursts of summer in every bite. Slice it warm, add a pat of butter and a drizzle of honey, and do your best not to eat the whole pan in one sitting. (No promises.)


July 27, 2026
Charlie Bird Salad (NYT Copycat Recipe)
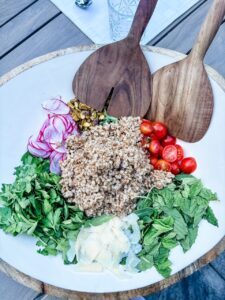
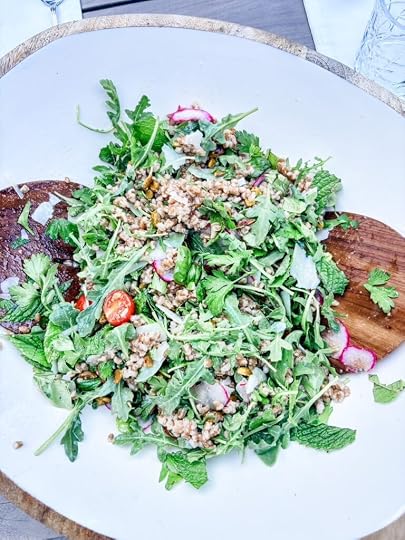
Meet your new favorite salad! Farro, parmesan, pistachio, and radishes served over a gorgeous mélange of greens and herbs in a tangy lemon vinaigrette. Charlie Bird Salad has rightly been described as stellar!
An NYC Restaurant Salad You Can Make at HomeAll the way back in 2013, the New York Times sang the praises of a “stellar” salad created by chef Ryan Hardy for the Charlie Bird restaurant in SoHo.
With more than eleven thousand five-star ratings, it’s been a favorite salad of home chefs ever since. Ina Garten has sung its praises as well. If Ina loves it, you know it’s good!
I first had Charlie Bird salad in Oklahoma. My daughter-in-love made it while I was visiting, and I became an instant fan. It’s one of those things I think I could eat every day and never tire of.
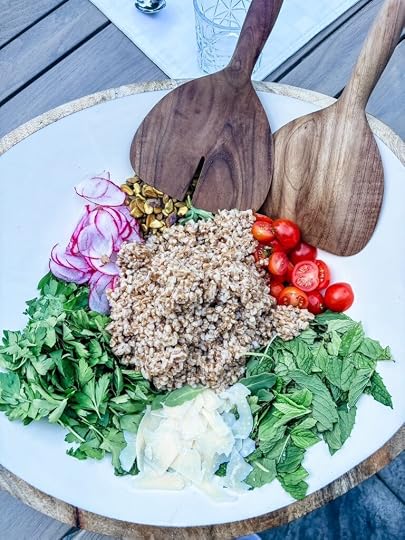
While I haven’t been serving it every day, it has become a centerpiece of my summertime company menu. Guests always rave when I serve it, and usually ask for seconds.
Though most of us don’t think of salads as a showstopper, Charlie Bird Salad truly is. It’s a restaurant-quality dish that’s easy to prepare at home.
I’ll explain how to do that below. But first, let’s talk about what goes into what I’m sure is going to be your new favorite salad.
What You Need to Make Charlie Bird Salad
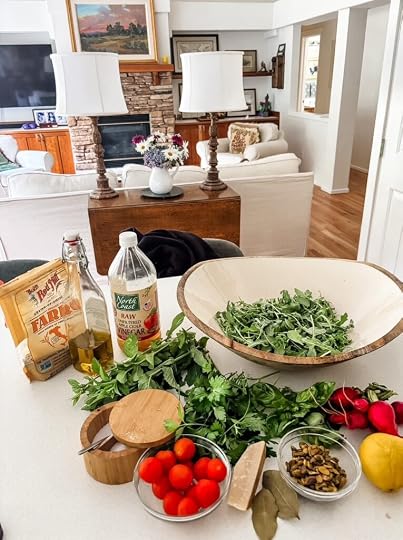
The first step in making Charlie Bird Salad is to cook the farro. You’ll simmer it in a broth of apple cider, water, bay leaves, and salt. Be sure to simmer, not boil! And keep an eye on the pot so it doesn’t boil dry.
The next step is to make the vinaigrette. It’s simple, just whisk up the ingredients and stir it into the cooked farro.
An Important Word About TimingThe farro will take some time to cook. Also, it should be combined with the vinaigrette for at least four hours before you make the salad, so be sure to plan accordingly. This is not a salad you’ll want to throw together at the last minute.
Please don’t let that discourage you from making it. The fact that you do need to make the farro and vinaigrette ahead of time can actually be a plus, especially when you’re entertaining.
I usually cook the farro the night before, then stir in the vinaigrette and store it in the fridge until I’m ready to make the salad. The farro really has a chance to soak up the flavors that way.
If you are making it the same day, start early. You can soak the farro in the vinaigrette for four hours at room temperature.
Assembling, Serving, and What to Pair It With
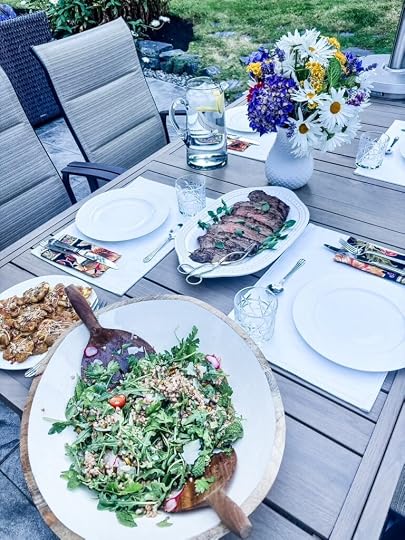
When you’re ready to serve the salad, you toss the greens and herbs together in a large bowl, then top with the farro and remaining ingredients and fold everything together gently.
I’m serious about being gentle. If you break the parmesan into little pieces, it won’t taste as good.
The original recipe for Charlie Bird Salad has you add a little salt at the end. I don’t do that, for a couple of reasons.
First, I’m very careful about avoiding sodium. Second, there’s already salt in the vinaigrette and the parmesan; adding more would make it too salty for me.
If you want to add salt to yours, that’s fine. You do you. But I would recommend you taste it first.
Ina Garten’s Jammy Egg Serving TipSo, what should you serve with Charlie Bird Salad?
Honestly, it’s so tasty and hearty that I’d be perfectly happy enjoying this for a meal. Especially lunch, when I’m eating a little lighter.
But it’d be wonderful served alongside virtually every kind of grilled or roasted meat, chicken or fish.
Ina Garten serves it with “jammy eggs”.
Those are eggs boiled for exactly six and a half minutes, then plunged into ice-cold water to stop them cooking, and peeled and served on the salad. The egg whites will be cooked, but the yolks will have a thick, jammy texture.
I haven’t tried this myself, but it sounds good. And would Ina steer you wrong? I don’t think so.
However you decide to serve it, Charlie Bird Salad is one of my favorite salads. Give it a try! I bet you’ll feel the same.
Print Charlie Bird Salad (NYT Copycat Recipe) Author: Marie Bostwick
  Yield: 6 servings 1x
  Print Recipe [image error] Pin Recipe Ingredients 1 cup pearled farro1 cup apple cider2 bay leaves1 1/2 tsp Kosher salt, divided1/4 tsp fresh ground pepper½ cup extra virgin olive oil2 T fresh squeezed lemon juice2 cups arugula1 cup basil or parsley leaves, torn1 cup mint leaves½ cup pistachios, roughly chopped¾ cup cherry tomatoes, halved1/3 cup thinly sliced radishes2.5 ounces of parmesan cheese, shaved from the wedge with a vegetable peeler* optional salt just before serving (taste to see if you think you need it) Cook Mode Prevent your screen from going dark Instructions Add farro, cider, 2 cups of water, bay leaves, and one teaspoon of Kosher salt to pot and bring to a boil over medium-high heat. Reduce heat and simmer for 30 minutes. (If liquid evaporates too quickly, add a little extra water). Drain off any remaining liquid. Discard bay leaves and set aside to cool.Whisk together olive oil, lemon juice, 1/2 tsp Kosher salt, and ¼ tsp pepper. Pour vinaigrette over cooked farro and stir. Let the mixture sit at room temperature for four hours, or covered in the fridge overnight. (If refrigerating, bring to room temperature before assembling salad.)Toss arugula, basil, and mint together in a large salad bowl. Top with pistachios, tomatoes, radishes, shaved parmesan, and farro. Gently toss or fold ingredients into the greens. If desired, add an extra sprinkle of Kosher salt before serving.
  Did you make this recipe?
 Share a photo and tag us — we can't wait to see what you've made!
July 20, 2026
Easy Chimichurri Sauce Recipe
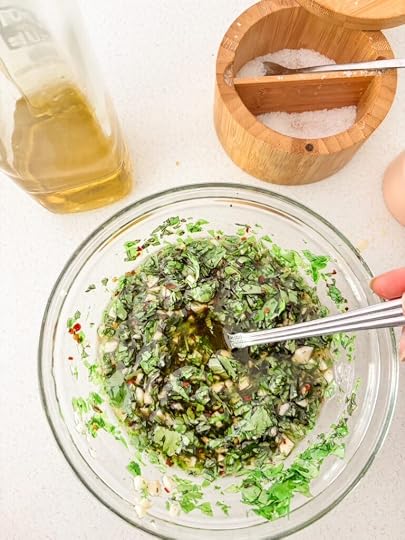
Got parsley? And garlic? Then make some chimichurri sauce! Loaded with fresh herbs and tons of flavor, this gorgeous, zesty sauce is so versatile and so VERY easy to make. A culinary classic!
Summertime Is the Best Time to Make Chimichurri SauceMy little garden is looking like a backyard jungle these days.
Healthy, burgeoning plants are spilling over the edge of the raised beds. We’re picking a zucchini a day, and sometimes two. The tomato plants have grown as tall as me and are loaded with little green tomatoes, and also some big green tomatoes. It’s providing lots of fodder for my Creamed Kale and Carrot Tops, Zucchini Gazpacho, and Zucchini and Cardamom Bread.
And the herbs? Well, they’re out of control.
We’ve got more thyme, basil, oregano, and parsley than I know what to do with!
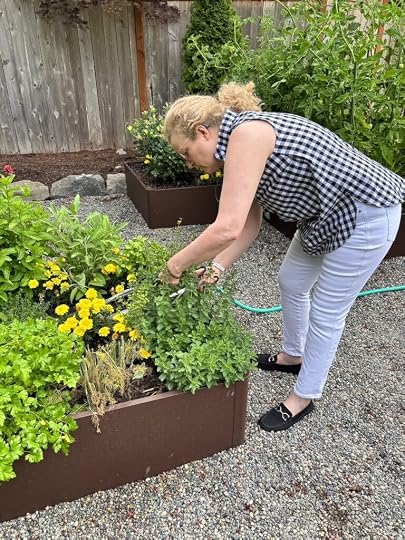
But maybe I should say, more oregano and parsley than I’d know what to do with if I didn’t know how to make chimichurri sauce. Fortunately, I do know how to make chimichurri sauce. This is a very good thing because it’s one of the most delicious sauces on the face of the earth.
By the time you’re finished reading this post, you’ll also know how to make this zesty, tasty, all-around terrific herb sauce. But before we get to that part, you might have a couple of questions, starting with…
What Is Chimichurri Sauce?Chimichurri is an uncooked herb and olive oil-based sauce with lots and lots of fresh minced garlic. Tangy and slightly acidic, it has a bright, zesty, herbaceous flavor.
The gauchos of Argentina and Uruguay invented chimichurri and used it to flavor meat that had been cooked over open campfires. Today, chimichurri is a popular condiment for all sorts of cuisines.
I first encountered it when my family lived in Mexico during the 1990s. It quickly became one of my favorite sauces. Because as you’ll see, it is easy to make and can be used in so many dishes!
What Can You Do With Chimichurri Sauce?The most common way to use chimichurri is as a marinade or condiment for grilled or roasted meat. Grilled flank steak marinated in chimichurri is something I make a lot during the summer. It would also be good on my tri-tip steak.
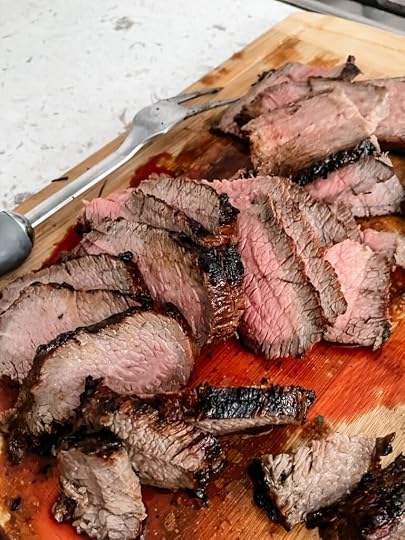
Just place the steak in a plastic zipper, pour in the sauce, and let it sit in the fridge for several hours or overnight. (But not more than twenty-four hours because the acids in the sauce could break down the texture of the meat.) Grill the steak as usual, and top with extra sauce when serving. Delish!
It’s just as terrific when used to marinate chicken, pork, other cuts of beef, and even fish and shellfish. If you’re using it on grilled fish or shrimp, just brush it on a few minutes before cooking.
Chimichurri is a fabulous and versatile condiment.
Add some to a charcuterie board with crusty bread for dipping. Spoon it over oven-roasted potatoes or veggies. Spread it onto steak sandwiches or inside grilled cheese paninis. A little chimichurri is a great addition to tomato soup, minestrone, or a white bean chili.
You can even spoon it over rice or other cooked grains.
Add a dollop of chimichurri to breakfast tacos, the filling of a savory omelet, or plain fried eggs, and you’ll be in breakfast heaven.
Once you start making chimichurri on your own, you’ll find all kinds of uses for it. And now is the ideal time to do it!
Because that freshly grown parsley and oregano that gardens are bursting with in summer make the most flavorful and delicious chimichurri.
Now that you know what chimichurri is and how to use it, let’s talk about what goes into it.
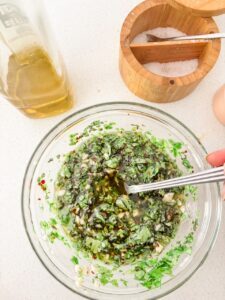
What You Need to Make Chimichurri Sauce
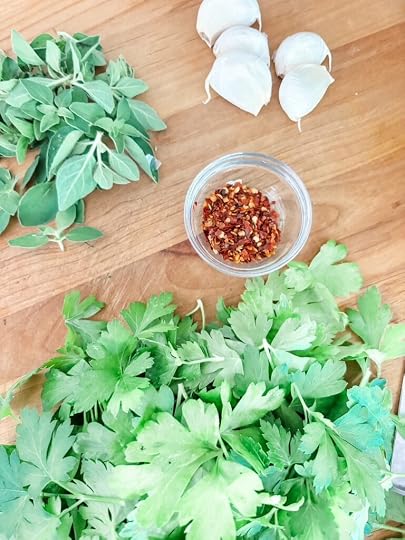
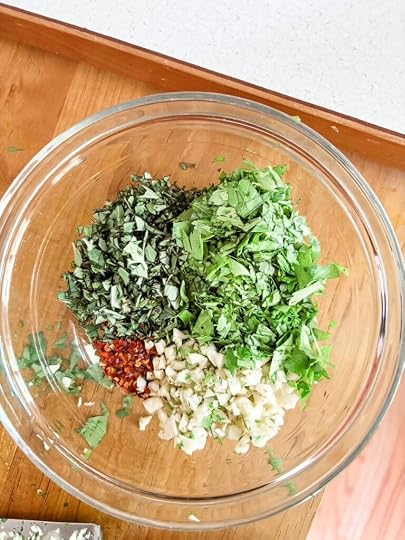
Making chimichurri really could not be easier.
Once you’ve chopped your herbs and minced the garlic, you just stir in the other oil, vinegar, and spices, and you’re done!
I prefer to do my chopping and mincing by hand. However, a food processor will work fine. Just make sure you don’t overprocess the sauce. You want chopped herbs and minced garlic, not pureed.
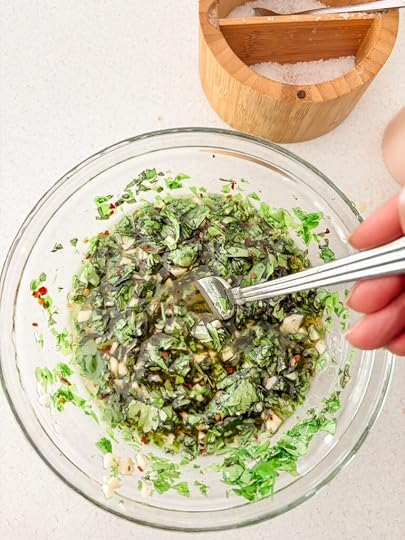
Chimichurri can be stored in an airtight container in the fridge for up to a week, preferably with a layer of plastic wrap directly on top. The combination of oxygen and acid can cause oxidation, which can break down the herbs and turn them brown. So, try not to expose it to air for extended periods of time.
Another reason to hand-chop is that it will help prevent discoloration. Larger pieces of herb are less likely to oxidize.
You can also freeze chimichurri for up to three months. The simplest way is to pour it into an ice cube tray. Once it’s frozen solid, pop them out of the tray and store the cubes in a plastic freezer bag.
A final note: it’s normal for oil and herbs to change when refrigerated or frozen. Just let the sauce sit on the counter for a bit with the cover on, so it warms up, then give it a stir before serving.
Print Easy Chimichurri Sauce Recipe Author: Marie Bostwick Yield: Makes approximately 1 ¼ cups 1x Print Recipe [image error] Pin Recipe Ingredients 1 bunch parsley, roughly chopped3 T chopped fresh oregano (or 2 tsp dried)4-5 large garlic cloves, minced1 tsp red pepper flakes2/3 cup olive oil¼ cup red wine vinegar1 tsp Kosher salt½ tsp pepper Cook Mode Prevent your screen from going dark Instructions Chop parsley and oregano. Mince garlic. Mix together in a small bowl.Stir in oil, vinegar, red pepper flakes, salt, and pepper into the herb mixture. Serve immediately or store in an airtight container in the refrigerator for up to one week. Can be frozen for up to 3 months. See post for storing and freezing instructions. Did you make this recipe?
 Share a photo and tag us — we can't wait to see what you've made!
July 13, 2026
Ham and Cheese Strudel — 5-Ingredient Appetizer

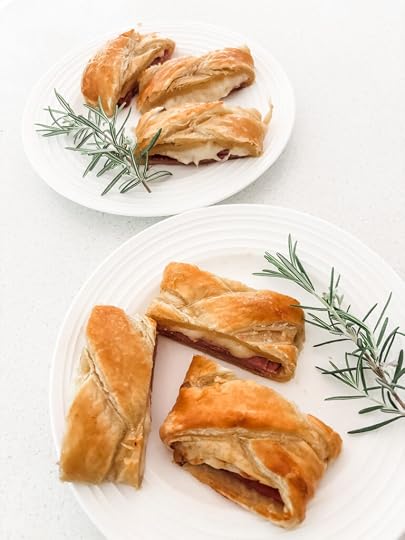
Looking for an appetizer that looks like you fussed but couldn’t be simpler to make? This Ham and Cheese Strudel is exactly that. Flaky puff pastry stuffed with deli ham, Swiss cheese, and a touch of stoneground mustard, finished with a simple faux-braiding technique that makes it look far more impressive than the effort it takes to put together. Five ingredients, one empty platter, and a recipe I’ve been making on repeat ever since I first brought it to a church gathering a few months ago.
An Elegant Appetizer That’s Easier Than It LooksThough I came up with the recipe a few months ago, I’ve been so busy that I haven’t had time to share it until now. You know how that goes, right?
Seems like everyone I know and I are perpetually juggling a couple more balls than we can handle. And that’s exactly what inspired me to come up with this Ham and Cheese Strudel recipe.
A while back, my priest asked me to make the food for a smallish gathering at church. I was happy to be asked and happy to say yes. After all, that gathering was weeks away!
Of course, when the time came to follow through, I was knee-deep in a work project. I knew the menu didn’t have to be elaborate – simple and fresh is usually best anyway. But I did want to have at least one item on the menu that tasted terrific and looked elegant.
Thankfully, I got an idea for a recipe that fit the bill perfectly. These Ham and Cheese Strudels are lovely to look at and taste so, so good!

Flaky pastry is stuffed with ham, cheese, and a touch of mustard for a delicious savory appetizer. A simple faux-braiding technique makes that pastry look elegant and extra special.
And boy, oh boy! Did they ever disappear quickly!
As we all know, an empty platter is the true measure of success in cooking. On that scale, Ham and Cheese Strudel is a huge winner. Pretty impressive for a recipe that only takes 5 ingredients.
Speaking of five ingredients….
What You Need to Make Ham and Cheese Strudel
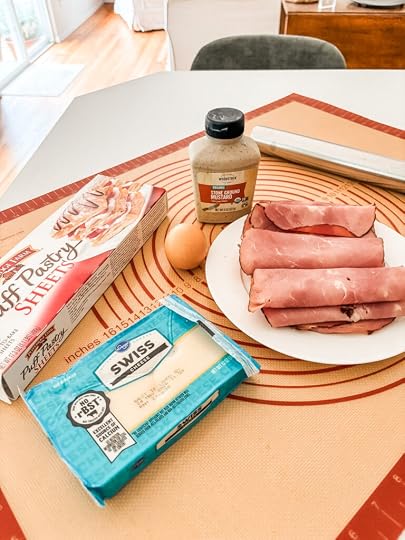
You’ll also need a little flour for rolling out the pastry and a bit of water for the egg wash. But I don’t really count those as ingredients since pretty much everyone has them on hand.
How to Make Ham and Cheese StrudelThis is a wonderfully simple recipe!
Preparing the Puff PastryBefore you begin, take the puff pastry out of the freezer and let it thaw on the counter for 40 to 60 minutes. You still want it to be very cold, but not so frozen that it breaks when you unfold it.
Once it’s ready, you’ll roll the pastry out on a floured surface. You want the dough rectangle to be just a little thinner, so roll the dough about three times in each direction.
Most puff pastry is folded into thirds in the box. So, think of the dough as having three equal sections.
Move the rolled-out pastry onto a piece of baking parchment placed in a rimmed baking sheet. It’s easier to do this now than after you add the filling.
Now, the Fillings
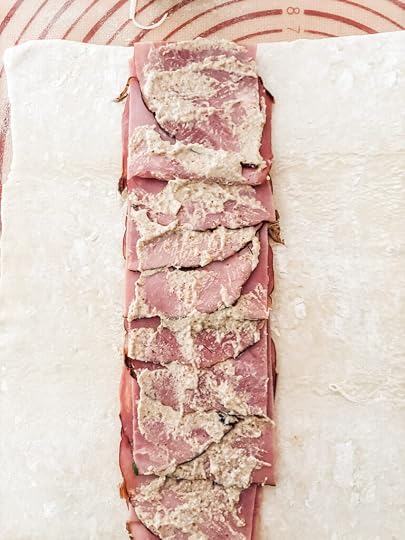
You’re going to layer the ham down the center section, with equal amounts of dough left on each side. Then, you’ll use a brush to paint a thin layer of mustard on the ham. After that, sprinkle the shredded cheese over the ham.
A Simple, Faux Pastry Braiding TechniqueNow comes the fun part! The faux braiding technique!
Use a sharp knife to make a perpendicular cut into the pastry all the way down both sides. You don’t have to be exact, but the cuts should be about two inches apart. Just eyeball it.
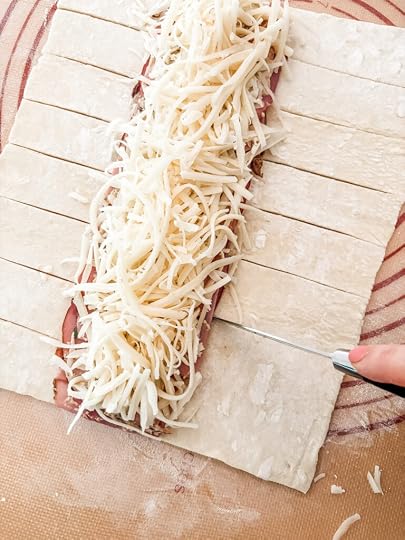
Starting at the bottom, take one of the cut pastry slices and fold it over the filling. Pull it gently and angle the slice slightly upward. Do the same with the slice on the opposite side, making sure it crosses over the first piece.
You’ll keep doing that all the way up– first one side and then the other. The effect will look like a braid and be so pretty when it bakes.
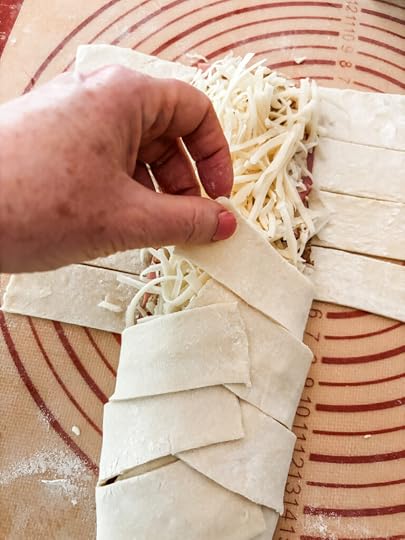
When you get to the top, just gently tuck the ends of the pastry under the strudel.
Finally, you’ll paint the egg wash all over the top and sides of the strudel and bake. That’s all there is to it!
Serving, Slicing, and What to Do With Leftovers (Spoiler: There Won’t Be Any)When it comes to serving, you can either leave it whole and let people cut their own slices or pre-slice it for them.
One strudel will make about 8 to 10 appetizers, depending on how large you slice them. While I use these for appetizers, cutting the strudel in half would give you two yummy portions for lunch or dinner.
No need for me to tell you how to store leftovers. Because, trust me, there won’t be any!
Print Ham and Cheese Strudel — 5-Ingredient Appetizer Author: Marie Bostwick Yield: Makes 8 to 10 appetizers, or 2 lunch or dinner entrees 1x Print Recipe [image error] Pin Recipe Ingredients 1 sheet frozen puff pastry8 oz deli sliced ham4 oz shredded Swiss cheese1 T stoneground mustard1 egg yolk2 T waterFlour for rolling out pastry Cook Mode Prevent your screen from going dark Instructions Remove the puff pastry from the freezer and allow to thaw on counter for 40 to no more than 60 minutes. Preheat the oven to 350.Unfold one sheet of puff pastry on a lightly floured surface. Sprinkle top lightly with flour and roll the pastry about 3 times in each direction, so it is a little thinner.Place the rolled rectangle of pastry rectangle on a piece of baking parchment that has been placed in a rimmed baking pan.Layer the ham evenly along the center third of the pastry (in the longer direction). There should be equal third of pastry left on either side of the ham. Brush mustard over the ham. Sprinkle the cheese on the ham.Use a sharp knife to make perpendicular cuts from the filling to the outside edge of the pastry, along on both sides, from top to bottom. The cuts should be about 2 inches wide.Starting at top, fold one cut pastry piece over filling, angling slightly downward. Fold slice on the opposite side over filling in the same manner, partially covering the edge of first slice. Repeat all the way down the strudel, folding over one piece and then one on the opposite side, creating a faux braid effect. Tuck edges of final slices under strudel.Whisk the egg yolk and water together to create a wash. Brush the egg wash all over the top and sides of the strudel.Place pan in preheated oven and bake for 20-25 minutes, until the pastry is turning golden brown. Did you make this recipe?
 Share a photo and tag us — we can't wait to see what you've made!
July 6, 2026
Creamed Kale and Carrot Tops: One of My Favorite Carrot Top Recipes
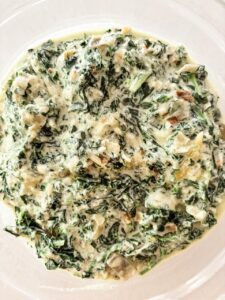
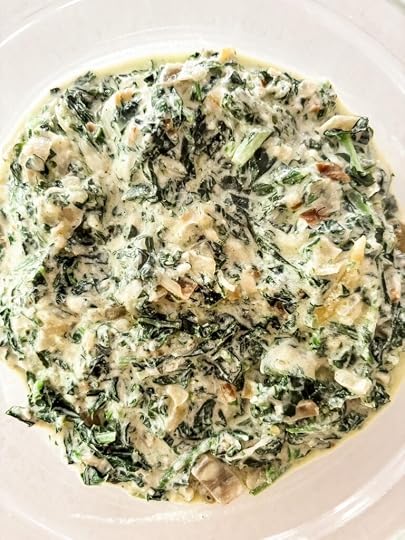
If you grow carrots, you already know the dilemma: beautiful, bushy carrot tops that feel too good to throw away. Good news — you don’t have to. Carrot tops are completely edible, and this recipe for Creamed Kale and Carrot Tops is one of the most delicious ways to use them. Fresh garden greens and herbs in a rich parmesan cream sauce, ready in under twenty minutes.
Don’t Toss Those Carrot Tops! Here’s What to Do With ThemThe kale has been coming on hard and fast in my garden. Almost faster than we can eat it sometimes!
I’ve been tossing fresh kale into our dinnertime salads for weeks now. We also like it simply sauted with garlic, salt and pepper, and a little olive oil. However, creamed kale is one of my favorite ways to enjoy this wonderful garden green.
Recently, I came up with tasty and somewhat surprising twist on my usual preparation that I’m excited to share with you! Here’s how it happened…
A couple of weeks ago, I was harvesting kale and doing some general garden maintenance, which included thinning my carrots. It had to be done; carrots won’t grow properly if they’re too crowded. But, oh how I hated throwing away all those big, leafy carrot tops!
Suddenly it occurred to me that maybe I didn’t have to. Because green carrot tops are…well, just greens, right? And wouldn’t greens taste good when combined with other greens?
The answer is yes! Especially when you serve them in a decadent, creamy sauce.
Can You Eat Carrot Tops? What Do Carrot Tops Taste Like?Yes, really!
Some of you probably have doubts, but believe me, carrot tops can be delicious! And they’re much too tasty to just toss into the trash. Especially after you went to all the trouble of growing them!
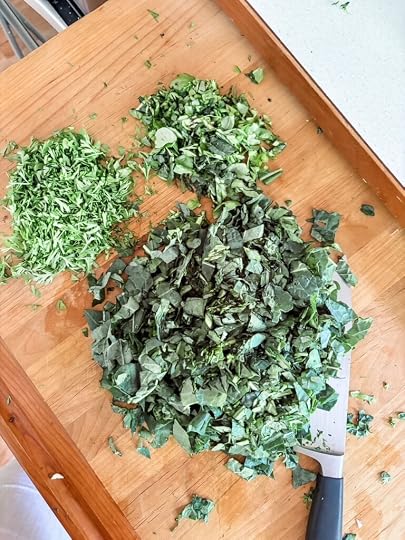
Carrot greens have an herby flavor that’s a little bit like celery. The feathery leaves on can be added to salads or made into pesto. They’re also good sprinkled onto dishes for a garnish, like you would with parsley.
Herby, slightly bitter taste of carrot tops are a beautiful counterpoint to the richness of the creamy cheese sauce. But they’re just one part of what makes this dish so good.
Let’s talk about the other ingredients!
What You Need to Make This Creamed Kale and Carrot Tops Recipe
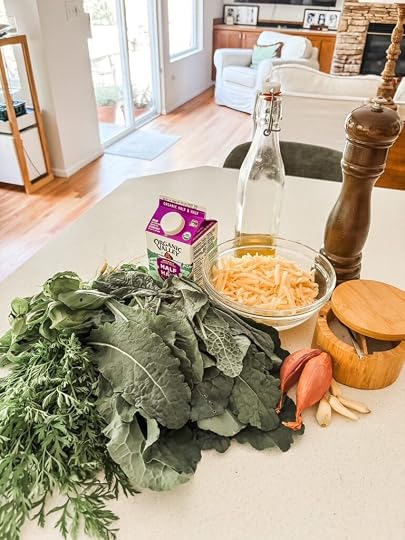
with a high smoke point.Kale – Any type of kale will work in this dish. It would also be good with chard. And since
you’re cooking it, feel free to use the more mature leaves that aren’t quite as good in salads. Strip the leaves from the stems and chop them roughly. If you like, you can freeze the stems to use later for making vegetable stock, kale stem pesto, or in a stir fry. (Just note that they need to be sliced fairly thin for pesto or stir fry.)Carrot tops – Use all the feathery leaves but discard any thick stems.Basil – You don’t absolutely have to include it, but little fresh basil adds a lovely, slightly grassy note to the dish.Parmesan Cheese –Parmigiano Reggiano is the best choice for this dish. Yes, it can be a
little pricey, but the robust flavor is worth it. In a pinch, you could also use regular real Parmesan or Romano.Half and Half – Even though this is Creamed Kale and Carrot Tops, I chose to use half and half for my recipe. The result gives me plenty of richness, but cuts down on the calories and fat a little and lets the flavor of the greens, herbs, and garlic come through. If you want to use heavy cream, you can do so. But you might want to add it a little at a time, tasting between additions. Because it really is possible for a dish to be too rich and creamy, so much so that it overpowers the flavor of the greens.Kosher Salt– Kosher salt is my go-to seasoning. If you decide to use regular table salt, reduce it by half and taste to see if you think you want more.Fresh ground pepper – The difference in flavor makes grinding the pepper worth it.How to Make Creamed Kale and Carrot Tops
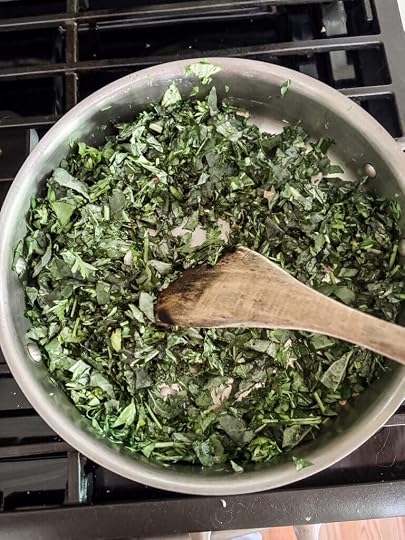
This is a super easy dish that can be made on the stove in just fifteen to twenty minutes.
You’ll start by cooking the shallots in the olive oil over medium high heat. Once they’re are soft and translucent, you’ll reduce the heat slightly. Then you’ll add the minced garlic and cook for a minute or two, just until it’s fragrant.
Next, you’ll add the kale, carrot tops, and basil. Cook them until they the leaves are completely wilted.
The for the next part, you’ll want to reduce the heat to medium low. That way, it can give the cheese time to melt without cooking off too much liquid.
Stir in the half and half and then add the cheese. Stir everything constantly, until the cheese is melted. Finally, stir in the salt and pepper, then taste and adjust seasonings if you need to.
Print Creamed Kale and Carrot Tops: One of My Favorite Carrot Top Recipes Author: Marie Bostwick Yield: 4 servings 1x Print Recipe [image error] Pin Recipe Ingredients Heat olive oil in large, heavy bottomed saucepan over medium high heat. Add chopped shallots and cook until soft and translucent, about 4 to 5 minutes. Lower heat slightly. Add garlic and cook until fragrant, about 1 to 2 minutes.Add chopped kale, carrot tops, and basil to the pan. Cook until leaves are completely wilted and any thinner stems used are slightly soft. 3 to 5 minutes.Turn heat to medium low. Add half and half and cheese to the pan, stir continually
until cheese is melted. Stir in salt and pepper. Taste and adjust seasonings if
needed. Cook Mode Prevent your screen from going dark Instructions 2 T olive oil½ cup diced shallot (diced fairly small)4 small garlic cloves, minced (about 1 T of minced garlic)8 oz kale, chopped (leaves only)2 oz carrot tops, chopped (feathery part)½ oz fresh basil, chopped1/2 cup grated Parmesan cheese (preferably Parmigiano Reggiano)1/2 cup half and half½ tsp kosher salt¼ tsp pepper
Did you make this recipe? Share a photo and tag us — we can't wait to see what you've made!
June 29, 2026
My Favorite Fourth of July Recipes – All From My Backyard to Yours!
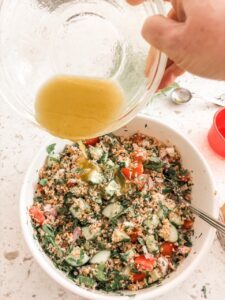
These are my favorite Fourth of July recipes, the grill-out dishes I come back to year after year, and I’m so glad to share them with you. If you asked me to name my favorite way to spend a summer day, I wouldn’t have to think about it for very long. Gather the people I love on the back patio, fire up the grill, set out a table full of good food, and let the afternoon stretch on as long as it wants to.
Grill-outs and barbecues are hands-down some of my favorite gatherings to host. I love the cooking, I love the eating, and most of all, I love that boards and platters and big bowls of salad mean the cook gets to spend the day visiting with guests instead of being stuck in the kitchen. Isn’t that what hospitality is all about?
So whether you’re feeding a crowd or just your own little crew, here are some of my favorite Fourth of July recipes to bring to the table. Every one of them has earned its place at our Independence Day cookouts, and I have a feeling they’ll earn a place at yours, too.
Fire Up the Grill: Fourth of July Main DishesMy Grilled Cedar Plank Salmon
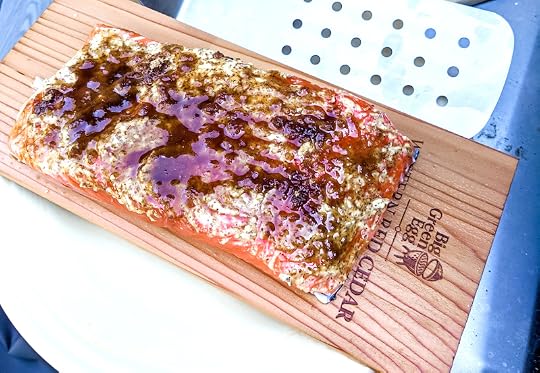
If you only make one thing on this list, make this. My Cedar Plank Salmon is one of my all-time favorite recipes, and I make it constantly, for good reason. It’s sweet, savory, just a touch smoky from the cedar, and it requires only five ingredients, salt and pepper included. The cedar plank does the work, imparting a delicate, smoky flavor that feels a little bit like magic. Just remember to soak your culinary plank for at least an hour (four is even better) before it goes on the grill, or you’ll end up with flambéed salmon instead.
Best Chicken Bacon Burgers
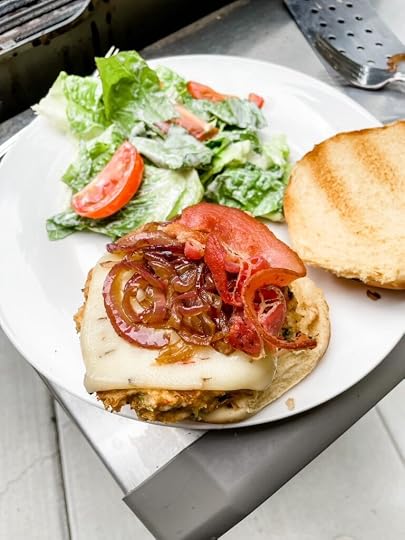
No Fourth of July cookout is complete without a burger, and these are the ones I reach for. Made with lean ground chicken, fresh cilantro and thyme, and a little smoked paprika, they’re flavorful and decadent and a whole lot healthier than they look. Top them with crispy bacon, savory sauteed red onions, and a slice of gooey, spicy pepper jack, and you’ve got a burger that goes from good to over-the-top fantastic. It might just be the best burger I’ve ever made, and a recipe I make over and over again.
Easy Mediterranean Chicken Skewers
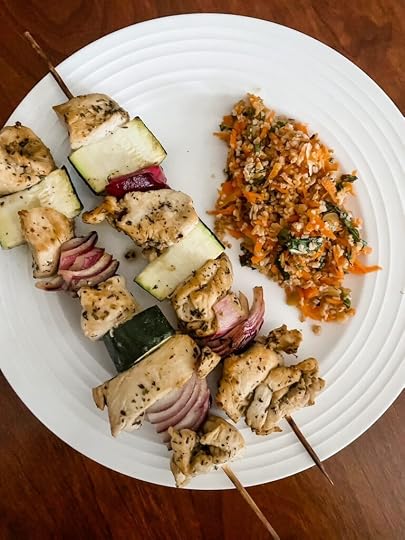
Eating stuff off a stick is just plain fun, isn’t it? These grilled chicken skewers are crazy simple to make. A super lemony marinade loaded with herbs tenderizes the chicken and infuses it with so much flavor that this is the chicken breast you’ll actually want to eat. Thread the marinated chunks onto skewers with zucchini and red onion (or whatever colorful veggies you’ve got on hand), toss them on the grill, and dinner is pretty much a meal on a stick.
Fresh Fourth of July Recipes: Side Dishes and SaladsAntipasto Pasta Salad
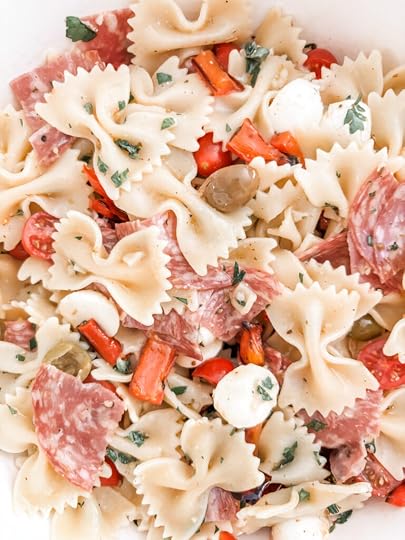
Now, I know pasta salad has a reputation for being bland and blah, but not this one. This is the taste of Italy in a bowl, and a wonderful make-ahead side dish for a barbecue. Bowtie pasta tossed with spicy salami, briny olives, creamy mozzarella pearls, sweet roasted red peppers, and fresh tomatoes, all brought together by a bright, robust homemade vinaigrette. Every single bite is a joyous little adventure of spicy, briny, sweet, and creamy. Do yourself a favor and skip the bottled dressing. The homemade vinaigrette is what makes this salad, and it’s so easy you might just throw the bottled stuff away for good.
No Cook Tabouli
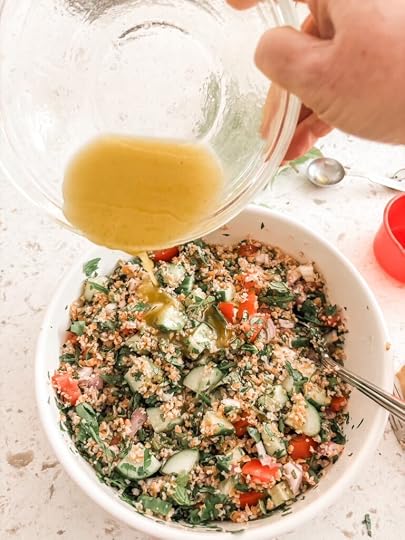
When the temperatures climb, and it’s just too hot to think about turning on the stove, this is the dish that saves the day, which makes it an ideal Fourth of July side dish. There’s no heat, no flames, and no cooking involved. The bulgar “cooks” simply by soaking in warm water, and then you fold in lots of fresh tomatoes, cucumber, parsley, and mint, plus a light lemon-and-olive-oil dressing. It’s loaded with heart-healthy ingredients, and those bright, fresh flavors will have everyone going back for seconds, even on the hottest Fourth. Stir in some chickpeas or a little feta, and it’s almost a meal in itself.
Stone Fruit Salad with Honey Lime Dressing
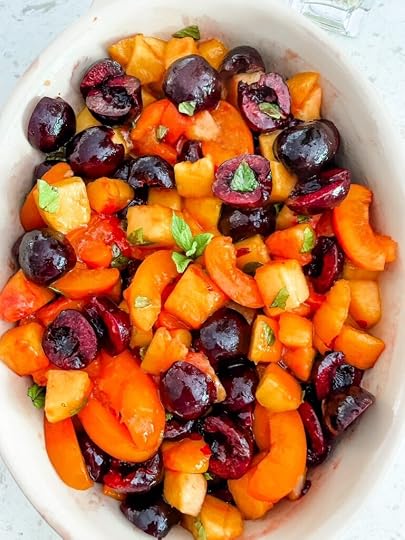
This one tastes like summer in a bowl. Juicy peaches, nectarines, apricots, and cherries are at their absolute peak in early July, and this salad lets them shine, dressed in nothing more than a simple, heavenly combination of honey and lime with a few torn mint leaves. It’s a feast for the eyes and the perfect thing to bring to a backyard barbecue. The honey-lime dressing keeps everything fresh and lovely, so it won’t go mushy on you the way fruit salad sometimes does.
Easy Fourth of July Recipes: DessertsStrawberry Rhubarb Poke Cake
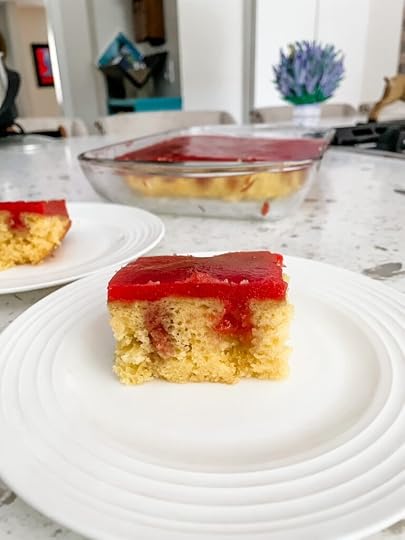
Remember poke cakes? This is my updated, grown-up version of that 1970s classic, and instead of the artificial flavors and colors of packaged Jell-O, it’s made with lots of real strawberries and rhubarb. It’s light, fruity, and that sweet-tart filling tucked into a tender lemon cake is a mouthful of heaven. Make it with the vegetarian ChillOver powder, and it’ll even hold up without refrigeration, which makes it wonderfully easy to transport to picnics and barbecues. It’s a great patriotic dessert for a Fourth of July celebration, or any summertime get-together at all.
Choose-Your-Fruit Shortcake Board
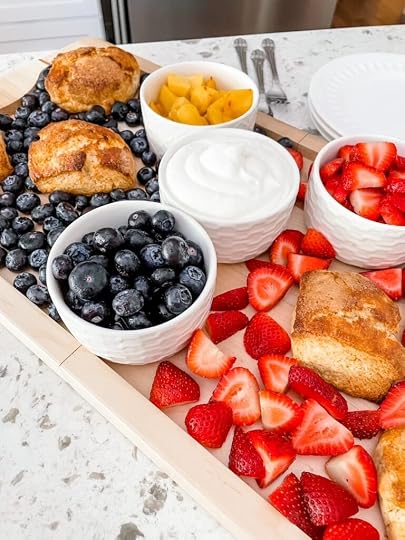
If you want to end your cookout on a real showstopper, this is it. Tender, buttery homemade shortcakes, a big bowl of real whipped cream, and an assortment of summer fruits, strawberries, blueberries, peaches, whatever looks gorgeous at the market, all arranged on a beautiful board. Guests get to build their own and pick a little of each. It’s the kind of dessert that makes hospitality easy: once the board is on the table, the cook is free to step back and enjoy the party. And with all that colorful, red-white-and-blue fruit, it’s a perfectly festive patriotic dessert for the Fourth.
Make-Ahead Tips for an Easy Fourth of July CookoutThe real secret to enjoying your own party is to do as much as you can before the guests arrive.
A few of these Fourth of July recipes are made for getting ahead. The Antipasto Pasta Salad, No Cook Tabouli, and Stone Fruit Salad can all be made the night before and stored, covered, in the refrigerator. The Strawberry Rhubarb Poke Cake actually needs time to chill and set, so it’s a wonderful day-ahead dessert, and the ChillOver version travels beautifully without refrigeration.
You can mix and shape the chicken burger patties and whisk together the skewer marinade in the morning, then keep everything cold until it’s time to fire up the grill. Do the prep early, and you’ll get to spend the Fourth doing the best part: relaxing with the people you love.
June 22, 2026
7 Blueberry Recipes to Make This Summer

Is there a more perfect summer fruit than the blueberry?
I don’t think so.
Blueberries are everywhere right now – piled high at the farmers market, two-for-one at the grocery store, practically begging to be turned into something delicious. And while I’ll never say no to a handful eaten straight from the carton while standing at the kitchen counter, I also like to put them to work.
So I went looking around the internet (and through my own recipe box) for the best blueberry recipes out there, and I came back with seven favorites: a couple of cocktails, a savory sauce, a wildly good jam, and three of my own recipes that I make on repeat all summer long. Sweet, savory, stirred, or shaken, there’s something here for every blueberry lover.
Blueberry Margarita from Kate the Baker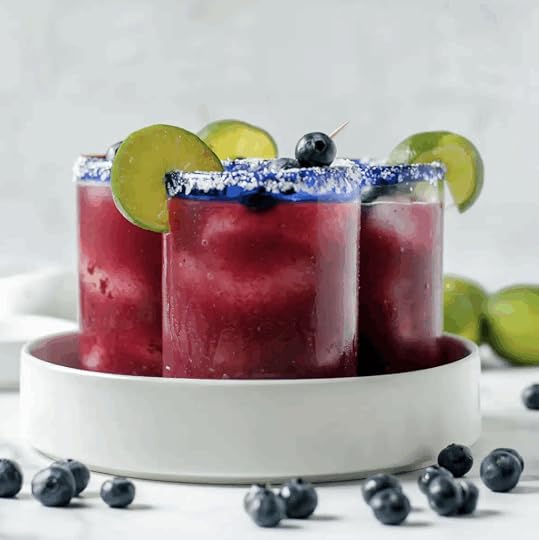
Courtesy of Kate the Baker
Katie the Baker takes a classic margarita and makes it even better. She blends fresh blueberries with a touch of sugar into a quick homemade sauce, then shakes it up with tequila, lime juice, and Cointreau for a margarita that’s just as gorgeous as it is refreshing. That beautiful purple color alone makes it worth the effort, but trust me, the flavor delivers too. This one’s going in my regular summer rotation.
Mint-Infused Blueberry Cocktail from If You Give a Blonde a Kitchen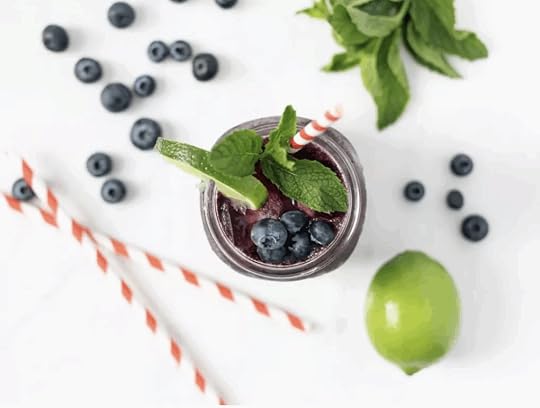
Courtesy of If You Give a Blonde a Kitchen
This one blueberry smash is an even easier drink. Fresh blueberries, mint, and lime get muddled together, shaken with vodka and a little honey, then topped off with seltzer for something light, herbal, and just sweet enough. I love that she left those little blueberry bits right in the glass. It makes for a beautiful drink, and you get a little burst of fruit in every sip. Perfect for a porch evening.
Savory Balsamic Blueberry Sauce from Rocky Mountain Cooking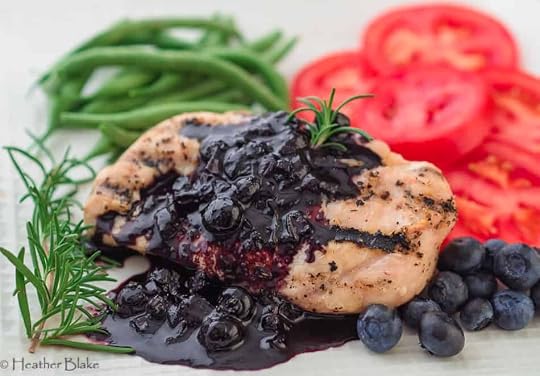
Courtesy of Rocky Mountain Cooking
If you’ve never tried blueberries in a savory dish, this is where to start. Simmer fresh blueberries with shallots, garlic, and rosemary, then balance it all out with balsamic vinegar and a little honey. The result is a rich, glossy sauce that’s wonderful spooned over grilled chicken or pork. It comes together quickly enough for a weeknight, but it’s pretty enough for company, too.
Blueberry Red Onion Jam from Pinch Me, I’m Eating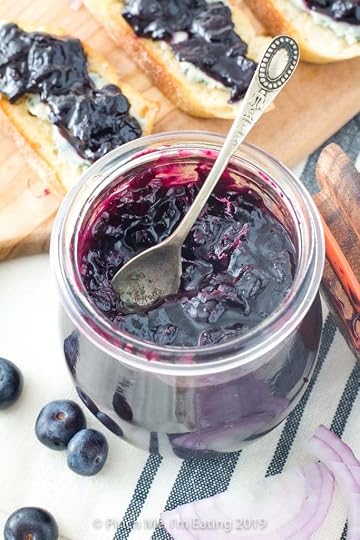
Courtesy of Pinch Me, I’m Eating
This jam might be the most unexpected recipe on this list, and I am completely on board with it. Caramelize red onion low and slow, then add blueberries, balsamic vinegar, red wine, and a little honey, and let it all simmer down into something rich, jammy, and downright addictive. Pile it onto a cheese board with some blue cheese, spoon it over a burger, or do as one of her readers suggested and slather it on a biscuit. However you serve it, it’s a showstopper.
From My KitchenSummer Arugula, Feta, and Blueberry Salad
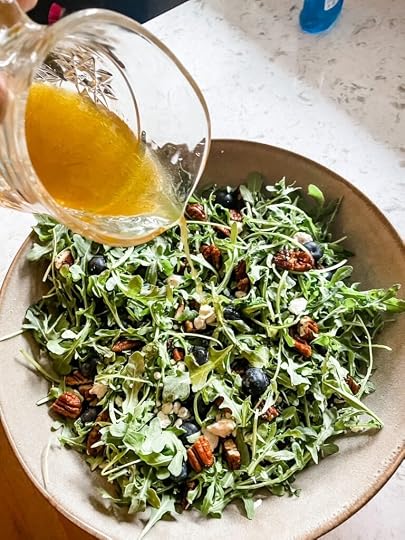
I have to tell you about my book club. We started out calling ourselves the Foodie Book Club, and at every meeting we’d cook something inspired by whatever we’re reading that month. One of our members showed up with an arugula, feta, and blueberry salad, and it might be one of the most delicious things I’ve ever eaten. I went straight to the market the next morning to make my own version, and it’s been my favorite salad ever since. Sweet blueberries, salty feta, peppery arugula, and crunchy candied pecans, all tossed in a bright lemon vinaigrette. it really does have it all.
Easy Blueberry Lemon Trifle Recipe
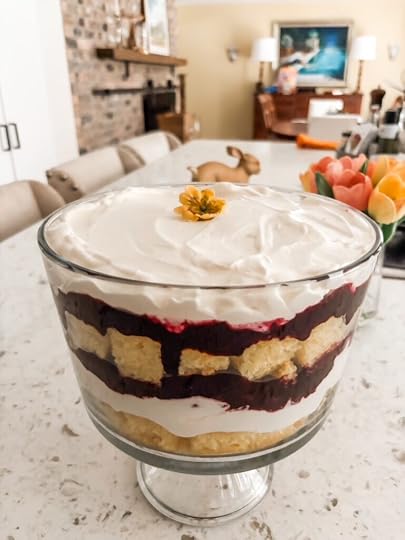
This is the dessert you make when you want everyone to think you fussed for hours, even though you really didn’t. A quick stovetop blueberry filling and a simple lemon cream get layered with lemon cake into a trifle bowl, and the result is just gorgeous – those distinct, colorful layers practically guarantee oohs and aahs at the table. I use a few smart shortcuts here, including jarred lemon curd, so don’t let the showstopping looks fool you. It really is easy.
Easy Homemade Crepes with Blueberry Sauce
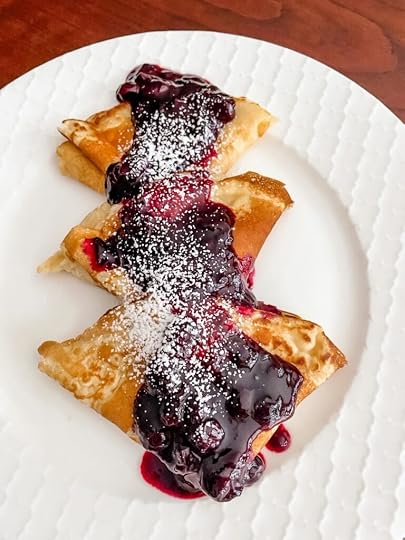
These crepes show up on my table a good number of Saturday mornings, and I never get tired of them. They’re thin, delicate, and just a little bit fancy-feeling, but truly no harder to make than pancakes. The blueberry sauce comes together while the batter rests, so the whole thing moves along easily, even if it’s your first time making crepes. Roll them, fold them, fan them out on a plate however you like – just don’t skip the sauce. You’ll want extra for spooning over ice cream, too.
June 15, 2026
Easy Chocolate Macaroons — 5 Ingredients, Gluten-Free
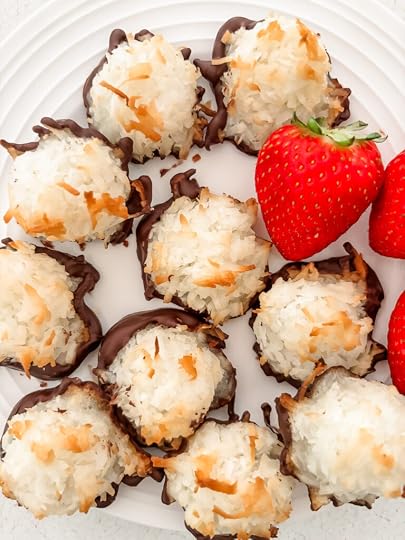
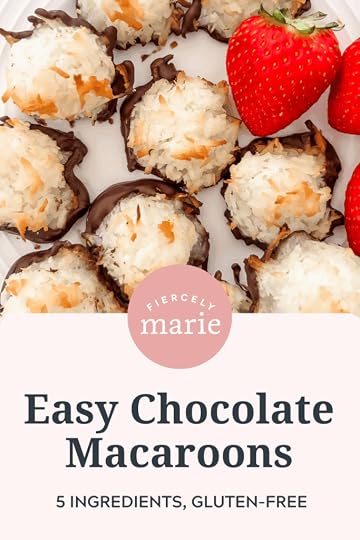
Looking for a simple-to-make, gluten-free sweet treat? Give these Easy Chocolate Macaroons a try! Sweet morsels of chewy baked coconut dipped in chocolate. SO good! And so easy to make!
The Best Gluten-Free Sweet Treat for Parties and PotlucksThese days, it’s rare for me to attend a gathering that doesn’t include at least a few folks who are eating gluten-free.
The desire to make sure everybody has something delicious to eat at parties and potlucks spurred me to create many gluten-free recipes. My gluten-free Swedish meatballs are a dish everybody loves, regardless of dietary restrictions. The same with my Grilled Chicken with Coconut Aminos.
But finding good gluten-free desserts or sweet treats can be a challenge. That’s especially true if you want something that’s quick and easy.
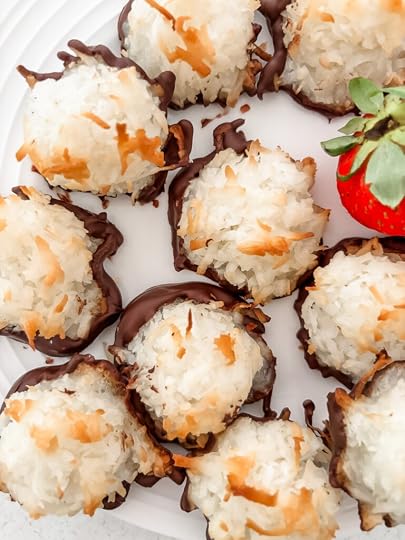
These Easy Chocolate Macaroons tick all the boxes! They’re so delicious! Sweet and chewy morsels of tender coconut dipped in chocolate. Kind of like a homemade Mounds bar!
The fact that they’re so easy to make is a huge plus.
You’ll only need 5 ingredients and a little time to make these scrumptious, gluten-free sweet treats at home.
Oh, and the best thing about those 5 ingredients? All five are easily available in the supermarket. In fact, you might have them in your pantry already.
Macaroons vs. Macarons — What’s the Difference?Before we talk about how to make your own Easy Chocolate Macaroons, let’s clear up a potential misunderstanding.
Macaroons and Macarons are both delicious, bite-sized, sweet treats with similar-sounding names. But that’s where the similarity ends.
Macarons are absolutely divine French sandwich cookies. The sandwich part is made with almond flour, egg whites, and sugar. The filling can vary depending on the flavor you want.
As I said, they’re just divine; a classic French cookie. However, though macarons are absolutely worth the effort, they are not easy to make.
Macaroons are shredded coconut, sugar, and egg white baked in the oven. The finished look reminds me a little bit of haystack. I dip mine in melted chocolate to make them extra decadent.
In short, macaroons are simply divine, but far simpler to bake than macarons.
Now that we understand the difference, let’s talk about baking your own Easy Chocolate Macaroons!
What You’ll Need to Make Easy Chocolate Macaroons
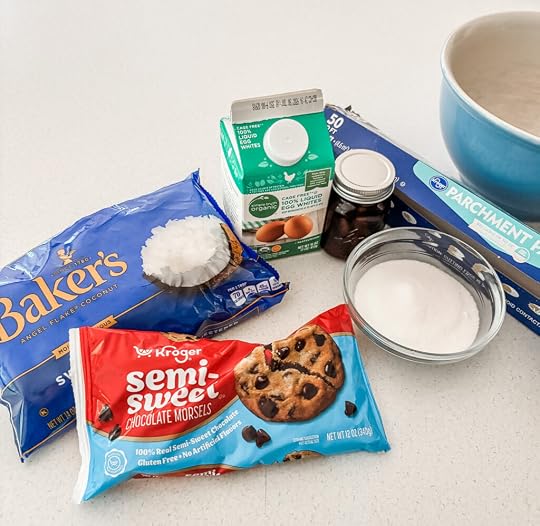
Like I said, five simple ingredients, and all of them are easy to find in the market. Or check your pantry. You may have everything you need on hand already!
Sweetened Shredded Coconut – Any brand will do. Just make sure you cook it fresh. It should be moist and even a little sticky. If your coconut has been sitting in the pantry for a bit, it might be too dry to use.Egg whites – you can either purchase a carton of egg whites at the market, or separate the whites from the yolks of whole eggs.Granulated sugarVanilla extract – Vanilla is the classic, but you could experiment with other flavors if you’d like. Almond comes immediately to mind. Oh, and what about orange? Coconut, chocolate, and orange sound like a can’t-miss combo to me. I’m definitely trying that next time!Chocolate – Use whatever type of chocolate is your favorite – milk chocolate, dark, or extra-dark. Should you not care for chocolate (I don’t understand this, but I’ve been told such people exist), then you can leave it out entirely. Macaroons are scrumptious with or without chocolate. So, choose your own adventure!How to Make Easy Chocolate MacaroonsWhen I say easy, I’m not kidding. We’re basically talking about four steps – mix, shape, bake, and dip.
MixYou’ll start by whisking together the egg whites, vanilla, and sugar. You don’t need to whisk for long, just long enough so the sugar is starting to dissolve a bit. A minute or two is plenty. Then, you’ll stir in the shredded coconut.
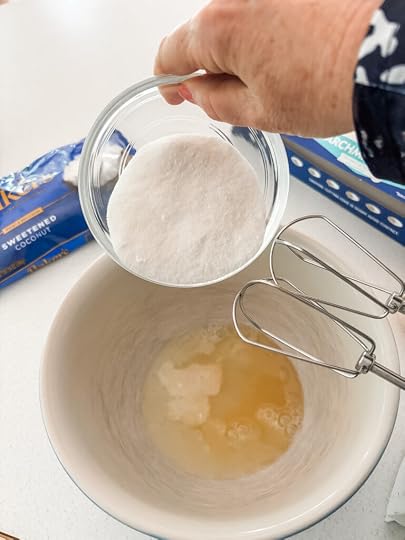
Shape
Next, you’ll take about a tablespoon of the coconut mixture and roll it into balls. I actually like to use a melon baller for this. It makes it easy to get a uniform size and is less messy. Just make sure you press the coconut into the ball or melon baller so it holds its shape while baking.
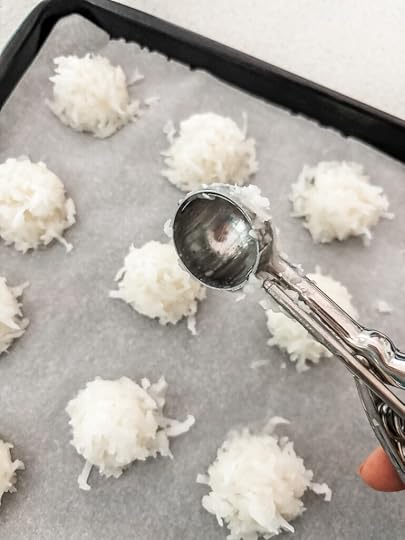
Macaroons are delicate, so you’ll line the baking sheet with parchment or bake on a Silpat baking mat. That way, they’re less likely to stick to the pan when you remove them. You’ll turn the pan halfway through the baking. They should be just turning golden brown when done.
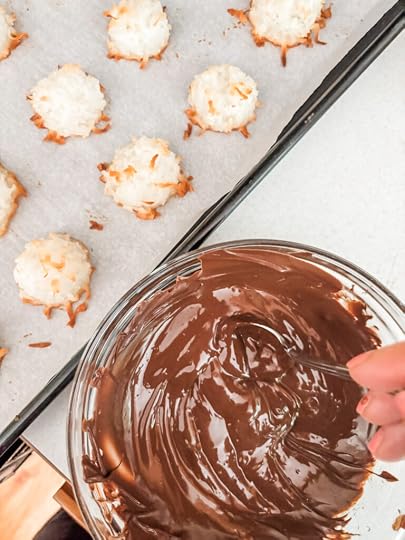
You could melt the chocolate in a double boiler. But the microwave is so much easier.
Just put the chocolate in a microwave-safe bowl, and cook at 50% power for 30 seconds. Stir the chocolate. If it’s not totally melted, then cook at 15-second intervals until it is.
Dip the bottom of each macaroon into the melted chocolate and place it back onto the baking sheet to cool. Alternatively, you could also drizzle the melted chocolate over the top of your macarons. Let the chocolate harden completely before serving.
Print Easy Chocolate Macaroons — 5 Ingredients, Gluten-Free Author: Marie Bostwick Yield: Makes about 30 1x Print Recipe [image error] Pin Recipe Ingredients ½ cup egg whites (whites of about 4 large eggs)½ cup granulated sugar1 tsp vanilla14 oz bag sweetened coconut8 oz semi-sweet chocolate chips (can sub dark) Cook Mode Prevent your screen from going dark Instructions Preheat oven to 325 degrees. Line a baking sheet with baking parchment.Whisk egg whites, sugar, and vanilla together in a medium-sized bowl until well combined and sugar is beginning to dissolve – 1 to 2 minutes. Egg whites will be frothy but still liquid. Stir in shredded coconut until well coated and combined.Using a melon baller or clean hands, shape tablespoons of the coconut mixture into balls or mounds. Set balls on prepared baking pan, spaced evenly. (They won’t spread much during baking.)Bake macaroons in preheated oven for 22 minutes, until just golden brown. Turn halfway through baking. Remove from oven and allow to cool for at least one hour.Melt chocolate chips in microwave (see post for instructions). Dip cooled macaroons into the melted chocolate. Return to baking sheet so chocolate can cool and set. (Can also drizzle chocolate over the top.) If kitchen is warm, place pan in refrigerator until chocolate sets. Did you make this recipe?
 Share a photo and tag us — we can't wait to see what you've made!
June 1, 2026
10 Great Gifts For Teachers (Because They Deserve So Much More Than An Apple!)

Every June, the same panic sets in. School’s almost out, and you haven’t figured out what teacher gifts to get your child’s teacher yet.
Sound familiar?
Look, I get it. Teachers can be notoriously hard to shop for. On one hand, you want to give something meaningful – something that says I see you, I appreciate you, and I know you spent your own money on construction paper again this year. On the other hand, you don’t want to be the parent who contributes to the ever-growing collection of “#1 Teacher” mugs gathering dust in someone’s cabinet.
With a little thought and creativity, you can give a teacher’s gift that will actually make them smile. Here are ten of my favorites, including one idea at the end that’s extra special.
1. A Gift Card to an Independent Bookstore

If there’s one thing I know about teachers, it’s this: they love books. Most of them became teachers because they love books. A gift card to a local independent bookstore is the gift that says, “Treat yourself.” And unlike a specific book you might pick out yourself, a gift card lets them choose exactly what speaks to them in that moment.
Getting that gift card at a local indie bookstore is the first and best choice. It’s so important to support local business! But if your community does have one, a gift card to Barnes & Noble can do in a pinch.
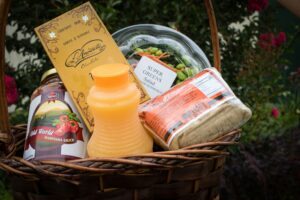
2. A Beach Read Basket
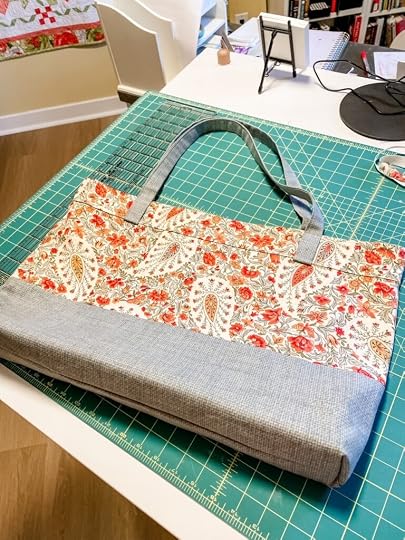
Now this one is fun to put together! Teachers work hard all year long, and when summer finally arrives, they deserve to do absolutely nothing. Preferably somewhere sunny with a cold drink in hand.
Fill a cute basket (or better yet, a handmade DIY Beach Tote) with all the summer essentials: a great beach read (check out my list here), a bottle of good sunscreen, and a colorful beach towel. It doesn’t have to be expensive to feel generous and thoughtful.
3. Flower Bulbs — One for Each Student

Here’s a gift idea that is equal parts sweet and symbolic. Pick up a bag of flower bulbs, tulips, daffodils, hyacinths, whatever is best for your area of the country, and gift one bulb for each child in the class.
It’s meaningful, it won’t break the bank, and it’s the kind of gift that keeps giving year after year. Just make sure to include a sweet note explaining the idea – otherwise it might just look like a bag of dirt and onions!
4. A Massage or Spa Gift Certificate
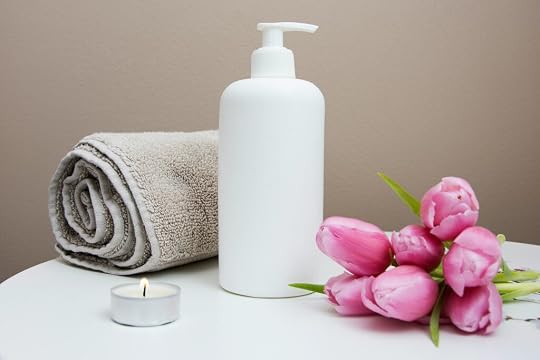
Let’s be honest here. Teaching is exhausting. These people manage 20+ children for six hours a day, navigate parent emails, write lesson plans, grade papers, handle conflict, inspire young minds, and somehow manage to do it all with a smile. They deserve some serious pampering.
A massage or spa gift certificate is on the pricier side, but here’s the thing: it doesn’t have to come from just one family. If a few parents pool together, you can give something truly luxurious without anyone having to take out a bank loan.
5. A Restaurant Gift CardThis one is simple, classic, and always appreciated. After a long year of packing lunches and eating on a twenty-two-minute schedule, there is nothing a teacher loves more than a nice dinner out where someone else does the cooking and the cleaning up.
Pick a restaurant you know they’d enjoy. If you’re not sure, a Visa gift card works just as well and gives them the freedom to choose. Either way, you’re giving them a night off.
6. A Teacher Supply Store Gift CardHere is something some parents don’t realize: teachers routinely spend their own money on classroom supplies. Markers, stickers, construction paper, organizational bins, decorations – the list is long, and the budget is short. A gift card to a teacher supply store local to you is incredibly practical and will be put to very good use.
Practical isn’t glamorous, but sometimes practical is the most loving thing you can give.
7. A Morning Treat Basket
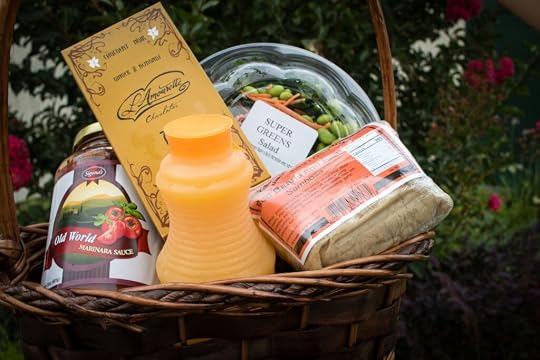
Teachers run on coffee. (And sometimes tea. And sometimes the sheer force of will.) A thoughtfully assembled morning treat basket is a cozy, cheerful gift that will get used every single day.
Fill a pretty basket with a bag of good coffee or a selection of interesting teas, a few packets of fancy hot cocoa, some shortbread cookies or chocolates, and maybe a pretty mug or two.
8. A Picnic Basket Full of Summer GoodiesThis one is similar in spirit to the beach read basket, but it’s a lovely standalone gift for the teacher who loves the outdoors. Fill a wicker basket (you can find beautiful ones at thrift stores for just a few dollars!) with a cheerful blanket, some gourmet crackers and jam, sparkling lemonade, and a few other goodies they can enjoy on a warm summer evening.
9. A Beautiful JournalTeachers spend so much of their year writing for and about other people – lesson plans, progress reports, notes home to parents. A gorgeous journal is an invitation to write for themselves for a change.
A beautiful moleskin journal, a set of nice pens, and maybe a sweet note encouraging them to rest up over the summer.
10. A Homemade Gift From The Heart
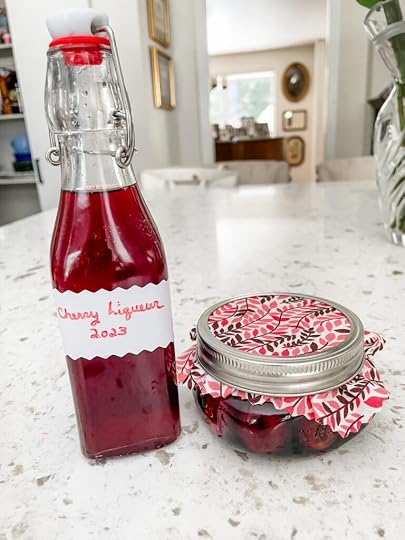
There is nothing quite like a gift that someone made with their own hands. And before you click away thinking, “That’s not me, I am not crafty,” I want you to hear me out.
You don’t have to be crafty to give a beautiful homemade gift. Case in point: my homemade cherry liqueur. It requires zero cooking, zero special skills, and just six simple ingredients. You mix it up, tuck it away in a cool dark spot for a few weeks, then decant it into a pretty swing-top bottle and tie on a ribbon. The result looks and tastes like something you’d find in a fancy boutique shop – and nobody has to know how easy it was to make!
It might be too late for an end of year gift, but with cherry season underway, it’d be a nice gift for meet-the-teacher night come late August.
And if you’re not crafty at all? Make a coupon. A heartfelt handmade card offering two hours of help. Think cleaning up the classroom, sorting supplies, or getting the room ready for the next school year. One year, I helped a teacher make her decorative bulletin boards, and she was incredibly appreciative. Sometimes, the gift of your time and two willing hands is the most generous thing of all.
May 25, 2026
3-Ingredient Mini Pepper Appetizer
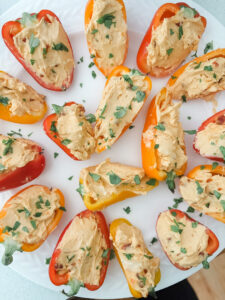
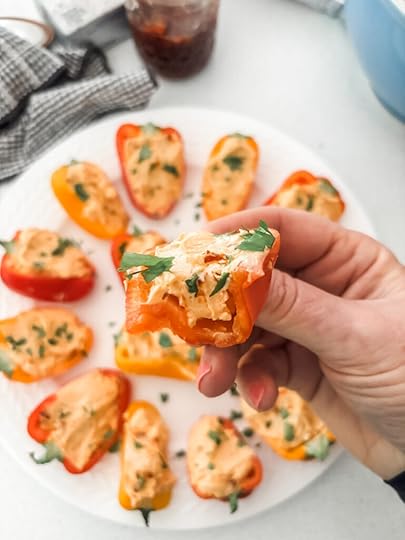
Looking for a super quick, super scrumptious appetizer? You found it! With just three ingredients, these yummy stuffed mini pepper appetizers are simple to make and cute as can be!
3-Ingredient Mini Pepper Appetizers – Tasty and Time-SavingOur supermarket started carrying bags of red, yellow, and orange mini bell peppers a couple of years ago. I’ve been buying them ever since.
They stay fresh for a fairly long time, so I like to keep them on hand to toss into salads or for quick stir-fries. Slightly sweet and crunchy, they’re also great for a quick snack or to use with dips instead of crackers.
But there’s no better way to enjoy mini peppers than in this scrumptious three-ingredient appetizer.
They’re perfect for potlucks, last-minute guests, game day snacks, or family gatherings.
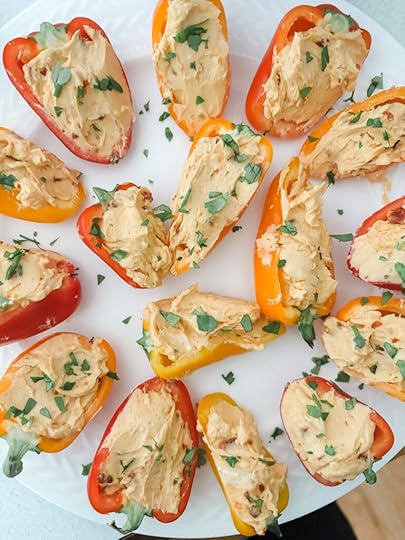
Recipes with just a few ingredients are a godsend for busy cooks, especially if they taste as good as these 3-ingredient mini pepper appetizers!
However, I do have a couple of thoughts when it comes to preparation and possible substitutions or add-ins. So, let’s talk about each ingredient separately.
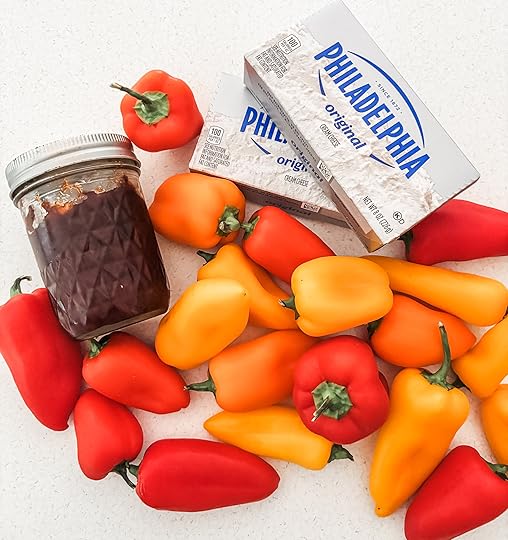
Most supermarkets are carrying them now. You’ll find them in the produce department, probably near the large, regular-sized bell peppers. My market sells them in two-pound bags.
That’s more than you’ll need to make the recipe for 3 Ingredient Mini Pepper Appetizers. However, they do stay fresh for quite a while. Save any extras to use in salads, stir-fries, as a topping for tacos or chili, with dips, or as a quick and healthy snack.
For this recipe, I recommend you choose peppers that are a bit on the round side. The elongated ones are harder to fill. You’ll definitely want a nice amount of filling in each appetizer.
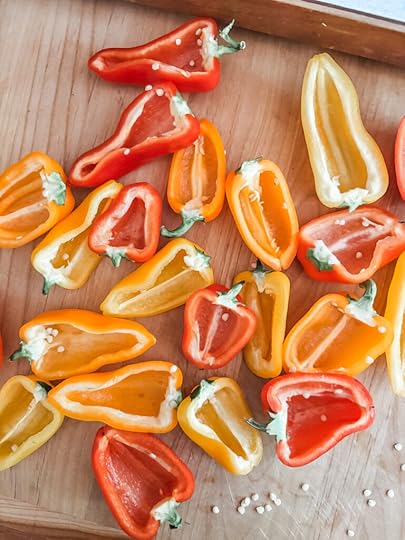
Prepping the mini peppers is easy. Start by giving peppers a quick rinse with cool water. Then pat dry with a paper towel.
Slice the peppers in half lengthwise. I recommend that you leave on the stem. Stems add a pretty pop of color, and leaving them on the pepper will keep the filling from falling out.
Finally, scoop out the seeds and use a paring knife to slice off any white ribs inside the peppers.
When it comes to ingredients for making quick, easy, tasty appetizers, cream cheese is the queen! It’s rich, creamy, and just slightly tangy. But the taste is subtle enough to let other flavors shine through.
I used plain old Philadelphia Brand, but just about any store brand will do. If you want to save a few calories, you could substitute Neufchatel for regular cream cheese. The taste and texture would be very similar.
Another option would be to substitute either strained Greek yogurt or ricotta cheese. You really would need to strain them to get a thick creamy texture. I use a strainer like this one.
But you could also just line a mesh strainer with a coffee filter, suspended over a bowl to let the liquids strain out.
Hot Pepper Jelly — the Magic IngredientThis is where things get fun!
Hot pepper jelly is the magic ingredient for 3 ingredients Mini Peppers. The combination of sweet and heat is just wonderful. It’s so tasty when paired with the rich cream cheese and stuffed into a crunchy mini bell pepper.
There are lots of directions you can go here.
This time, I used some homemade jalapeno hot pepper jam I already had in the pantry. It was very thick and so good, with just a touch of heat. But store-bought hot pepper jelly or jam can be just as good.
Trader Joe’s stocks it, as do most supermarkets. I’ve used the Stonewall Kitchen brand in the past, and it’s great.
If you’d like to get a little creative, check out this Hot Pepper Bacon Jam from Terrapin Farms. Bacon, peppers, and cream cheese? What’s not to love!
Optional Add-Ins to Customize Your FillingThree ingredients are really all you need to make this tasty appetizer. No kidding. Prepare the recipe as is, and I all but guarantee you an empty platter.
However, if you feel like gilding the lily, I’ve got a few suggestions for add-ins
Minced scallionsMinced jalapeno pepperA few sprinkles of smoked paprikaA dash of hot sauce for a little extra heatSprinkle chopped parsley on top for garnishMake-Ahead Tips, Storage, and Serving IdeasHow to make them?Once you’ve prepped the mini peppers, you’ll mix the pepper jelly into the cream cheese (also any optional add-ins) with a hand mixer. Mix for a good minute or two, so the filling is light and fluffy. Fill each pepper with a scoop of the cream cheese filling and serve. That’s it!
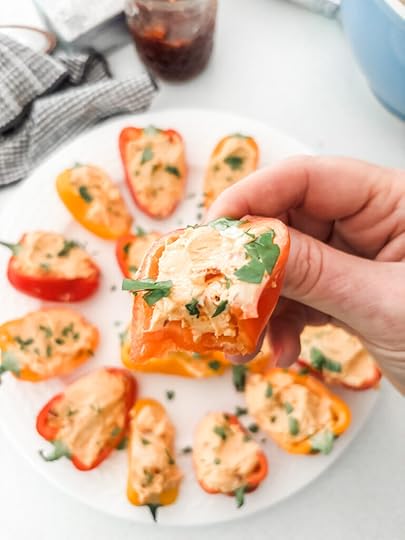
The number can vary depending on how large the mini peppers are and how much filling you put into each pepper. You should get somewhere between 12 and 18 appetizers from this recipe.
How long will they keep?If you keep them covered in the refrigerator in an airtight container, they’ll be good for two to three days.
Print 3-Ingredient Mini Pepper Appetizer Author: Marie Bostwick Yield: Makes between 12 and 18 appetizers 1x Print Recipe [image error] Pin Recipe Ingredients 6 to 9 mini bell peppers, sliced lengthwise, seeds and ribs removed,8 oz cream cheese, slightly softened¼ cup hot pepper jelly or jam, (see notes about types above)Optional add-ins (see notes) Cook Mode Prevent your screen from going dark Instructions Place softened cream cheese and hot pepper jelly or jam (plus any desired add-ins) in a deep mixing bowl. Blend thoroughly with a hand-mixer for one to two minutes, until filling is light, fluffy, and well combined.Fill each mini pepper with a generous amount of the cream cheese/pepper jelly mixture. Garnish with chopped parsley if desired. Serve. (Will keep covered in refrigerator for 2-3 days.) Did you make this recipe?
 Share a photo and tag us — we can't wait to see what you've made!