
Colin McCrate's Blog
November 18, 2025
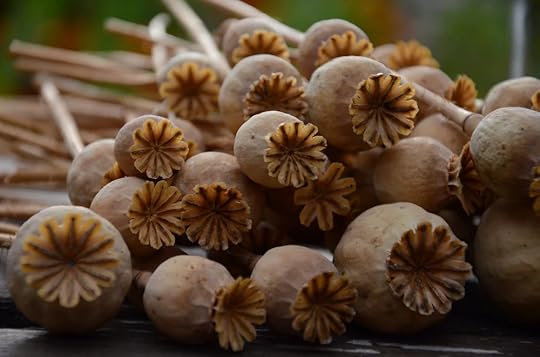
How to Plant Poppies for a Colorful Spring Display
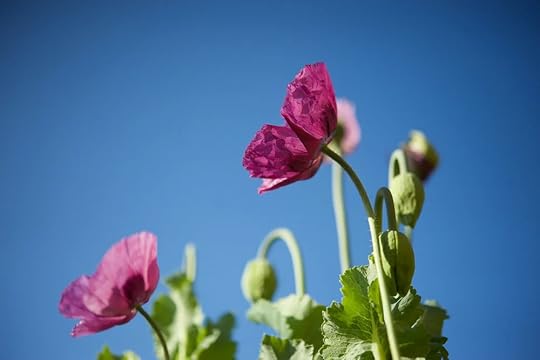
Papaver somniferum - all photos by Hilary Dahl
Poppies are one of the easiest—and most rewarding—flowers you can grow. Their delicate petals and vibrant colors add whimsical charm to any garden. The best part? They thrive with very little fuss, as long as you plant them the right way.
Choose the Right TimePoppies prefer to start in cool weather.
Best time to plant: fall or very early spring
Poppy seeds require a period of cold to germinate and grow, so they generally do best when planted in the late fall or early spring. Ultimately, where you live will determine the best planting time for your poppies. Here are some general guidelines:
If you live in Zone 6 or warmer, you might have the best luck preparing your growing area in the fall and sprinkling the seeds (poppies prefer to be direct seeded into the garden). They will germinate in the early spring.
If you live in Zone 5 or colder, sow the seeds in the soil as soon as you can work it in the spring. Poppies are very cold tolerant, and can handle frost and even some snow, so don't stress about the temps dropping again.
Poppy seeds need light to germinate, so skip the deep digging.
Just rake the soil to loosen the top layer and remove any big clumps.
They love well-drained soil
Full sun gives the best blooms (think 6 hours minimum!)
Poppy seeds are tiny—almost dust-like—so scatter them lightly across the soil.
Don’t cover them with soil; just press them gently so they make contact.
For even spacing, many gardeners mix seeds with a bit of sand before spreading.
Water GentlyKeep the soil lightly moist until seedlings appear. If you live in an area where the ground is under snow, or you get lots of rain, don’t worry about supplemental water!
After they sprout, they’re quite drought tolerant and prefer not to be overwatered.
Once poppies bloom, let some of the seed pods dry out naturally.
They’ll drop seeds on their own and return year after year with little effort from you.
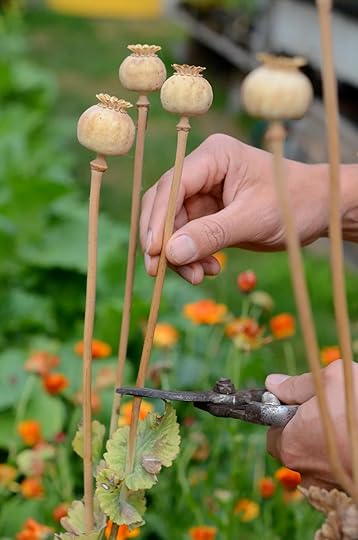
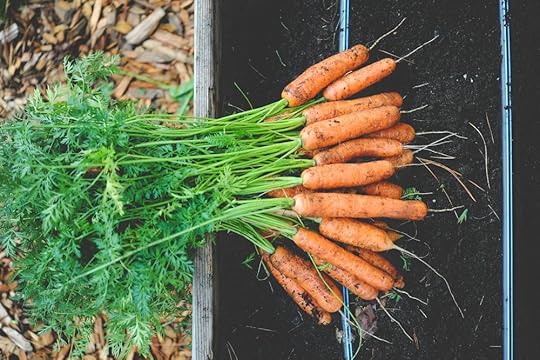
If you’re growing poppy varieties with edible seeds, such as Hungarian breadseed or Pepperbox poppies (Papaver somniferum), you can harvest the familiar edible seeds often used in baking. Here's how:
Wait for the pods to dry naturallyAfter the flowers fade, the pods will swell and turn from green to a pale tan or light brown.
They should feel dry and firm—almost like a tiny rattle when you shake them.
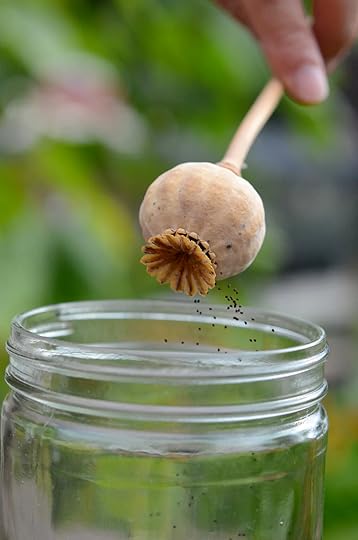
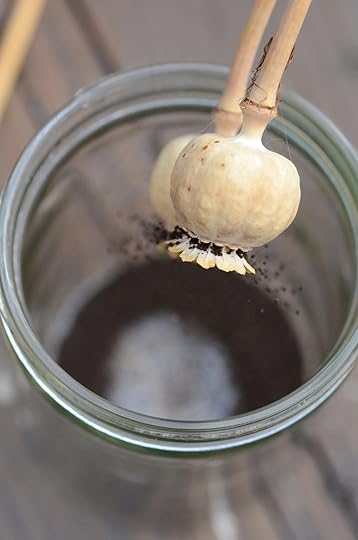
Snip the pods from the plant and tip them upside down over a bowl.
Tiny blue-gray seeds will pour out through the natural openings at the top.
Let the seeds dry completely, then keep them in an airtight jar.
They’ll stay fresh for many months and can be used for cooking—or saved to plant again next year.
Use the dried pods
Keep the dried pods!
They’re gorgeous and can be used in floral arrangements, wreaths, or craft projects.
 Related posts:


November 6, 2025
Pro-tips for successful seed starting

Seed starting is a fairly simple process, but it’s important to do it properly to ensure even, consistently high germination rates. Most seeds should have a germination rate of 80 to 95 percent when you purchase them, but it’s up to you to provide the conditions necessary to achieve this.
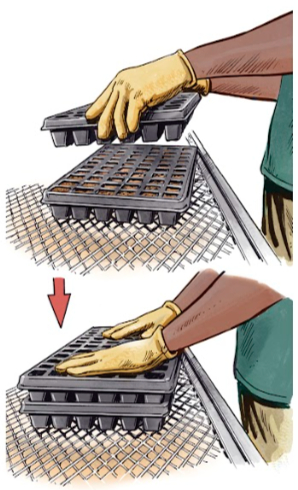
When you’re ready to sow, fill each flat or pot up to the top with germination mix or screened potting soil. Use the bottom of a similar-size container to gently tamp down the soil in your pot, creating a level seeding surface 1/2 to 1 inch below the rim of the container. If the soil mix is dry, moisten it thoroughly before sowing.
2. Sow the seeds directly on top of the prepared seed surface and dust over the seed with germination mix until achieving the desired depth. Seeds require different sowing depths. Every seed packet should indicate how deeply to sow the seed in the soil, but usually smaller seeds are planted more shallowly than larger seeds, and as a general rule, seeds should be planted twice as deep as their diameter.
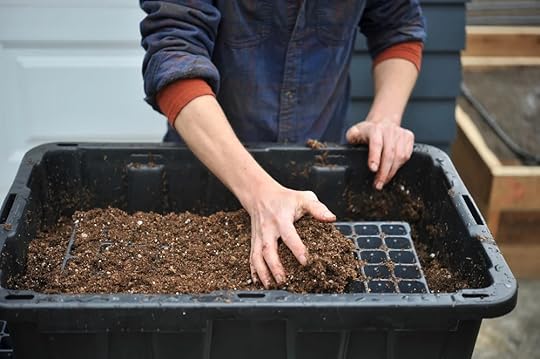
3. Sow more than one seed per cell or pot. In a small nursery setting, space is at a premium and you don’t want to dedicate heated propagation space to empty containers. Sow heavily enough to ensure a viable plant in each container, and then thin to the healthiest plant once they emerge. For most crops two to three seeds per container should be adequate; sowing any heavier than this can make thinning difficult and stressful for the little sprouts.
4. Seeds need good contact with the soil to absorb moisture during germination. Simply watering in the seeds after planting will provide adequate seed-to-soil contact. Keep newly sown flats consistently moist during the entire germinating process. If a seed dries out for even a few hours, young sprouts may desiccate and die. We recommend checking on your transplants daily, if possible.
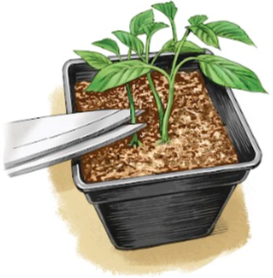
5. Once the plants have germinated and are large enough to distinguish, cull all but one plant in each cell. Culling can be done by uprooting extra plants or simply by snipping them off with scissors. The appropriate technique may be dictated by the crop and its size at culling time. If in doubt, pinch or snip off the extra plants to prevent disturbing the young root system of your keeper plant.
Filling trays in another container helps reduce waste
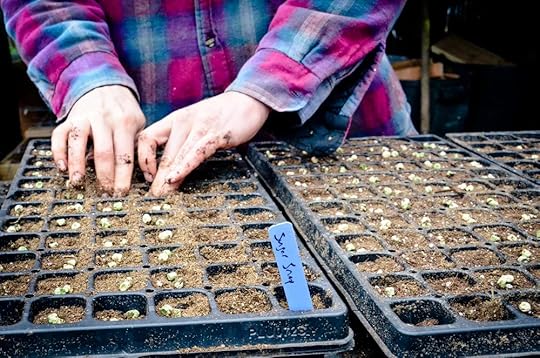
Sowing 2-3 seeds per cell helps improve germination
This article and the accompanying images are from our 2nd book, Grow More Food, and is just part of an entire chapter dedicated to starting your own transplants at home.
FOr more in-Depth Info on Starting seeds at home, read on:November 5, 2025
Top 3 tips for setting up your Freyr trellis
The Freyr trellis was designed to be easy to set up. We wanted the installation process to feel simple, fast, and require a minimum of tools. However, taking a little time to closely follow the instructions will go a long way in making your trellis as stable and attractive as possible!
Here are a few tips to make sure your setup goes smoothly:
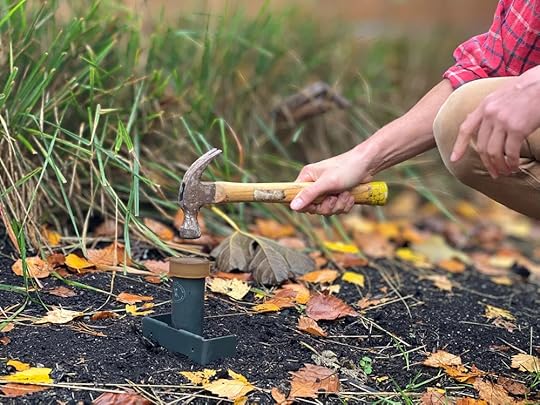
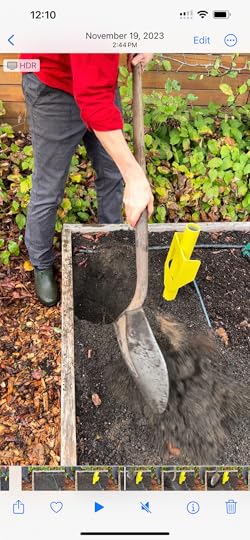
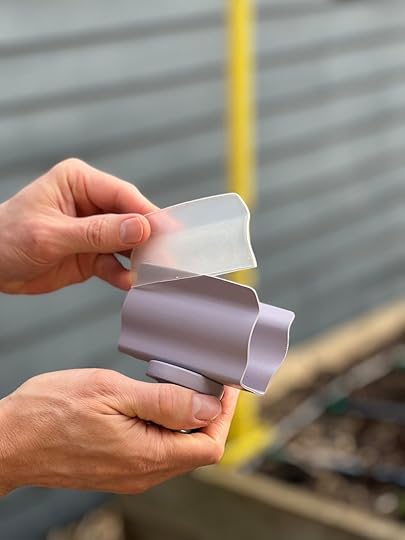
Sink the ground anchor as deep as possible when installing the Freyr trellis
Sink the ground anchors as deep as possible.The trellis comes with 2 ground anchors. These pieces sink into the soil and hold your trellis upright. The anchors are about 18” long and can be set into the soil up to about 16” deep. The very top of the anchor needs to be above soil level so that you can tighten the set screw (and so soil doesn’t fall into the top of the anchor!)
We recommend setting the anchors at least 12” deep, but deeper is always better if possible.
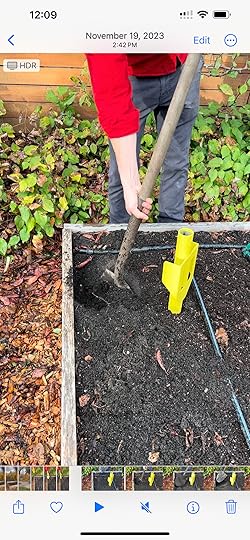
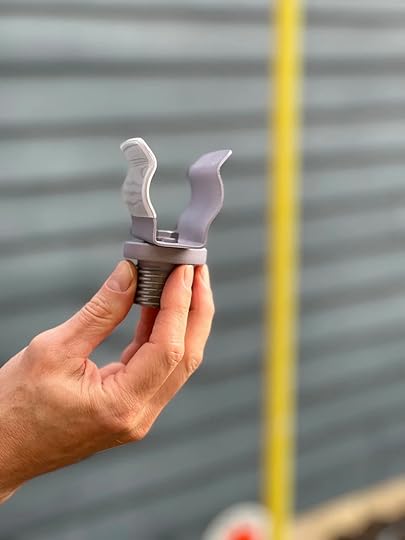
The trellis comes with 2 black anchor caps and 1 yellow hammering cap. The black caps are optional and can be used to cover the tops of your anchors if you decide to take down the trellis in the off-season but want to leave the anchors in place for next year. The yellow hammering cap should be placed on the top of the anchors during installation so you can hit the hammering cap as hard as you want without fear of damaging the anchor. If you’re Thor and the yellow cap gets stuck after hammering, just lightly tap it on the side and it’ll pop right out!
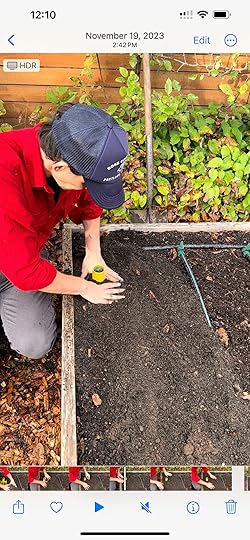
If your soil is difficult to work or you just don’t like the idea of hammering the anchors, another option is to dig a hole, place the anchor into the hole, fill it back up and tamp the soil around the anchor to stabilize it. Some people actually find this technique easier.

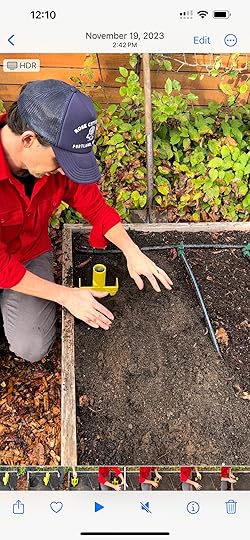
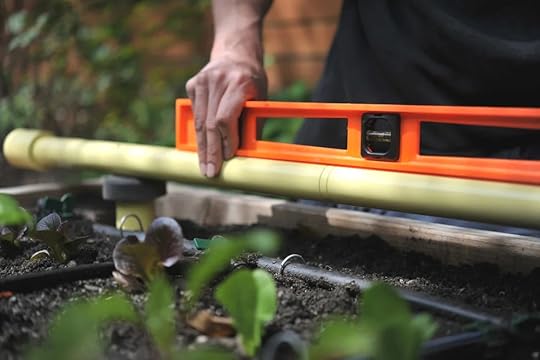
Leveling the Frey trellis during installation
Use a level and tape measure
Not every garden bed is completely level (in fact most aren’t). If your bed slopes in the direction the trellis is spanning, you may need to set one ground anchor deeper into the ground than the other to make sure the top bar of the trellis is level. This isn’t essential, the trellis will work with a slight slope, but it looks better when it’s level!
You can easily check the level of your anchors by:
Assembling your top bar
Placing a black anchor cap into each anchor
Placing the top bar across the anchor caps and placing a level on top of the bar.
Once your anchors are level, you’re almost done! Check the level of your posts side-to-side and back-to-back to make sure they are straight. Then simply snap the top bar into place.
The trellis comes with optional joint sleeves. This are covers for the fitting at the top of your posts. They add a little bit of friction, which helps the top bar stay in place and feel snug. They’re not necessary, some people prefer to use them and some don’t!
Tighten your set screwsOnce your anchors, posts, and top bar are in place and looking good, the last step is just to tighten down the set screws at the top of the ground anchors. Your trellis comes with an allen wrench. Just tighten each screw with the wrench. This will help keep everything in place.
Remember to loosen the set screw before you take down your trellis! If you don’t loosen the screw, it may make it impossible to remove the posts (or it might scratch the powder-coating).
That’s a lot of words to describe a relatively simple process! We hope it took longer to read this article than it does to set up the trellis. Of course, if you have any questions at all, please reach out at: info@seattleurbanfarmco.com
Thank you! We’re so glad you’re here ♥️
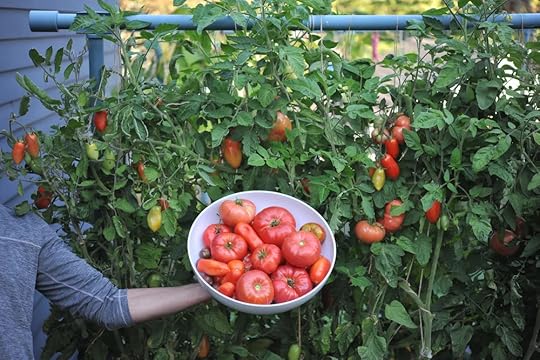
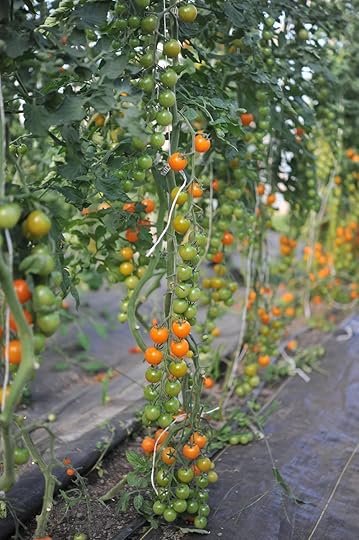
Why we choose hemp twine
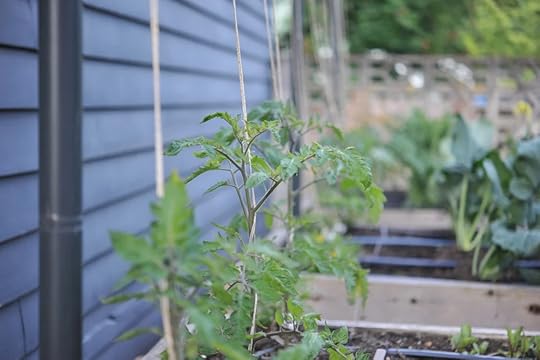
Tomatoes growing up a hemp-twine support.
Hemp’s strength and natural rot-resistance makes it a great support for climbing crops
When we started offering biodegradable twines, our goal was to:
Make it easier for people to garden with natural materials
Reduce the amount of plastic in the landscape
Make end-of-season garden cleanup easier
We chose hemp as our first twine product because of its strength and rot resistance, and because it's one of the most environmentally-sound materials available. We didn’t perform any of our own environmental impact studies, but to the best of our knowledge, here’s why hemp is a great alternative to plastics in the garden:
Carbon capture champion
Hemp is a powerhouse when it comes to pulling carbon out of the atmosphere—absorbing roughly 1.6 tons of CO₂ for every ton of hemp produced. That makes it one of the most effective crops for carbon sequestration on the planet.
Healthy soil, happy plants
With deep, fibrous roots, hemp helps loosen compacted soil, prevent erosion, and build healthy soil structure. After harvest, the leftover plant material adds organic matter right back into the soil—fuel for future crops.
Low-maintenance
Naturally resistant to many pests and weeds, hemp can thrive without the heavy use of herbicides and pesticides. That means cleaner soil, cleaner water, and a healthier ecosystem overall.
Water-wise crop
Compared to many other industrial crops, hemp is a water-sipper. It often grows well on rainfall alone—making it a smart option for regions facing water stress.
Built to break down
Hemp-based products are fully biodegradable, meaning they return to the earth instead of lingering in landfills.
Supports biodiversity
A field of hemp isn’t just good for farmers—it’s good for wildlife too. The dense, varied habitat attracts beneficial insects, birds, and other pollinators.
While the cultivation of pretty much any crop will have some impacts, like nutrient depletion, we’re proud to be able to offer this low-impact alternative. Our hemp products are made in Romania, from hemp grown in Romania.
Tips for use:
Store your hemp twine in a dry place when you’re not using it
Compost your hemp twine the rest of your plants when you’re done with it
November 4, 2025
Garden nets are be very useful!
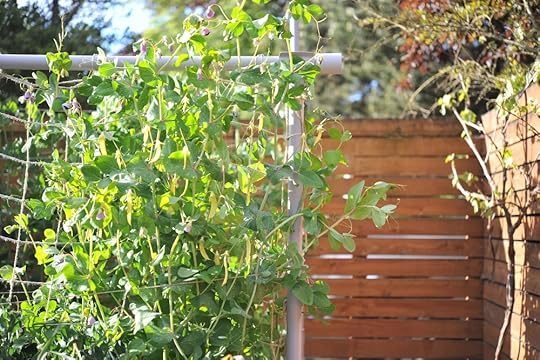
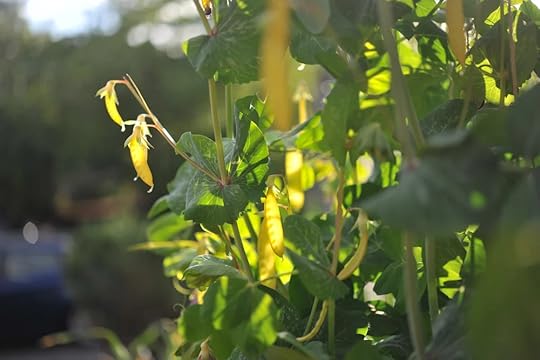
Snow peas growing vertically on a jute net.
Our compostable nets can be used to support plants both vertically and horizontally.
Vertical trainingWhen set up vertically, nets provide a ready-to-go structure for your plants to grow up.
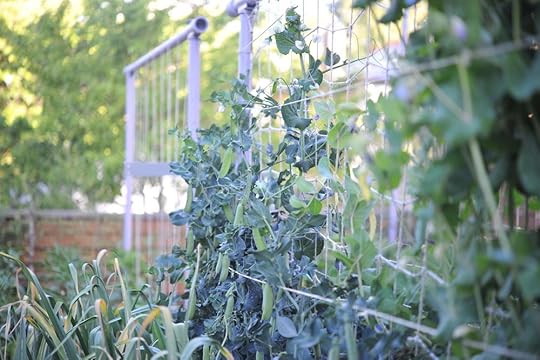
Shelling pea vines (shown here) and snap pea vines can get really heavy with fruit. We like to tie them back even when using a net, to ensure they don’t flop over onto our other plants.
Keep in mind that not all vining plants will climb. Some plants like pole beans and cucumbers have strong tendrils that will wrap themselves around your support, while crops like tomatoes and peas need a little extra attention.
Tips for vertical training:
Secure the net on both sides, and across the top if possible. Our nets have loops along the top of the net for easy installation. If you’re not using a support that allows you to use the loops, simply snip them in half and use them like the ties along the sides.
Plant your crops directly along the base of the net.
When your plants are small, feel free to wind them in and out of the net as long as they are flexible enough to do so without breaking.
Consider adding a simple horizontal string of twine every few feet along the front edge of the plants growing along the net. This will help stabilize heavy, fruit laden vines and make sure they don’t pull free of the net. We have used this technique for decades when growing peas specifically, because the pea plants are often too heavy for their delicate tendrils to support. Tying back your pea plants with a few additional horizontal rows of string also keeps the plants from shading out whatever may be growing in front of them, and helps to maximize your garden space.
Use compostable trellis clips to attach the plant to the netting if needed. This can be helpful for particularly large branches and stems, or when supporting branches that are heavy with fruit.
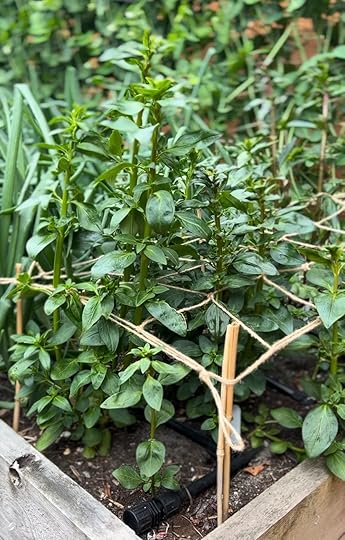
When used as a horizontal support, they provide a cage-like structure for tall crops such as snapdragons and fava beans.
Tips for horizontal training:
Start early. Install the netting before plants get too tall, and begin training them as soon as they start to grow.
Place the netting at about ½ of the mature height of your plant. This placement provides support for the plants, while also maintaining access for harvesting, especially when one needs to access long stems for flower harvesting.
We like to use bamboo stakes to secure the corners of our horizontal nets, but any stake, found, foraged or purchased, that’s tall enough to support your net will do.
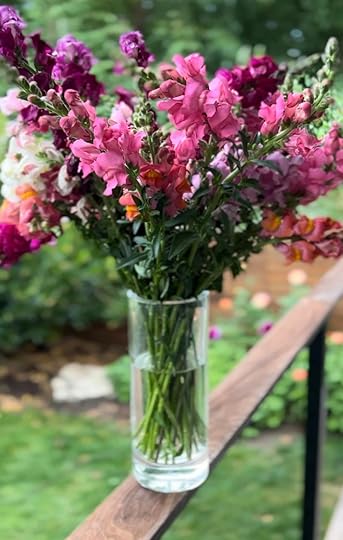
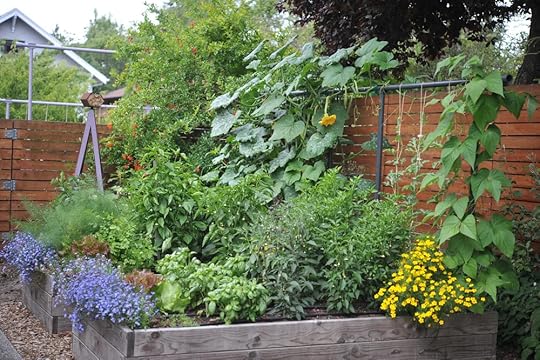
The following is an example of a simple horizontal training structure we set up for snapdragons growing at the end of one of our raised beds. The net is about 18 inches above the bed (I’d actually set it up even higher for this variety in the future). These plants thrived and bloomed for months! The tall stems in the vase were harvested in August, so the plants had already been blooming for months, and we’re still producing long, straight, sturdy stems.

October 8, 2025
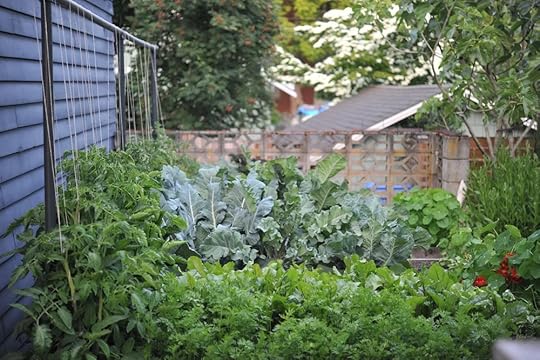
3 Reasons to Grow Vertically: Plants, People, and Productivity
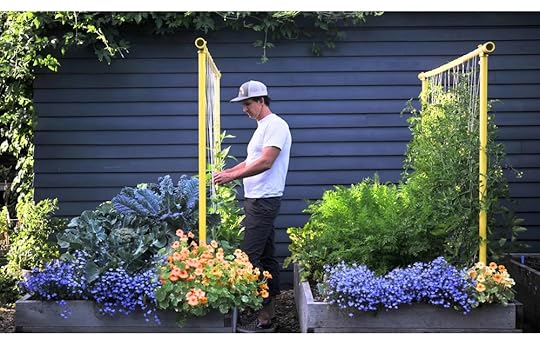
We’re all about vertical gardening. Why? Because space in the home garden is almost always a limiting factor. How many times have you said “I wish I had room for a few more basil plants!”. Well, if you take full advantage of your vertical space, by training your vining plants straight up, you might just have enough room next season to make all of your pesto dreams come true.
Growing upward instead of outward might just be one of the simplest ways to grow smarter. Vertical gardening—encouraging your plants to climb instead of sprawl—saves space, reduces pests, and makes gardening (and harvesting) a whole lot easier.
Whether you’re training tomatoes up a string trellis or letting sweet peas climb a net, growing vertically helps both your garden and your back.
Vertical gardening simply means giving your plants something to climb. Most crops grow upward naturally, but vining plants—like tomatoes, cucumbers, and beans—need extra support to stay off the ground.
A trellis is the structure that provides this support. When vines are lifted onto a trellis, they’re healthier, easier to harvest, and far more space-efficient.
Pro tip: Set up your trellis before planting. Moving supports later can damage tender stems and roots.
Growing up instead of out brings benefits to your plants, your garden design, and your own comfort. Here’s how trellising helps in three big ways:
1. Plants: Healthier, Stronger, HappierBetter airflow = fewer diseases.
When vines sprawl across soil, leaves stay damp after rain or morning dew, which encourages fungal diseases like powdery mildew. Lifting plants off of the ground up increases air circulation so foliage dries faster and stays healthier!
More sunlight, more growth.
Trellising opens up the plant’s canopy so every leaf gets its share of sunshine, improving photosynthesis and overall plant vigor.
Easier pest management.
Tangled vines make it harder to spot and manage pests. A trellised plant helps you easily monitor, prune, and remove pests and any affected parts of the plant.
 2. People: Easier Gardening, Easier Harvests
No more garden gymnastics.
Vertical gardening means less bending, crouching, and crawling to find ripe fruit. Everything's closer to eye level—tomatoes, cucumbers, and beans practically hand themselves to you.
Simpler training and pruning.
Guiding plants up their supports lets you see and manage growth patterns clearly. Redirect an errant branch or clip a stray vine—no more guesswork under a canopy of tangled leaves.
A prettier garden (and proud gardener).
A tidy trellised row not only functions better, it looks better. Visitors will ask how you keep your garden so organized, and you can smile modestly while saying, “Oh, I just grow vertically.”
 3. Productivity: More Food, Less Fuss
Protect your harvest.
Keeping fruit off the ground reduces rot and deters pests like slugs, rodents, and insects that love a ground-level buffet.
Prevent breakage.
Trellised plants are less likely to snap under the weight of heavy fruit or strong winds. No more heartbreak from a loaded tomato branch breaking before harvest.
Grow more in less space.
Vertical gardening doubles your growing potential by using both horizontal and vertical space. In small urban gardens or raised beds, this is a game-changer—more yield, same footprint.
Not every plant needs a trellis—but most benefit from one. Here are a few that thrive when lifted skyward:
Vining Crops
Tomatoes
Cucumbers
Pole beans
Peas
Melons
Summer squash
Winter squash
Top-Heavy Crops
Peppers
Eggplant
Fava beans
Bush beans
Climbing Flowers
Sweet peas
Dahlias
Runner beans
Nasturtiums (climbing varieties)
Install supports before planting. Avoid damaging roots later.
Train early. Check plants weekly and guide them toward the trellis.
Use clips or twine as needed. Some vines (like cucumbers) climb naturally, while others (like peppers) need a gentle tie for support.
Mix and match systems. Combine string trellising for tomatoes with garden netting for peas—it’s a beautiful and efficient combo.
Growing vertically is about working with your plants, not against them. You’ll grow healthier crops, make harvesting easier, and transform a cluttered garden into a productive and beautiful space.
Whether you’re working with a single raised bed or a backyard full of vines, a few well-placed trellises can make your garden more bountiful—for your plants, for you, and for your productivity.
Shop vertical growing suppliesVegetable Garden Soil Health 101
 Vegetable Garden Soil Health 101: How to Build and Maintain Healthy Soil
By Colin McCrate
Healthy soil grows healthy plants—it’s that simple. This is the backbone of organic agriculture: tend to the soil and the plants will take care of themselves. In fact, if you want to sound like an authentic, overzealous garden nerd, you can start saying things like “I don’t grow plants, I grow soil.” It’s typically best to reserve comments like this for precarious social situations, such as an awkward silence on a first date.
If you want abundant harvests and nutrient-rich vegetables, start by improving your soil. Soil health determines the quality, productivity, and long-term success of your garden.
Whether you’re building a new raised bed or maintaining a long-loved garden plot, the principles are the same: test, amend, and feed it consistently. Here’s how to create and sustain soil that gives back year after year.
Your soil is more than dirt—it’s a living system. It contains minerals, organic matter, microbes, and fungi that interact to support plant growth. When soil is in balance, plants are stronger, pests are fewer, and yields are higher.
Unfortunately, most residential soils—especially urban or compacted ones—lack key nutrients and structure. That’s why improving garden soil isn’t a one-time task. It’s an ongoing process, your soil should get healthier over time (rather than more depleted).
Before planting, it’s a good idea to understand what you’re working with.
If your garden site is in an older urban area, test for lead or other contaminants before building edible garden beds. (You can find soil testing resources at the end of this article.)
Once you know your soil is safe to use, (or if you’ve decided to import all of your soil, use containers, etc) you’ll want to measure its pH (how acidic or alkaline it is). pH controls how easily plants can absorb nutrients. The pH matters because, even if you add compost and fertilizer, your plants may not be able to absorb their nutrients if the pH is out of whack.
Ideal Vegetable Garden pH6.2–6.9 is the perfect range for most annual vegetables.
Below 6.2 = acidic soil. Add calcitic lime or dolomitic lime to raise pH.
Above 6.9 = alkaline soil. Add elemental sulfur to gently lower pH.
Tip: Test your soil pH once a year, ideally several months before planting. This gives amendments time to work on adjusting the acidity before you plant. You don’t need anything fancy, an at-home pH test kit or digital meter is perfectly adequate and will give you precise enough information to act on.
If soil health had a secret ingredient, it would be compost. When you add compost, it breaks down into humus—the rich, dark, crumbly material that gives soil its structure and resilience.
Humus improves tilth, meaning the soil holds together in soft clumps that are easy to work with. It acts like a sponge, balancing moisture by holding water in sandy soil and improving drainage in heavy clay.
As humus decomposes, it also feeds your crops naturally, releasing nutrients slowly throughout the growing season.
What to DoApply 2–3 inches of finished compost to your beds every year.
In spring and fall, loosen (don’t turn) your soil with a garden fork to preserve soil structure and beneficial microbes.
Compost not only boosts yields—it’s one of the best ways to build long-term soil health.
 Step 3: Feed Your Soil (and Plants) with Organic Fertilizers
Vegetable plants are heavy feeders. This means that they absorb lots of nutrients from the soil. Even with good pH and compost, most vegetable plants do better with some supplemental fertilizer. Organic fertilizers keep soil microbes active and nutrients cycling all season long.
It’s important not to overapply fertilizers, since this can create a buildup of salts in the soil and actually harm your crops. However, it’s been our experience that most beginning gardeners dramatically underfertilize! Always follow the directions on the package since application rates depend on the mix you buy. But just know that on your first go, you may be surprised at how much you actually need to use.
Here’s how we recommend applying fertilizers:
Before PlantingMix granular organic fertilizer* into the top 4 inches of soil.
For direct-seeded or densely planted crops, broadcast it evenly across the bed.
For larger crops like tomatoes or winter squash, add fertilizer directly into each planting hole.
* Our second book, Grow More Food (Storey 2022) includes the recipe for our time tested homemade granular organic fertilizer blend!
Side-dress heavy feeders (like tomatoes, corn, and brassicas) every 2–4 weeks with granular or liquid fertilizer.
For liquids, dilute as recommended on the label, apply at the base of plants, and rinse your watering can after each use.
Seedlings & transplants: Use low-dose liquid fertilizer 2–3 times per week after emergence. We tend to use fish, kelp or seaweed-based liquid fertilizers.
Transplanting: Use a high-phosphorus blend (2-4-2) to encourage root development.
Fruiting plants: Apply a 0-5-5 foliar spray for better fruit quality.
Leafy crops: Side-dress with a high-nitrogen mix (5-1-1) or straight blood meal (12-0-0) for lush green growth.
Healthy soil is alive—and like any living system, it needs care, balance, and food.
By adding compost, maintaining pH, and feeding with organic fertilizers, you’ll build soil that’s productive, resilient, and teeming with beneficial life.
The payoff? Healthier plants, higher yields, and a garden that gets better every year.
Shop our best-selling how-to gardening booksString Trellising: The best way to trellis???
By Colin McCrate
Imagine this: you walk down immaculate rows of vegetable crops. Each tomato plant extends perfectly straight towards the heavens. Brilliant arrays of orange, red, yellow, and purple fruit dazzle. You effortlessly pluck your harvest without once stooping over or scratching your arm on rusty wire. Your focus remains in the present, enjoying the sights and sounds of the morning, rather than considering the date of your latest tetanus shot. Is it pure fantasy, or is it string trellising?
If you want healthier plants, easier harvests, and a more efficient garden layout, string trellising might just change the way you grow.
A technique devised by professional farmers and refined for the home garden, this minimalist method turns simple twine into a powerful vertical support system for tomatoes, cucumbers, beans, and much more.
What Is String Trellising?
String trellising uses twine instead of cages or other structures to support plants. Each plant is supported by string, growing upward toward light and air.
The approach originated in greenhouse vegetable production, where crops like tomatoes and cucumbers are grown on hanging strings. But you don’t need a greenhouse to make it work—just a simple frame, some good twine, and a few minutes a week.
Why String Trellising Works So WellString trellising keeps plants organized, accessible, and productive. Here’s why we love it:
Better plant health. Lifting foliage improves airflow and reduces soil-borne disease.
Simpler pruning and harvests. Fruit grows at eye level, and vines stay neat and open.
Higher yields in less space. Plants grow vertically, so you can fit more per bed.
Cleaner fruit. No muddy cucumbers or bruised tomatoes from sprawling on the soil.
Once you try it, you’ll see why professional growers rely on strings —it’s faster, cleaner, and easier to maintain.
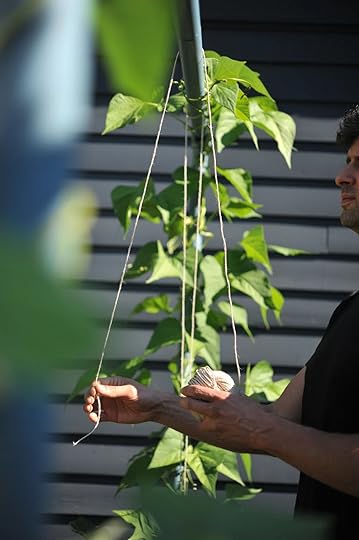
Choosing the Right TwineHemp twine – The strongest natural twine. It’s biodegradable, can hold virtually anything and easily lasts a full season.
Linen twine - Nearly as strong as hemp, just as attractive and also biodegradable. Our linen twine comes in a variety of colors.
Jute twine – Good for horizontal strings, lighter crops, and netting.
Plastic twine – We don’t recommend plastic twine. It’s durable but not biodegradable; it can shed microplastics into the garden and removing it from old vines can be tedious.
Whenever possible, go with natural fibers. At season’s end natural twine and spent vines can go straight into the compost—no plastic waste, no cleanup headache.
Vertical strings, Horizontal Strings, and Nets
There are 3 main approaches to string trellising:
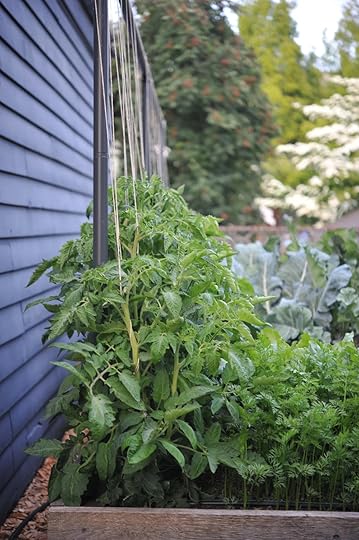
Vertical string trellising: One string per plant (or per main stem - we often let our tomatoes have 3-4 main stems, so we add additional strings to support them), hanging straight down. Ideal for tomatoes, cucumbers, beans, and peppers.
Horizontal string trellising: Twine runs side-to-side between posts, supporting plants in layers—great for peas, flowers, and even bush beans - short crops that need a “fence” rather than a single line.
Netting: String nets are a great mix with benefits of both vertical and horizontal strings. Set up the net before planting and train crops to grab on as they grow. Nets work best when supplemented by occasional horizontal strings across the front (to help fruit-laden vines stay in place)
Many gardeners mix these methods in the garden: vertical strings for tall crops like tomatoes, cucumbers, and pole beans, horizontal lines or nets for peas and flowers.
Set up your frame. Install two sturdy posts and a crossbar 5–7 feet above the ground. A Freyr trellis, cedar posts, or an existing arbor all work.
Attach the string. For vertical strings, you’ll drape twine over the top bar so both ends hang to the soil. Clip or tie them loosely to the plant’s base. For horizontal strings, simply tie the string to a post, weave it between your plants and tie off on the other post.
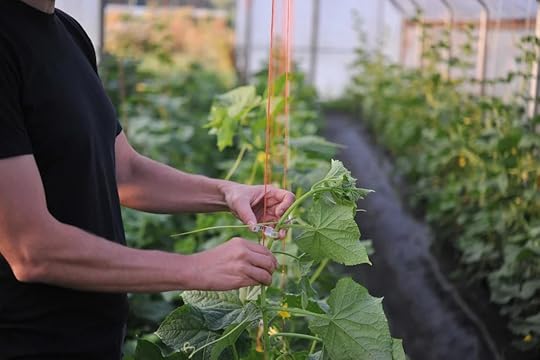
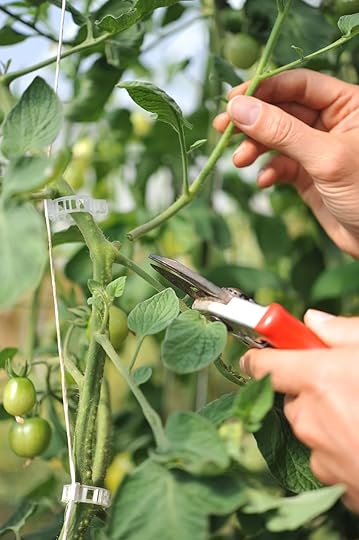
Train the plant. As stems grow, gently wrap them around the string, add new horizontal strings, and/or secure them with trellis clips. Check weekly and guide new growth upward.
Prune as you go. Remove crowded or downward-facing branches to keep air and light moving freely.
Pro tip: When using vertical strings, use a double string (looped up and over the bar). It’s stronger and avoids tension knots that can slip or weaken midseason.
Not all plants will reach the top of the trellis, but some particularly vigorous vines, like indeterminate tomatoes can. When plants climb past the top of the trellis, we like to let them get about 6-12” above the top bar. This is short enough that the branches won’t snap or bend, but tall enough that it looks great and gives you a little extra vertical space.
When they’ve reached a height that you can still easily manage, simply snip off the tops. Some plants will send up new shoots, which is okay, just trim those tops as needed for the rest of the season.
If your plants regularly exceed that height, you can use a tomahook or similar reel to unwind extra string and lower the vine in a gentle arc.
 Best Crops for String Trellising
Tomatoes: Wrap or clip the main stems weekly for tidy, high-yield growth.
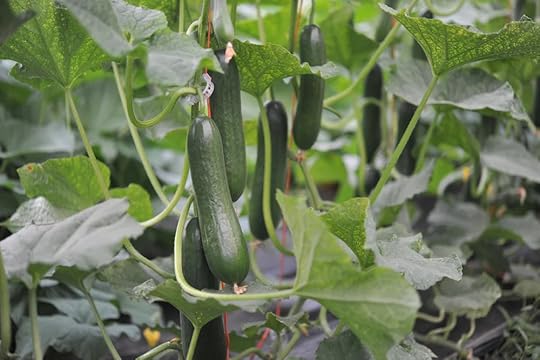
Cucumbers: Their tendrils naturally climb the string.
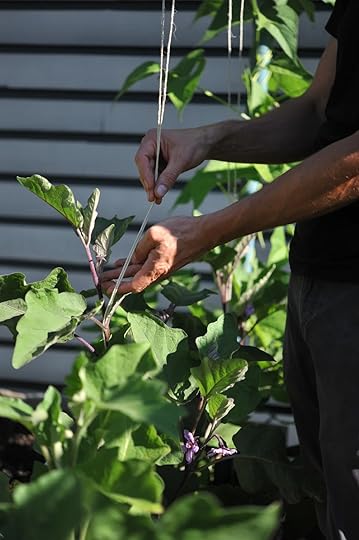
Peppers & Eggplants: Support the main stem to prevent bending under fruit weight.
Pole Beans: The easiest crop—just drop a string and let them climb.
Peas: Pair horizontal netting with front support strings to prevent collapse.
Small Squash & Melons: Choose compact varieties and provide slings for heavy fruit.
Summer squash: Look for climbing varieties like Incredible Escalator Zucchini (shown in photo above)
How tall should my trellis be?
5–7 feet is ideal. It keeps most crops upright and reachable for easy harvest.
Do I need clips?
Not always. Tomatoes and squash can be wrapped by hand; delicate vines benefit from soft plastic or biodegradable clips.
Can I reuse the string?
Natural fiber twine breaks down quickly, so it can easily be composted at the end of each season. Reuse only if it’s still strong and hasn’t had prolonged exposure to water, and it’s disease-free.
Organic Fertilizer in the Vegetable Garden: What to Use, When, and How
By Colin McCrate
Vegetables are needy. They need you to delicately place them under 1/8” of perfectly screened, organic germination mix. They need you to water them gingerly, as if they were bathing in the fine mist of a waterfall deep in the Shire. They need you to pick them up from the mall after the midnight screening of Little Shop of Horrors. And, most of all (maybe because they’ve seen that movie too many times) what they really need is for you to feed them!
Compared to most ornamentals, annual veggies demand more nutrients, more often. In perfect conditions, humus-rich soil can supply everything they need. In real gardens, a smart organic fertilizing plan keeps plants vigorous and yields high.
This guide covers what’s in organic fertilizers, how to read NPK labels, when to use slow-release vs. soluble products (and why both matter), plus crop-specific tips and foliar feeding basics.
Organic fertilizers come from animal, plant, or mineral sources and are processed to be safe for gardens.
Mineral sources: greensand, rock phosphate, sulfate of potash, glacial rock dust.
Animal byproducts: blood meal, bone meal (cow/fish), feather meal, crab/whole fish meal, bat guano, chicken manure, worm castings.
Plant sources: kelp, alfalfa, cottonseed, soybean meal.
Each ingredient contributes a different nutrient profile and release speed. Blends combine them to hit target ratios.
The three big numbers are N-P-K:
Nitrogen (N): leafy/vegetative growth.
Phosphorus (P): root growth, flowering, early vigor.
Potassium (K): fruit quality, stress resilience, disease resistance.
Also important: Calcium (Ca) for cell walls and blossom-end rot prevention; Magnesium (Mg) for chlorophyll (aim for a Ca:Mg ratio around 5–7:1 for good availability), plus micronutrients (S, B, Zn, Mn, Fe, Cu).
Balanced fertilizers (e.g., 5-5-5, 3-2-3) simplify pre-plant and side-dress needs across mixed beds.
Slow-release (granular/insoluble):
Microbes break these down gradually, reducing leaching and feeding plants at a pace they can use. Great for pre-plant and scheduled side-dressings.
Soluble (liquid/quick-release):
Provides an immediate bump—ideal for transplant shock, visible deficiencies, or early fruit set. Think of granular as the “meal” and liquid as the “energy gel.”
Blood meal offers both: a quick bit of soluble N (often 1–6% of its N) plus a longer tail of slow N.
Plants can absorb diluted nutrients through leaf stomata—often faster than roots. Use foliar sprays to correct shortfalls or support early fruit set.
When: Cloudy days or before 8 a.m.—avoid full sun to prevent leaf burn.
What: Most organic liquids work if diluted per label (e.g., kelp/fish blends).
How: Fine mist to the undersides of leaves (dicots have more stomata there). Add a surfactant (molasses or yucca) so droplets spread and stick.
Tools: Hand pump sprayer for beds; backpack sprayer for larger areas.
Foliar feeding complements soil fertility—it doesn’t replace it.
Early spring & cool soils: Use a high-phosphorus fertilizer (e.g., 2-4-2) at transplant to support roots when P uptake is limited by cold.
Heavy feeders (tomatoes, cukes, winter squash): Need steady nitrogen—side-dress throughout the season.
Leafy/brassica crops: Favor higher-N feeds (e.g., 5-1-1). We often use straight blood meal (12-0-0) to side-dress garlic, onions, brassicas, arugula, and lettuce.
Fruiting crops at early set: Foliar or liquid feeds with P-K-Ca (e.g., 0-5-5) can improve fruit quality and reduce disorders.
As you refine soil health (compost + pH management), you may reduce inputs—but most mixed veggie gardens still benefit from a thoughtful fertilizer plan.
When to Apply Organic FertilizerBefore Planting (Bed Prep)
Broadcast a balanced granular fertilizer and mix into the top 4 in of soil - our second book, “Grow More Food” (Storey 2025), has a great recipe for home-made balanced organic fertilizer.
For big spacings (tomatoes, potatoes, winter squash): blend into each planting hole.
Side-dress heavy feeders at 2, 4, and 6 weeks after planting with granular or liquid.
Granular: sprinkle the labeled amount around the dripline, scratch into the top 1 in, and water.
Liquid: dilute per label in a watering can or hose-end sprayer; rinse tools afterward (organic liquids can clog and… smell).
Apply low-dose liquid 2–3×/week from emergence to transplant for steady, gentle growth.
Pre-plant: balanced organic 5-5-5 across beds; add 2-4-2 in transplant holes for spring/roots.
Weeks 2/4/6: side-dress with 5-1-1 (leafy) or balanced for mixed beds; use 12-0-0 blood meal for garlic/onion/brassicas if needed.
Early fruit set: foliar 0-5-5 + Ca on tomatoes/peppers/cukes.
Spot issues: apply diluted liquid feed; recheck soil moisture and pH.
Feed the soil first with compost and good structure; use granular fertilizers to maintain baseline fertility; deploy liquid and foliar when plants need a quick nudge. That combo keeps crops humming from seedling to final harvest.
How to build wood-framed raised garden Beds
A raised bed physically separates the planting area from the walking area, so you’re not compacting your soil every time you stroll through your garden, and you’re not fertilizing your path every time you add compost. Raised beds also drain well and warm up quickly when the sun hits them, and a designated raised bed allows you to plant your crops close together, so you end up using your available space productively and efficiently.
Building a wood-framed garden is a little more work than building other types, but many of our customers felt that it was worth the time and expense, so we built hundreds of them during the 18 years we designed and built edible landscapes. Framed beds are versatile, durable, and make gardening easier on your body. They also:
They Add Depth and Flexibility
Wood-framed beds let you add a deep layer of new soil, which is ideal for rocky or compacted yards. You can install them directly on top of grass, pavement, or even contaminated soils (with proper lining).
They Protect Against Roots and Pests
Line your beds with hardware cloth and landscape fabric to keep moles, voles, and tree roots out of your growing space.
They Create Structure and Accessibility
Framed beds clearly define planting zones and paths, preventing soil compaction and improving accessibility. Build them higher to reduce back strain.
They Work Just About Anywhere
With enough sunlight, you can place raised beds on rooftops, patios, or steep slopes. Frames also make it easy to attach trellises, shade cloths, or fencing.
Trade-Offs:
Wood-framed beds cost more upfront and are easiest to construct in rectangular shapes — not ideal for every space — but they offer long-term durability and flexibility.|
Start by choosing your wood. When it comes to wood, you want something that won’t rot too quickly but won’t leach anything nasty into your vegetable soil. To begin with, let’s rule out treated lumber. Treated lumber is designed to resist rotting when exposed to moist soil. The treatments used today are not as toxic as they used to be, but treated wood still has the potential to leach chemicals into your garden bed. Its use is prohibited for farms producing certified organic crops, and it is best left out of the home food garden as well.
NOTE: that if you already have beds bordered with treated lumber, they may be safe to use for food. Most leaching from treated wood happens in the first few years after installation, so most contaminants may have already left the wood and leached out of the nearby soil. Unfortunately, there is no clear research indicating how long the contamination may persist, and toxin retention can vary depending on soil type. Treated lumber manufactured before 2004 contains arsenic, which is toxic to humans. We recommend testing for arsenic if you’re considering reusing an old bed made of treated wood to be sure the soil is clean.
The most commonly available untreated options are pine, fir, cedar, redwood, juniper, and composite lumber.
Pine/fir: The main advantage of pine is that it’s inexpensive; the main disadvantage is that it rots relatively quickly. Pine or fir beds may start to show signs of rot after three to five years. This may not be a problem if you are looking to save money, or you think you may want to move or redesign your garden in the future.
Cedar/redwood/juniper/black locust: These woods can be quite expensive, but they are naturally rot resistant and beautiful. They should last at least twice as long as pine or fir when used outside.
Composite lumber: Composite lumber is made from a mixture of recycled plastic and wood fibers. This option is also expensive, but it has great lon- gevity and doesn’t require additional treatment. It also makes use of recycled material. Unfortunately, it’s a little harder to work with than real wood: Normal wood screws won’t hold composite lumber together, so you will need special screws or bolts.
NOTE: You can extend the life of a natural wood bed by coating it with a nontoxic wood treatment.
We like to use 2 × 6 lumber for the sides of garden frames. Stacking two or three 2 × 6 boards will give you a frame 11 or 161⁄2 in. high (2 × 6 boards are actually 51⁄2 in. wide instead of a full 6 in.). We’ve built them much taller than that and it isn’t a lot of extra work, so don’t be afraid to make tall beds. For corner posts, we recommend 4 × 4 post lumber, and we use 2 × 4 for braces. Lumber commonly comes in 8 ft., 10 ft., and 12 ft. lengths.
For most home gardeners, the classic 4x8-foot bed is the sweet spot — efficient to build, easy to manage, and uses lumber with no waste. So, let’s say you’ve decided on a 4 ft. × 8 ft. × 11 in. bed. Here’s what you’ll need:
Six 2 × 6 boards, 8 ft. long
One 4 × 4 post, 8 ft. long
One 2 × 4 board, 8 ft. long
2 pounds of 3 in. wood screws (about 90 screws)
Before heading off to the lumber store, call and ask if they cut lumber in-house. Many will cut your wood for free or a nominal fee, which will save you a lot of time. Make sure to bring your cutting list with you. For your own cutting, use a hand saw or some kind of power saw, whatever you’re comfortable with.
Whether you’re cutting the wood yourself or having it done at the store, here’s what you should end up with:
Long sides: No need to cut these. Just set aside 4 of your 2 × 6 boards.
Short sides: Cut the other two 2 × 6 boards into 4 ft. pieces.
Corner posts: Cut your 4 × 4 into four 11 in. pieces (you’ll end up with a little scrap).
Braces: Cut the 2 × 4 into one 4 ft. piece and two 11 in. pieces.
It’s almost time for a trip to the lumber yard*. But first, take a look at this list of tools you’re likely to need:
Hand saw or power saw (If you know how to use it, a power circular saw or power miter box will speed up the cutting process.)
Tape measure
Pencil
Speed square
Electric drill, with both drilling and screw driving bits (Cordless drills are great when you’re outside!)
Paint brush or roller (if applying a wood treatment)
Don’t have tools? The tools above are relatively inexpensive to buy, but if new tools aren’t in the budget, you may be able to borrow them or find them used at a salvage or pawnshop. Many hardware stores rent power tools by the hour or day.
*(if you need more tips on preparing your garden design, or if you’d like some more visual prompts, check out our first book, Food Grown Right, In Your Backyard and/or our YouTube series)
Assembling Your FrameFirst, if you’re using a wood treatment, now is the time to apply it. This will let you coat the end cuts before any of them get butted up against other pieces.
Measure as shown in the diagram, and drill pilot holes for your screws.
Assemble the frame. Start by screwing the short sides to the corner posts. Then stand the short sides up and screw the long sides to the posts (it helps to have an extra set of hands for this step). Screw the side braces to the long sides and the center brace to the side braces, and you’re done!
Use landscape fabric if soil is contaminated or if the bed sits on pavement.
Add hardware cloth underneath to block burrowing pests - we started lining all of the beds we built because it is so effective in keeping out moles and voles, and it’s SO much easier to do before you fill the beds with soil.
Combo: Use both materials to deter roots and pests! Use hardware cloth first (touching the ground) and then line the inside of the beds with landscape fabric for the ultimate pest/root protection!
Set the frame in place. If you’re placing it on level or gently sloping grass, no preparation is necessary—just put it down where you want it. If you’re placing it on bare soil, use a shovel or trowel to make a level base.
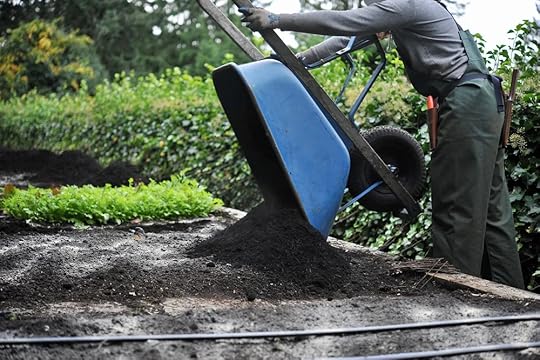
Fill the frame with soil. If you’re using a wheel-barrow, make a prop out of old bricks or scrap lumber to help you tip the soil into the bed (an old doormat will protect the lumber from getting beaten up). However, tipping out the soil can be difficult if the bed is 11 in. high, and impossible if it’s taller. If necessary, shovel the soil out of the wheelbarrow and into the bed.
~ Our lumber cut list, as well as a step by step video on building our wood-framed raised beds!
~ “Food grown Right, In your Backyard” - the essential handbook for beginning home gardeners. Combining our knowledge of small-scale organic food production, environmental education and residential landscaping, we have created a thorough, easy-to-use guide for backyard farmers. Including hundreds of instructional photographs, the book provides step-by-step information on everything you need to know when setting up and caring for a home garden including: garden site selection, garden construction, crop selection, garden maintenance and crop harvesting. “Food Grown Right, In Your Backyard” will be your go-to gardening companion, always on hand to provide quick answers to your gardening questions.


