Starhawk's Blog
February 18, 2026
Getting Started With Stargazing Using Simple Equipment
You’ve probably looked up at the night sky and wondered what you’re actually seeing. I did too, for a long time. And like most people, I assumed getting into astronomy meant I would need some expensive telescopes and learn complicated star charts.
Fortunately, it doesn’t. After years of stargazing from backyards, national parks, and coastal spots across Australia, I’ve learned that getting started is much easier than it seems.
This guide shares beginner stargazing tips that’ll help you enjoy the night sky with gear you probably already own. By the end, you’ll know how to find darker skies, recognise constellations and bright planets, and figure out if a telescope is even worth it.
A Beginner’s Guide To Your First Night Under The Stars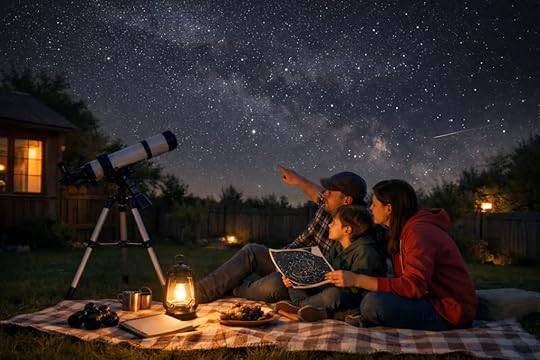
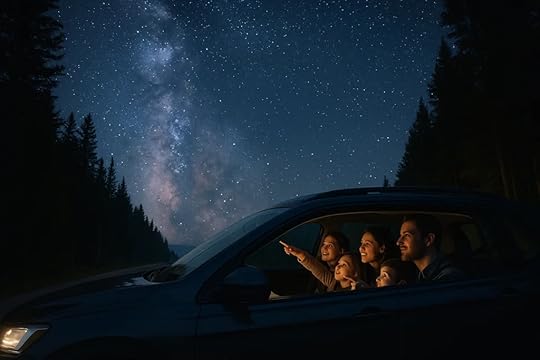
Stargazing is one of the easiest hobbies to start because you already have everything you need. Your eyes, a clear night, and a bit of patience are enough to begin exploring the night sky. Frankly, most amateur astronomers didn’t start with a telescope or fancy binoculars; they simply stepped outside and gazed upward.
The one thing that makes a real difference early on is giving your eyes time to adjust to the darkness. I learned this the hard way on my first few nights out, but about half an hour in the dark lets your night vision fully kick in.
Once that happens, fainter stars and constellations start appearing that you couldn’t see before.
From there, you can focus on spotting patterns and shapes across the sky. You don’t need to memorise anything yet, just observe and let your eyes wander. Over time, recognising bright stars and familiar constellations will become second nature.
Now, let’s look at where to actually go for darker skies.
Finding A Dark Sky Away From Light Pollution
The darker your surroundings, the more stars you’ll see, and finding a good spot is simpler than you think. Even a short trip outside a major city can reveal hundreds of stars that light pollution normally hides.
Here are a few ways to find the best dark sky locations near you.
Why City Lights Wash Out The StarsCity lights create a glow that drowns out fainter stars and deep sky objects. This is called light pollution, and it affects most urban areas across the southern hemisphere and the northern hemisphere alike. Even a 30-minute drive away from bright light sources can improve your view dramatically (and yes, even a short drive makes a noticeable difference).
Remember, the goal is to find a dark location where the night sky isn’t competing with streetlights and buildings.
Free Apps To Find Dark SpotsFinding a dark sky used to take a lot of guesswork, but now some tools do the work for you. Free apps like Stellarium show you exactly what’s visible overhead in real time.
You can also check the Bortle scale rating for your area, which measures how dark or light-polluted your sky is.
Best Locations For Stargazing In AustraliaNational parks, rural farmland, and coastal areas typically offer the darkest skies for stargazing. In Australia, spots like the Warrumbungle National Park and parts of outback Queensland are popular among amateur astronomers for good reason.
These locations sit far from any major city, which gives you clear views of the Milky Way, planets, and even faint galaxies on a clear night.
Spotting The Milky Way, Southern Cross and Meteor ShowersEver wondered what those bright patterns in the sky actually are, or when to catch a shooting star? The night sky is full of celestial objects you can spot with the naked eye, and timing plays a big role in what’s visible.

Here’s a quick guide to some of the best targets for beginner stargazers.
Celestial Object Best Time To View Visibility Southern Cross Year-round Always visible in Australia Milky Way Winter months (June–August) Darkest skies, no moon Meteor Showers Varies by shower Check annual peak datesThere are a few things you can look for when you head outside.
Firstly, the Southern Cross is one of the most recognisable constellations in the southern hemisphere, and it’s visible every night of the year from Australia. This star cluster points toward the South Celestial Pole, which makes it a handy anchor for finding your bearings. Many amateur astronomers use it as a starting point for locating other constellations nearby.
Next, the Milky Way stretches across the sky like a hazy, glowing band. The first time I saw it stretch across a cold winter sky in Queensland, I couldn’t look away. On a dark night, you can spot star clusters, bright stars, and even distant galaxies within it.
And lastly, meteor showers like the Geminids and Eta Aquariids happen throughout the year. You’ll get the best views after midnight on a clear night, and you don’t need binoculars or a telescope, just patience.
Speaking of which, let’s talk a bit about equipment.
Do You Need A Telescope To Start?No, you don’t need a telescope to start stargazing. And as we’ve already mentioned, plenty of amateur astronomers spend years enjoying the night sky with nothing more than their eyes or a good pair of binoculars. That said, the right equipment can open up a whole new universe of things to see.
Now, Binoculars are a great first step for beginners. A 7×50 or 10×50 pair lets you observe the moon’s craters, bright planets like Jupiter and Saturn, and even the Pleiades star cluster. They’re lightweight, affordable, and easy to use, which makes them perfect for casual nights under the stars.
Also, believe it or not, a first telescope doesn’t need to cost a fortune. A basic refractor or reflector under $200 can show you the rings of Saturn, the moons of Jupiter, and dozens of deep sky objects. Different telescopes serve different purposes, so it helps to know what you want to observe before buying.
Goto telescopes take things further by automatically locating celestial objects for you. While this sounds convenient, learning to find things manually builds stronger astronomy skills (that’s a skill worth building early on). Which is why many stargazers recommend starting with a simple new telescope and upgrading later.
Now that you know the basics, let’s cover a few tips to make your sessions even better.
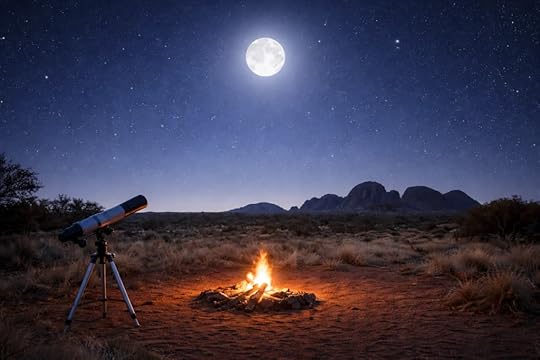
Beginner Stargazing Tips For Full Moon NightsA few simple habits can turn casual glances at the sky into a lifelong hobby you’ll never tire of. And timing your stargazing around the moon’s phases is one of the easiest ways to improve what you see.
Full Moon Viewing: At its core, this comes down to one thing. Bright moonlight washes out fainter stars and deep sky objects, so full moon nights work best for observing lunar craters and surface details with binoculars or a telescope.New Moon Planning: The new moon phase offers the darkest skies, which is perfect for spotting the Milky Way, galaxies, and faint star clusters. Many amateur astronomers plan their best sessions around these nights.Keeping a Journal: Writing down what you observe helps you track progress and notice patterns over time (you’d be surprised how satisfying this becomes). Recording the date, moon phase, and constellations or planets you spotted makes each night more rewarding.These small habits turn casual stargazing into something you’ll enjoy for years.
The Night Sky Is Waiting For YouGetting started with stargazing doesn’t require expensive equipment or years of study. A clear night, a dark sky, and a bit of curiosity are all you need to begin exploring the universe above you.
The stars have been there every night of your life, waiting to be noticed. Tonight might be the perfect time to step outside and see what you’ve been missing. So grab a pair of binoculars or simply look up with your naked eye. Either way, the night sky has something to show you.
Once you start, you’ll wonder why you didn’t begin sooner. For more tips and guides on astronomy and outdoor living, explore Star Hawks Blog.
The post Getting Started With Stargazing Using Simple Equipment appeared first on Star Hawks Blog.


February 9, 2026
Planning a Stargazing Night in the Australian Outdoors
Ever stared up on a clear night and thought, “I wish I knew what I was looking at”? Well, you’re not alone. Most Aussies never even try stargazing because it seems too complicated with all the telescopes, strange constellation names, and confusing apps.
Little did they know that your eyes alone can spot thousands of stars, several planets, and even our home galaxy stretching overhead. In fact, it’s possible to see around 9,096 stars with the naked eye from a dark location. But most city dwellers see fewer than a dozen stars because of light pollution.
This guide walks you through picking the right night based on moon phases and weather. You’ll also learn about finding locations with minimal light pollution across Australia and packing the essentials for your stargazing trip.
Let’s get you watching the southern sky from your first dark site.
What Makes a Perfect Stargazing Night in Australia?A perfect stargazing night needs three things: dark skies away from city lights, a moonless night, and clear weather conditions. Get these right, and you’ll see thousands more stars than you ever thought possible.
Here’s how you can find unforgettable views while stargazing.
Finding True Darkness Away From City LightsLight pollution from cities washes out faint stars completely. You need at least 50 kilometres of distance to get proper darkness where the Milky Way becomes visible.
Generally, national parks and rural areas provide the darkest conditions. In that true darkness, you’ll spot the Milky Way, along with individual star clouds and dark dust lanes running through it.
Note that your eyes need 20 to 30 minutes in complete darkness to reach maximum sensitivity. Also, don’t check your phone during this time because even a quick glance resets the whole process.
 Moon Phases Change What You’ll See With the Naked Eye
A full moon brightens the sky so much that it hides most stars and constellations. The moon acts like a natural streetlight that fades out everything except the brightest objects. In contrast, new moon nights or the week before and after give you the darkest skies for spotting the Milky Way.
Speaking from our stargazing experience during a new moon week, we could count over 2,000 stars with our naked eyes at Warrumbungle National Park. But the same location during a full moon revealed only about 300 stars.
Reading Weather Patterns for Clear Night SkiesCloud cover ruins stargazing completely. So check forecasts for zero cloud coverage several hours before heading out.
Winter months in Australia typically offer clearer skies and less humidity than summer. Especially, June through August provides the most reliable clear nights across southern Australia. The cold air holds less moisture, which creates sharper views and more visible stars.
Note: Coastal areas often get marine layer clouds at night, while inland locations stay clearer year-round.
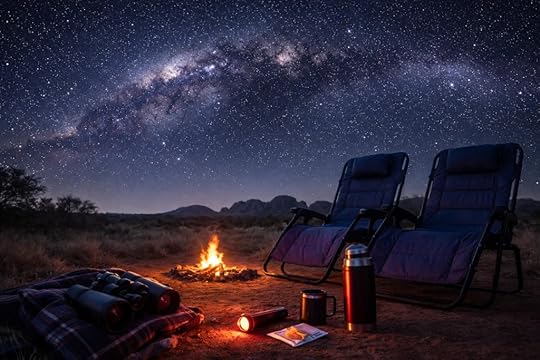
Stargazing Gear: Everything You Need For Your TripBeginners think stargazing requires a telescope to see anything worthwhile up there. But the truth is, most stargazers spend their first year using nothing but their naked eyes and maybe a pair of binoculars.
Below is a list of everything you’ll truly need as a beginner stargazer:
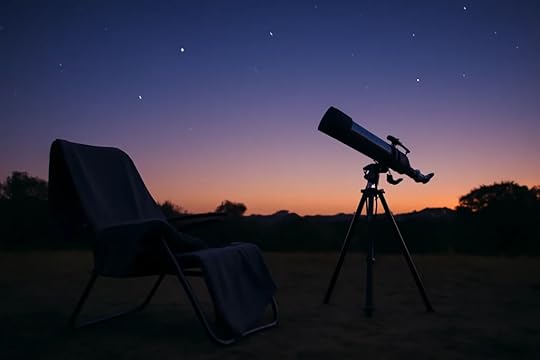
Naked Eye Viewing: On average, we can see around 3,000 stars on a clear night without any equipment. That’s more than enough to spot constellations, planets, and the Milky Way stretching overhead.Binoculars (7×50 or 10×50): A decent pair reveals Jupiter’s four largest moons lined up like tiny pearls beside the planet. The moon’s craters with sharp detail will show you the impact zones from billions of years ago. Star Chart Apps: SkyView Lite and Stellarium work offline and use your phone’s gyroscope to show what’s above you right now. You can point your phone at any star, and it identifies the object instantly if you download the star data before leaving.Red Flashlight: Unlike white light that resets your eyes completely, red light preserves your night vision while reading maps. That way, you won’t lose 30 minutes of adjustment every time you need to check something.Reclining Chairs or Blankets: Looking straight up for hours can cause serious neck strain. On the other hand, lying flat or using a reclining chair lets you watch meteors and track satellites comfortably across the sky.As for telescopes, skip them until you’ve tried naked eye stargazing first (save yourself a few hundred dollars for now). Rather, start with your eyes and add gear only when you know what you want to see better. The universe doesn’t care how much you spend.
 Best Places for Stargazing in Australia
Did you know that over 80% of the world’s population lives under light-polluted skies? Which means most Australians have never experienced a truly dark night. However, the good news is that Australia has some of the world’s darkest skies, and you don’t need to travel far to find them.
Here are some stargazing places that make overseas visitors jealous of us.
Warrumbungle National Park: Australia’s First Dark Sky ParkWarrumbungle National Park earned official Dark Sky Park status. Which means it has exceptionally low light pollution and protected darkness. This certification doesn’t come easy because the park has to prove near-zero artificial light interference.
The park sits in central New South Wales and offers designated stargazing spots with clear horizon views in all directions. Its viewing platforms face away from nearby towns and give you unobstructed 360-degree access to the sky.
Along with that, Siding Spring Observatory nearby has been studying the southern sky here since the 1960s (and for good reason).
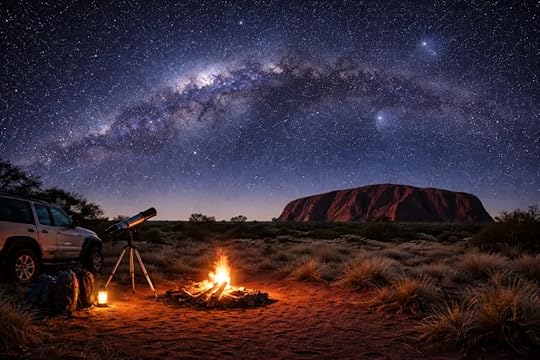
Remote Outback Spots to See the Milky WayThe Red Centre around Uluru provides pitch-black skies where you can see the Magellanic Clouds (small galaxies that look like faint smudges floating beside the Milky Way) with your naked eyes.
During our autumn trip to the Flinders Ranges in South Australia, stars appeared at different depths, with layers you never see from cities. This area combines stunning daytime landscapes with incredibly dark nights for double the adventure.
Apart from these, western Queensland’s outback towns have zero nearby light sources that reveal stars invisible from anywhere coastal.
 National Parks Within Driving Distance
Blue Mountains National Park sits just90 minutes from Sydney and offers reasonable darkness at elevated lookout points. The elevation helps you rise above some of Sydney’s light domes.
Grampians National Park in Victoria also provides dark sky camping spots away from Melbourne’s glow. The Pinnacle lookout in the Grampians blocks light from nearby Halls Gap, and creates a dark pocket for stargazing. On weeknight visits, you’ll often have the spot entirely to yourself. You can call it a night whenever you’re ready and drive back to town in 20 minutes.
Another great spot is Tasmania’s Cradle Mountain. The extra southern position reveals constellations and celestial objects that never rise above the horizon in mainland Australia.
Your Stargazing Night ChecklistFor your stargazing trip, you need to pack with Australian nights in mind, which can drop to near-freezing even after warm days in many regions. The temperature difference between sunset and midnight catches most beginners off guard. Especially, desert regions can hit even 2°C after midnight.
Take a look at this checklist to get an idea about stargazing essentials:
Layered clothing (thermals, fleece, and a windproof jacket) Thick blankets or a sleeping bag Hot drinks in a thermos Hand warmersSweet and salty snacksReclining chairs or foam matsOffline maps and star chartsBasic first aid kit (bandages, pain relievers, and any personal medications)Note: Always let someone know your location and expected return time before you leave. The universe rewards those who come prepared.
Start Your First Stargazing Adventure TonightPlanning a successful stargazing night depends on picking dark locations, checking moon phases, and packing for cold weather. When you get these things sorted, you’re already ahead of most beginners who show up unprepared.
And the best part is you can start tonight without spending money on fancy gear or taking astronomy courses. You can just grab a blanket, hit the road away from the city lights, and be amazed at what’s been waiting overhead this whole time.
If you need more guides on observing Australia’s night sky, check out the resources at Star Hawks Blog. You’ll find practical tips, seasonal highlights, and beginner-friendly advice to help you get started.
The post Planning a Stargazing Night in the Australian Outdoors appeared first on Star Hawks Blog.
January 28, 2026
Why Astrophotography Is as Much Patience as Skill
Astrophotography requires patience because capturing clear images of distant objects means long waits, repeated adjustments, and working around unpredictable conditions. In fact, each frame needs 15 to 30 seconds of exposure time just to gather enough light from the night sky.
When each attempt takes this long, there’s no room for the spray-and-pray approach that works during the day. This slower pace of star photography often throws many people off.
In this article, we’ll walk through the main reasons the astrophotography journey demands patience over speed. You’ll also learn about the gears you’ll need as a beginner, and how you can plan your photography session for the best results.
Let’s find out everything you need to know before heading out for night sky photography.
What Makes Astrophotography Different from Regular Photography?Astrophotography requires longer exposure times, manual camera settings, and darker locations than daytime photography ever demands from you. For example, your autofocus stops working, exposure meters give useless readings, and what looks bright to your eyes shows up completely black on your screen.
Here’s why this happens and what you need to change during deep sky photography.
Dark Sky Locations are More Important Than Expensive Gear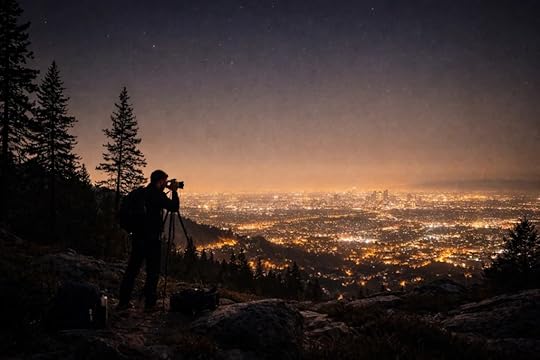
Research found that night skies are getting 9.6% brighter every year, which means dark sky locations become more valuable with each passing year. It’s because light pollution from cities washes out faint stars and makes photographing deep sky objects nearly impossible to see.
In fact, 80% of Americans can no longer see the Milky Way due to light pollution from cities and suburbs. Even a small town’s glow can brighten the night sky enough to hide everything except the brightest few dozen stars.
In reality, your entry-level DSLR camera performs better in a truly dark location than expensive gear does near streetlights. The best camera can’t fix a bright sky, but proper darkness makes even basic equipment produce stunning results.
Exposure Time Forces You to Wait and WatchEach frame of astrophotography takes 20 seconds minimum, so you can’t just snap away and move on quickly. You’ll have to spend more time reviewing and adjusting than shooting.
Reviewing images on your camera screen teaches you what worked versus what you imagined would work. Say, that bright star you thought would add interest is creating lens flare across half your frame. This is the learning process nobody warns you about, and those hours of trial and error build your skills better than any tutorial ever could.
The Best Camera Settings Need Hours of PracticeSwitching from daytime photography to stars takes a relearning of how your camera works. Everything that adapts automatically with a single press of a button now needs your constant attention and adjustment.
These are the general settings that work for astrophotography:
Manual Mode: Firstly, change the auto mode to manual. This mode gives you full control over every setting because your camera’s auto modes completely fail in darkness. If you let the camera decide anything, you’ll get either pure black frames or wildly overexposed shots.Shutter Speed: Keeping the shutter speed between 15 and 30 seconds captures enough starlight without creating trails. You can’t go longer because Earth keeps spinning, which makes stars streak across your frame after about 30 seconds with most lenses.ISO Settings: Somewhere between 1600 and 3200 grabs faint details without drowning your star photos in grain. If you go lower, your exposure time needs to stretch beyond what’s practical. But go higher, and noise ruins the image quality you worked so hard to capture.Aperture: Wide aperture at f/2.8 or f/4 is standard because you need every bit of light your lens can gather. However, stopping down to f/8 as you would in daylight just makes everything disappear into darkness.Mastering these camera settings takes practice to balance properly. So be mentally prepared for trial, error, and learning how your gear responds to the night sky.
Basic Equipment: The Camera and Lens You’ll Need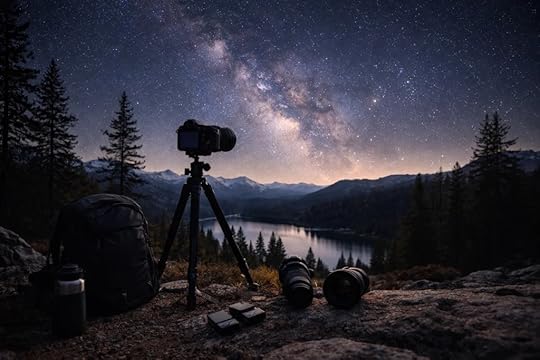
For starting night sky photography, you don’t need thousands of dollars in gear to capture stunning night sky shots. Most beginners think they need a telescope and a fancy tracking mount before they can even start. But some of the most impressive starry landscape photos you’ve seen online were shot with basic equipment.
The gear list below covers everything you need when you’re learning:
A DSLR camera or mirrorless camera (a crop sensor camera works fine for learning)Lenses with f/2.8 or wider apertures A sturdy tripodRemote Shutter Release (to stop you from bumping the camera)Wide-angle lenses between 14mm and 24mm Crop factor on APS-C sensors (to crop a 24mm lens into roughly 36mm ) Spare BatteriesOnce you’ve got these basics sorted, you’re ready to head out and start shooting. The gear is less important than knowing how to use it well. And that understanding only develops by getting outside, experimenting, and mindfully observing mistakes.
Common Frustrations And Astrophotography TipsBelieve it or not, astrophotography trips up nearly everyone because the problems don’t show up on your camera’s tiny screen in the dark. You’ll think everything looks sharp until you get home and open the files on your computer. However, these frustrations teach you more than any YouTube tutorial ever could.
Let’s walk through the two most common challenges beginners face.
Setting Focal Length Without Autofocus HelpAutofocus hunts endlessly in darkness and rarely finds sharp focus. It’s because your camera’s AF system needs contrast and defined edges to lock onto something. And stars don’t have either of those things. Setting your lens to infinity doesn’t guarantee sharp images either, because most lenses focus slightly past infinity.
Pro Tip: Magnify a bright star, then slowly turn the focus ring until the star shrinks to its smallest possible point. That’s your focal point. Then take test shots at different focus positions and zoom in to 100% on your screen to compare them.
Learning Which Bright Stars Throw Off Your CompositionSirius and Vega create lens flares that ruin parts of your frame if positioned poorly. Based on our shooting sessions, placing these bright stars near the edge of your composition spreads light artefacts across your deep sky objects awkwardly.
A bright star near your frame’s corner acts like a spotlight you didn’t ask for. It bleeds light across the sensor and washes out fainter details you’re trying to photograph. Moving that star just slightly inward or out of frame completely fixes the problem.
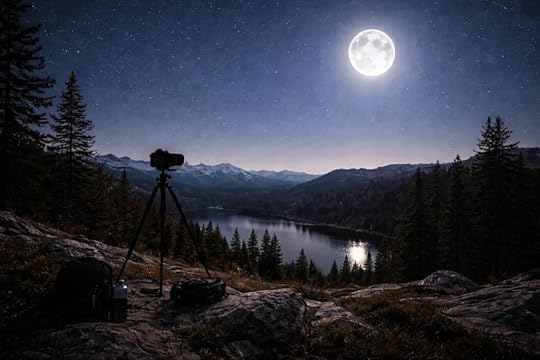 Planning Around Full Moon and Deep Sky
We’ve seen most beginners pick a clear night and head out without checking the moon phase or weather forecast. Then they wonder why their night sky images look washed out or why clouds rolled in an hour after setup. However, the moon and weather control your success more than any camera setting ever will.
Here’s what you need to track before each session.
Full Moon Impact: The full moon brightens the sky so much that faint nebulae and galaxies disappear completely from view. Because of that, the night sky resembles twilight and washes out everything fainter than Jupiter.New Moon Advantage: New moon phases give you the darkest skies for capturing deep sky targets successfully each month. This is when the Milky Way looks vibrant, and night sky photography provides the results you’re after.Weather Apps: Cloud patterns can totally demolish your plans, but watching forecasts gives you better odds. Weather apps can also help you track cloud cover days in advance, so you don’t waste petrol driving out to a dark sky site. Winter Clarity: Winter months offer clearer skies in many regions, though you’ll freeze while waiting for those 20-second exposures. But what we’ve noticed over multiple outings is that cold air holds less moisture, which means sharper stars.Summer Humidity: Summer brings the Milky Way core into view, but also adds humidity that softens star sharpness frustratingly. After shooting through multiple summers, we’ve learned that deep sky objects look hazier even on technically clear nights.When you plan your sessions around these factors, it separates frustrating nights from productive ones. So check the moon phase first, then the weather, and finally commit to going out or staying home.
Start Your Astrophotography Journey This WeekendStar photography combines technical camera settings knowledge with the patience to wait for perfect conditions under dark skies. The learning curve might feel steep at first, but every session teaches you something new about timing, composition, and working with limited light.
We suggest starting with basic equipment during a new moon phase, then reviewing your shots to improve each session gradually. It’s best to focus on one skill at a time rather than trying to master everything in your first night sky outing.
For more astrophotography tips and location guides across Australia, visit Star Hawks Blog. You’ll find practical advice from actual shooting experience, and the best gear recommendations for your skywatching journey.
The post Why Astrophotography Is as Much Patience as Skill appeared first on Star Hawks Blog.
December 12, 2025
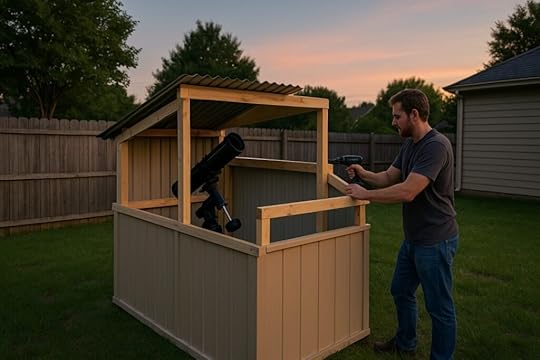
Building a Backyard Observatory on a Budget
Welcome to our guide on building a backyard observatory on a budget.
A backyard observatory is a permanent shelter that protects your telescope and lets you start observing in minutes rather than hauling equipment outside each night. It’s similar to those fancy white domes at professional observatories, just scaled down for your backyard.
Without a dedicated setup, you’d need to carry your telescope in and out every time you want to stargaze can quickly become tiring. With a backyard observatory in place, you can just walk outside, open the roof, and be ready to explore the night sky.
In this article, we’ll show you how to build one on a tight budget and which materials you need. You’ll also learn the three main observatory types and realistic budget ranges to expect.
Let’s start with the basics.
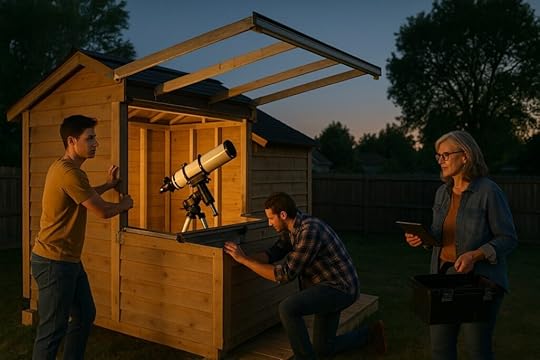
What Types of Backyard Observatories Can You Build?You can build three main types of observatories: roll-off roof sheds, clamshell designs, and rotating domes. Each one suits different budgets and skill levels. And among these, the roll-off roof is the most popular choice for backyard astronomy enthusiasts.
Take a look at each one to find your best match.
Roll-off Roof ObservatoryThe design is straightforward. Picture a shed where the roof sits on wheels or rails and slides backward, so your telescope gets an unobstructed view of the night sky.
This design is the cheapest option for beginners with basic tools and limited construction knowledge. You don’t need fancy carpentry skills or power tools to build one. In fact, most people finish theirs in a weekend using lumber from the hardware store.
Now, when you’re done observing, simply slide the roof back, and your equipment stays protected from weather and critters.
Clamshell or Flip-top DesignIf you’re short on space, consider the clamshell design. The setup includes two roof panels that hinge open like a clamshell to expose the telescope underneath. This design works great for small backyards where ground-level space is tight.
Even better, the roof panels are built using lightweight materials like corrugated plastic over a wooden frame. This material choice keeps costs low and makes the setup simple enough for one person to handle. Plus, some builders finish these DIY projects in just three days using salvaged materials.
Dome ObservatoryA round dome rotates with a slit opening that follows your telescope mount across the sky. It’s the same design you see at professional observatories.
Beyond looks, domes offer the best wind protection, so you can observe indoors during cold weather or when conditions get rough. Also, the rotating design blocks stray light from streetlights better than other types.
The downside? Domes are more expensive and complex to build. But they look top-notch and handle strong winds better than roll-off or clamshell designs.
How Much Does a Backyard Observatory Cost?A backyard observatory can cost anywhere from $200 to $3,000, depending on your design and materials. Believe it or not, some backyard astronomy enthusiasts have built working setups using just hardware store bargains and salvaged lumber. So you don’t need a huge budget to start observing the night sky from home.
Here are three budget-friendly approaches.
Ultra-budget Build Under $500Use salvaged materials like pallets and leftover lumber to keep costs minimal. Even with salvaging, you’ll spend most on corrugated roofing, recycled wood, and basic hardware.
To be specific, your shopping list includes roof panels, 2×4 studs, garage door wheels, and simple track materials. And you can grab everything in one hardware store run and fit it all in a pickup truck.
This ultra-budget approach works well for testing a permanent telescope setup before you commit to spending more money.
Mid-range Prefab Conversion $800-1500The easiest mid-range option is converting a 6×6 or 8×8 plastic garden shed into a roll-off roof observatory. These sheds eliminate wood rot issues and need less maintenance over time in the rain and weather.
For the roof mechanism, however, a DIY rail system using garage door wheels and U-channel track creates smooth roof operation. In terms of longevity, the plastic construction handles moisture better than wood and won’t warp or crack.
Premium DIY Build $2000-3000At this price point, you’re building for the long haul. A custom wooden structure gives you full control over size and features. Since you’re building from scratch, use pressure-treated lumber and quality hardware throughout for a build that lasts decades. After that, the main detail to sort out is the foundation.
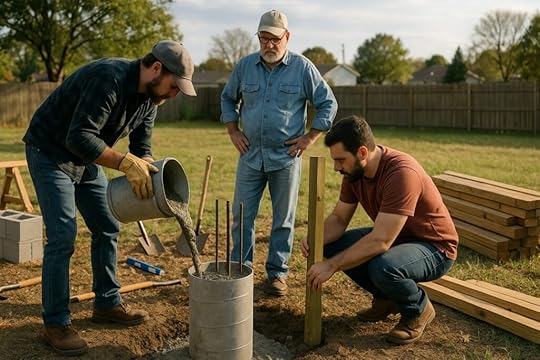
The big expense here is the concrete pier foundation isolated from the main building floor. This isolation prevents vibrations when you walk around the interior during long observation sessions.
That way, you can match the layout to your mount and add automation features whenever it makes sense.
What Materials Do You Need for a Budget Observatory?You need three main categories of materials: foundation and pier materials, structure and walls, and roof with weatherproofing. Out of all three, the foundation carries the highest expense but provides stability.
We’ll break it down category by category.
Foundation and Pier MaterialsConcrete bags and rebar create the isolated telescope pier at ground level. You’ll pour this separately from the main building to prevent vibrations.
As for the observatory walls, cinder blocks or pressure-treated posts set in gravel form your building base. These materials keep the floor elevated above ground moisture.
Once the pier cures, steel pipes secure your telescope mount to the concrete pier. In turn, this setup prevents movement issues during long observation sessions.
Structure and WallsPressure-treated 2×4 studs frame your walls to handle extreme conditions, unlike regular lumber that rots quickly in outdoor weather.
Building on that base, cover the frame with OSB or plywood sheets for rigid wall support and room structure. Then apply dark paint to reduce interior lighting reflections when observing the night sky.
Roof and WeatherproofingCorrugated plastic or metal roofing panels are lightweight and handle wind well. So before buying them, check your local weather conditions, especially if your area gets strong winds or heavy rain.
Your roof also needs hardware to slide back and forth, which means garage door wheels and U-channel track for smooth roll-off functionality. Plus, silicone sealant and weatherstripping keep rain and critters out for good.
With these basics covered, your observatory stays dry and functional year-round.
Is Building a Backyard Observatory Worth It?Setting up your telescope every night gets old fast. That’s why most amateur astronomers give up on regular observing because the hassle outweighs the excitement. A backyard observatory solves that problem by keeping your gear ready and protected year-round.
We’ve covered three observatory types, a budget ranging from $200 to $3,000, and the essential materials you need. You’ve also seen how roll-off roofs offer simplicity, clamshells save space, and domes provide premium protection. Now choose based on your budget and backyard size.
Ready to start your build? Check out more stargazing tips and astrophotography guides on Star Hawks Blog. Your night sky adventures are waiting.
The post Building a Backyard Observatory on a Budget appeared first on Star Hawks Blog.
November 28, 2025
The Connection Between Outdoor Living and Mindful Observation
When was the last time you stepped outside and felt the moment instead of thinking about your to-do list? If you’re like most people, it’s probably been a while.
The truth is, most of us spend our days rushing between tasks, barely noticing the world around us. But here’s something interesting: spending just a few minutes practising mindfulness outdoors can change your mental state.
This isn’t just feel-good advice. After years of photographing the night sky across Brisbane and studying astrophysics, I’ve learned that nature has this incredible way of pulling you back to the present.
In this article, we’ll explore how outdoor living connects with mindful observation, why it works so well for stress relief, and simple ways to start tonight.
I know you’re here because something about this topic resonates with you. So, let’s discover what happens when you slow down under the stars.
What Is Mindfulness Outdoors?Mindfulness outdoors is the practice of being fully present in natural settings while observing your surroundings without judgment. But what does that look like in practice?
Think of it like this: you’re sitting in a park, and instead of scrolling through your phone or planning dinner, you’re actually there. You notice the wind brushing your skin, hear birds chatting in the trees, and feel the ground beneath you. It combines awareness of your breath, body sensations, and all those natural elements happening around you right now.
Research from Brown University shows outdoor mindfulness reduces stress hormones more effectively than indoor meditation or traditional relaxation techniques. The reason this works so well is that nature doesn’t ask anything from you. It just lets you be present, and that’s where the real benefits kick in.
Why Does Spending Time Outdoors Boost Your Mental Health?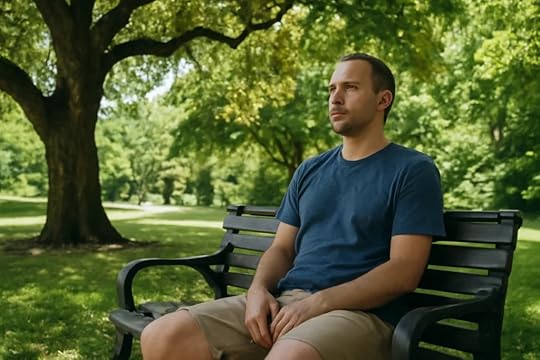
Spending time outdoors improves mental health by lowering stress hormones, boosting mood, and creating space for your mind to reset naturally. Believe it or not, science backs this up in surprising ways.
In this section, I’ll walk you through what researchers have discovered about nature and your well-being.
New Research on Nature and WellbeingNew research shows that 20 minutes in nature lowers cortisol levels significantly, improving mood and reducing anxiety symptoms. Japanese studies on forest bathing demonstrate how outdoor exposure strengthens immune function and promotes better sleep quality.
What makes this even more interesting is that Australian research confirms green spaces near homes correlate with lower depression rates. You don’t need to spend an arm and a leg on fancy equipment to experience these benefits.
The Physical Benefits You Didn’t ExpectOutdoor mindfulness improves balance, flexibility, and core strength through gentle movements like walking or stretching. Here’s how:
Better Sleep: Natural sunlight regulates circadian rhythms, helping you fall asleep faster and wake feeling more refreshed.Improved Focus: When you combine a simple walk in nature with focused breathing, you improve focus while getting exercise.Energy Boost: Fresh air increases oxygen intake, boosting energy levels and improving concentration throughout your day.How It Calms Your Nervous SystemNatural environments activate your parasympathetic nervous system, triggering relaxation responses that counteract daily stress. So that instant sense of calm you feel in nature is real.
Also, unpredictable outdoor sounds create varied stimuli that keep your mind engaged without overwhelming your senses. Grounding techniques outdoors, like feeling grass or soil, provide an immediate physical connection that settles racing thoughts and brings you back to peace.
These are the mental and physical perks. Now, let’s see what you can actually do outside to tap into all this.
Mindfulness Activities That Work Best OutdoorsSo what’s the real deal with outdoor mindfulness activities? These are simple practices you can start today in the great outdoors, no special training required.
Walking Meditation: Walking meditation lets you focus on each footstep. You notice how your weight shifts and muscles engage naturally. It might not be everyone’s cup of tea at first, but give it a go.Sensory Observation: The process involves identifying five things you see, four you hear, three you touch, and two you smell. This exercise pulls your awareness into the present moment instantly.Breathing Exercises: Pair your breath with natural rhythms like waves or wind to create deeper awareness of your body. When you sync your breath with nature, your stress melts away, and your mind stops racing.Night Watching: Stargazing combines visual focus with patience, training your mind to slow down and observe without rushing. You’re catching sight of objects millions of kilometres away while your thoughts settle.Garden Work: The practice of working with soil connects you to the natural world in ways that feel surprisingly meditative. It’s because mindful gardening engages touch, smell, and sight while completing satisfying tasks that ground you in present moments.Night Sky Observation: A Gateway to Mindfulness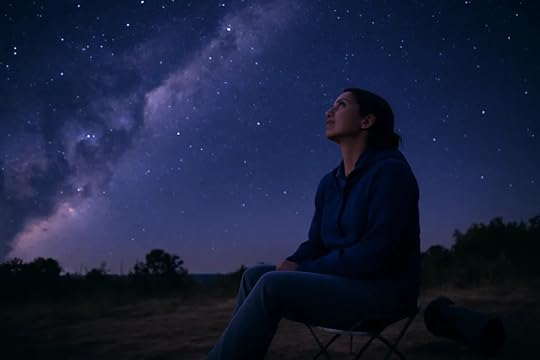
The best thing about stargazing is that it naturally forces your mind to slow down and focus. And that’s where things get interesting.
The night sky naturally slows your thinking because celestial objects move slowly, which encourages patient observation and reflection. When you watch the stars, you’re present in the moment, letting wonder take over.
What’s more, astronomy requires you to sit still in darkness and eliminate visual distractions. The practice pulls you away from screens, notifications, and endless to-do lists.
Through countless nights observing meteor showers and tracking constellations across Brisbane’s skies, I’ve learned that space rocks and planetary movements give unpredictable moments. They teach acceptance of natural timing and rhythms you can’t control.
How Does Astronomy Connect to Mindful Living?Astronomy connects to mindful living by teaching patience, perspective, and present-moment awareness through observing celestial rhythms and patterns. Once you start paying attention to what’s happening above you, life on Earth feels different.
Here’s how it works in practice.
Stargazing as Active MeditationTracking constellations keeps your mind focused on one task (pretty similar to following your breath during meditation). The vastness of space naturally puts daily problems in perspective, reducing anxiety about minor concerns.
When you realise you’re looking at stars that might not even exist anymore, your work deadline suddenly feels less world-ending.
In my experience, learning star patterns builds patience as the skill develops gradually through consistent practice over months. This sense of slow progress mirrors the concept of mindful living perfectly.
The Rhythm of Celestial EventsMoon phases create natural checkpoints for reflection, offering monthly cycles that mirror personal growth patterns. As seasons shift, the changing constellations teach acceptance of natural transitions, helping you embrace change in daily life.
The reason this matters is that the planets move through the sky on their own schedule, reminding you that some things unfold in their own time.
Quick Tip: Resources like Telescope Magazine can help you track upcoming meteor showers and planetary alignments, so you never miss these moments.
Setting Up Your Outdoor Space for Mindful MomentsNow that you understand the connection between astronomy and mindfulness, let’s look at creating your own observation spot.
Start by choosing a spot with minimal light pollution where you can see stars clearly on most nights. Dark skies reveal more stars, sharper constellations, and faint objects like nebulae that the bright city glow simply washes out. If you live in a bright city, even finding a park twenty minutes away helps.
Once you’ve found your spot, add comfortable seating like a reclining chair or blanket that supports extended observation without physical discomfort. You’ll want to stay out there longer than you think, so comfort matters.
Mindfulness Tip: Keep distractions away by leaving phones inside or using aeroplane mode to prevent interruptions during practice (notifications kill mindfulness faster than anything else).
While a basic telescope helps you see more detail, your eyes alone can spot plenty of stars and planets. The atmosphere looks clearest on cool, dry nights when humidity doesn’t blur your view.
Creating the right space sets you up for consistent practice under the night sky.
Common Barriers and How to Overcome ThemDoes the weather or city lights keep stopping you from getting outside at night? I know it’s frustrating when you’re ready to stargaze, but conditions won’t cooperate.
However, you can work around most of these obstacles with simple adjustments. Follow these strategies to keep your outdoor mindfulness practice consistent:
Weather Changes: Check forecasts and have backup indoor activities for extremely cold nights. If rain’s coming, shift your session to the next clear evening instead of skipping it entirely.Light Pollution: Since your eyes need darkness to adjust and see fainter stars in the sky, try driving just a few minutes to a nearby park. This simple change reveals sky objects your backyard view can’t show you.Time Pressure: While life gets busy, try dedicating ten minutes once a week to start. You don’t need hours here and there. Consistency beats duration.The benefits of reduced stress and improved mindfulness are worth pushing through these initial barriers. And who knows, you might become that neighbour everyone envies for having the calmest evenings.
Make Tonight Your First StepMindfulness in the outdoors doesn’t require fancy gear or perfect conditions. The connection between spending time in nature and mental health is real, research-backed, and available to anyone willing to step outside. Your mind needs these moments under the night sky more than you realise.
I’ve explored how outdoor living connects with mindful observation, why it boosts mental health, specific activities you can try, and how astronomy deepens the practice. I’ve also covered setting up your space and overcoming common barriers that might hold you back.
Don’t wait for the perfect moment to discover this for yourself.
Head outside tonight, find a comfortable spot under the sky, and let the stars guide you into a calmer, more mindful life. The natural world is waiting, and your practice starts now.
Explore more ways to connect with the night sky and outdoor mindfulness on Star Hawks Blog.
The post The Connection Between Outdoor Living and Mindful Observation appeared first on Star Hawks Blog.
November 19, 2025
Stargazing Made Simple: Beginner’s Guide for 2026 Night Watchers
Ever looked up at the night sky and thought, “I wish I knew what I was looking at”?
Trust us, you’re not alone on this. Most people who want to try stargazing never start because it seems too complicated. With telescopes, star charts, constellations with weird names, where do you even begin without making a fool of yourself?
Fortunately for you, stargazing in 2026 is surprisingly easy now. And this guide covers everything beginners actually need to know about stargazing. You’ll find out:
What you’ll see in 2026 Which free tools help the most How to prepare for your first night under the starsSo, let’s read it all to prepare, and then explore the universe!
Stargazing 2026 Brings Incredible SightsYou’d be overjoyed to know that 2026 is actually one of the best years for stargazing in over a decade! The year is full of major celestial events visible across the northern hemisphere and the southern hemisphere
We’re talking about a total solar eclipse, meteor showers during perfect moon conditions, and planets at their brightest positions. So if you’ve been waiting for the right time to start watching the night sky, this is your star sign!
Let’s look at the highlights that you wouldn’t want to miss.
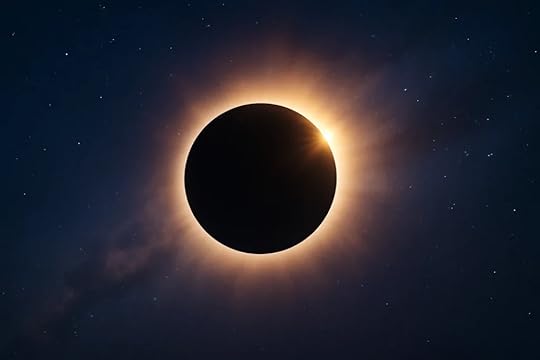
Total Solar Eclipse on August 12On August 12, daylight will fade to darkness, and the moon will completely cover the sun for a few unforgettable minutes. This eclipse path runs through Iceland, Greenland, and northern Spain. Here’s the key information in short:
Date: August 12, 2026Visible From: Iceland, Greenland, parts of SpainNext chance: 22 July 2028 from AustraliaYou’ll need eclipse glasses to watch this event safely. Remember to never look directly at the sun without proper eye protection. But during totality, when the moon completely covers the sun, you can remove your glasses briefly and see the corona.
Pro tip: Book early if you plan to travel because hotels in Iceland are already filling up. Flights and tour packages for eclipse viewing always sell out months in advance. So plan your trip as early as possible.
The Perseids Meteor Shower in AugustThis year’s Perseids will be spectacular thanks to a new moon. That means there’ll be no glare and the skies will be extra dark. You can expect up to 60 shooting stars an hour, that’s roughly one every minute. Take a look at the timetable:
Peak dates: August 12-13Best time: 2 AM – 4 AMWhere to watch: Any dark spot away from city lightsPro tip: Find any dark spot away from city lights and prepare a blanket. It’s best to lie back and give your eyes at least 20 minutes to adjust. And then enjoy the show from a front-row seat to some of the sky’s most dazzling moments.
Stargazing in the Night Sky Without GearLet us tell you something that most beginners get wrong: they think stargazing requires a telescope.
Your eyes are already powerful enough to see thousands of stars, several planets, and even parts of our galaxy. So you won’t need any gear, any fancy setup, or any learning curve. You can literally step outside tonight and start watching the stars.
Let us tell you about what’s up there.
Constellations You Can Find EasilyThe patterns of some constellations have guided travellers, storytellers, and dreamers for centuries. So you don’t need a chart or an app to get started, just a clear sky and a bit of curiosity.
To spot them in the sky, you can look for these:
Big Dipper: The Big Dipper is your starting point. It stays visible year-round in the northern hemisphere and appears as seven bright stars shaped like a pot with a handle. The two stars at the front of the “pot” point directly to Polaris, the North Star. Orion: In winter, look for Orion. That’s the three bright stars that line up perfectly to form his belt, which you definitely can’t miss. Orion sits right on the celestial equator, so people in both hemispheres can see it.Milky Way: You’ll only spot the Milky Way from truly dark locations away from city lights. It stretches across the sky like a hazy, cloudy band. That’s our home galaxy, seen from inside looking out.These constellations are like landmarks in the sky. Once you recognise a few, the night will start to feel like you’ve unlocked a secret map above you.
 Planets That Look Like Bright Stars
Unlike stars, planets don’t twinkle as brightly. But once you know about them, they’re surprisingly easy to find, even from a city balcony.
Try spotting these bright wanderers next time you’re outside:
Venus: Venus is the brightest “star” in the evening or morning sky. It’s so bright that people sometimes mistake it for an airplane or a UFO.Jupiter: Jupiter comes in second in terms of brightness. It has a steady, golden light that doesn’t twinkle like stars do.Saturn: Saturn has a soft glow near the horizon after sunset. It won’t twinkle like nearby stars do. That steady light gives it away every time.Mars: Mars has a distinctive reddish tint. Even from cities with lots of light pollution, you can pick it out.Mercury: Mercury is a bit harder to find because it stays close to the sun. You can look for it low on the horizon just after sunset or right before sunrise. But be quick because you’ve only got a small window to catch it.So now that you know these, step outside, look up, and see how much of the universe you can find with your own eyes.
Best Apps for Stargazing 2026Remember when people used to carry thick star charts and struggle to read them with dim red flashlights? Well, those days are over.
Now your phone has a lot of free apps that can identify every star, planet, and constellation above you in seconds. And most of these apps work offline, so you don’t need cell service at remote dark sites.
We’re here with the two types of apps you actually need.
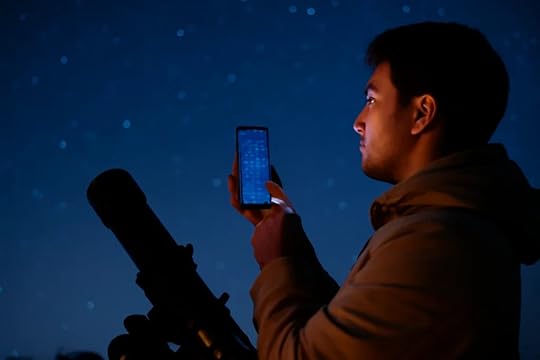
Stellarium for Real-Time Sky MapsStellarium is like having a planetarium in your pocket. You just have to hold up your phone, and it instantly matches the stars above you. You can see constellations, planets, and even satellites move in real time as you tilt or turn your screen.
And the offline mode is handy when you download the star database before heading out. You’ll still get millions of stars and celestial objects even without the internet. Plus, the free version displays stars, planets, and even details about the altitude and brightness of celestial objects.
ISS Tracking Apps for Satellite SpottingThe ISS Detector tells you exactly when the International Space Station will pass overhead. You’ll get a notification about 30 minutes before it appears, and the app guides you on where to
Now, when it shows up, it will look like a bright, fast-moving star gliding silently across the sky. The best times to watch satellites are just before sunrise or right after sunset when sunlight can catch the station’s surface.
 Find Your Perfect Dark Sky Spot
Light pollution is the greatest enemy of stargazing. Why? It’s because city lights wash out faint stars, blur the Milky Way, and make meteor showers harder to see.
But the good news is you don’t have to drive hours into the wilderness to find decent skies. Since most people actually live within 30-60 minutes of a spot dark enough for solid stargazing, you just need to know where to look.
And that’s where light pollution maps come in.
What is the Light Pollution Map?Light Pollution Map is a free website that shows you exactly how dark (or bright) the skies are near you. There’s also Dark Site Finder with similar functions. They use colour codes to indicate different levels of pollution. For example,
Dark Blue/Black: Amazing stargazingYellow/Orange/White: Too much lightThese maps use something called the Bortle scale. It rates sky brightness from 1 (pitch black, pristine) to 9 (city centre, terrible). So you have to aim for Bortle 4 or lower for good views.
Many certified Dark Sky parks achieve Bortle 1-3 zones. So these locations often have the blackest skies for seeing deep space objects like galaxies and nebulae. Along with these, state parks work too, and they’re often closer to home than you’d think.
See the Solar System up Close With BinocularsIt may sound unexpected, but binoculars usually work better than a telescope when you’re starting out.
Sure, telescopes sound exciting, but they’re pricey, bulky, and take patience to master. You’ll need to align them, track moving objects, and deal with lots of advanced adjustments. So it’s a bit much when you’re still getting used to the night sky.
But for binoculars? You can just pick them up and start your stargazing right away. These are some of the things you can see with binoculars:
You can see Jupiter’s four biggest moonsYou can even spot Saturn’s rings as tiny “ears.”The Moon’s craters look crisp enough and full of texture.Pro tip: When you’re buying a binocular, a solid beginner pair is 10×50 binoculars (10x magnification, 50mm lenses for brightness). They’re light, affordable ($50–150), and you can also throw them in a backpack, use them for hiking during the day.
Stargazing 2026: The Year You Finally Look UpYou don’t need perfect skies or fancy gear to begin stargazing. Just step outside tonight, find a few constellations, and maybe open an app like Stellarium. And you’ll be surprised how much more you can see when the city lights fade away.
All you need to do is start. The Perseids and August 2026’s solar eclipse will happen whether you’re ready or not. And the planets are shining tonight, waiting for someone to notice.
So grab a blanket, step outside, and look up. The universe has been putting on this show forever, and it’s about time you caught it live.
The post Stargazing Made Simple: Beginner’s Guide for 2026 Night Watchers appeared first on Star Hawks Blog.
October 9, 2025
Backyard Stargazing Ideas for Families
Your kids probably spend too much time on devices. So do most families. But getting them outside doesn’t mean you have to plan another exhausting day out.
Believe it or not, the night sky above your backyard has all the free entertainment you need to hold their attention. Just grab some lawn chairs, wait for darkness, and let curiosity do the rest.
Backyard stargazing gives your family something to do together without the usual complaints. Even restless kids settle down once they start spotting stars and learning what’s actually out there.
The tips ahead cover simple ways to set up, activities that work for different ages, and how to keep everyone interested beyond the first ten minutes. Let’s jump into it!
Getting Started with Backyard StargazingMost parents dismiss the idea and think it takes a lot of time and effort to set up. But the truth is, you’re about five minutes away from your first stargazing session.
Here’s what you need to get started:
Find Your SpotWalk around your yard after sunset and see where the streetlights aren’t blasting directly overhead. That’s your spot. It’s usually the darkest corner that works best, even if it’s not the most convenient part of your backyard.
Now just toss down some lawn chairs or spread a blanket on the grass. Make sure it’s a cosy blanket, cause you’ll be looking up for a while, and neck cramps end the fun quickly.
Time It RightClear nights work better than cloudy ones (groundbreaking insight, I know). But it does help to check when the moon rises. A full moon washes out fainter stars, so aim for nights when it’s less bright or hasn’t come up yet.
From our experience, summer months tend to bring later sunsets, which means the kids can stay up without everyone freezing.
What You’ll NeedYou don’t need anything fancy. Your eyes work fine for spotting constellations and planets. Just grab a torch with red cellophane over it so you can see without ruining your night vision.
A star chart app also helps, but you can learn plenty without one. And binoculars beat a cheap telescope any day if you do want to upgrade later.
Activities Beyond Just Looking Up
Staring at the sky is great for about ten minutes. Then the kids start getting restless, and someone needs the toilet. We found that the trick is mixing in other outdoor activities that keep the whole evening interesting.
Constellation scavenger hunt: Print out a simple star map or use an app to create a list of constellations to find. The little ones love ticking things off as they explore the night sky. Also, the first person to spot Orion’s Belt wins bragging rights. You can even add shooting stars to the list if you’re feeling optimistic.Glow-in-the-dark games: Bring out glow sticks or those cheap light-up toys from the dollar shop. And because kids are more likely to sit still after they’ve had a chance to run around, play a quick round of frisbee or tag before settling down.Space-themed picnic: Pack some snacks and call it a “moon mission meal.” Gather everyone on blankets with food and decorations if you’re feeling fancy. We can’t explain it, but cheese and crackers taste better under the stars. And no one complains about eating outside when it feels like an event.Star stories and mythology: Tell (or make up) the old Greek myths about constellations. Because most of them involve drama, monsters, or both. And once kids’ curiosity kicks in, they realise there’s a proper story behind those dots.Night photography attempts: Hand older kids a phone or camera and let them try capturing the stars. Most shots won’t turn out, but they’ll have fun trying. Create a competition for the best image.While all of these sound fun, we’ll bet that the older kids will get bored faster than the younger ones. That’s is why we’ll cover some ideas for the teens in the sections below.
Ideas for Older KidsTeenagers and pre-teens need something that feels less like a family activity and more like their own project. Surprisingly, a nature journal works brilliantly for this.
Just hand them a notebook and let them sketch what they see in the night sky. They can draw constellations, track moon phases, or just doodle their thoughts about space. It’s their thing, not yours.
Older kids also love attempting star trails photography with a phone or camera. So, try setting up a tripod (or a stack of books), use a long exposure app, and see what happens. The pictures look impressive even when they’re slightly blurry.
You might notice that some of them are getting interested in identifying deep sky objects when you point them towards apps that show galaxies and nebulae. Once they start creating their own space logs and comparing notes from different nights, you’ve got them hooked.
Daytime Prep for Better Stargazing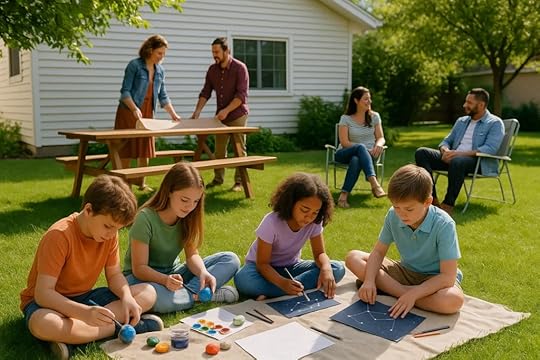
Most families overlook the daytime hours before the stargazing session. A bit of prep during the day goes a long way in making the activity more enjoyable for everyone.
Let’s look at a few activities you can plan:
Paint rocks like planets: Grab some rocks from the garden and let the kids paint them to look like Mars, Jupiter, or whatever they fancy. It gets them thinking about space before the sun even sets. Plus, you can use the painted rocks as decorations around your viewing spot later.Collect natural items for space crafts: Send the kids out to gather pine cones, leaves, and twigs. They can turn these into alien creatures or spaceships whilst you’re setting up dinner.Create constellation maps together: Print out blank star charts and have everyone colour them in. Older kids can add labels and facts they’ve looked up. And when night arrives, they’ll actually want to find the constellations they spent time drawing.Read space books in the garden: Spend twenty minutes outside with picture books about the moon and stars. Even just flipping through the pages gets younger children curious about what they’ll see later.These small activities turn stargazing from a random idea into something the whole family can prepare for together. A child’s curiosity grows when they’ve had time to think about space throughout the day.
Beyond Your Own BackyardWhile your backyard works brilliantly most nights, sometimes a change of scenery adds extra excitement. Like a local park with fewer streetlights often gives you a clearer view of the night sky. Try packing up your blankets and snacks, and make it a mini adventure without the hassle of driving far.
If you’re really keen, look up the nearest dark sky park for a special occasion. The difference is dramatic when you’re away from city lights. You might even spot things that never show up at home, and the Milky Way actually looks like the photos you see online.
During summer, you can mix stargazing with other outdoor activities. For instance, you can ride bikes to your viewing spot whilst there’s still daylight. Or fly kites in the afternoon, then stick around as the sun goes down. Beach trips can work too if you’re near the coast.
The time spent outside builds connection beyond just staring upward. And your kids will remember the whole evening, not just the stars.
Once you experience how nice it is, you might be tempted to make it into a regular thing.
Make Star Gazing a Regular TraditionThe first stargazing session is easy because it’s new. But keeping the excitement alive takes a bit more creativity. So, mix things up so it doesn’t feel like you’re doing the exact same activity every time.
Here are a few things you can try:
Try a water balloon fight before settling down to watch the sky.Plan an evening of fishing if you’ve got a pond nearby, then transition to stargazing as darkness falls.Pick flowers and pine cones during the day for craft projects you’ll work on the next afternoon.These little variations stop the routine from getting stale. And the moment your family starts asking when you’re doing it again, you’ve built something worthwhile.
Some nights you’ll catch a glimpse of the Milky Way. Other nights you’ll just lie there talking. Both count as time well spent, and that’s the whole point, really.
Ready to Start Tonight?You’ve got everything you need now. We covered finding the right spot in your backyard, timing your sessions for the clearest views, and keeping the kids entertained with activities beyond just staring upward.
The daytime prep ideas help build excitement before the sun even sets. And mixing things up with local park visits or pairing stargazing with other outdoor fun stops from feeling repetitive.
The best part? None of this requires expensive gear or expert knowledge about space. Your family can start tonight if the sky is clear. Grab some blankets, head outside, and see what happens.
For more ideas on getting your family outside and exploring the world around you, check out the Star Hawks Blog. Now stop reading and go see what’s visible tonight!
The post Backyard Stargazing Ideas for Families appeared first on Star Hawks Blog.
July 11, 2025
Why Outdoor Living Is More Than Just a Design Trend
The benefits of outdoor living come from changes in your brain and body. Research shows outdoor spaces trigger brain responses like better attention, higher relaxation, and improved creativity that indoor spaces simply can’t match.
You’ve probably experienced it too when you took a walk in nature, and it instantly lifted you up. Many people shared the same feeling with me when we worked on outdoor wellness projects together.
In this article, I’ll show you how outdoor lifestyle wellness improves your well-being through:
Memory boosts backed by science studiesSleep improvements you can measureSocial connections that grow stronger outsideThe cool thing is that you don’t need fancy gear or a complicated plan to tap into these benefits. All it takes is you and the world right outside your door.
Want to know exactly how this works and how you can start experiencing these benefits yourself? Let’s get into it.
The Growing Embrace of Outdoor LivingMore people are using their patios as a proper living area than ever before. Australia’s outdoor furniture market is projected to grow by 5.31% annually, driven by the growing trend of outdoor living spaces. This change makes sense when you consider our screen-heavy lives.
Think about your typical day. You check your phone, work at a computer, and then scroll social media aimlessly. That’s pretty common. Most of us spend several hours staring at screens and later deal with tired eyes, brain fog, and feeling on edge. However, when you step outside, your stress levels drop, and your mind clears.
Here’s how outdoor living could change the way you think about your home and well-being:
Redefining Your Home’s FootprintThink of your outdoor living area as adding an extra room to your house. These spots completely change how you use your home and enjoy the natural world around you.
You can easily move from your comfy indoors to getting some refreshing fresh air without feeling like you’re leaving your personal space behind. And your living room just got larger and came with built-in vitamin D. Isn’t that great?
Modern Lifestyle DemandsOur modern life feels more hectic than ever. Between work deadlines, family responsibilities, and constant notifications, we’re always switched on. But Outdoor living gives our mind permission to slow down. When we breathe fresh air, it naturally reduces cortisol levels, and natural light helps reset our internal clock.
As a result, more people are realising that spending time outside helps them feel more energised and less overwhelmed by daily pressures.
Speaking of wellness benefits, your outdoor space can boost your physical health in ways that might surprise you. Let’s find out how.
Boosting Physical Health in Your Outdoor Space
Want to feel stronger and healthier? Your backyard might be the best medicine you never knew you had. Outdoor living naturally improves your body’s systems, leading to better health across the board. What’s amazing is that even a simple walk outside can create lasting changes in your long-term well-being. It’s wellness that doesn’t require a prescription.
Here’s how your outdoor space becomes a natural health booster:
Strengthening Your Natural DefencesYour body’s defence system loves outdoor time. Fresh air and sunlight work together to boost your vitamin D levels, which strengthens your ability to fight off infections. Meanwhile, simply being around plants and trees helps reduce inflammation and supercharges your immune function.
This combination means fewer sick days and better overall health year-round. It’s like giving your body’s natural defence system the perfect fuel to keep you healthy.
Enhancing Heart HealthEver wondered how often your heart pumps in a day? Well, doctors say a healthy heart beats around 100,000 times per day (that’s quite a lot!). That’s why having a healthy heart is so important for your overall well-being.
Your heart needs regular exercise to stay healthy. The good news? Outdoor activities and games naturally give you that workout without feeling like work. Over time, this strengthens your heart muscle and improves blood flow throughout your body, which means less risk of heart problems down the road.
Optimising Sleep CyclesYou might be surprised to learn that outdoor living can improve your sleep quality. The natural light and fresh air you get in your outdoor living area work together to regulate your body’s sleep cycle. Natural light exposure during the day helps your body produce melatonin at the right time, while fresh air increases oxygen levels that promote deeper sleep.
But many people neglect the benefits of good sleep. Proper rest every day is important because it allows your body to repair and recharge effectively.
Pro Tip: Spending just 20 minutes outside in the morning light helps reset your sleep cycle naturally. So, try sitting on your patio with your morning coffee to make this an easy daily habit.
While your body gets stronger outside, your mind also experiences some pretty amazing changes. Now, we’ll see how outdoor spaces can help you handle stress better and feel more balanced emotionally.
Building Emotional Strength OutdoorsThe peace of an outdoor space is a natural stress-buster, and it does wonders for your mental health. When you connect with the natural world, it offers incredible ways to improve how you think and feel. For example, the sound of rustling leaves instantly calms your nervous system. Even the feeling of grass under your feet or a gentle breeze on your skin triggers your body’s relaxation response.
Just being in the great outdoors helps you relax and recharge. Try it, and you’ll see how your mind gets the break it desperately needs from constant indoor stimulation.
Here’s how outdoor spaces impact your mind:
Staying More FocusedHave you ever noticed how your brain feels sharper after spending time outside? Studies show that being in green spaces can help you remember things better and pay more attention. Even a short walk in nature boosts how well your brain works.
What’s happening is that the calming feel of the natural world reduces mental tiredness, which makes you think more clearly and handle information faster.
Reduce Stress and AnxietyOutdoor spaces don’t just help your brain work better. They also help you feel calmer because your stress levels drop when you step outside. Outdoor living is scientifically proven to reduce stress hormones like cortisol, which means your body literally switches from panic mode to a more relaxed state.
Picture this: you’ve had a rough day at work, your boss is breathing down your neck, and deadlines are piling up. When that happens, step outside for just 10 minutes, breathe in some fresh air, and watch how your shoulders relax and your mind clears.
Inspiring Creativity and Presence
Beyond stress relief, spending time outdoors also sparks your creative side. Open spaces and nature inspire you to think bigger, bringing more creativity and inspiration. Doing outdoor activities helps you be more present and truly enjoy the moment rather than worrying about tomorrow’s to-do list.
A nice garden or a simple, natural spot can spark your imagination, too. Maybe Einstein didn’t discover relativity while gardening, but your next great idea might come from right in your backyard.
You’ll notice these mental benefits in other areas of your life, including how you connect with others and even your wallet. Let’s explore some money-making ideas you can apply to your outdoor living.
Social & Financial Gains from Outdoor SpacesYour outdoor space brings a whole range of practical perks, both socially and financially. On the social side, it becomes a hub where meaningful connections happen effortlessly, from casual family dinners to weekend gatherings with friends. And from a financial perspective, your property value rises when you invest in quality outdoor living areas.
See how your outdoor space can bring social and financial benefits for you:
Build Community and ConnectionsThink about where your best conversations happen. Usually somewhere relaxed and comfortable, right? Outdoor living creates those perfect moments for connection, whether you’re having casual chats or playing lively outdoor games. A welcoming outdoor space works as a hub for family get-togethers and neighbour visits.
You know how people naturally feel more relaxed and open when they’re outside. That’s exactly why it becomes so much easier to form real friendships. There’s something special about sharing a meal under the stars or laughing over a backyard game that doesn’t happen the same way indoors.
Increase the Value of Your HomeBeyond social connections, a nicely designed outdoor living area becomes a hot selling point. This makes perfect sense when you consider that 97% of real estate agents believe that how your home looks from the street is important in attracting buyers.
Potential buyers are looking for homes that blend indoor and outdoor space seamlessly. Many real estate agents say that well-planned outdoor spaces can add thousands to your home’s worth. It’s like getting paid to enjoy your backyard.
Maximise the Living SpaceAn outdoor living area essentially adds an additional room for you to use. This extra space is super handy for dining, entertaining, or just chilling out. And having that extra space makes you the host everyone wants to visit.
Since you now understand all these fantastic benefits, you’re probably wondering how to make outdoor living work for your lifestyle and space. Next, I’ll share some practical tips to enhance your outdoor space.
Practical Ways to Embrace Outdoor Living
Even with a small space or a tight budget, you can make your outdoor living area awesome. The goal is to make the great outdoors accessible and fun for everyone. You don’t need a mansion or thousands of dollars to start enjoying the benefits we’ve talked about.
Here are practical ways to get started:
Overcoming Common HurdlesIf the weather is stopping you from going outside, there are many solutions available for that problem, too. Use features like:
Pergolas provide shade on sunny daysOutdoor blinds to block wind and rainAwnings that extend your covered spaceWeather-resistant furniture that stays outside year-roundGot a small urban space? Don’t worry. Try these space-saving ideas:
Vertical gardens that grow up instead of outFolding furniture that tucks away when not neededMulti-purpose pieces like storage benchesHanging planters to add greenery without floor spaceCreating Your Perfect Outdoor ExperienceOnce you’ve tackled the practical challenges, focus on making the space truly enjoyable:
A comfy chair becomes your favourite relaxation spotPotted plants instantly bring natural vibes to any spacePleasant scents like lavender or herbs make the area more invitingSmall water features add calming sounds that help you unwindString lights create a cozy atmosphere for evening gatheringsSmooth connections between indoor and outdoor spaces make your home feel biggerOne of my friends transformed her small patio by adding string lights and a few potted herbs. Now, she has breakfast out there every morning and says it has completely changed how she starts her day.
Your Outdoor Living Journey Starts NowYour outdoor space can change your life. We’ve seen how spending time outside makes your brain work better and helps you sleep deeper. It builds stronger friendships and even adds value to your home while helping the planet at the same time.
You don’t need to wait for the perfect time or lots of money. Start small with one comfy chair or a few plants. Each small step gets you closer to the outdoor life your body and mind really want.
Want to see more of what nature has to offer? Check out our amazing night sky photos at StarHawk’s Blog that show the natural beauty waiting right outside your door. These pictures can inspire your own outdoor adventures and remind you to look up at the stars above.
Visit our gallery today and fall in love with the night sky.
The post Why Outdoor Living Is More Than Just a Design Trend appeared first on Star Hawks Blog.
October 31, 2014
Blogs will now be posted on my updated website

Our ancestors were sometimes more like we are than we could imagine
It seems fitting somehow, that the final and 100th post on this blog will be posted on Samhain.
As you may know I am in the process of having my website updated. The old site was huge and sprawling. The new one will be easier to navigate and easier for me to manage.
Please go to my website and sign up on the right sidebar to be subscribed to future posts.
Eventually this site will be retired.
October 8, 2014
Why Vote?
We’re getting close to voter registration deadlines here in the US for our November elections, and it’s time for my periodic voting rant.
Why vote, when politics are vile, the right wing is a pack of intransigent bullies and the politicians who call themselves progressive inevitably go belly-up and give in to them? Obama, the guy who stood for hope, turned out to be just another good-looking guy who let us down, and a true progressive like Bernie Sanders – I’m at an age where I go for older men! – probably doesn’t stand a chance.
Nonetheless, it is vitally important that you vote, and here’s three good reasons why: the practical, the political, and the spiritual.
Practically speaking, there is one arena where your vote absolutely makes an enormous difference—and that’s on local issues. Granted, national politics are enough to discourage anyone from getting out of bed, let alone dragging yourself down to the polling station. But locally, even a few votes can make a huge difference. In Sonoma County, where I live much of the time, elections for the Board of Supervisors are often decided by a handful of votes. And the Board of Supervisors controls vitally important decisions that impact land use, water use, development, whether there is habitat for salmon or money for firefighters – issues that directly affect our lives. Schoolboards, water boards, transport boards, police review boards might not seem terribly sexy, but the right wing climbed to power by taking over school boards. Water boards often determine whether a new area can become a huge real estate development or remains farmland. Transport boards can decide to run busses on biodiesel made from used restaurant grease. Police review boards can determine whether that sheriff who shot the unarmed Latino kid stays on the force. In San Francisco, our local politicians stopped an attempt to shut down our city college, the only path to higher education for many low-income students.
Hate fracking? One of the most successful strategies to stop it has been getting local towns to ban it. Care about climate change? Then care about local public transport, urban food growing, community gardens and farmers’ markets which are all subject to local regulation. Want to legally re-use your graywater? Want programs to teach inner-city youth to grow and eat healthy food? Want schools that teach critical thinking, that have programs for art and music, that have curriculums that reflect diversity? All of these issues come back to the local, where your vote does make a difference!
This summer I met a town councilor from Glastonbury, in England – the town that many believe was the site of ancient Avalon and is currently a haven for Goddess worshippers, New Age spiritual movements and music festivals. Fracking has now become a threat to ancient sacred landscape. And in Glastonbury, a right-wing conservative was elected over a progressive environmentalist by one vote. One vote!
Okay, if that isn’t enough to persuade you, here’s a political argument for those of you who consider yourselves too revolutionary to engage in anything as reformist as voting:
That’s a position of pure privilege.
Why? Because the revolution may take a little while to get underway. I’ve been working on this one myself for close to half a century, and see how far we’ve gotten! In the meantime, all those reformist half-measures do have a huge impact on real peoples’ lives, often the people with the least resources and who are most impacted by policies. They might determine things like whether or not someone goes to jail for life for a petty drug offense, or spends years in solitary, or gets tried as an adult when they’re sixteen. Or whether a pregnant teen can get on food stamps, or get a safe, legal abortion, or get medical care if she keeps her child. They determine whether old people can keep the pensions they worked for or whether corporations pay taxes.
And no, they never work perfectly, or make the deep, structural changes we might like to see. But even incremental change can make the difference between life and death for someone.
And when the right wing is working so hard to keep the young, the poor, and the non-white from voting, why on earth would you want to help them?
And now, the spiritual reasons:
First, I vote to honor the ancestors. The women who campaigned for sixty years to get the right to vote. The civil rights marchers who put their lives on the line to open the vote to the people who were most disenfranchised. How could I possibly turn up my nose at the rights for which they worked so hard and sacrificed so much?
Ah, you say, but politics are so ugly, so nasty and conflictual and such a low vibration. Won’t I sully my spiritual purity and disturb my inner peace by getting involved?
If your inner peace has any depth to it, it will withstand a trip to the voting booth. True spirituality is not about some aseptic removal from the world, it’s about engagement with reality in all its forms. True compassion requires us to face what’s ugly and disturbing, not hide from it. Withdrawal is, again, a position of pure privilege. Privilege means advantages and power and choices that you haven’t earned, and exercising unearned power never earned anyone any karmic good points.
The farmer whose land is taken for a pipeline doesn’t have the luxury of denial. The community whose drinking water is toxic from a chemical spill is looking for a very practical form of purity. They need our solidarity, which is the wonderful use we can make of privilege – to put it to the service of making a more just world.
Finally, it’s a magical law that you don’t gain more power by disdaining the power you have. If we want to call in the great powers of creation, compassion and justice to transform our world, we must use whatever avenues are open to us, even if they seem weaker than we’d like. The trickle carves a path for the stream to flow, and the stream makes the way for the river.
So do a walking meditation, and walk on down to the voting booth. Make filling out your ballot an act of prayer, if you like.
Take that hour, or day out of your busy life and make your small voice heard as an act of magical, political will that can open the gates to a world where we all have bigger voices. When you go back to your meditation, or your anarchist collective, or your revolutionary praxis, or your simple struggle to pay the rent and put food on the table, the world will not have transformed overnight. The Great Turning won’t have turned. The Good Guys will not have completely triumphed over the Bad Guys.
But the world might just be a slight bit better than it would have been otherwise. And that small difference might be the divergence in the path that heads us away from destruction and onto the road to hope.