Getting Started With Stargazing Using Simple Equipment
You’ve probably looked up at the night sky and wondered what you’re actually seeing. I did too, for a long time. And like most people, I assumed getting into astronomy meant I would need some expensive telescopes and learn complicated star charts.
Fortunately, it doesn’t. After years of stargazing from backyards, national parks, and coastal spots across Australia, I’ve learned that getting started is much easier than it seems.
This guide shares beginner stargazing tips that’ll help you enjoy the night sky with gear you probably already own. By the end, you’ll know how to find darker skies, recognise constellations and bright planets, and figure out if a telescope is even worth it.
A Beginner’s Guide To Your First Night Under The Stars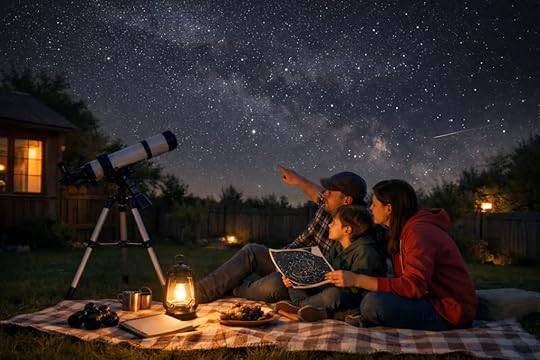
Stargazing is one of the easiest hobbies to start because you already have everything you need. Your eyes, a clear night, and a bit of patience are enough to begin exploring the night sky. Frankly, most amateur astronomers didn’t start with a telescope or fancy binoculars; they simply stepped outside and gazed upward.
The one thing that makes a real difference early on is giving your eyes time to adjust to the darkness. I learned this the hard way on my first few nights out, but about half an hour in the dark lets your night vision fully kick in.
Once that happens, fainter stars and constellations start appearing that you couldn’t see before.
From there, you can focus on spotting patterns and shapes across the sky. You don’t need to memorise anything yet, just observe and let your eyes wander. Over time, recognising bright stars and familiar constellations will become second nature.
Now, let’s look at where to actually go for darker skies.
Finding A Dark Sky Away From Light Pollution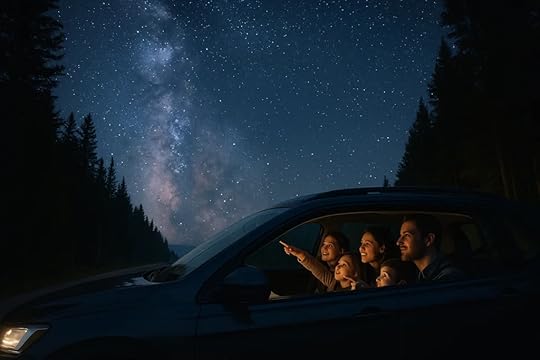
The darker your surroundings, the more stars you’ll see, and finding a good spot is simpler than you think. Even a short trip outside a major city can reveal hundreds of stars that light pollution normally hides.
Here are a few ways to find the best dark sky locations near you.
Why City Lights Wash Out The StarsCity lights create a glow that drowns out fainter stars and deep sky objects. This is called light pollution, and it affects most urban areas across the southern hemisphere and the northern hemisphere alike. Even a 30-minute drive away from bright light sources can improve your view dramatically (and yes, even a short drive makes a noticeable difference).
Remember, the goal is to find a dark location where the night sky isn’t competing with streetlights and buildings.
Free Apps To Find Dark SpotsFinding a dark sky used to take a lot of guesswork, but now some tools do the work for you. Free apps like Stellarium show you exactly what’s visible overhead in real time.
You can also check the Bortle scale rating for your area, which measures how dark or light-polluted your sky is.
Best Locations For Stargazing In AustraliaNational parks, rural farmland, and coastal areas typically offer the darkest skies for stargazing. In Australia, spots like the Warrumbungle National Park and parts of outback Queensland are popular among amateur astronomers for good reason.
These locations sit far from any major city, which gives you clear views of the Milky Way, planets, and even faint galaxies on a clear night.
Spotting The Milky Way, Southern Cross and Meteor ShowersEver wondered what those bright patterns in the sky actually are, or when to catch a shooting star? The night sky is full of celestial objects you can spot with the naked eye, and timing plays a big role in what’s visible.

Here’s a quick guide to some of the best targets for beginner stargazers.
Celestial Object Best Time To View Visibility Southern Cross Year-round Always visible in Australia Milky Way Winter months (June–August) Darkest skies, no moon Meteor Showers Varies by shower Check annual peak datesThere are a few things you can look for when you head outside.
Firstly, the Southern Cross is one of the most recognisable constellations in the southern hemisphere, and it’s visible every night of the year from Australia. This star cluster points toward the South Celestial Pole, which makes it a handy anchor for finding your bearings. Many amateur astronomers use it as a starting point for locating other constellations nearby.
Next, the Milky Way stretches across the sky like a hazy, glowing band. The first time I saw it stretch across a cold winter sky in Queensland, I couldn’t look away. On a dark night, you can spot star clusters, bright stars, and even distant galaxies within it.
And lastly, meteor showers like the Geminids and Eta Aquariids happen throughout the year. You’ll get the best views after midnight on a clear night, and you don’t need binoculars or a telescope, just patience.
Speaking of which, let’s talk a bit about equipment.
Do You Need A Telescope To Start?No, you don’t need a telescope to start stargazing. And as we’ve already mentioned, plenty of amateur astronomers spend years enjoying the night sky with nothing more than their eyes or a good pair of binoculars. That said, the right equipment can open up a whole new universe of things to see.
Now, Binoculars are a great first step for beginners. A 7×50 or 10×50 pair lets you observe the moon’s craters, bright planets like Jupiter and Saturn, and even the Pleiades star cluster. They’re lightweight, affordable, and easy to use, which makes them perfect for casual nights under the stars.
Also, believe it or not, a first telescope doesn’t need to cost a fortune. A basic refractor or reflector under $200 can show you the rings of Saturn, the moons of Jupiter, and dozens of deep sky objects. Different telescopes serve different purposes, so it helps to know what you want to observe before buying.
Goto telescopes take things further by automatically locating celestial objects for you. While this sounds convenient, learning to find things manually builds stronger astronomy skills (that’s a skill worth building early on). Which is why many stargazers recommend starting with a simple new telescope and upgrading later.
Now that you know the basics, let’s cover a few tips to make your sessions even better.
Beginner Stargazing Tips For Full Moon NightsA few simple habits can turn casual glances at the sky into a lifelong hobby you’ll never tire of. And timing your stargazing around the moon’s phases is one of the easiest ways to improve what you see.
Full Moon Viewing: At its core, this comes down to one thing. Bright moonlight washes out fainter stars and deep sky objects, so full moon nights work best for observing lunar craters and surface details with binoculars or a telescope.New Moon Planning: The new moon phase offers the darkest skies, which is perfect for spotting the Milky Way, galaxies, and faint star clusters. Many amateur astronomers plan their best sessions around these nights.Keeping a Journal: Writing down what you observe helps you track progress and notice patterns over time (you’d be surprised how satisfying this becomes). Recording the date, moon phase, and constellations or planets you spotted makes each night more rewarding.These small habits turn casual stargazing into something you’ll enjoy for years.
The Night Sky Is Waiting For YouGetting started with stargazing doesn’t require expensive equipment or years of study. A clear night, a dark sky, and a bit of curiosity are all you need to begin exploring the universe above you.
The stars have been there every night of your life, waiting to be noticed. Tonight might be the perfect time to step outside and see what you’ve been missing. So grab a pair of binoculars or simply look up with your naked eye. Either way, the night sky has something to show you.
Once you start, you’ll wonder why you didn’t begin sooner. For more tips and guides on astronomy and outdoor living, explore Star Hawks Blog.
The post Getting Started With Stargazing Using Simple Equipment appeared first on Star Hawks Blog.