June Kessler's Blog
March 26, 2017
Losing Your Belly Fat
2 Tips for Losing Belly Fat | Workouts, Nutrition, Diet for Stomach Fat Loss
Losing Your Belly Fat the Right Way with These 2 Vital Strategies (Also a Healthy Fast Recipe Below)
by Mike Geary, Certified Nutrition Specialist, Certified Personal Trainer
Before I give you the 2 vital secrets for losing stubborn belly fat, I wanted to tell you about yet another new healthy lunch recipe that I came up with recently. As you probably already figured out, I’m always trying to concoct meal ideas that are healthy but also unique and help to keep us from getting bored with our meals.
I know this meal concoction may sound a little weird, but I had a couple friends try it and they couldn’t believe how good it was. They demanded the recipe they liked it so much. Really it’s nothing more than a bunch of stuff thrown together in a pot.
Geary’s Healthy Turkey-Bean Concoction Recipe (makes about 4-5 servings)
2 large cans of chunked or shredded turkey breast (or use about 1-lb of fresh shredded turkey breast, which is slightly healthier)
One 16-20 oz. can of baked beans (yes, this has sugar, but is also balanced by high fiber and protein in this recipe)
1 large tomato diced (or 1 can crushed tomatoes)
2 Tbsp extra virgin olive oil
A couple cloves fresh diced garlic (or a tablespoon or so of crushed garlic from the jar)
1 large vidalia onion diced
2 red peppers diced
In a large pot, mix the olive oil, diced tomatoes, onions, peppers, and garlic together until it starts simmering and allow to cook for a few minutes. Then add in the shredded turkey and can of baked beans and simmer for a few more minutes. That’s it… Simple, and maybe sounds a little weird, but I couldn’t believe how delicious it was! Plus, it has a great mix of healthy carbs, protein, and fat, as well as a good dose of antioxidants, vitamins, and minerals.
The 2 Vital Secrets You Need for Losing Your Belly Fat for Good
I bet you’re thinking that you’ve tried every technique in the world for losing your stubborn belly fat, but it just never seems to budge… right? I’m sure you see TONS of commercials and ads making all kinds of miracle claims for losing your belly fat overnight with their magic pill or wildly-hyped snake-oil supplement.
How about all of the bogus infomercial gadgets out there claiming you can shrink your stomach in a matter of days just by strapping some worthless “ab-belt” around your waist, or sizzle away the stomach fat by using their patented “ab-roller-rocker” do-hicky.
Come on now! I hope you’ve been insulted by all of these fraudulent marketers and the gimmicks and scams that they are pushing down your throat by trying to get you to believe that a fat-loss miracle is possible overnight.
So let’s get past all of the scams and gimmicks and get right down to the hard science and reality behind what techniques and strategies really do help you for losing your stubborn belly fat and keeping it off for life!
1) The first important principle we’ll discuss is how you structure your workouts. In order to stimulate fat-loss from your stomach, you need to stop wasting so much of your time doing all kinds of various abdominal exercises and hundreds of reps of crunches, leg lifts, and torso twists in the hopes of “spot-reducing” your belly and love handles.
I’m sure you know by now if you’ve read any reputable fitness publications over the last decade that spot-reduction DOES NOT occur. It’s a myth that just won’t seem to go away. The truth is, losing belly fat does NOT occur by doing exercises that target the stomach area. Unfortunately, even though most people by now do understand this (or at least they should), they still spend WAY too much of their training time trying to target the stomach with tons of abs exercises.
Now don’t get me wrong, a certain amount of abdominals exercises are great and they do help to strengthen your core and help you maintain a healthy back. But the fact is that direct abs exercises should only be a small portion of your workout routines. The majority of your time should be spent focusing on big multi-joint exercises that work the largest muscle groups of the body like the legs, chest, and back.
Now that is one of the REAL secrets for ridding yourself of that sloppy belly fat for good. Focusing on big multi-joint exercises for the largest portions of your body greatly increases your metabolic rate both during the workout, and for 24-48 hours after the workout. In addition, this also stimulates an increase in fat-burning hormones within your body. You simply don’t get this type of metabolic and hormonal response by wasting most of your time with “abs-pumping” exercises.
Want to lose your belly fat the right way… Well, get your butt under a barbell and do some squats, some lunges, some deadlifts, step-ups, some back and chest work. For you ladies, don’t worry…it’s not going to “bulk you up”.
It doesn’t matter per se if it’s barbells, dumbbells, or even bodyweight exercises… the focus needs to be on big multi-joint exercises at a high intensity. That means no 5-minute rest periods between sets while you flap your gums with half of the people at the gym. Losing that stubborn belly for good requires some focus and intensity in your workouts! Anybody who tells you that you can do it while sitting on your couch watching TV with some “ab-belt” strapped to you, or doing only 2-minutes of crunching with your “ab-rocker-roller” is flat out lying to you!
2) The second important principle to rid yourself of that flabby belly revolves around your nutrition. The first thing you need to realize is that “diets” only work against your body in your effort to lose the stomach fat. You see, if you follow any of these fad diets like extremely low-carb, or low-fat, or the grapefruit diet, the soup diet, or anything else that restricts 1 or more of the macro-nutrients (protein, carbs, and fat), most of the time you will actually lose lean muscle and lower your metabolic rate. This only makes you fatter in the long run, when you start to eat normal again!
I could go into all kinds of details, but essentially you are messing up processes related to your hormonal balance in your body, the muscle glycogen process, insulin, blood sugar, etc., and this stops your fat loss dead in its tracks!
It’s important to stop falling for the fad diet gimmicks, and understand that as humans, we are meant to eat a balanced diet full of a diverse array of foods from healthy natural sources of carbohydrates, proteins, AND fats. This gives your body all of the macro-nutrients as well as all of the vitamins, minerals, antioxidants, and enzymes that your body needs to run like a well-oiled fat-burning machine!
I could go on and on with dozens more strategies for losing your belly fat faster, the natural way, but I’ve rambled on long enough for one article. You can find all of my best fat-loss strategies to help you uncover those hidden abdominal s of yours, laid out into actual programs for you to follow in my Truth about Six Pack Abs Program for Losing Belly Fat
 If you’ve been thinking of getting a copy of The Truth about Six Pack Abs Program, but just haven’t made the move yet, now is the time to take action, and get started on your lean ripped flat stomach today!
Click Here
http://junekess.mikegeary1.hop.clickbank.net/?pid=70&tid=blog
The post Losing Your Belly Fat appeared first on The Art of Perfect Bread Baking.
December 27, 2016
Eggnog Pie
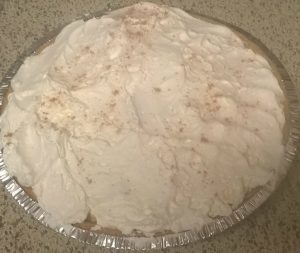 Eggnog Pie
1 pkg (5.1 oz.) vanilla instant pudding
1 ½ cups eggnog
Pinch nutmeg
1 graham cracker pie crust
Directions
1 . Using a whisk, mix vanilla instant pudding into eggnog until no lumps remain and mixture has thickened.
2. Stir in nutmeg (to your taste). Stir in half the tub of whipped topping.
3. Spoon mixture into graham cracker crust – You can sprinkle more nutmeg on top for garnish if you want. Serve topped with the remaining whipped topping.
4. Refrigerate until ready to serve.
The post Eggnog Pie appeared first on The Art of Perfect Bread Baking.
October 18, 2015
Red Velvet Whoopie Pies
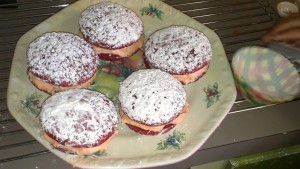 Red Velvet WHOOPIE PIES
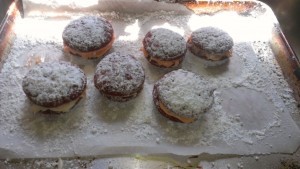
Red Velvet Whoopie Pies are great for Halloween or any time, This was my first attempt at making Red Velvet Whoopie Pies, They turn out very good, the Grandchildren ate most of them. They are like 2 cookies with a cream-cheese and sugar frosting for the filling, we made ours orange by mixing yellow and red food coloring together. Just smash them together like a sandwich. and sprinkle with powdered sugar. we made these for Halloween so we made our filling orange. Try this delicious recipe for Red Velvet Whoopie Pies
¾ cup butter, softened
1 cup sugar
2 eggs
½ cup Sour Cream
1 Tablespoon red food coloring
1 ½ teaspoons white vinegar
1 teaspoon vanilla extract
2 ¼ cups all-purpose flour
¼ cup baking cocoa
2 teaspoons baking powder
½ teaspoon salt
¼ teaspoon baking soda
¾ cup powdered sugar
Filling
3 cups confectioners’ sugar
½ cup (1 stick) unsalted butter, softened
8 ounces cream cheese, softened
1 teaspoon pure vanilla extract
Yellow and Red food coloring, if desired
Directions
1. Preheat oven to 375°. In a large bowl, cream butter and sugar until light and fluffy. Beat in eggs, sour cream, food coloring, vinegar and vanilla. In another bowl, whisk flour, cocoa, baking powder, salt and baking soda; gradually beat into creamed mixture. Stir in cooled chocolate.
2. Drop dough by Tablespoonful’s 2 inches apart onto parchment paper-lined baking sheets. Bake 8-10 minutes or until edges are set. Immediately sprinkle with powdered sugar and place in the freezer to cool fast; for about 5 minutes.
3. For filling: In a large bowl, beat cream cheese and butter until fluffy. Beat in confectioners’ sugar and vanilla until smooth. Add I drop of red food coloring and 2 drops of yellow food coloring; if desired, for orange filling. Spread filling on bottom of half of the cookies; cover with remaining cookies.
Makes 24 Whoopie Pies
The post Red Velvet Whoopie Pies appeared first on The Art of Perfect Bread Baking.
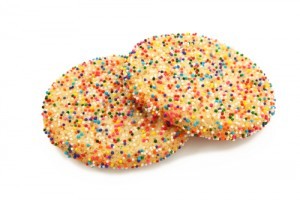
Sugar Cookies
Sugar Cookies
Sugar Cookies
These Sugar Cookies Contain no egg , which makes the dough safe to eat, the Grandchildren love to eat the dough; a mixture of cream cheese and butter, creates a soft chewy center and a crispy coat on the outside.
Great for cookie decorating! These classic sugar cookies are great for cookie-cutting and decorating during the holidays or anytime you feel festive, or top with sprinkles. Your kids will love to decorate these cookies.
1 (8-oz) pkg. Cream Cheese, Softened
1 cup (2 sticks) butter or margarine, softened
2/3 cup sugar
½ teaspoon vanilla
2 cups flour
Colored sugar, sprinkles and colored gels
Directions
1. Mix cream cheese, butter, 2/3 cup sugar and vanilla with electric mixer on medium speed until well blended. Mix in flour, Refrigerate several hours or overnight.
2. Roll dough to ¼-inch thickness on lightly floured surface. Cut into desired shape; sprinkle with colored sugar. Place on ungreased cookie sheets.
3. Bake at 350 degrees F. for 12 to 15 minutes or until edges are lightly browned. Cool on wire racks. Decorate as desired with colored sugar. Sprinkles and colored gels:
Makes about 3 ½ dozen
The post Sugar Cookies appeared first on The Art of Perfect Bread Baking.
Candy Apples

Candy apples prepared for a party
Candy Apples
Oh, Candy Apples reminds me of my childhood making Candy Apples with my mom; I made Candy Apples for my daughter and now my Grandchildren. Golden delicious apples dipped in a candy sauce, be careful when making these because to mixture is very hot, and can cause a nasty burn. You will need a food digital thermometers and a heavy saucepan.
Making Candy Apples are great to make for Halloween and a real treat for my Grandchildren, at great family tradition, a crispy red delicious apple smoothed in a sweet crunchy candy shell.
4 medium-sized Red Delicious apples
4 wooden skewers
3 cups sugar
2/3 cup light corn syrup
2/3 cup water
1 teaspoon vinegar
6 to 8 drops red food color
Directions
1. Wash and dry apples; remove stems. Insert wooden skewers into stem end of each apple; set aside.
2. In a heavy saucepan combine sugar, corn syrup, water, and vinegar; mix well. Cook over medium high heat until mixture reaches 300 degrees F. stirring occasionally. Remove from heat; stir in food coloring. Quickly dip apples into the mixture; allow to drip off. Place apples on a buttered baking sheet to cool.
Makes 6 servings
The post Candy Apples appeared first on The Art of Perfect Bread Baking.
Witches Fingers
Halloween Mexican Pizza
 Halloween Mexican Pizza
The boys love to decorate their own supper; we used leftover cheese sauce instead of cheese which turned out well and also used up some leftovers.
This Halloween Mexican Pizza is really easy to make. The first time I ate a Mexican Pizza was at Taco Bell, they became my daughters favorite pizza, then I decided to make this Halloween Mexican Pizza, and what a hit for our Halloween feast the grandchildren really loved them, and had so much fun decorating them.
1-Pound ground beef or ground turkey
1-(1.0-oz-28.g) pkg. taco seasoning
1 cup fried beans
½ cup salsa (jarred or homemade)
½-1 cup shredded cheddar cheese or cheese sauce
8-4in flour tortillas
Your choice of toppings, tomatoes, green onions, peppers
Directions
1. Preheat oven to 350 degrees. Brown ground beef in skillet. Add in taco seasoning; simmer covered for 10 to 15 minutes .Drain if needed. Spray baking sheet with nonstick cooking spray. Lay 4 tortillas on sheet. Spread with beans, then, with meat and salsa; sprinkle with cheese. Cover with second tortilla.
2. Bake for 10 minutes. Remove from oven. Spread top tortilla with Cheddar cheese or cheese sauce, heat in oven for 5 minutes to melt cheese and top as desired. Bake an additional 5-10 minutes or until cheese is melted or heated completely. Decorate as desired.
The post Halloween Mexican Pizza appeared first on The Art of Perfect Bread Baking.
October 4, 2015
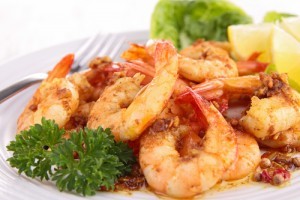
Citrus Shrimp Platter
Citrus Shrimp Platter
Citrus Shrimp Platter
Citrus and spice with a fresh and zesty sauce for shrimp that can be made the day before.
1 cup finely chopped fennel (medium)
1 cup of cocktail sauce
2 Tablespoons orange juice
1 ½ Tablespoons lemon juice
1 Tablespoon grated orange peel
1 teaspoon ground fennel seed
¼ teaspoon lemon-pepper seasoning
Salt to taste
¼ teaspoon white pepper
¼ teaspoon black pepper
2 pounds shelled, deveined cooked large shrimp (21-30count)
Directions
In a large bowl whisk all ingredients together except the shrimp. Add the shrimp; toss to coat well: Cover. Refrigerate 8 hours or overnight. Serve at room temperature.
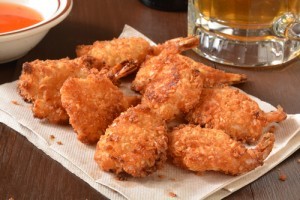
Coconut-Orange Shrimp
Coconut Shrimp-Orange Shrimp
Coconut Orange Shrimp makes great Game day appetizer, with the hot sauce and orange mixture
Prep Time: 30 minutes
Cook Time: 6 minutes
2 ½ cups flaked coconut, divided
1 medium ripe banana
¼ cup hot sauce. (Franks-redhot sauce works well)
¼ cup orange juice
1 Tablespoon olive oil
1 Tablespoon grated orange peel
1 Pound raw large shrimp, shelled and deveined
Directions
1. Combine ½ cup coconut, banana, hot sauce, juice, oil and orange peel in blender or food processor; process until puréed.
2. Pour into resealable plastic food storage bag. Add shrimp; toss to coat. Seal bag. Refrigerate; 1 hour.
3. Preheat oven to 450 degrees F. Line baking sheet with foil; grease foil.
4. Sprinkle remaining coconut onto sheet of waxed paper. Dip shrimp into coconut, pressing firmly to coat. (Do not shake off excess marinade from shrimp) Place shrimp on prepared baking pan. Bake 6 to 8 minutes or until shrimp are opaque.
Makes about 6 Servings
September 27, 2015
Italian Breads
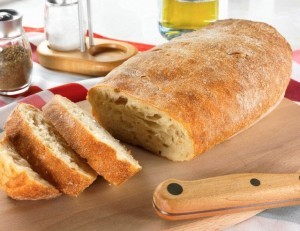
Ciabatta is a delightfully different, and well-known creature altogether. Truly an Italian Bread, Ciabatta is shaped similar to a traditional loaf of bread. It is filled with several holes and is the perfect tool for dipping in flavored olive oil. Since it is made all over Italy, the recipe can vary by region. In Tuscany, the crust is crunchy and the inside is chewy. When made in Biga, near Lake Cuomo, the interior is fluffy and soft, with a chewier crust.
Breadsticks are a typical house specialty, no matter where you visit in Italy. There are a multitude of different recipes for breadsticks, as every region and chef has a favorite style. The most common recipes all begin with a typical breadstick dough, brushed with egg and baked at 375F/190C for about 15 minutes. You can add your own toppings, anything from fresh herbs and spices to shredded mozzarella or parmesan cheese.
Focaccia is perhaps the best known Italian bread, and for good reason. Anyone who tries this chewy, spiced bread can agree that there is no comparison. Seasoned with olive oil, basil and oregano, it is simply delicious.
From Romagna comes a wonderful flat bread called Piadina. A cross between a tortilla and a Middle Eastern pan bread, delicious side dish. Lard, hot water, and unbleached flour are mixed together and flattened with a rolling pin. The dough is then cut and fried in a skillet until light brown. It’s ready to eat after about three or four minutes.
If you are looking for a true Italian dessert bread, however, sink your teeth into a Panini Dolci alla Cannella. A type of cinnamon roll, this fluffy doughy goodness will have you begging for more. Potato flakes are often added to give them a more airy quality. Try adding some chopped nuts, for a crunchy surprise; towards the end of the baking cycle, don’t forget to sprinkle the Cannella with a hefty blend of cinnamon and sugar.
For those looking for bite-sized breads, try a croissant-style Cornetti. The dough is flattend, cut into triangles, then brushed with egg or butter and rolled up. For a dessert-like treat, add a bit of cinnamon and sugar. It can turn this plain, everyday bread into a delightful pastry. Bake the Cornetti at 350F/175C for about 20 minutes, then devour with delight.
Focaccia’s preparation is much like its cousin, the universal pizza crust. However, this flat bread is taken to a whole new dimension. It is rolled out, pressed by hand and then baked in a stone oven. The baker usually slices the top of the bread during the baking process, removing bubbles and allowing for the addition of spices and oil. The contribution of spices and olive oil helps to preserve interior moisture.
While best known for pasta dishes, the Italians bring many other amazing foods to the culinary table. One masterpiece that should never be overlooked, by those seeking great taste, are Italian breads. Bread is one of the most essential and available foods around, dating back to ancient times. Nowhere has bread been more thoroughly adapted into daily cuisine than the sun-drenched land of Italy.


 The Art of Perfect Bread Baking