
Andy Reynolds's Blog: AndyReynolds.net
July 17, 2023
Love Poem by a Robot -Polymer Clay / Puppet Show
Greetings!
I’ve just finished my first high-quality puppetry video! I’m so happy with how this turned out.
Here is Nostalgia the Robot Puppet performing the love poem, “Take Me to the Jukebox.”
An enchanting robot puppet reads a romantic love poem with the help of stop-motion animation and cardboard-crafted sets. Nostalgia the robot puppet is a polymer clay and mixed-media sculpture that I crafted for my surreal & weird poetry/performance art projects.
“Take Me to the Jukebox” is a love poem I wrote for my wonderful girlfriend. I’ve been wanting to make a puppetry version of it for months, but finally developed the skills and ideas to put this together.
Here’s a behind-the-scenes look at my film setup:

I’m so happy with the cardboard sets and the stop-motion animation. I have a lot of ideas on how to make more intricate sets and animation in the future. I’m thinking that I can make one sculpting video and two puppetry/poetry videos a month.
The music for the intro and outro is “Andy’s Imaginarium” by the amazing Kallie Marie (https://www.kalliemarie.com). It’s a song I commissioned from Kallie years ago and only used a few times. I’m happy that I now get to weave the song into these more high-quality videos that I’m making now.
This is my second professional-level video. The first one I just published a couple of weeks ago - it’s a 10-minute sculpting tutorial of how to build a mixed-media robot with polymer clay.
Leave a comment and let me know what you thought of the poem and video! And make sure to subscribe to my newsletter to keep updated on my projects.
Until next time,
Andy


July 4, 2023
Sculpting a Robot with Polymer Clay
Greetings!
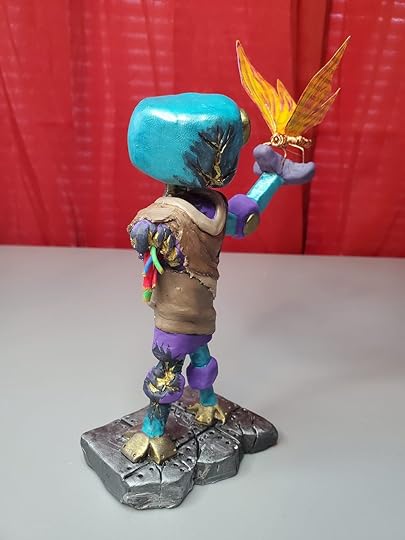
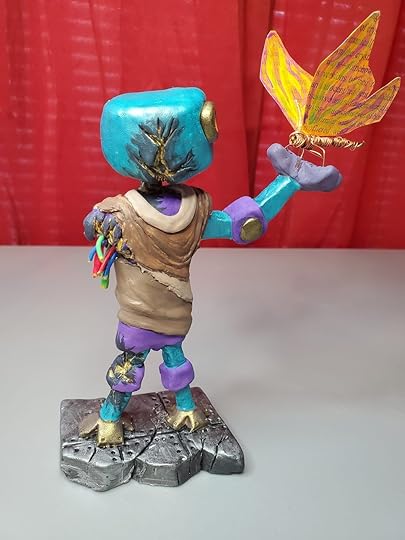
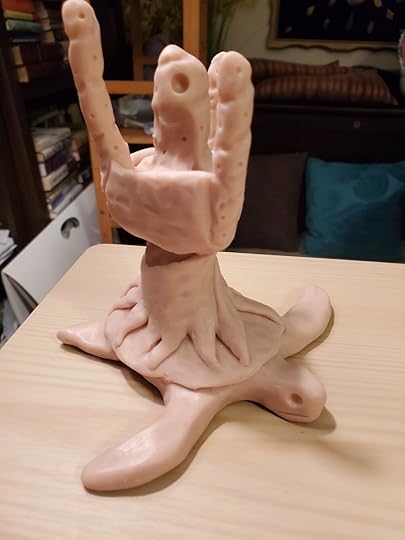
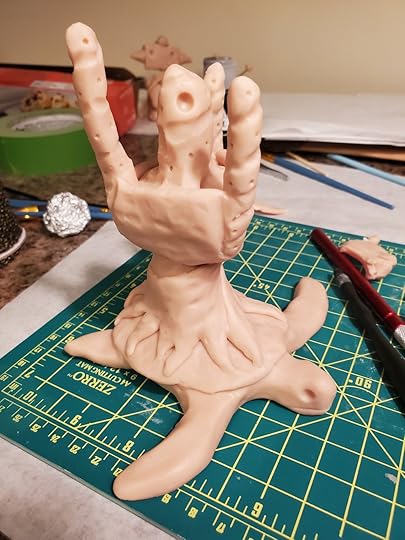
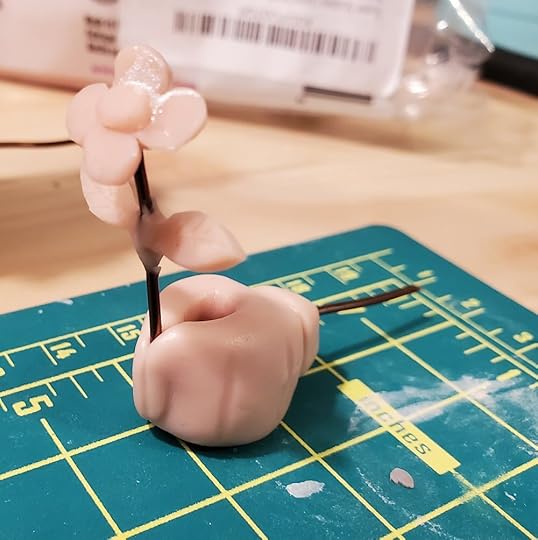
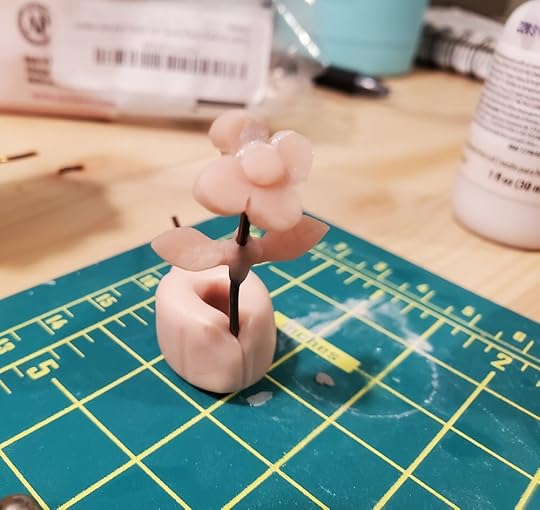
I just made possibly my best sculpture to date. It’s a post-apocalyptic robot that’s battle-damaged and finding a beautiful butterfly.
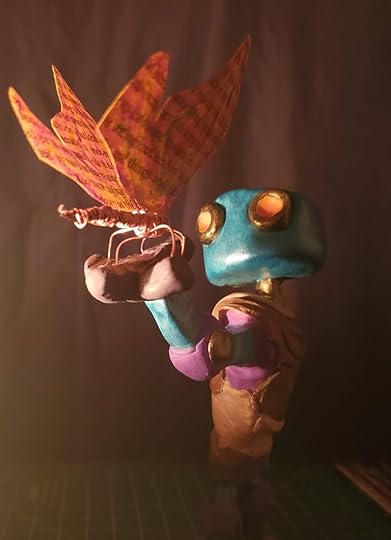
It’s a mixed-media sculpture created with polymer clay, wire, foil, and cut-up pages from one of my books that was damaged.
I filmed the whole process and cut together this 10-minute video showing my whole making-of process, complete with descriptions of what I’m doing. I even throw in some robot-inspired poetry!
Check out the video here:
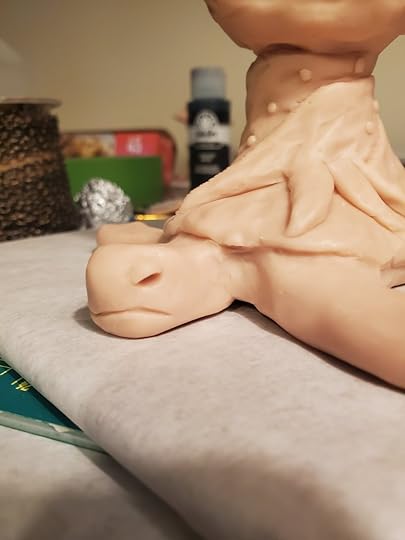
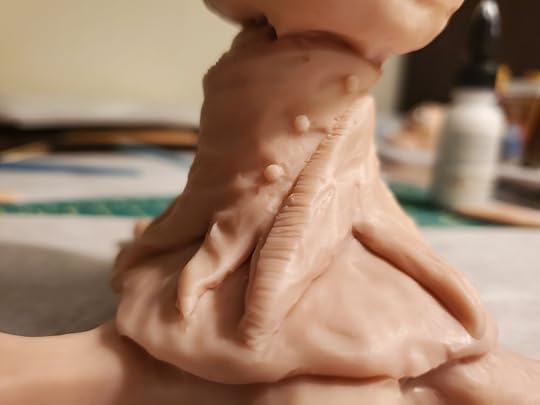
Here are some shots of the finished sculpture below. If you scroll through you can see the damage on the right side of his body—he’s even missing his right arm.


This piece feels more personal than any sculpture I’ve made yet. The last year has been challenging, with the house fire caused by lightning and moving to Mississippi for almost a year. But now I’m back in New Orleans and really feel like my artistic endeavors are taking off in a way they haven’t for a long time.
This piece feels like a description of how I feel - crawling through a tough and challenging time and finding hope.
One of the most symbolic aspects of this piece are the butterfly’s wings. I have a stack of books that are smoke-damaged from the house fire - the edges and some of the pages too smoke-stained for me to sell. So I cut the wings from one of the stories in my book, Visions from the Dream Gyre.
Here’s the passage from my story “The Iris” that I cut the wings from:
With two fingers, The Iris reached into her mouth and dragged her nails along the inside of her cheek, pulling out a butterfly’s wing, all golden and burgundy. Then she did the same to her other cheek, pulling out a second wing. When she put the two wings together they began flapping madly, lifting away from her into the air. She reached out and caught the wings, cupping them carefully in her hands, and as she slowly pulled her hands apart, the wings grew—and between the wings, and insect body formed and sprouted legs. She kept growing the creature until its body was almost half her size. Then she swiftly grabbed it and flipped it over her head and behind her, its legs wrapping themselves around her ribs and shoulders and chest, attaching itself to her back.
She felt the creature flex and stretch along her spine, and she touched one of its legs reassuringly. Then she took two steps forward and leapt down into the cavern of crystal, letting it envelope her as the creature on her back beat its wings manically to slow their descent.
I really love the idea of using my damaged books as part of my artwork. I plan on making more of these sculpting videos and continuing to integrate pages from my unsellable books into my sculptures.
Until next time,
Andy
March 2, 2023
Book Giveaway!
My birthday is at the end of this month (March 27th), and for my birthday I’m going to give away some books!

For my birthday two years ago, I published my novel Ballad of the Reverie Organ, the sequel to The Axeboy’s Blues. This year I’m doing something a little different. A lot of people have read one or two of my books, and I thought this would be a great way for someone to get books of mine they don’t have yet.
How It Works:Leave a review this month (March) for one of my books. You can leave a review on Amazon, Goodreads, or any other site that you like that has book reviews.
Send me a message telling me where you left a review, and I’ll enter your name into the drawing. (You can also email me at: Andy@AndyReynolds.net)
I’ll draw a name on April 1st and send free books to the winner!
What You Win:A signed copy of Visions from the Dream Gyre - my short story & poetry book which revolves around the concept of dreams.
A signed copy of one of my novels (your choice):
Find out more about my books:
Andy’s BooksFebruary 17, 2023
Mushroom Bot! (Detailed Making-Of Process)
Greetings!
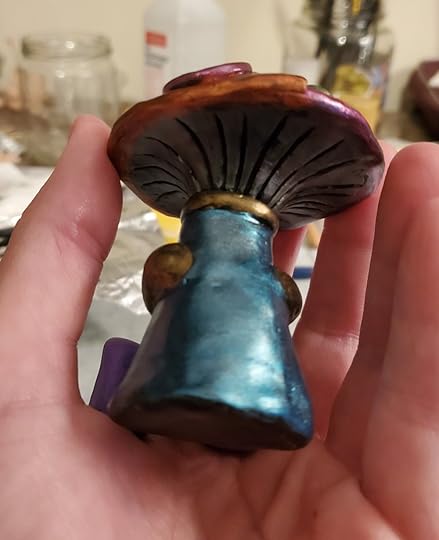
I just made this adorable little Mushroom Bot! (It’s available in my shop until sold)
In my other blog posts I usually show some making-of pictures, but today I thought I’d spend a little more time detailing out what I did.
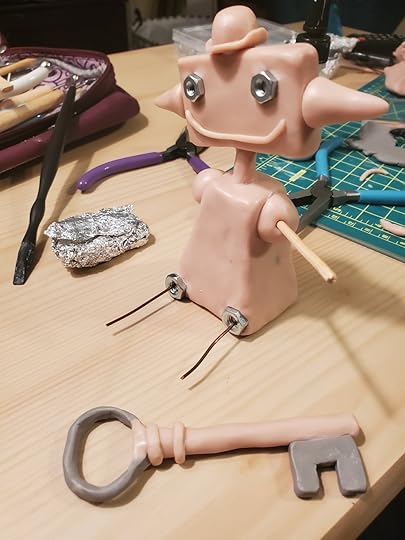
Starting with Foil and a Sketch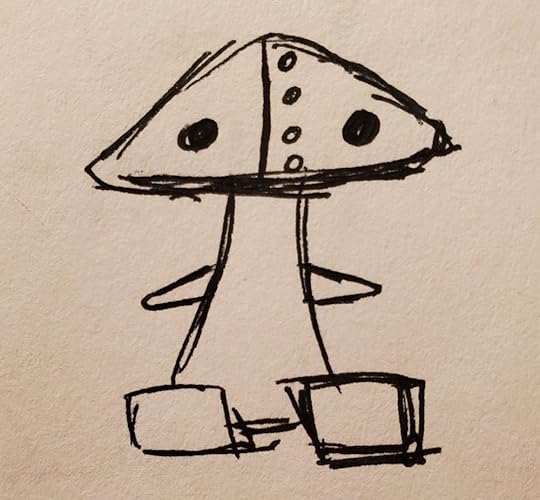
Wanting to make a sculpture, I went back through my robot idea sketches and found this cute little guy.
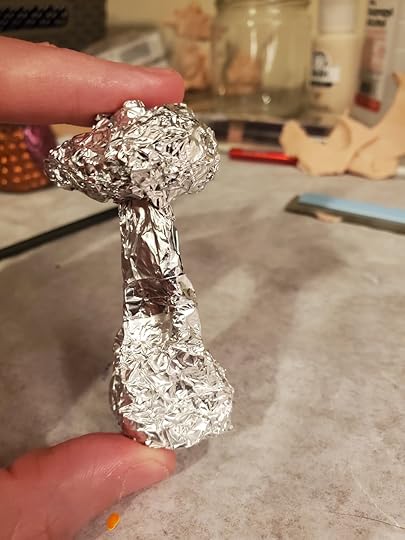
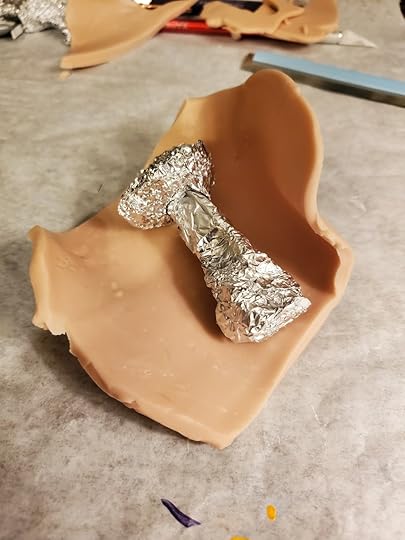
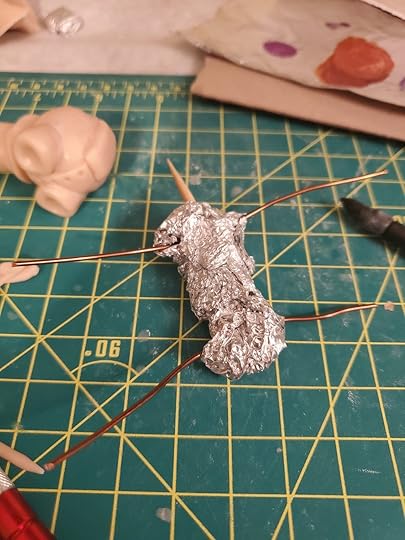
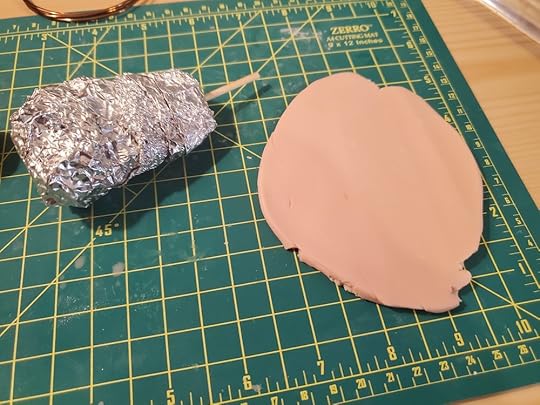
So first I made a vague foil shape for my mushroom bot, then used a rolling pin to roll out a thin slab of polymer clay. The kind of clay I’ve been using is Super Sculpey Original by the company Sculpey. For me it’s just the right combination of softness and firmness.
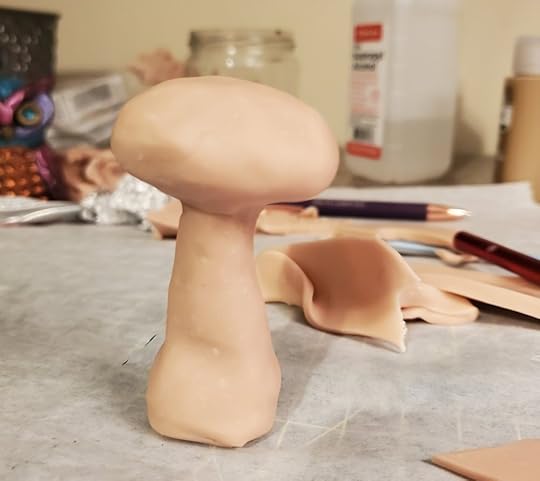
After wrapping the foil in polymer clay, I added more clay and created a mushroom shape.
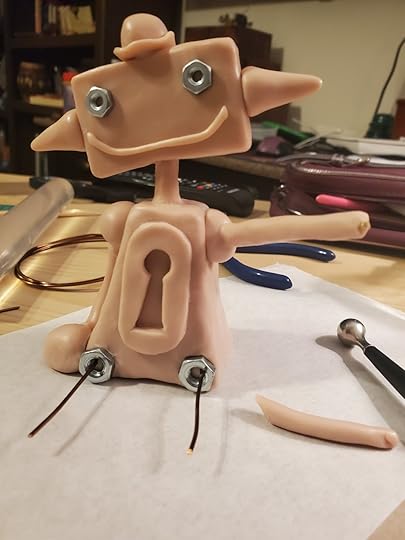
Adding Features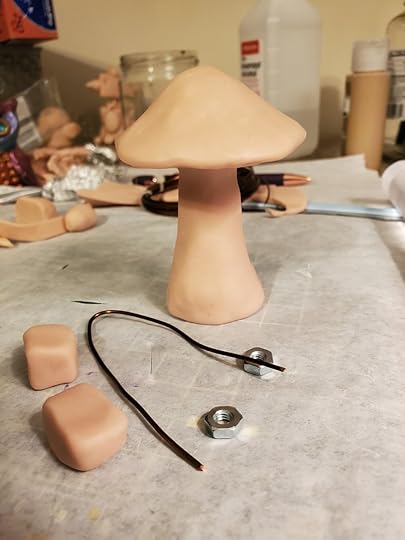
I shaped the mushroom even more into the shape that I wanted.
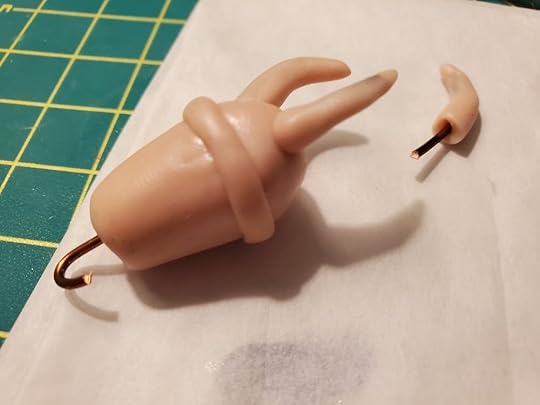
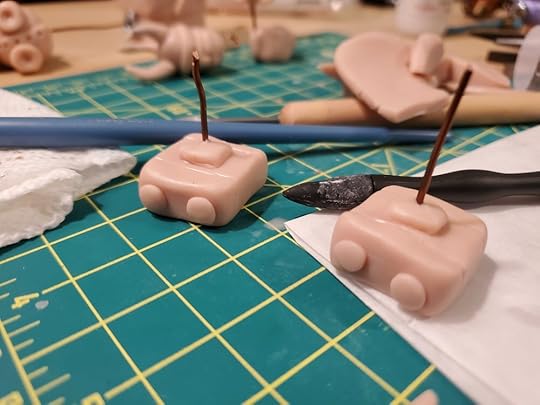
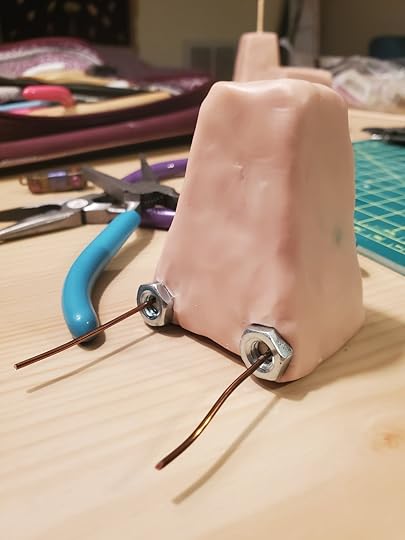
Next I shaped some blocks for the shoes. At first I thought I would just have the shoes attached to the bottom of the mushroom without legs, but then I realized I wanted to add legs. To make sure that the legs and shoes were sturdy enough, I wanted to attach them to the foil inside the mushroom. I cut and bent a piece of wire, which you can see in the first picture.
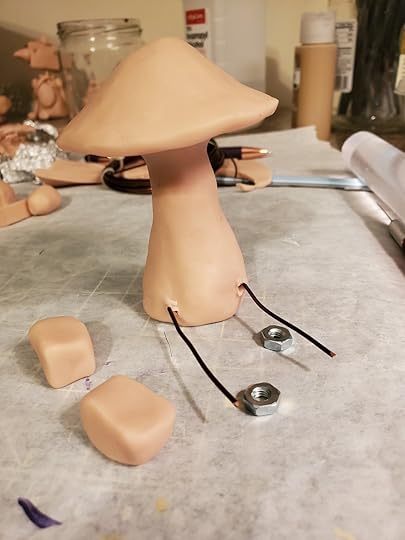
Then I pushed that bent piece of wire through the clay from the back of the sculpture, pulling it through so that the bend hooked around the foil inside. Then I smoothed the clay back over in the back, covering up where I’d pushed the wire through.

I cut the two ends of the wire, then bent them up, as you can see in the first picture. The bending of the wire is to ensure that the clay of the shoes won’t just slide off after the sculpture is complete - it kind of hooks the shoe pieces on.
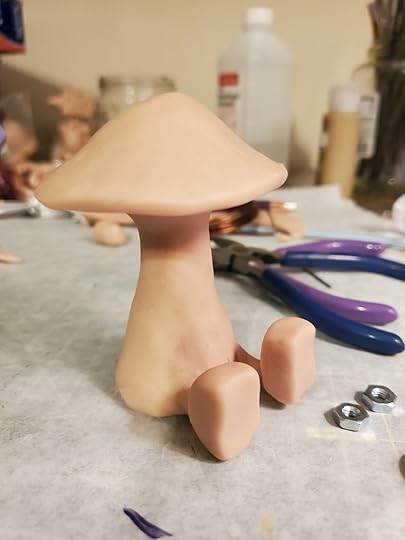
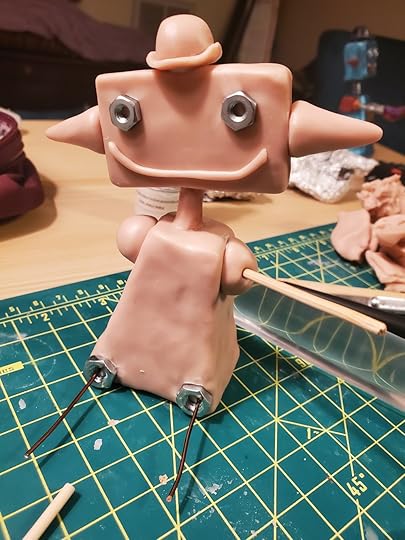
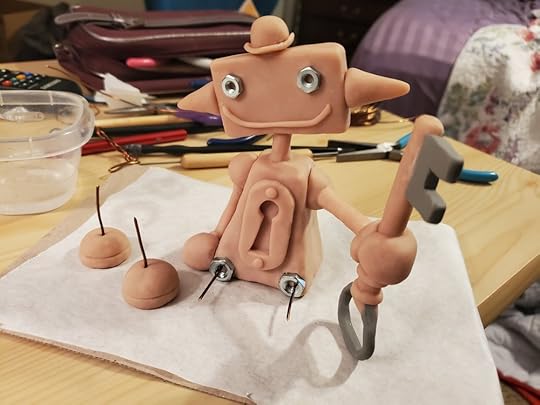
I slipped the shoes on, then made some tiny sheets of clay to wrap around the remaining wire to make the legs.
Adding Details
I added arms at this point, shaping them out of clay, placing them on the body, and then smoothing the edges into the body.
For the “neck”, I added a kind of collar, then used a rubber clay sculpting tool to press the neck in so that it looked like it was coming out of the body.
I wanted to make lines under the mushroom cap, and to do this I bent a piece of wire which I used to press lines into the clay. I could have drawn the lines, but it would have taken longer and been messier, requiring even more time to clean it up.

To complete the shoes, I took a piece of wire and pressed lines into the souls of the shoes.
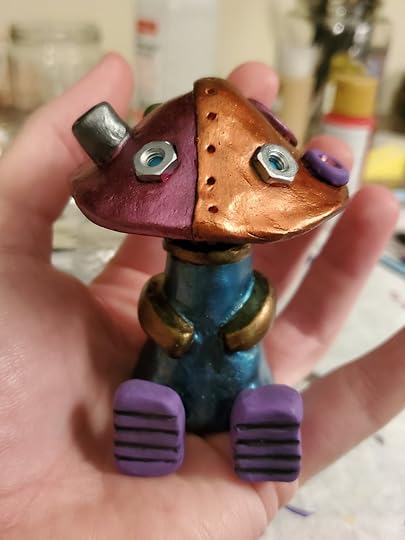
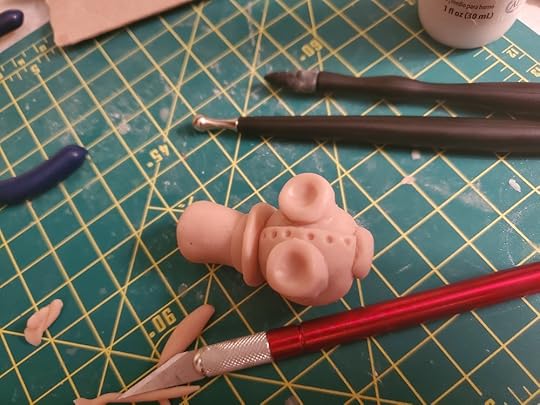
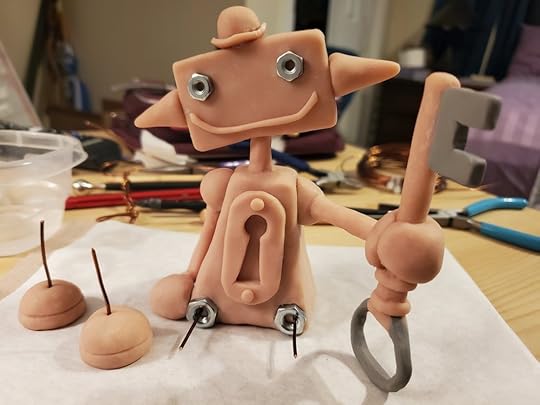
Next, I got a thin strip of clay and ran it down the center of the head, smoothing one side of it to create the effect of one piece of metal riveted onto another. Then I added the rivets by poking holes with a ball stylus tool (essentially a stick with a tiny ball on one end).
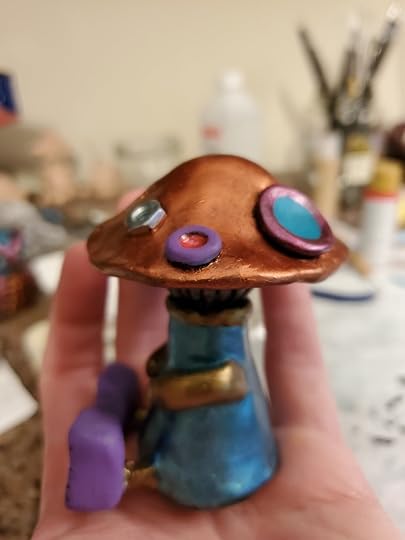
I took the metal nuts and pressed them into the head to give the Mushroom Bot some eyes.
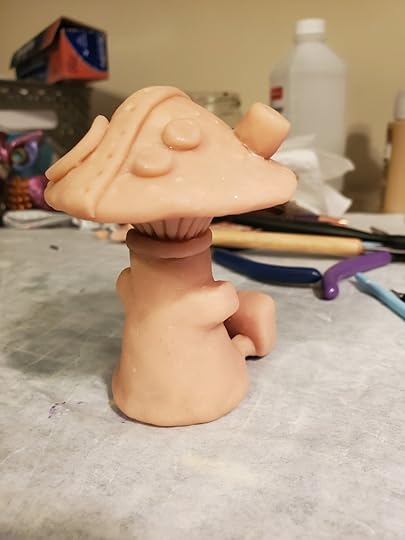

I added some buttons, an exaust pipe, and some fuel gauge pieces to the robot’s head. Then I used a sponge and some Isoprobyl alcohol to smooth out the body, trying to get rid of fingerprints and other imperfections.
Baked and Ready for Painting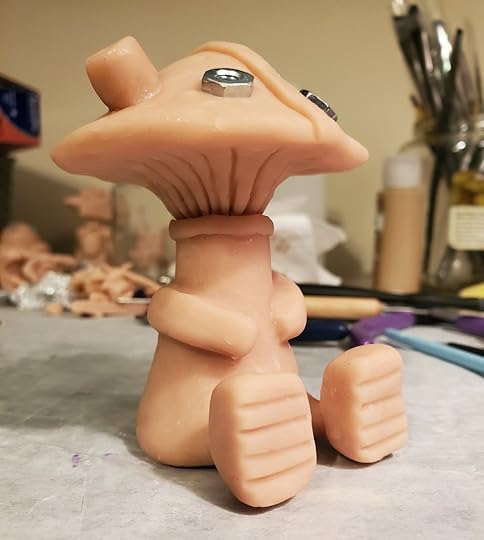
Next, I preheated my kitchen oven to 275 degrees and put the little robot inside for 30 minutes. Different kinds of polymer clay have different instructions on how long to bake. The Sculpey clays that I’ve used say to bake at 275 degrees for 15 minutes per quarter inch, so most of my sculptures are baked for 30 minutes.
After he was taken out and cooled down, he was ready to paint.
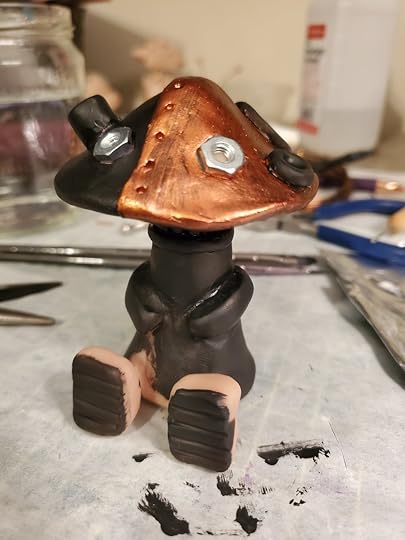
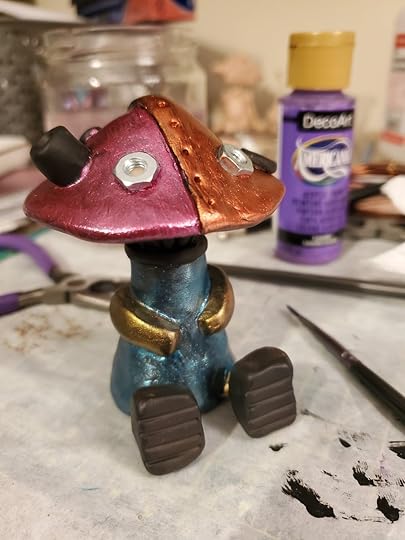
I did an undercoat of black paint because it gives the metalic paints a gritty, worn look that I thought would look good on this robot. I wanted him to look a bit kicked-around, like he’d been on some crazy adventures. Also, some of my paint colors (like copper and bronze) don’t look good at all over a lighter color, so I always paint black underneath.
I use a mix of different paints from FolkArt, DecoArt, and Artist’s Loft. As I’m buying new paint, I’m transitioning to FolkArt, because I really like the quality of that paint.

I use teal as the eye color for nearly all my robots and sculptures. My idea is that they all run on the same fuel source (which I have yet to name or figure out). And I like how it really connects them all.
Mushroom Bot is Complete!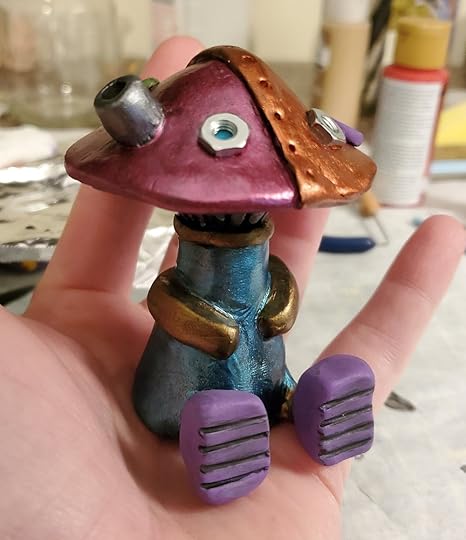
And he’s done!
I really had fun working on this robot. I think I might make a series of mushroom bots.
If you liked this more detailed description of my making-of process, let me know by commenting or messaging me and I’ll be sure to make more. Also, if you’re not signed up for my newsletter, be sure to sign up here. I only send out one or two newsletters a month.
And if you’re interested in helping fuel my creativity for a few bucks a month, check out my Patreon.
Until next time,
—Andy
February 14, 2023
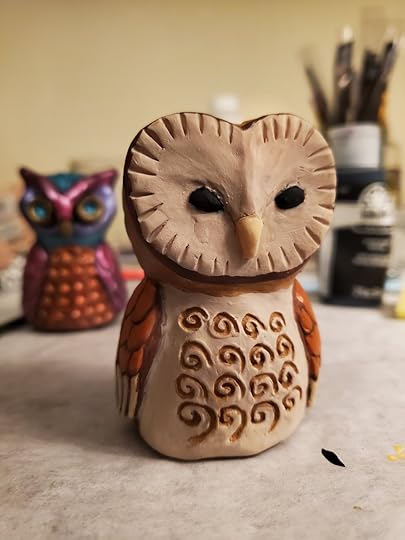
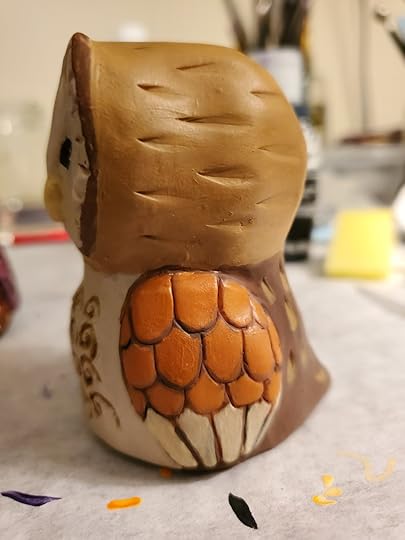
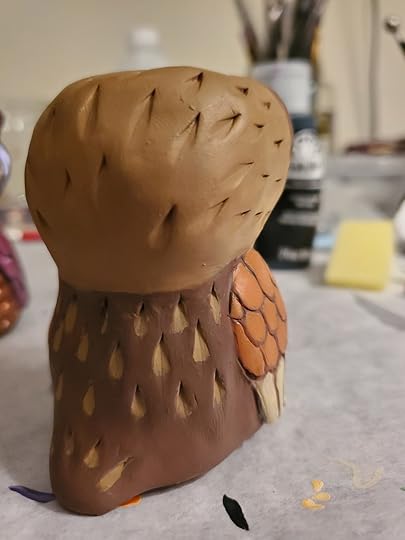
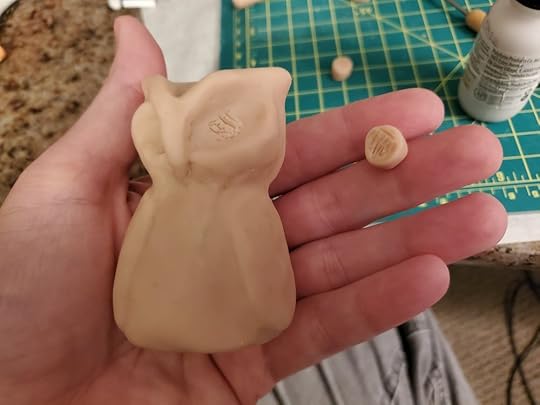
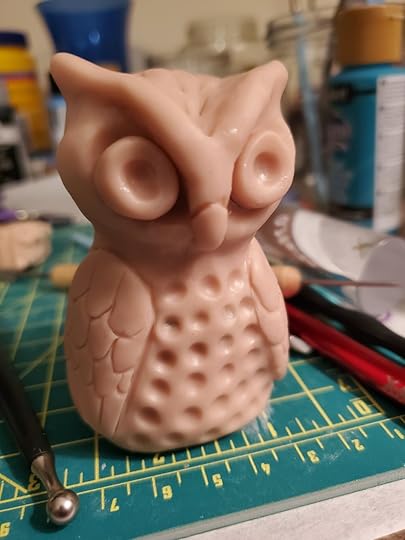
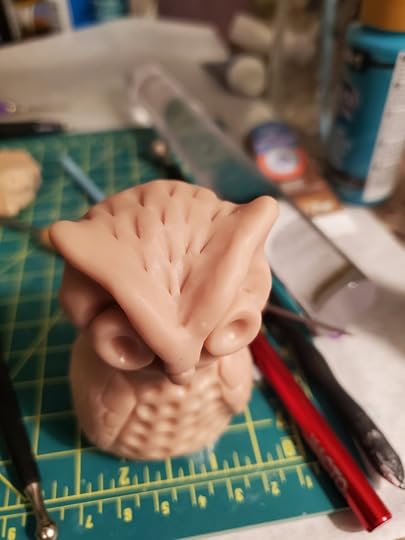
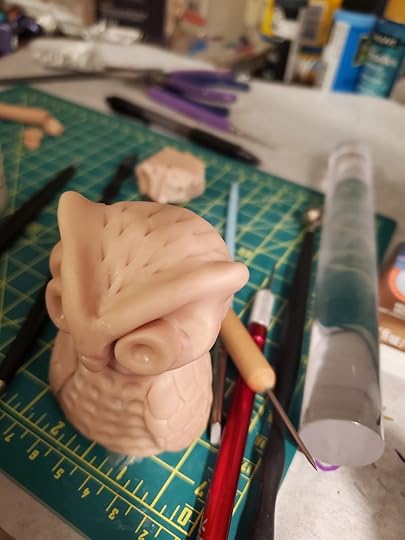
Barn Owl - Sculpture
Greetings!
I just finished this Barn Owl commission sculpture. I’m really happy with how it turned out. A friend of mine saw my Metallic Owl sculpture on social media and hired me to make her a barn owl. It was really fun to make and is one of my best uses of non-metallic paint yet. It’s made of foil, polymer clay, and acrylic paint.
Here is a video I put together for it:
The video I made for my Metallic Owl went so well that I tried to do something similar here without doing the exact same thing.
One thing that my wonderful girlfriend has helped me realize is that with crafts, you don’t need to make things “perfect.” People are buying hand-made sculptures, so flaws are alright because if they wanted a flawless machine-made figure, they would go to a big store and buy one. It’s the imperfections that make it both beautiful and let your personality and voice shine through.
Below are some making-of pics. I was having a rough week, so most of my making-of pics didn’t come out, so there aren’t as many. (Working on this piece definitely helped me get into a better mental state though, so the piece is special to me for that reason)
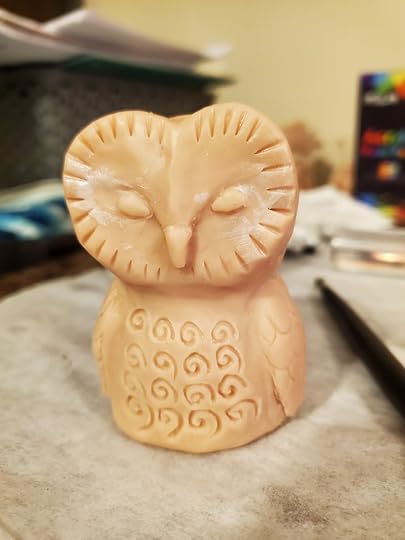
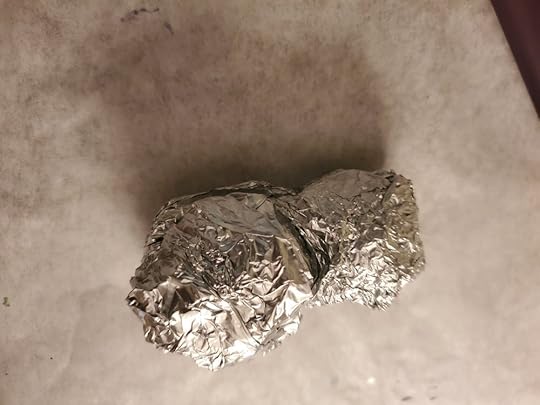
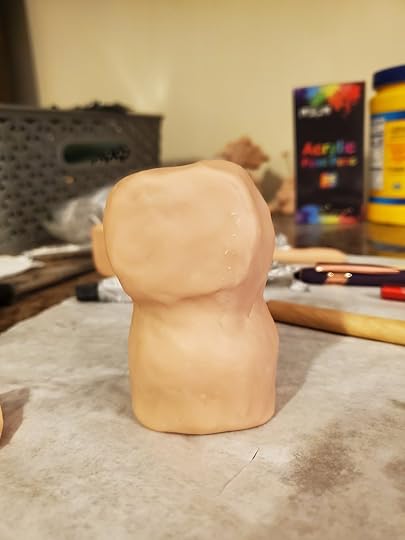
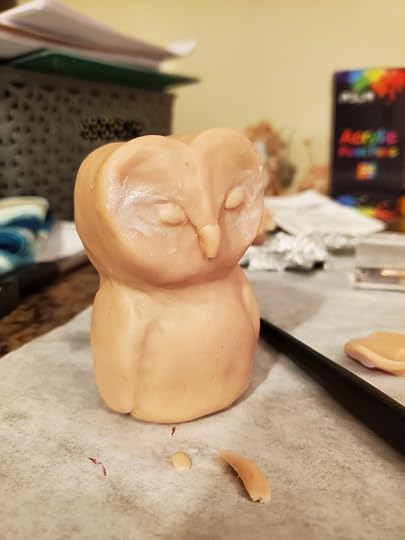
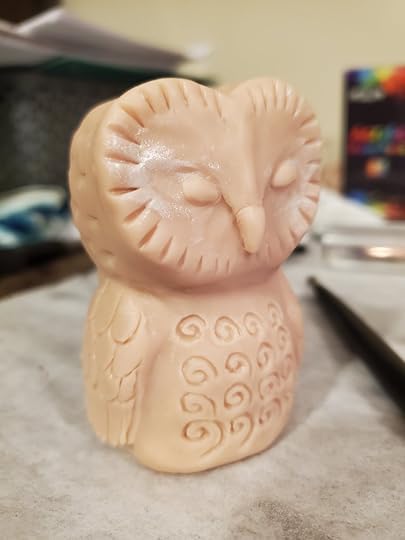
The white liquid around the eyes was from an experiment that I tried. I tried using liquid polymer clay to make the eyes, but they didn’t work out.

I hope you like my Barn Owl sculpture! And have an inspiring week!
—Andy
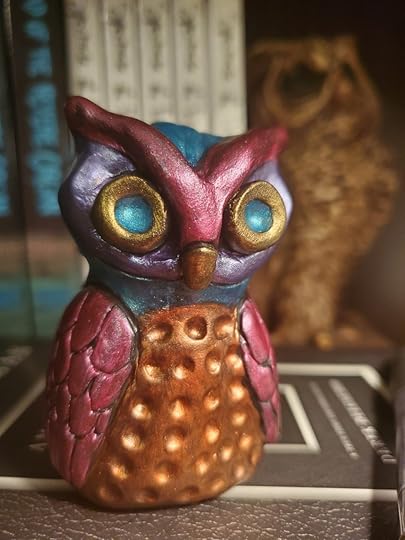
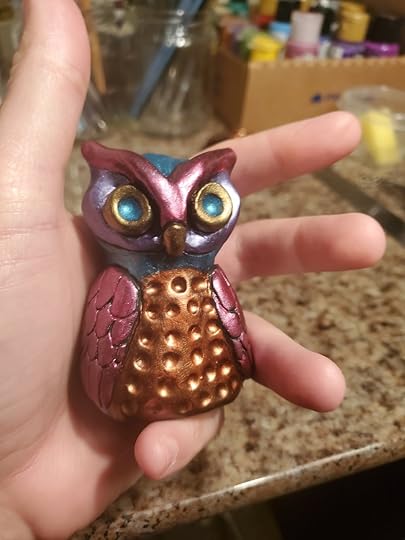
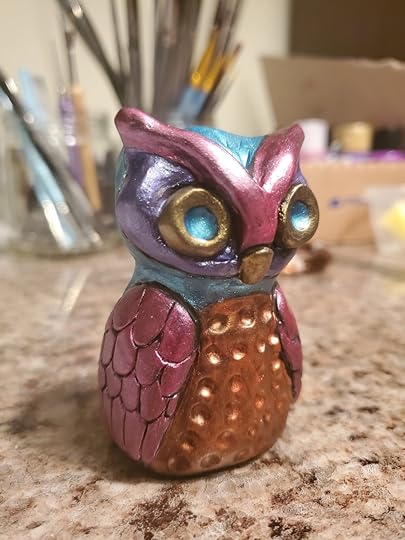
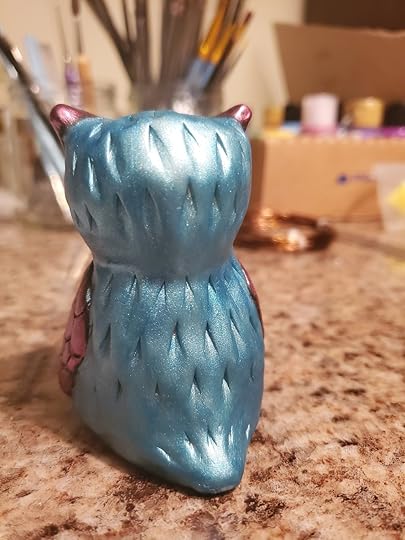
Sculpting a Metallic Owl
Greetings!
My first project this month was sculpting a metallic owl. It’s available in my shop until it’s sold. It’s made of polymer clay, foil, and acrylic paint.
A friend of mine saw my social media posts about the owl and commissioned me to do a barn owl (which will be my next blog post).
I was inspired by some owl statues that my girlfriend’s mother has in her backyard. Here’s a picture of the main owl that inspired me:
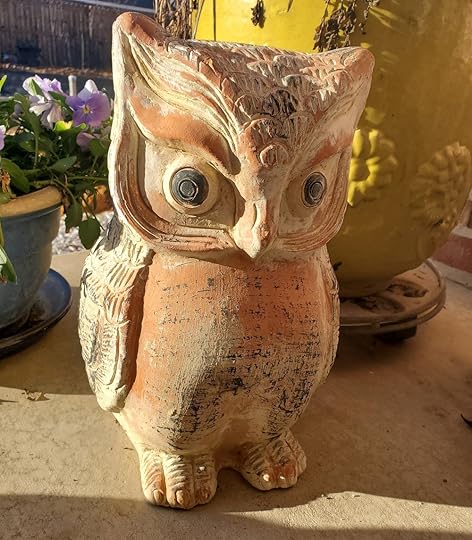
I really liked how the owl was almost turned into shapes, and that the shapes that make up an owl are so iconic that you can really play with them and people will still recognize what it is.
Here’s a magical “how-to” video:
The video was really fun and I’ve already made another of these for the barn owl.
Here are some making-of pics:


That’s it for my metallic owl sculpture. Hope you have an inspired day!
—Andy
January 17, 2023
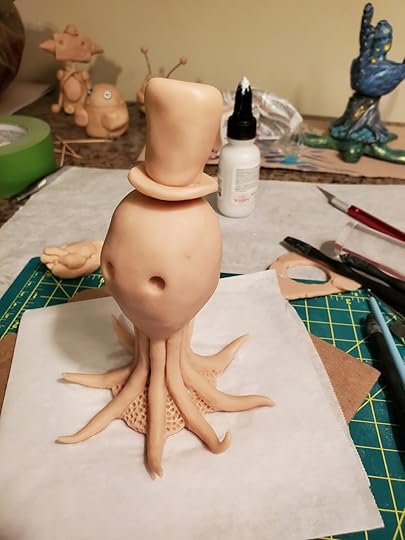
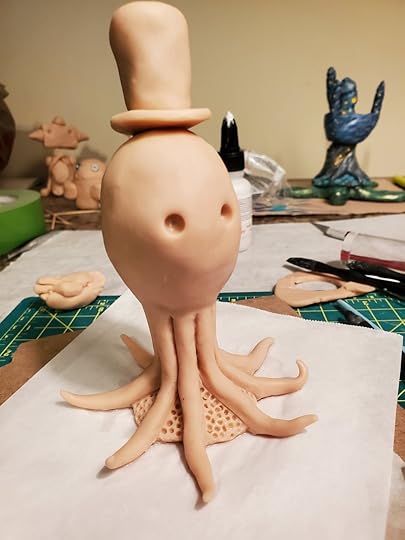
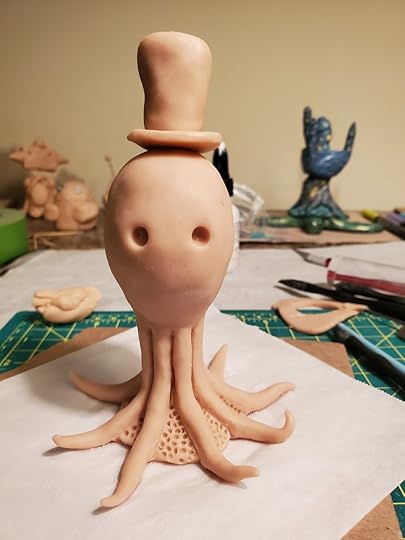
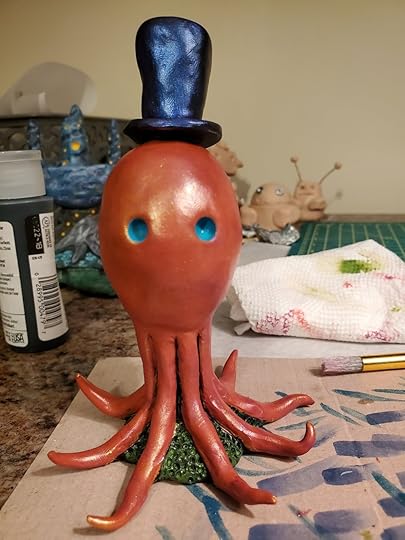
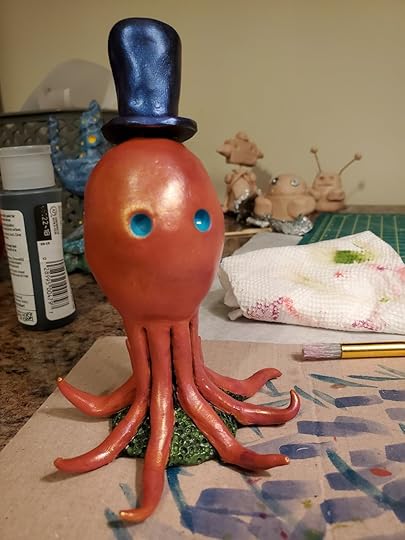
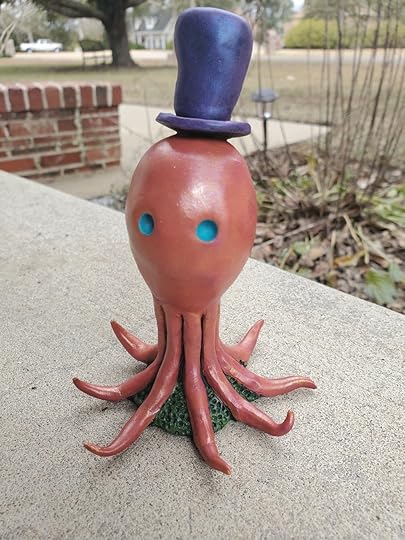
The Dapper Octopus - Sculpture
Greetings!
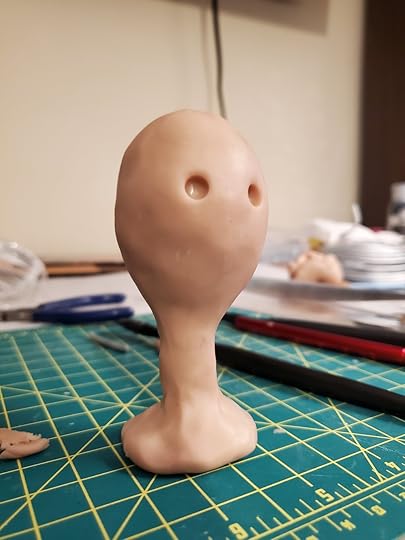
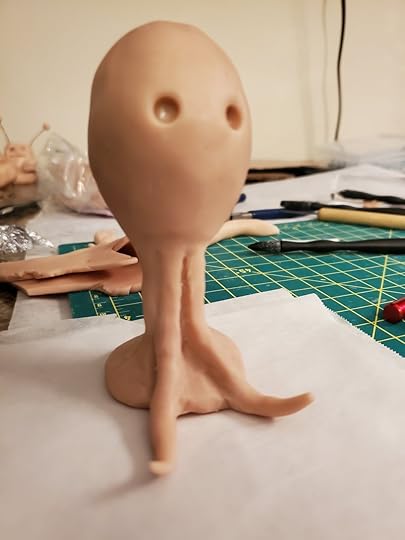
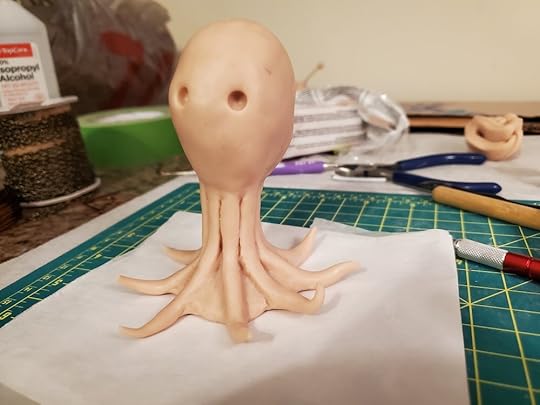
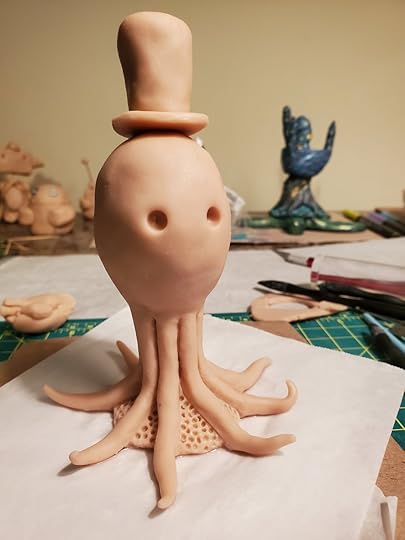
I made this little octopus sculpture for my girlfriend for the holidays. I’m really happy with how he turned out, and I like how cartoon-ish he looks.
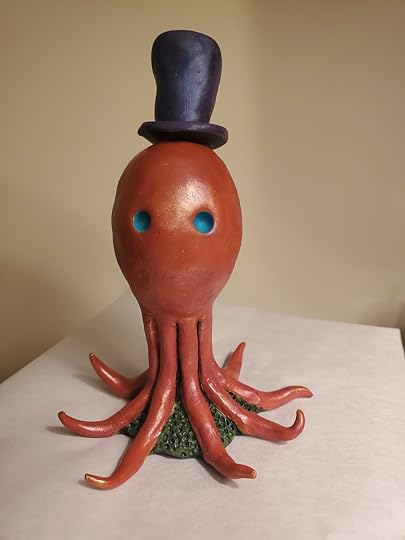
He’s made out of polymer clay, wire, foil, and acrylic paint.
Here are some making of pics:
Here are some painting pics. I tried experimenting with patterns and different colors on the octopus body, but they would either look good on the tentacles and bad on the body, or vise versa. So I stuck with a simpler coloring, and I think it lends well to the cartoon-ish aspects of the sculpture. I kept the teal eyes, which has become a kind of signature for my sculptures. It’s like they all have the same life force inside of them.
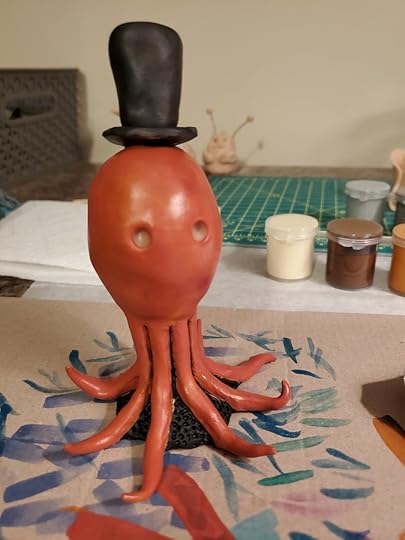
This was really fun to make, and I plan on making more octopus sculptures in the future.
Until next time,
—Andy
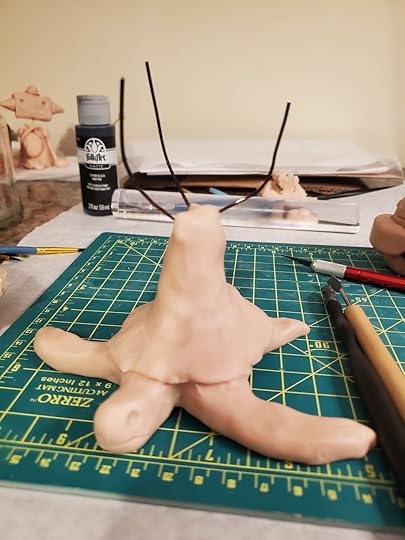
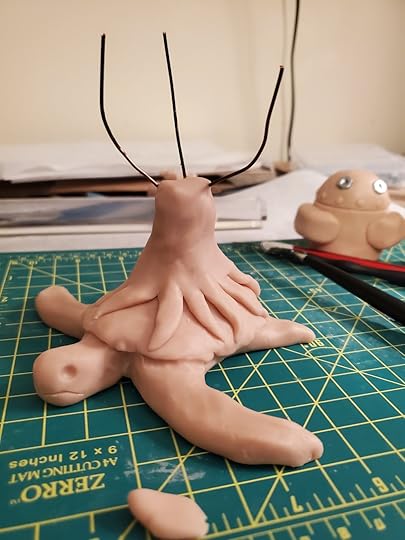
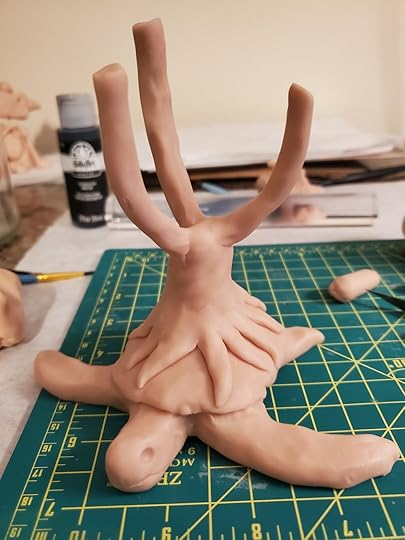
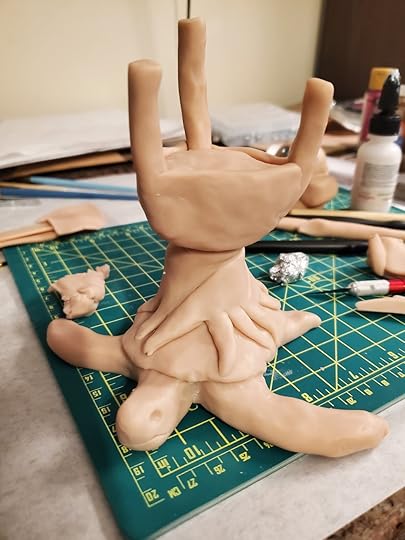
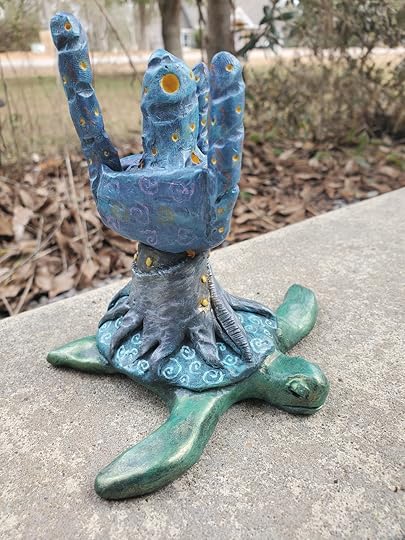
Sea Turtle City - Sculpture
Greetings!
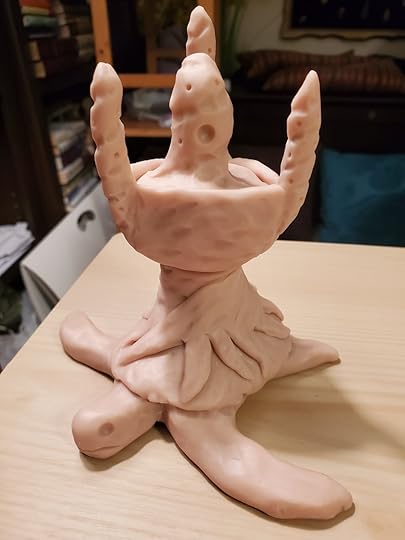
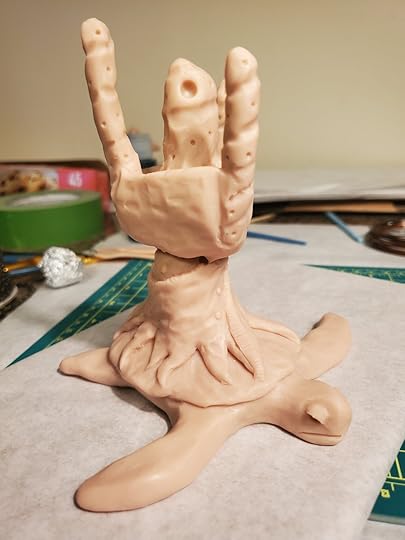
This is a sculpture I made for my girlfriend’s mother this past holiday season. She likes sea creatures and so I thought of this surreal idea of a sea turtle with a strange kind of city or building growing atop its shell.
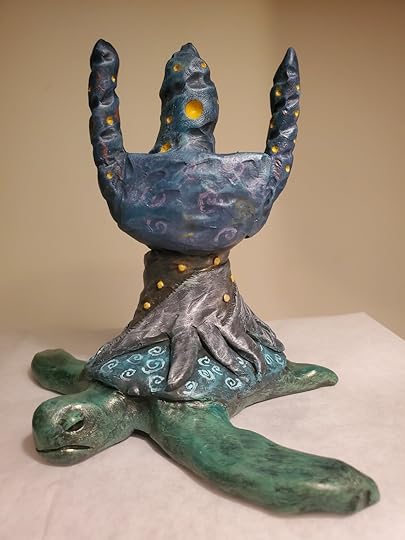
I really like the idea and plan on making more sea creatures with cities or castles growing from them.
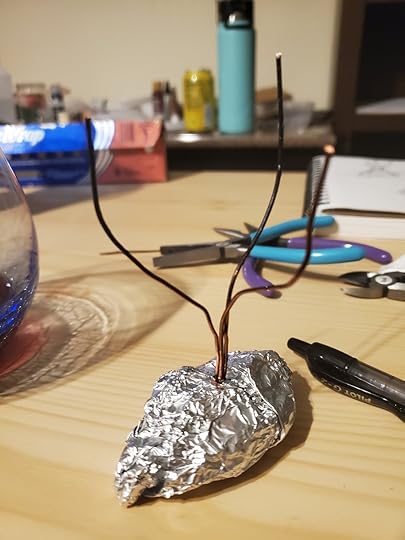
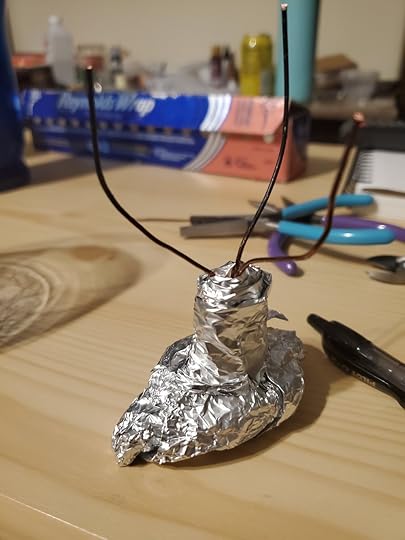
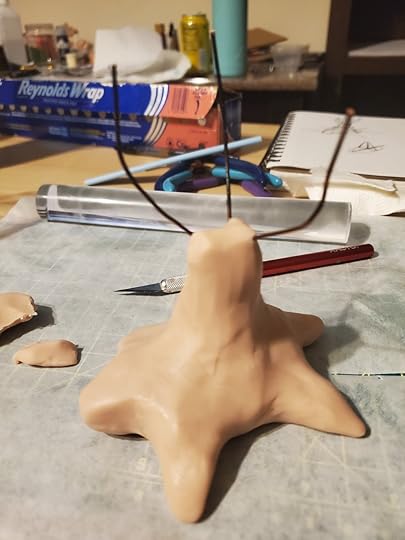
Here are some making-of pictures:

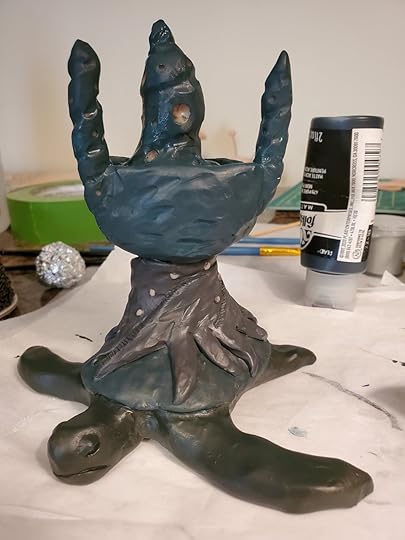
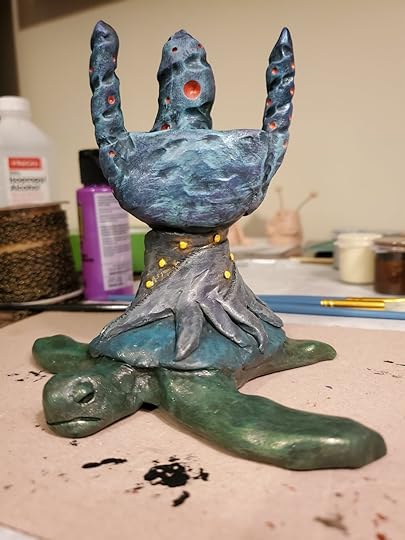
Here are some pics of the painting process. I was experimenting a lot, so there was a lot of trial and error as I tried things out. It was definitely challenging to get the coloring right since I’ve only been painting my robot characters.
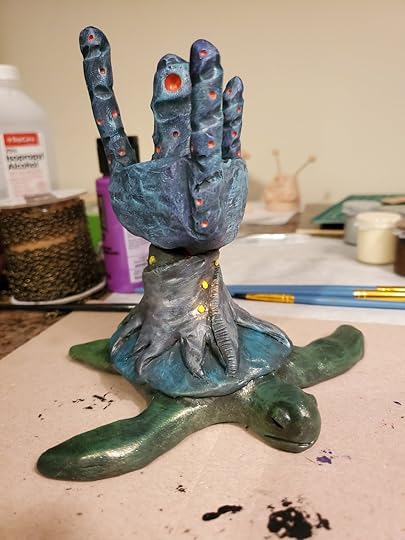
I’m definitely going to make more sculptures like this for my shop. Make sure to sign up for my email list for updates.
Until next time,
—Andy
A Robot Named Nostalgia
Greetings!
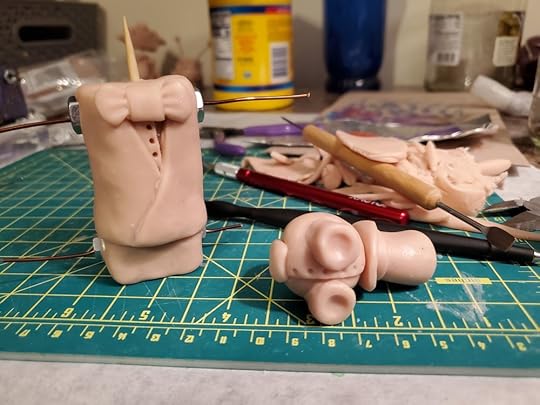
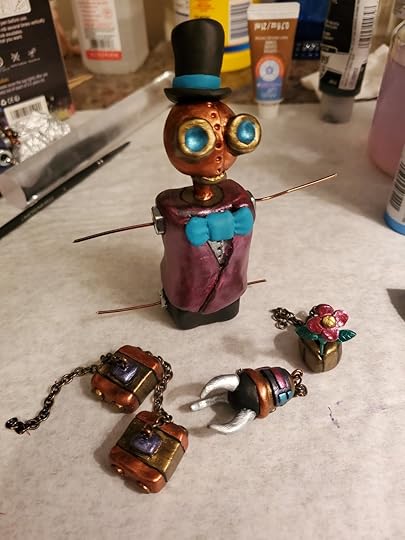
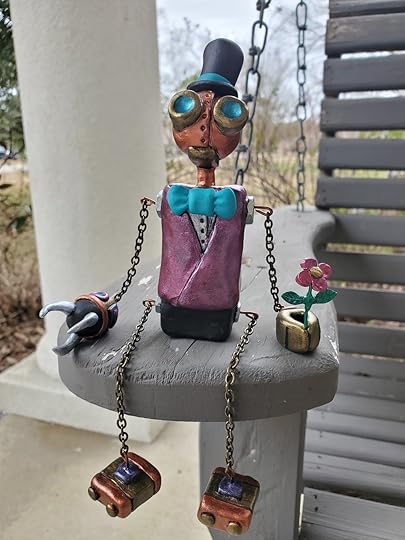
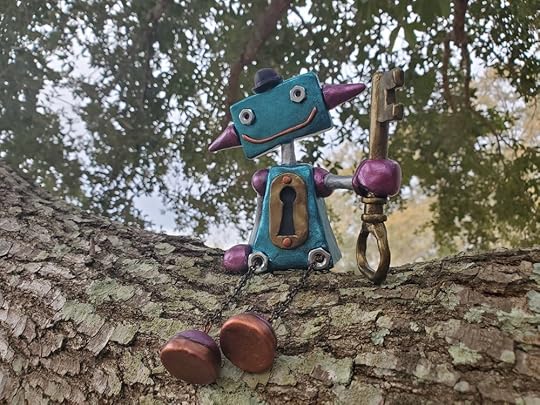
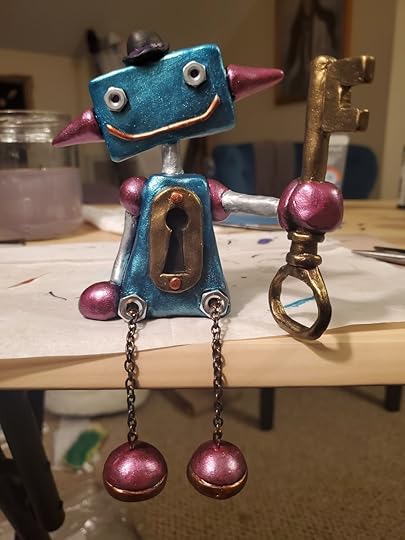
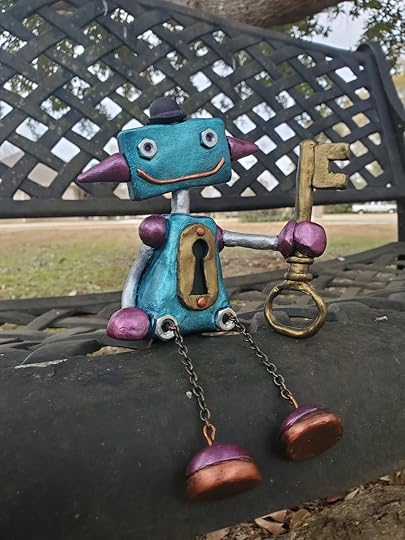
I’ve finished a sculpture of my robot character named Nostalgia. He’s a sitting sculpture, made for sitting on the edge of a shelf or ledge with his legs dangling off. As of this post, he’ll be for sale in my shop.
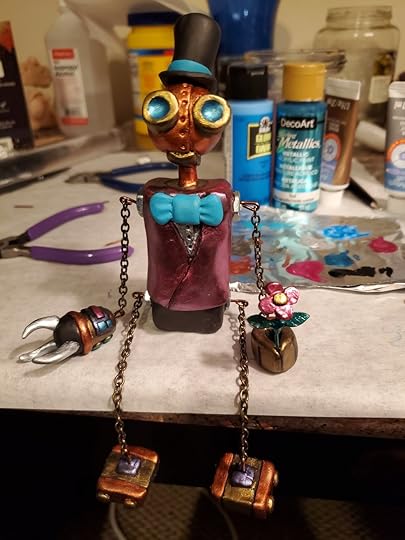
I really love this design. I first made him as a puppet version, which you can check out here.
Those who know him debate on whether he’s from the past or from the future, but no one believes he’s from the present era.
He’s made of polymer clay, wire, chain, foil, metal nuts, and acrylic paint.
Here are some making-of pics:

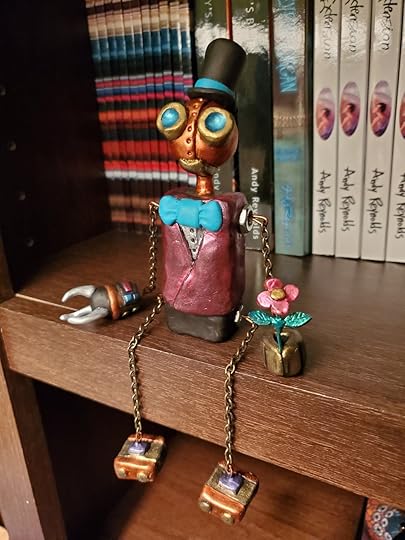
He really is one of my favorite designs that I’ve come up with, and he’s really fun to make. I’ll be making more of these sitting robots for my shop.
Until next time,
—Andy
Another Sculpture of Wonder
Hi there!
So this is another sculpture of my robot character named Wonder. I actually made this one first, before .
He’ll be available in my store until he’s sold :)
Here are some making-of pictures:

I’m really happy with this design, and plan on making more of these sitting robots. Make sure to be on my email list to get updates. I send out a newsletter once or twice a month.
Until next time,
—Andy
AndyReynolds.net

- Andy Reynolds's profile
- 20 followers

