Marie Bostwick's Blog
November 17, 2025
Healthy Butternut Squash Slow Cooker Soup with Fennel and Pear (Easy & Flavorful!)
Tired of bland butternut squash soup? Give this one a try! Sweet and savory notes of fennel, pear, onion, ginger, and garlic make this Butternut Squash Slow Cooker Soup something special. Easy to make, and easy to love – it’s fast to prep and a flavorful vegetarian dish.
Banish The Bland – Butternut Squash Slow Cooker Soup With Fennel And PearButternut squash soup is a fall staple. It’s healthy and easy to make, especially when made in the slow cooker. But let’s face it, when it comes to taste, butternut squash soup tends toward the 3Bs.
Boring, blah, and bland.
Recently, I set out to make a butternut squash soup that was anything but bland. In other words, a soup that my family and I would genuinely enjoy eating.
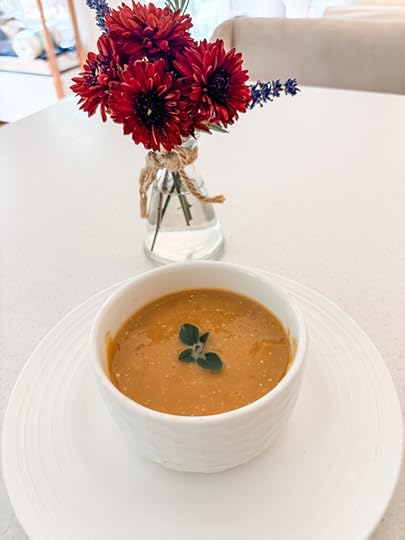
The result was this Butternut Squash Slow Cooker Soup with Fennel and Pear. A touch of sweetness from the pears, subtle anise flavor from the fennel, plus brighter aromatic notes from onion, garlic, and fresh ginger root make this a 3D soup.

Delicious, delectable, and divine.
It’s a scrumptious, savory soup that you, your family, and even your guests will truly enjoy.
This simple-to-make, surprisingly delicious butternut squash soup would make a wonderful first course for holiday meals. But it’s just as wonderful for weekday dinners or lunches.
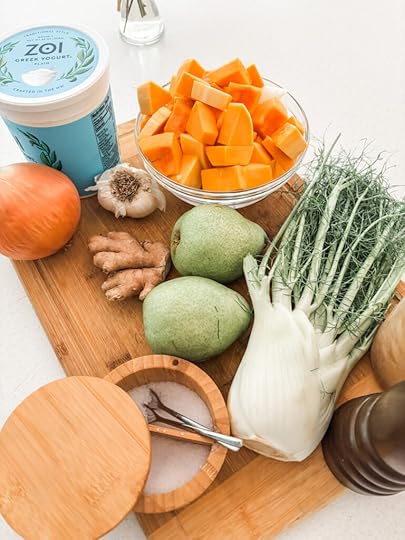
And it all starts with the ingredients…
What Do You Need To Make Butternut Squash Slow Cooker Soup With Fennel And Pear?


Oh, how I love a recipe that tastes terrific and is crazy easy to make! This one ticks off both boxes.
Really, the only time-consuming part of this recipe is peeling and chopping the ingredients. And that part won’t take much time at all – maybe fifteen minutes. Even less if you buy pre-cut butternut squash at the market, or use frozen squash.
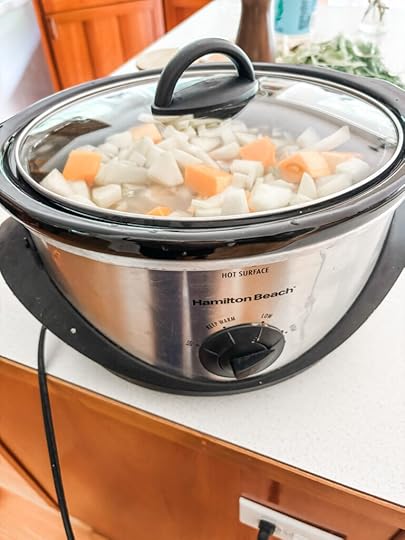
Once the ingredients are ready, you just dump everything into the slow cooker crock (but leave out the yogurt, if you’re using it.) Then you turn on the slow cooker and walk away for a few hours.
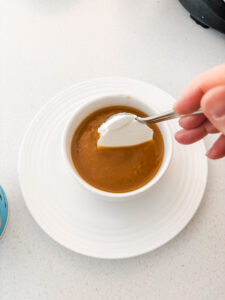
When the time is up, blend the soup according to your preference. Go full-on smooth puree, or leave in a few chunks of veggies. It’s up to you.
My immersion blender is terrific for jobs like this, and one of my most-used kitchen tools. No mess, no fuss, no burned fingers. However, you can also blend the soup in batches, using a regular blender. Just wait until it cools down before you try it.
The last step is to taste the soup and adjust the seasonings to your liking. Don’t skip this part! Your preferences may be different than mine!
You can serve the soup as is, or add some Greek yogurt for extra protein and creamy texture. A dollop on top works great. You can also blend it into the whole batch, but be aware that it may not blend perfectly smoothly.
Don’t add yogurt to any portion of the soup that you might want to freeze later. Dairy products in soup can separate when thawed, giving you a grainy texture.
Butternut Squash Slow Cooker Soup with Fennel and Pear does freeze beautifully! Stored in an airtight container, it will freeze for up to three months.
Make some soon and freeze the extra. It’s great for quick winter meals or as a delicious first course for holiday dinners.
Print Healthy Butternut Squash Slow Cooker Soup with Fennel and Pear (Easy & Flavorful!) Author: Marie Bostwick
  Print Recipe [image error] Pin Recipe Ingredients 20 oz butternut squash, cubed1 large fennel bulb, white part only, core and root cut out, then chopped2 small pears, peeled and chopped1 medium onion, peeled and chopped2 inches of ginger root, peeled and sliced4 large cloves garlic, minced4 cups vegetable or chicken broth1 tsp Kosher salt½ tsp fresh ground pepperPlain Greek Yogurt – Optional Cook Mode Prevent your screen from going dark
  Did you make this recipe?
 Share a photo and tag us — we can't wait to see what you've made!


November 10, 2025
Tips for Kitchen Downsizing and Decluttering: Part Two

If you love to cook, kitchen downsizing can be a daunting task. But with a few easy tips and products to help maximize every inch of storage, even a smaller kitchen can be a dream kitchen!
Making a Good Start in My Smaller KitchenAs I explained in my first post on Kitchen Downsizing and Decluttering, my husband and I recently moved into a smaller home. (If you haven’t read the first post, you might want to check it out.)
The idea of downsizing didn’t seem all that daunting…until we got to the kitchen.
Cooking is a hobby as well as passion for me. The prospect of cooking in a kitchen with less than half the storage and counter space of my old kitchen was more than a little overwhelming.
Following the tips I shared in my first post was a good beginning, and definitely heartening.
Don’t get me wrong – fitting all the food, equipment, and tableware I need to cook in this smaller space was still a daunting task. However, decluttering the equipment I didn’t really need, prioritizing the equipment I did need, and carving useful storage space out of wasted space made a big difference.
I’d made a good start. But there was still more to do, and only one way to do it.
Find efficient, attractive ways to make the most of every inch of available space.
Kitchen Downsizing: Combatting Countertop ClutterMy old kitchen had miles of countertops. That meant I could store all kinds of the things on the counters without it looking cluttered.
Not so in my new kitchen. Placing all the stuff I’d left out before on these far less spacious counters made the kitchen look untidy and disorganized. That kind of thing just makes my teeth hurt, so I had to find a better way.
The first step was to prioritize the things I used frequently that really needed to be left out on the counter.
Coffee pot? Utensil crock? Yes.
Tea kettle? Toaster? No.
The answer to those questions will be different for everyone, but sorting out what absolutely had to live on the counter versus those that could be stored in cabinets was a good start. My next step was to find some practical, good looking storage options for items in both those categories.
The giant island in my old kitchen had room for a 20-inch wooden tray to store salt, spices, oils, and vinegars I liked having close at hand.
That wasn’t an option this time. I pared the list down to the essentials and bought a 10-inch, bamboo wood Lazy Susan to store salt, pepper, olive oil near the stove. It’s attractive and very handy.

Chef’s knives are something I use every day. I wanted to keep them close at hand, but my knife block took up a lot of space on the counter. This magnetic knife holder sticks to my refrigerator and solves the problem perfectly.

This nifty paper towel caddy can be mounted under or inside a cabinet, or on a wall. I chose to mount it on the interior door of my pantry, making the most of some otherwise wasted space. It’s easy to grab a paper towel when I need it, and keeps the roll from cluttering up the counters.

Lower cabinets are necessary, but less than ideal. Having to bend down or get onto the floor to find what you’re looking for is a pain. If you’ve got a bad back, the pain of lower cabinets is more than just a figure of speech.
Pull-out shelving makes dealing with lower cabinets much, much easier. The pullout shelves I found on Amazon have some real advantages.
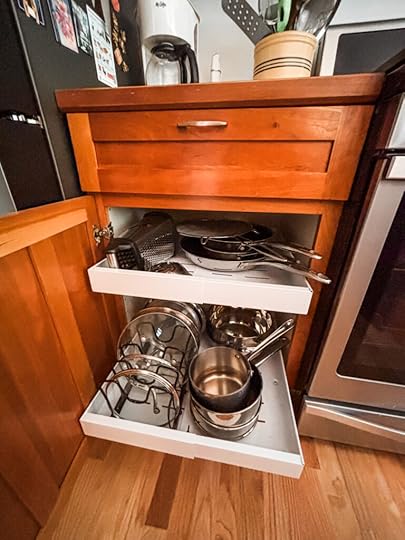
First, they’re expandable. I ordered shelves that will fit any cabinet from 12 to a bit more than 20 inches. However, they’re available in several different width ranges – from 9-inches to more than 26. So, you should be able to find one to fit your particular cabinet.
Second, adhesive mounting strips made installation super easy. They’ll work on frameless or framed cabinets with edge heights up to .04-inches.
If you’d prefer to mount the shelves with screws, that’s an option too. But the adhesive mounts are very strong. My shelves are loaded up with heavy pots, but I’ve had no trouble with them coming loose. Just make sure you follow the easy installation instructions and you should be good to go.
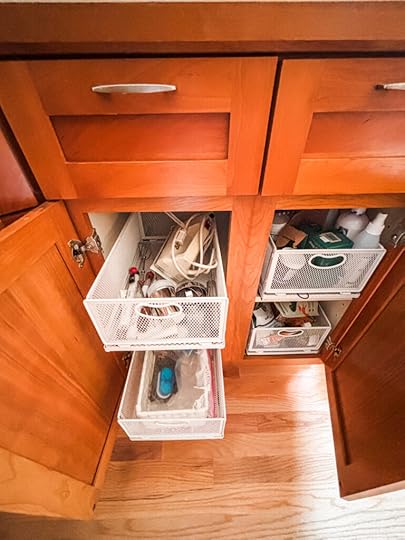
Drawer space is a little tight in my new kitchen, but these slide out baskets were a great solution. They gave me a place to store baking tools, dogs treats and other items, putting some small and fairly inconvenient lower cabinets to good use.
Once again, they feature strong adhesive mounting strips. Installing them only took a few minutes.
It’s easy to just toss stuff into a drawer. I mean, nobody’s going to see it unless they open it, right?
But cluttered drawers make it hard to find what you need, when you need it. That’s the kind of thing that can take the joy out of cooking. It might even make you scorch the caramel during the mad search for the candy thermometer, and nobody wants that.
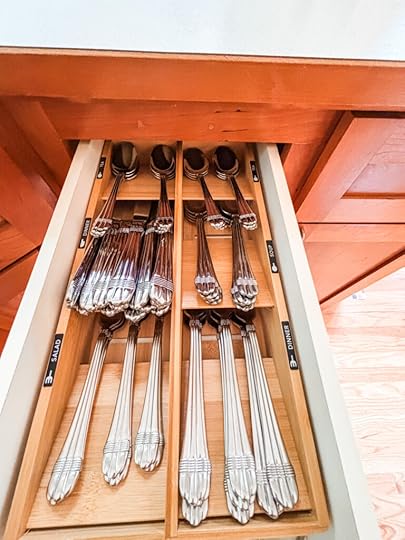
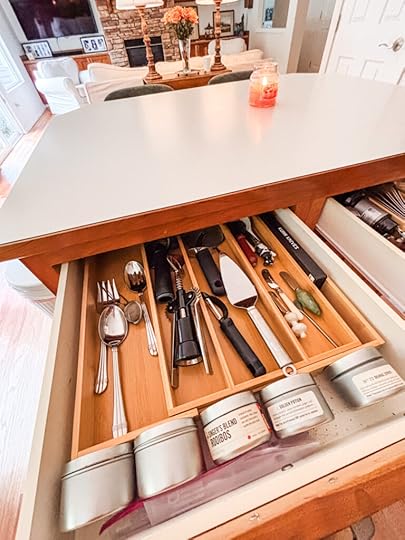
Besides being efficient, neat, and attractive, organized drawers just make my heart happy. Here are a few items that really help.
This silverware caddy is one of my favorite organization finds. The bamboo wood looks beautiful and the nifty stickers make it easy to know what goes where. Best of all, I can fit all my cutlery into a narrow drawer. (The caddy I picked is 8-inches wide, but an almost 16-inch model is available too.)
These bamboo drawer organizers pictured below expand from 12.6 to 22-inches. They make it easy to separate items by category and find them easily. I like them so much that I bought three of them!
This wrapping organizer holds four, 12-inch rolls of wrapping plastic, paper, or foil, and comes with stickers to identify each roll. The built in cutters make it easy to pull out what you need and get a clean tear.

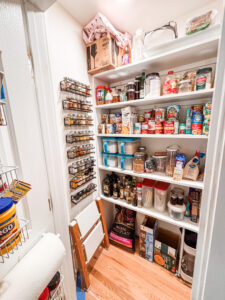
As I said in my previous kitchen downsizing and decluttering post, building a new pantry was a game changer for me. I’m so happy we were able to find space to squeeze it in.
But even with the new pantry (more of a sideways-step-in than a true walk-in), I still had to find ways to maximize my available shelf space.
One of these adjustable racks lives in a cabinet near my stove to store my pot lids. I bought two more for the pantry.
They’re also terrific for sideways storage of serving platters, casseroles, bowls instead of stacking. Because the platter you want is somehow always on the bottom of the stack, right?
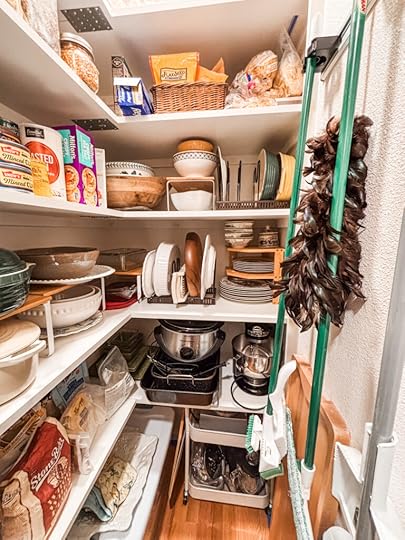
This nifty little corner shelf gives me easy access to a set of dishes I like, but don’t use daily.

Speaking of shelves, these rectangular numbers help my limited pantry shelf space do double duty. They’re sturdy enough for even my biggest bowls, and help me cut down on stacking. Because, once again…the one you want will always be on the bottom. Always.

The appliances and equipment I use seasonally or infrequently have been stored in the garage. But I still needed to find space for those I used more often, but not so often that they deserved to take up precious cabinet space.
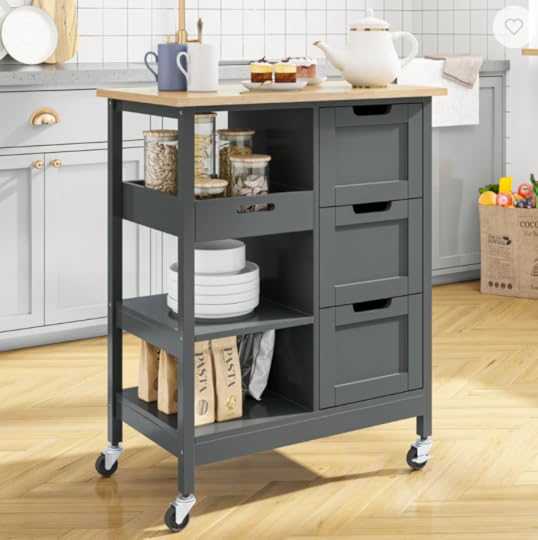
The floor area below the bottom pantry shelves seemed like a good spot, but access was a problem. These rolling carts were a great solution.

At 22.4-inches tall, they fit neatly under the shelves. Wheeling them out whenever I need to use my blender or food processor is easy as pie. Often, I roll them right out of the pantry and next to whatever counter I’m working at.
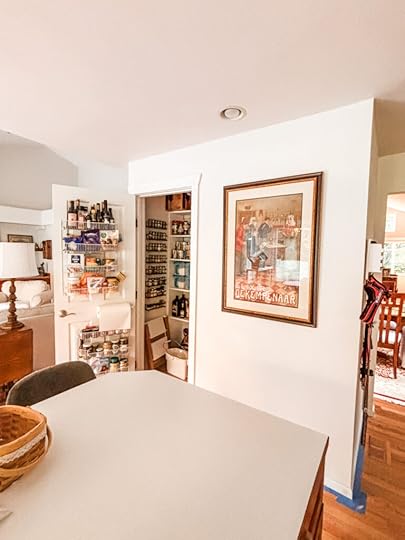
Kitchen Downsizing: Don’t Waste Wall SpaceWall space can be useful space, especially when you’re downsizing. Make sure you take advantage of it.
In the past, I’ve always stored my huge collection of spices in kitchen drawers. However, drawer space is scare in my new kitchen so I had to find a new storage option.

These wall-mounted spice racks solved the problem. Two racks gave me room to store forty-eight spice bottles that I can see and access easily. If you don’t have wall space, they can also be mounted on the inside of a cabinet door.
Speaking of racks and doors, mounting these racks inside the pantry door gave convenient storage for jars and condiments.

With my storage solutions solved, I turned my attention our kitchen furniture. My previous kitchen had a huge island, with room for four equally huge swivel counter stools that I loved.
However, even if we only used two, those stools were just too massive for our new, smaller island. So, I ordered new Jack Metal counter stools from West Elm.

They’re just the right size and the quality is excellent. There are forty-one upholstery options. I went with Green Spruce upholstery and Champagne Bronze finish.
Something our new kitchen does have that the old one didn’t is a breakfast nook! A search for the perfect table sent me back to West Elm.

This 32-inch Mosco table in the Cool Walnut finish is the perfect size. Small enough so it doesn’t overwhelm, large enough to seat three. If you only had place settings on the table, no serving dishes, I think you’d have no trouble seating four.

However, I only ordered two Jack Metal Chairs to match the counter stools, one for my husband and one for me. We love eating breakfast or sipping our morning coffee here.
A Place for Everything in Our New, Smaller PlaceParing down and prioritizing my equipment, appliances, and tools, and utilizing various racks, caddies, and shelves to organize them has made kitchen downsizing a lot easier.
Though I had my doubts when I began, I love cooking in my new kitchen. There really is a place for everything, with everything in its place.
If you’re downsizing, I hope the tips, solutions, and products I’ve shared in these posts will help transform your new kitchen into a place you’ll cook up great meals and happy memories.
November 3, 2025
Tips for Kitchen Downsizing and Decluttering: Part One

Kitchen downsizing is challenging! But with some effort and ingenuity, even smaller kitchens can be a pleasure to cook in. Read on for tips to declutter and maximize space in smaller kitchens.
Downsizing Wasn’t That Daunting – Until I Got to the KitchenA few months ago, my husband and I moved into a new house. There was nothing wrong with our old house; we’d spent almost a year remodeling it and loved how it turned out.
However, no amount of remodeling would change the location, and we soon realized that we wanted to live in a more walkable neighborhood.
There wasn’t much coming on the market, so we planned to rent until we could find just the right house. Just four days before we were set to move to the apartment, we found it – a sweet one-level house with three bedrooms and two bathrooms in a conveniently located neighborhood with sidewalks.
It was also more than 750 square feet smaller than our previous home.
But that was okay. We’re getting to the stage of life when we want to spend more time traveling than maintaining a big house. And this house had all the right rooms – including space for my baby grand piano and a separate office for my husband.
Smaller bedrooms meant there was no space for quilting stuff in my office. Fortunately, the house had a third garage we could convert to a sewing studio later. Yes, we’d have to pare down our possessions, but we were confident we could make it work.
And we have. For the most part, it’s been a fairly painless transition.
Well…except for the kitchen.
Kitchen downsizing can be a challenge for anybody. But cooking is serious business for me, and I spend a significant part of every day in my kitchen.

Some of the available cupboard space in my old house.

The available cupboard space in my new house.
My old kitchen (see the first photo) had endless cabinets and counter space, a huge center island, and not just one but THREE pantries. Even though my new kitchen (see the second photo) is lovely, the prospect of transitioning to a kitchen with half the square footage, storage, and counter space, and only three really usable upper cabinets, was pretty daunting.
Making the switch wasn’t easy, but I did it. And so can you!
Read on for tips to help you make the most of space in a smaller kitchen.
Kitchen Downsizing Tip One – Keep Only What You Actually UseWhen you’re trying to fit into a small kitchen with less storage, the first and most important step is to get rid of things you don’t use.
If you love kitchen appliances, gadgets, and dishes as much as I do, this isn’t easy. You’re going to have to make some hard choices.
A good place to begin is by trying to remember the last time you used something. If you’ve been holding onto that fondue pot for five years but haven’t actually made fondue for the last four, it’s unlikely you ever will again.
Same thing might be true for your Instant Pot, air fryer, yogurt maker, or the set of dishes you inherited from Aunt Petunia when she passed.

If you’re not using them, give those items to a family member, friend, or charity. Even if you’ve never really liked that air fryer or Aunt Petunia’s Dessert Rose dishes, someone else will.
The same goes for smaller utensils, kitchen tools, and gadgets. Even small items can take up space, so give away those you’re not using or that you might have more than one of. When sorting through my things, I realized I had duplicate box graters and three of the exact same vegetable peelers.
Giving away the things I didn’t need gave me extra drawer space and made it easier to find the tools I use regularly.
Kitchen Downsizing Tip Two – Prioritize Shelf Space for Frequently Used ItemsOnce you’ve gotten rid of the items you don’t need, it’s time to prioritize the things you do need. Separate them into three categories – those you use daily, those you use a few times a month, and those you use infrequently or seasonally.
Though I only use my big canning pot and jars in the fall, I didn’t want to get rid of them. The same was true of my (very large) dehydrator, which I only use in the summer, and my largest serving platters and buffet plates that I use for parties.
Instead of letting them take up valuable real estate in the kitchen, I moved them to storage cabinets in the garage. They’re still easy to pull out when I need them, but storing them in a location separate from the kitchen freed up a lot of prime shelf space for the things I use regularly.
Kitchen Downsizing Tip Three – Convert Underutilized Spaces to Pantry StorageThis won’t be an option for everyone, but if your kitchen has underutilized space or poorly designed cabinets, consider replacing them with more useful storage.
For example, both our house and the old house came with kitchen desks. Have you ever known anybody who actually used a kitchen desk?
Neither have I.
Removing them gave us space to put in pantries, the most efficient possible storage spaces for any kitchen. Rather than buy pricey cabinetry, we built what was essentially a closet and then lined it with shelves.
Removing the kitchen desk in our previous house gave us room to install a six-foot-wide, reach-in pantry with sliding barn doors. Our new house also had a closet-style, reach-in pantry. But it was only about four feet wide, and it didn’t provide as much storage as I needed.
Lucky for me, one of those useless kitchen desks sat adjacent to the pantry. There was also forty-five inches of space between the pantry and the island, which is more than is needed for a standard walkway in a kitchen.

The old smaller pantry and kitchen desk
New walk-in pantry took place of the desk
Removing the kitchen desk and the old pantry, and grabbing that extra nine inches of floor space allowed us to build a new, nearly eight-foot-wide, walk-in pantry closet. Well, it’s actually more of a sideways-step-in pantry than a full walk-in. But it still more than doubled my pantry storage, and that’s been a game-changer!
Something else you can consider is replacing a standard lower and upper cabinet with a built-in pantry with pull-out shelving. That’s something we did in our last kitchen, and I loved it.
Though a walk-in or full-sized pullout pantry isn’t an option for everyone, even narrow spaces can be utilized for pull-out pantries.

A search of the Lowe’s and Home Depot websites will show ready-made, pull-out pantries in 24, 18, 11, and even 9-inch widths. Local cabinet makers can custom-build pull-out shelving and pantries to your exact specifications, taking advantage of every available inch of space.
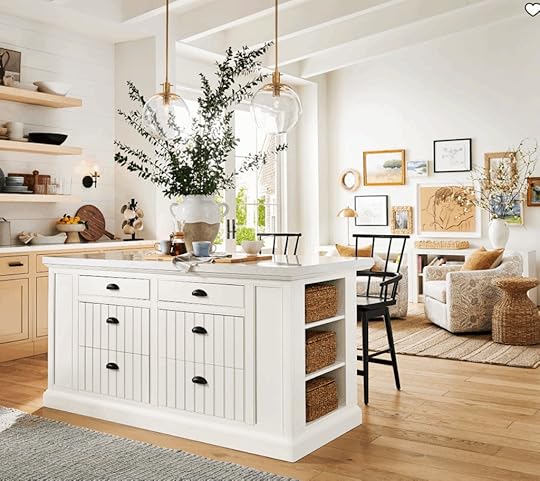
Kitchen Downsizing Tip Four – Add Counter and Storage Space with Center IslandsIf building a pantry or installing extra cabinetry isn’t an option, consider getting a kitchen island. Islands provide convenient extra storage and counter space, and can make kitchen downsizing a lot easier.
One option is to purchase an island from a cabinet company or have one custom made by local cabinet maker, then have it professionally installed. Another option is to buy a freestanding island. Freestanding islands come in a variety of sizes, styles, and price points, so there’s probably one that’s just right for your kitchen.
If you’ve got a little extra space and budget, this elegant, six-foot-long farmhouse-style island from Pottery Barn is a great choice. It’s got a quartz top, six big drawers, plus extra storage shelves, and enough room for two counter stools.
This solid wood, four-foot-long island from Wayfair will give you a traditional look, plus storage and workspace in a smaller footprint and more affordable price point. It’s got four drawers, a storage cabinet, and a flip-up counter.

Want a more modern style? This fluted rolling island cart is available in a green, blue, or white finish with configurations of two drawers or three, or one drawer with shelving and tip-out trash can. It’s a stylish, convenient, and very affordable option.

For very small spaces, consider this well-priced, cleverly-designed rolling cart from Wayfair. It’s got two drawers, cabinets with adjustable shelves, racks for spices, condiments, and glassware, a flip-up counter, plus three power outlets and a 2-meter-long extension cord.

If your kitchen is truly tiny, check out this rolling cart. Though compact at just 27 x 15 inches, it will still give you some extra workspace, plus three drawers and three shelves. And in a truly tiny kitchen, even a little extra space can make a big difference.
Downsizing your kitchen can feel overwhelming. But following these four tips will give you a good start on transforming a smaller kitchen into an efficient space that’s a pleasure to cook in.
In my next post, I’ll share products and solutions that helped me squeeze every inch of space out of my cabinets and pantry – without cluttering the counters.
October 27, 2025
Oven-Roasted Pumpkin: A Savory Side Dish

There’s more to pumpkin than pies and jack o’ lanterns! Oven-roasted pumpkin is a delicious savory side or alternative to potatoes. Add your favorite spices for a tasty flavor bump!
Don’t Toss Your Halloween Pumpkin – Make Oven-Roasted Pumpkin InsteadThis time of year, an array of pumpkins makes a very attractive porch decoration for so many of us.
But those cute little pumpkins can do double duty once Halloween is over. Don’t forget, pumpkins are a yummy vegetable as well as a cute seasonal decoration. Instead of throwing them out to make room for Christmas décor, make oven-roasted pumpkins.
A recent trip to a Japanese restaurant and an order of tempura that included pumpkin slices reminded me how yummy pumpkin can be.
Deep frying isn’t my thing. But oven roasting is easy to do and a much healthier option.
Oven-roasted pumpkin has a dense and creamy texture and a savory, slightly sweet taste. It’s a wonderful side dish and a great alternative to potatoes.
It’s also really easy to make!
What You Need to Make Oven-Roasted Pumpkin
Prepping the pumpkin isn’t difficult, but it does require a little time and a very big knife. Because I roast my pumpkin in slices with the skin, my first step is to just rinse my pumpkin with cool water to wash away any dirt.
You could peel the skin off before roasting if you’d like, but I find it easier to scoop or slice the pumpkin off the skin after cooking, when the flesh is nice and soft.
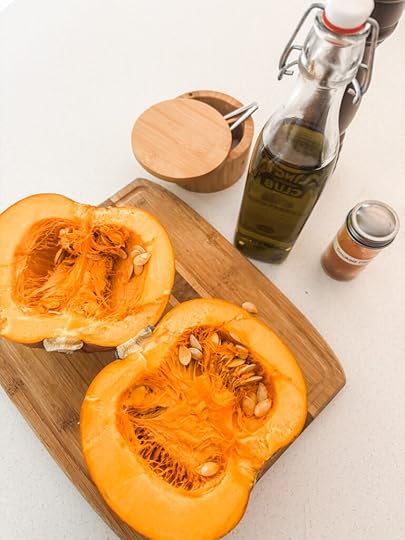
After washing, slice off the stem from the top and the brown blossom end from the bottom of the pumpkin. Next, cut the pumpkin in half or in quarters and scoop out the stringy flesh and seeds.
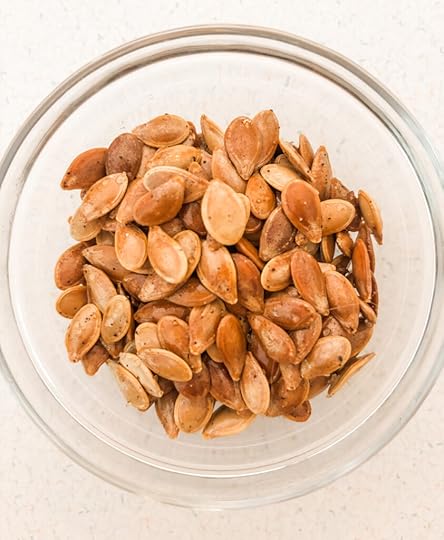
(If you want, you can reserve the seeds for roasting later. I’ll explain how to do that below. They’re terrific for snacking or for sprinkling on salads.)
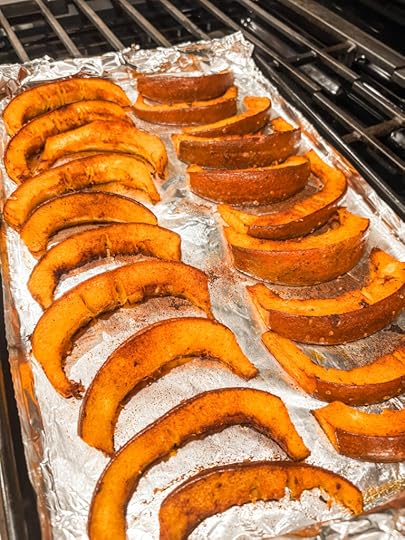
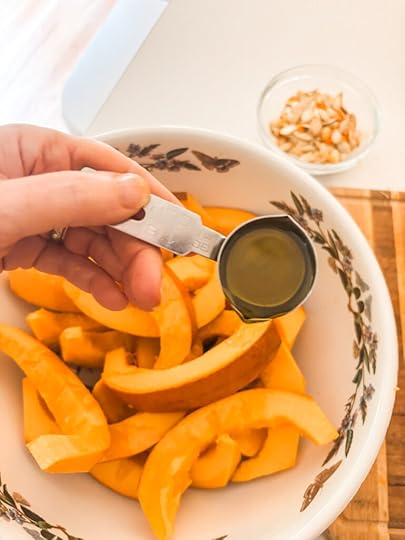
Next, cut the pumpkin into slices, about an inch thick. Put the slices in a big bowl, then drizzle with oil and stir to coat. Sprinkle your spices, salt, and pepper over the pumpkin and stir again.
The last step is to roast the slices in the oven until the flesh is soft and tender.
That’s it!
What To Do with Oven-Roasted Pumpkin?Like other types of squash, pumpkin makes a great side for just about any kind of meat, poultry, or even fish. If you’re trying to stay away from carbs, it’s a great, filling dish to serve instead of potatoes, rice, or pasta.
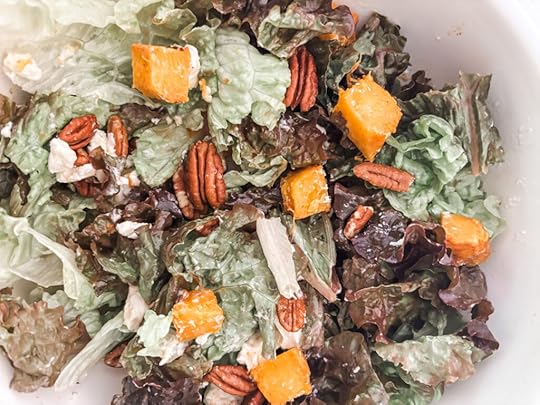
Chunks of roasted pumpkin are also a great addition to autumn salads.
I combined my smoky paprika roasted pumpkin with red lettuce, pecans, maple bourbon chevre, and a champagne vinaigrette. It was incredible! Sweet, savory, and very satisfying.
When it comes to salad, there are endless ingredients that would pair beautifully with pumpkin.
Just about any type of lettuce would work, as well as baby kale, spinach, or chicories. Chunks of sweet and crisp apple or pear would be a great combination with the savory, creamy, and slightly sweet pumpkin (like in this salad!). Tart, colorful pomegranate arils could be wonderful too.
If you save the pumpkin seeds (and I hope you do), it’s simple to roast the seeds for snacking or to sprinkle on salads or even soup.
Pick the seeds from the stringy pulp of the pumpkin. Rinse them with water in a colander to remove the last of the pulp, then spread them in a single layer on a clean tea towel to dry overnight.
Pour on a little oil – about a tablespoon per half cup of seeds – and stir to coat. Sprinkle the seeds with Kosher salt and pepper, or other favorite spices, and stir again.
Place the prepared pumpkin seeds on a foil-lined baking sheet in a single layer. Bake in a 300-degree oven for about an hour, stirring halfway through.
Remove from the oven and allow to cool. Seeds will keep in an airtight container at room temperature for up to two weeks, or up to two months if stored in the refrigerator.
Looking for more ways to use pumpkin?
Check out my recipe for easy homemade pumpkin puree. It’s better than canned and perfect to use in pies, bread, soup, and other recipes that call for pumpkin!
Print Oven-Roasted Pumpkin: A Savory Sidedish Author: Marie Bostwick Print Recipe [image error] Pin Recipe const share_pin_buttons = document.getElementsByClassName( 'share-pin button' ); if ( share_pin_buttons ) { for ( let share_key = 0; share_key < share_pin_buttons.length; share_key++ ) { share_pin_buttons[share_key].addEventListener( 'click', (e) => { e.stopPropagation(); window.open(e.target.dataset.href,'targetWindow','toolbar=no,location=no,status=no,menubar=no,scrollbars=yes,resizable=yes,width=500,height=500'); return false; } ); } } Ingredients 1 Sugar Pie Pumpkin2 T olive oil (see post for possible subs)2 tsp smoked paprika (see post for other spice suggestions)1 tsp Kosher salt½ tsp fresh ground pepper Cook Mode Prevent your screen from going dark Instructions Preheat oven to 400 degrees. Rinse pumpkin with cool water to remove any dirt or residue. Pat dry with paper towels. Line a rimmed baking sheet with foil or parchment.Slice the stem and the blossom end from the top and bottom of the pumpkin. Cut the pumpkin in half or in quarters.Scoop the pulp from the pumpkin, scraping off all the stringy fibers. If you’d like, reserve the pumpkin seeds for later roasting (See the post for instructions).Cut the pumpkin into slices, approximately one-inch thick. Place pumpkin slices in a bowl, drizzle with the oil, and stir to coat. Sprinkle smoked paprika, salt, and pepper over pumpkin and stir again.Place the pumpkin slices on the prepared baking sheet in a single layer. Place sheet in oven and roast pumpkin for 30 to 40 minutes, until it is soft and tender. Did you make this recipe?
 Share a photo and tag us — we can't wait to see what you've made!
October 20, 2025
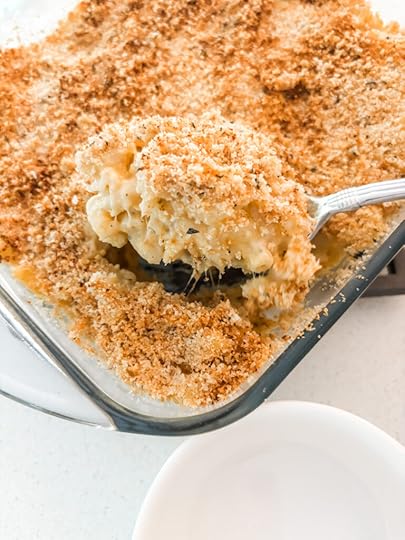
Butternut Squash Mac and Cheese with Sage
Cheesy macaroni with savory squash, fresh herbs and spices, plus a buttery baked topping. My Butternut Squash Mac and Cheese with Sage is a scrumptious, seasonal twist on a classic comfort food.
Butternut Squash Mac and Cheese with Sage – Family Favorite Updated for FallFalling leaves and cooler temperatures call for warm sweaters, cozy fires, good books, and classic comfort foods. For many families, including mine, homemade macaroni and cheese can be hard to beat.
Recently, I tried to do just that, giving the classic mac and cheese casserole a fall update with the addition of butternut squash.
My first attempt was…just okay.
The color leaned more toward orange than yellow, which looked appetizing. And I felt good about adding a vitamin-rich veggie to the dish. It wasn’t bad. But it wasn’t great either. I’d been hoping to come up with something that packed more of a punch flavor-wise.
Back to the kitchen I went.
This time, I leaned on memories of the delicious butternut squash ravioli with sage and browned butter served by one of my favorite restaurants back in Connecticut.
The resulting Butternut Squash Mac and Cheese with Sage was just what I’d hoped for. The addition of plenty of fresh sage, spices, and a sharper, more flavorful cheese paired perfectly with the savory, sweetness of the squash.
Though this is a more grown-up version of the classic, the flavor is still delicate, creamy, and cheesy. So, kids will enjoy it as much as adults. As long as you don’t spill the beans, they’ll never know they’re eating vegetables.
What Do You Need to Make Butternut Squash Macaroni And Cheese With Sage?
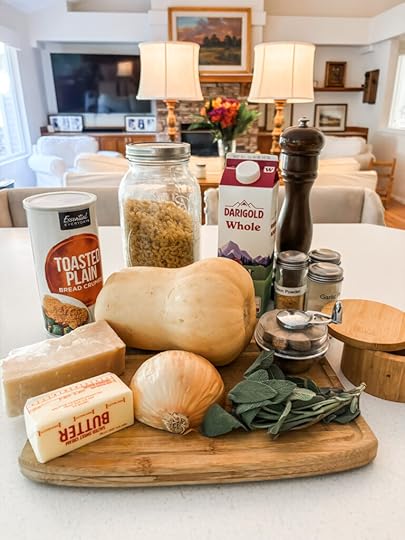
Many of the ingredients you’ll need for this recipe are the same that you’d use for regular homemade mac and cheese, including…
Macaroni – I went with regular elbow macaroni this time. You could also use other types of pasta, including fusilli, penne, or small-sized shells. You want something that’s bite-sized, with a shape that will hold onto the sauce.Milk – Though you could sub low-fat or no-fat milk, I think whole milk is the better choice. It’ll give the sauce a little extra richness.Butter – Since cheese has quite a bit of salt, I use unsalted butter. But I do taste the sauce before I pour it over the macaroni, to see if I need to add a little more salt. Most of the time, I don’t.Breadcrumbs – Panko bread crumbs would be my first choice for the topping. They crisp up beautifully when baked. But regular bread crumbs will work well too.But you’ll also find several special ingredients that kick the flavors of this recipe up a few notches, including…
Butternut squash – It adds fiber, vitamins, and a richer color to the dish. And the creamy texture plus subtle sweetness of roasted butternut squash makes it a perfect partner for mac and cheese.Onion – I would stick with sweet yellow onions here – white or red would be a little too sharp in taste. But shallots would work nicely too.Spices – a blend of savory spices, including garlic powder, onion powder, and nutmeg, help enhance the flavor of all the other ingredients. It’s a subtle difference, but the spices matter, so don’t skip them.Sage – Fresh Sage brings a lot to this recipe, and I use it two ways. Half is oven-roasted along with the squash and onions. Half is minced fine and mixed into the bread crumb topping. If you don’t have like sage, you could try subbing fresh thyme.Parmigiano Reggiano – The sharp, nutty taste of this gorgeous Parmesan cheese really shines through, enhancing all the other ingredients. Grate the cheese yourself for the best flavor. Parmigiano Reggiano isn’t cheap, but you’ll only need a few ounces, and the results are worth it. However, Pecorino Romano would be an acceptable and more affordable second choice.How to Make Butternut Squash Mac and Cheese with SageThe first step in this recipe is oven roasting the butternut squash, onion, and half of the sage leaves with a little olive oil and a sprinkle of Kosher salt and fresh ground pepper.
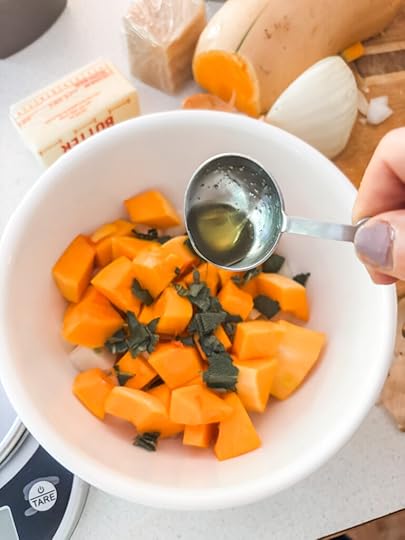
Oven roasting really helps bring out the sweetness of the squash and onion, and the savory flavor of the sage.
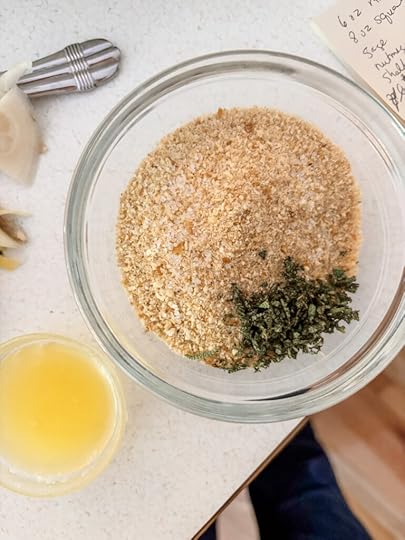
While the veggies are roasting, you’ll boil the macaroni in well-salted water according to the package directions, and make the bread crumb topping. That’s just a matter of tossing the crumbs, minced sage, and a pinch of salt and pepper together with some of the melted butter.
Once the vegetables are roasted, you’ll puree them in the blender along with the spices and milk. Then you’ll stir the puree into the cooked macaroni, along with the grated cheese and remaining melted butter.
Ideally, the macaroni will still be hot enough to melt the cheese, creating a smooth sauce. If the pasta has cooled down too much, you’ll have a hard time melting the cheese and butter and will need to put it back on the stove.
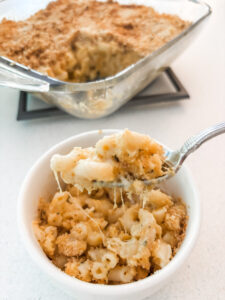
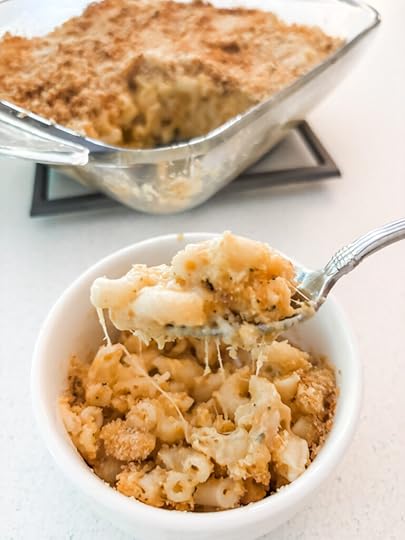
The last step is to put the mac and cheese into an oven-proof casserole, sprinkle the crumb and herb topping over the top, and bake until the topping is crispy and golden brown.
Yum!
Butternut Squash Mac and Cheese with Sage is a tastier, grown-up take on the classic that your whole family will love. Give it a try soon, or try other takes on this classic like my Cheesy Cauliflower Pistachio Pasta!
Print Butternut Squash Mac and Cheese with Sage Author: Marie Bostwick
  Yield: 4-6 servings Print Recipe [image error] Pin Recipe const share_pin_buttons = document.getElementsByClassName( 'share-pin button' ); if ( share_pin_buttons ) { for ( let share_key = 0; share_key < share_pin_buttons.length; share_key++ ) { share_pin_buttons[share_key].addEventListener( 'click', (e) => { e.stopPropagation(); window.open(e.target.dataset.href,'targetWindow','toolbar=no,location=no,status=no,menubar=no,scrollbars=yes,resizable=yes,width=500,height=500'); return false; } ); } } Ingredients 10-12 large sage leaves, divided (half baked w/ squash, half minced for topping)10 oz butternut squash, peeled and cut into 1-inch cubes (about 2 cups)¼ medium onion, chopped1 T olive oil6 oz macaroni (can sub fusilli, penne, small shells)½ cup Panko bread crumbs3 T butter, divided½ tsp onion powder½ tsp garlic powder1/8 tsp nutmeg1 cup whole milk6 oz Parmigiano Reggiano cheese, gratedKosher saltFresh ground pepper Cook Mode Prevent your screen from going dark Instructions Heat the oven to 400 degrees. Tear half of the sage leaves into small pieces and toss in the olive oil with the butternut squash, chopped onion, and a sprinkle of salt and pepper. Place veggies in a single layer on a rimmed baking sheet or roasting pan. Roast in the oven for 25-35 minutes, until squash is soft and onions are turning golden brown.While the veggies are roasting, boil the macaroni in salted water according to the package directions and make the crumb topping.To make the topping, mince the remaining sage leaves and stir with the bread crumbs in a small bowl. Melt one tablespoon of butter and drizzle over the crumb mixture, tossing with a fork to mix. Set topping aside.When the veggies are finished roasting, remove the pan from the oven. Lower the oven temp to 350. Place roasted veggies in a blender along with the milk, onion powder, garlic powder, and nutmeg. Blend on high speed until smooth.Drain water from pot of cooked macaroni. Pour on the squash puree and stir. Add grated cheese and remaining butter. Stir gently until cheese and butter have melted completely. (If macaroni has cooled too much, do this on stove over low heat.)Place mac and cheese in an ovenproof casserole dish. Sprinkle bread crumb topping evenly over the top. Bake in a 350 degree oven for about 20 minutes, until the topping is golden brown. Did you make this recipe?
 Share a photo and tag us — we can't wait to see what you've made!
October 13, 2025
Pumpkin Spice Pancakes: Fall Recipes

Make these pumpkin spice pancakes and start your day with fall’s favorite flavor – light and fluffy pancakes with pumpkin puree and fragrant spices. It’s the perfect breakfast for PSL lovers!
Celebrate Fall with Pumpkin Spice Pancakes!For so many people, pumpkin spice takes the top prize in the favorite fall flavor category.
In fact, pumpkin spice is so popular that Starbucks keeps pushing the yearly launch date for pumpkin spice lattes (PSL) earlier and earlier. This year, they started serving them on August 26th, almost a month before the official start of fall.
If you were among the people standing in line for their first PSL of the season, these Pumpkin Spice Pancakes will be right up your alley.
But even if you’re not a full-on fanatic for PSLs, there’s still plenty to love about this fall-themed pancake recipe.

To start with, they smell and taste terrific! (And isn’t that the most important thing?)
A blend of spices will fill your kitchen with the mouth-watering fragrance of cinnamon, allspice, nutmeg, and cloves. And when it comes to flavor, those delicious warming spices in a fluffy pancake are hard to beat!
Pumpkin spice pancakes include real pumpkin for an extra little boost of fiber, vitamins, and minerals. That’s good for everybody. And if you’re a mom of a veggie-averse kid, every bite of veggies you can sneak in is a win, right?
Another plus to this recipe is that you can make the batter ahead of time and store it covered in the refrigerator for up to three days. Pull out the batter in the morning, fire up the griddle, and you’ve got a delicious hot breakfast in minutes!
On the off chance that you make more pumpkin spice pancakes than your family can consume in one sitting, any leftovers will freeze beautifully.
Just cool the pancakes completely, wrap them individually in plastic wrap, and freeze for up to three months. When you want pancakes, just pop a frozen one in the toaster to reheat and voila! Breakfast is served!
There’s a lot to love about these pancakes. But the best thing might be just how easy they are to make.
How To Make Pumpkin Spice PancakesYou can find all kinds of pancake mixes at the grocery store, but making your own pancake batter is cheaper and incredibly easy. It’s simply a matter of combining the dry ingredients – flour, baking powder, sugar, and spices – in one bowl.
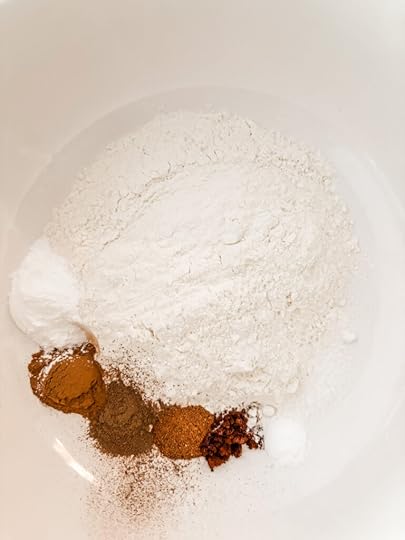
In a second bowl, you’ll whisk together and wet ingredients – eggs, milk, pumpkin puree, and melted butter. Then you’ll stir the wet ingredients into the dry, making a smooth batter.

At this point, you can either store the batter covered in the refrigerator for later use or start making pancakes right away. When you’re ready to cook the pancakes, just heat some butter or oil in a skillet or griddle over medium or medium-low heat.
Pour some batter into the pan. I like to use a one-third measuring cup to pour out the batter, so my pancakes are roughly the same size.
Let the pancakes cook until the edges begin to look a little dry and you see some air bubbles form in the batter. Those bubbles are your signal that it’s time to flip the pancakes. Once you do, let the pancakes cook for another minute or two.
Serve the pancakes hot with your favorite toppings.
Ingredients, Substitutions, Additions, and ServingOne thing to note: you need to use 100% pumpkin puree for this recipe, not pumpkin pie filling. Be sure to read the label on the can before you add it to the batter.
I used a classic pumpkin spice blend of cinnamon, allspice, nutmeg, and cloves in amounts that taste perfect to me. But feel free to adjust the seasonings and measurements to suit your palate.
If you like lots of cinnamon, go ahead and add more. Cloves not your thing? Either leave it out or substitute a little ground ginger.
Lots of people are trying to up their protein intake these days. If that’s you, add a scoop or two of unflavored protein powder to the batter, along with a little extra milk to keep the batter from getting too thick.
Another option is to smear a little peanut or almond butter on your pancakes for a tasty protein boost. Speaking of serving…
We usually go with the classic butter and maple syrup option at our house. Take an extra minute to warm up the syrup. It makes a big difference!

Applesauce, apple butter, or pumpkin butter, with or without syrup, would be yummy too. If waffles are your thing, this pumpkin spice pancake batter is also great for waffles.
No matter how you prepare and serve them, Pumpkin Spice Pancakes are a terrific, easy-to-make breakfast that you and your family will love! Make some soon!
Print Pumpkin Spice Pancakes: Fall Recipes Author: Marie Bostwick Yield: Makes 8-10 pancakes Print Recipe [image error] Pin Recipe const share_pin_buttons = document.getElementsByClassName( 'share-pin button' ); if ( share_pin_buttons ) { for ( let share_key = 0; share_key < share_pin_buttons.length; share_key++ ) { share_pin_buttons[share_key].addEventListener( 'click', (e) => { e.stopPropagation(); window.open(e.target.dataset.href,'targetWindow','toolbar=no,location=no,status=no,menubar=no,scrollbars=yes,resizable=yes,width=500,height=500'); return false; } ); } } Ingredients 1 cup white flour2 tsp baking powder2 T sugar (white or brown)1 tsp ground cinnamon½ tsp ground allspice¼ tsp ground nutmeg1/8 tsp ground cloves¼ tsp salt½ cup pumpkin puree (100% pumpkin, NOT pumpkin pie filling)2 eggs3 T butter, melted¾ cup whole milkButter or oil for cooking Cook Mode Prevent your screen from going dark Instructions In a large mixing bowl, stir together the flour, baking powder, sugar, cinnamon, allspice, nutmeg, cloves, and salt. Set aside.In a medium sized bowl, combine the pumpkin puree, eggs, melted butter, and milk. Whisk thoroughly.Pour the wet ingredients into the dry ingredient. Stir to create a smooth, even batter.Coat a skillet or griddle with a little butter or neutral-flavored oil over medium heat on the stove.When the oil or butter is hot, pour about a quarter to a third of a cup of batter into the pan for each pancake. (Batter will spread so don’t overcrowd the pan.) Cook until the edges of the pancake begin to look a bit dry and air bubbles form in the batter. Flip the pancake(s) and cook for another minute or two, until cooked through. Serve with your favorite toppings. (See post for suggestions.) Did you make this recipe?
 Share a photo and tag us — we can't wait to see what you've made!
October 6, 2025
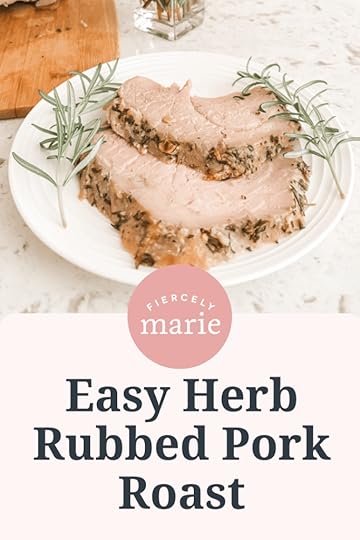
Easy Herb Rub Pork Sirloin Roast

A simple herb rub with plenty of garlic infuses this Easy Pork Sirloin Roast with can’t-miss flavor! A terrific way to prepare an affordable Costco favorite. Great for family meals or company dinners. So easy! And so good!
Easy Pork Sirloin Roast – Great Recipe for A Costco Favorite!Whenever I go to Costco, I head straight for the meat department to buy meat, fish, and poultry. They’ve got terrific prices that make it easy to stock up.
One of my favorite items is the four-pack Pork Sirloin Roast. They’re a real bargain and freezer staple for our family.
Each roast weighs about two pounds. That’s the perfect size to feed four people, or just my husband and me with leftovers. If we’ve got extra guests for dinner, as happened recently, I make two.
This simple fresh herb rub is one of my favorite ways to prepare pork sirloin roast. It’s crazy easy and the results are always tender, juicy, and mouth-wateringly flavorful. It’s second only to my Perfect Boston Butt Pork Roast.
However, this pork sirloin was my recipe of choice for the final company dinner I hosted in our old house. It earned rave reviews and requests for second and even third helpings. It’s that good! And so easy.
Scroll down and you’ll see what I mean.
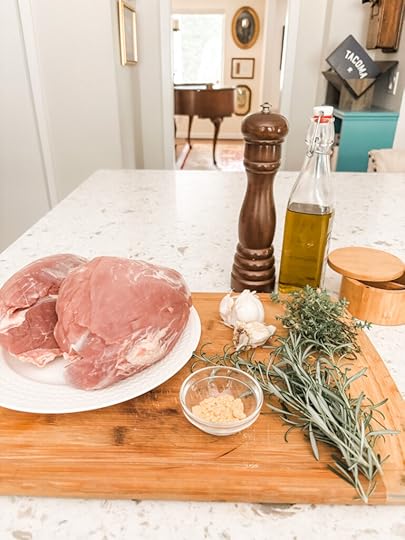
Ingredients for Easy Herb Rub Pork Sirloin Roast
Though I made two roasts when I photographed this recipe, the amounts you’ll find in the recipe below are for one roast. Just double it up if you want to cook an extra pork sirloin roast.
Pork Sirloin Roast – Weight should be about a pound and a half to two pounds. Costco’s prices are hard to beat, but you can buy at any supermarket. Just make sure that your pork sirloin roast is boneless. Cooking times would be very different for a bone-in cut.Garlic – Slivered, peeled garlic cloves will actually be stuffed into the roast to help infuse it with flavor. It adds a lot, so I wouldn’t skip this part.Fresh Herbs – I love rosemary and thyme for this recipe. With its robust flavor and fragrance, rosemary in particular brings a lot to the party. But you could also use other fresh herbs, including oregano, sage, or even tarragon. Parsley can work too, but it’s fairly mild in flavor, so be sure to pair it with a more strongly flavored herb if you use it.Dry mustard – Powdered mustard combined with the herbs adds a nice little zing to the rub. If you dislike mustard, you could substitute smoked or regular paprika.Olive oil – You can also sub just about any neutral-flavored oil, including vegetable, corn, canola, grapeseed, or safflower oil.Kosher salt – Kosher is my go-to choice for salt. I like the way the coarse grains provide little pops of flavor as I’m eating. If you substitute regular table salt, reduce the amount of salt by about half.Ground pepper – if at all possible, grind it fresh. It really does taste better.Prepping and Cooking Easy Pork Sirloin RoastThis is such a simple and delicious recipe. The instructions below are straightforward and practically foolproof. But I do have a couple of tips.
The first step is to pat the pork sirloin roast dry with clean paper towels. That will make it easier for the meat to absorb the flavors of the herb rub.
As I said, garlic adds a lot to this recipe, so don’t skip that part. And if you want to add extra garlic, feel free to add an additional clove or two. You’d have a hard time using too much.
Be sure to use large, peeled garlic cloves, and slice each one into three or four slivers.
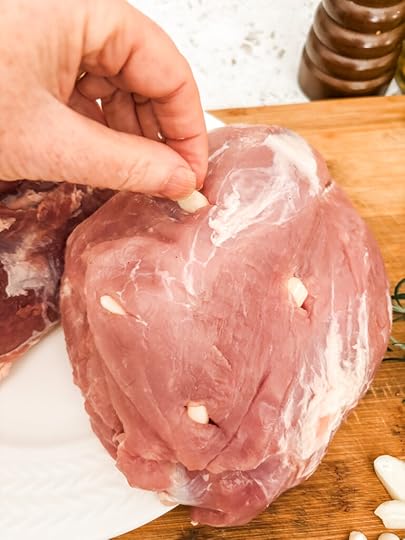
Use the tip of a sharp knife to cut pockets into the roast, and stuff a garlic sliver into each pocket. Don’t be afraid to make some of the pockets deep. You want the garlic flavor to infuse deep into the roast, not just on the surface.
The herb rub goes on next. After applying it, let the pork sirloin roast sit in the fridge for at least an hour before cooking. If you have time, let it sit for several hours or even overnight. More time to rest and absorb the rub will give you an even more flavorful result.
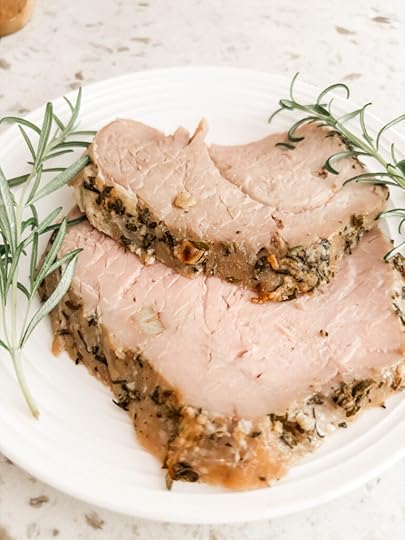
After taking it out of the oven, let the roast rest on the counter for ten to fifteen minutes before slicing. That will give the juices time to absorb back into the meat, which will make it more tender. If you’re worried about it getting too cool, tent the roast with foil while it rests.
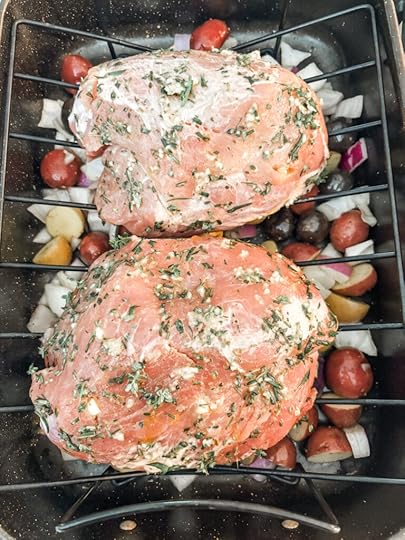
What To Serve with Easy Pork Sirloin RoastTurning this recipe into a one-pan dinner is easy.
Cut up potatoes, onions, or other root veggies and put them in the bottom of the roasting pan. Then drizzle on some olive oil, sprinkle with a little Kosher and fresh ground pepper, and give them a stir. If you like, you can stir in a few more chopped herbs as well.
Place the pork roast on a rack over the veggies. As the pork roast cooks, those lovely herb and garlic juices will drip down onto the vegetables to help flavor them. Cooking your main dish and side dish simultaneously is a huge time saver.
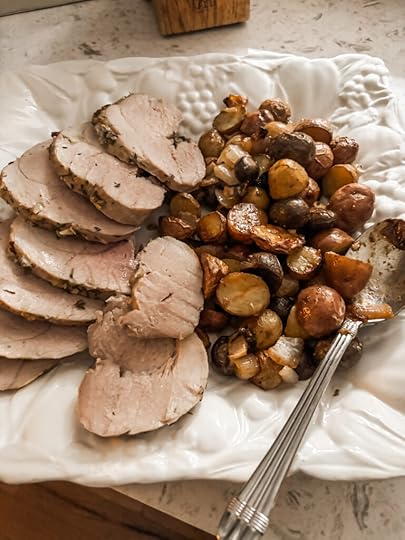
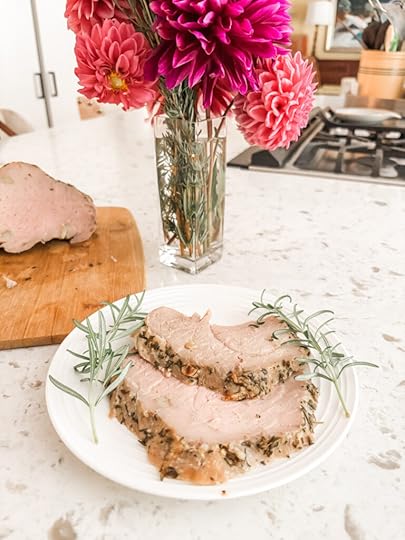
Serve slices of the pork alongside the potatoes or veggies. Add a green salad and some nice, crusty bread, and dinner is served!
This easy pork sirloin roast is a satisfying meal your friends and family will love. Give it a try soon!
Print Easy Herb Rub Pork Sirloin Roast Author: Marie Bostwick Yield: 4 to 5 servings Print Recipe [image error] Pin Recipe const share_pin_buttons = document.getElementsByClassName( 'share-pin button' ); if ( share_pin_buttons ) { for ( let share_key = 0; share_key < share_pin_buttons.length; share_key++ ) { share_pin_buttons[share_key].addEventListener( 'click', (e) => { e.stopPropagation(); window.open(e.target.dataset.href,'targetWindow','toolbar=no,location=no,status=no,menubar=no,scrollbars=yes,resizable=yes,width=500,height=500'); return false; } ); } } Ingredients 1.5 to 2lb boneless pork sirloin roast3 to 4 large cloves garlic, peeled and slivered (3 or 4 slivers per clove)2 T fine chopped fresh rosemary1 T fresh thyme leaves2 tsp ground dry mustard2 T olive oil1 tsp Kosher salt½ tsp fresh ground pepperOptional – 1 lb potatoes and/or other root vegetables, drizzled with olive oil and seasoned with salt and pepper, to cook under the pork roast. See post for suggestions. Cook Mode Prevent your screen from going dark Instructions Use paper towels to pat the surface of the pork sirloin roast dry.Use the tip of a sharp knife to cut pockets all around the pork and at varying depths. Shove a sliver of garlic into each pocket.In a small bowl, stir together rosemary, thyme, mustard, olive oil, Kosher salt, and fresh ground pepper. Rub the herb mixture over the roast on all sides. Place the roast in the refrigerator to rest for at least one hour, or up to overnight.When ready to cook the roast, preheat the oven to 350 degrees. Place the roast in a deep roasting pan on a rack. (If using, place optional prepared potatoes or vegetables in the pan beneath the rack.)Place roast in the preheated oven and cook for 60 to 90 minutes, until the interior temperature reaches 145 degrees.Remove pan from oven. Allow the roast to rest for 10-15 minutes before slicing and serving. Did you make this recipe?
 Share a photo and tag us — we can't wait to see what you've made!
September 29, 2025
Creamy Tomato and Lentil Slow Cooker Soup: Inspired by the NYT Recipe
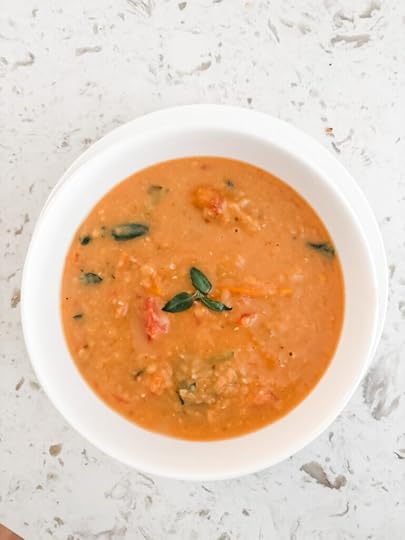
Fresh tomato, basil, spices, and red lentils, simmered in a savory broth. Nothing could be more delicious, or easier to make, than this Creamy Lentil and Tomato Slow Cooker Soup. It’s my version of a favorite, 5-star NYT recipe.
No Time to Cook? Creamy Tomato and Lentil Slow Cooker Soup to the Rescue!Sometimes, even though you have zero time to cook, you still want to.
That’s the boat I was in a couple of weeks ago.
We’d just moved into a new house and everything was understandably chaotic. The fact that I was leaving town for ten days of book tour events a week after the move wasn’t helping.
However, wanting to start life in our new house off on the right foot, I asked the vicar of our church to come and bless the house. His only availability was in the evening, so naturally I invited him to stay for dinner.
We’d only moved in four days before. Half my kitchen was still in boxes. If I had decided to pick up a pizza or takeout Thai, the vicar would have understood. He’s a good guy.
But I didn’t want to.
He was to be the very first guest in our new home. Though I had zero time and couldn’t find my garlic press, favorite skillet, or the good wine glasses, I still wanted to serve him a proper, home-cooked meal.
Fortunately, I had been able to locate my trusty slow cooker. It was one of the first things I’d unpacked.
And though I couldn’t find the box with my cookbooks, I had one of my favorite NYT-inspired slow cooker recipes all but memorized. That’s understandable, because this Creamy Tomato and Lentil Slow Cooker Soup really is memorable.
And when you’re short on time but still want to cook? Well, it’s a lifesaver!
Scroll on down, you’ll see what I mean.
Simple, Fresh Ingredients for the Best Creamy Tomato and Lentil Slow Cooker Soup

My recipe for creamy tomato and lentil soup is slightly different than the original New York Times version it was inspired by.
However, it still features the fresh, flavorful veggies and herbs that make this five-star soup so mouthwateringly good. Including…
Tomatoes – Fresh tomatoes are the star of the show here! You’ll use more than a pound and a half, which means your soup will be loaded with tons of bright, beautiful tomato flavor. Use any kind of tomato you want – Beefsteak, Romas, cherry, or heirlooms. Just make sure they’re nice and ripe.Basil – When it comes to the basil in this soup, more is definitely more! It adds a wonderful scent and citrusy taste to the soup, as well as some beautiful color and smell.Garlic – This recipe calls for four large cloves of garlic. That might seem like too much but trust me, it’s not. Stick with the recipe and you’ll see what I mean.Red lentils – they have a delicate flavor that’s perfect for this soup and cook very quickly. I don’t recommend substituting other types of lentils for this recipe, as it would drastically alter the cooking time as well as the flavor.Tomato pasteOlive oilDried oregano – You could sub thyme or herbs d’ Provence if desiredBroth – This is one of the places where my recipe varies from the NYT version. I use broth instead of water, which boosts the flavor. My preference is for homemade vegetable or chicken broth. If you use store-bought broth, try to stick with a no-salt or low-sodium version. Or, if you use regular salted broth, leave out the salt during the first stage of cooking, only adding extra at the end after you’ve tasted it.Sugar – Just a little, to help balance the acidity of the tomatoes and lemon juiceLemon juice – Fresh lemon juice is best, but you can sub bottled in a pinchWhole milk – The original NYT version calls for cream, but I prefer to use whole milk. It adds plenty of richness with a little less fat.Salt and pepperSimple Steps for Making a Delicious Creamy Tomato and Lentil Slow Cooker Soup
Thanks to the slow cooker, this soup isn’t just incredibly tasty (people always go back for seconds), it’s incredibly easy to make!
It’s not quite some of those “dump it in and walk away” slow cooker recipes, but it’s pretty close.
In the first stage of cooking, you’ll add broth, lentils, garlic, about half the tomatoes, tomato paste, olive oil, sugar, seasonings, and one or two basil stems.
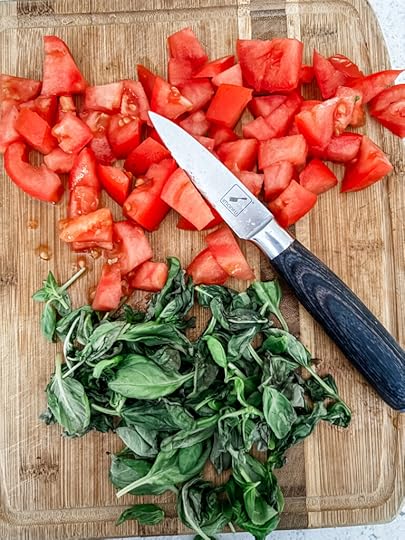
Just chop the tomatoes roughly before adding them to the cooker, or halve them if you’re using cherry tomatoes. Toss everything in – seeds, juices, and all.
And yes, I did say to add the whole basil stems with the leaves attached, during this stage. They’ll help infuse the soup with a wonderful basil flavor.
Once the soup has cooked, you’ll fish out the basil stems. Then you’ll use a whisk or immersion blender to help break up the tomatoes and lentils. It doesn’t need to be perfectly smooth, just more like a soup than a stew.

The last step will be to add the rest of the tomatoes, plus the basil, lemon juice, and milk. Give it a good stir and then let the soup cook for another five to ten minutes, to give the milk a chance to warm up.
That’s all there is to it!
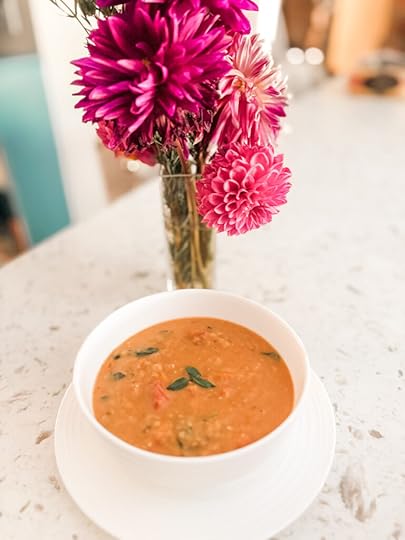
After that, you simply serve it up and wait for compliments and requests for seconds.
Creamy tomato and lentil slow cooker soup is the delicious dinnertime solution for busy days – or even not-so-busy days. Give it a try soon, and check out some of my other slow cooker recipes!
Print Creamy Tomato and Lentil Slow Cooker Soup: Inspired by the NYT Recipe Author: Marie Bostwick Yield: 6-8 servings Print Recipe [image error] Pin Recipe const share_pin_buttons = document.getElementsByClassName( 'share-pin button' ); if ( share_pin_buttons ) { for ( let share_key = 0; share_key < share_pin_buttons.length; share_key++ ) { share_pin_buttons[share_key].addEventListener( 'click', (e) => { e.stopPropagation(); window.open(e.target.dataset.href,'targetWindow','toolbar=no,location=no,status=no,menubar=no,scrollbars=yes,resizable=yes,width=500,height=500'); return false; } ); } } Ingredients 1.5 pounds of your favorite tomato (or two dry pints of cherry tomatoes), roughly chopped, and divided1.5 cups red lentils, rinsed5 cups no-salt vegetable or chicken broth4 large garlic cloves, peeled, smashed, and minced1-2 large stems of basil with leaves, plus 1 cup rough chopped fresh basil¼ cup canned tomato paste2 T olive oil2 tsp Kosher salt¼ tsp black pepper2 tsp sugar1 tsp dried oregano2 T lemon juice, preferably fresh¾ cup whole milk Cook Mode Prevent your screen from going dark Instructions Add half the tomatoes, the lentils, broth, minced garlic, basil stems, tomato paste, olive oil, salt, pepper, sugar, and oregano to a 6 to 8 quart slow cooker. Stir ingredients, then cook on high setting for 4 hours.Remove the basil stem from the slow cooker. Use a whisk or immersion blender to help break up the tomatoes and lentils. The texture doesn’t have to be perfectly smooth, but should be more like a soup than a stew.Add the remaining tomatoes, the cup of chopped basil, lemon juice, and cream to the cooker. Stir to combine and cook for another five to ten minutes, until the milk has heated through. This is a thick soup, but if it seems too thick for your liking, add a little more broth, milk, or water.Add half the tomatoes, the lentils, broth, minced garlic, basil stems, tomato paste, olive oil, salt, pepper, sugar, and oregano to a 6 to 8 quart slow cooker. Stir ingredients, then cook on high setting for 4 hours.Remove the basil stem from the slow cooker. Use a whisk or immersion blender to help break up the tomatoes and lentils. The texture doesn’t have to be perfectly smooth, but should be more like a soup than a stew.Add the remaining tomatoes, the cup of chopped basil, lemon juice, and cream to the cooker. Stir to combine and cook for another five to ten minutes, until the milk has heated through. This is a thick soup, but if it seems too thick for your liking, add a little more broth, milk, or water. Did you make this recipe?
 Share a photo and tag us — we can't wait to see what you've made!
September 15, 2025
Savory Corn and Zucchini Fritters: Zucchini Recipes

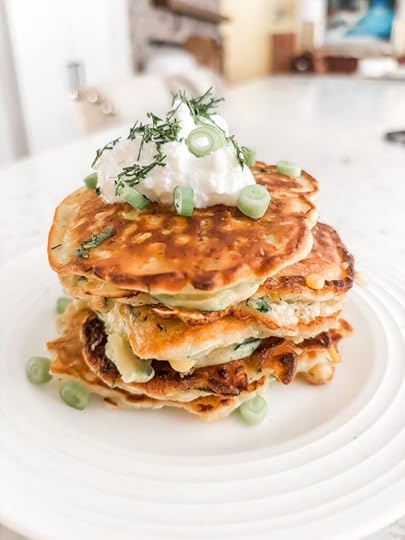
These Savory Corn and Zucchini Fritters make the most of your garden’s bounty. Healthy, simple to make, and simply delish! Great for quick snacks, appetizers, or a yummy dinnertime side dish!
Savory Corn and Zucchini Fritters – The Tastiest Way to Eat Your VeggiesSummer is winding down as I write this. Gardeners are harvesting lots of late summer veggies, especially corn and zucchini. Farmers’ markets and grocery stores are offering good prices on them, too. And lots of folks are looking for zucchini recipes so they nothing goes to waste.
So, here’s no better time to make these savory Corn and Zucchini Fritters. They’re simple to make and oh-so easy to love.
Sweet corn, fresh zucchini, and citrusy dill, lightly fried in simple batter is a scrumptious way to eat (and love) your veggies. It’s a recipe that’ll have everybody from picky-eater kids to gourmand grownups asking for seconds.
What Do You Need to Make Savory Corn and Zucchini Fritters?
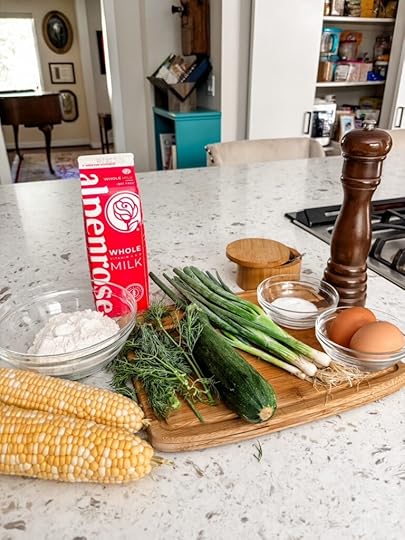
One of the things I love about this recipe is the simplicity of the ingredients. Chances are good that you already have most of what you need on hand, including…
Corn – You can use frozen or even canned corn in this recipe. But I love corn fresh off the cob for my fritters. I just shuck the corn and boil it in well-salted water for about five to seven minutes to remove the starchiness. Then I run the cobs under cold water and use a sharp knife to slice the kernels from the cob. You’ll need two or three large cobs to get two cups of corn kernels.Zucchini – Because the taste is so mild, grated zucchini is the secret weapon for moms of veggie-averse kiddos. If you peel the skin off, they’ll never know they just ate a vegetable. Zucchini has a lot of water, so put it in a clean tea towel and squeeze out the excess moisture after grating.Dill – Fresh dill has a subtle, citrusy taste that pairs beautifully with the sweetness of the corn. You could also substitute an equal amount of fine-chopped basil. Fresh dill has a milder flavor than dry, so reduce the amount by half if you use dried dill.FlourBaking powder – This will help the fritters rise and make them lighter and fluffier.Salt and pepperEggsWhole milk – Some fritter recipes call for cream, but I think whole milk adds plenty of richness to the fritters.Neutral oil – Though I use a lot of olive oil for my recipes, the taste would be too strong for this. Vegetable, corn, safflower, or canola oils are the way to go. The amount of oil you use is up to you. I prefer to use just a light coating of oil on a non-stick griddle. That gives me a fritter that’s light and crispy on the edges, but not greasy.How to Make Savory Corn and Zucchini FrittersIf you’ve ever made pancakes, you’ll have no trouble at all making Savory Corn and Zucchini Fritters. The process is very similar.
It all starts with whisking.
In one bowl, you’ll whisk together your dry ingredients – flour, baking soda, and seasonings. In a second bowl, you’ll whisk together the wet ingredients – eggs and milk. Whisk the eggs and milk vigorously, so the mixture is perfectly smooth.
Next, you’ll sift.
Sifting the flour mixture into the egg mixture is important because if you just dump in the flour and stir, you’ll get lumps. If you don’t have a proper sifter, use a fine mesh soup sieve or colander. Then stir everything well to make a smooth batter.
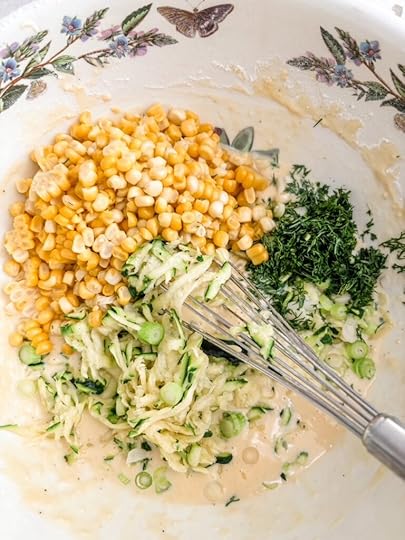
Then, you’ll add your veggies to the batter.
Be sure to read my ingredient notes about prepping the vegetables, especially the grated zucchini. If you don’t squeeze the water out before adding it to the bowl, your batter will be too thin.
The last step is frying.
As I said in the ingredient notes, how much oil you use is up to you. But you really don’t need a lot to get a nice, crispy edge on your fritters.
Make sure the oil is nice and hot, then pour about a quarter cup of the batter onto the griddle or pan. Cook the fritters for about three minutes per side, until they’re golden brown.

You can serve the fritters warm, but they’re also terrific cold. We like to enjoy a few hot from the pan, and then save the rest covered in the refrigerator to snack on later. Leftover fritters will keep covered in the refrigerator for up to three days.
They’re also really terrific, make-ahead appetizer or party nibble. Serve alongside a small bowl of tzatziki or aioli for dipping.
Sometimes, I serve corn fritters as a side dish. They’re terrific with all kinds of roasted meat and poultry, including chicken, pork, and beef. Add a nice green salad, and you’re all set with a healthy and hearty meal!
However, at our house, occasionally Savory Corn and Zucchini Fritters are the meal.
Top generously with a dollop of tangy Greek yogurt and an extra garnish of dill and scallion, and you’ve got a terrific light and tasty lunch or dinner.
Though I especially love this recipe when fresh corn is in season, frozen or canned corn will also work well. So, anytime is a great time to make some yummy corn and zucchini fritters.
Give them a try soon!
Print Savory Corn and Zucchini Fritters: Zucchini Recipes Author: Marie Bostwick Yield: Makes 12 to 16 fritters Print Recipe [image error] Pin Recipe const share_pin_buttons = document.getElementsByClassName( 'share-pin button' ); if ( share_pin_buttons ) { for ( let share_key = 0; share_key < share_pin_buttons.length; share_key++ ) { share_pin_buttons[share_key].addEventListener( 'click', (e) => { e.stopPropagation(); window.open(e.target.dataset.href,'targetWindow','toolbar=no,location=no,status=no,menubar=no,scrollbars=yes,resizable=yes,width=500,height=500'); return false; } ); } } Ingredients 1 cup white, all-purpose flour2 tsp baking powder½ tsp Kosher salt¼ tsp fresh ground pepper2 large eggs¾ cup whole milk2 cups corn kernels (can use fresh, frozen, or canned – see notes in post)1 medium zucchini, grated and squeezed to extract liquid (see preparation notes in post)3 scallions, white and pale green parts, sliced (reserve a few for garnish)2 T minced dill (reserve a little for garnish)2 to 4 T neutral oil for frying (see post notes regarding amounts) Cook Mode Prevent your screen from going dark Instructions In a small bowl, whisk together flour, baking powder, salt, and pepper. In a medium sized bowl, vigorously whisk eggs and milk until smooth.Sift dry ingredients into wet ingredients and stir, making a smooth batter. Add prepared veggies and herbs to the bowl – corn kernels, grated zucchini, scallions, and dill. Stir to combine.Add oil to a non-stick pan or griddle, set on medium high heat. When oil is hot, add quarter cups of fritter batter to pan, leaving enough room between so fritters can spread a bit.Cook fritters for about 3 minutes on each side, until cooked through and golden brown on both sides. Serve hot or cold. See serving and storage suggestions in post. Did you make this recipe?
 Share a photo and tag us — we can't wait to see what you've made!

September 8, 2025
Gluten-Free Peach Crumble Dessert
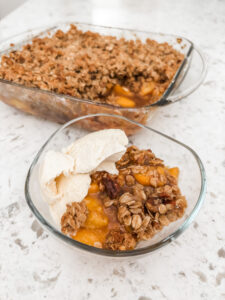

Family and friends will cheer for this Gluten-Free Peach Crumble Dessert! Sweet, cinnamon-kissed peaches with a crunchy, buttery oats and nut topping. Easy to make and SO, so good!
Gluten-Free Peach Crumble – A Peachy Keen Dessert Everyone Will LoveBy necessity or choice, more people (but not all people) are eating gluten-free these days. Though that can create something of a challenge for home chefs, it really doesn’t have to. The solution is simple. Find delicious, gluten-free recipes that taste so great that nobody will miss the gluten.
This Gluten-Free Peach Crumble is one of those recipes!
I recently made it for a mixed- audience dinner party, with equal number of gluten lovers and gluten avoiders. Not only did people go back for seconds, they scraped their bowls in hopes of getting one last, luscious bite.
And who can blame them?
What’s not to love about a warm, peach and cinnamon filling topped with a sweet and crunchy crumble of oven-baked oats, nuts, and butter. Nothing!

This scrumptious peach crumble will bring a cheer from everybody at your dinner table – especially the cook! Because not only is this delectable dessert a genuine crowd-pleaser, it’s incredibly easy to make.
Scroll on down and I’ll show you!
What Do You Need To Make Gluten-Free Peach Crumble?Fruit crumbles have two parts – the filling and the topping. Let’s go over the ingredients for each part separately, starting with the filling.
Peaches – Fresh, ripe, peeled, and sliced peaches would be my first preference here. But if peaches aren’t in season, frozen will work too.Brown sugar – Brown sugar has a rich, slightly caramel flavor that works well with peaches. You could sub white sugar in a pinch, but brown is better.Tapioca flour – This will help make the filling a little thicker (but not gluey). Tapioca flour is my favorite thickener for fruit fillings. It has a neutral taste that lets the fruit flavor shine through. You could also use cornstarch. Either way, sift it onto the fruit. Nobody likes lumps in their peaches!Ground cinnamon – A little cinnamon adds flavor and smells amazing during baking!Next, let’s talk about the topping ingredients. If you’re making this for someone who is gluten-free, you need to pay attention to this part.
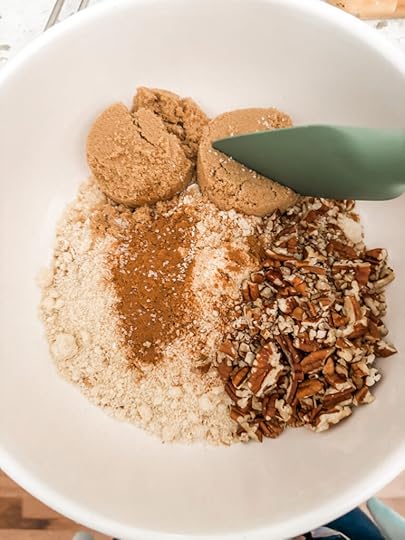
One of the many things I love about crumbles is that they are incredibly easy to make.
You don’t even have to cook the filling beforehand. You just plop the peaches into the baking pan, sprinkle on the other ingredients, and stir.
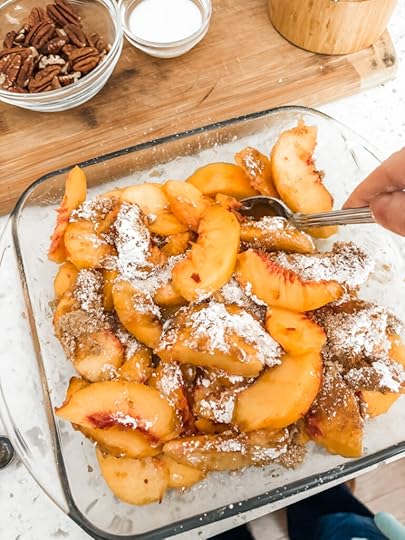
The topping’s dry ingredients are stirred together in a bowl. Then you’ll drizzle and stir the butter and milk in turn, spoon it over the peaches, and bake.
Honestly, that’s all there is to it!
The filling will be very hot when it comes out of the oven. So, you should let it cool for a few minutes before serving, especially if you’re feeding kids.
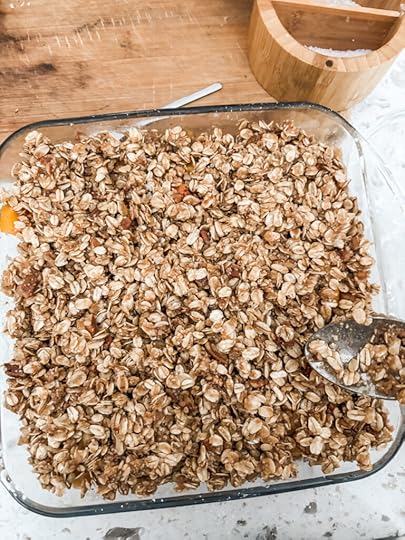
It’s just as good warm as cold. That’s a bonus if you want to make dessert ahead of time. If you want the best of both worlds – warm and made ahead – just pop it back in the oven for five or ten minutes before serving.
Gluten-Free Peach Crumble is terrific all by itself. However, a scoop of vanilla ice cream will add an extra layer of yum to an already fantastic dessert.
Give it a try soon!
Print Gluten-Free Peach Crumble Dessert Author: Marie Bostwick Yield: 6-8 large muffins Print Recipe [image error] Pin Recipe const share_pin_buttons = document.getElementsByClassName( 'share-pin button' ); if ( share_pin_buttons ) { for ( let share_key = 0; share_key < share_pin_buttons.length; share_key++ ) { share_pin_buttons[share_key].addEventListener( 'click', (e) => { e.stopPropagation(); window.open(e.target.dataset.href,'targetWindow','toolbar=no,location=no,status=no,menubar=no,scrollbars=yes,resizable=yes,width=500,height=500'); return false; } ); } } Ingredients
 For the filling:
2.5 lbs peaches, peeled and sliced1/3 c brown sugar2 T tapioca flour (can sub cornstarch)½ tsp cinnamonFor the topping:
1.5 gluten-free rolled oats2/3 cup brown sugar½ cup almond flour½ cup pecans, chopped1 tsp salt4 T unsalted butter, melted2 T milk Cook Mode Prevent your screen from going dark Instructions Preheat oven to 350 degrees.Place peaches in an ovenproof 8×8 baking pan. Sprinkle brown sugar, tapioca flour, and cinnamon on peaches and stir gently to distribute and coat peaches.In a separate bowl, stir together oats, brown sugar, almond flour, pecans, and salt. Drizzle melted butter over top of mixture and stir. Drizzle milk over mixture and stir.Spoon topping over the peaches. Bake in preheated oven for 30 minutes, until peach filling is bubbly and topping is golden brown. Serve warm or cold, alone or with ice cream. Did you make this recipe? Share a photo and tag us — we can't wait to see what you've made!