Pamelia Chia's Blog
July 17, 2026
taro toast
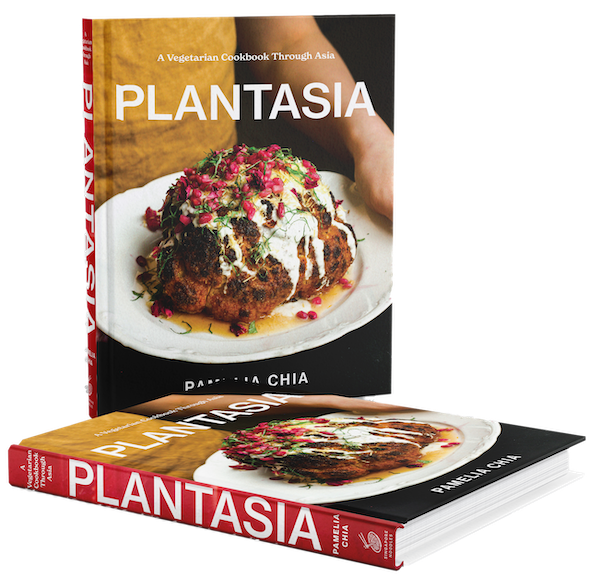
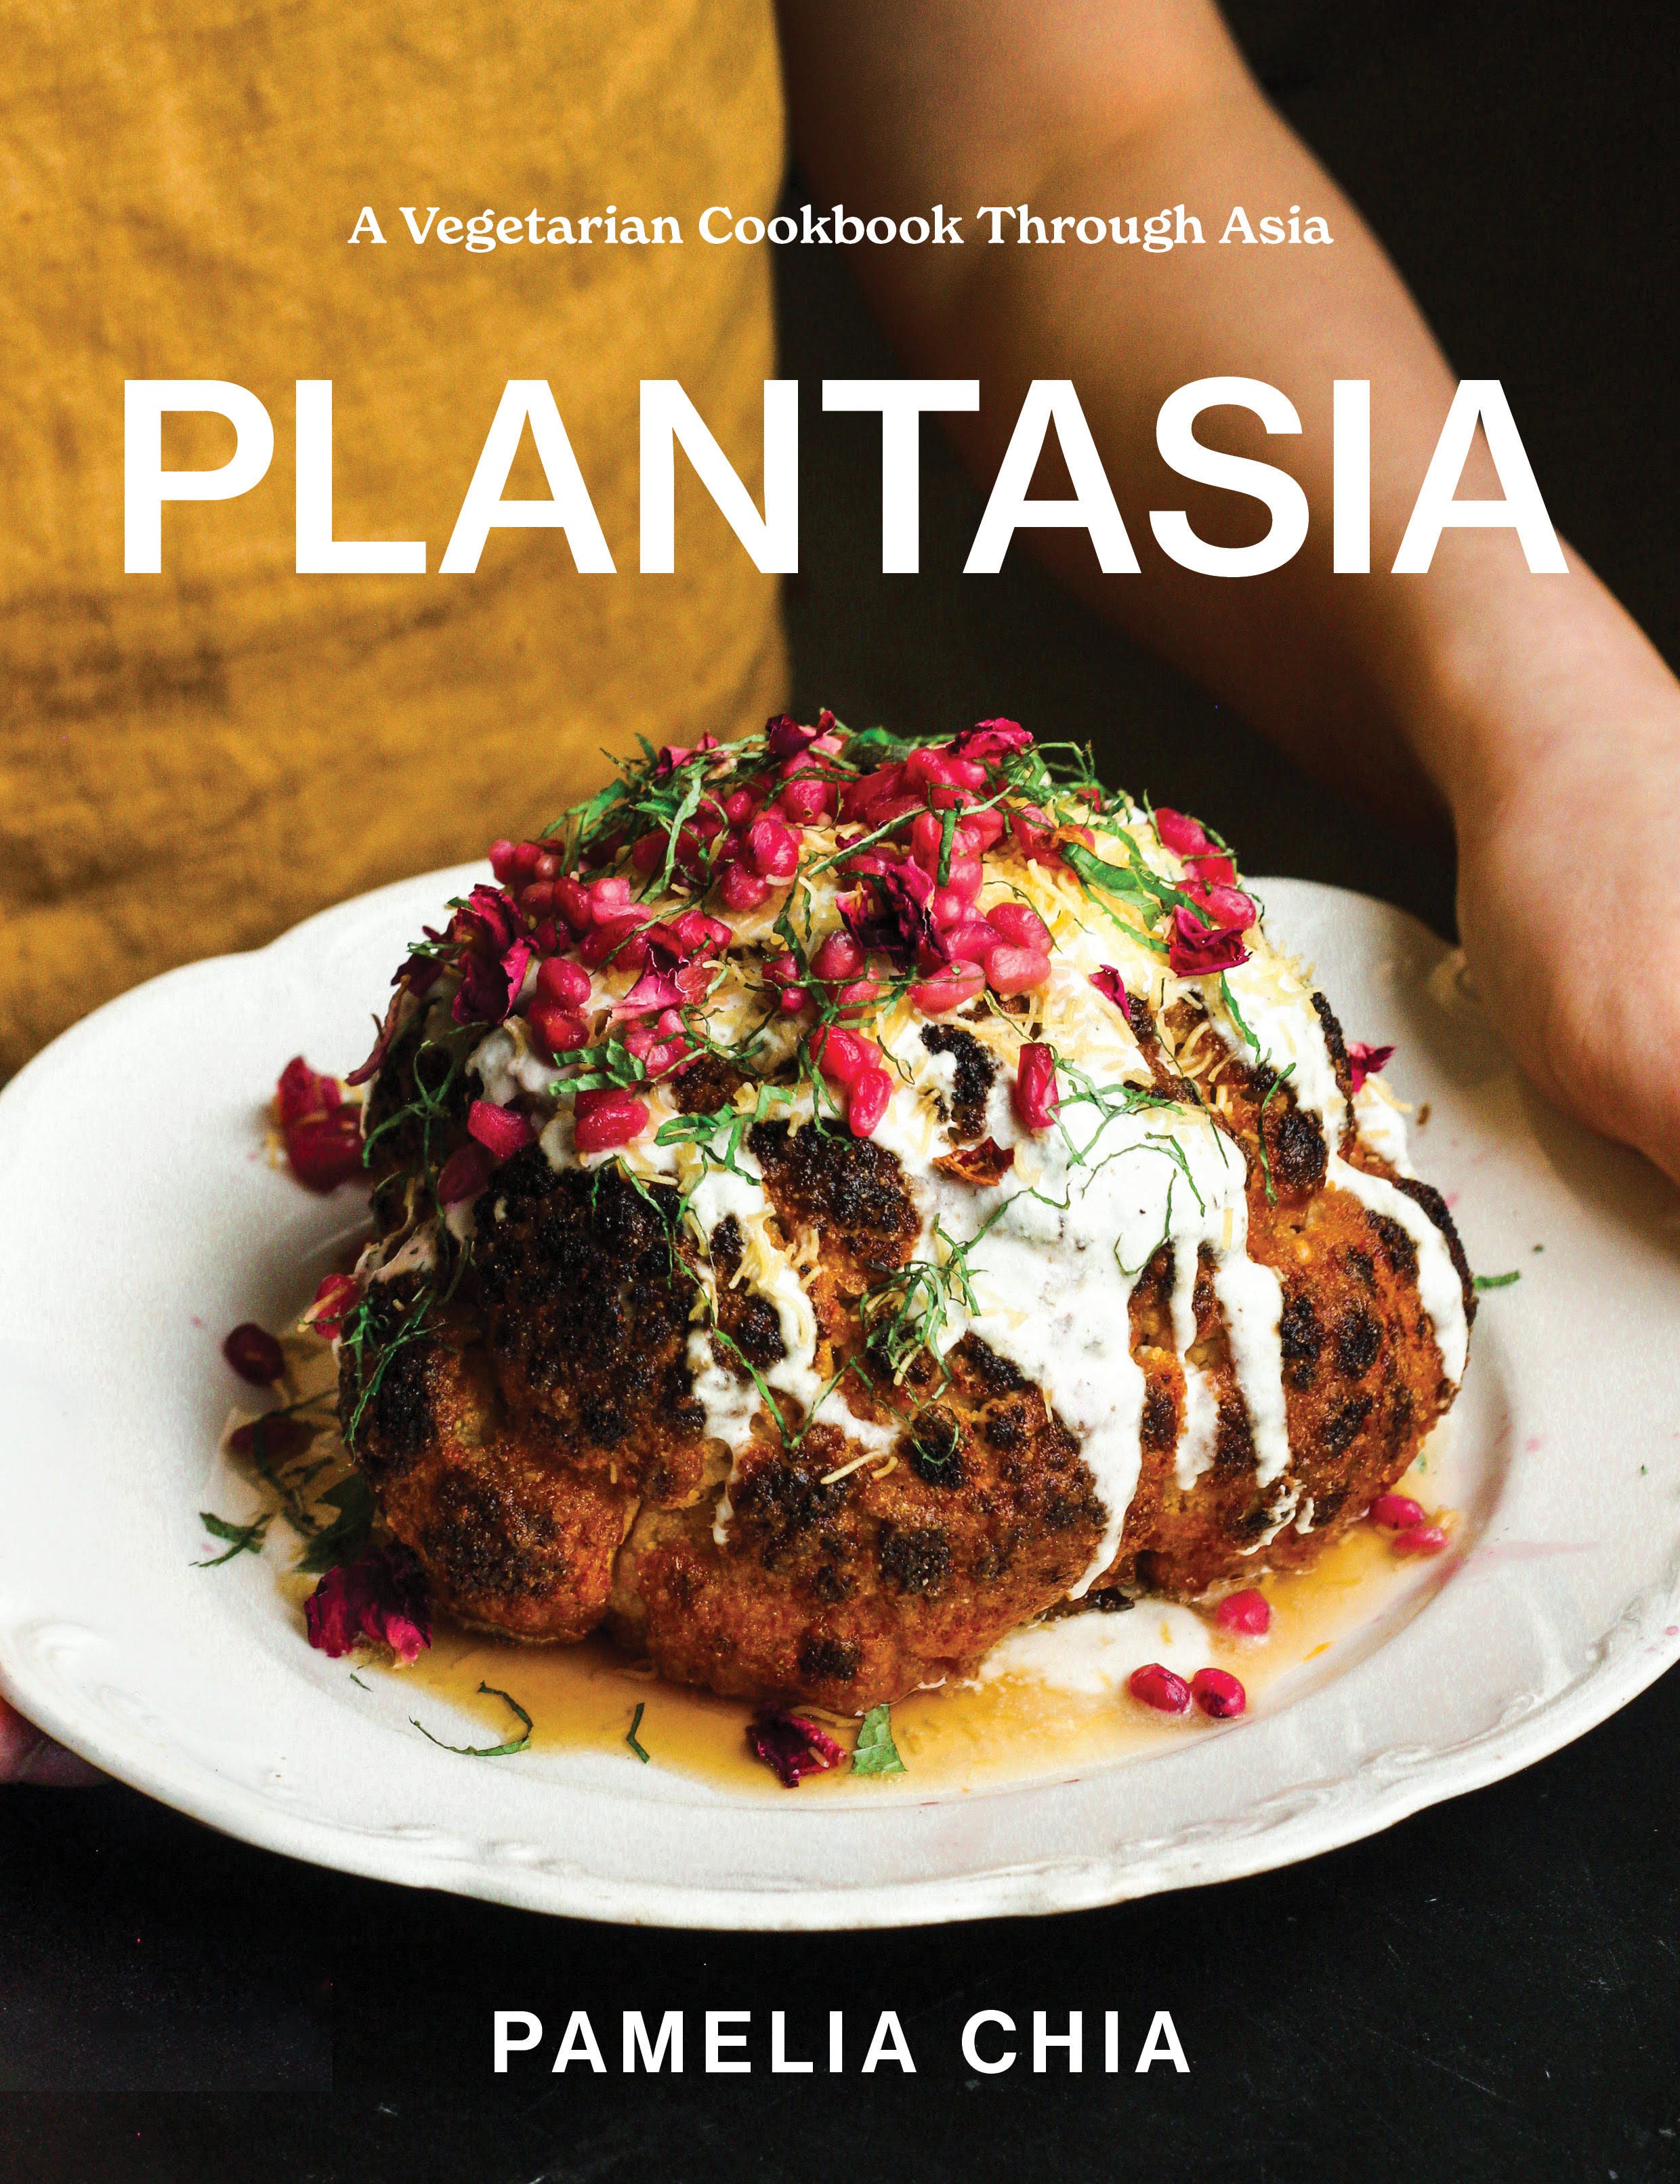
Welcome back to the Singapore Noodles newsletter! Before we get to this week’s recipe, a note on PlantAsia. If you’ve been enjoying these weekly deep dives into recipes, techniques, and food history, you’ll probably enjoy PlantAsia as well. The book follows the same curiosity — combining recipes with stories, ingredients, and the cultural traditions behind them. The original self-published edition is still available on my website. Once the remaining copies in Singapore are gone, I won’t be replenishing stock, and this edition will not be reprinted.
Thank you for reading, and now onto this week’s recipe.
TARO TOAST
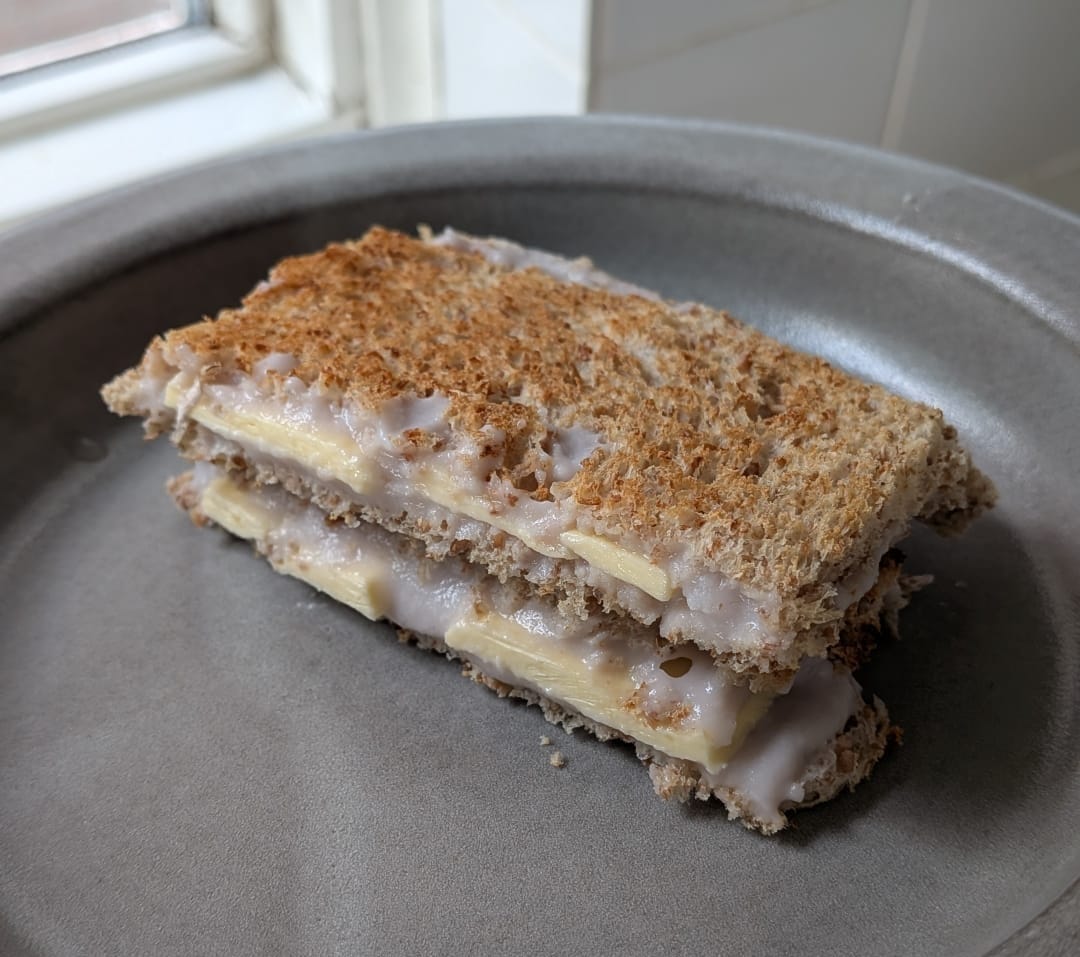
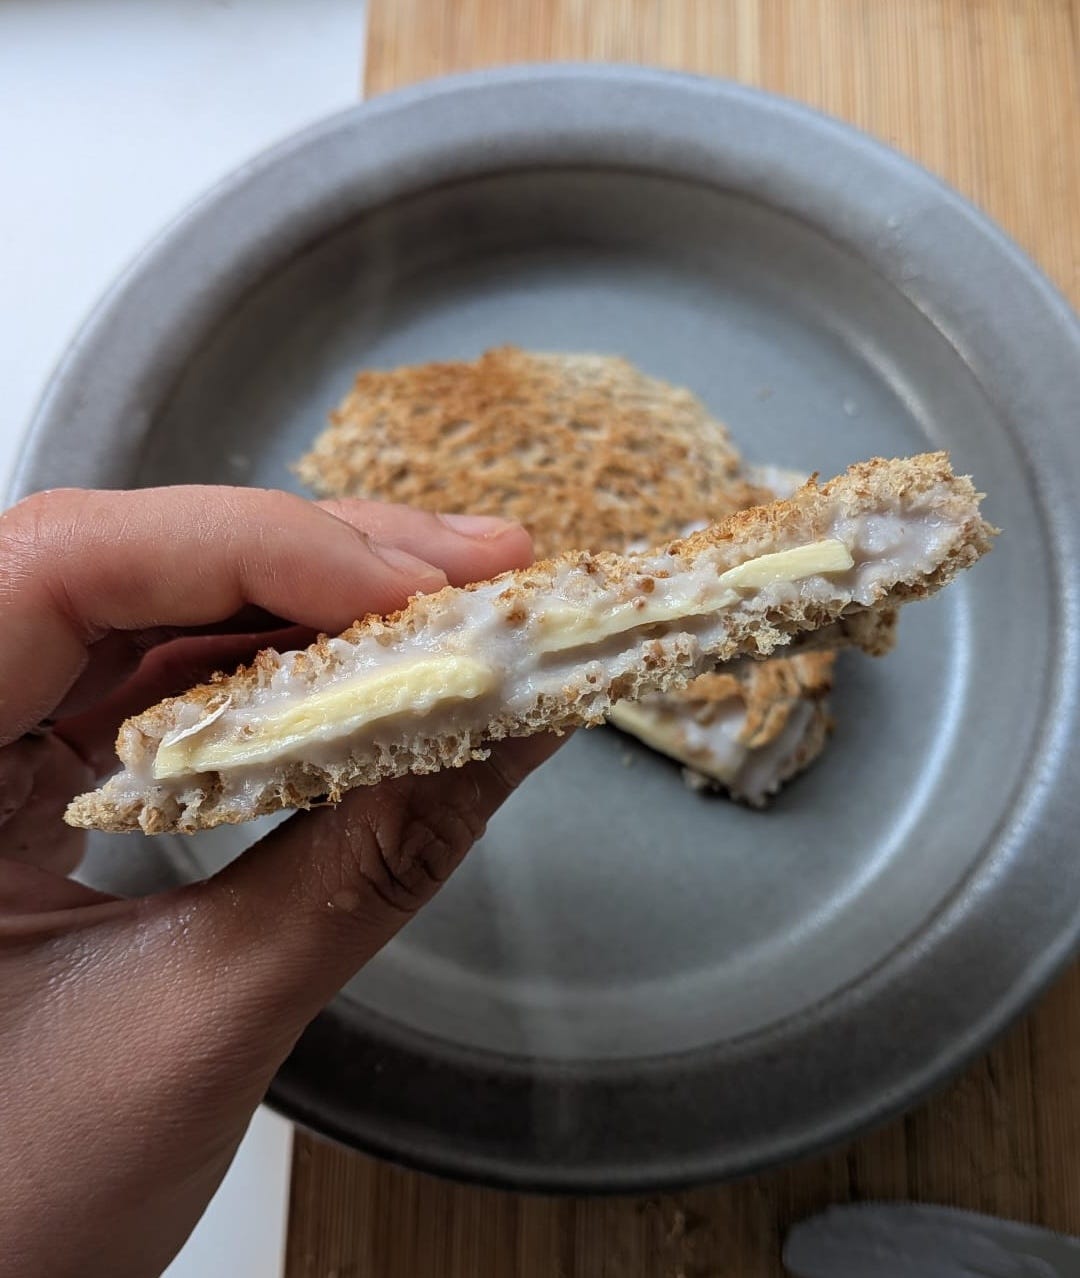
In Singapore, the national breakfast is kaya toast — toast filled with eggy, pandan-scented curd and shards of cold salted butter. The textures are lovely together: a single slice of bread toasted until it is so crunchy it is almost cracker-like, the oozing kaya, and smooth slabs of butter usually thick enough to leave teethmarks. Since moving abroad about 8 years ago, I’ve noticed a modern interpretation appearing in cafés which features a taro spread (orh nee 芋泥) instead.
Taro is an edible corm. It has ivory flesh with purple striations which, when steamed, has a powdery mouthfeel and sweet earthiness that works well in both savoury dishes and desserts. It is the star ingredient in orh nee, a traditional Teochew dessert where steamed taro is rendered into a luxuriously smooth paste with sugar and lard or shallot oil. While the traditional accompaniments for orh nee are pumpkin puree, fried shallots, and gingko nuts, some eateries also serve it with lashings of coconut milk.
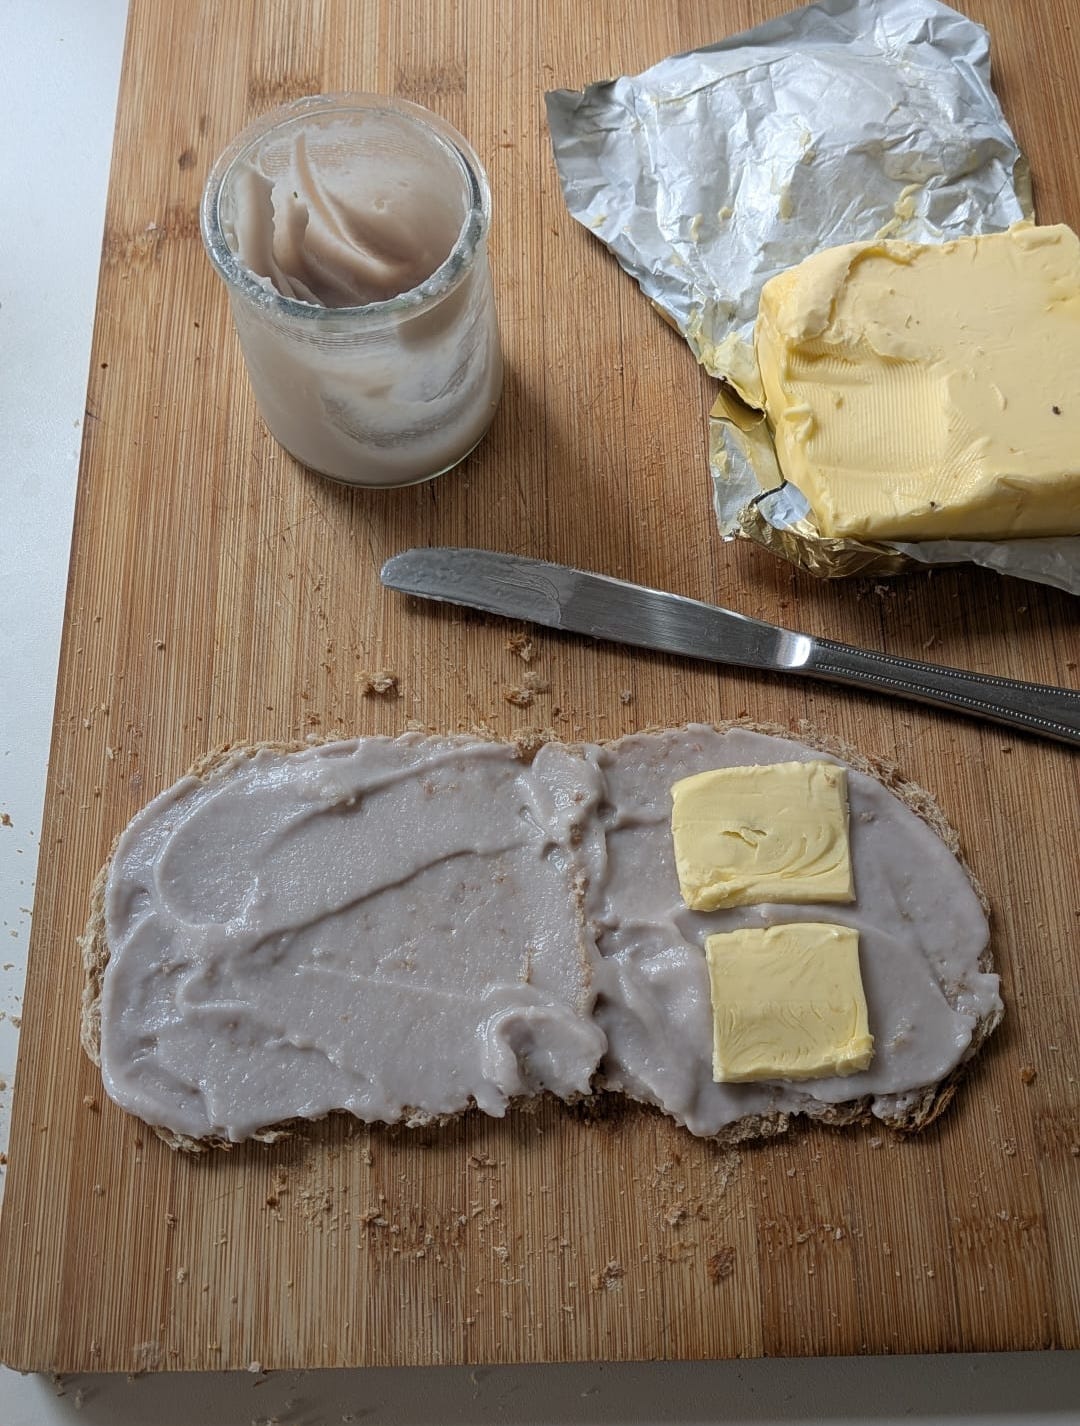
Making taro spread is easy. I sliced up the frozen taro I’d bought from the Asian supermarket and steamed it until fork tender. While the taro steamed, I infused some water with pandan leaves. I then blended the taro with the pandan-infused water, sugar, oil, and salt. While the quantity of sugar to add is up to you, for the purposes of taro toast, I recommend a higher amount to approximate the sweetness of kaya. I stir in coconut cream at the end; if you blend coconut cream, sometimes it can lead to an off-smell from the coconut heating up and breaking down.
All that’s left to do is to simmer the mixture until it reaches your desired consistency. For maximum ooziness, I’ve kept it quite runny — just until you can see the bottom of the pot as you stir. Refrigerate the spread until it is thoroughly chilled.
For the taro toast, any sandwich bread will do — white or brown both work. The key is to toast it really well and cut off the crusts. Slice it in half with a serrated knife and slather the taro spread generously on both sides. Top with as much butter as you dare. It is important that the butter is good quality (I like Kerrygold). Close the sandwich and slice it in half to expose the oozing cross-section and enjoy.
Taro toast
Makes about 1/2 jam jar’s worth


July 3, 2026
scallion pancakes 葱油饼
Welcome back to the Singapore Noodles newsletter! Before we get to this week’s recipe, a note on PlantAsia. If you’ve been enjoying these weekly deep dives into recipes, techniques, and food history, you’ll probably enjoy PlantAsia as well. The book follows the same curiosity — combining recipes with stories, ingredients, and the cultural traditions behind them. The original self-published edition is still available on my website. Once the remaining copies in Singapore are gone, I won’t be replenishing stock, and this edition will not be reprinted.
Thank you for reading, and now onto this week’s recipe.
SCALLION PANCAKES 葱油饼
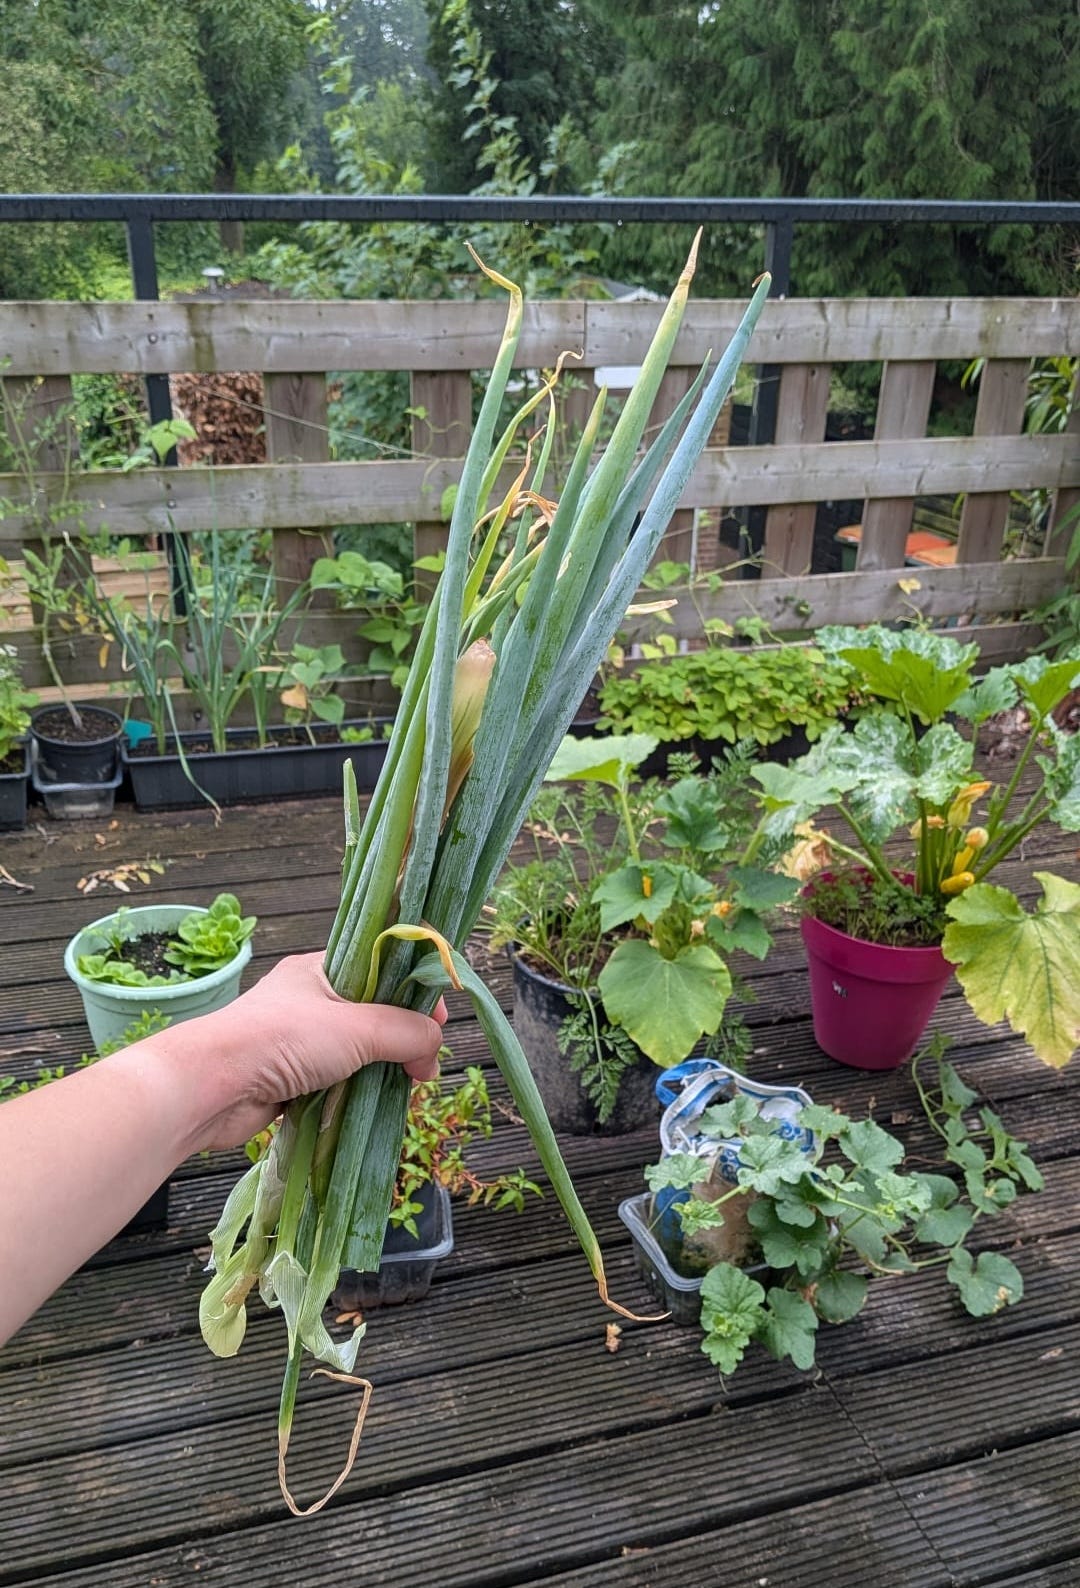
The pleasant weather of late has meant that our garden is now in full bloom. Our spring onions, in particular, are thriving, so Wex proposed some scallion pancakes. These are not true pancakes in the Western sense — they are studded with sliced spring onions, and come closer to crisp flatbreads with tissue-thin, tender layers within.
Like other food items that involve simple ingredient lists and cooking techniques, scallion pancakes go so far back in time that it is difficult to pinpoint their origin. That said, Chinese Menu: The History, Myths, and Legends Behind Your Favorite Foods by Grace Lin suggests a connection to Shanghai. As a trading port with a large population of South Asian descent, the flaky, layered scallion pancake might have emerged here, inspired by the paratha that the Indian immigrants were accustomed to eating.
Unlike paratha, scallion pancake traditionally relies on a hot water dough. The goal is to achieve a dough that is easy to roll out, so that you get lots of thin, tender layers within each pancake. Adding boiling water to flour limits the formation of gluten, which is what causes toughness and elasticity.
Another way to reduce gluten presence in the dough is to use flour of a lower protein content. In fact, many recipes for scallion pancake online call for a mix of cake flour and plain flour. Unfortunately, cake flour isn’t at all common here in the Netherlands, so I replaced part of the flour mix with cornstarch, which contains no protein.
Once the dough is made, it has to rest overnight in the refrigerator so that the gluten has a chance to relax. Given the long rest in the refrigerator, brushing the surface with oil is key to prevent the surface of the dough from drying out.
Scallion pancakes are a sort of laminated pastry — the dough is rolled out into a thin sheet, then fat and spring onion is spread all over, and the sheet is then rolled up and coiled to create many thin layers. I’ve seen two approaches: the first distributes oil and fresh spring onion between the layers, while the other uses an “oil roux” (油酥). At its core, the oil roux is flour scalded with hot oil, resulting in a thin, fragrant paste that can be spread over the dough. For fragrance, the spring onion can be added to the mixture to be scalded as well.
I was curious about the differences between the two approaches, so I prepared two pancakes using the same dough — one layered with oil and fresh spring onion, and the other with the spring onion-infused oil roux.
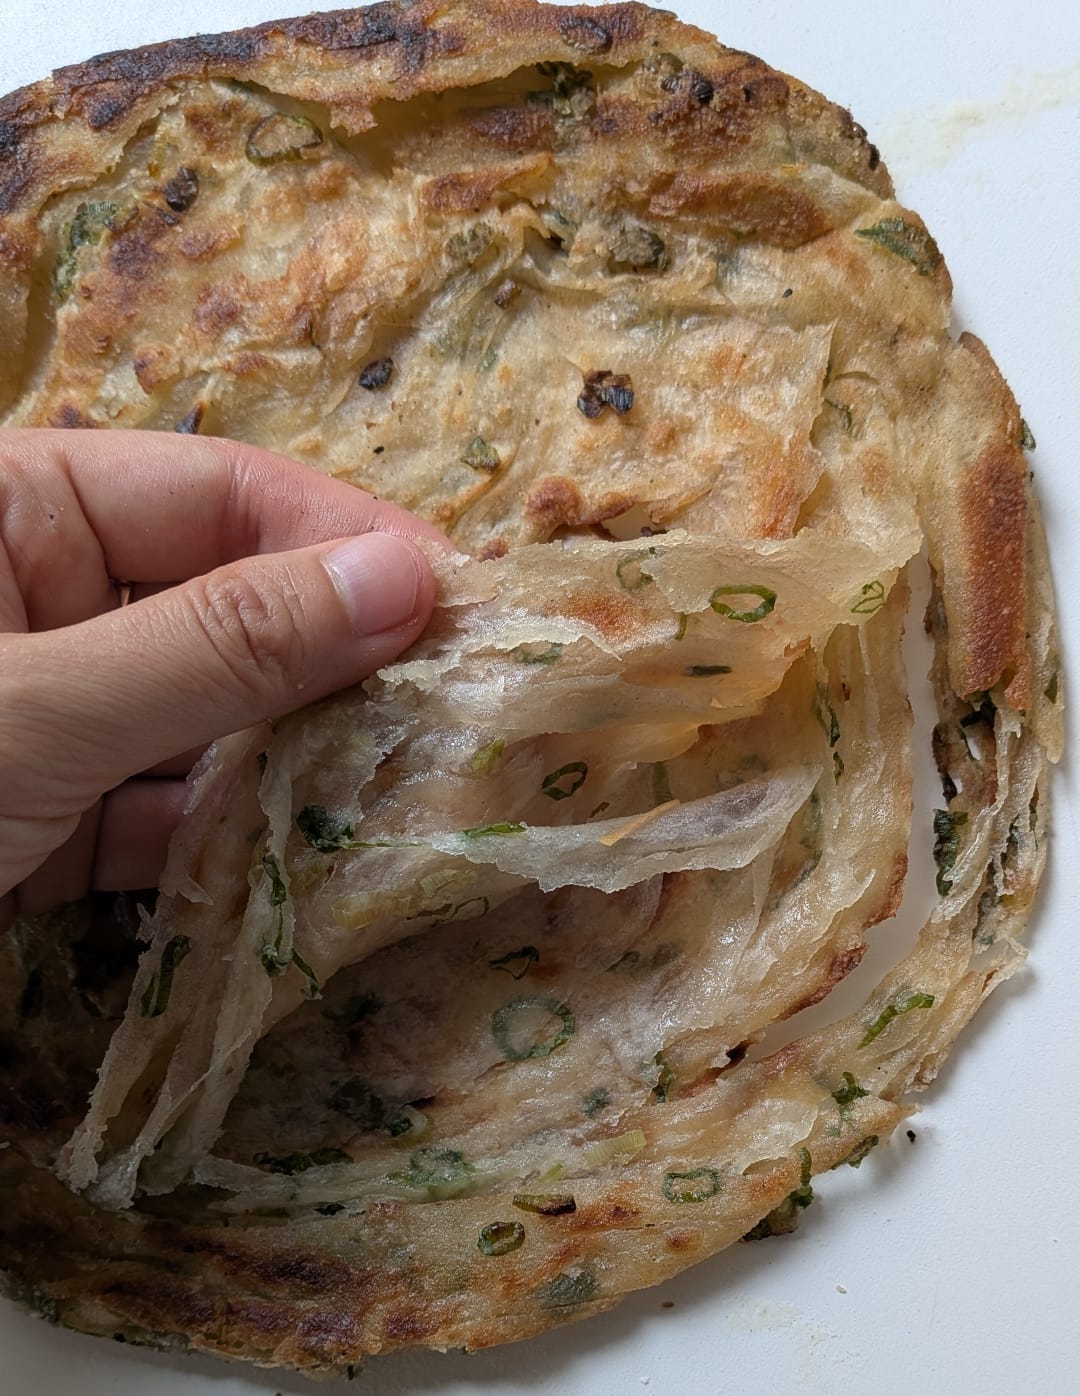
Once fried, the results were astounding. The pancake with fresh spring onions didn’t roll out into as neat a circle compared to the pancake with the oil roux, and the flavour of spring onion was greener and more pungent — which could be a good thing, depending on your personal preference. That said, the layers stuck together rather than being separated, so the overall texture was tougher and gummier.
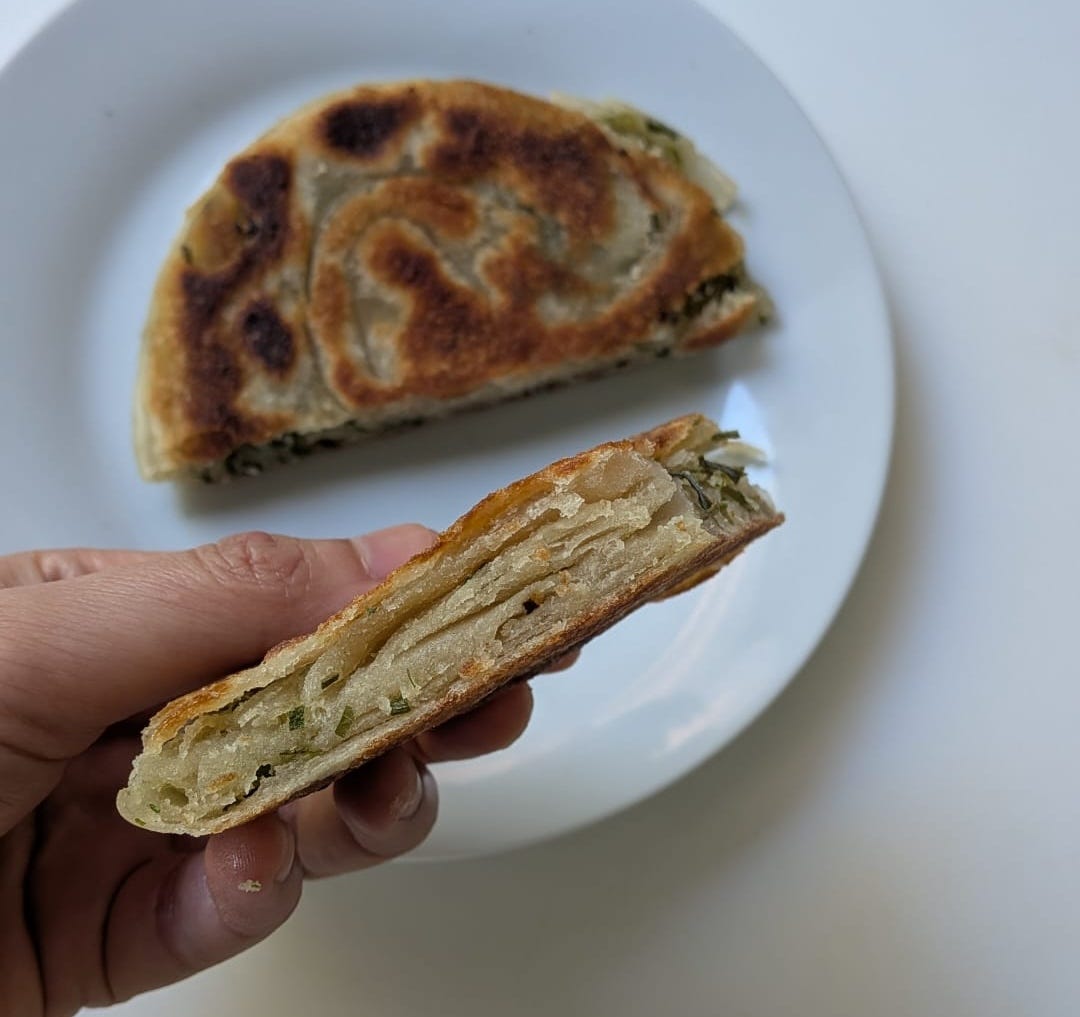
The pancake with the oil roux really surprised me — the presence of flour allowed the layers to be clearly defined and the the pancake was super crispy and pastry-like. That said, the spring onion flavour was a little more subtle. This was an easy fix: I added some chopped fresh spring onion to the wilted spring onion and oil roux mixture for a stronger fragrance without the spring onion getting in the way of rolling the dough out.
Scallion pancakes vary widely in thickness, depending on the variant (thicker pancakes offer a chewier, more substantial bite). I experimented with two different thicknesses: thin (with the pancake measuring approximately 24cm across), and thick (13cm across). While thin pancakes could simply be fried uncovered on both sides until they turned brown and crisp, the thicker ones had to be cooked covered and over low heat, so that they could cook through thoroughly. For the latter, it was crucial for the oil roux to be spread thinly to avoid a sandy mouthfeel.
In the end, my preference is for the thinner pancakes. Once you have them rolled out between parchment sheets, you could freeze them if not enjoying immediately. Simply pop them into a pan with a bit of oil, over low heat, without defrosting.
Scallion pancakes 葱油饼
Makes 6 pancakes | Vegan
June 27, 2026
tempura soba
Before I get to this week’s recipe, I want to share an update on my second cookbook, PlantAsia: A Vegetarian Cookbook Through Asia. I published PlantAsia in 2023 because I believe that part of eating sustainably is reducing our overconsumption of meat. As someone who does eat meat, I wanted to explore the ways in which Asian cuisines make vegetables as delicious and satisfying.
What began as a self-published passion project has since found readers around the world, and last year I signed with a publisher to bring a new global edition to bookstores internationally.
It’s been incredibly rewarding to see the book take on a new life. But it also means that the original edition — the one I independently created, edited, and published — is approaching its final chapter. There are now just 175 copies remaining in Singapore, and once these are gone, I will not be reprinting this edition.
If you’ve been meaning to add PlantAsia to your bookshelf, or if you’d like to own the original edition that started this journey, order it while stocks last (free shipping for Singaporean addresses).
Whether you bought the book, cooked from the ebook, or have simply followed along on this journey, thank you. Your support has made it possible for this self-published cookbook to grow into something bigger than I’d imagined.
TEMPURA SOBA

We’re right smack in the middle of a heatwave right now. You’d think that as people who grew up in Singapore, we would be adjusting better to this sudden spurt of heat but we’re not! For one, air-conditioning in homes and public spaces are the norm; and two, after having living in the Netherlands for the past three years, our bodies are now slightly more adapted to the cold. In the absence of an air-conditioning unit at home, the way we’ve been coping is through chilled beverages and meals.
I am a huge fan of cold / cool noodles, such as this chicken rice-inspired glass noodles and cold noodles with peanut butter dressing. Recently, for dinner, we had tempura soba, which was not only a way to beat the heat, but also a way to clear my fridge of all the bits and bobs of vegetables I had.
Funnily enough, I couldn’t find tempura flour at the Asian supermarket or regular supermarket, so I made my own really quickly with pantry ingredients and it turned out well. The main thing to note is that the batter should be closer to the consistency of heavy cream than pancake batter, so that it fries up as a wispy coating than a thick shell. Deep-fried food might be the last thing on your mind in hot weather, but tempura is so light and delicate that it doesn’t weigh you down, and it’s absolutely delicious when dipped briefly in that iced sauce.

Tempura soba
Serves 2
For the soba and sauce:
200g mirin
120g soy sauce
1 teaspoon dashi powder
Squeeze of lemon or yuzu juice
400g cold water
2 bundles dried soba
For the tempura:
Oil, for deep-frying
125g plain flour
2 tablespoons cornstarch
1/2 teaspoon baking powder
1/2 teaspoon salt
240g sparkling water
1 egg yolk
A few shelled prawns, deveined (score the underside to prevent from curling up)
Assorted vegetables of your choice, such as a few pumpkin slices, shimeiji clusters, trimmed French beans, bite-size pieces of eggplant etc.
For serving:
Thinly sliced spring onion
A handful of ice cubes
Wasabi paste (optional)
Make the sauce: In a bowl, combine the mirin, soy sauce, dashi powder, lemon or yuzu juice, and cold water. Place in the refrigerator to chill.
Boil the soba: Fill a pot with salted water and bring it to the boil. Add the soba and cook for 2 minutes, or until al dente. Drain and rinse in cool running tapwater to get rid of excess starch. Drain very well and set aside.
Prepare the tempura: In a wide saucepan, heat the oil for deep-frying. In a bowl, whisk together the flour, cornstarch, baking powder, salt, sparkling water, and egg yolk to form a watery batter that still coats your finger when you dip it inside. When the oil is hot, dip the prawns in the batter, allowing excess to drip off, then add them to the pan. When golden and crispy, transfer the prawns to paper towels to drain. Repeat this with the vegetables.
To serve: Arrange the vegetables attractively on a sharing platter. Divide the soba between two serving bowls (if the soba sticks together, rinse and drain again). Top with the spring onion. Pour over the sauce and add the ice cubes. Serve with wasabi and the tempura on the side (they are delicious dipped into the sauce).
If you’re in the Netherlands...
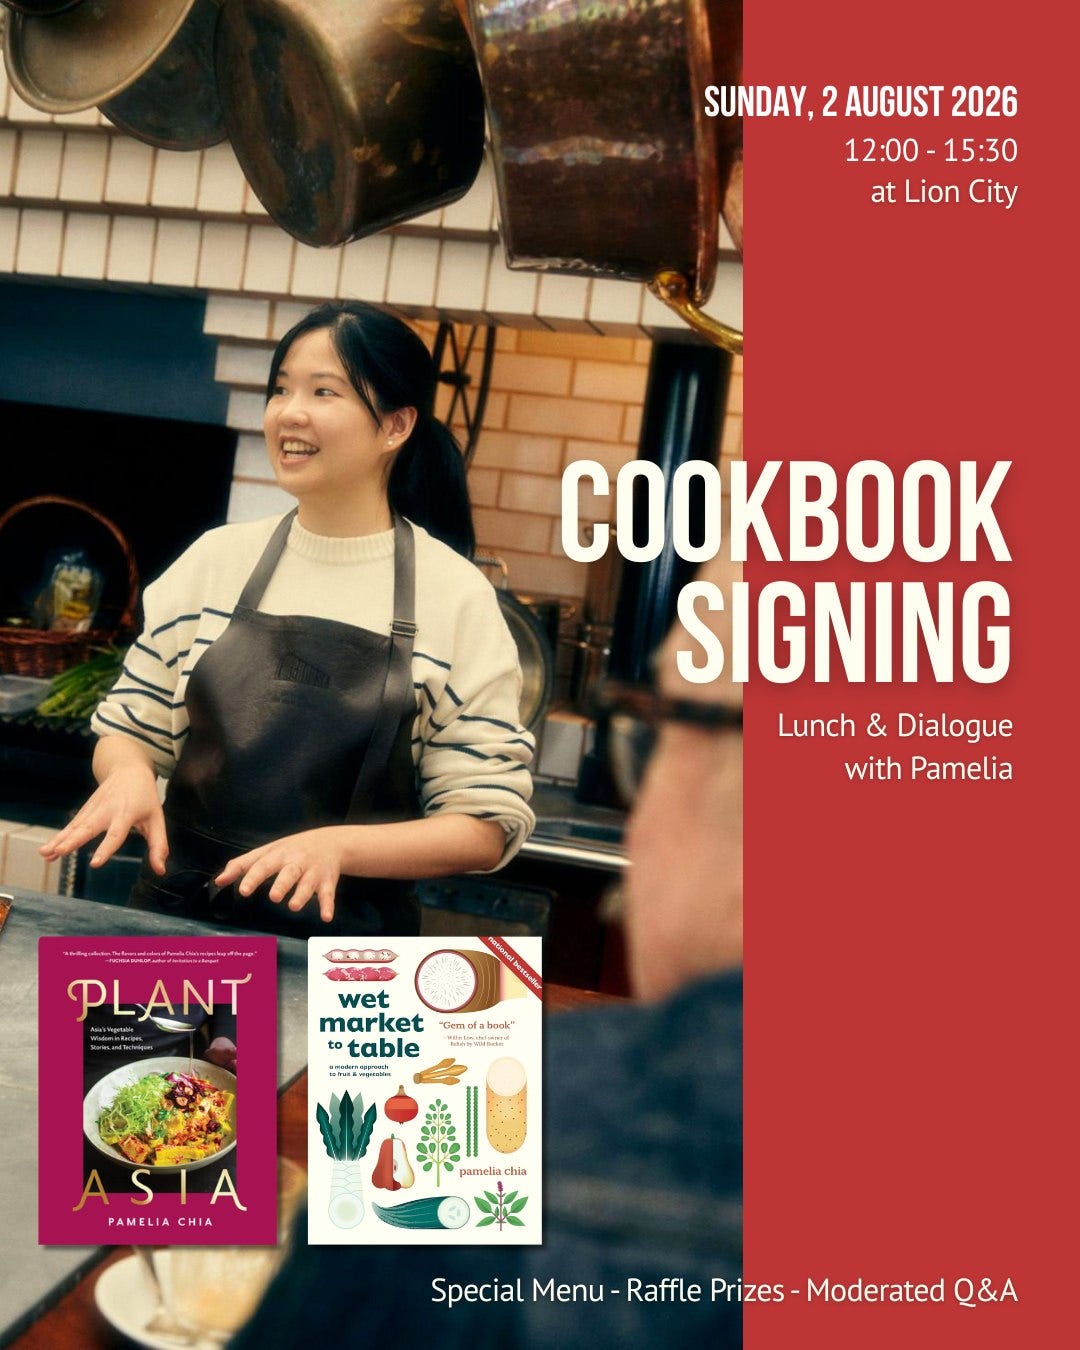
I’ll be signing books and speaking about food heritage at Lion City in Rotterdam on 2 August 2026 (12:00-15:30). The event is free to attend — to sign up, reserve your spot via the Lion City website. I’ll have copies of both my cookbooks (Wet Market to Table and PlantAsia) available, and you’re also very welcome to bring along your own copy for signing. See you there!
June 19, 2026
avocado tres leches cake
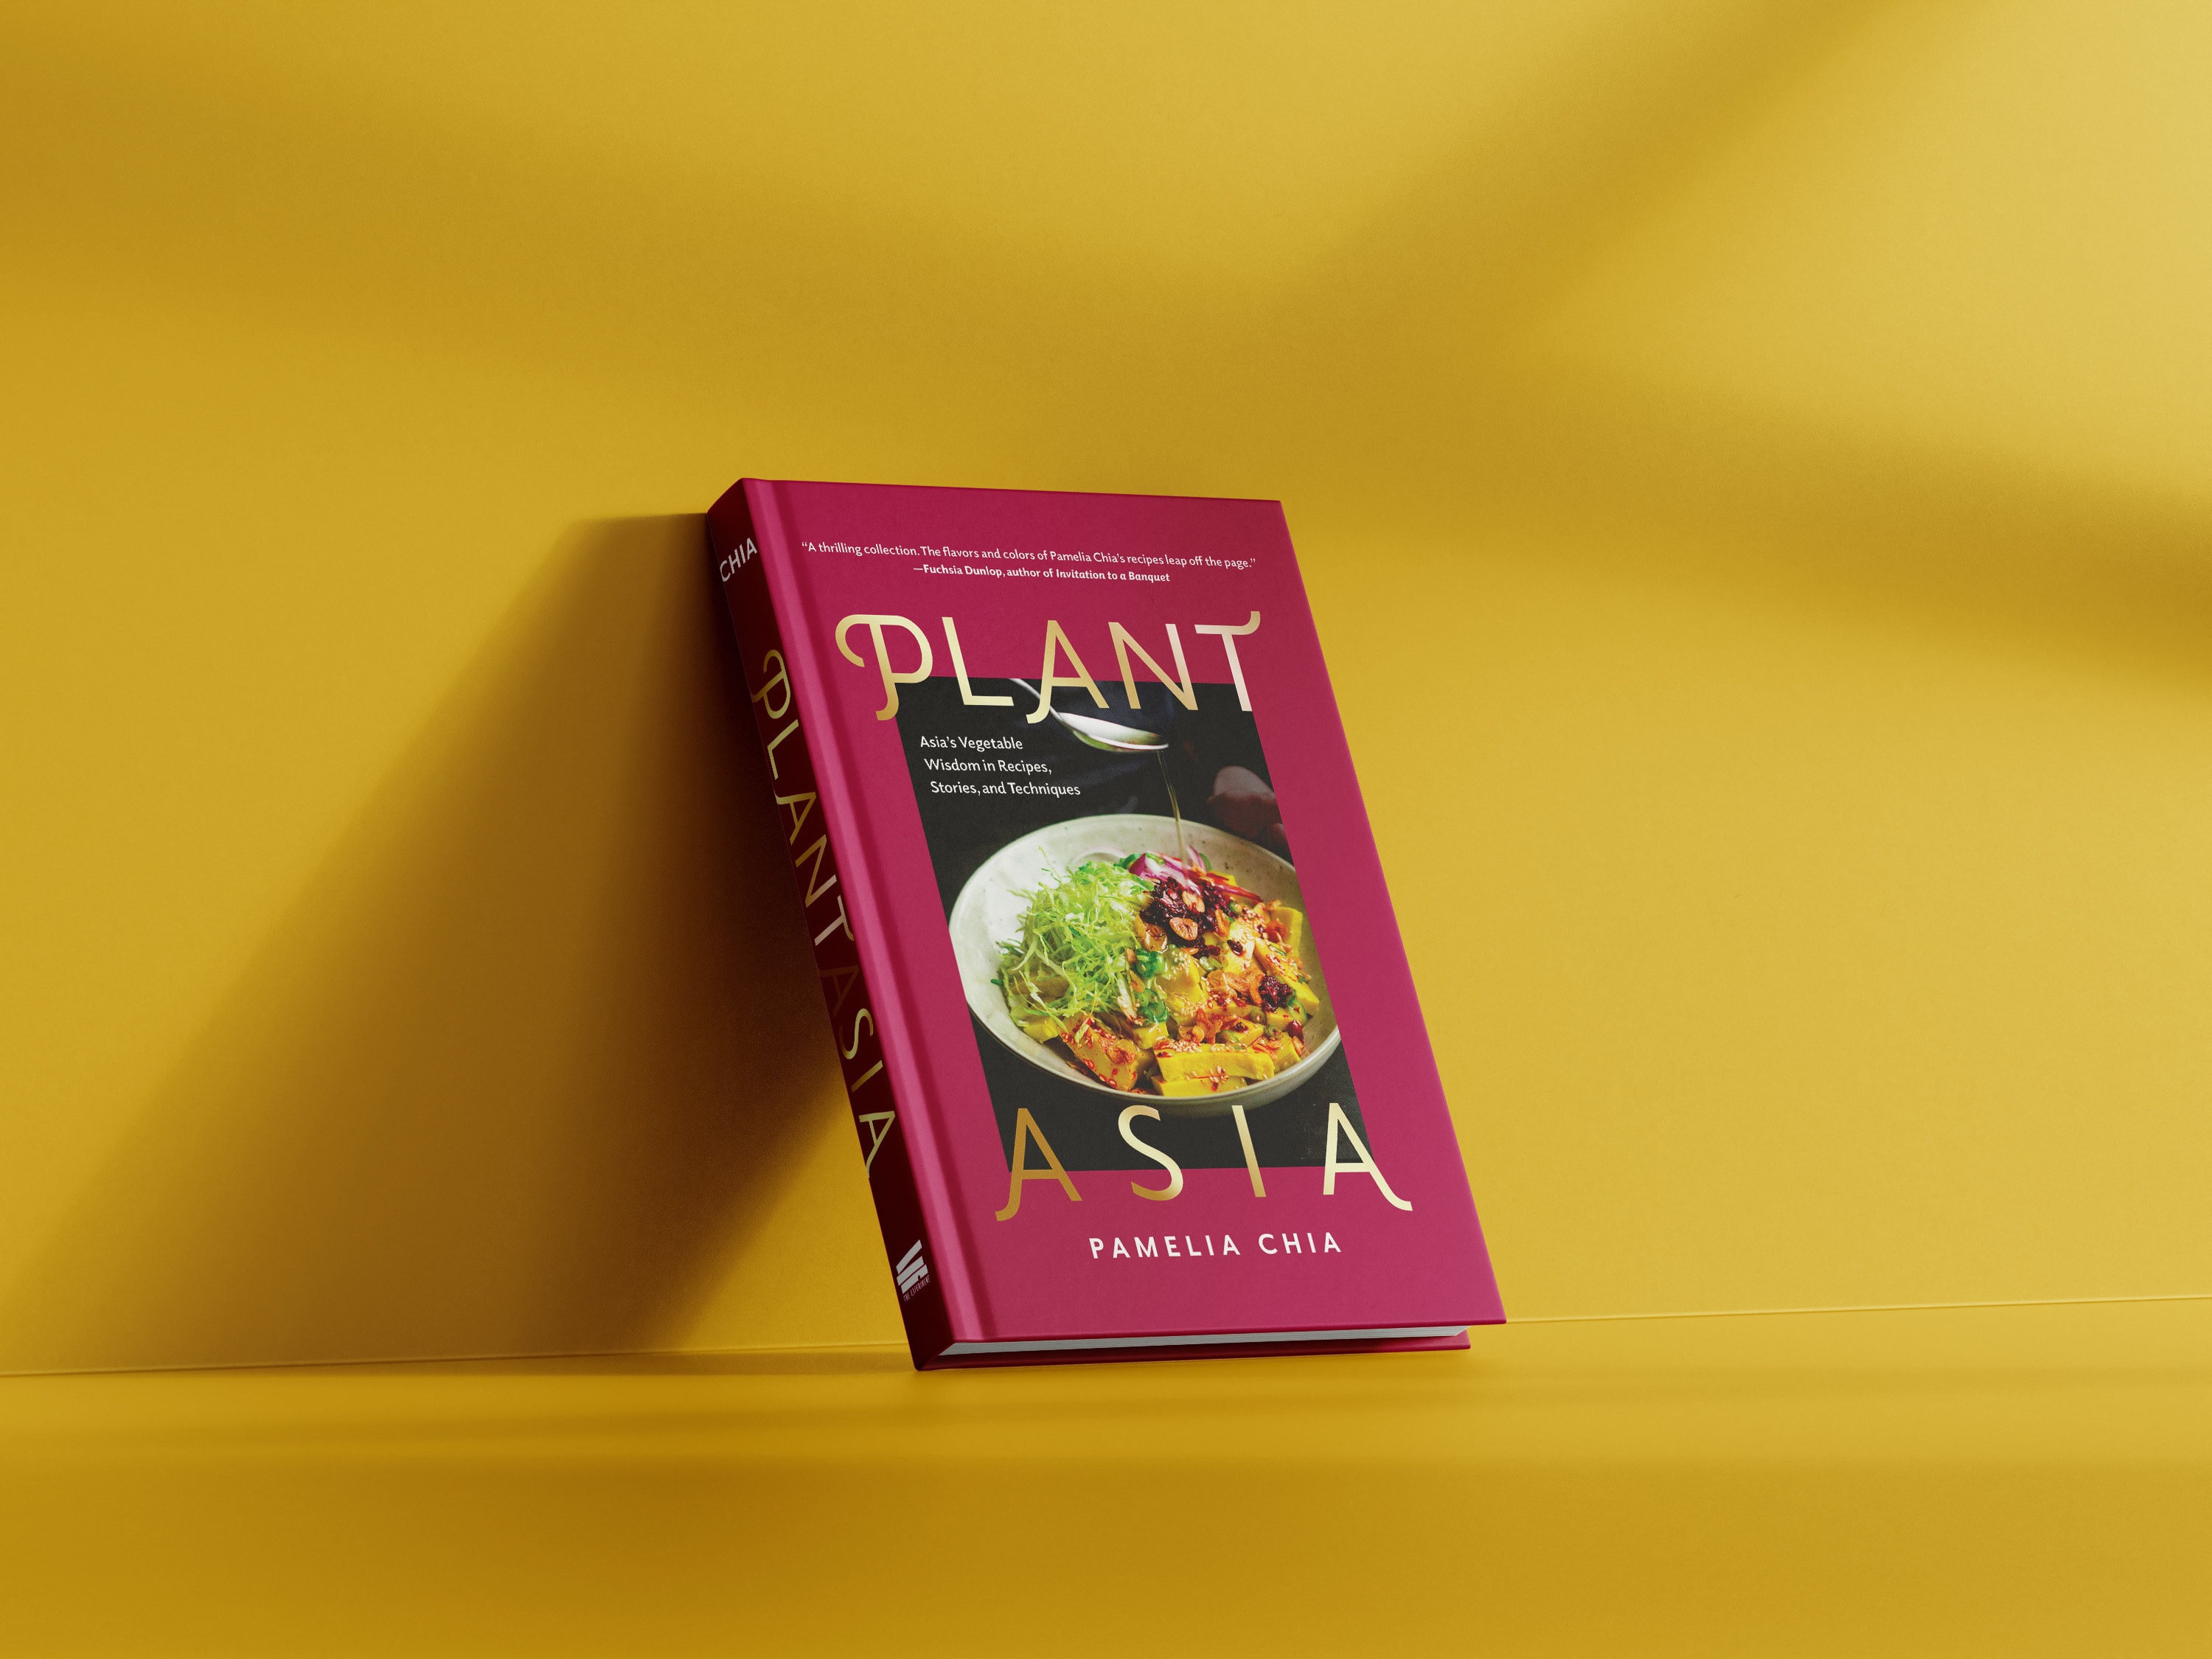
Welcome to Singapore Noodles, a newsletter where I share recipes from my kitchen in the Netherlands. Archived recipes and other content can be found via the index. My cookbooks, Wet Market to Table and PlantAsia: Asia’s Vegetable Wisdom in Recipes, Stories, and Techniques, are available for purchase. Thank you for being here, and enjoy this week’s post! ✨ — Pamelia
AVOCADO CAKE
I’ve said this before and I’ll say it again. I love tres leches cake. Let me count the ways. One, it is guaranteed to be moist because the cake is drenched with a combination of three milks (evaporated, condensed, and regular) and left to soak overnight for maximal absorption. Two, it keeps terrifically in the refrigerator, making it the perfect do-ahead dessert. Three, for something so lush, it is very light since the cake is a sponge — the perfect dessert for warm weather.
I’ve published recipes of several versions of tres leches cake now: a soursop and passionfruit version in my first cookbook, and more recently a pandan version sprinkled with inti (a rich, caramelised mixture of grated coconut cooked with palm sugar). I want to introduce my new favourite: the avocado tres leches cake. At the sound of avocado in a cake, some of you might screw your face in disgust because you are so familiar with avocado in a savoury context. I, however, grew up associating avocado more with sweet treats in Singapore.
Fruit juice stalls are ubiquitous in hawker centres, and while my go-to was the ABC (a blend of apple, beet, and carrot), very occasionally, I’d splurge and get the more expensive avocado milkshake. This is a tall iced goblet of avocado blended with evaporated milk and condensed milk, and it is a drink enjoyed not only in Singapore, but also its neighbouring countries such as Vietnam and Indonesia. It’s absolutely delicious, the slightly vegetal and buttery quality of avocado enhanced by the sweet dairy. Unlike most popular avocado desserts you might encounter today — such as avocado chocolate mousse — the avocado is not hidden, but brought to the fore.
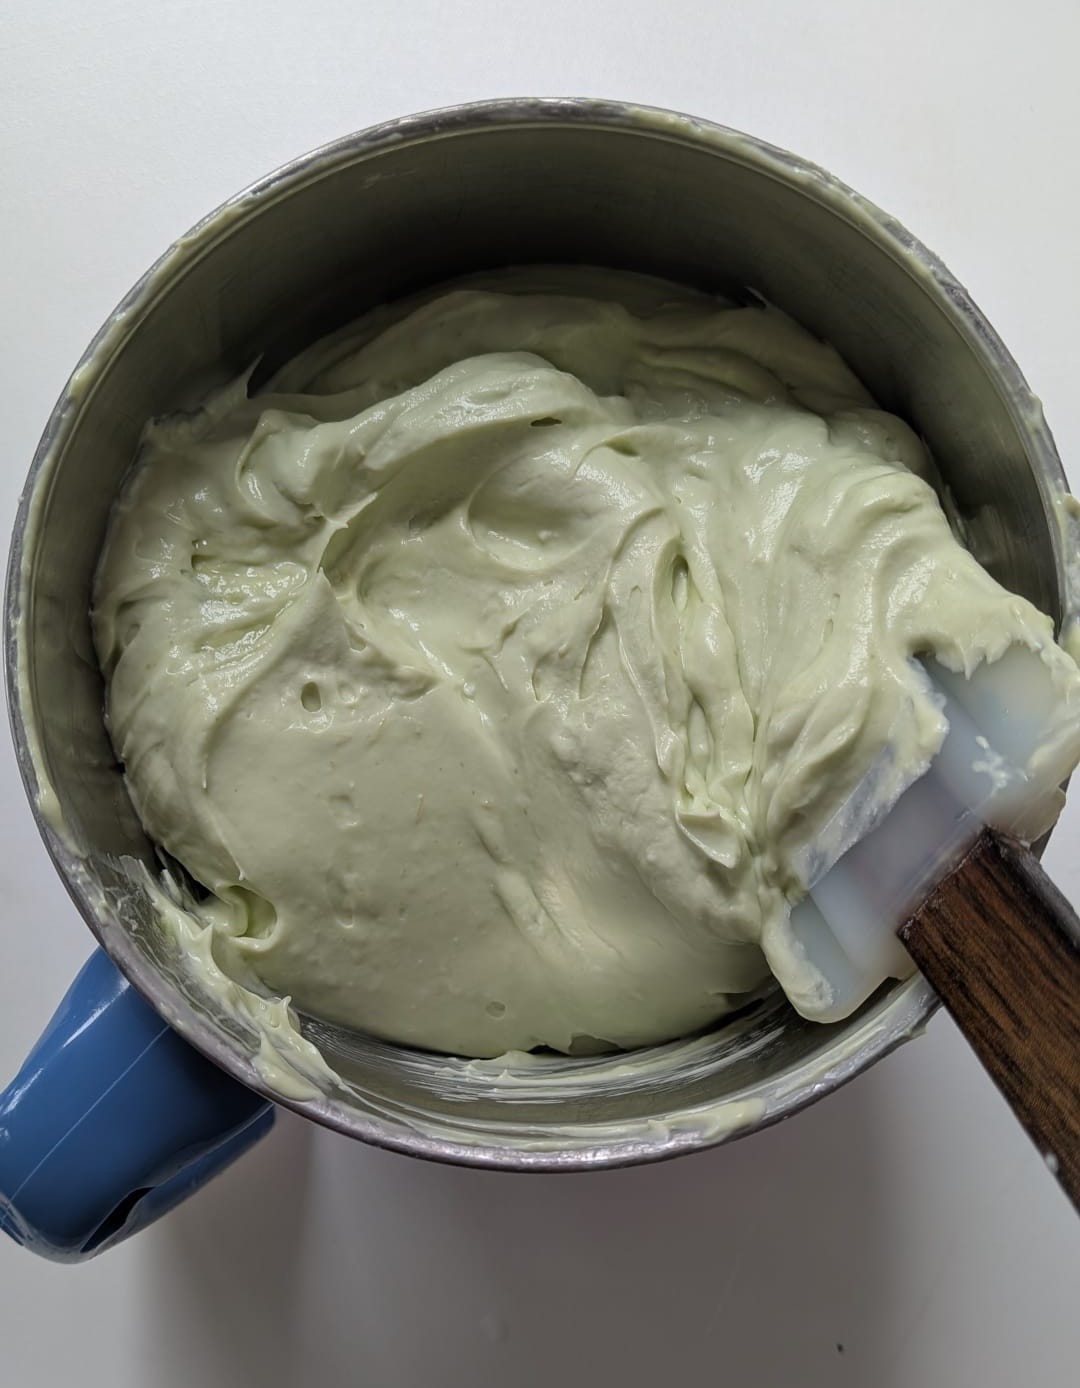
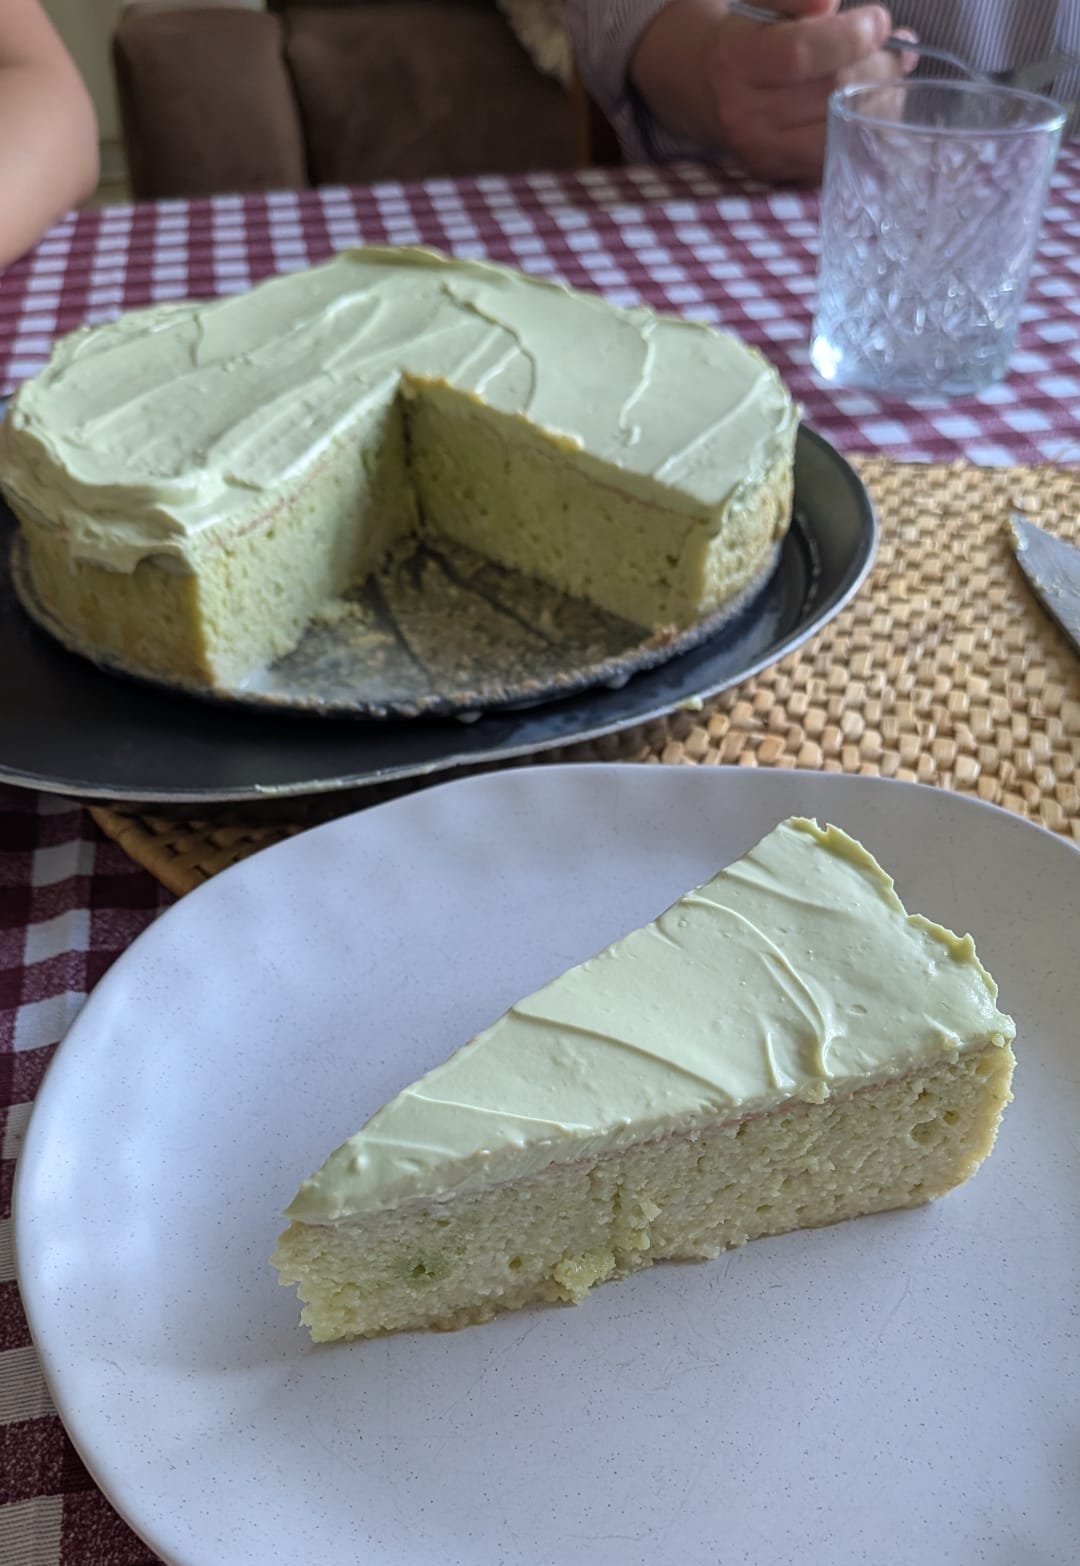
For the cake itself, I made the same sponge as the one in my pandan tres leches — you need the green sponge to convincingly sell this cake as an avocado cake. And besides, avocado goes beautifully with flavours of coconut and pandan. For the avocado cream that I used to frost the cake, I simply blitzed a perfectly ripe avocado with mascarpone and the barest touch of icing sugar. It frosted like a dream.
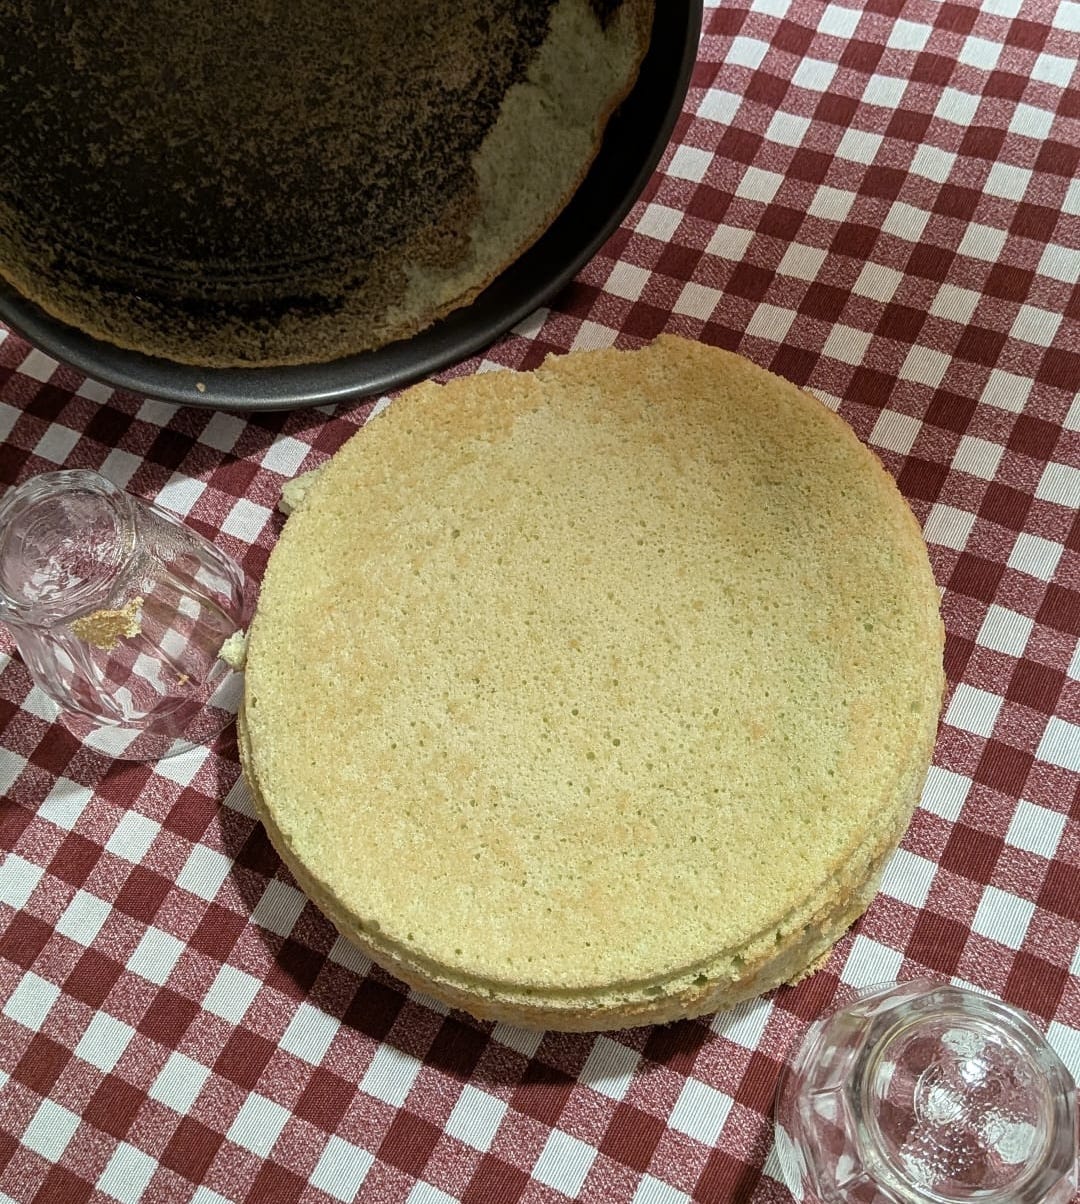
Not everything went to plan and the pan actually slid off the glasses it was resting on while cooling, so the cake had a huge dent. I was devastated but continued to soak and frost the cake as planned, and was pleased at how presentable it still managed to look: which is only testament to how forgiving of a cake tres leches is. When I took a bite, I was immediately transported back to those sweltering days in Singapore with a glass of avo milkshake in hand.
Our guests raved about the cake and I even got the following text the next day. There’s no higher compliment!


Avocado Tres Leches Cake
Makes a 22.5cm round cake
June 14, 2026
ichigo daifuku

Mochi is something that the students at my cooking classes get excited about. I don’t teach it at the moment, but I’ve had a few requests, which is surprising because mochi has a softly gelatinous and chewy texture that not everyone is a fan of. One of the most popular ways to enjoy it is as small sweet dumplings known as daifuku, where the dough is stretched around a filling of red bean paste, ice cream, cream, or fruit.
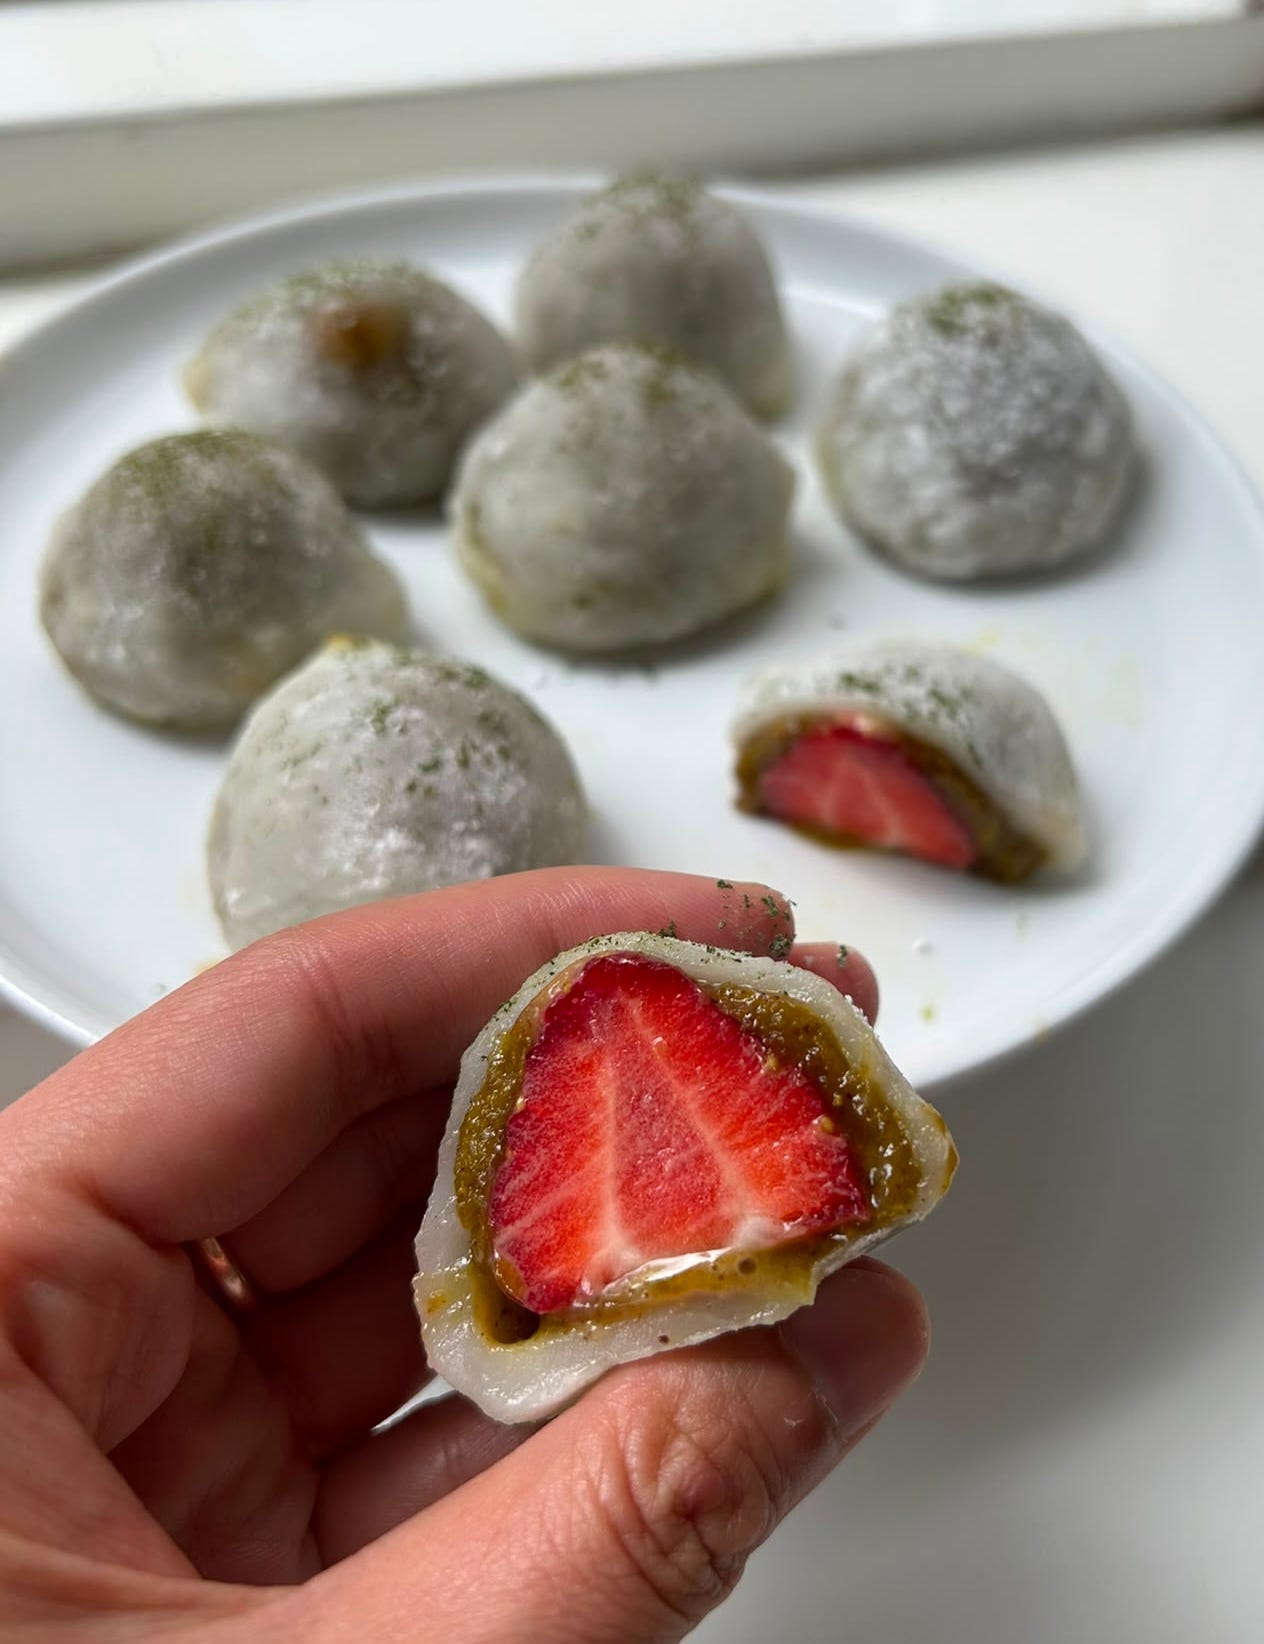
While Wex and I were in Germany camping last weekend, we spotted some beautiful strawberries and ended up splitting a box of eight punnets with friends. Because the strawberries were so ripe and perfumed, I thought that they would be perfect for ichigo daifuku, or strawberry and bean paste wrapped within a thin layer of mochi.
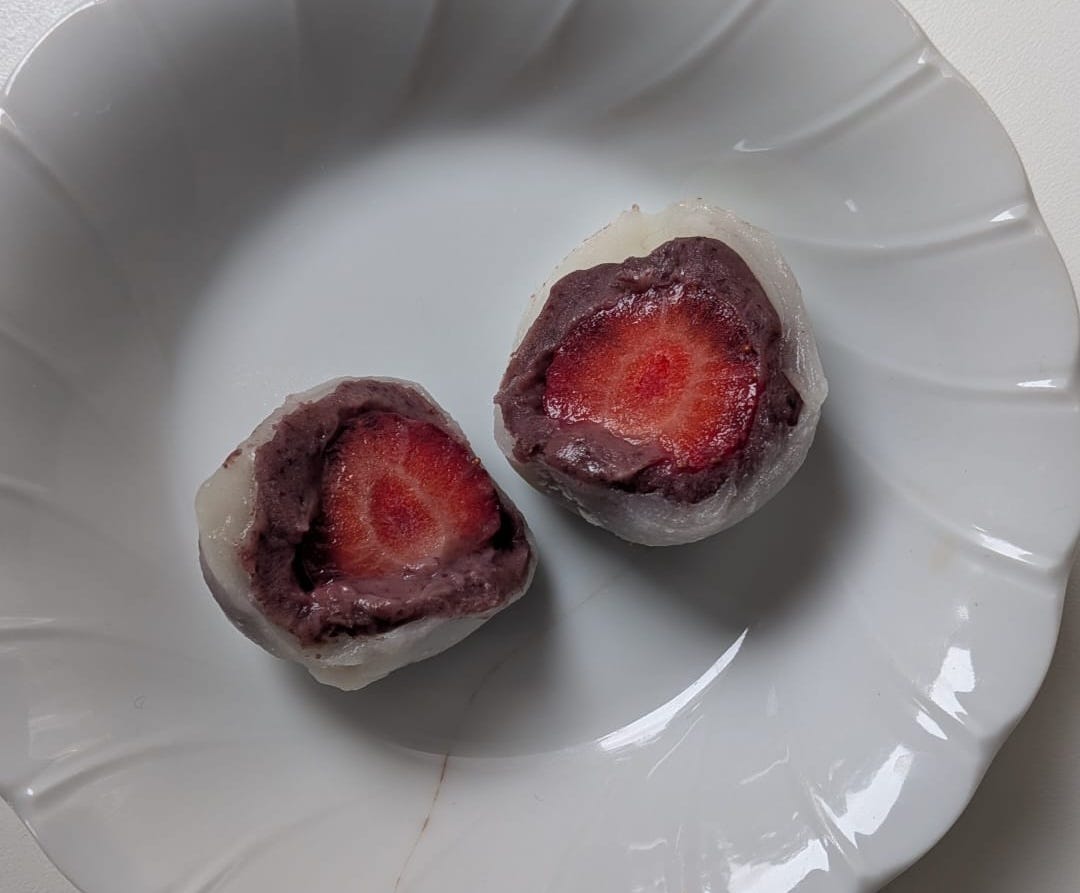
Ichigo daifuku is deceptively difficult to make. They look simple, but require attention to detail. With my first attempt, I didn’t pay attention to the orientation of the strawberries the mochi skin wasn’t evenly thick all around the filling, so the dumplings didn’t look very pretty when sliced. That said, I shared some with a friend who lives down the street, and she loved it. Her rave reviews convinced me that I was on the right track, and that it was worth making a second batch.

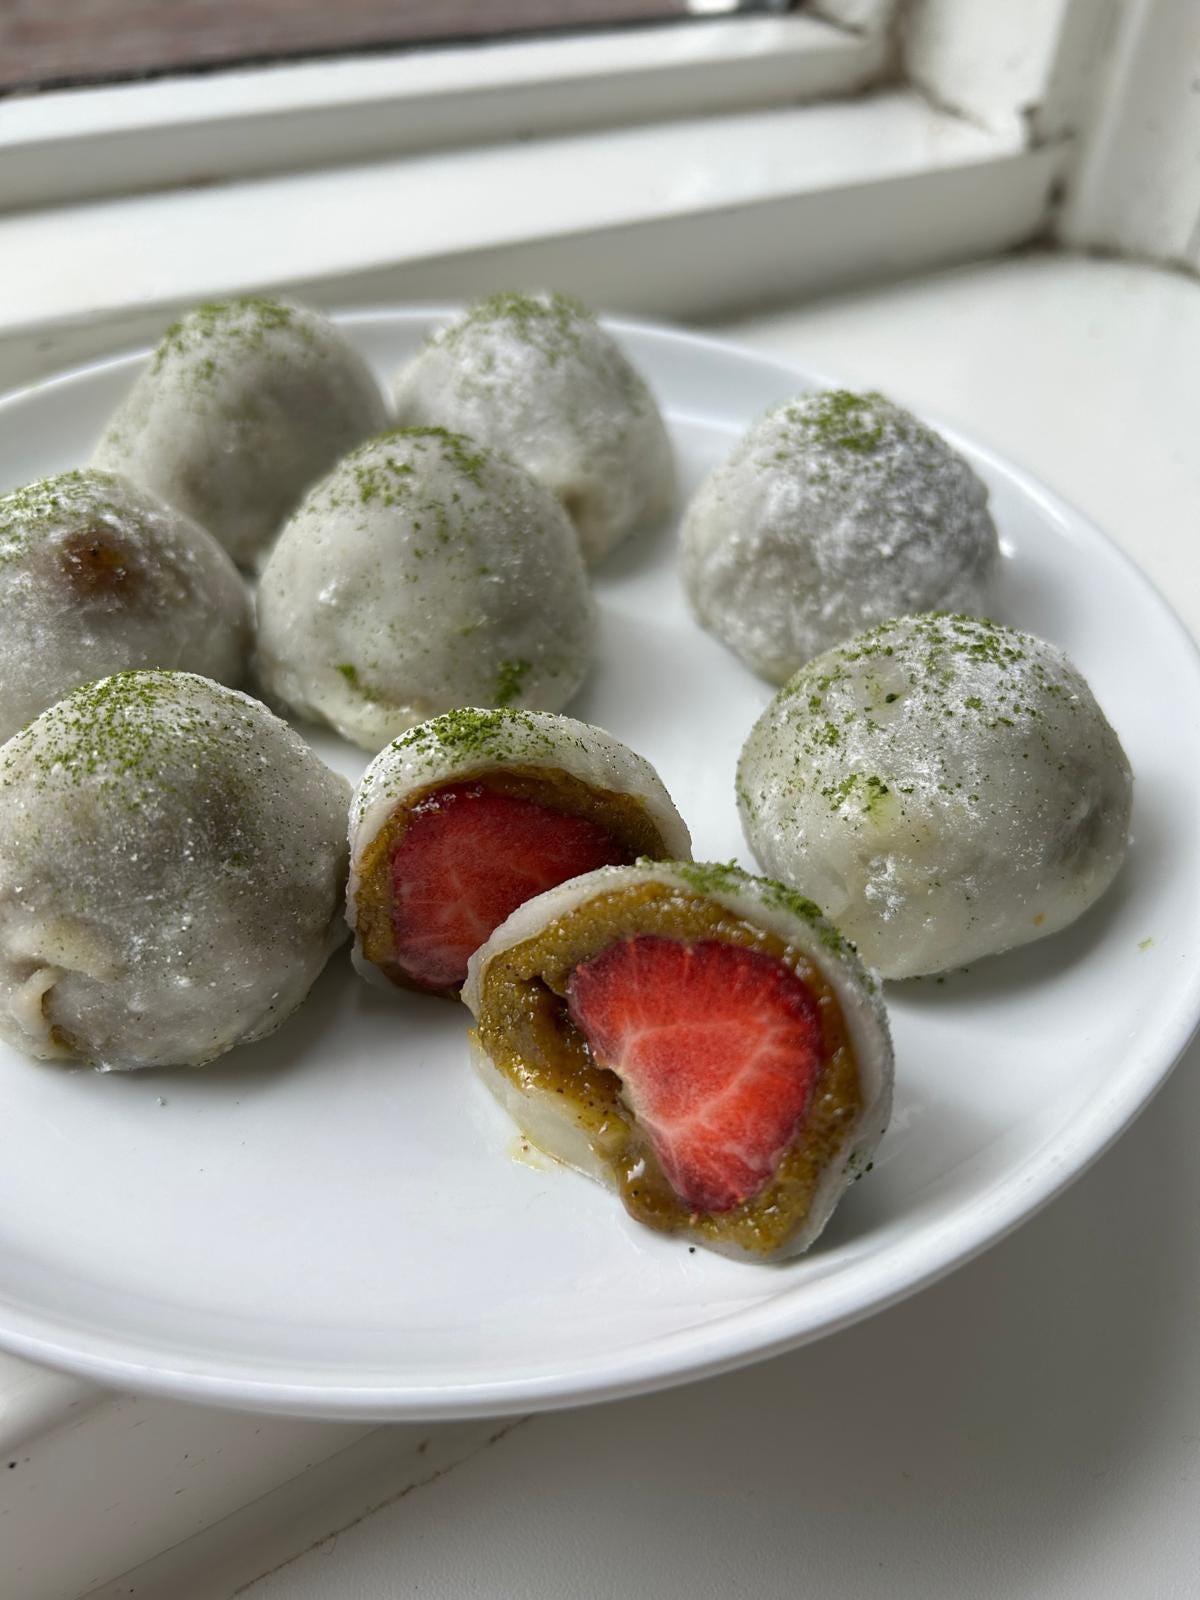
For my second attempt, in addition to refining the technique, I chose to go with a pistachio filling and finished the mochi with a light dusting of matcha. I was pleasantly surprised at how luscious it tasted — the pistachio filling oozed beautifully and complemented the juiciness of the strawberry perfectly.
THE BEAN / PISTACHIO FILLINGS
Ichigo daifuku is traditionally made with adzuki bean paste. Unfortunately, the bean paste from my local Asian supermarket is rather disappointing. The alternative was to make my own from scratch but frankly, I didn’t feel like cycling across town to buy dried adzuki beans, so I turned to an ingredient I always have in my pantry: canned red kidney beans.
I’ve made bean paste with canned black beans / red kidney beans in the past, such as for my red bean pancake. While it doesn’t taste the same as adzuki bean paste, for something that comes together in a fraction of the time, they are a great substitute.
Canned beans are incredibly quick to transform into a paste. Simply blend them with sugar and oil until smooth, then cook the mixture gently. As it heats, the starch granules in the beans absorb water and thicken the slurry into a spreadable paste. The key is to cook it until it holds its shape and you can see the bottom of the pan as you stir. Allow the paste to cool completely, as it will continue to thicken as it cools.
The pistachio filling is even simpler to make. All I did was blend the pistachios with icing sugar and honey until the mixture transformed from a fine rubble into a crumbly paste as the nuts began releasing their oils. To enhance the softness and pliability of the mixture, I added a little oil.
THE STRAWBERRIES
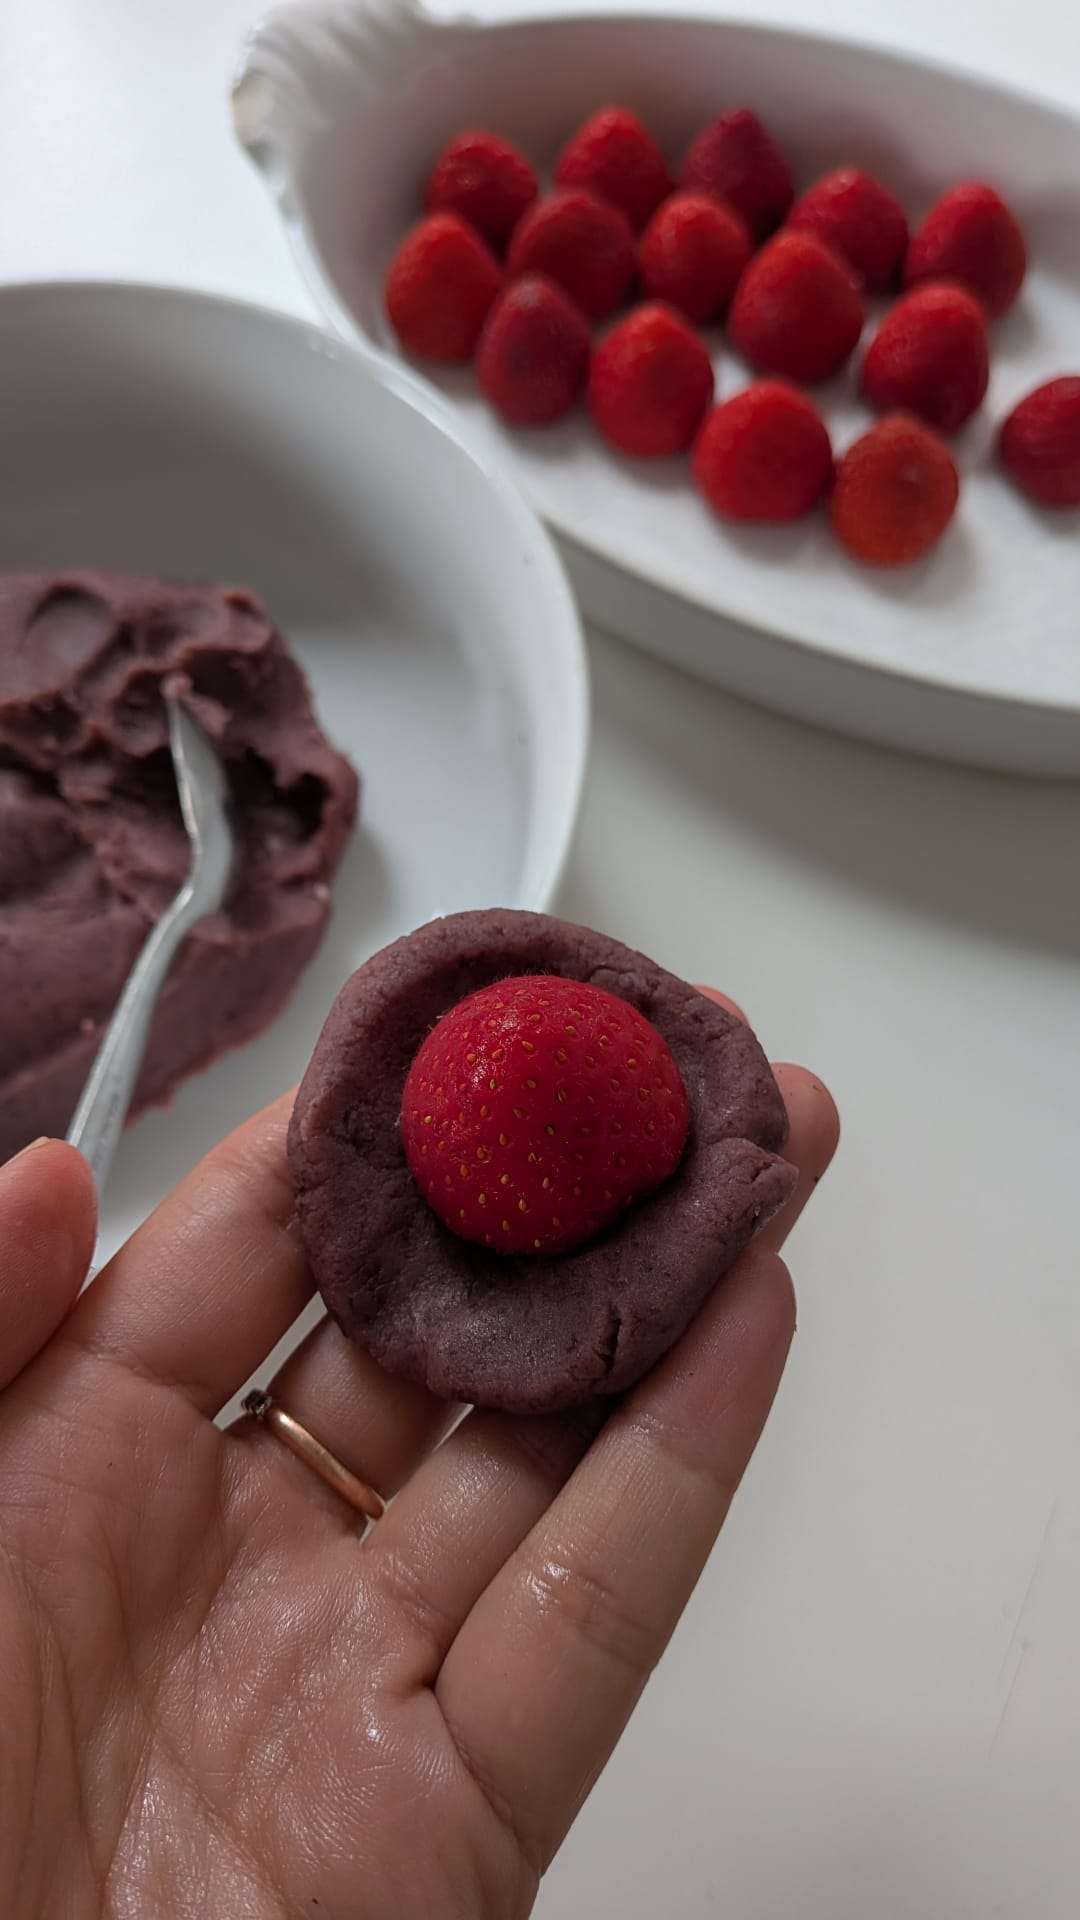
With ichigo daifuku, the size of strawberries matters. Smaller ones are ideal, as they will be encased in bean / pistachio paste and mochi. If they are too large, the ichigo daifuku loses its dainty appearance.
Because the pastes can be sticky, I found that the quickest and easiest way to wrap the strawberries is with a sheet of plastic. For the best presentation, keep the strawberry tips pointing upwards while wrapping and place them upright on a plate (the creases left by the plastic will also serve as a useful visual cue for the strawberry’s orientation).
THE MOCHI SKIN
The mochi skin is traditionally made with shiratamako or mochiko, Japanese glutinous rice flours made specifically from a wet-milling process. For accessibility, I went with generic glutinous rice flour — made by dry-milling raw glutinous rice to a fine powder — because it’s easier to source.
Most recipes I’ve seen call for cooking the mochi dough in the microwave, heating it in short bursts and mixing between each interval with a spatula. While effective, it can be difficult to control the cook of the mochi in a microwave. I resorted to cooking the dough on the stovetop, but the dough cooked rather unevenly because of how viscous and sticky it is. Eventually, I settled on steaming the slurry instead, which gave much more consistent results. The mochi is ready when it changes from bright white to slightly off-white and no longer has a powdery mouthfeel. The best way to check is to snip off a tiny piece from the centre and taste it.
WRAPPING
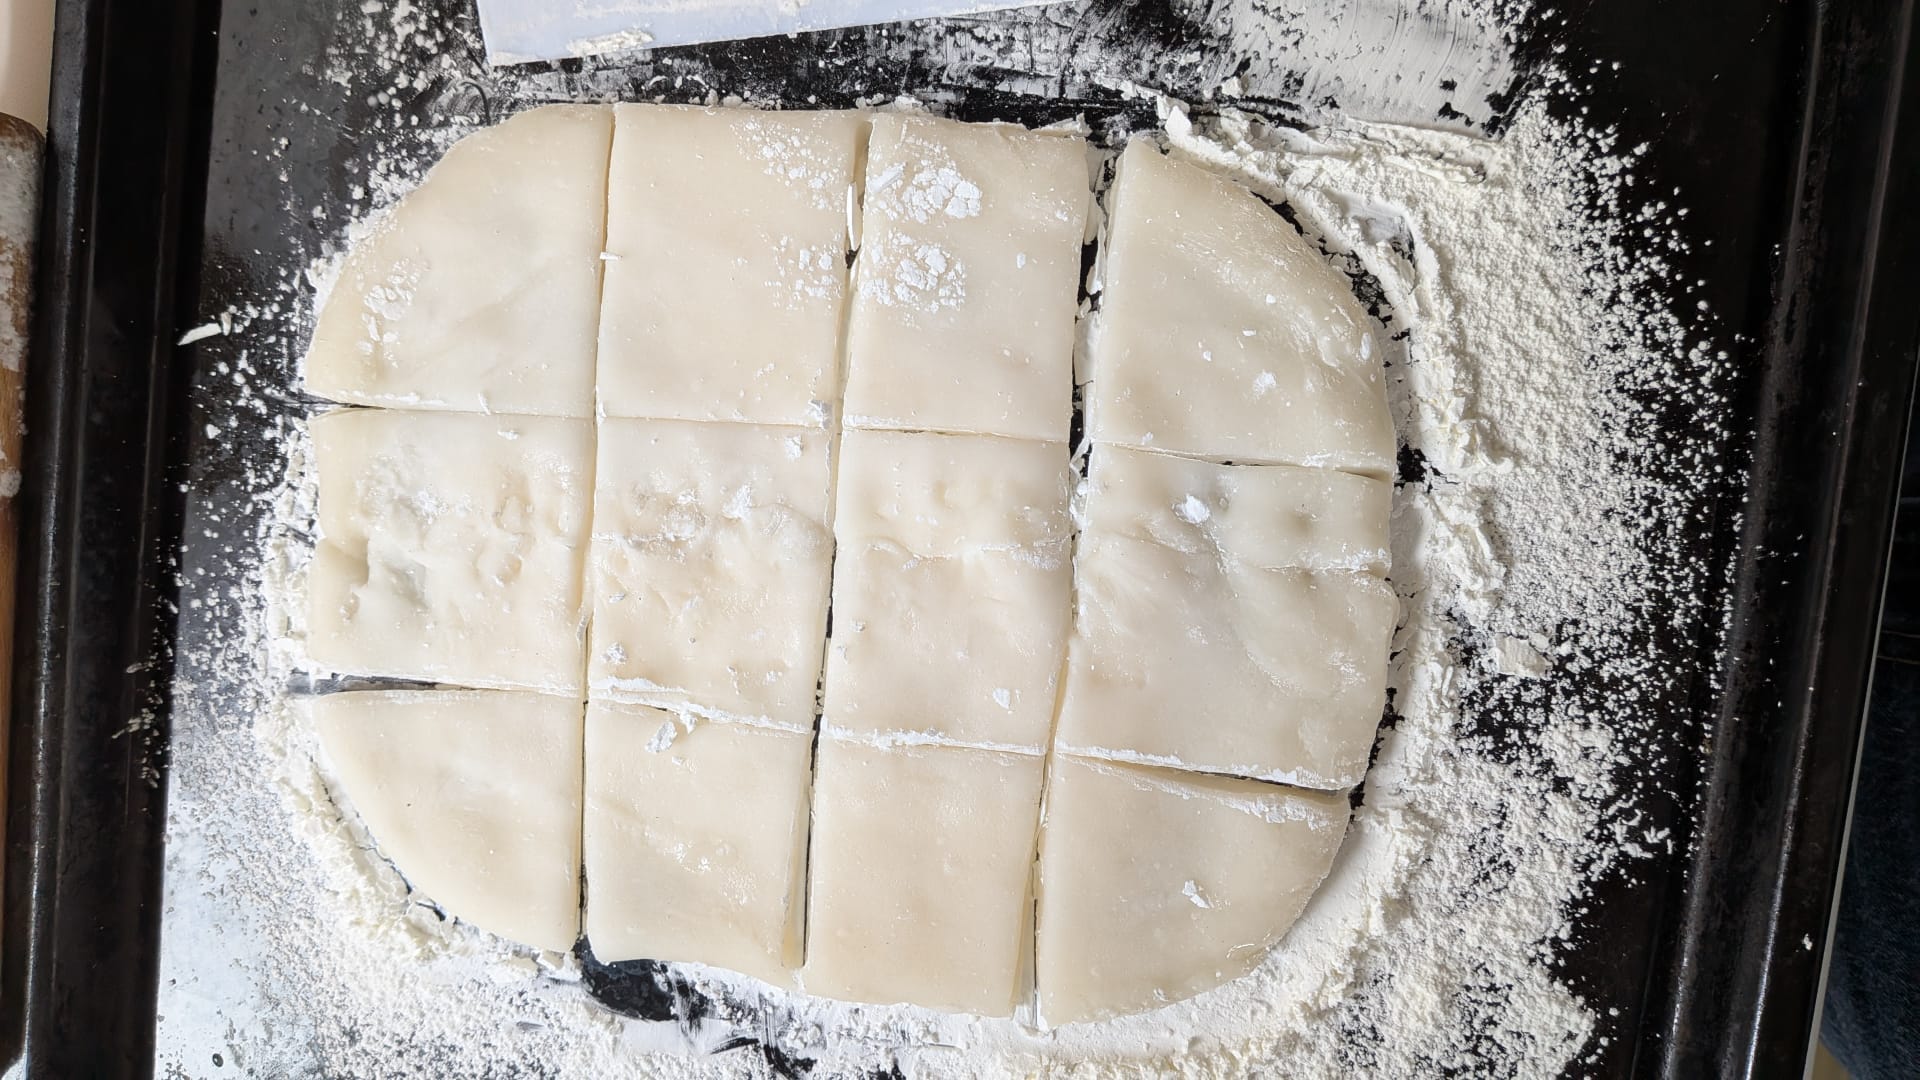
For other types of dumpling wrappers, I would typically weigh each portion of dough to ensure perfectly even pieces. However, mochi is so sticky that a different approach works better. I pat the dough into a rectangle on a tray dusted generously with cornstarch, then cut it into individual portions. To even out the thickness of each piece, I roll each portion out slightly before wrapping. I place the strawberry tip-side down on the mochi, gather the wrapper around the filling, and trim away any excess with kitchen scissors. This gives the daifuku a beautifully even layer of mochi all around.
Once wrapped, the ichigo daifuku will keep for a few days in an airtight container in the refrigerator, but is best eaten the day it is made, when the skin is the softest and delightfully chewy.
Ichigo daifuku
Makes 12 | Vegan
June 4, 2026
japanese cheesecake
Welcome to Singapore Noodles, a newsletter where I share recipes from my kitchen in the Netherlands. Archived recipes and other content can be found via the index. My cookbooks, Wet Market to Table and PlantAsia: Asia’s Vegetable Wisdom in Recipes, Stories, and Techniques, are available for purchase. Thank you for being here, and enjoy this week’s post! ✨ — Pamelia
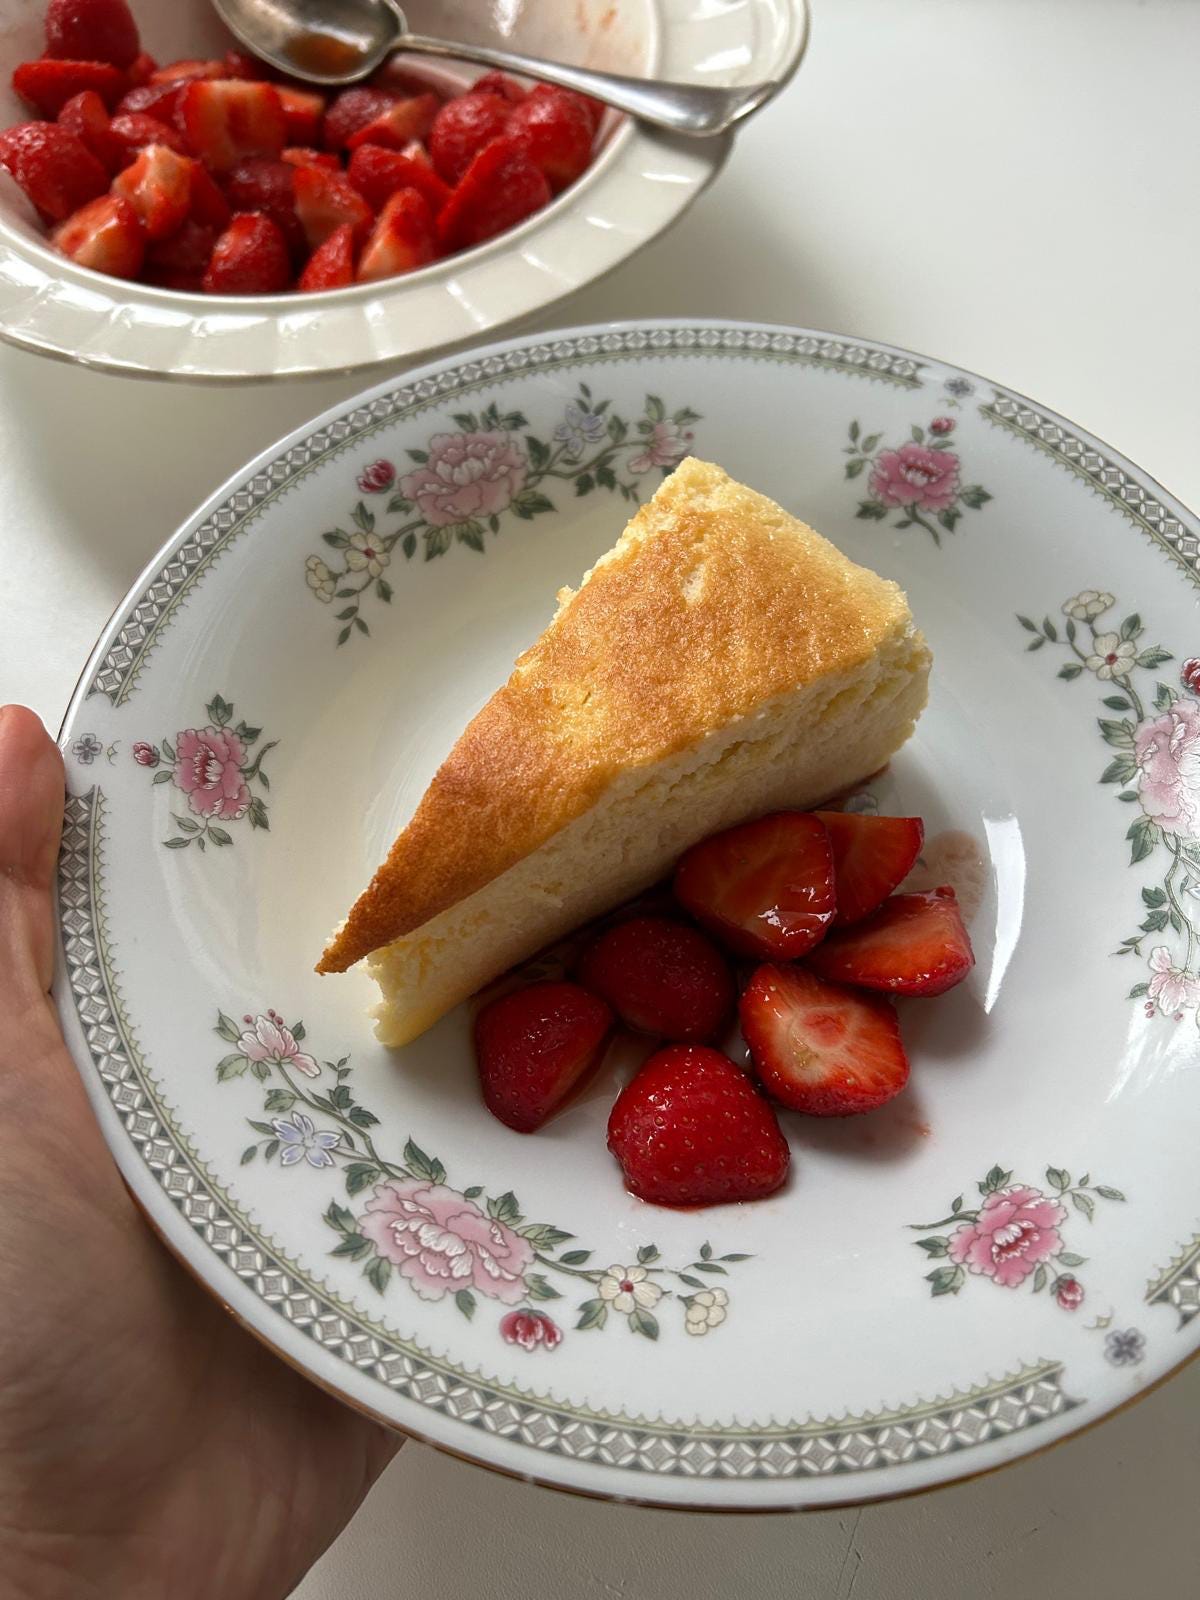
JAPANESE CHEESECAKE
When I was growing up in Singapore, it was far more common to enjoy a spongy, airy cheesecake than a rich, dense one. This style of cheesecake — also known as cotton or soufflé cheesecake — was invented in the 1960s by Japanese pastry chef Tomotaro Kuzuno after tasting German cheesecake. Adapted to Japanese tastes, the cake involves whipping egg whites into a meringue and folding it into a cream cheese batter, then baked in a water bath so that the cake is cloud-like with a gentle wobble. Whether you ate it at room temperature or straight from the refrigerator, it was simultaneously ethereally airy, melt-in-your-mouth, and lushly creamy; like if a chiffon cake and cheesecake had a baby.
Japanese cheesecake was incredibly popular in Singapore in the ‘90s (and probably still is), and could be found in neighbourhood bakeries next to local breads and pastries. Its popularity in Singapore is unsurprising as it really is the perfect treat in blistering weather — light enough to not weigh you down, but rich enough to taste luxurious.
Getting its rise almost entirely from eggs, Japanese cheesecake can be a little finicky, but it is not much harder than making a chiffon cake (if you’ve made my pandan chiffon cake with success in the past, you wouldn’t have trouble with this cheesecake). For a long time, I’ve favoured making Basque cheesecake for its ease, but now that we’re in summer, Japanese cheesecake feels just right.
Cream cheese is what separates Japanese cheesecake from chiffon cake and other sponge cakes. It provides not just a source of fat, but also contributes to a custardy mouthfeel. It has to be warmed through for it to be incorporated into the batter — I warm it with butter and milk over the smallest flame in a saucepan. Some recipes specify using a bain-marie to do this, but it is not necessary as long as you are vigilant. The last thing you want is for the mixture to get too hot and split.
When everything looks smooth, I whisk in the sugar, salt, and egg yolks. The mixture should be the temperature of baby’s milk, not hot enough to scramble the eggs. For the smoothest finish, it’s best to pass this mixture through a sieve to catch any small clumps of cream cheese or thick strands of egg.
In terms of the starch in Japanese cheesecake, there are two: plain flour and cornstarch. Plain flour (used in a tiny quantity compared to a conventional cake) provides some structure so that it is sliceable like a cake. Cornstarch enhances the cake’s smooth, rich mouthfeel, but also plays the crucial role of keeping weeping to a minimum. Watery liquid exuding from cake happens when egg proteins are overcoagulated, such as when the cheesecake is baked too aggressively or for too long. Because cornstarch absorbs water and traps it in a gel when it gelatinises, it acts as a buffer and makes the mixture less prone to weeping.
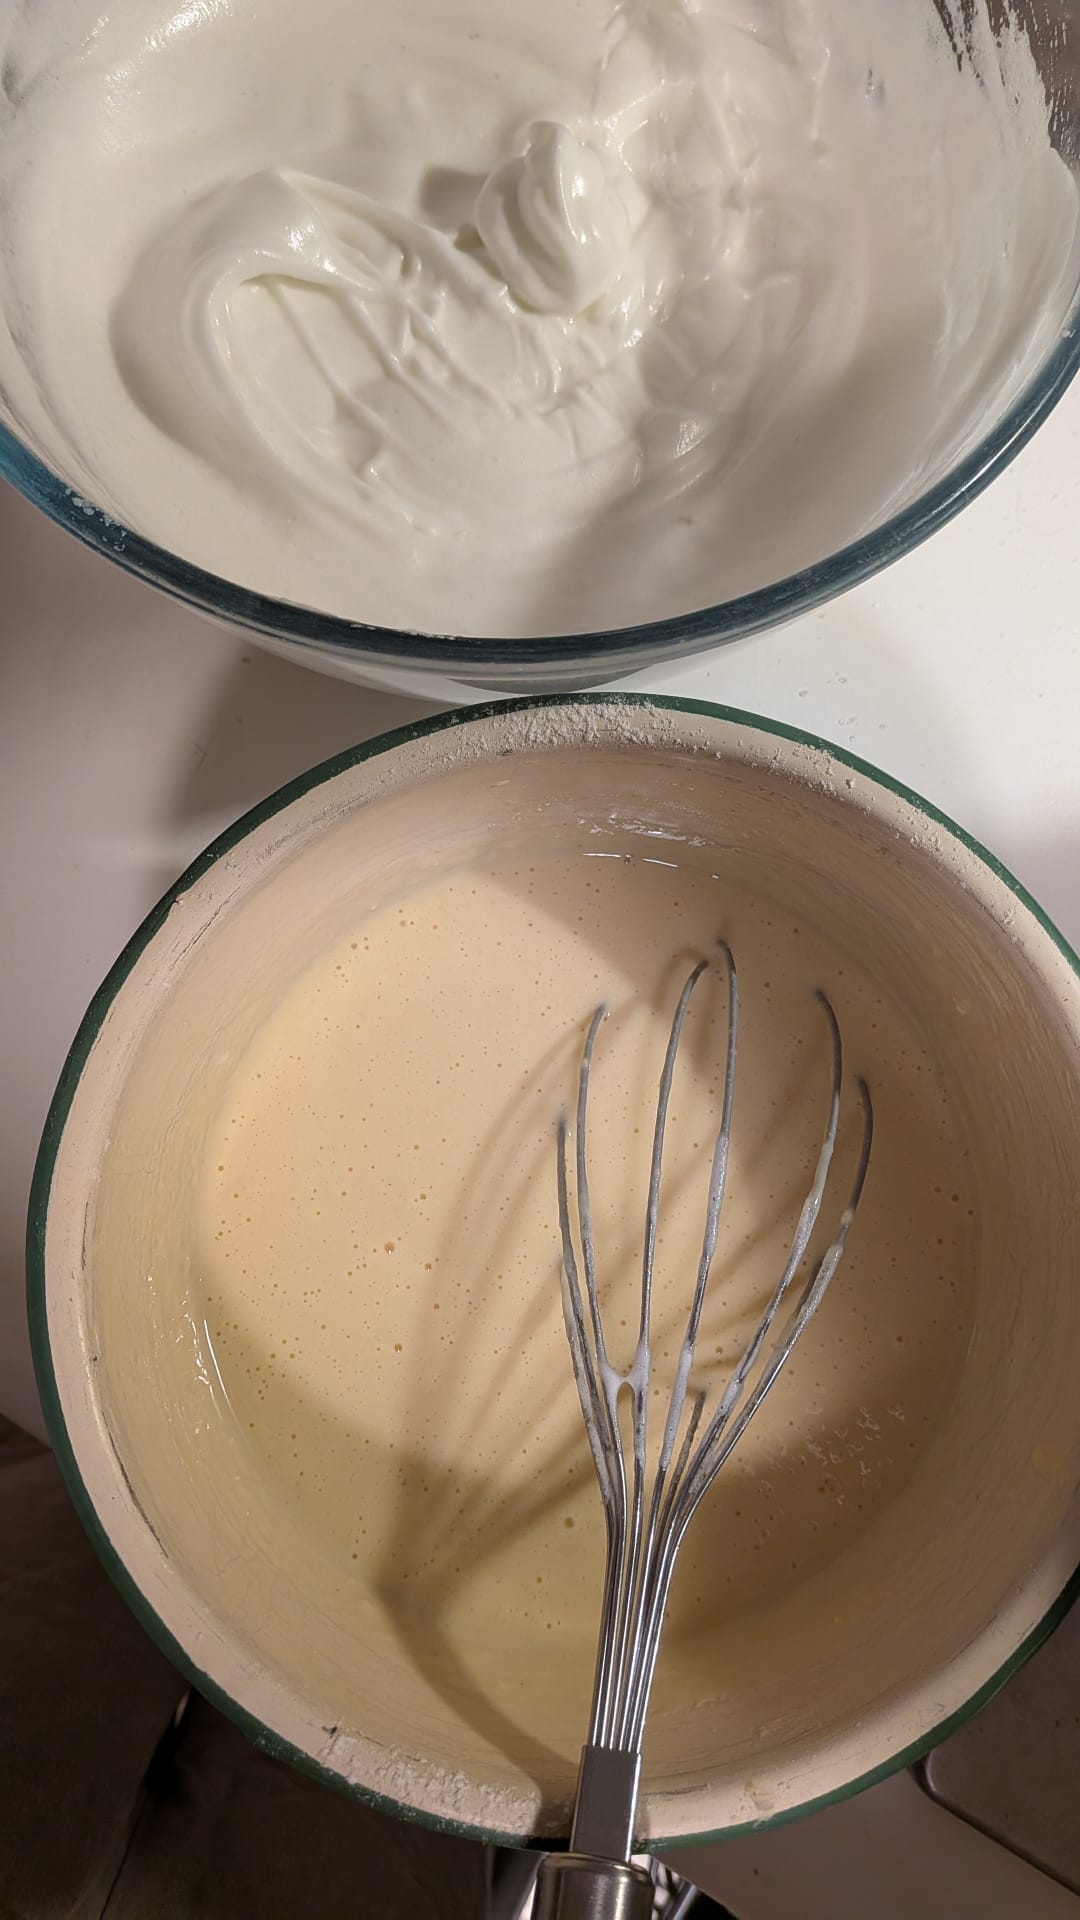
Like chiffon cake, Japanese cheesecake relies upon an egg foam for its rise and structure, rather than on flour. Where the two cakes depart is the extent to which the whites are beaten. For chiffon cake, it is common for the whites to be beaten to medium-firm peaks because the chiffon batter is lighter, so the meringue has to hold structure and resist collapsing while the cake sets. For Japanese cheesecake, because it is a heavier batter with cream cheese and baked more gently, soft peaks are preferred to encourage gradual, gentle inflation. The egg whites get folded into the cream cheese mixture.
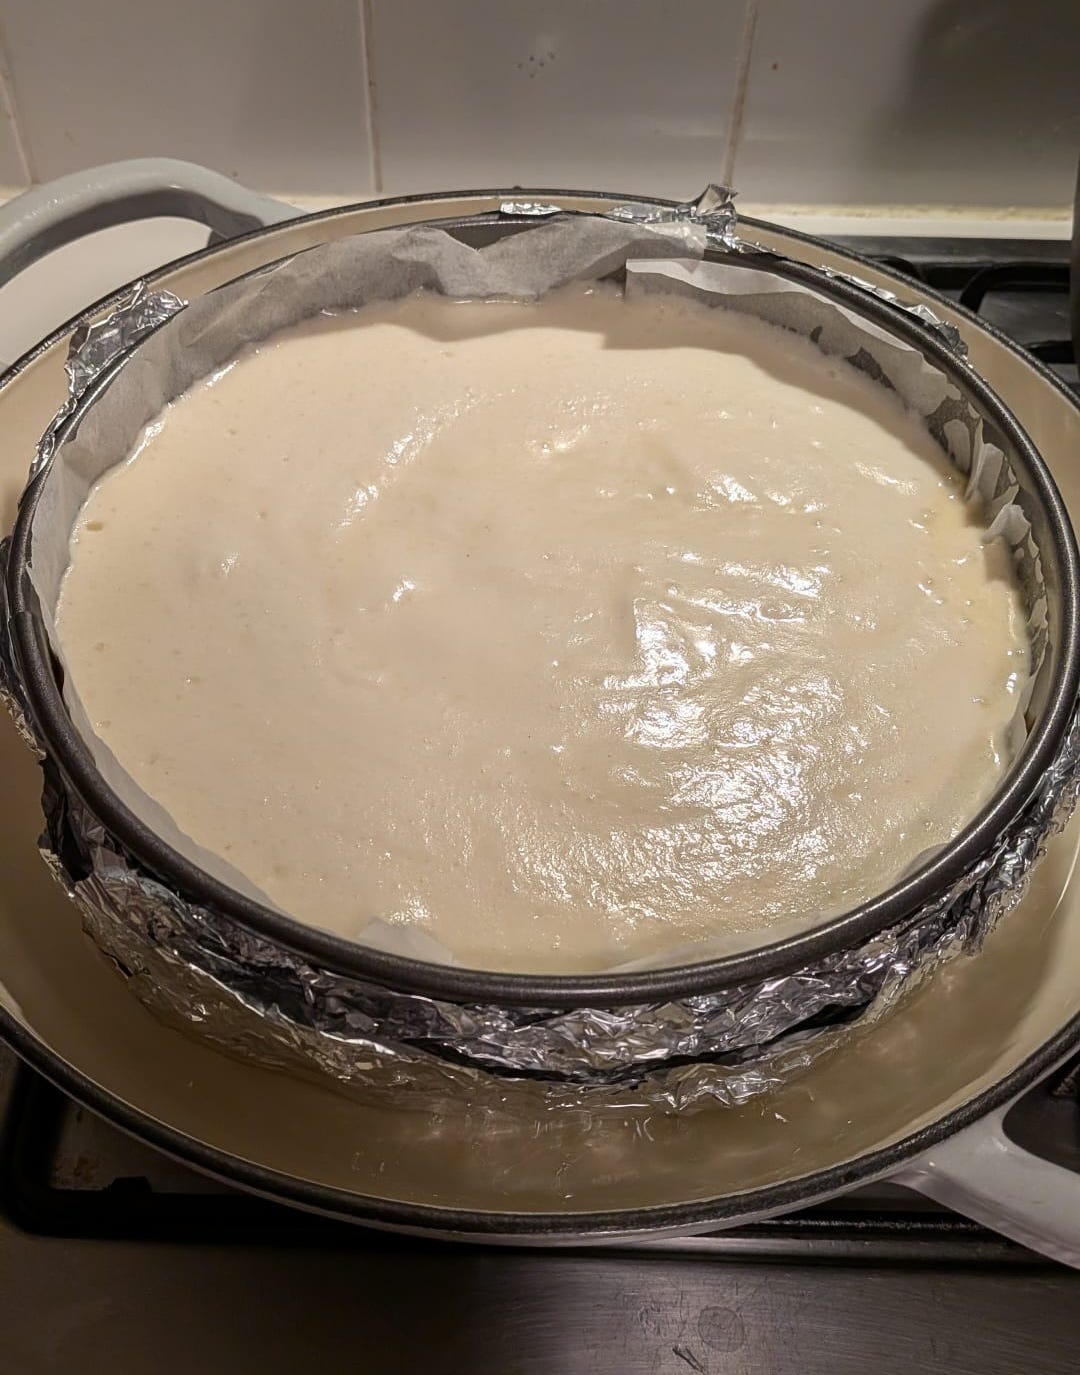
A low temperature-bake is essential for Japanese cheesecake, so that the eggs coagulate slowly, like the making of a delicate custard. In addition to a low temperature, a water bath is also necessary to coddle the custard and conduct heat evenly, thereby achieving a flat and uncracked top. Without one, the cake may set and contract on the outside while its centre is still expanding, leading to cracks or collapse. (To avoid water seeping into the batter while it is baking, wrapping the pan in layers of foil is paramount if you’re using a springform pan.)
There are many ways to ascertain doneness, such as the skewer test or the jiggle test, but the most reliable one is to use a thermometer. I aim for an internal temperature between 70-75°C. The cake’s surface should feel springy and soft and will not hold the indent of your finger when pressed.
The cooling of a foam-based sponge cake also takes as much care, because the fresh-from-the-oven cake contains a lot of trapped air and steam. As the cake is removed from the oven, the sudden temperature drop causes the gases to contract or condense into water while its structure still remains delicate. This causes the walls of the bubbles to get pulled inwards, leading to collapse. There are ways to circumvent this. Chiffon cake, for example, is typically flipped upside down to cool, so that the air cell structure is supported as the cake sets. Japanese cheesecake, being more custardy, cannot support its own weight upside down and will tear if inverted warm. Allowing the cake to cool in a turned-off oven allows the cake to cool gradually so that its structure has a chance to set while the gases escape.
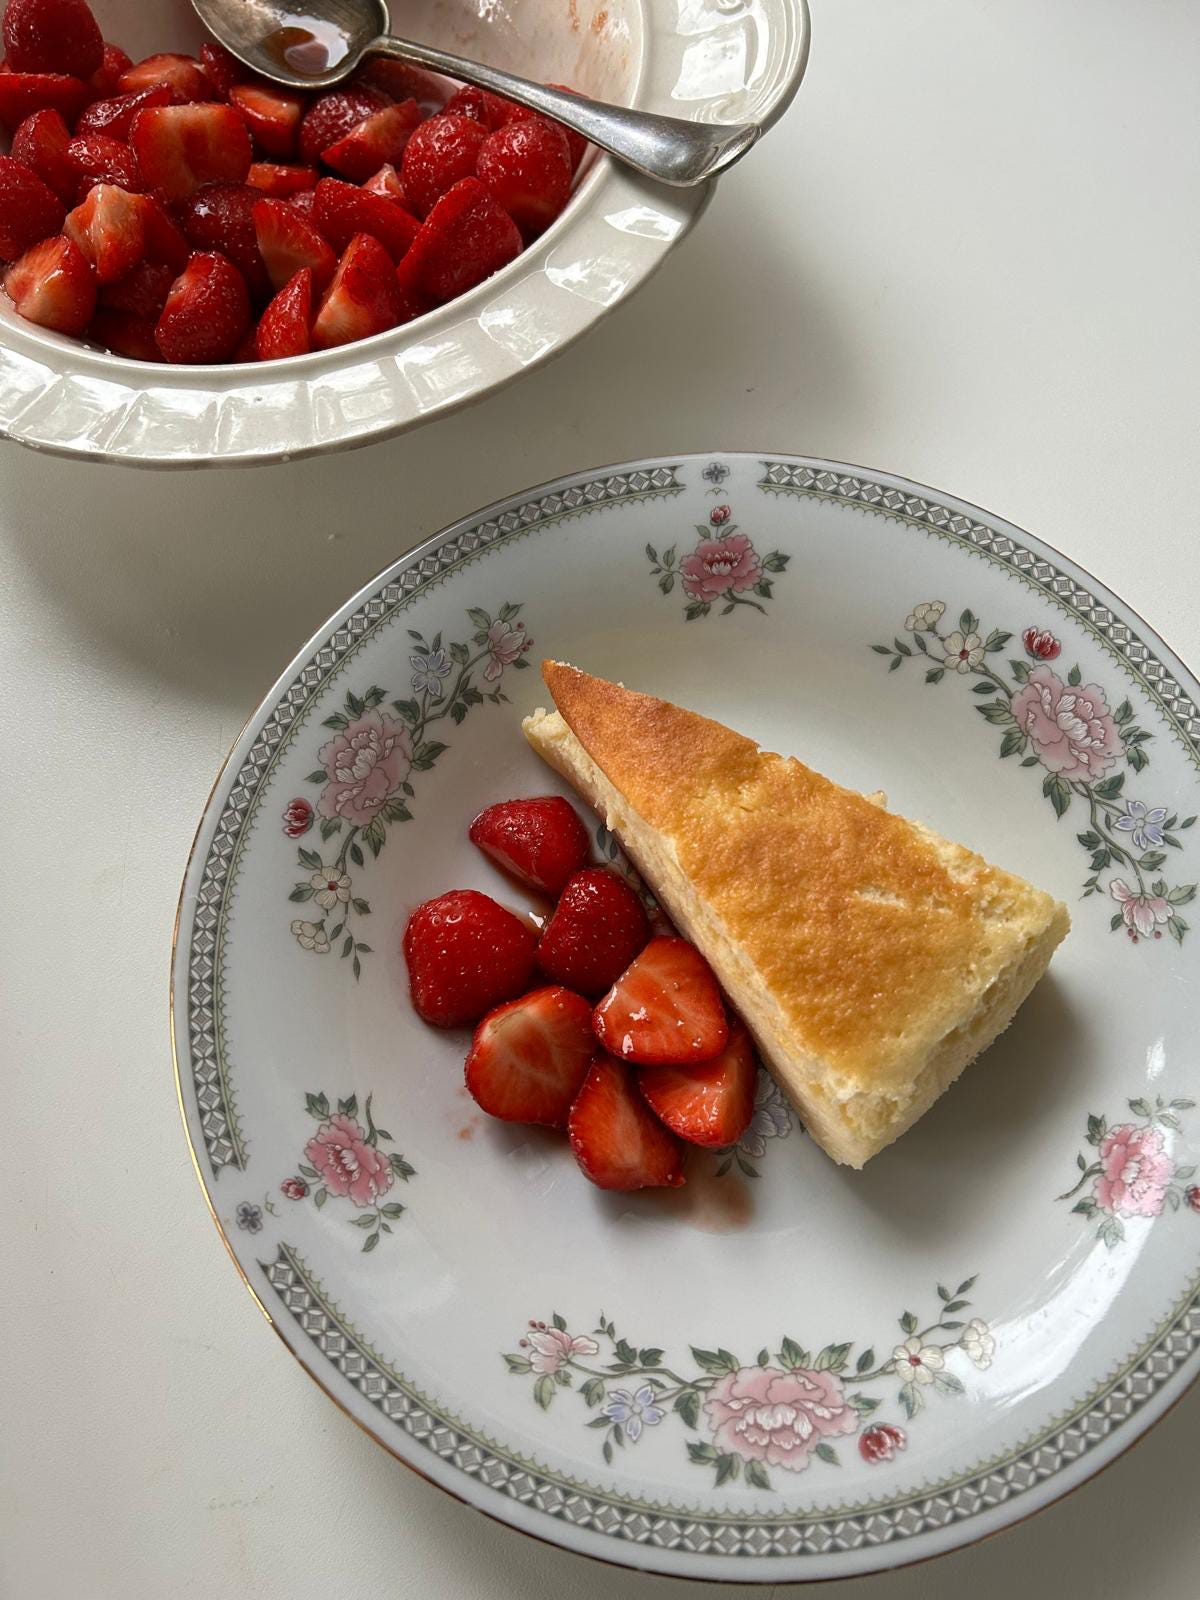
With something as quietly perfect as Japanese cheesecake, I like to keep things very simple. As strawberries are in season now, I toss them in a bit of sugar and balsamic vinegar and let them macerate for 15 minutes or so, before serving them alongside the cake. Japanese cheesecake keeps well in the refrigerator for up to 3 days. Some people warm slices of it in the microwave so that it’s wobbly and fragrant, but I much prefer it well-chilled.
Japanese Cheesecake
Makes a 9” cheesecake
May 28, 2026
krapao gnocchi
It is always a treat to be invited to someone’s home to cook alongside them. Over the weekend, our Italian friends Fabio and Elisa had us over for dinner. Elisa said, if I wanted to, I could arrive a few hours earlier to watch her make gnocchi. I, of course, said yes.
I was first shown how to make gnocchi during a short stage at the restaurant Etta in Melbourne. That was my first taste of how incomparably light gnocchi could be when made with care. Supermarket gnocchi could never, and I raise my eyebrows whenever I see “springy” or “chewy” as a descriptor for gnocchi. During our recent trip to Italy, we ordered gnocchi on several occasions and were disappointed each time by how stodgy they were. I was ready for some good gnocchi and was curious about how an Italian would approach making it at home.
Elisa is a meticulous cook. Her kitchen shelf is lined with books on Italian gastronomy which expound on the science and art of the craft, and she seems to have just the perfect tool for every task. The ragu recipe she recently sent me is 8 pages long, replete with explanations, just to illustrate the pride she takes in cooking. But as with many experienced home cooks I’ve had the pleasure of joining in their kitchens, she works with remarkable ease and simplicity. Nothing too fussy, and everything relying upon instinct.
We began with the potatoes. Most cooks would advise you to use a floury potato, such as the Russet potato, but Elisa favours the waxier, red-skinned ones which cohere better when cooked and riced. Rather than boiling the potatoes in water, she steamed them in her Instant Pot. This marked another departure from the norm, but made a lot of sense. After all, the goal with gnocchi is to keep the moisture levels of the cooked potato as low as possible, so that you require less flour to bind it into a dough. Less flour = less gluten = more delicate texture.
While the potatoes were still warm, Elisa pressed them through her ricer. Ricing is preferable to mashing because it produces an even texture with no lumps, and you get a light, fluffy mound of potato as opposed to a gummy mass. At Etta, the cooks pushed the cooked potato through a metal sieve, which achieves a similar effect (I do this because I don’t own a ricer).
Once riced, the potato and flour were combined in a stand-mixer — this surprised me. I’d always heard the advice to work the dough as delicately as possible, but Elisa’s insouciance was proof that the amount and type of flour matters more.
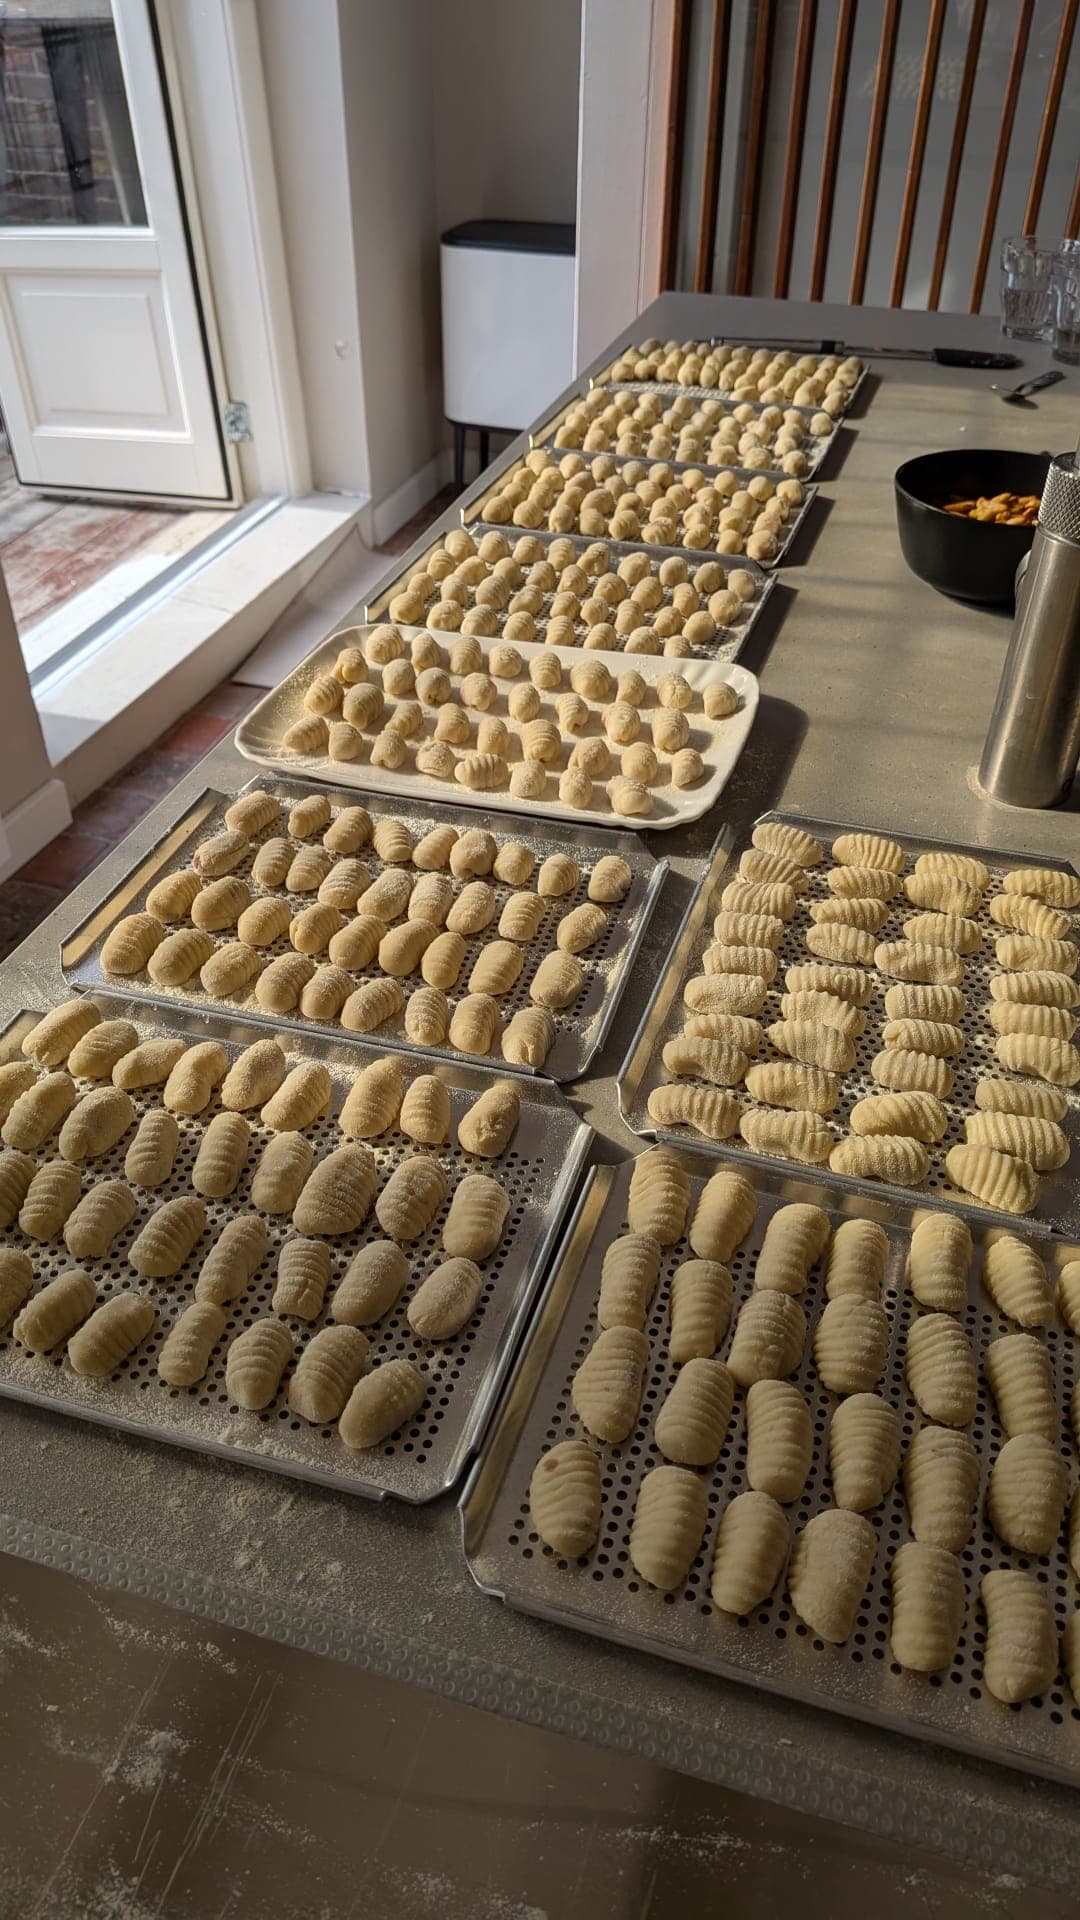
The real brilliance of Elisa’s method lies in the shaping. Rather than fussing about with forming ropes of dough and nipping them into individual pillows, she rolled the mass out between pastry strips for an even thickness. The flat rectangle of dough was then cut into cubes, that we rolled into marbles between our floured palms. Finally, we pushed the dumplings along a gnocchi board to give them their characteristic ridged backs. For dusting, Elisa likes finely milled semolina flour for the way they prevent the dough from sticking more effectively than conventional wheat flour, though this is not strictly necessary.

We cooked the gnocchi in barely simmering water, and tossed them in Elisa’s homemade tomato sauce. In the Sorrentina tradition, we layered them with torn mozzarella (drained to remove excess moisture) and grated grana padano, then grilled them in the oven until the top was nice and bubbly.
Elisa initially worried that they may be too light — she is haunted by the leaden lumps that her nonna used to make, and always errs on the side of using less flour. Gnocchi are good only if they are light, but Elisa confessed that sometimes she puts so little flour in hers that she worries they may fall apart. But they were perfect — incredibly light, almost melting in the mouth.
It was clear that the lightest gnocchi involve straddling the line between not enough flour and just enough flour, and a certain residue of doubt in the cook’s mind. Sadly, because this type of gnocchi requires a bit of patience and is a lot more delicate to handle, Elisa says that it is not at all common in restaurants, where speed and efficiency are king.
Yesterday, I cooked the gnocchi for dinner so that I could go over everything before I forget, and to get the quantities down. Instead of doing a tomato sauce like Elisa did (the weather was too hot for that!), I chose to use the gnocchi in krapao. This is a fragrant stir-fry of mince, garlic, chillies with lashings of sweet soy and fish sauce, and a generous handful of basil (traditionally holy basil, which Italian basil is a great substitute for). As krapao is typically a meat dish, I added snow peas to balance the meal out. It turned out fabulous. The starch from the gnocchi actually helped to thicken the meat juices in the pan such that the rubbly mixture clung to it like a second skin.
With just two ingredients in the gnocchi — potatoes and flour — it’s really more about developing a sensitivity and feel for the dough rather than slavishly following a recipe. The lightest gnocchi — made with the smallest amount of flour you can get away with — are great in a tomato sauce, while slightly firmer gnocchi stand up to stir-fries. I might even add a touch of tapioca flour next time for a touch of springiness!
If you make a big batch of gnocchi, you can freeze any extras on a tray (spaced apart) while still raw, then transfer to a ziplock bag or container to keep in your freezer until ready to use. To cook, simmer in water until they float.

Krapao gnocchi
Feeds 2
May 22, 2026
midweek kimbap
Welcome to Singapore Noodles, a newsletter where I share recipes from my kitchen in the Netherlands. Archived recipes and other content can be found via the index. My cookbooks, Wet Market to Table and PlantAsia: Asia’s Vegetable Wisdom in Recipes, Stories, and Techniques, are available for purchase. Thank you for being here, and enjoy this week’s post! ✨ — Pamelia
The trouble with cooking diversely is that you end up with a pantry full of partially used items a lot of the time. For months, I’ve had an opened packet of nori sheets that I’ve been wanting to use, but have been feeling a lot of inertia to. The obvious way to use it up is in the form of a roll, such as kimbap, which I love. Kimbap looks similar to sushi, but the main difference is that its rice is seasoned with sesame oil and salt, rather than sweetened rice vinegar. It also tends to be a complete meal in and of itself, chockful with a variety of proteins and greens. With the nori already turning from glossy black to a dry, reddish, it was now or never.
The easiest way to approach kimbap, I’ve found, is to make the rice in advance and zap it in the microwave until warm and pliable when you’re ready to make the rolls. When considering the fillings, it’s helpful to think of kimbap as a vehicle, just as a sandwich is a vehicle. You can get really playful with them, and make things as simple or fancy as you want.

The vegetables I’ve chosen are accessible ones that I could get from any supermarket and cook quickly. Baby spinach wilts in a pan in no time at all, and julienned carrots (which I buy already prepped) — by virtue of their thinness — cooks in seconds (it’s really to take the rawness out of them than anything else). I keep the seasonings for the vegetables minimal — just salt and sesame oil — and let the protein be the star and carry the main flavour.
Gochujang is a condiment I always have in my fridge — it adds so much flavour without much work. One day this week, I made kimbap with gochujang-marinated pork, a simplified version of a dish I make on weeknights. Another day, I simply mixed some sliced smoked salmon into gochujang mayonnaise — it turned out so well that both Wex and I preferred this to the pork. It’s brilliant on many fronts. Compared to fresh fish, smoked salmon keeps well and is, thus, a staple we often already have in our fridge. Though cured and smoked, it still retains the tender, slightly chewy texture of raw fish, and when mixed into gochujang mayonnaise, it comes very close to the kind of spicy tuna that you might encounter in sushi.
Several things to note for kimbap-wrapping success:
Use warm, but not hot rice: Cold rice is slightly brittle and will not form a thin, even layer over the nori. Hot rice, on the other hand, will cause the nori sheets to tear. Warm rice is ideal, and a generous drizzle of sesame oil helps further to render it pliable and easy to work with.
Limit the moisture in the fillings: Fillings with too much moisture may cause kimbap to fall apart. This means squeezing water out of spinach, frying the marinated pork sufficiently so that the marinade glazes the strips etc. (For the same reason, I also cook my rice with slightly less water than usual.)
Leave a border: When spreading the rice on the nori, I leave a border. Same goes for when I arrange the toppings on the rice. This way, when you roll the kimbap up, the ingredients naturally move into the empty space and everything lines up neatly.
Roll the kimbap up tightly: Some people use a bamboo mat or plastic wrap — I find this cumbersome, but you might find that it helps. After rolling the kimbap up, compress it with your hands. With a firm roll, slicing becomes a breeze. Just as it’s hard to cut a loose string, a taut kimbap will be much easier to cut than a loose, falling-apart one.
Slice the kimbap with a sharp knife: Grab a sharp knife and slice through the roll in a clean, sawing motion. To prevent sticking, you can wet the blade, or grease it with a little sesame oil.
 Gochujang pork kimbap.
Enjoy kimbap at room temperature. In warm weather, kimbap makes the perfect picnic or snacking food, tightly stacked into lunchboxes and eaten away in layers as the day progresses. Leftover sliced kimbap can be refrigerated and dipped in egg and pan-fried to refresh them.
Rice for kimbap
Makes approximately 750g cooked rice (enough for 4 rolls)
300g short-grain rice (often sold as sushi rice)
500g water
1 tbsp sesame oil
1½ teaspoon salt
Rinse the short-grain rice until the water runs clear. Drain well and add to a rice-cooker with the water. Cook until tender. (Alternatively, combine the rice and water in a saucepan. Set over high heat and stir occasionally until the water comes to a simmer. Cover and cook on low heat until all the rice is absorbed.) Stir the sesame oil and salt into the cooked rice. Cool until warm before using for kimbap, or refrigerate in an airtight container and reheat before use.
Gochujang pork / smoked salmon kimbap
Makes 4 rolls
May 12, 2026
oven-baked flaky curry puffs
Welcome to Singapore Noodles, a newsletter where I share recipes from my kitchen in the Netherlands. Archived recipes and other content can be found via the index. My cookbooks, Wet Market to Table and PlantAsia: Asia’s Vegetable Wisdom in Recipes, Stories, and Techniques, are available for purchase. Thank you for being here, and enjoy this week’s post! ✨ — Pamelia
Italy has long been a destination I’ve wanted to visit. The country has a kind of mythical status for those who love food and is known for all the right things: its reverence for the nonna; the passion the average Italian on the street has when it comes to the “right” way of preparing a dish; the fabulous produce — the cheeses, the cured meats, the hand-rolled pasta.
What surprised me was how rustic and gutsy Italian food culture was, in particular the rich offal tradition, which is still alive and kicking in the parts where we went to — certainly not the case in many other parts around the world. It sprang out of cucina povera, as a way to make use of the entire animal. In that way, it was really more out of necessity than desire, but it turned into something delicious that persisted. We enjoyed lampredotto in Florence — sandwiches stuffed with the braised fourth stomach of the cow, dripping with meat juices, a sharp salsa verde, and what the menu simply described as “spicy sauce”.
Everyday, we had gelato — which not only puts gelato / ice cream we’ve tasted in so many countries to shame not only because gelato in Italy manages to taste so true to its ingredients, and yet is some of the cheapest.
Other delights (unexpected in their simplicity) included courgettes sliced thinly and deep-fried in olive oil — not to the end of being crisp, but for them to lose most of their inherent water and concentrate in flavour and sweetness — before being lightly dressed in vinegar, garlic, and mint.
The whole time I was in Italy, I was keeping notes in my telephone of all the things I was inspired to make when I get home. A particular source of inspiration came from a historic sfogliatelle shop close to our AirBnB in Naples. There was a long line when we arrived but the wait was worth it because our sfogliatelle riccia — a flaky pastry encasing a orange-scented mixture of ricotta and semolina — came warm from the oven, the filling practically quivering. That such a flaky result could be produced in the oven and hold its crunch even after the pastry had cooled got me thinking if curry puffs could be made a similar way. (I love deep-fried foods, but being in my mid-30s has done something to me. I now cook with olive oil instead of vegetable oil and think of deep-frying as a treat rather than a regular occurrence at home. Who am I?!)
Making sfogliatelle relies on a laminated pastry. A stiff dough is made, allowed ample time to rest so it relaxes enough to roll out. These days, this is done with the help of sheeters in professional settings or pasta machines at home, although traditionally it relied entirely on nonna muscle. The success of the sfogiatelle is determined almost entirely by the thinness of the dough at this stage: the thinner, the more delicately crunchy and tender the layers become. (I rolled mine out by hand, but if you have a pasta machine, definitely use it!) The thin sheet of dough is then spread with lard and rolled up to form layers.

Making curry puffs this way is easier and faster than you think. By faster, I don’t mean that you can whip these up in 30 minutes. The dough needs ample rest for it to get sufficiently thin, but the actual hands-on time is but a fraction of what you assume it needs, judging by the result. I filled my curry puffs with spiced mashed potato, studded with chicken thigh, as is the norm when you order a curry puff in Singapore. But if you prefer, diced mushrooms or frozen peas are just as good in place of chicken.

Oven-Baked Flaky Curry Puffs
Makes 8 | Vegetarian option
April 18, 2026
oyster mushroom tacos & smoked salmon pasta
Welcome to Singapore Noodles, a newsletter where I share recipes from my kitchen in the Netherlands. Archived recipes and other content can be found via the index. My cookbooks, Wet Market to Table and PlantAsia: Asia’s Vegetable Wisdom in Recipes, Stories, and Techniques, are available for purchase. Thank you for being here, and enjoy this week’s post! ✨ — Pamelia
Lately, I’ve been feeling very grateful for friends who know, appreciate, and cook good food, for they often come bearing wonderful gifts. A couple of months ago, one was on a work trip to Japan and brought us some yuzu kosho upon his return to the Netherlands. This is an ingredient I’m rather familiar with, having worked in a Japanese restaurant when I lived in Melbourne. A condiment made by fermenting yuzu zest and green chillies in salt, it is an ingredient that instantly adds depth to dishes while being completely vegan (useful when going meatless). More recently, another friend brought me her homemade chilli condiment made with lots of Mexican chillies. Smoky and indulgent, it made me want to make tacos.
I’ve always been drawn to Mexican cooking because of its affinity for and many parallels to Asian cooking. There’s the love for lime juice and coriander leaves, and then there’s the technique of wrapping food in fragrant banana leaves and grinding elemental ingredients into condiments and base pastes that are more than the sum of their parts.
Oyster mushrooms make some of the best taco toppings, in my opinion. They don’t weep as much as other types of mushrooms, sponge up marinades terrifically, and have a unique texture between firm, crunchy, and slippery that brings a sort of clam to mind. My favourite marinade for them so far is this one that marries gochujang, paprika, the liquid from canned pineapple, and soy sauce; and the end result reminds me simultaneously of al pastor and char siu — a great marriage if you ask me. You don’t have to make your own flour tortillas but I highly encourage it. You likely have all of the ingredients in your pantry, and it tastes better than anything you can buy from the supermarket. For best texture and flavour, lard can’t be beat, but for meatless days, olive oil is a great alternative. You just have to eat the olive oil tortillas freshly made because they stale quickly.


Gochujang oyster mushroom tacos
Serves 2 | Vegan
For the flour tortillas:
240g plain flour
55g olive oil
1/2 teaspoon salt
100g water
For the fillings and toppings:
1x 220g can of pineapple rings
1 tablespoon chipotle sauce (I use La Morena)
1 tablespoon gochujang
1 tablespoon smoked paprika
1 tablespoon dark soy sauce
1 tablespoon agave syrup, rice syrup, or honey
2 tablespoons olive oil
250g oyster mushrooms
Finely chopped white onion
Finely chopped coriander leaves
Lime wedges
Your favourite hot sauce or chili condiment (optional)
To make the flour tortillas, stir the flour, olive oil, and salt together in a bowl until the olive oil is dispersed evenly throughout the flour as small clumps. Add the water gradually while stirring until most of the flour is absorbed (you might not need all of the water). Knead the mixture together to form a soft but not sticky dough. Divide the dough into 30g portions (about 13 tortillas). Dust each in flour and place them in a bowl. Cover and allow to rest for 30 minutes.
To cook the flour tortillas, set a wide pan (preferably cast-iron) over medium heat. Roll the tortillas out into 5-inch rounds, dusting with flour to avoid sticking. Lay the tortillas on the pan and cook for 30 seconds or until the bottom is just set. Flip the tortillas and cook until light golden spots form on the other side. Flip the tortillas one last time and cook until the tortillas begin to puff up. Remove the tortillas from the pan and cover in a warm towel to prevent them from drying up. Keep the pan hot.
For the pineapple, drain the can of pineapple, reserving the liquid. Add the pineapple rings and allow to sear without disturbing until charred. Remove the pineapple from the pan and cut into chunks. Keep the pan hot for the mushrooms.
For the mushrooms, in a wide mixing bowl, stir together the pineapple liquid, chipotle sauce, gochujang, paprika, dark soy sauce, honey, and olive oil. Taste and adjust the seasoning if desired. Add the oyster mushrooms and toss them so that every nook and cranny is coated in sauce. Add the mushrooms in a single layer, working in batches if necessary, and allow to sear without disturbing until charred. Flip and sear on the other side.
Assemble the tacos by topping the flour tortillas with the charred pineapple chunks, mushrooms, chopped onion, coriander, a squeeze of lime, and your favourite hot sauce or chilli condiment.
With the yuzu kosho, I made a very spring-appropriate spaghetti of smoked salmon and asparagus. It might seem odd to use a such a Japanese ingredient in pasta, but I’m a big fan of Japanese-style pasta dishes. In my teenage years, there was a chain of restaurants in Singapore that specialised in these. You’d be surprised at how a spoonful of miso, yuzu kosho, or soy sauce can transform something like a vongole or cream-based pasta — don’t knock it till you’ve tried it.

Smoked salmon & asparagus spaghetti
Serves 2 as a light lunch